concur mobile app registration:
TRANSCRIPT
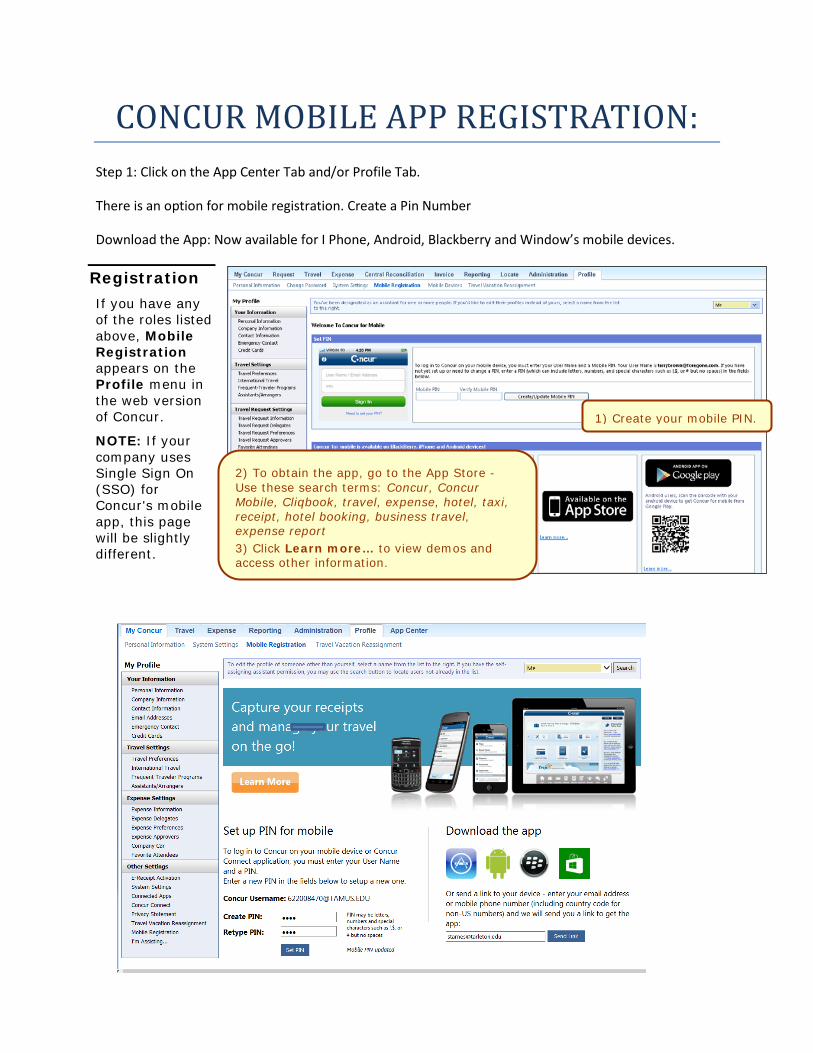
CONCUR MOBILE APP REGISTRATION: Step 1: Click on the App Center Tab and/or Profile Tab.
There is an option for mobile registration. Create a Pin Number
Download the App: Now available for I Phone, Android, Blackberry and Window’s mobile devices.
Registration If you have any of the roles listed above, Mobile Registration appears on the Profile menu in the web version of Concur.
NOTE: If your company uses Single Sign On (SSO) for Concur's mobile app, this page will be slightly different.
1) Create your mobile PIN.
2) To obtain the app, go to the App Store - Use these search terms: Concur, Concur Mobile, Cliqbook, travel, expense, hotel, taxi, receipt, hotel booking, business travel, expense report 3) Click Learn more… to view demos and access other information.
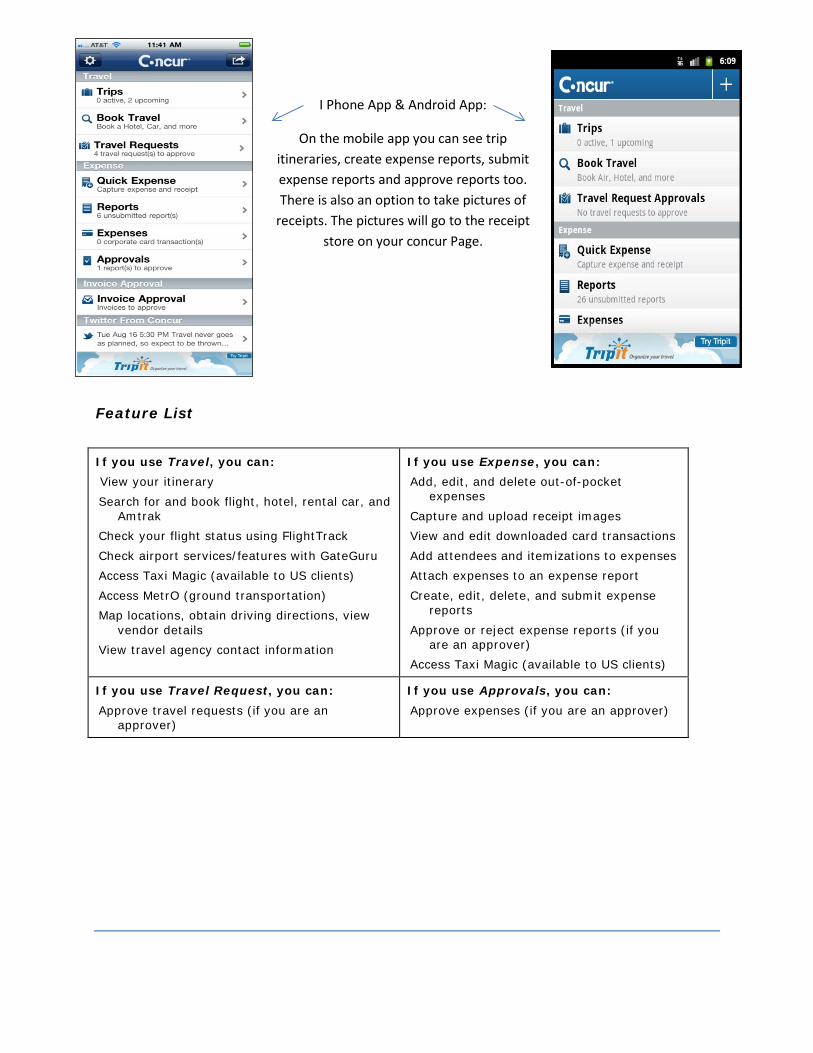
I Phone App & Android App:
On the mobile app you can see trip itineraries, create expense reports, submit expense reports and approve reports too. There is also an option to take pictures of
receipts. The pictures will go to the receipt store on your concur Page.
Feature List
If you use Travel, you can: View your itinerary Search for and book flight, hotel, rental car, and
Amtrak Check your flight status using FlightTrack Check airport services/features with GateGuru Access Taxi Magic (available to US clients) Access MetrO (ground transportation) Map locations, obtain driving directions, view
vendor details View travel agency contact information
If you use Expense, you can: Add, edit, and delete out-of-pocket
expenses Capture and upload receipt images View and edit downloaded card transactions Add attendees and itemizations to expenses Attach expenses to an expense report Create, edit, delete, and submit expense
reports Approve or reject expense reports (if you
are an approver) Access Taxi Magic (available to US clients)
If you use Travel Request, you can: Approve travel requests (if you are an
approver)
If you use Approvals, you can: Approve expenses (if you are an approver)

I PHONE APP:
FLIGHT INFORMATION
Access additional information
from the flight screen

Expenses and Expense Reports
List of Expenses (the Expenses Screen) Select Expenses on the home screen to access the Expenses screen. On the Expenses screen, you can:
Add, view, edit, and delete Quick Expenses NOTE: Quick Expenses are designed to be quick and easy. For more intricate expenses (car mileage/kilometers, attendees, and itemizations), create the expense from an open expense report.
View and make minimal edits to card charges, which appear with
the icon. Note the following:
To make more extensive edits, edit the transaction once it is attached to an expense report.
If you are allowed to delete card transactions in the web version of Expense, then you can delete them here, too.
Attach expenses - both Quick Expenses and card charges - to an expense report.
NOTE: The icon indicates that there is a receipt image attached.

List of Reports (the Active Reports Screen) Select Reports on the home screen to access the Active Reports screen.
On the Active Reports screen, reports are grouped by: Unsubmitted Reports, Submitted Reports, and Other Reports.
On the Active Reports screen, you can:
Review the report status
Delete a report
Create a new report
Access your expense reports so you can:
View and edit the report summary (report header)
View and attach receipt images
Add simple as well as more intricate expenses (car mileage/kilometers, attendees, and itemizations)
View, edit, and delete expenses
Submit your report
Submit Your Report When ready, select Submit.
If you are allowed to select an approver before submitting an expense report, then you will be prompted to do so when you select Submit.
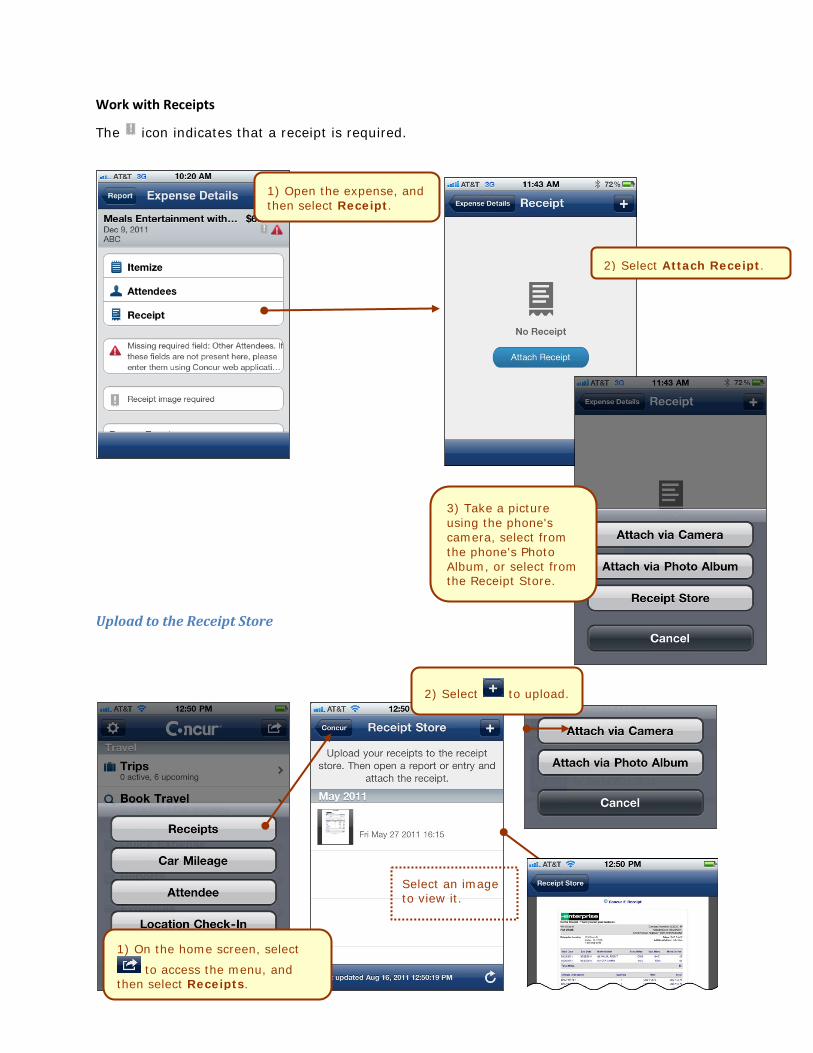
Work with Receipts
The icon indicates that a receipt is required.
Upload to the Receipt Store
1) On the home screen, select
to access the menu, and then select Receipts.
1) Open the expense, and then select Receipt.
2) Select Attach Receipt.
3) Take a picture using the phone's camera, select from the phone's Photo Album, or select from the Receipt Store.
2) Select to upload.
Select an image to view it.
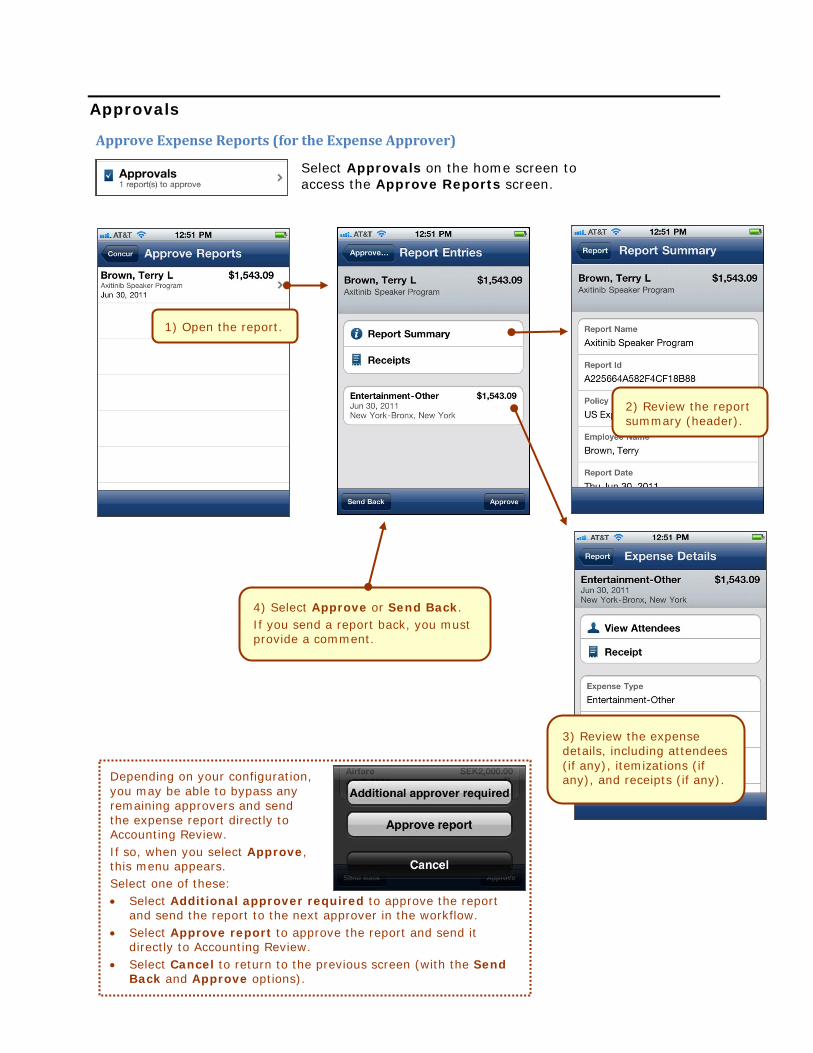
Approvals
Approve Expense Reports (for the Expense Approver)
Select Approvals on the home screen to access the Approve Reports screen.
1) Open the report.
2) Review the report summary (header).
3) Review the expense details, including attendees (if any), itemizations (if any), and receipts (if any).
4) Select Approve or Send Back. If you send a report back, you must provide a comment.
Depending on your configuration, you may be able to bypass any remaining approvers and send the expense report directly to Accounting Review. If so, when you select Approve, this menu appears. Select one of these: • Select Additional approver required to approve the report
and send the report to the next approver in the workflow. • Select Approve report to approve the report and send it
directly to Accounting Review. • Select Cancel to return to the previous screen (with the Send
Back and Approve options).

Approve Payment Requests (for the Invoice Approver)
Select Invoice Approval on the home screen to access the Approve Invoices screen.
1) Open the request.
3) Review the vendor information, line item information, images, etc.
4) Select Approve or Send Back. If you send the request back to the employee, you must provide a comment.
2) Review the summary (header).
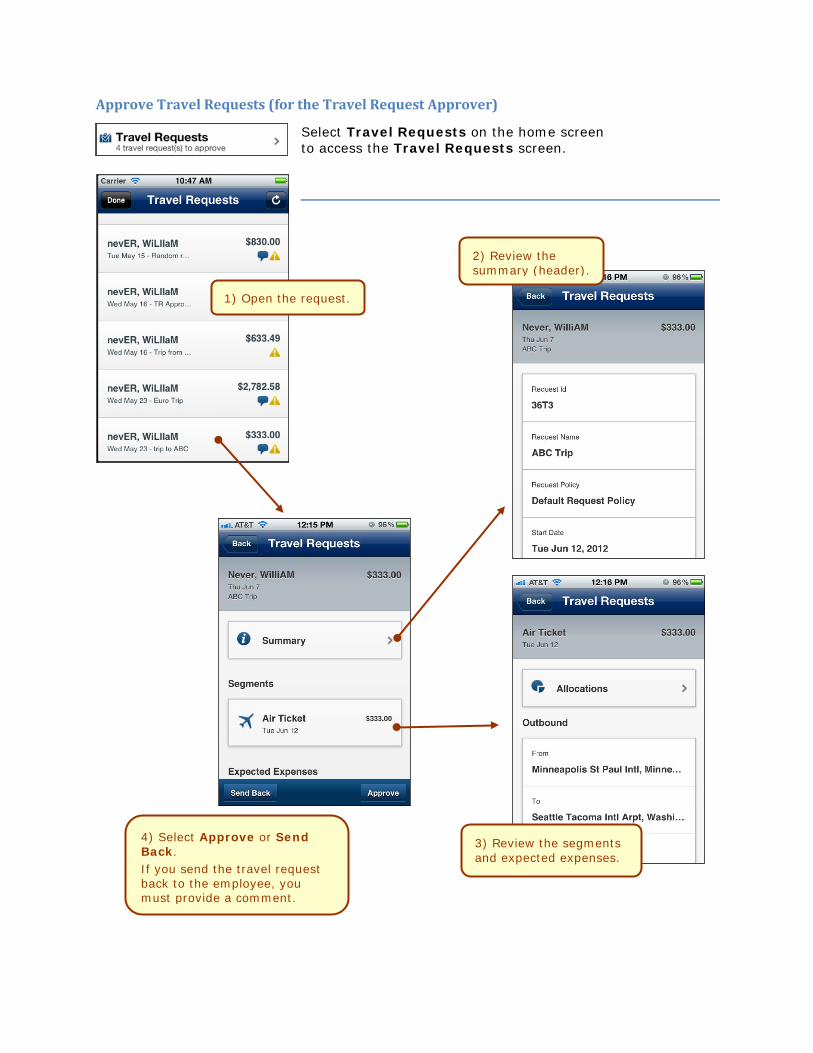
Approve Travel Requests (for the Travel Request Approver)
Select Travel Requests on the home screen to access the Travel Requests screen.
1) Open the request.
2) Review the summary (header).
4) Select Approve or Send Back. If you send the travel request back to the employee, you must provide a comment.
3) Review the segments and expected expenses.