coded ui - lesson 3 - case study - calculator
TRANSCRIPT
Automatic Testing using the Coded UI Framework
Lesson 3 – Example - Calculator
Omer Karpas
1
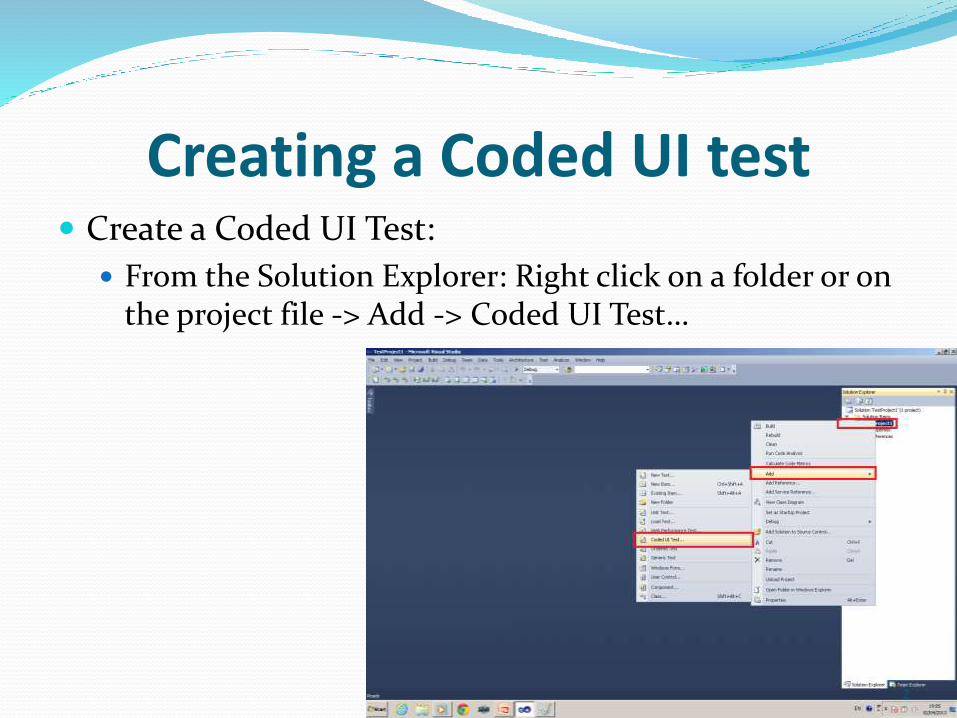
Creating a Coded UI test Create a Coded UI Test:
From the Solution Explorer: Right click on a folder or on the project file -> Add -> Coded UI Test…
2
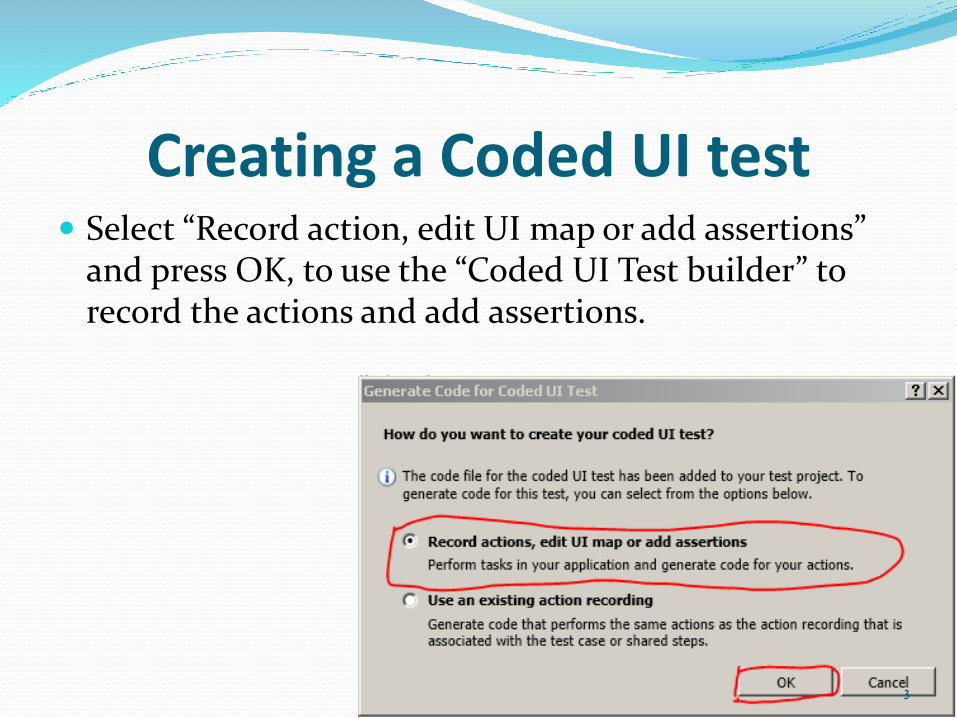
Creating a Coded UI test Select “Record action, edit UI map or add assertions”
and press OK, to use the “Coded UI Test builder” to record the actions and add assertions.
3
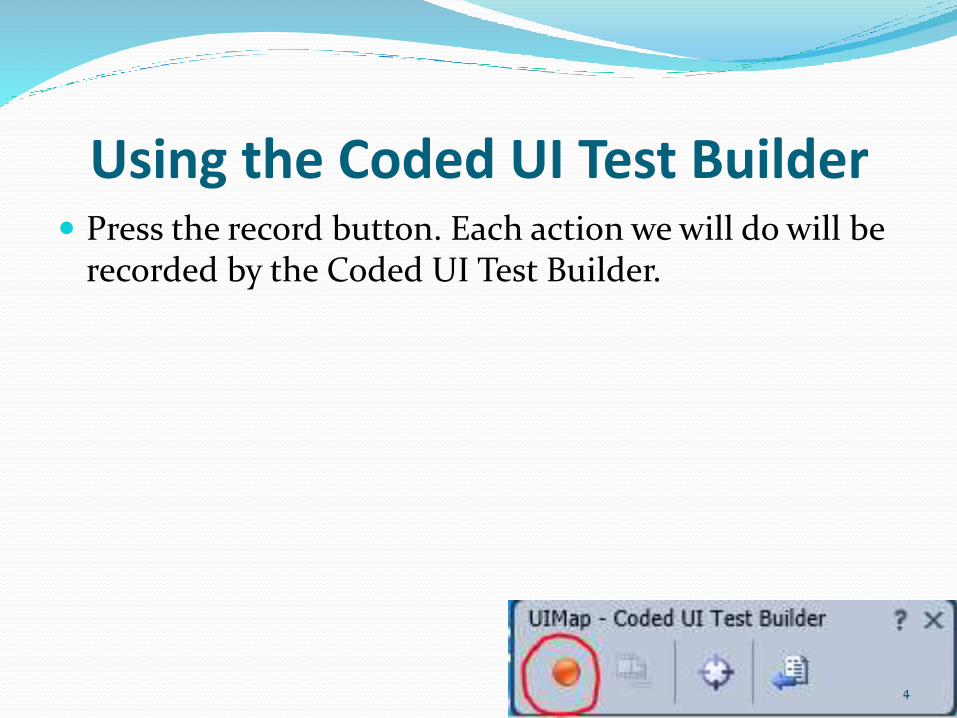
Using the Coded UI Test Builder Press the record button. Each action we will do will be
recorded by the Coded UI Test Builder.
4
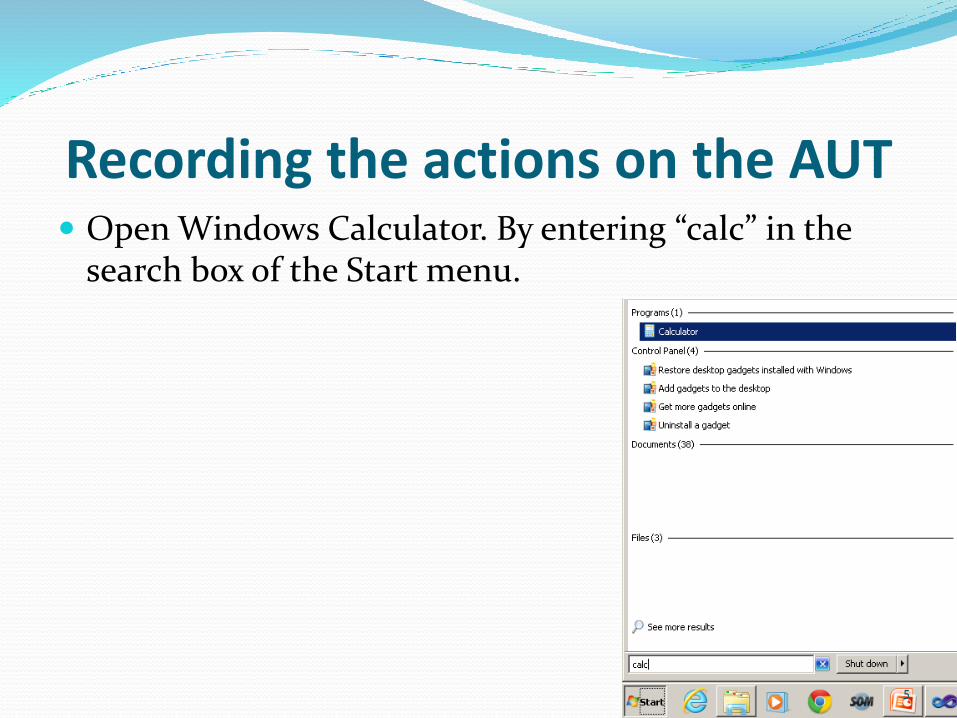
Recording the actions on the AUT Open Windows Calculator. By entering “calc” in the
search box of the Start menu.
5
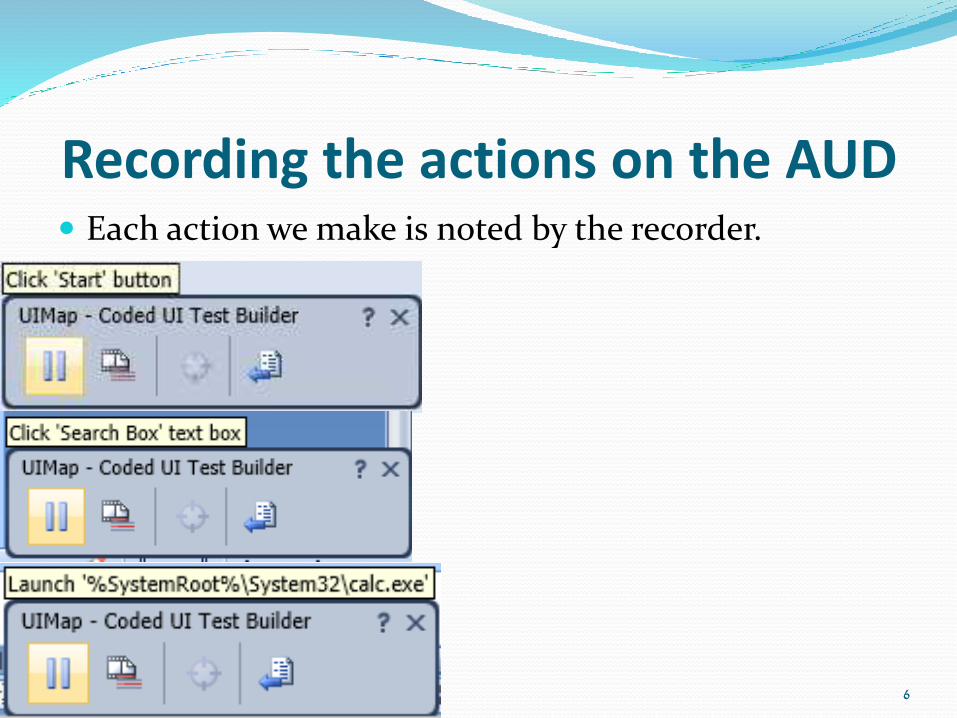
Recording the actions on the AUD Each action we make is noted by the recorder.
6
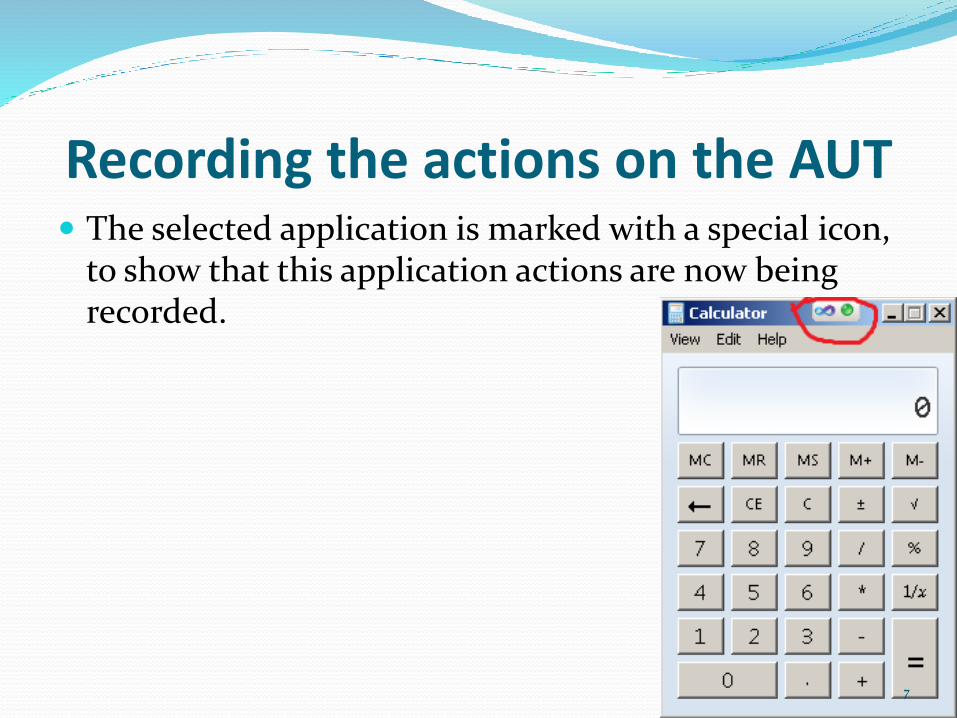
Recording the actions on the AUT The selected application is marked with a special icon,
to show that this application actions are now being recorded.
7
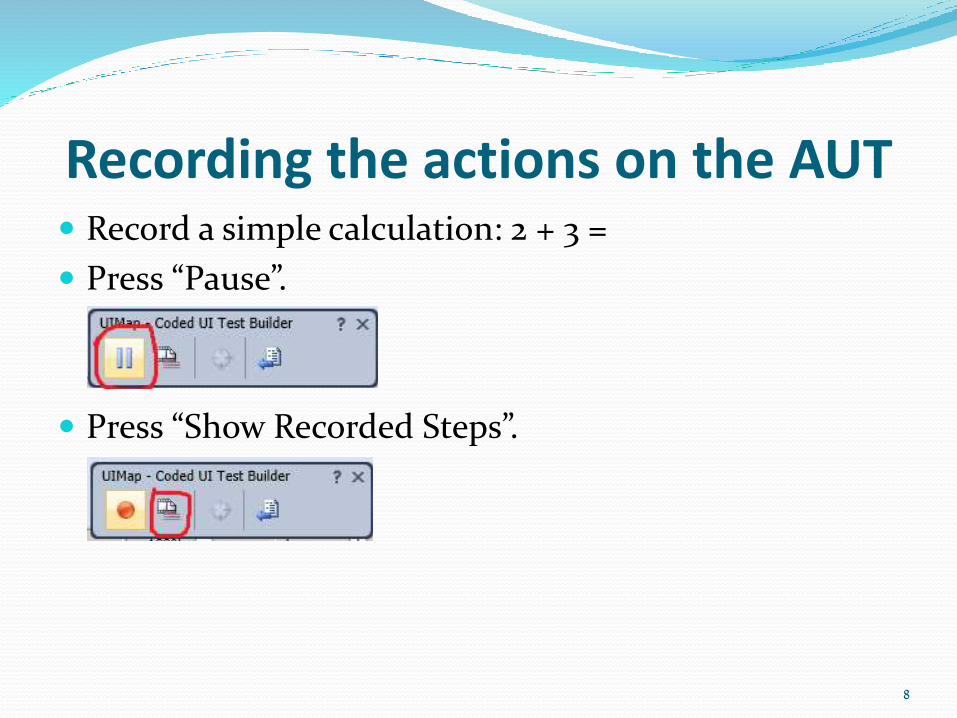
Recording the actions on the AUT Record a simple calculation: 2 + 3 =
Press “Pause”.
Press “Show Recorded Steps”.
8
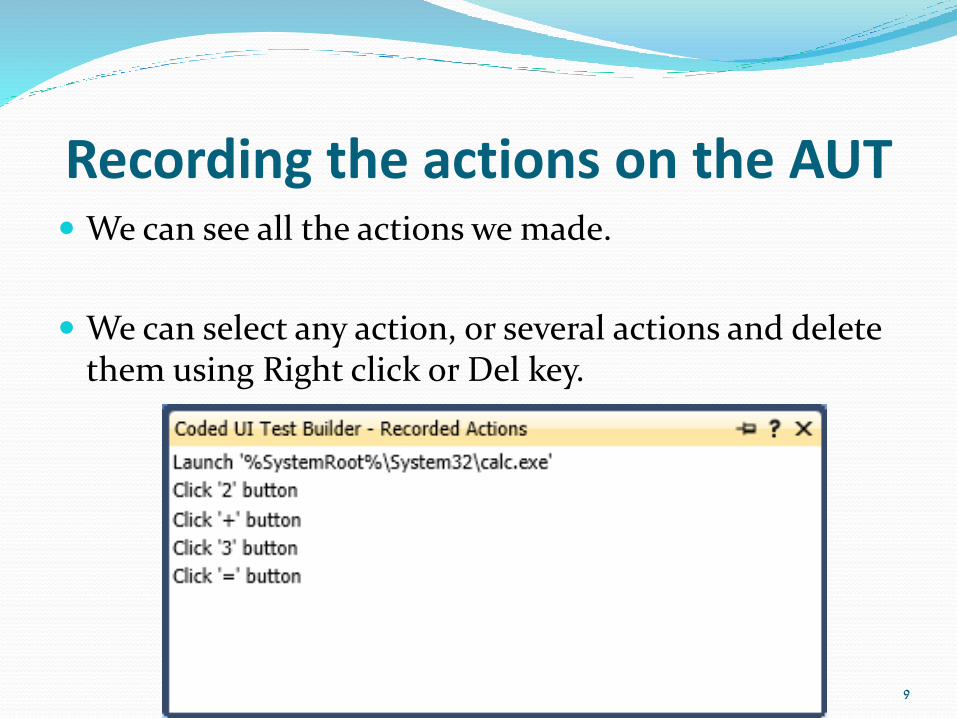
Recording the actions on the AUT We can see all the actions we made.
We can select any action, or several actions and delete them using Right click or Del key.
9
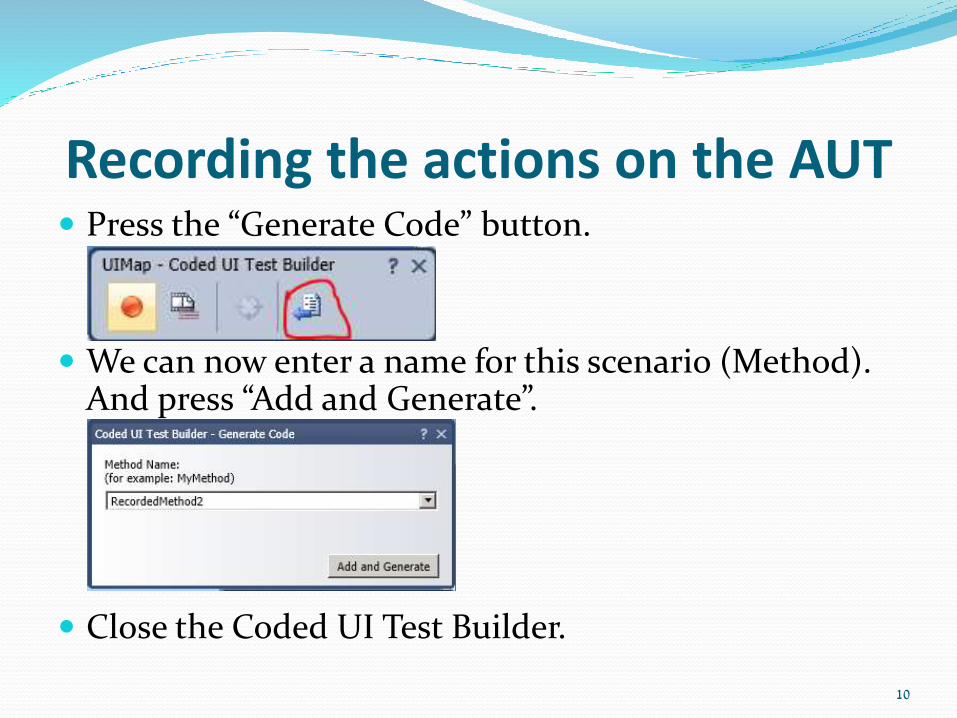
Recording the actions on the AUT Press the “Generate Code” button.
We can now enter a name for this scenario (Method). And press “Add and Generate”.
Close the Coded UI Test Builder.
10
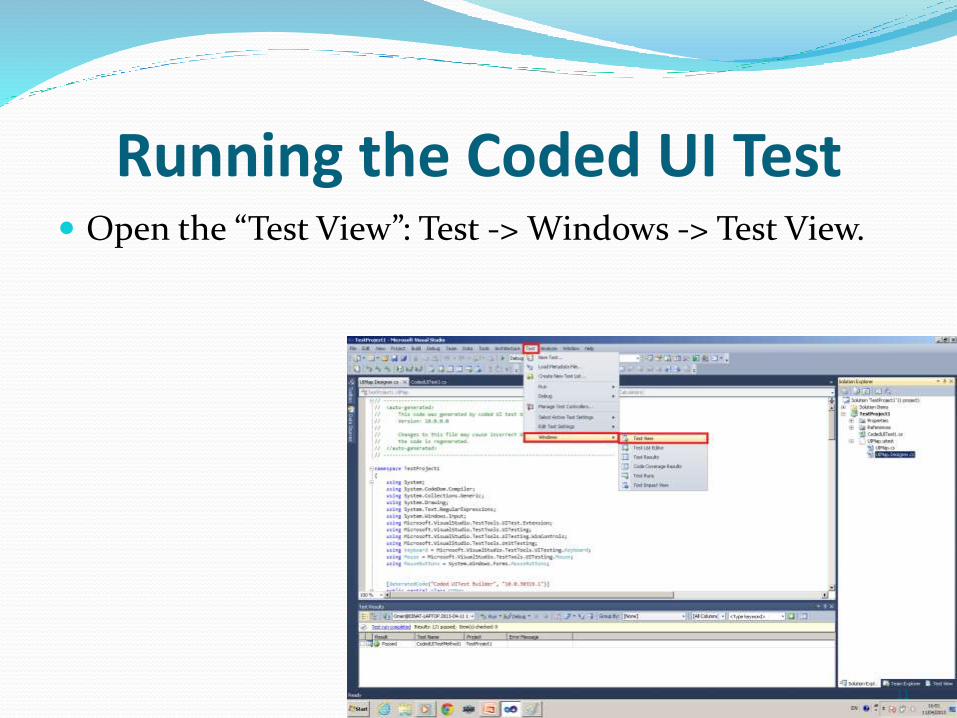
Running the Coded UI Test Open the “Test View”: Test -> Windows -> Test View.
11
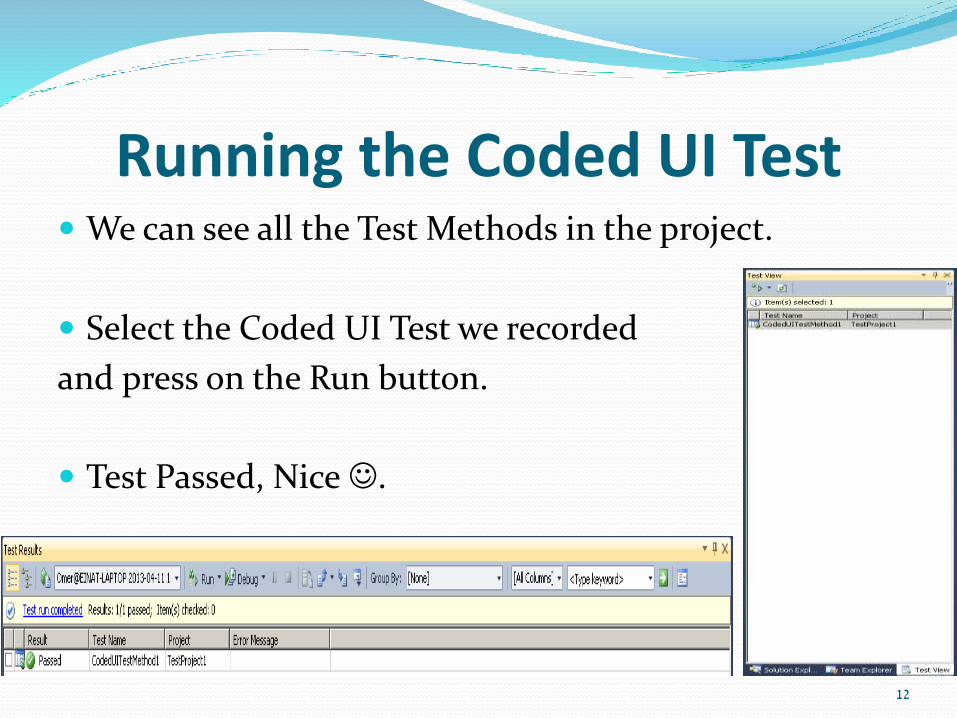
Running the Coded UI Test We can see all the Test Methods in the project.
Select the Coded UI Test we recorded
and press on the Run button.
Test Passed, Nice .
12
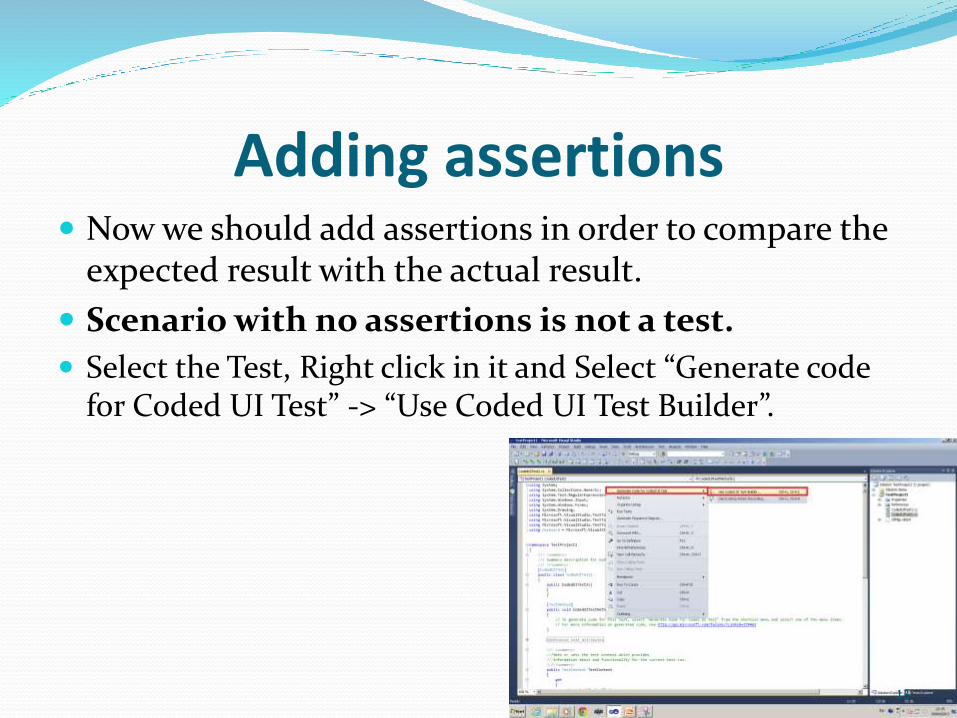
Adding assertions Now we should add assertions in order to compare the
expected result with the actual result.
Scenario with no assertions is not a test.
Select the Test, Right click in it and Select “Generate code for Coded UI Test” -> “Use Coded UI Test Builder”.
13
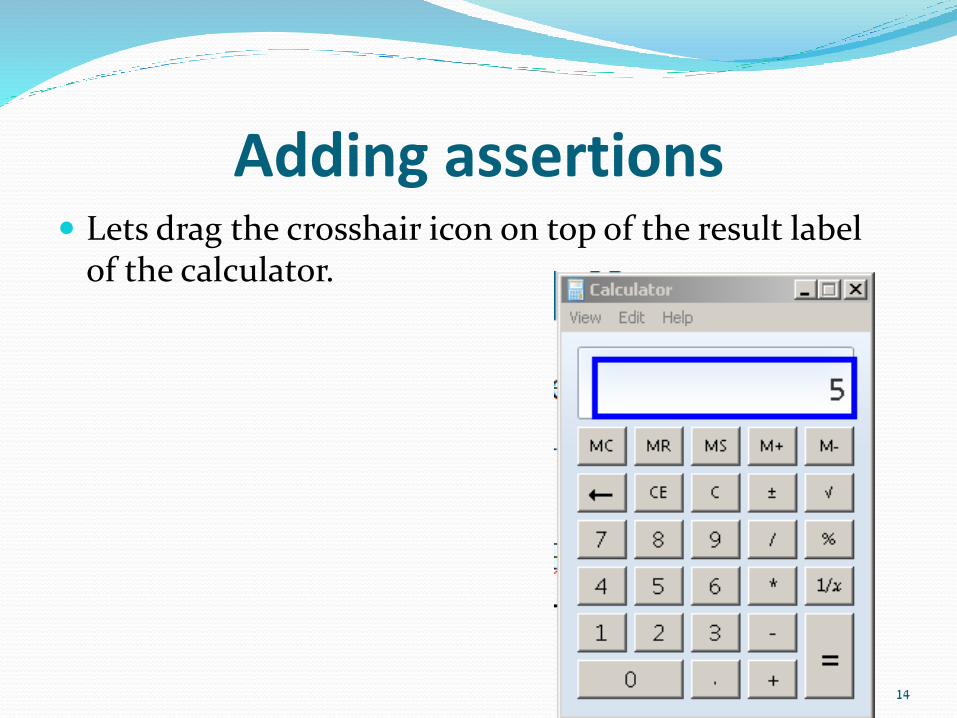
Adding assertions Lets drag the crosshair icon on top of the result label
of the calculator.
14
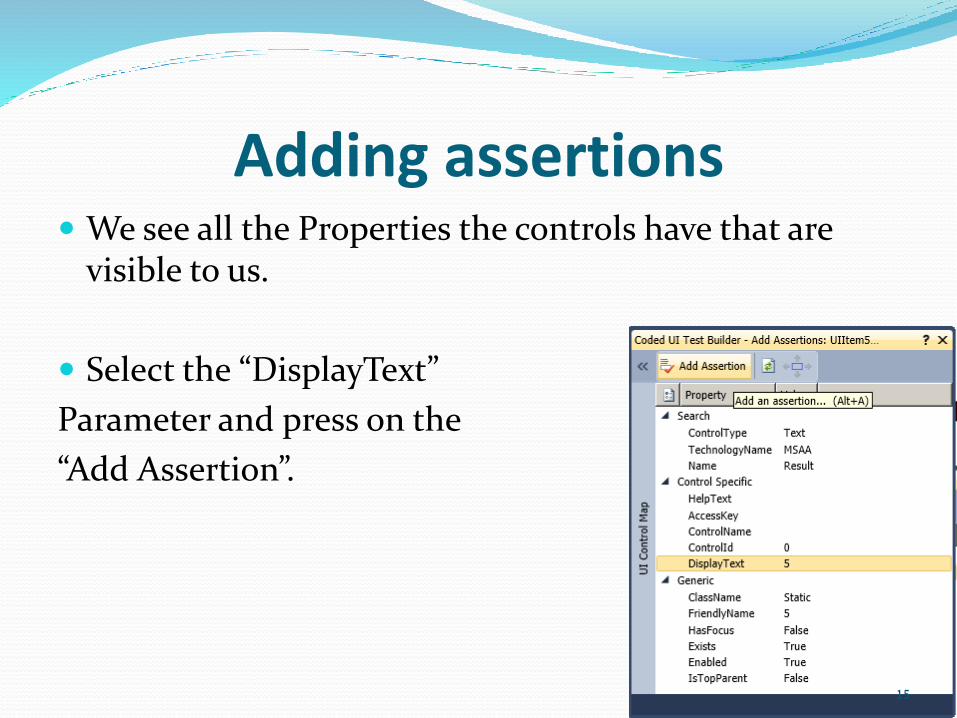
Adding assertions We see all the Properties the controls have that are
visible to us.
Select the “DisplayText”
Parameter and press on the
“Add Assertion”.
15

Adding assertions Select “AreEqual” from the listBox and leave the value
as is. Press OK.
Close the assertions window.
Press on “Generate Code”, add a Method name And press “Add and Generate”.
Close the CUIT Builder.
16
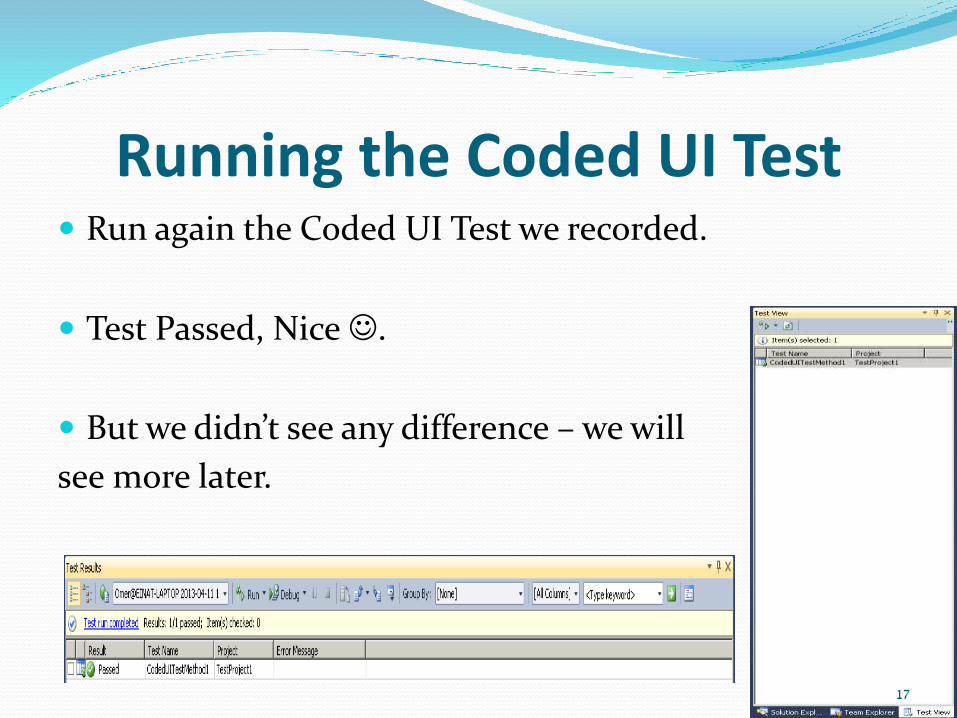
Running the Coded UI Test Run again the Coded UI Test we recorded.
Test Passed, Nice .
But we didn’t see any difference – we will
see more later.
17
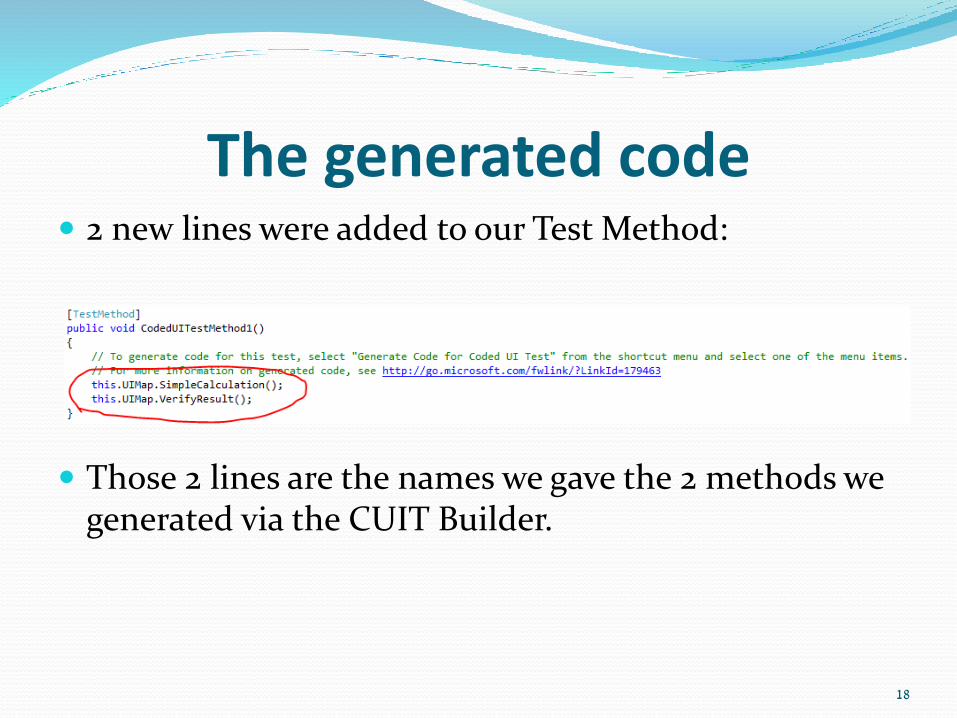
The generated code 2 new lines were added to our Test Method:
Those 2 lines are the names we gave the 2 methods we generated via the CUIT Builder.
18
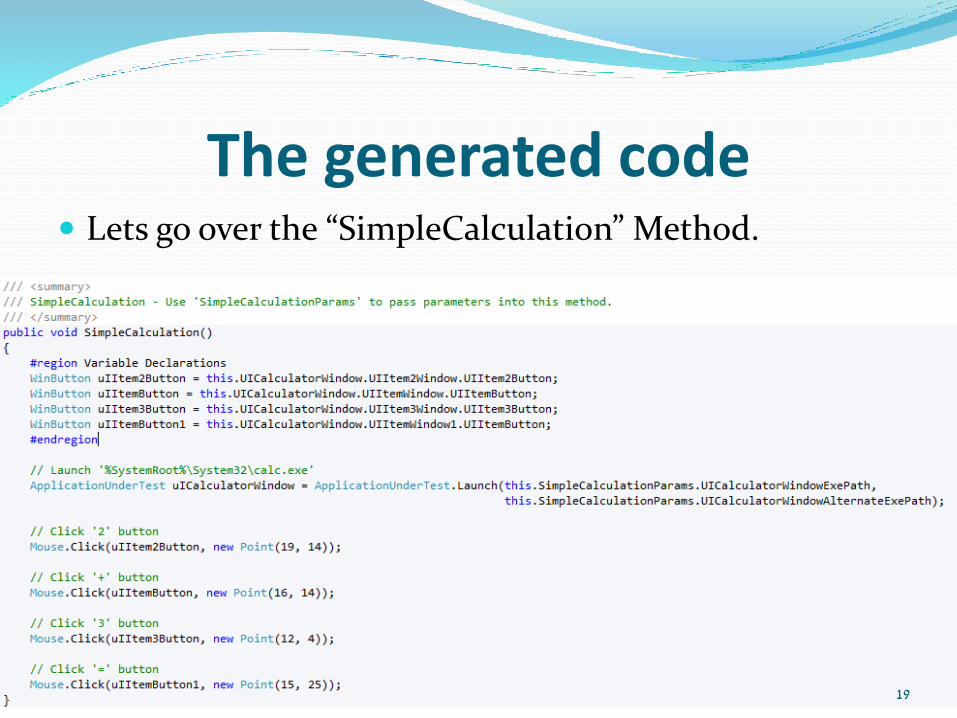
The generated code Lets go over the “SimpleCalculation” Method.
19
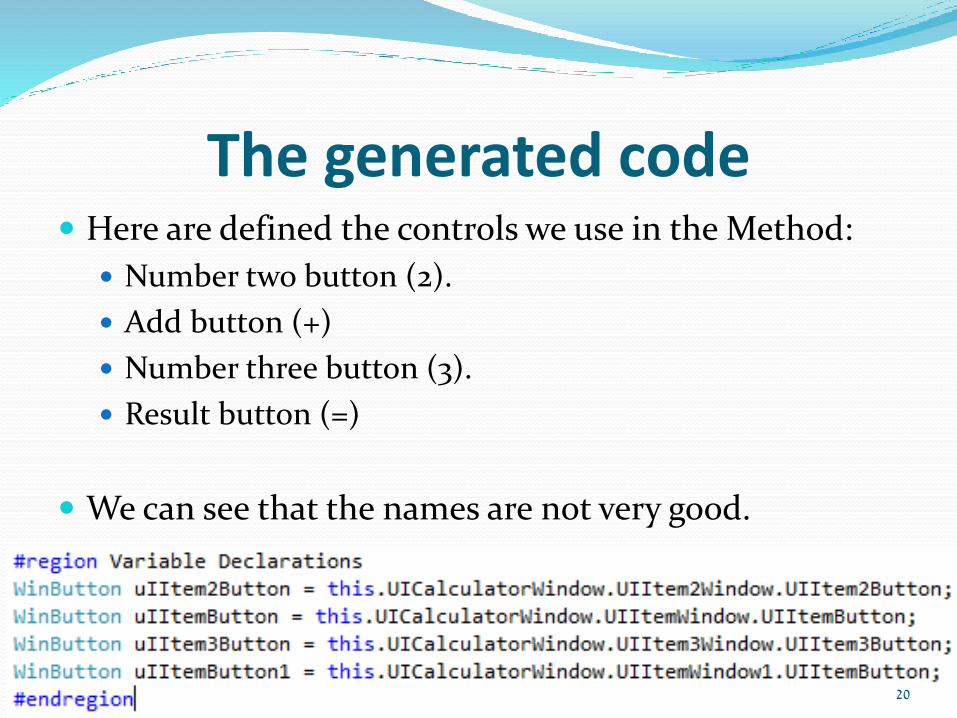
The generated code Here are defined the controls we use in the Method:
Number two button (2).
Add button (+)
Number three button (3).
Result button (=)
We can see that the names are not very good.
20
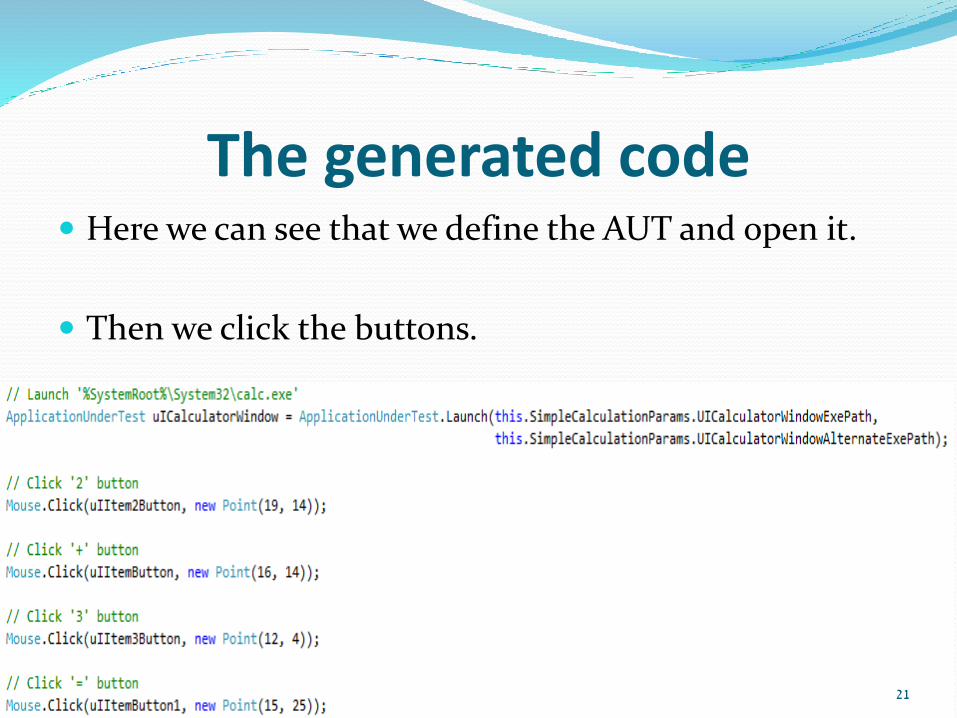
The generated code Here we can see that we define the AUT and open it.
Then we click the buttons.
21
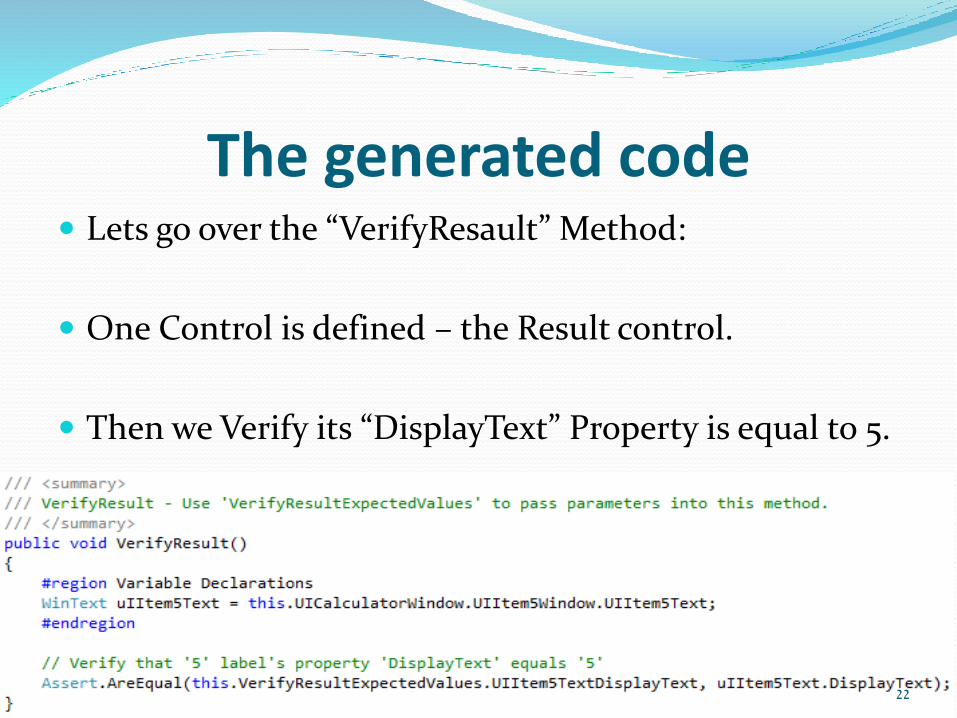
The generated code Lets go over the “VerifyResault” Method:
One Control is defined – the Result control.
Then we Verify its “DisplayText” Property is equal to 5.
22
To be continued.. We will go over the generated code in more details and
depth in the next lessons..
23