clinical excellence
TRANSCRIPT
134 Australasian Dental Practice May/June 2019
The utilisation of Cone Beam Computed Tomography (CBCT) scan data in conjunction with treatment planning software to enable guided surgery for implant reconstruction cases is one of the fastest growing segments of implant dentistry.
Often, to have a more complete understanding of final tooth position (FTP) in relation to the implant position, a specific appliance worn by the patient during the CBCT scan can complete the picture and help align all the digital data correctly in relation to the final planned prosthetic. This is known as a radio-graphic guide or more commonly, a scan appliance.
By utilising a scan appliance correctly, the case can be planned from both a prosthetic and surgical perspective prior to the implant surgery taking place, making the process restoratively driven. Focusing on the restorative outcome maximises the strength, lon-gevity and aesthetics of the restoration and makes the restoration more predictable for the restorative dentist and the technician.
The scan appliance is also essential in edentulous cases as there are usually no matching landmarks that will show up in a CBCT that will allow an optical scan of the edentulous soft tis-sues to be correctly merged with it. Utilising a correctly made scan appliance at the time of the CBCT increases the accuracy of this “merge” immeasurably.
The scan appliance is often critical to this process and to the success of digitally-planned implant cases. It has three main pur-poses. The first is to show the ideal prosthetic positions of the teeth to be replaced in the digital plan in relation to the implants. Secondly, it provides an invaluable diagnostic tool to detail the tooth-to-bone relationship. And thirdly, during computer planning and prior to the construction of the drill guide, the scan appliance also helps us sync the optically scanned model to the CBCT scan.
While “virtual computer teeth” are very useful for many situ-ations, especially in partially edentulous cases, an appliance in which the teeth have been set in the ideal position and tried in the
The Implaguide Digital Scan Appliance
By Terence Whitty
clinical | EXCELLENCEclinical | EXCELLENCE
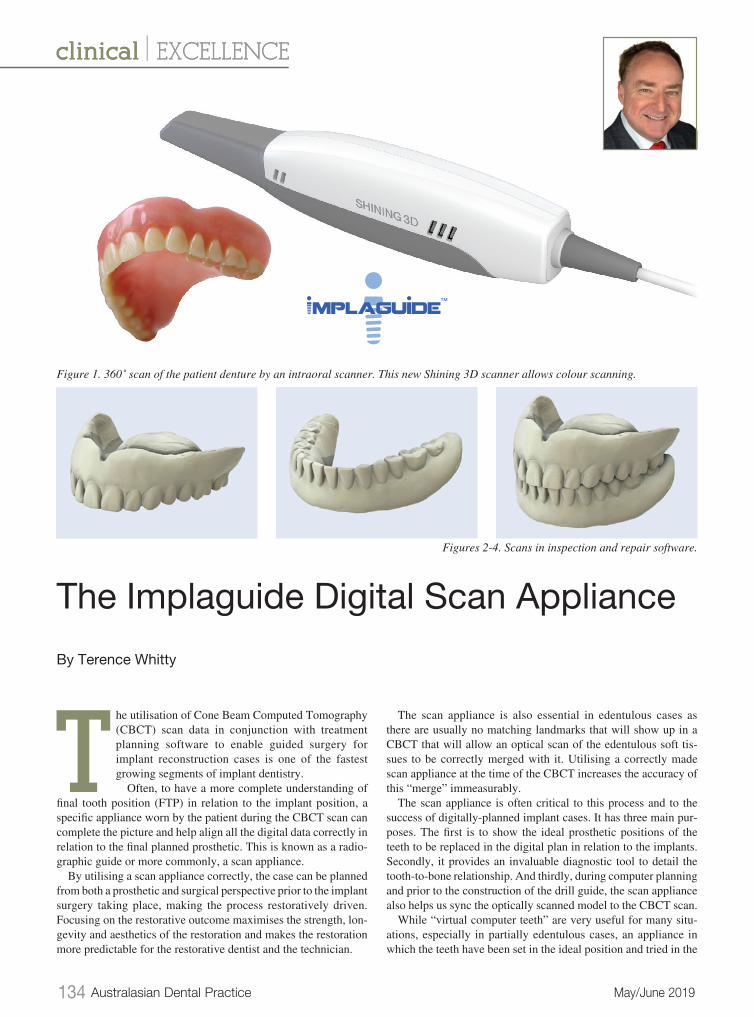
Figure 1. 360˚ scan of the patient denture by an intraoral scanner. This new Shining 3D scanner allows colour scanning.
Figures 2-4. Scans in inspection and repair software.

May/June 2019 Australasian Dental Practice 135
patient’s mouth provides far greater accuracy. Hence, it is usu-ally advisable for all edentulous cases to have a scan appliance and often the patient’s existing denture is duplicated and used as a reference.
After the scan appliance is utilised in the planning stage, it is also sometimes modified to create the drill guide, though in the author’s opinion, this is not ideal. A custom drill guide is a better choice as it can also guide depth correctly if a fully guided sur-gical kit is used. These days, it’s quick and inexpensive to do this.
There are generally two types of scan appliances in current use today - Single Scan and Dual Scan Appliances. The Single Scan appliance is generally made of an acrylic mixed with approximately 20%-40% radiopaque barium sulphate, depending
on the application, that allows various structures to be seen radiographically. Increasing the percentage of barium sulphate in the tooth portion of the scan appliance can allow this section of the scan appliance to be better identified in the CBCT.
The Single Scan appliance is worn by the patient during the CBCT scan and will show up in the scan with markers to assist implant placement.
The Dual Scan appliance is often used when scatter from neighbouring metal restorations can obscure the view of the teeth in the scan appliance when using Single Scan appliances. Barium sulphate from Single Scan appliances can also cause issues and obscure the view of potentially vital structures, especially when it is not mixed correctly in the acrylic.
Figure 7. Printing complete using biocompatible 3D resin.
Figure 6. Setup ready to print in 3D printer software.
Figure 5. DLP 3D Printer.
Figure 8. Remove from build tray. Figure 9. Printed copy dentures.
136 Australasian Dental Practice May/June 2019
Commercial acrylics are now available to help solve this issue such as Lang Dental’s JET XR™ Radiopaque Acylic as the barium sulphate is mixed exactly in the acrylic so no second guessing is required.
Opinions on adding barium sulphate vary; some say it may affect the quality of the scan, however, one could argue when scanning partially edentulous cases that any radiopaque material in the mouth does likewise, such as a crown or other restorations. The optimal method is to always use a good quality cone beam CT scanner at high resolution.
The key to constructing a scan appliance is placing what is known as radiopaque fiducial or reference markers into the scan appliance. Often gutta-percha, used in root canal treatments, is used but other radiopaque materials are suitable too such as Lang’s Jet XR acrylic. Taking a CBCT scan with the patient wearing the scan appliance and another with the appliance on the stone model is the procedure of choice for the dual scan tech-nique. By doing this, a software merge of the stone model, the scan appliance and the CBCT scan can be accurately achieved by aligning the fiducial markers.
Sometimes, the patient’s existing denture can be used as a scan appliance but it will need modification and possible repair or maintenance after the scan is done. An easier way to make either type of scan appliance is by duplicating the patient’ s existing denture or diagnostic wax-up.
Unfortunately, these methods have shortcomings, namely being time consuming and the patient is unavoidably without dentures for some period of time.
A new method described here uses intraoral scanning tech-nology and 3D printing to manufacture a superior scan appliance, namely the Implaguide Digital Scan Appliance, that can be used with a single scan procedure in almost all circumstances, replacing dual scan appliances completely.
Procedure
For edentulous cases, the patient’s current dentures are scanned 360 degrees using an intra oral scanning device making sure
to capture all surfaces (Figure 1).Next, the scans are analysed for any imperfections or holes and
repaired in software to be “water tight” and ready for 3D printing.The scans are then 3D printed in a biocompatible material and
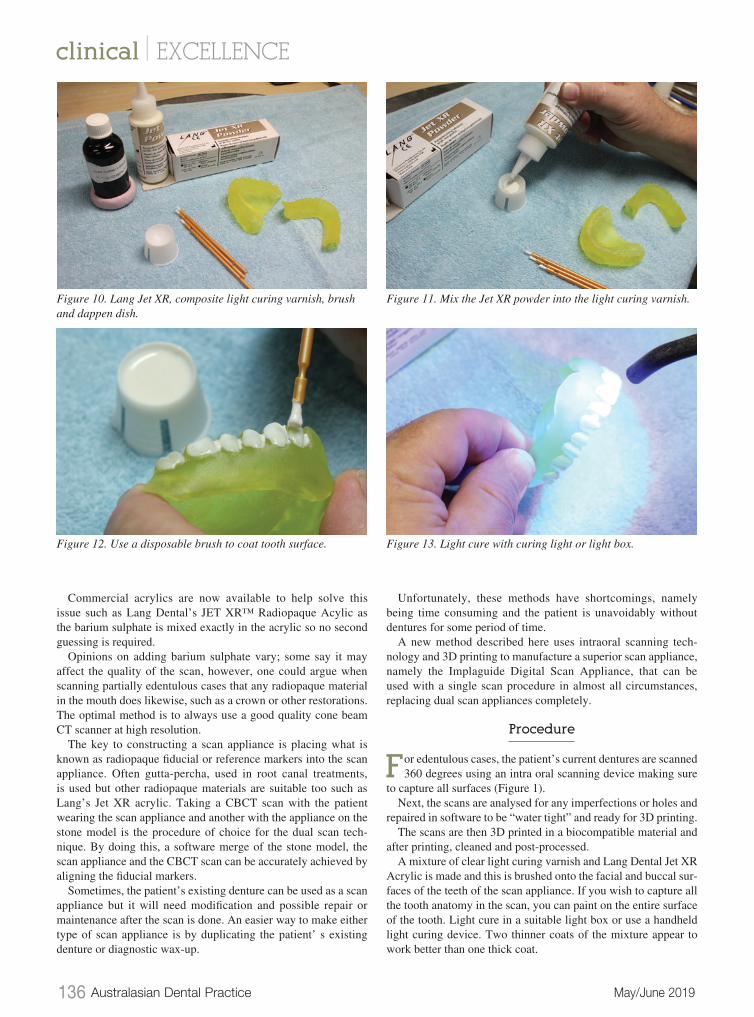
after printing, cleaned and post-processed.A mixture of clear light curing varnish and Lang Dental Jet XR
Acrylic is made and this is brushed onto the facial and buccal sur-faces of the teeth of the scan appliance. If you wish to capture all the tooth anatomy in the scan, you can paint on the entire surface of the tooth. Light cure in a suitable light box or use a handheld light curing device. Two thinner coats of the mixture appear to work better than one thick coat.
clinical | EXCELLENCE
Figure 10. Lang Jet XR, composite light curing varnish, brush and dappen dish.
Figure 11. Mix the Jet XR powder into the light curing varnish.
Figure 12. Use a disposable brush to coat tooth surface. Figure 13. Light cure with curing light or light box.
138 Australasian Dental Practice May/June 2019
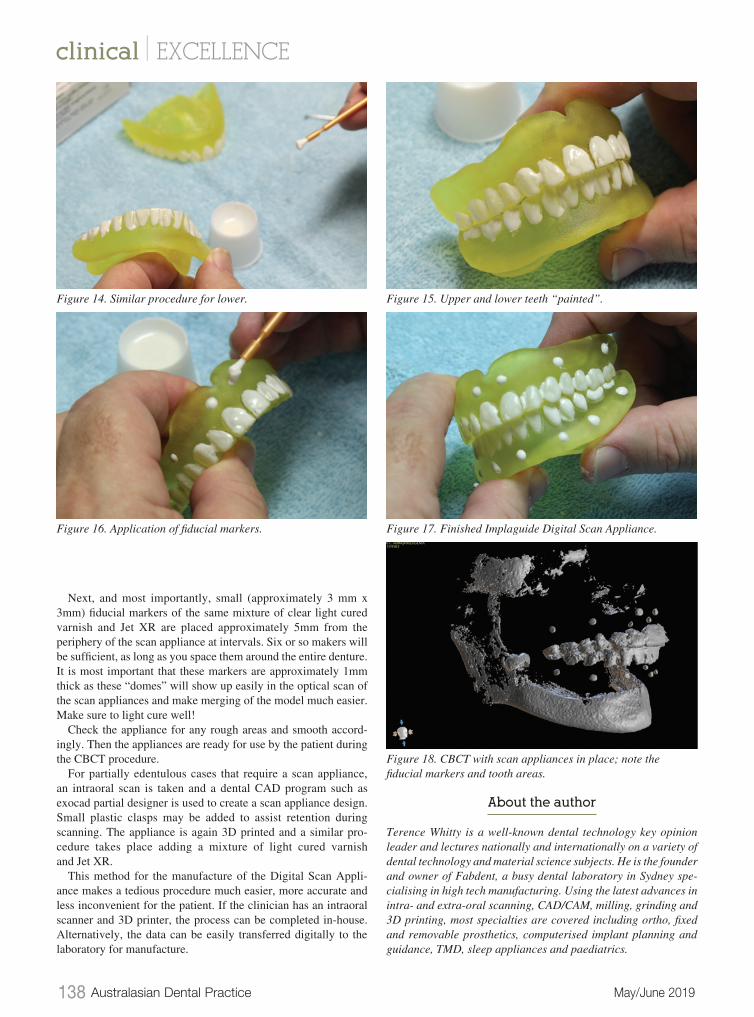
Next, and most importantly, small (approximately 3 mm x 3mm) fiducial markers of the same mixture of clear light cured varnish and Jet XR are placed approximately 5mm from the periphery of the scan appliance at intervals. Six or so makers will be sufficient, as long as you space them around the entire denture. It is most important that these markers are approximately 1mm thick as these “domes” will show up easily in the optical scan of the scan appliances and make merging of the model much easier. Make sure to light cure well!
Check the appliance for any rough areas and smooth accord-ingly. Then the appliances are ready for use by the patient during the CBCT procedure.
For partially edentulous cases that require a scan appliance, an intraoral scan is taken and a dental CAD program such as exocad partial designer is used to create a scan appliance design. Small plastic clasps may be added to assist retention during scanning. The appliance is again 3D printed and a similar pro-cedure takes place adding a mixture of light cured varnish and Jet XR.
This method for the manufacture of the Digital Scan Appli-ance makes a tedious procedure much easier, more accurate and less inconvenient for the patient. If the clinician has an intraoral scanner and 3D printer, the process can be completed in-house. Alternatively, the data can be easily transferred digitally to the laboratory for manufacture.
About the author
Terence Whitty is a well-known dental technology key opinion leader and lectures nationally and internationally on a variety of dental technology and material science subjects. He is the founder and owner of Fabdent, a busy dental laboratory in Sydney spe-cialising in high tech manufacturing. Using the latest advances in intra- and extra-oral scanning, CAD/CAM, milling, grinding and 3D printing, most specialties are covered including ortho, fixed and removable prosthetics, computerised implant planning and guidance, TMD, sleep appliances and paediatrics.
Figure 14. Similar procedure for lower. Figure 15. Upper and lower teeth “painted”.
Figure 16. Application of fiducial markers. Figure 17. Finished Implaguide Digital Scan Appliance.
Figure 18. CBCT with scan appliances in place; note the fiducial markers and tooth areas.
clinical | EXCELLENCE