cimco nc base v7 user guide - cnc.uk.com · cimco nc-base v7 user guide. contents ... start cimco...
TRANSCRIPT

CIMCO NC-Base v7 User Guide

Contents
Introduction
Installation
Database Tab
NC-Base Database
NC-Base Settings
Using Triggers
Using NC-Base Help
License Information
Information in this document is subject to change without notice and does not represent
a commitment on the part of CIMCO A/S. The software described in this document may
be used or copied only in accordance with the terms of the license. The purchaser may
make one copy of the software for a backup, but no part of this user manual may be
reproduced, stored in a retrieval system, or transmitted in any form or by any means
electronically or mechanically, including photocopying and recording for any purpose
other than the purchaser's personal use, without prior written permission from CIMCO
A/S.
TERMS OF USE FOR:
Software: NC-Base v7
Version: 7.x.x
Date: August 2014
Copyright © 1991-2014 by CIMCO A/S
Notice
CIMCO A/S reserves the right to make changes to the NC-Base v7 Software at any time
and without notice.
Software License
You have the right to use the number of licenses of the enclosed program, which you
have bought from CIMCO A/S. You may not distribute copies of the program or related

documentation to any persons or companies. You may not modify the program or related
documentation without the prior written consent of CIMCO A/S.
Disclaimer of all Warranties and Liability
CIMCO A/S makes no warranties, either express or implied, with respect to the software,
its quality, performance, merchantability, or fitness for any particular purpose. The
entire risk as to its quality and performance is with the buyer. Should the NC-Base v7
software prove defective following its purchase, the buyer (and not CIMCO A/S, its
distributor, or its retailer) assumes the entire cost of all necessary servicing, repair, of
correction and any incidental or consequential damages. In no event will CIMCO A/S be
liable for direct, indirect, or consequential damages resulting from any defect in the
software, even if CIMCO A/S has been advised of the possibility of such damages. Some
jurisdictions do not allow the exclusion or limitation of implied warranties or liability for
incidental or consequential damages, so the above limitation or exclusion may not apply
to you.
Notice:
The accompanying software is confidential and proprietary to CIMCO A/S. No use or
disclosure is permitted other than as expressly set forth by written license with CIMCO
A/S.
Copyright
Copyright © 1991-2014 by CIMCO A/S. All rights reserved.
This software contains confidential information and trade secrets of CIMCO A/S. Use,
disclosure, or reproduction is prohibited without the prior express written permission of
CIMCO A/S.
CIMCO NC-Base, CIMCO Edit, DNC-Max, and the CIMCO Logo are trademarks of CIMCO
A/S.
Microsoft, Windows, Win32, and Windows NT are trademarks or registered trademarks of
Microsoft Corporation.
Other brand and product names are trademarks or registered trademarks of their
respective holders.


Introduction
Management of part programs and associated production documents is often a time
consuming task for CNC programmers and operators. CIMCO NC-Base v7 takes care of
that job and goes one step further. By providing an integrated and highly flexible
management, search and editing environment, programmers and operators are
guaranteed to work more effectively.
CIMCO NC-Base Client.
Information Management
Achieving product and quality goals today requires that the correct information and data
get to the right individuals and equipment as efficiently as possible. NC-Base is the CNC
program management tool that allows you to organize and manage your CNC programs
and related production documents most effectively through the use of a reliable and fast
SQL relational database.

CIMCO NC-Base is production centric, designed to be used by people in the programming
department and on the shop floor. With NC-Base, CNC programmers and production staff
can assemble virtual folders containing all the necessary data used by machinists,
operators, quality staff, and others who are responsible for finished parts.
Why just send CNC programs to the shop floor when you can also provide setup sheets,
tool lists, images, and other vital information required to manufacture parts? This
information may be accessed from PCs running the NC-Base Client or printed out for
manual distribution. Either way, NC-Base helps ensure the right part gets made right
every time.
CNC operators can access and update the database directly from the CNC control, or any
PC on the shop floor.
Installation
To install NC-Base v7 follow the instructions below.
1. Locate installation files
If you received NC-Base v7 on a CR-ROM, open the NC-Base v7 directory on the CD. If
you received NC-Base via e-mail, save the NC-Base v7 file in a temporary directory.
2. Run installation program
Start the installation program by clicking on the CIMCO Software setup program:
CIMCO Software setup program.
3. Select components
Now follow the instructions on the screen.
When prompted for selecting components, select CIMCO Database Server for installing
NC-Base Server and select CIMCO Edit for installing NC-Base Client (CIMCO Edit is
needed in order to run NC-Base Client).

If you have purchased a license for CIMCO DNC-Max, or wish to install an evaluation
version of CIMCO DNC-Max, you should also select DNC-Max from the list.
4. Copying your key file
If you do not have a key file and wish to install an evaluation version, just proceed to the
next step.
If you have received a key file from CIMCO, it should be copied to the NCBase7 directory
after the installation is completed.
If you have installed both NC-Base Server and Client, the key file must be copied to the
CIMCOEdit7 directory too.
5. Starting the server
When the installation is completed, and you have copied your key file, you are ready to
start NC-Base for the first time.
Go to the NC-Base installation directory (typically C:/CIMCO/NCBase7) and run
NCBaseServer.exe, this will bring up the database server console. Click the "Start"
button to start the server.
Verify that your company name is shown at the top of the window. If not, you forgot to
copy the key file to the NC-Base directory. If you are running an evaluation version, the
license name is Demo version.
In Windows 8, Windows 7 and Vista you need to right-click and select "Run as
administrator".
6. Starting the client
Start CIMCO Edit v7 and verify that the Database tab is available in the ribbon. If not,
open the Editor configuration by clicking the Global Setup icon in the Editor tab. Go to
the Plugins section in the left tree of the configuration window, and ensure that the
option Disable NC-Base is unchecked. Now restart the program to activate the Database
tab.

Database Tab
In this section, the functions under the Database tab are described.
The functions in NC-Base v7 are activated using the appropriate icons on the Ribbon.
The commands are organized into different menus under the Database tab.
If the function can be activated through the Ribbon bar or a keyboard shortcut, the icon
or the shortcut is displayed next to the command name.
The database is optional and will be present in the Editor only if you also purchased it.
If the Database tab is not available, please refer to Installation to read about how to
start the NC-Base Client.
Database
Search
Program
Status
Transfer
Backup
Customer
Administration

Database
This section describes the functions in the Database menu. You can access the database
configuration using the icon .
The Database menu.
Explorer / Ctrl+E
Opens the database window.
The following dialog appears to let you log into the database.
Database Login.
Enter your User name and Password in the corresponding fields and click the OK button.
Further information on User Rights is found under User Groups.
Logoff
Logs you out from the database.
The NC-Base Explorer closes when you log off from the database.
By default, NC-Base Explorer auto logs you off after 5 minutes. You can specify the auto
logout time in the Client Settings dialog.
Database Setup
Use this dialog to configure the database.

Click on this icon , or select the Setup icon in the Administration menu to open the
database configuration dialog.
Please refer to the section NC-Base Settings for details.

Search
This section is concerned with the Database Search function. This menu contains the
functions described below for file searching.
For more details about the Search settings, please refer to NC-Base Settings / Search
Settings.
The Search menu.
Queue
Click on this icon to display a list of all programs on the import queue.
Queued programs are marked with a red cross on the corresponding icon. Programs on
the import queue can be accepted or rejected, and only approved programs can be
edited. The queue function can only be used with DNC-Max enabled. Programs received
by using DNC-Max auto receive or auto import options can be placed on the queue.
Find programs received from CNC's
Click on this icon to display a list of received programs from CNC's that are placed on the
queue.
Programs that have been placed on the queue by the CNC machine are designated in the
program log with DNCMAX as user.
Find auto imported programs
Click on this icon for a list of auto imported programs that are placed on the queue.
The auto import function can only be used with DNC-Max enabled.
Last 24 Hours

Click on this icon to display a list of programs that have been modified within the last 24
hours.
Find Modified Last 7 Days
Click on this icon for a list of programs that have been modified within the last 7 days.
Locked
Click this option to display a list of all locked programs.
To search for locked programs, the option Use locking system must be activated in the
NC-Base Configuration dialog under Server Settings / Advanced.
Find All Unlocked
Click this option for a list of all unlocked programs.
To search for unlocked programs, the option Use locking system must be activated in the
NC-Base Configuration dialog under Server Settings / Advanced.
Read/Write
Click on this icon for a list of all read/write programs.
To search for Read/Write programs, the option Use read-only system must be activated
in the NC-Base Configuration dialog under Server Settings / Advanced.
Find All Read-only
Click this option to display a list of all read-only programs.
To search for Read-only programs, the option Use read-only system must be activated in
the NC-Base Configuration dialog under Server Settings / Advanced.
Find Deleted
Click this icon to display a list of all deleted programs.

Program
This section describes the Program menu on the Database tab. The Program menu
contains the functions described below for file handling.
For more details about Program settings, please refer to NC-Base Settings.
The Program menu.
Program Info
Shows program info for the selected program(s).
Program Info can be specified for the fields defined in the Database Settings.
You can find additional settings for the automatic reading of the database fields under
Program Format.
Copy Program Info
Click this option to copy the program info from the selected program.
Paste Program Info
Click this option to paste the copied program info to the selected program.
Open
Opens the selected file.
Click this icon to open the selected file with the associated file extension application (e.g.
*.pdf will open with Acrobat Reader, *.doc with Microsoft Word, etc.).
Open with CIMCO Edit
Opens the selected file in CIMCO Edit.
Click this icon to open the selected files for viewing or editing in CIMCO Edit.

Compare
Compares the selected programs.
Click this option to open the selected files in CIMCO Edit File Compare. When you select
two programs and compare them, the corresponding NC programs are usually also
compared.
If you want to compare associated files, you must select them. You can compare
associated files for different programs.
View Version Report
Views a version report for the selected file.
To view version reports, the option Use versioning system must be activated in the NC-
Base Configuration dialog under Server Settings / Advanced.
Show File Notes
Shows the file notes.
Add Program
Adds a new program to the database.
When you click on this icon, the following dialog appears:
The dialog for adding a new program.
Machine: Select a machine to add to the new program.
File: Files can be added as follows:

o Existing File: Adds an existing file to the selected machine group. Select a
program and click Open.
Add existing file.
o New File: Creates an empty file and adds it to the selected machine.
Enter a descriptive name in the input field Program and click on Add. If
necessary, you can add the file before entering any other information about
the file (e.g. customer, status, etc.). Click Cancel to exit the dialog without
entering data.
Add new file.

o Empty Mazatrol File: Creates an empty Mazatrol file and adds it to the
selected machine. Proceed as described under New File to add the file.
The editor must be licensed for Mazatrol Viewer to use this option.
Add Current Program
Adds program in current window to the database.
Proceed as described under New File to add the file.
Copy Program
Copies the selected program.
Proceed as described under New File to add the file.
Associate File(s)
Associates file(s) to a program.
You can associate any file to the program (e.g. digital pictures in jpeg-format, drawings
in pdf-format, etc.).
The preview is active for supported formats such as jpeg, bmp, and pdf, but not for
unsupported formats.
Add/Update Memo File
Add/Update new memo file.
Add/Update Tool List
Add/Update new tool list.
By default, a tool list is automatically generated when adding new programs (can be
deactivated by checking the box Disable Tool List in Server Settings / Associated Files).
If you want to add a tool list, the following message appears:

Click Yes to replace the existing tool list with a new one. Click No to abort the operation.
If you click Yes, the following message appears:
Click Yes to add an existing tool list. Click No to generate a new tool list automatically.
Click on Cancel to exit without any changes taking effect.
Add/Update Setup Sheet
Add/Update new setup sheet.
Please proceed as described above under Add Tool List.
Delete
Deletes selected program(s).
Deleted programs can be restored (please refer to Restore Deleted Programs for details).
Purge
Purges selected file(s).
Purged programs can NOT be restored.

Undelete
Undeletes selected program(s).
Permanently deleted programs can NOT be restored.

Status
This section describes the Status function. The Status menu contains the functions
described below for file processing.
Please refer to section NC-Base Settings / Server Settings for further information.
The Status menu.
Lock
Locks the selected program(s).
Locked programs cannot be transferred to CNC machines. To lock a program, go to
Server Settings / Advanced, and check the field Use locking system.
Unlock
Unlocks selected program(s).
Read-only
Marks selected program(s) as read-only.
When a program is marked as read-only, it can be simulated (in Backplot) but not
edited. To use this option, check the field Use read-only system under Server Settings /
Advanced.
Read/Write
Sets selected program(s) read/write.
Accept
Accept imported file.

Click this option to accept the imported file under the name defined in DNC-Max auto
receive or auto import.
Programs on the import queue can be accepted or rejected. The queue function can only
be used with DNC-Max enabled (see also Search / Queue).
Accept Imported File As
Accept imported file under a different name. The following dialog appears:
Enter a new program name and click OK. Click on Cancel to exit without entering a new
filename.
View Imported File
Shows a preview of the imported program. This function allows you to view the file
before accepting or rejecting it.
Compare with Imported File
Compares the imported file with a program on the queue. This allows you to view the file
before accepting or rejecting it.
Reject
Reject imported file.
Add Comment
Add change comment to the selected program. The following dialog appears:

Add change comment.
In the field Change Comment, select a comment and click OK to insert it. To add your
own comment, select Other change, enter your comment in the field Reason for the
change? and click OK. To cancel the operation, click Cancel.
Change Status
Click this option if you wish to change the program status.

Transfer
In this section, the Database Transfer command is described. The Transfer menu
contains the functions described below for file transfer.
Information on the Transfer settings is found under NC-Base Settings.
The Transfer menu.
Send
Sends the selected program(s). When you click on this icon, the following message
appears:
Click Yes to send the file. If you want to cancel the operation, click No.
If multiple CNC machines are associated with an NC-Base machine group, you must first
select a machine in the Select Port dialog below:

Select a machine for the transmit operation.
Click finally on OK in the dialog Info, file set on the transmit queue.
You need DNC-Max to send NC programs, and DNC-Max must be configured for this
operation. It is also possible to send programs from NC-Base using the DNC module of
the Editor (optional). Please contact your local dealer for information about the required
DNC settings.
Stop current DNC Transfer
Stops the current DNC transfer (only when using the Editor DNC Option).
Receive
Receives the selected program(s) in the database. Existing files are overwritten. When
you click on the Receive icon, the following message appears:

Click Yes to receive the file. To cancel the receiving process, click No.
If multiple CNC machines are associated with an NC-Base machine group, you must first
select a machine in the Select Port dialog.
Click finally OK in the dialog Info, file set on the receive queue.
You need DNC-Max to receive NC programs, and DNC-Max must be configured for this
operation. If DNC-Max is in use, the NC programs are normally received automatically. It
is also possible to receive programs in NC-Base using the DNC module of the Editor
(optional). Please contact your local dealer for information about the required DNC
settings.
Receive New Program
Receives a program in a new window.
Backup
This section is concerned with the Database Backup function. This menu contains the
functions described below for database backup and restore.
Please refer to NC-Base Settings / Backup for further information.
The Backup menu.
Restore

Restores the selected program. Clicking on this icon will open the following dialog
(example).
The Restore dialog.
Help Button
Opens the NC-Base help file.
Open Button
Opens the selected backup file in the editor.
Purge All Button
Deletes all listed backups.
Compare Button
Compares the selected backup with the current version.

Delete Button
Deletes the selected backup.
Restore Button
Restores the selected backup.
Close Button
Closes the backup dialog.
Restore Latest
Restores latest backup of the selected program(s).
The latest created backup is restored.
Compare With Latest Backup
Compares the selected file with the latest backup.
Backup
Makes a backup of the selected program(s).
Customer
This section describes the Database command Customer. The Customer menu contains
functions described below for customer managing.
Information on Customer settings is found under NC-Base Settings.
The Customer menu.
Add Customer
Click this icon to add a new customer to the database. The following dialog appears:

Add customer.
Enter the customer data in the corresponding fields and close the dialog by clicking on
Add. If you want to exit without entering data, click on Cancel.
Modify Customer
Click this option to modify the data of the selected customer. A dialog which is similar to
the Add customer dialog appears, although with the title Modify customer. Select the
customer you want to modify from the drop-down list and click Modify to enter new
customer data. Click OK to apply the changes, or click Cancel to abort the operation.
Delete Customer
Click this option to delete a customer from the database.
Administration
In this section, the Database Administration command is described. The below
mentioned functions are used for system administration.

Information on how to configure this function is found under NC-Base Settings.
The Administration menu.
Setup
Click this icon to configure the database.
Please refer to the section NC-Base Settings for more information on how to configure
the database.
System Log
Opens the system log browser.
System Log.
Program

Use this field to specify a program name.
Example: To find all events for the program MOULD1, specify MOULD1 in this field. To
find all events for programs containing MOULD in the program name, specify *MOULD*.
Wildcards are allowed.
User ID
Specify the user info in this field.
Wildcards are allowed.
Event type
Use this field to specify the type of event. Select the blank field to display all types of
events.
Date / Time
Use this field to specify dates that should be searched.
From
Use this field to specify the date that should be searched.
To
Use this field to specify the date that should be searched.
Export
Click this button to export the log file.
Clear
Clears all search fields.
Search
Click this button to show the NC-Base system log.
Exit
Closes the log window.

Export List
Click this option to export current search to a file.
Print Program List
Prints the result of current search.
Change Password
Click this icon to change your password.
NC-Base Database
In this section you will find general information about the functions and settings of the
NC-Base interface, as well as information on setting up search criteria to find programs
in the database.
With NC-Base v7, a system for information storing and transferring is at your disposal,
which makes it possible for you to search for programs without necessarily knowing all
details about them. An example of such a database could be the search system of a
common library: The books in the shelves are sorted by the names of the authors. If you
know only the title of the book, it may result in a long search through the bookshelves. A
database allows you to search for certain book using the title as search key, the result in
this case being the name of the author, or you could enter the name of the author as
search key and the result would be all titles by this author to date.
The NC-Base Explorer
Search for Programs
The NC-Base Explorer
NC-Base v7 consists of two applications: The NC-Base Server (no user interface, runs in
the background as a service) and the NC-Base Client (NC-Base Explorer).
The function of the NC-Base Server is primarily the data storage and the actual data
processing, e.g. the search for specific programs.

The NC-Base Explorer serves as user interface for the service provided by the NC-Base
Server, thus enabling the entering of search criteria, as well as the (graphical)
presentation of the results, the further processing of programs, and the possibility of
program data modification.
Using the Explorer, you can perform operations like Program search, Add program,
Associate file(s), Lock program, make Backup, Add customer, Send program, etc.
Edit program files
The NC-Base Explorer allows the editing of NC programs in the CIMCO Editor, as well as
the modification of associated files by means of applications outside NC-Base, normally
used when opening these files. Depending on the configuration of your PC, only a
double-click on the file is needed to start the corresponding application. From there, you
edit your file as you normally would and click Save, and all changes will be assumed by
the database.
Do not save the file clicking Save As.... If the file is saved in another directory, the
modified data will not be stored in the database.
Start NC-Base Explorer
To start NC-Base Explorer, click on the Explorer icon in the Database menu. The
following window will appear:
Login window.
Enter your User name and Password in the corresponding fields and click OK.
Further information on the assignment of user permissions is found under User Groups.

The following window appears:
NC-Base Explorer.
Common information
The NC-Base Explorer consists of two parts: On the right a preview field and a tree
structured presentation of all programs for showing table contents, and on the left fields
for entering search criteria.
Program search
The fields Program, Machine, Customer, and Status are predefined (see following
picture).

Program Search.
Program search with customised search fields
If you have defined Text field 1, Text field 2, Text field 3, etc. in Database Settings,
these fields will be recognised as search fields (see following picture).

Program search with customised search fields.
You can specify up to 9 customised search fields.
Preview
If you highlight an NC program or an associated file in the NC-Base search result window
to the right, the contents will be displayed in a separate window below the search result
window (see the following picture).

File preview.
In Client Settings, you can deactivate the preview by checking the Disable preview field,
or you can specify whether to Preview associated files.
Add/remove columns
By right-clicking the title bar of any column in the search window, you can add or
remove columns from the Explorer search result window (see following picture).

Add/remove columns.
In the context menu, which appears when right-clicking the title bar, you can check and
uncheck a column title to make it appear in or disappear from the Explorer search result
window.
Column order
You can easily change the column order by clicking a column title and dragging it to a
new position.
You can click and drag between column titles to adjust the width of the nearest column
to the left.
Search for Programs
In this section, you will find information on how to enter search criteria to find programs
in the database.
By entering search criteria in the fields Program, Machine, Customer, etc., you can make
a search for specified programs. Using wildcards like ? (for any unspecified character)
and * (for a string of unspecified characters) you can limit the search to come up with
programs having certain character strings in common.

You must be logged on to search for a program in NC-Base. To do this, select Explorer
in the Database menu to start the NC-Base Explorer. In the Logon dialog, enter your
User name and Password and click OK. The following window appears:
NC-Base Explorer.
Search for programs
A search can be simple or complicated, narrow or broad. A "successful" search (user
finds all information needed) should be simple and broad.
In the Program Search window, you can enter part or all of the search term. If a field is
left empty, it will not be included in the search criteria. You can thus enter search terms
into one, some, or all of the fields, as well as select machine group, customer, and status
from the drop-down lists.
When the desired search terms have been entered, click Search.
All programs matching the search criteria will be shown in the search result window, as
shown in the following example:

Click on Clear if you wish to clear the search fields.
Advanced search
In NC-Base v7 you can extend the search to include groups of data not defined by field
names. Check the field Advanced search to activate the extended search options. The
following window will appear:

All Fields
Use this field to specify a search string that should match any of the fields.
Program filename / description / memo
Use this field to specify a search string that should be matched. All programs with a
program file that matches the specified name are found.
All filenames that contain the specified string are matched.

All filenames / descriptions / memos
Use this field to specify a search string that should be matched. All programs with a
program or associated file that matches the specified name are found.
All filenames that contain the specified string are matched.
Content of program files
Use this field to specify a search string that should be matched inside program files.
Content of all files
Use this field to specify a search string that should be matched inside files.
Date
Performs a search for files that are created and/or modified within the time period
specified below.
Do not search by date: A search for programs without considering the
dates of their modification or creation (the options Between and and are
disabled).
Created and Modified time: A search for programs created and modified
within the dates specified in the Between and and fields.
Created time: A search for programs created within the dates specified
in the Between and and fields.
Modified time: A search for programs modified within the dates
specified in the Between and and fields.
Locked
Use this field to search for either locked or unlocked programs.
All: A search for locked and unlocked programs.
Yes: A search for locked programs.
No: A search for unlocked programs.
Imported on queue: A search for locked or unlocked programs on the
import queue.

Read-only
Use this field to search for programs that are either read-only or read/write.
Both: A search for read-only and read/write programs.
Yes: A search for read-only programs.
No: A search for read/write programs.
Deleted
Both: A search for deleted and not deleted programs.
Yes: A search for deleted programs.
No: A search for not deleted programs.
Deleted on date: A search for programs deleted within the dates
specified in the Between and and fields below.
Programs without a machine
Check this box to search for programs that are not linked to a machine group.
Programs without a customer
Check this field to search for programs that are not linked to a customer.

NC-Base Settings
This section describes in details the configuration of the NC-Base database, including
Client Settings, Server Settings, User Permissions, Passwords, Machine Groups, etc. The
configuration of the database depends on which machine is to be connected to it, where
programs and associated files should be stored, which user should have access and with
which permissions, etc.
In order for you to be able to configure the database, you must be permitted access as
system administrator and have access to the PC where the NC-Base Client is installed.
When you start to configure the database, you will be prompted to enter your password.
Client Settings
Server Settings
Machines
User Groups
Database Settings
Maintenance
Backup
Predefined Fields
Client Settings
In this section, it is described how to set up and use the NC-Base Client (NC-Base
Explorer) functions.
Search Settings
Advanced
The NC-Base Client is the user interface of the NC-Base Server.
To configure the Client, select Setup in the Administration menu, or click the Setup
dialog launch icon in the Database menu. This will open the CIMCO NC-Base
Configuration window. Select Client Settings from the left hand list. The following dialog
appears:

Client Settings configuration dialog.
Remember password
Check this field to log in automatically.
Selecting this option will render the properties of the Auto logout function inactive.
Double-click opens program info
With this field checked, the dialog Program Info will start when a program is double-
clicked.
Double-click opens program
With this field checked, you can open and edit the program file with a double-click.
Disable file dragging

Check this field to disable file dragging. With this option selected, the user cannot copy
or move associated files between programs by Drag'n'Drop.
Disable drop files
Check this field to disable drop files. With this option selected, the user cannot copy or
move program files or to-be associated files into the database by using Drag'n'Drop.
Disable change columns
Check this field to disable the function Change columns. With this option selected, the
user cannot change which columns are displayed in the search window.
Disable column re-arrange
Check this field to disable the function Column re-arrange. With this option selected, the
user cannot change the order of the columns in the NC-Base search window.
Disable editor setup
Check this field to disable the editor configuration dialogs. This limitation should not be
imposed on users with Administrator access.
Disable database client setup
Check this field to disable the NC-Base client configuration dialogs, unless the user has
Administrator access.
Disable preview
Check this field to disable the preview window.
Preview associated files
Check this field to enable the preview of associated files.
Show preview below results
Check this field to show the preview below the search results.
Disable preview auto refresh
Check this field to disable auto refresh of the preview windows. You should check this
field if other programs have problems accessing files when they are opened from NC-
Base.

Logout on close/minimize
Check this field to logout from the database when minimizing the editor.
Disable external editors
Check this field to disable external editors. All files are then viewed or edited using
CIMCO Edit.
Disable external editors for programs
Check this field to disable external editors for all program files. When this option is
selected, program files will always be edited/viewed with CIMCO Edit.
Only edit known file types
Check this field if users should only be allowed to edit known file types.
To add new file types to the editor, go to the File types setup sheet in the editor
configuration window.
Show file path
Check this field to show the file paths of associated files in the search window.
Show file types
Check this field to show the file types of associated files in the search window.
Move associated files to program directory
Check this field if files should automatically be moved to the machine directory, when
they are associated with an existing program.
Never copy/move files to program directory
Check this field if files should never be copied/moved to the program directory, when
they are associated with an existing program.
Leave original when moving files
Check this field if you wish to copy files to the program directory, leaving the original.
Auto read/write
Check this field if programs should automatically be set to read/write mode when
opening the program file or an associated file for editing.

Disable other groups
Check this field if machine boxes should show only allowed machines.
Add new edit programs
Check this field if all new programs created in the editor should be added to the
database.
Show DNC Stop/End Transfer button
Check this field to show the DNC Stop/End Transfer button on the NC-Base toolbar.
Allow user to send files looped
Check this field to allow users to send files looped. When a file is sent in a loop
operation, DNC-Max will repeat the file transfer until the transfer is stopped by the
operator.
Login using current Windows user name
Check this field to use the current Windows user name as login when NC-Base is first
started. When this option is checked, the user does not have to specify a password.
Minimal client mode
Check this field to enable the Minimal client mode. In Minimal client mode, the setup
menu etc. is not available so you have to hold down Ctrl+Shift when starting the editor
to temporarily disable minimal mode.
You must restart the editor to activate this function.
Super minimal client mode
Check this field to enable the Super minimal client mode. In this mode no editing
functions are available.
You must restart the editor to activate this function.
Max search results
Enter the maximum search results.
Auto logout time (mins)

Enter the time in minutes before automatic logout. To deactivate the automatic logout,
specify 0 in this field.
This option is not available when the option Remember password is enabled.
Search Settings
This section describes how to configure and use the Search Settings functions.
To configure Search Settings, select Setup in the Administration menu, or click the
Setup dialog launch icon in the Database menu. The CIMCO NC-Base Configuration
window appears. Click on Client Settings in the left hand list and select Search Settings.
The following dialog appears:
The Search Settings dialog.
Remember last search
Check this field to store the latest search made.

Disable multiple search window
Check this field to deactivate the function Multiple Search Windows. With this option
selected, the user can open only one search window at a time.
Start with the Database Explorer opened
Check this field if the Database Explorer should be opened automatically when the editor
is started.
Press 'Enter' to search
Check this field if you wish to start the search when you hit Enter in the search window.
Press 'Enter' to go to next field
Check this field if you wish to move to the next field in the search window when you hit
Enter.
Always use wildcard search
Check this field to always use wildcard searches. When this option is selected, a search
will match any field that contains the specified string, instead of any field that matches
the specified string.
Always use wildcard in program search
Check this field to always use wild card when searching program names.
When this option is selected, a search will match any program that starts with the
specified string, instead of any program that matches the specified string.
Disable advanced search
Check this field to disable the advanced search options.
Disable status search
Check this field if you do not wish to search for programs with a specific status.
Disable filename search
Check this field if you do not wish to perform searches using filenames.
Disable file content search
Check this field if you do not wish to search for file contents.

Disable customer search
Check this field if you do not wish to search using customer names.
Disable machine search
Check this field if you do not wish to search after programs for specific machines.
Disable 'Project' search
Check this field if you do not wish to make searches using the 'Project' field.
Disable 'Field 1, 2, 3...' search
Check this fiend if you do not wish to perform searches using the database custom fields.
Advanced
This section describes how to set up and use the Advanced functions.
To configure the Advanced settings, select Setup in the Administration menu, or click
the Setup dialog launch icon in the Database menu. The CIMCO NC-Base
Configuration window appears. Click on Client Settings in the left hand list and select
Advanced. The following dialog appears:

The Advanced dialog.
Keep dialogs open
Check this field to keep dialogs open. When this option is selected, the customer and
program dialogs will stay opened after adding a new entry. This makes it easier to add
multiple programs/customers.
Allow users to copy files
Check this field to allow the user to copy files to another location, like a floppy or other
drive.
Show path relative to base directory
Check this field if filenames should be displayed relative to the base directory.
Example: If the base directory is N:\NCBASE, then the file
N:\NCBASE\FANUC3\MOULD.NC is shown as FANUC3\MOULD.NC.

Auto completion
Check this field to enable the function Auto completion.
If you have a slow network/computer, you should disable this option.
Notify when DNC Import queue updated
Check this field if a notification sound should be played, when one or more programs
have been imported.
Notify when a program is updated
Check this field if a notification sound should be played, when one or more programs
have been updated.
Notify when a program needs to be checked
Check this field if a notification sound should be played, when one or more programs
need to be checked.
Notify when a program needs approval
Check this field if a notification sound should be played, when one or more programs
need approval.
Show message box with notification
Check this field if a notification message box should be shown, when one or more
programs need to be accepted/checked/approved/etc. by the user currently logged in.
Notify only when program has focus
Check this field if notifications should be shown only when CIMCO Edit has focus.
Notify interval (secs.)
Use this field to specify how often the database should be checked for updates, so the
user can be notified of any changes.
Specifying a low value here will load the server, and can also slow down the client.
Show 'Update program info from file'
Check this field to show Update program info from file in the program list popup menu.

Show 'Update file with program info'
Check this field to show Update file with program info in the program list popup menu.
Show 'Version Reports'
Check this field to show Version Reports in the program list popup menu.
Server Settings
This section describes the setup and use of the NC-Base Server functions.
Advanced
Other
Associated Files
Logging
Required Fields
Printing
List Export
The function of the NC-Base Server (no user interface, runs in the background as a
service) is primarily the data storage and data processing, such as searching for
individual programs.
The server offers functions like Use CIMCO DNC-Max, Disable memo files, Use versioning
system, Max number of backups, Allow multiple auto imports for one program, Only
backup if changed, etc. In this dialog, the optional search fields are also defined.
To open the Server Settings dialog, select Setup in the Administration menu, or click
the Setup dialog launch icon in the Database menu. Then click on Server Settings in
the left window of the CIMCO NC-Base Configuration dialog. The following dialog
appears:

The Server Settings dialog.
Server Settings
Allow files outside the program directory
Check this field to allow programs to be placed outside the program directory.
Allow files outside base directory
Check this field to allow programs to be placed outside the base directory.
The main directory is specified in Database Settings.
Lock program names
Check this field to lock program names. When this option is selected, the program name
cannot be changed.
Synchronize filenames
Check this field to synchronize filenames. When this option is selected, the filename is
always synchronized with the program name. So if the program name is changed, the
filename is also updated.

When this option is used, the database will not allow two programs for the same machine
to have the same program name, and program files cannot be stored outside the base
directory.
Move/Synchronize keeps directory
Check this field to leave the program in the same directory, and only update the
filename when Synchronize filenames is selected, or move the program to the same sub-
directory name when moving program between program groups.
If this option is not selected, the program is moved to the machine base directory when
the program name is changed.
Allow changing program file
Check this field if the user should be allowed to change the program file associated with
a program.
Always default to machine directory
Check this field if the Add program dialog should always default to the machine
directory.
Remember 'Add program' values
Check this field if values from the previous program added should be remembered when
adding a new program.
Auto purge
Check this field to delete programs permanently.
When this option is enabled, deleted programs cannot be undeleted.
Set deleted programs offline
Check this field to move deleted program files to the machine's Deleted Folder. This will
prevent deleted programs from showing up in directory listings on the CNC control.
Set associated files offline
Check this field to move deleted associated files to the machine's Deleted Folder. This
will prevent deleted files from showing up in directory listings on the CNC control.
Delete program leaves file
Check this field to leave all files when deleting a program.
If this option is not checked, deleted files are moved to the Deleted directory.
Delete associated leaves file
Check this field to leave the file when deleting an associated file.
If this option is not checked, deleted files are moved to the Deleted directory.
Delete associated prompt to leave file
Check this field to prompt the user to leave the file when deleting an associated file.
If this option is not checked, deleted files are moved to the Deleted directory.
Disable customer info
Check this field to disable all customer info.
Never send 'Locked' files
Check this field if users should not be allowed to send locked files, even if they have
permissions to lock/unlock files.
Use customer folders
Check this field to move programs into a sub-folder named after the customer when
adding new programs.
Disable project
Check this field to disable the project field.
Use customer projects
Check this field if projects should be locked to customers.

Disable file notes
Check this field to disable file notes.
Prompt for notes when associating files
Check this field if the user should be prompted to add a file note when associating files
to a program.
Allow multiple DNC imports for one program
Check this field to allow multiple DNC imports for the same program.
Allow multiple auto imports for one program
Check this field to allow multiple auto imports for the same program.
Auto reject other imports
Check this field to automatically reject other imports for the same program, when an
import is accepted.
Add associated files to the import queue
Check this field if associated files should be placed on the import queue when auto
imported or auto received.
Un-lock when accepting imports
Check this field to unlock the program when accepting a program on the import queue.
Un-lock when rejecting imports
Check this field to unlock the program when rejecting a program on the import queue.
Do not store editor file types in db
Check this field to prevent the editor file types (ISO/Heidenhain/Text etc.) from being
stored in the database.
Strong passwords required (minimum 7 letters and digits)
Check this field to require strong passwords. A strong password must be at least 7
characters long and it must contain both letters and digits.
Use UNC names
Check this field to use UNC names.
Send e-mail notifications
Check this field to send e-mail notifications when programs are locked/unlocked etc.
E-mail server settings must be configured in the DNC-Max server to use this feature.
Show port(s) under machine (group)
Check this field to show the port name(s) for each machine in the NC-Base Explorer.
Enable DNCMax OEMLink
Check this field to enable OEM-Link.
Enable NC-Base configuration cache (Restart required)
Check this field to enable the NC-Base configuration cache, and create a local
configuration file. The NC-Base configuration will be loaded from this file and not from
the database.
Backup machine group changes
Check this field to enable backup of association between machine groups and DNC-Max
ports. The log is saved in the Editor's log directory.
When NC-Base is connected to DNC-Max ports, it may occur that you lose the
association between NC-Base machines and DNC-Max ports when upgrading DNC-Max or
migrating to a new server. By enabling Backup machine group changes a record is made
of the association between NC-Base machines and DNC-Max ports after each change.
This backup can then be used to restore the association.
The machine port association is only backed up after each change. No initial backup is
performed when enabling "Backup machine group changes".
Max number of backups
Use this field to specify how many backups should be kept in the database.
To disable backups, specify a value of 0 in this field.
Expire files on import queue
Use this field to specify how long imported programs should be waiting on the import
queue, before they are automatically rejected.

Expire passwords after days (0 = disabled)
Use this field to specify how often users must change their password.
Advanced
This section describes the setup and use of the NC-Base Server's Advanced features.
To open the Advanced dialog, select Setup in the Administration menu, or click the
Setup dialog launch icon in the Database menu. This will open the CIMCO NC-Base
Configuration window. Click on Server Settings in the left hand list and select Advanced.
The following dialog appears:
Advanced Server Settings.
Server Settings

Use versioning system
Check this field to enable the versioning system. When the versioning system in enabled,
NC-Base will automatically create a backup when updating a file. The Maximum number
of backups setting controls how many old versions should be retained. If you have one
or more machines that use large 3D files, you can disable the versioning system for
these machines in the machine setup. When using versioning, it will take a little longer
to open and/or close a file because NC-Base needs to create a backup file.
Use read-only system
Check this field to enable the read-only system. When this system is enabled, users
cannot edit files marked as read-only.
Set program info read-only
Check this field if program info should be read-only when the program is set to read-
only.
Use locking system
Check this field to enable the locking system. When this system is enabled, users are
only allowed to send unlocked programs.
Set unlocked files read-only
Check this field if all unlocked files should be marked as read-only. This prevents
unauthorized changes to unlocked files.
Set read-only attr. on program files
Check this field if the read-only file system attribute should be set on program files,
when the program is marked as read-only.
When the read-only attribute is set, external programs cannot modify/delete the file.
Set read-only attr. on associated files
Check this field if the read-only file system attribute should be set on associated files,
when the program is marked as read-only.
When the read-only attribute is set, external programs cannot modify/delete the file.

Backup files when setting read/write
Check this field if program files should be backed up when a program is changed from
read-only to read/write.
Backup associated when setting read/write
Check this field if associated files should be backed up when a program is changed from
read-only to read/write.
Only backup if changed
Check this field if backups should only be generated, if the file is different from the latest
backup.
Backup before restoring
Check this field if a backup should be created before restoring a file.
Backup programs before editing
Check this field to automatically backup program files before editing them.
Backup associated files before editing
Check this field to automatically backup associated files before editing them.
Check backups using file time
Check this field if NC-Base should only use the time stamp of a file to check if it is
changed.
The time stamp might fail to identify changed files on some network drives and operating
systems. If NC-Base does not generate backups correctly, remove the check from this
field.
Use CIMCO DNC-Max
Check this field if CIMCO DNC-Max should be used as DNC link.
Enable NC-Base Secure Mode
Check this field to enable the secure mode. When NC-Base is running in secure mode,
users do not need write access to the NC-Base base directory.
Disable user management
Check this field to disable user management.

List all users on login dialogs
Check this field if the login dialog should show a list of all users.
Hide timestamps on ribbon bar
Check this field to hide the file created/modified time shown on the ribbon bar above the
preview window.
Restrict groups to specific computers
Check this field if individual user groups should be restricted to specific computers.
When this field is selected, the User group setup will have a check box next to each
group. Check these to specify which groups can login to NC-Base from this computer.
Allow users to change password
Check this field to allow users to change their passwords.
Keep extension in program name
Check this field to keep the file extension as part of the program name.
Update program info when editing files
Check this field to update the database information when editing the NC file.
You must configure the Program Format Triggers to use this option.
Update files when updating program info
Check this field to update the database information specified in the NC file when
updating the database info.
You must configure the Program Format Triggers to use this option.
Allow 'Restore All'
Check this field to allow user to restore programs and associated files from the Restore
dialog.
When this option is selected, a backup is created for associated files even if they are not
changed since the last backup.

New Setup/Tool/Memo file on copy
Check this field if a new Memo/Setup/Tool file should be created when a program is
copied.
If this option is not selected, the user will be prompted if the file should be copied. When
the file is not copied, a link to the existing file is created.
Do not copy associated files on copy
Check this field if associated files should not be copied/linked to the new program when
copying an existing program.
Use 'Family of parts'
Check this field to allow specifying multiple part numbers for one program.
Backup/restore program information
Check this field to restore the program fields when restoring a program.
Do not allow sending files on the import queue
Check this field if operators are not allowed to send files waiting on the import queue.
Remote request is normally not possible unless the DNC-Max port is configured to look
for files on the import queue.
Primary data is not NC data
Check this field to change NC-Base mode. When checked, NC-Base assumes that the
primary program file is not an NC program but a CAM file or similar.
Revision all saves
Check this field to revise all saves from the editor. If this option is not checked, the file is
only revised the first time it is saved, and will not be revised again until the file is closed
and opened again.
Lock programs when restoring
Check this field to lock programs when restoring the program file from a backup.
Unlock new programs
Check this field to set new programs unlocked when added by a user that does not have
permission to unlock programs.

Do not prompt to set programs read/write in editor
Check this field to disable the Set program read/write message when editing read-only
programs.
Use 'Transfer Limit Counter'
Check this field to use the Transfer Limit Counter option.
When this option is enabled, the number of times a file can be transferred is specified on
the program info dialog. When this counter reaches 0, the program can no longer be
transferred.
Use 'Transfer Limit Timer'
Check this field to use the Transfer Limit Timer option.
When this option is enabled, a file can only be transferred until the transfer time expires.
When the timer reaches 0, the program can no longer be transferred.
Use 'Transfer Limit Window'
Check this field to use the Transfer Limit Window option.
When this option is enabled, a timer is started when a file is transferred. When the timer
reaches 0, the program can no longer be transferred.
Set Transfer Limit when restoring
Check this field if the Transfer Count Limit should be set to the default value (specified
under Server Settings, Other) when restoring a program.
Set transfer limit per machine
Check this field to set individual default transfer limits for each machine.
Other
This section describes how to configure and use the Other functions in the NC-Base
Servers setup.
To configure Other settings, select Setup in the Administration menu, or click the
Setup dialog launch icon in the Database menu. This will open the CIMCO NC-Base

Configuration window. Then click on Server Settings in the left hand list and select
Other. The following dialog appears:
The 'Other' dialog.
Server Settings
Use 'Field folders' (1-5)
Use this field to move programs into a sub-folder named after the selected field when
adding new programs.
Default Transfer Limit Count
Use this field to specify the default transfer limit count for new/auto imported programs.
Specify -1 in this field to disable transfer limit by default for the selected machine.
Primary e-mail domain

Use this field to specify the primary e-mail domain.
When you specify the e-mail address of a user, you do not need to specify
@yourdomain.com, if you have specified yourdomain.com in this field.
Deleted files directory
Use this field to specify the directory where deleted files should be stored.
Version Report
Version Report column width
Use this field to specify the width of the version report column.
Ignore Block numbers
Select this option to ignore block numbers.
Ignore White spaces
Select this option to ignore tabs (ASCII 9) and space (ASCII 32).
Ignore Comments
Select this option to ignore any changes within comments.
Ignore Case
Select this option to ignore the case of the compared files, i.e. a matches A.
Ignore Numeric format
Select this option to ignore leading/trailing zeros, and optional '+' character, i.e.
X+14.10 matches X14.1.
System log only visible to administrators
Check this field if the system log should be visible to administrators only.
Super Users
Users that can manage users and user groups
Use this field to specify users not in the Administrators group that can manage
users/groups.

Example: ALICE, BOB.
Users that can manage machines and ports
Use this field to specify users not in the Administrators group that can manage
machines.
Example: ALICE, BOB.
Associated Files
This section describes how to configure and use the Associated Files settings.
To open the Associated Files dialog, select Setup in the Administration menu, or click
the Setup dialog launch icon in the Database menu. Then click on Server Settings in
the left window of the CIMCO NC-Base Configuration dialog and select Associated Files.
The following window appears:
Associated Files dialog.
Server Settings

Disable associated files
Check this field to disable associated files.
Add id number to associated filenames
Check this field to append a unique id number to all associated filenames (memo
files/setup sheets/tool lists).
Adding a unique id to filenames avoids potential filename conflicts.
Add id number to other filenames
Check this field to append a unique id number to all other files (not memo files/setup
sheets/tool lists).
Adding a unique id to filenames avoids potential filename conflicts.
Add id number to picture filenames
Check this field to append a unique id number to all picture filenames.
Adding a unique id to filenames avoids potential filename conflicts.
Disable Memo Files
Check this field to disable memo files.
Auto add memo files to new programs
Check this field to automatically add a memo file to new programs.
Update variables in memo files
Check this field to insert variables in memo files.
Append existing memo file updates
Check this field to copy any additional text added to the end of the existing file when
generating a new file.
Disable Tool Lists
Check this field to disable tool lists.
Auto add tool lists to new programs
Check this field to automatically add a tool list to new programs.

Update variables in tool lists
Check this field to insert variables in tool lists.
Append existing tool list updates
Check this field to copy any additional text added to the end of the existing file when
generating a new file.
Disable Setup Sheets
Check this field to disable setup sheets.
Auto add setup sheets to new programs
Check this field to automatically add a setup sheet to new programs.
Update variables in setup sheets
Check this field to insert variables in setup sheets.
Append existing setup sheet updates
Check this field to copy any additional text added to the end of the existing file when
generating a new file.
Memo file directory mode
Use this field to override where memo files should be stored.
Sub-directory: The associated files are stored in a sub-directory of
the NC program directory if the Store in sub-directory or Store in
specified directory is specified on the Machines\Directories page.
Specified Directory: Files are always stored in the directory
specified on the Machines\Directories page.
Any Directory: Files are not left in their original location.
In Program Directory: Files are stored in the same directory as the
program.

Tool list directory mode
Use this field to override where tool lists should be stored.
See Memo file directory mode description above for information about the different
options.
Setup sheet directory mode
Use this field to override where setup sheet files should be stored.
See Memo file directory mode description above for information about the different
options.
Other files directory mode
Use this field to override where other associated files should be stored.
See Memo file directory mode description above for information about the different
options.
Sub-program directory mode
Use this field to override where sub-program files should be stored.
See Memo file directory mode description above for information about the different
options.
Logging
This section describes the setup and use of the Logging parameters.
Log Entries
Log Prompts
Log Changes
Status Text
To configure Logging settings, select Setup in the Administration menu, or click the
Setup dialog launch icon in the Database menu. Then click on Server Settings in the
left window of the CIMCO NC-Base Configuration dialog and select Logging. The following
window appears:

The Logging dialog.
Logging
Disable logging
Check this field to disable the log facility.
Disable 'Change Comments'
Check this field to disable Change Comments. Change Comments allows users to
manually add comments to the log.
Disable 'Log Prompts'
Check this field to disable the Log Prompts. When Log Prompts are enabled, the operator
is prompted to specify the reason why an operation was performed.
Example: If a program file backup is restored, the operator must specify why he restored
the backup.

Disable 'Status System'
Check this field to disable the Status System.
The Status System allows operators to set the status of a program/file to: Running In,
Ready, Checked or Approved.
Disable 'Running In'
Check this field to disable the Running In status.
Disable 'Ready'
Check this field to disable the Ready status.
Un-lock when 'Ready'
Check this field if programs should be unlocked when the status is changed to Ready.
Set Read-Only when 'Ready'
Check this field if programs should be marked as Read-Only when the status is changed
to Ready.
Allow 'Ready' if not 'Run in'
Check this field if it should be allowed to mark programs as Ready if they are not marked
Running In.
Disable 'Updating'
Check this field to disable the Updating status.
Disable 'Checking'
Check this field to disable the Checking state.
When Checking is disabled, parts marked as Ready cannot be marked as Checked before
they are approved.
Un-lock when 'Checking'
Check this field if programs should be unlocked when the status is changed to Checked.
Set Read-Only when 'Checking'
Check this field if programs should be marked as Read-Only when the status is changed
to Checked.

Allow 'Checking' if not 'Ready'
Check this field if it should be allowed to mark programs as Checked if they are not
marked Ready.
Lock when 'Check Failed'
Check this field to lock programs when setting status Check Failed.
Read/Write when 'Check Failed'
Check this field to set the program Read/Write when marked Check Failed.
Disable Transfer Count on 'Checked'
Check this field to disable the transfer limit count when the status is changed to
Checked.
Disable 'Approval Failed'
Check this field to disable the Approval Failed status.
Un-lock when 'Approving'
Check this field if programs should be un-locked when the status is changed to
Approved.
Set Read-Only when 'Approving'
Check this field if programs should be marked as Read-Only when the status is changed
to Approved.
Disable Transfer Count on 'Approve'
Check this field to disable the transfer limit count when the status is changed to
Approved.
Allow 'Approving' if not 'Checked'
Check this field if it should be allowed to mark programs as Approved if they are not
marked Checked and/or Ready.
Lock when 'Approval Failed'
Check this field to lock programs when setting status Approval Failed.

Confirm when changing status
Check this field to confirm status changes.
Do not allow status change if Read-Only
Check this field if the operator should not be allowed to change the program status, if
the program is marked as Read-Only.
If the operator has permission to mark a program as Read/Write, this field is ignored.
No logging until approved/checked
Check this field if log information should not be added until the program has been
Checked or Approved once.
No versioning until approved/checked
Check this field if version information/backups should not be created until the program
has been Checked or Approved once.
No new version when adding comment
Check this field if a new version should not be created when adding a change comment.
No new version when setting status
Check this field if a new version should not be created when changing the program
status.
Use 'Updated' / 'Approved' only
Check this field to use only Updated/Imported/Approved status states.
Set Transfer Count to 1 when status set to 'Updating'
Check this field to set the transfer limit count to 1 when status is changed to Updating.
Log Entries
This section is concerned with Log Entries settings. In the dialog, you can enable/disable
individual log entries.

To open the Log Entries dialog, select Setup in the Administration menu, or click the
Setup dialog launch icon in the Database menu. Click on Server Settings in the left
window of the CIMCO NC-Base Configuration dialog and select Logging / Log Entries. The
following window appears:
Log Entries configuration dialog.
Log Entries
Log messages
This field contains a list of log messages you can select from. Click in the field next to a
message to enable/disable individual log entries.
If an entry is not checked, it will never be added to the log.
Log Prompts
This section provides a list of Log Prompts. You can enable/disable individual Log
Prompts in the dialog.

To open the Log Prompts dialog, select Setup in the Administration menu, or click the
Setup dialog launch icon in the Database menu. Click on Server Settings in the left
window of the CIMCO NC-Base Configuration dialog and select Logging / Log Prompts.
The following window appears:
Log Prompts configuration dialog.
Log Prompts
Prompts
This field contains a list of prompts you can select from. Click in the field next to a
message to enable/disable individual log prompts.
If an entry is checked, the user will be prompted to specify a reason for the update.
Answer required
This field shows whether or not an answer is required from the user.
Change Comments
This field indicates if Change Comments should be shown.
Answer required
Check this field if the user is required to fill in a comment when prompted with this
entry.
Show 'Change Comments'
Check this field if the Change Comments field should be shown for the selected entry.
Log Changes
Use this dialog to define Change Comments. Change Comments are manually added to
the log by the operator to indicate changes made to a program or file.
To open the Log Changes dialog, select Setup in the Administration menu, or click the
Setup dialog launch icon in the Database menu. Click on Server Settings in the left
window of the CIMCO NC-Base Configuration dialog and select Logging / Log Changes.
The following window appears:

Log Changes configuration dialog.
Change Comments
Pre-defined Comments
This field shows a list of all defined Change Comments.
Rename
Use this button to rename the selected Change Comment.
Remove
Click this button to delete the selected Change Comment.
Add
Use this button to add a new Change Comment.
Prompt user to answer question
Use this field to specify a question that the operator should answer when adding a
Change Comment.

Answer required
Check this field if it is required that the operator answers the specified question.
Status Text
Use this dialog to define messages that should be shown when the operator tries to send
a program with the selected status from the NC-Base Client.
To open the Status Text dialog, select Setup in the Administration menu, or click the
Setup dialog launch icon in the Database menu. Click then on Server Settings in the
left window of the CIMCO NC-Base Configuration dialog and select Logging / Status Text.
The following window appears:
Status Text configuration dialog.
Send Prompts

Status type
Select the prompts status from the drop-down list.
Show message
Check this field to specify a message that should be shown when the operator tries to
send a program with the selected status from the NC-Base Client.
Use the text field below this check box to specify the message to show.
Status Text
Imported
Use this field to specify the name used for the status Imported.
Running In
Use this field to specify the name used for the status Running In.
Updating
Use this field to specify the name used for the status Updating.
Ready
Use this field to specify the name used for the status Ready.
Checked
Use this field to specify the name used for the status Checked.
Approved
Use this field to specify the name used for the status Approved.
Updated
Use this field to specify the name used for the status Updated.
Check failed
Use this field to specify the name used for the status Check failed.
Approval failed
Use this field to specify the name used for the status Approval failed.

Required Fields
This section describes how to set up the Required fields.
To configure Required Fields, select Setup in the Administration menu, or click the
Setup dialog launch icon in the Database menu. The CIMCO NC-Base Configuration
window appears. Click on Server Settings in the left hand list and select Required fields.
The following dialog appears:
Required fields dialog.
Required fields
Check these fields if a value is required.
Required fields are search criteria / search fields that have been activated during the
installation and start-up. When adding an NC program, you can specify additional
information such as search criteria next to the program name. Additional information is
by default optional and can be omitted.
When a field is checked, a new program cannot be added without the operator specifying

the corresponding field.
Printing
This section describes the setup of printing settings.
To configure the printing functions, select Setup in the Administration menu, or click
the Setup dialog launch icon in the Database menu. Choose Printing from the Server
Settings menu in the left window of the CIMCO NC-Base Configuration dialog. The
printing configuration dialog is shown below:
The Printing dialog.
Printing
Print database info header
Check this field to add database info (machine group, customer, text field 1, etc.) to the
print header.

Print compact header
Check this field to print database info in compact mode (2 columns).
Print customer
Check this field to include the customer name in the print header.
Print Project
Check this field to include the project name in the print header.
Print machine
Check this field to include the machine name in the print header.
File modified time
Check this field to include the file modified time in the print header.
Database modified time
Check this field to include the database modified time in the print header.
Modified by
Check this to include the field Modified by in the print header.
User Name
Check this field to include the user name in the print header.
Print Field 1-9
Check this to include the specified field(s) (Text field 1 to Text field 9) in the print
header.
List Export
This section describes how to configure program listing export. Program listing can be
stored as a text file or Excel file, and exported to a file or a printer.
To File
To Printer

To configure List Export settings, select Setup in the Administration menu, or click the
Setup dialog launch icon in the Database menu. Select List Export from the Server
Settings menu in the left window of the CIMCO NC-Base Configuration dialog. The List
Export dialog is shown below:
List Export configuration dialog.
To File
File type
Select the file type used for exporting program lists from the drop-down list.
Field separator
Use this field to specify the field separator (only active if text file is selected as file type).
Worksheet name
Select the Excel worksheet name from the drop-down list (only active if Excel
Spreadsheet is selected as file type).

Add field names to first row
Check this field if the field names should be inserted as the first row in the exported file.
Filename
Use this field to specify the default filename used when exporting program lists.
You can use the normal environment variables for date and time, and 3 additional
variables:
$DBBASEDIR : Database base directory.
$DBCUSTOMER : If all programs in the list are associated with the
same customer, the variable $DBCUSTOMER contains the
customer name.
$DBMACHINEGROUP : If all programs in the list belong to the
same machine, the variable $DBMACHINEGROUP contains the
machine name.
Real name (example)
This field shows the result of the file name specified above, when the environment
variables are replaced with their values.
To Printer
Print in two columns
Check this field to print program info in two columns.
Custom SQL Queries
You must restart the Editor to activate these functions.
Custom Query 1-2
Custom database query. The format should be SELECT programid FROM programs
WHERE ....

To File
Use this dialog to define the settings for the text file listing export.
To open the dialog, select Setup in the Administration menu, or click the Setup dialog
launch icon in the Database menu. Choose List Export / To File from the menu Server
Settings in the left window of the CIMCO NC-Base Configuration dialog. The following
dialog appears:
To File dialog.
To File
Check these boxes to export the specified fields.
To Printer
Use this dialog to define the settings for listing printing.

To open the dialog, select Setup in the Administration menu, or click the Setup dialog
launch icon in the Database menu. Select List Export / To Printer from the menu
Server Settings in the left window of the CIMCO NC-Base Configuration dialog. The
following dialog appears:
To Printer dialog.
To Printer
Check these boxes to export the specified fields.

Machines
Directories
Extensions
Advanced
Program Format
Templates
The Machines dialog provides functions that make it possible to attach a defined machine
group to a DNC port. Whether the machine groups are defined in the Editor or in DNC-
Max depends on the Use CIMCO DNC-Max setting made in the Advanced server
configuration dialog.
In NC-Base it is possible to associate programs with a machine group, which in turn is
connected to a DNC port. In this way, NC programs that are imported to the database
can be accessed or sent directly from the machine control (this method utilizes the
functions Remote Request and Auto Receive from optional DNC-Max).
To open the Machine Groups dialog, select Setup in the Administration menu, or click
the Setup dialog launch icon in the Database menu. Then click on Machines in the left
window of the CIMCO NC-Base Configuration dialog. The following dialog appears:

Machine Groups.
Machines
Machines
This field shows a list of all defined machine groups.
Program directory
Shows the program directory where each machine group is stored.
Expand/Collapse
Click this button to expand the machine groups and view the ports assigned to each
group, or collapse the machine groups.
Add Port

Click this button to add a DNC port to the selected machine group. DNC Ports are either
defined in the Editor DNC configuration or in DNC-Max, depending on the Use CIMCO
DNC-Max setting in the Advanced server configuration dialog.
Click Add port to add a DNC port to the selected machine group. The following dialog
appears:
Add port.
Highlight the machine you want to connect to the port and click OK.
Delete
Click this button to remove the selected port/machine group.
During the deletion process, you can add programs to another machine.
Rename
Press this button to rename the selected port/machine group.
To rename a machine group, highlight it and click on the button Rename. The following
dialog will appear:

Rename machine group.
Assign a new name to the machine group and click OK.
Add
Click this button to add a new machine group.
To add a DNC port to a machine group, you must first create the machine. Click Add to
add a new machine group to the list. The following dialog will appear:
Add a new machine group.
Assign an indicative name to the machine group and click OK.
Directories
This section describes how to configure the directories of the database machine groups.
In the Directories dialog the structure of the directories can be changed, based on the
previously defined main directory.
The fields below the directory name show the contents of the folder icons to the right.
To configure the Directories settings, select Setup in the Administration menu, or click
the Setup dialog launch icon in the Database menu. Click on Machines in the left
window of the CIMCO NC-Base Configuration dialog and select Directories. The following
dialog appears:

Directories configuration dialog.
Program and backup directories
Machine
This list shows all the defined machines. Select a machine from the list to configure its
directories.
Program directory
Use this field to specify the program directory.
Press the icon with the red check mark to move the file to the specified directory.
When you click this icon, a window opens, asking if all program files should be moved to
the specified directory. Click Yes to move the files, or click No to abort the operation.
You can also click the folder icon if you want to change the location of the selected
machine. Here, you will be prompted to select a new directory for the program. Select a
directory from the list and click OK, or click Cancel if you do not want to select a
directory.

Backup directory
Use this field to specify the backup directory.
Please refer to the description above for more information on how to use the folder
icons.
Directories for associated files
Apart from storing program files, CIMCO NC-Base also assumes management of
associated files. All formats accepted by Windows can be stored, e.g. Word files (*.doc),
PDF files (*.pdf), images (*.jpg, *.gif and others), etc.
Below is described in details, where you can store all your associated files and which
templates you can use for Memo file, Tool list, Setup sheet, and Other files.
If these files are to be used, they must NOT be disabled in the Associated Files dialog.
Further information on the settings for associated files is found in the section Server
Settings / Associated Files.
Associated files location
Specify here where the memo files, tool lists, and setup sheets should be stored.
Store in program directory: Files are stored in the same directory
as the program files (see following picture).
Associated files are stored in the same directory as the program files.

Store in subdirectory: Files are stored in a directory subordinate to
the program directory (see following picture). This is the sub-
directory you specify in the field Subdirectory.
Associated files are stored in a sub-directory of the program file directory.
Store in specified directory: Files are stored in the directories
specified below (see following picture).
Associated files are stored in the specified 'Memo directory, 'Tool list directory, 'Setup sheet directory',
and 'Other files directory'.
Memo directory
Use this field to specify the directory where memo files should be stored.
Please refer to the description under Program directory for more information on how to
use the folder icons.
Tool list directory
Use this field to specify the directory where tool lists should be stored.

Please refer to the description under Program directory for more information on how to
use the folder icons.
Setup sheet directory
Use this field to specify the directory where setup sheets should be stored.
Please refer to the description under Program directory for more information on how to
use the folder icons.
Other files
Use this field to specify the directory where other associated files should be stored.
Please refer to the description under Program directory for more information on how to
use the folder icons.
Other machines that can send files from this machine(group)
Available machines(groups)
Use this field to specify another machine(group) that can send files belonging to this
machine(group).
Share with machines(groups)
Use this field to specify another machine(group) that can send files belonging to this
machine(group).
Use the arrows to move machine/group to the appropriate field.
Extensions
In the Extensions dialog, you can specify the file extensions of NC programs and
associated files for each machine/machine group. You can also specify the default
directories to be used when adding new programs or associated files.
To open the Extensions dialog, select Setup in the Administration menu, or click the
Setup dialog launch icon in the Database menu. Then select Extensions from the

Machines menu in the left window of the CIMCO NC-Base Configuration dialog. The
Extensions dialog is shown below:
Extensions dialog.
Machine
Machine
This field shows a list of all defined machine groups.
Extension
Use this field to specify the default extension for NC programs.
Sub-program extensions

Use this field to specify extensions for sub-programs. When associating a file with one of
the specified sub-program extensions, the file will automatically be marked as a sub-
program.
Only the program file and associated files marked as sub-programs can be sent/received
by the DNC system.
You can specify multiple extensions by separating them with commas.
Example: To mark NC and ISO files as sub-programs, specify: ISO,NC.
Default directories
Default directory for new program files
Specify the default directory used when adding new programs in this field. New
programs are temporary stored in this directory. When you select Add Program, the file
dialog will open at this location.
Click on the folder icon with the red mark to delete the default directory.
If this field is empty, the file dialog will open in the last used directory.
Default extensions for new program files
Specify the default extensions used when adding new programs in this field. When you
click on Add Program, the file dialog will show files with these extensions by default.
If this field is empty, the file dialog will show all files by default.
You can specify multiple extensions by separating them with commas.
Example: To show NC and ISO files, specify: ISO,NC.
Always show all files (*.*)
Check this field if the file dialog should always show all files.
Default directory when associating files
Use this field to specify the default directory used when associating files. New associated
files are temporary stored in this directory. When you click on Associate File(s), the file
dialog will open at this location.

Click on the folder icon with the red mark to delete the default directory.
If this field is empty, the file dialog will open in the last used directory.
Default extensions for associated files
Use this field to specify the default extensions used associating files to a program. When
you select Associate File(s), the file dialog shows files with these extensions by default.
If this field is empty, the file dialog will show all files by default.
You can specify multiple extensions by separating them with commas.
Example: To show Word and JPG files, specify: DOC,JPG,JPEG.
Advanced
This section describes how to configure and use Advanced machine settings.
To open the Advanced dialog, select Setup in the Administration menu, or click the
Setup dialog launch icon in the Database menu. Choose Advanced from the Machines
menu in the left window of the CIMCO NC-Base Configuration dialog. The following
window appears:

Advanced machine settings.
Advanced
Machine
List of all defined machines.
Disable versioning
Check this field to disable versioning for the selected machine. When versioning is
enabled, a backup is created every time the program is updated. For machines using
large 3D programs, this can use large amount of disk space, so you might want to
disable versioning for such machines.
Do not update info in file
Check this field if the machine uses a binary program format. When this option is
checked, NC-Base will not update the database information specified in the NC file.

This option is only active if you have checked the Update files when updating program
info on the Advanced Server Settings page.
Do not use 'Field Folders'
Check this field if 'Field Folders' should not be used for this machine.
This option is only active if you have selected Use 'Field Folders' on the Other Server
Settings page.
Do not show 'Send Prompts'
Check this field to disable 'Send Prompts' messages for this machine when the operator
sends a program.
Set Locked files offline
Check this field to move locked files to a separate directory (BaseDirectory\Locked).
Move all associated files offline when locking
Check this field to move all files associated with a program to a separate directory
(BaseDirectory\Locked) when a program is locked.
Generate locked status file
Check this field to generate a status text file with the locked status of the program in the
send directory of directory monitor ports.
Disable transfer limit
Check this field to disable transfer limits for the selected machine.
Default Transfer Limit
Use this field to specify the default transfer limit for this machine.
To disable transfer limits by default for the selected machine, specify -1 in this field.

Approved Directory
Copy approved files to an 'Approved directory'
Check this field to copy approved program files to the specified Approved directory.
When a program is marked as Approved, a copy of the program file is placed in the
Approved directory.
Approved directory
Use this field to specify the 'Approved directory'.
Change Extensions
Change extension on
Select from the drop-down list the type of files that you wish to change the extension
for.
Change from
Use this field to specify the extension of files that should be changed.
To change extension on all files, specify *. To specify multiple extensions, separate them
with a comma. The use of the wildcards * and ? is supported. To allow files without
extensions, specify a comma at the beginning.
Example: To rename only files with the extensions .ISO and .NC, specify: ISO,NC.
Example: To rename only files where the first letter of the extension is N, specify: N*.
Example: To rename only files without an extension or with the extension NC, specify:
,NC.
Change to
Use this field to specify the new extension.
Also change extension on the files
Check this field if the file should also be renamed to use the new extension.
It is recommended that you check this option.
Start
Click this button to change the extensions as specified.

Program Format
This section describes how to use the Program Format functions to automatically extract
NC programs comments, and depending on the configuration, fill them in the appropriate
database fields. This function is active when adding programs manually or using the DNC
Auto import option.
To configure Program Format, select Setup in the Administration menu, or click on the
Setup dialog launch icon in the Database menu. Choose Program Format from the
Machines menu in the left window of the NC-Base Configuration dialog. The following
dialog appears:
The Program Format dialog.
Field Configuration
Machine
Select the machine group you wish to configure a program format for.

Database field
Select the database field you wish to configure from this list.
The following database fields can be selected: Program, Customer and Text field 1-9
(custom fields in Database Settings).
Extract from
Use this field to specify where the program information should be extracted from.
Enable trigger
Check this field to enable a trigger for the selected database field.
Please refer to Using Triggers for detailed information about triggers.
Use advanced trigger
Check this field to specify a trigger using the advanced trigger format.
Please refer to Using Advanced Triggers for detailed information about advanced
triggers.
Start trigger
Use this field to specify the start trigger.
The server will look for the start trigger in the file, and when found, match all characters
between the start trigger and end trigger.
End trigger
Use this field to specify the end trigger.
The server will look for the end trigger in the file, and when found, match all characters
between the start trigger and end trigger.
Ignore
Use this field to specify any characters/strings/triggers that should be removed from the
extracted value.
Example: If you specify '-' in this field, and the extracted value is MOULD-3, then the
string MOULD3 will be inserted into the database.

Match number
Use this field to specify how many times the trigger should be matched, before the value
is extracted.
If the trigger occurs only once in the file (i.e. each database field contains a trigger),
specify 1.
Max length
Use this field to specify the maximum length of the value extracted.
Example: If you specify 4 in this field, and the extracted value is MOULD, only MOUL will
be used.
Max lines
Use this field to specify how many lines should be scanned (starting from the top of the
program).
Example: If you specify 10, and the trigger is not within the 10 first lines of the program,
the value will not be found.
Global Change All Triggers
Click this button to change all triggers for the selected machine(s).
Global Change This Trigger
Click this button to change the current trigger for the selected machine(s).
Test trigger
Use this field to test your triggers. Copy the header of the corresponding NC program in
the test field and test the above values to see if the correct content will be extracted.
Example: You can see in the Program Format dialog that the Start and End triggers are
defined for the database field Program. We will test the following NC program, where the
comment (P-ID 1234) should match the program name:
%
O1234
(P-ID 1234)
(PART 123-4567)
(JOB 123-4567)
The string '(P-ID' is used as start trigger for the program name, and ')' is used as end
trigger. The extracted program name 1234 is displayed in the field below the test field.

You can proceed in the same way to test more triggers.
Program
This field shows the result of the test program based on the parameters specified above.
Templates
Use this dialog to configure program and associated files templates.
To open this dialog, select Setup in the Administration menu, or click on the Setup
dialog launch icon in the Database menu. Select Templates from the Machines menu in
the left window of the CIMCO NC-Base Configuration dialog. The following dialog
appears:
Templates dialog.
Template files

The directory structure of the templates can be modified on the basis of the defined base
directory. If you already use a predefined template for e.g. Setup sheet, you can select it
from here.
Machine
This field displays a list of all defined machines.
Memo template
This field shows the location of the memo template. Click on the folder icon to the
right to change the memo file template.
If you wish to edit the specified memo template, click the icon next to the folder icon.
Tool list template
This field shows the location of the tool list template. Click the folder icon to the right
to change the tool list template.
If you wish to edit the specified tool list template, click the icon next to the folder icon.
Setup sheet template
This field shows the location of the setup sheet template. Click the folder icon to the
right to change the setup sheet template.
If you wish to edit the specified setup sheet template, click the icon next to the folder
icon.
Program template
This field shows the location of the program template. Click on the folder icon to the
right to select a template program file.
If you wish to edit the specified program template, click the icon next to the folder
icon.
Editor file type
Select a file type for this machine from the drop-down list.
Click the icon on the right side of this field if you wish to create a new editor file type
for the selected machine.
Tool list setup

Tool trigger
Use this field to specify the tool trigger.
Example: If the machine uses T01 for tool 01, specify T in this field.
$TOOL1 Trigger
Use this field to specify the advanced trigger that should be used to generate the
$TOOL1 variable.
Example: To include the value specified after R into the following line: (T1 5MM DRILL
R33), specify the trigger <R[0-9]+>. This will assign the value R33 to $TOOL1.
Please refer to Using Triggers for detailed information about triggers.
$TOOL2 Trigger
Use this field to specify the advanced trigger that should be used to generate the
$TOOL2 variable.
Example: To include the value specified after R into the following line: (T1 5MM DRILL
R33), specify the trigger <R[0-9]+>. This will assign the value R33 to $TOOL2.
Please refer to Using Triggers for detailed information about triggers.
Sort tool list
Check this field to sort the tool list.
When you check this field, each tool is only listed once.
Ignore duplicate info (T020202 = T02)
Check this field to ignore duplicate/magazine info in the tool number, i.e. T020202
should be listed as T02.
Ignore 0's (T02 = T2)
Check this field to ignore leading zeros in tool numbers, i.e. T02 should be listed as T2.
Two line comments
Check this field if the tool comment consists of two lines.
Scan comments below tool name
Check this field if the tool comment is always located below the tool change line.

Advanced Tool trigger: Scan two lines at a time
Check this field if the Advanced Tool trigger should scan two lines at a time.
User Groups
This section describes how to configure user groups and user permissions.
Defining different users with different access profiles has some advantages:
The number of users allowed to alter configurations is limited.
The normal user cannot accidentally change or delete important
configuration setups, nor delete an entire NC program
(configuration dependent).
Possible monitoring of each users program changes.
Possible conferment of individual user access for each user.
To open the User Groups dialog, select Setup in the Administration menu, or click the
Setup dialog launch icon in the Database menu. Then click on User Groups in the left
window of the CIMCO NC-Base Configuration dialog. The following window appears:

User Groups configuration dialog.
User Groups
Group name / Members
This field shows the list of all defined groups and their members.
Add
Click this button to add a new user group. The following window appears:
Add a new user group.
Enter the name of the group and click OK. If you want to exit the window without any
changes, click Cancel.

Delete
To delete a user group, highlight the user group and click Delete.
The administrator user ADMIN cannot be deleted.
Rename
To rename a user group, highlight the user group and click Rename. The following
window appears:
Rename user group.
Assign a new name to the user group and click OK, or click Cancel to exit without any
changes taking effect.
Permissions
There are two access levels: Administrator and User. You can permit a new user access
on administrator level.
Permissions
This field contains a list of all defined permissions. Check the boxes in this list to allow
the highlighted user group access to the corresponding functions.
Super User
Click this button to select the super user permissions automatically.
Normal User
Click this button to select the normal user permissions automatically.
Clear All
Click this button to clear all permissions for the selected user group.

Allowed machines
This field shows a list of all defined machines. Check the box next to the machine group
to allow the selected user group access to the machine.
User Setup
Use this dialog to configure user information.
To configure the User settings, select Setup in the Administration menu, or click the
Setup dialog launch icon in the Database menu. This will open the CIMCO NC-Base
Configuration window. Click on User Groups in the left hand list and select User Setup.
The following dialog appears:
The User Setup dialog.
User Info
User Name

This field contains a list of all defined users.
Add
To add a new user, click on the button Add. The following dialog appears:
Add a new user.
Enter a User ID, password, and other information (if necessary) and then click OK. If you
want to exit without entering data or changes taking effect, click Cancel.
Delete
To delete a user, highlight the user and click Delete.
The administrator ADMIN cannot be deleted.
Modify

To modify the information of a user, highlight the user and click Modify. A window that
resembles the Add dialog appears, although with the title Modify user.
User Groups
List of all defined user groups. Select a user to see which user group the user belongs to.
The user groups are set up in the dialog User Groups.
Database Settings
This section describes how to define a Base Directory, declare Custom Fields, and affix
prefix/suffix to the Memo, Tool, and Setup files.
To open the Database Settings dialog, select Setup in the Administration menu, or
click the Setup dialog launch icon in the Database menu. Then in the left window of the
CIMCO NC-Base Configuration, click on Database Settings. The following dialog appears:
Database Settings dialog.

Base Directory
Base Directory
In this field, the program base directory is defined. Click on the folder icon to the right
to select a base directory.
Custom fields
Text field 1 - 9
Enter into these fields the title of the corresponding custom search field. If you do not
want to use this custom search field, leave it empty.
Uppercase field
Check this field to make it uppercase.
Field is read-only
Check this field to make the input field read-only.
When a field is read-only, it can only be modified by importing, receiving, or scanning
the program.
Text 'Program'
Use this field to specify the title used for the 'Program' field.
Text 'Project'
Use this field to specify the title used for the 'Project' field.
You can disable this feature by checking the option Disable project under Server
Settings.
Memo Prefix
Use this field to specify the memo file filename prefix.
Memo Suffix
Use this field to specify the memo file filename suffix.
Tool Prefix
Use this field to specify the tool list filename prefix.

Tool Suffix
Use this field to specify the tool list filename suffix.
Setup Prefix
Use this field to specify the setup sheet filename prefix.
Setup Suffix
Use this field to specify the setup sheet filename suffix.
Database Server
This section describes how to configure the connection to the CIMCO NC-Base Server.
To open the Database Server dialog, select Setup in the Administration menu, or click
the Setup dialog launch icon in the Database menu. The CIMCO NC-Base Configuration
window appears. Click on Database Settings in the left hand list and select Database
Server. The following dialog appears:

Database Server.
Database Server
Database server
Select the server you want to configure from the drop-down list.
Enable server
Check this field to enable additional servers.
Always default to primary server
Check this field to always default to the primary server.
Database type
Select from this list, the type of database that should be used.
Database connection
Select the data source from this list.

You must configure the ODBC data source that should be used by NC-Base through the
Control Panel / Administrative Tools / Data Sources (ODBC) setup dialog.
NC-Base Server name
Use this field to specify the computer name/address where the CIMCO NC-Base Server is
installed. The server name can be either the IP address or the host name of the server.
If the NC-Base Server is running on this computer, you can specify 'localhost' if you are
using the CIMCO NC-Base server. If you are using a MS/Oracle SQL server, you must
specify the computer name.
NC-Base Server port
Use this field to specify the port number used by the NC-Base Server.
Normally, you do not need to change this value.
User ID
Use this field to specify a user ID. If the selected connection does not require a user ID,
leave the field blank.
Password
Use this field to specify a password. If the selected connection does not require a
password, leave this field blank.
Server version
Server version
This field shows the NC-Base server version.
Maintenance
Use this dialog to perform database maintenance functions.
To open the Maintenance dialog, select Setup in the Administration menu, or click the
Setup dialog launch icon in the Database menu. Click on Maintenance in the left
window of the CIMCO NC-Base Configuration dialog. The following dialog appears:

Maintenance dialog.
Purge Deleted Files
Purge files older than (days)
Use this field to specify the age of deleted files that should be purged.
Example: If you specify 30 in this field, all programs that were deleted more than 30
days ago will be purged from the database.
Click Start to purge the corresponding files, or click Calculate to calculate the result of
running this operation first.
Start
Click this button to purge deleted programs with the specified age.
Calculate
Click this button to show the result of running this operation, without actually updating
the database.

Delete program file
Check this field to physically delete program files from the hard drive, when a program is
purged.
Delete backups
Check this field to physically delete backup files from the hard drive, when a program is
purged.
Delete Memo/Setup/Tool
Check this field to physically delete memo/setup/tool files from the hard drive, when a
program is purged.
Delete other associated files
Check this field to physically delete other associated files from the hard drive, when a
program is purged.
Machine
Select from the list, the machine for which the purge operation should be performed.
If you do not select a machine, the operation will be performed for all machines.
Purge Backups
Purge backups older than (days)
Use this field to specify the age of backups that should be deleted.
Click Start to purge the corresponding files, or click Calculate to calculate the result of
running this operation first.
Keep how many backups
Use this field to specify the number of backups to keep.
Example: If you specify 3 in this field, the 3 latest backups of a file will not be deleted.
Start
Click this button to purge backups with the specified age.
Calculate
Click this button to show the result of running this operation, without actually updating
the database.

Sync Date/Time
Set Modified Date
Use this button to set the program modified time to the last modified time of the
associated program file.
To change the time for a single machine(group), select the machine(group) from the
drop-down list to the right.
Set Created Date
Click this button to set the program created time to the created time of the associated
program file.
To change the time for a single machine(group), select the machine(group) from the
drop-down list to the right.
Get Modified Date
Click this button to set the last modified time of the associated program file to the
program modified time.
To change the time for a single machine(group), select the machine(group) from the
drop-down list to the right.
Get Created Date
Use this button to set the create time of the associated program file to the program
created time.
To change the time for a single machine(group), select the machine(group) from the
drop-down list to the right.
Machine
Select from the list, the machine for which you want to change the date/time.
If you do not select a machine, the date/time will be changed for all machines.
Only Get/Set date for programs with 1 log entry
Check this field if you want to get/set only the date for programs with 1 log entry.
Set all programs to 'Approved' (run 'Set Modified Date' or 'Set Created Date')
Check this field if you want to set all programs to the status Approved.

Other
Maintain DNC-Max ports in machine groups
Unlink ports
Click this button to unlink all DNC-Max ports connected to machine groups. The
association can be restored using the Restore button.
When you click this button, the following message appears:
Unlink port message.
Click Yes to unlink the DNC-Max ports, or click No to abort the operation.
Delete ports
Click this button to delete all DNC-Max ports in the NC-Base. The ports will be recreated
next time DNC-Max is restarted, and the association can then be restored using the
Restore button.
When you click this button, the following message appears:
Delete port message.

Click Yes to delete the DNC-Max ports in the database, or click No to abort the operation.
Restore DNC-Max port association to machine groups
Restore
Click this button to restore association between machine groups and DNC-Max ports,
using the log file. The following dialog appears:
The Restore association dialog.
Select a restore point on the list, and click OK to restore the link between machine group
and DNC-Max ports. Click Cancel if you do not wish to restore the association.
After a restore has been performed, you can verify the association on the machine group
page by clicking on Machines in the left tree of the configuration window. If the restore
operation was not successful, you can choose another restore point and try again.
This option is only active if Backup machine group changes has been enabled under
Server Settings.
Backup
Use this dialog to backup and restore the database.

To configure Backup settings, select Setup in the Administration menu, or click the
Setup dialog launch icon in the Database menu. Then click on Backup in the left
window of the CIMCO NC-Base Configuration dialog. The following window appears:
NC-Base Backup dialog.
Backup Database
Backup files
Check this field to backup all the files in the database.
Fail if an error is encountered
Check this field if the backup should fail if one or more programs files are missing.
Backup
Click this button to create a database backup.

Restore Database
Restore database
Check this field to restore the database.
Restore files
Check this field to restore all the files stored in the backup.
The backup file must be created with the Backup Files option selected.
Overwrite existing files
Check this field to overwrite existing files.
Perform integrity check after restoring the database
Check this field to perform integrity check after restoring the database.
Restore
Click this button to restore a database backup file (*.ncb).
Restore Dump
Click this button to restore a SQL dump file (*.sql).
Check Database Integrity
Delete references to non-existing files
Check this field if the database integrity check should delete all references to non-
existent files.
Click Start to check the database integrity, and to repair the database if a problem
arises.
It is recommended that you select this option.
Start
Click this button to check the database integrity, and repair the database if any problems
are found.

Database Statistics
Start
Click this button to calculate database statistics.
Predefined Fields
Use this dialog to specify predefined values for the database fields.
To open the Predefined Fields dialog, select Setup in the Administration menu, or click
the Setup dialog launch icon in the Database menu. Click then on Predefined Fields in
the left window of the CIMCO NC-Base Configuration dialog. The following dialog
appears:
The Predefined Fields dialog.
Predefined Fields

Database field
Select from the list, the database field for which you wish to set up the predefined field
values.
Enable predefined values
Check this field to specify predefined values for the selected database field.
Field value
This field shows a list of all predefined values for the selected database field.
Up/Down arrows
Use these buttons to move the selected value up or down the list.
Sort
Use this button to sort the predefined values in numerical or alphabetical order.
Auto Fill
Click this button to use all the values currently in the database as predefined values.
Rename
Click this button to rename the selected entry. The following window appears:
Rename field value.
Assign a new name to the field value and click OK. If you want to exit without any
changes taking effect, click Cancel.
Delete
Click this button to delete the selected field value.
Add
Use this button to add a new entry to the predefined values. The following window
appears:

Add a new field value.
Enter the value and click OK, or click Cancel to cancel the operation.
Using Triggers
When specifying a trigger to extract comment from file contents, there are normally
three different formats you can use: Characters, String, and Advanced.
Here is an example where the same trigger is assigned to several database fields. This
field is used to specify the start trigger.
Specify start trigger.
The small icon at the right end of the input field indicates the type of trigger selected, in
this case Characters.
To change the type of trigger, click on the icon, and select the type of trigger from the
drop-down list, as shown below:
Select trigger format.
Character Trigger ( )
Character triggers are used if you wish to trig on any single character from a list of one
or more characters.

Example: To start the feed from the first line that contains % or O, specify %O in the
input field, and select Characters from the drop-down list.
String Trigger ( )
String triggers are used if you wish to trig on the occurrence of a specific string.
Example: To start the feed from the first line that contains the string "PGM", specify PGM
in the input field, and select String from the drop-down list.
Advanced Trigger ( )
Advanced triggers can be used when a more complex search is needed.
Example: To speed up the transmission, it is possible to remove comments from the
transmitted data. To do this, specify the following advanced trigger <(.*)> in the Omit
strings field, assuming that comments are enclosed in '(' ')'.
When specifying an advanced trigger, a small picture with a red cross indicates an
invalid expression.
For more information on how to specify advanced triggers, please refer to Using
Advanced Triggers.
Using Advanced Triggers
The following section provides information on how to use advanced triggers to extract
program names in CIMCO DNC-Max. The extraction of comments in NC-Base is done in
the same way.
This section contains information only relevant to advanced users. If you do not need to
use or understand advanced triggers, you can skip this section.
NC-Base advanced triggers are a modified version of what is known as Regular
Expressions. Regular expressions are a powerful method for searching text strings.
The following example shows how advanced triggers can be used. Suppose you have an
ISO NC program with line numbers in the format N2010 at the beginning of each line,
but the post processor used to generate the file has inserted a number of comment lines

at the beginning of the file without block numbers. If you want to make sure that these
lines are not sent to the CNC machine, you should specify the following Start trigger:
^N[0-9]{1,4}
This trigger consists of the following elements:
ˆ The following trigger must be found at the beginning of a line
N Look for the character N
[0-9] Any character in the range from 0 to 9
{1,4} Match 1-4 of the previous character (0 - 9)
This means: Start transfer from the first line that has N followed by 1 to 4 digits at the
beginning of the line.
A more advanced example is provided at the end of this section.
List of Symbols Recognized by Advanced Triggers
. Match any single character
* 0 or more of previous expression
+ 1 or more of previous expression
- Range
ˆ Negate set (inside set delimiters [])
{ Start interval
} End interval
[ Begin set
] End set
? Previous expression is optional

| Previous expression OR next expression
ˆ Anchor to beginning of line
$ Anchor to end of line
( Start of sub expression
) End of sub expression
< Start extraction
> End extraction
To use a special symbol as part of the text to be found, precede it with a backslash
character '\'.
Example: To find a '\' at the beginning of a line, specify ˆ\\.
Sets (Bounds)
Sets are specified with the '[' and ']' symbols.
Example: [abc] will find an occurrence of any one of the characters 'a', 'b' or 'c'.
You can negate a set by specifying 'ˆ' as the first character in the set.
Example: [ˆabc] match any character that is not 'a', 'b' or 'c'.
Ranges
Ranges are specified with the '-' symbol.
Example: [a-z][0-9] will find any character from 'a' to 'z' followed by any digit from '0'
to '9'.
Example: [a-zA-Z0-9] will find any letter or digit.
Interval Expressions
Interval expressions are specified with the symbols '{' and '}'.

Example: [0-9]{1,4} will find 1-4 digits.
Example: [0-9]{3,} will find 3 or more digits.
Example: [0-9]{4} will find exactly 4 digits.
Extracting Sub Expressions
To extract part of the expression, enclose the sub expression in '<' and '>'.
Example: To extract the program number 1234 from the string PRG=1234, specify
PRG=<[0-9]{4}>.
Regular Expressions
A regular expression (RE) is one or more non-empty branches separated by '|'. It
matches anything that matches one of the branches.
A branch is one or more pieces concatenated. It matches a match for the first, followed
by a match for the second, etc.
A piece is an atom possibly followed by a single '*', '+', '?' or bound. An atom followed
by '*' matches a sequence of 0 or more matches of the atom. An atom followed by '+'
matches a sequence of 1 or more matches of the atom. An atom followed by '?' matches
a sequence of 0 or 1 matches of the atom.
A bound is '{' followed by an unsigned decimal integer, possibly followed by ',' possibly
followed by another unsigned decimal integer, always followed by '}'. The integers must
lie between 0 and 255 inclusive, and if there are two of them, the first may not exceed
the second. An atom followed by a bound containing one integer i and no comma
matches a sequence of exactly i matches of the atom. An atom followed by a bound
containing one integer i and a comma matches a sequence of i or more matches of the
atom. An atom followed by a bound containing two integers i and j matches a sequence
of i through j (inclusive) matches of the atom.
An atom is a regular expression enclosed in '()' (matching a match for the regular
expression), an empty set of '()' (matching the null string) , a bracket expression (see
below), '.' (matching any single character), 'ˆ' (matching the null string at the beginning
of a line), '$' (matching the null string at the end of a line), a '\' followed by one of the
characters ˆ.[$()|*+?{\ (matching that character taken as an ordinary character), a '\'
followed by any other character (matching that character taken as an ordinary character,

as if the '\' had not been present), or a single character with no other significance
(matching that character). A '{' followed by a character other than a digit is an ordinary
character, not the beginning of a bound. It is illegal to end a regular expression with '\'.
A bracket expression is a list of characters enclosed in '[]'. It normally matches any
single character from the list (but see below). If the list begins with 'ˆ', it matches any
single character (but see below) not from the rest of the list. If two characters in the list
are separated by '-', this is shorthand for the full range of characters between those two
(inclusive) in the collating sequence, e.g. '[0-9]' in ASCII matches any decimal digit. It is
illegal for two ranges to share an endpoint, e.g. 'a-c-e'.
To include a literal ']' in the list, make it the first character (following a possible 'ˆ'). To
include a literal '-', make it the first or last character, or the second endpoint of a range.
To use a literal '-' as the first endpoint of a range, enclose it in '[.' and '.]' to make it a
collating element (see below). With the exception of these and some combinations using
'[' (see next paragraphs), all other special characters, including '\', lose their special
significance within a bracket expression.
Within a bracket expression, a collating element (a character, a multi-character
sequence that collates as if it were a single character, or a collating sequence name for
either) enclosed in '[.' and '.]' stands for the sequence of characters of that collating
element. The sequence is a single element of the bracket expression's list. A bracket
expression containing a multi-character collating element can thus match more than one
character, e.g. if the collating sequence includes a 'ch' collating element, then the
regular expression '[[.ch.]]*c' matches the first five characters of 'chchcc'.
Within a bracket expression, a collating element enclosed in '[=' and '=]' is an
equivalence class, standing for the sequences of characters of all collating elements
equivalent to that one, including itself. (If there are no other equivalent collating
elements, the treatment is as if the enclosing delimiters were '[.' and '.]'.) . For example,
if o and ˆ are the members of an equivalence class, then '[[=o=]]', '[[=ˆ=]]', and '[oˆ]'
are all synonymous. An equivalence class may not be an endpoint of a range.
In the event that a regular expression could match more than one substring of a given
string, the RE matches the one starting earliest in the string. If the RE could match more
than one substring starting at that point, it matches the longest. Subexpressions also
match the longest possible substrings, subject to the constraint that the whole match be
as long as possible, with subexpressions starting earlier in the regular expression taking

priority over ones starting later. Note that higher-level subexpressions thus take priority
over their lower-level component subexpressions.
Match lengths are measured in characters, not collating elements. A null string is
considered longer than no match at all. For example, 'bb*' matches the three middle
characters of 'abbbc', '(wee|week)(knights|nights)' matches all ten characters of
'weeknights', when '(.*).*' is matched against 'abc' the parenthesized subexpression
matches all three characters, and when '(a*)*' is matched against 'bc' both the whole RE
and the parenthesized subexpression match the null string.
Advanced Trigger Example
The advanced triggers can also be used to look for program numbers, path information
etc. The following example can be used in the standard protocol auto receive setup to
identify the program name for the received file.
Suppose we store the program name in the NC program as O2123 (where 2123 is the
program number), but we only want to look for program numbers in a specific line, if the
previous line starts with a character %. If this is the case, we should specify:
^%.*\LF.*O<[0-9]{4}>([^0-9]+|$)
This trigger consists of the following elements:
ˆ The following trigger must be found at the beginning of a line
% Look for the character %
. Match any character
* Match zero or more of the previous character, in this case any character
\LF Match a line feed
. Match any character
* Match zero or more of the previous character, in this case any character
O Look for the character O

< Start of program name
[0-9] Any character in the range from 0 to 9
{4} Match 4 of the previous character, in this case any character in the range from 0
to 9
> End of program name
( Start of sub-expression
[ˆ0-9] Any character outside the range from 0 to 9
+ Match one or more of the previous character, in this case, any character outside
the range from 0 to 9
| Match the expression to the left or to the right of the '|'
$ Must be at end of line
) End of sub-expression
This is translated into something like this:
Look for a line that begins with %, then accept all characters until the end of the line. On
the next line, accept all characters until O followed by 4 digits. These 4 digits must be
followed by either one or more characters that are not digits, or must be at the end of
the line.
The last part ensures that exactly 4 digits must be specified. Because something like
O12345, is O followed by 4 digits, followed by something that is a digit (5), and it is
therefore not matched.
The '<' and '>' are the delimiters for the part of the expression that should be extracted
to get the program number. In this case, 4 digits.
Using NC-Base Help
This section describes how to use the help system in CIMCO products.

A standard Windows Help file is available through the drop-down Help menu by clicking
NC-Base help.
Help menu.
Using Help In Dialogs
Printing Help Information
Using Help In Dialogs
CIMCO NC-Base v7 contains multiple dialogs that provide drop-down lists, check boxes,
text fields and buttons for specific configurations.
To get help for a particular dialog item, click the ? at the top of a dialog box, as shown
below.
Click the question mark.
This will change the cursor to an arrow and a question mark indicating that you are in
Help Mode. The new pointer is shown below.
The question cursor.
Now click on the item that you want further information about. If help is available for the
selected item, a small window will pop up displaying the help text. If no help is available
the general help file is launched. An example of a pop-up help is shown below.
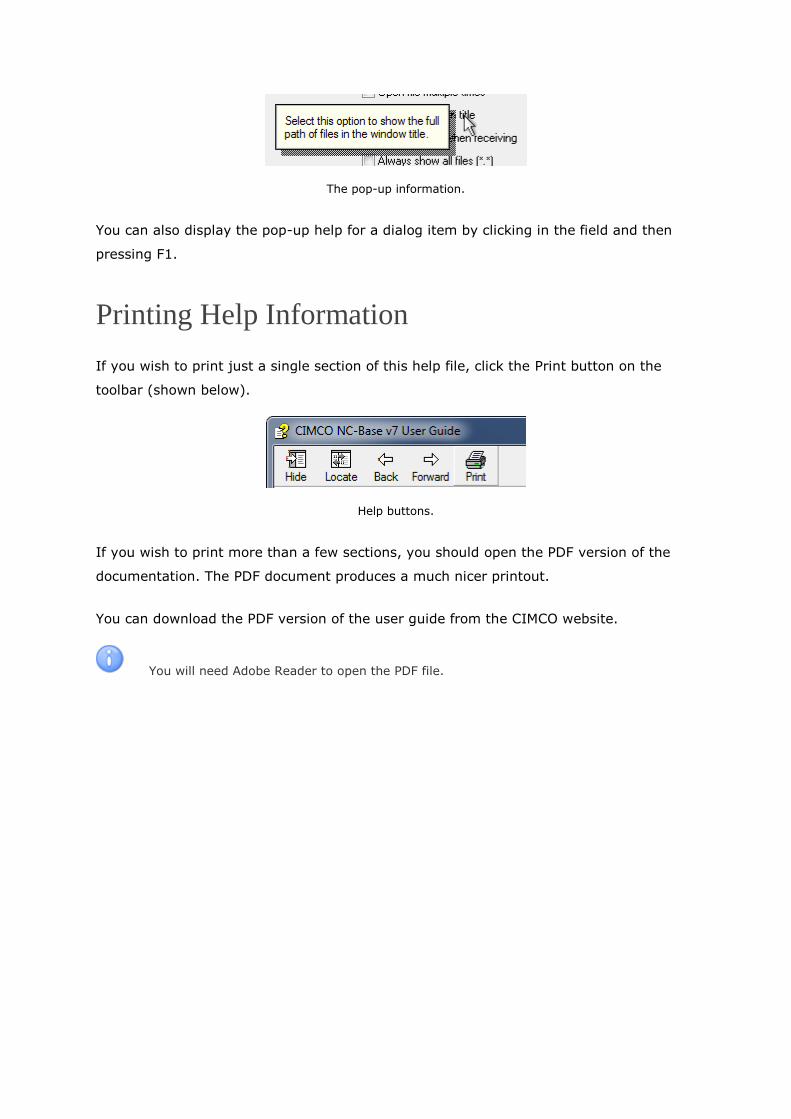
The pop-up information.
You can also display the pop-up help for a dialog item by clicking in the field and then
pressing F1.
Printing Help Information
If you wish to print just a single section of this help file, click the Print button on the
toolbar (shown below).
Help buttons.
If you wish to print more than a few sections, you should open the PDF version of the
documentation. The PDF document produces a much nicer printout.
You can download the PDF version of the user guide from the CIMCO website.
You will need Adobe Reader to open the PDF file.

Program Search.
Program search with customised search fields
If you have defined Text field 1, Text field 2, Text field 3, etc. in Database Settings,
these fields will be recognised as search fields (see following picture).

Program search with customised search fields.
You can specify up to 9 customised search fields.
Preview
If you highlight an NC program or an associated file in the NC-Base search result window
to the right, the contents will be displayed in a separate window below the search result
window (see the following picture).
File preview.
In Client Settings, you can deactivate the preview by checking the Disable preview field,
or you can specify whether to Preview associated files.
Add/remove columns
By right-clicking the title bar of any column in the search window, you can add or
remove columns from the Explorer search result window (see following picture).

Add/remove columns.
In the context menu, which appears when right-clicking the title bar, you can check and
uncheck a column title to make it appear in or disappear from the Explorer search result
window.
Column order
You can easily change the column order by clicking a column title and dragging it to a
new position.
You can click and drag between column titles to adjust the width of the nearest column
to the left.