christmas wall hanging
TRANSCRIPT

www.jackietopa.typepad.com
Christmas Wall HangingCreated by Jackie Topa
Instructions
Supplies
Ivory Fabric: 12” x 17” (2 pieces)
Quilt Batting: 12” x 17”
Champagne Glass Glitter
Dazzling Diamonds
Card stock: Cherry Cobbler, Basic Black,
Whisper White, Pumpkin Pie
Chocolate Chip Grosgrain Ribbon
Deck the Halls Big Designer Buttons
Deck the Halls Designer Fabric
Big Shot Fabric Adhesive
Wooden dowel
Needle and Quilting Thread
Iron (one that works when you’re on stage)
Accessories
Pennant Die
Tasteful Trim die
Star Punch
1 ¼” Circle Punch
Small Oval Punch
Large Oval Punch
Extra Large Oval Punch
5-Petal Punch
1. Cut a paper template with the
pennant die. Trim a piece of
Artichoke fabric from the Deck the
Halls collection leaving it about ½”
larger than the template on all sides.
www.jackietopa.typepad.com
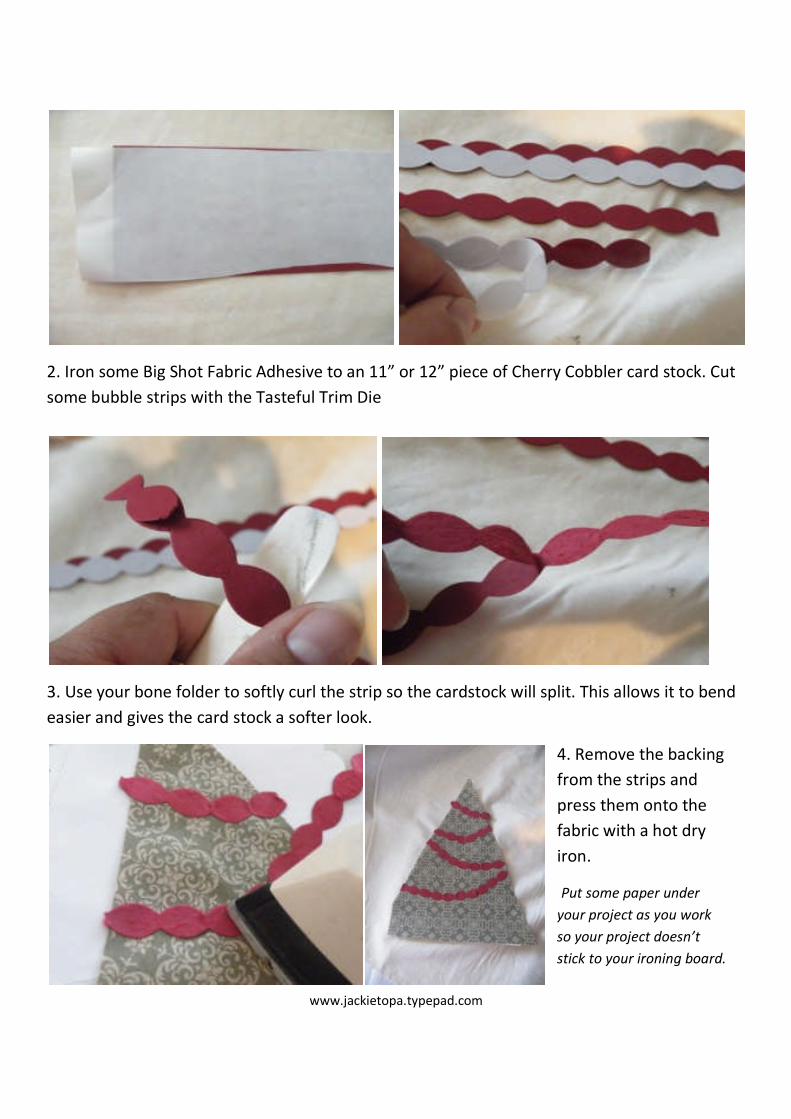
2. Iron some Big Shot Fabric Adhesive to an 11” or 12” piece of Cherry Cobbler card stock. Cut
some bubble strips with the Tasteful Trim Die
3. Use your bone folder to softly curl the strip so the cardstock will split. This allows it to bend
easier and gives the card stock a softer look.
4. Remove the backing
from the strips and
press them onto the
fabric with a hot dry
iron.
Put some paper under
your project as you work
so your project doesn’t
stick to your ironing board.

www.jackietopa.typepad.com
5. Cut a piece of Fabric Adhesive and Iron it to the back of your tree. Fold it in half and cut thetree with the pennant die. Don’t worry about the fold. It will press out when you iron your treeto your project.
6. Cut a 3” piece of ribbon, fold it in half and tuck
it under the tree as you iron the tree to your
background fabric.
7. Punch or die cut a star from Fabric Adhesive.
Iron it onto your fabric at the top of the tree.
8. Sprinkle some glitter onto a sheet of foil, turn
your project upside down into the pile of glitter
and press it lightly from the back with an iron.
If you want to add some glitter to your tree, cut some thin
strips of Fabric Adhesive, iron them it to your tree and add
some glitter the same way as you did with the star.
9. Iron some Fabric Adhesive to the back of
card stock and punch out the pieces for the
penguin. See cheat sheet below

www.jackietopa.typepad.com
www.jackietopa.typepad.com
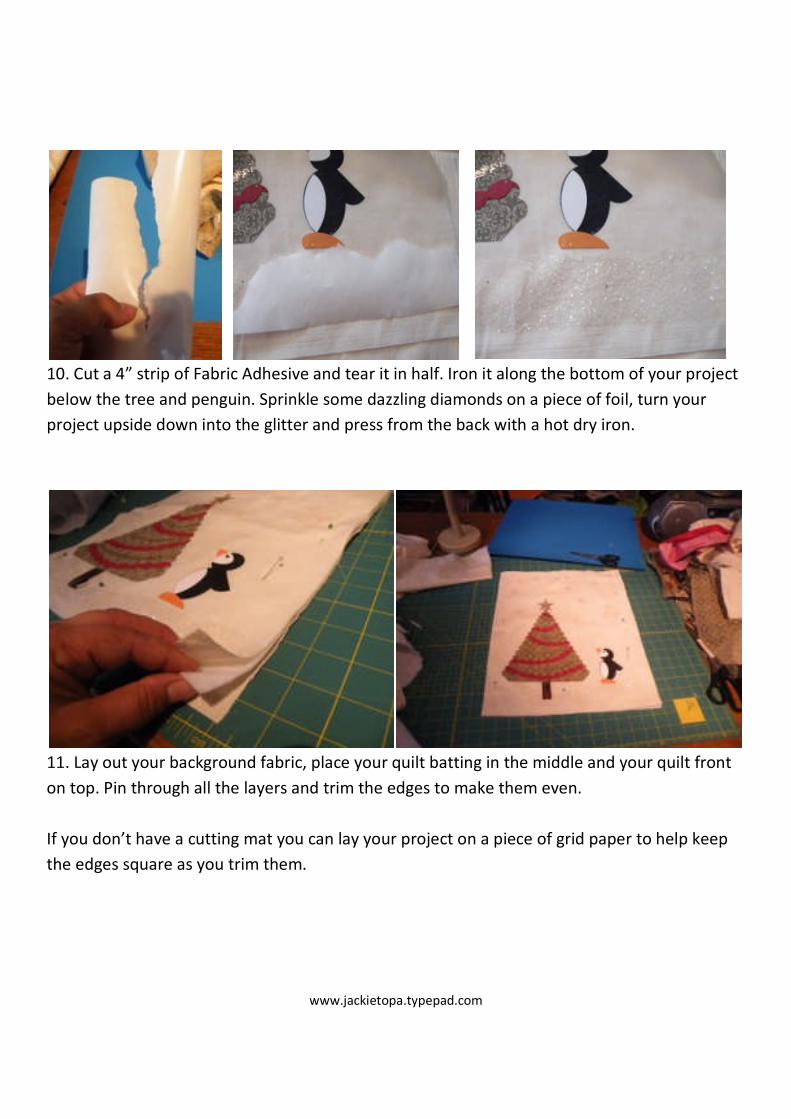
10. Cut a 4” strip of Fabric Adhesive and tear it in half. Iron it along the bottom of your project
below the tree and penguin. Sprinkle some dazzling diamonds on a piece of foil, turn your
project upside down into the glitter and press from the back with a hot dry iron.
11. Lay out your background fabric, place your quilt batting in the middle and your quilt front
on top. Pin through all the layers and trim the edges to make them even.
If you don’t have a cutting mat you can lay your project on a piece of grid paper to help keep
the edges square as you trim them.

www.jackietopa.typepad.com
12. Hand stitch or sew around the outside edges of your quilt sandwich. Snip the edges with a
sharp pair of scissors being careful not to cut through your stitching.
13. Cut 4 pieces of fabric 2” x 9” (half the width of the Deck the Halls fabric). Pick out 4
coordinating Big Designer Buttons from the Deck the Halls collection.
14. Gather the ends of each end of the fabric. Sew one end to the back and one to the front.
Sew a button to the front of each tab.
15. Stick a length of doweling through your loops and your project is ready to hang.