chapter 5 playing instruments - montessoriworld.org · music, moving and dancing to music, ... one...
TRANSCRIPT

Chapter 5
Playing Musical Instruments

Table of Contents
IntroductionSound CylindersSilence GameThe BellsTone BarsInstruments of the OrchestraIntroducing the DulcimerLevel 1 DulcimerDulcimer Demonstrations for Level 1Key Links of Resources for Level 1Dulcimer Level 2Level 2 Dulcimer DemonstrationsDulcimer Level 3Other Musical InstrumentsUkuleleMore Instruments

Chapter 5. Playing Musical Instruments
In a developmental approach to learning music, before beginning to play a musical instrument, children need to develop their ear. In order to accomplish this, children need to listen to music, to move and dance to music, to feel the rhythm and beat of the music, and to discriminate differences in pitch and develop the ability to sing and sing on key. Children need to develop their ability to discriminate differences in tone, to consciously become aware of differences in volume between loud and soft sounds, and develop auditory imagination. Auditory imagination enables children to hear tunes, melodies, harmonies, lyrics, and rhythms in their head. This enables them to be able to sing, clap rhythms, and have a mental reference to use when playing a musical instrument.
And so, children need a lot of experience and preparation listening to music, moving and dancing to music, and singing before they are ready to begin learning to play an actual musical instrument.
Ideally, children should begin their experience with music as young as possible. In fact, the first 12 months of age are a critical period for being exposed to sound. During the first 12 months, children have a unique capacity to absorb sound and discriminate complex patterns and rhythms. During this period, the young baby can discriminate the sounds of all the languages and is also very sensitive to the sounds of the language of music. As a result, a young child can pick up multiple languages without an accent and has the capacity to develop perfect pitch. However, after 12 months of age, young children begin to lose this unique ability. As children get older, it gets more difficult to learn a second language as well as the language of music. An extensive study in China did not find anyone who had developed perfect pitch if their exposure to music started after the age of 10. The younger students were when they started in music, the more likely they were to have

developed perfect pitch. For information on the China Study on Perfect Pitch, see
https://www.researchgate.net/publication/51694116_Large-scale_direct-test_study_reveals_unexpected_characteristics_of_absolute_pitchTo utilize this knowledge, a music professor, Rich Beato developed a program to give his son Dylan a rich exposure to complex music starting when he was a young baby. You can view the result by watching a compilation of short video clips taken over the first 8 years of Dylan’s life.
https://www.youtube.com/watch?v=GoIofNSgeHs
Thus, the research suggests that it would be helpful to have an electronic keyboard placed in the classroom. For this classroom use, it would be best to attach headphones preset at a set safe volume level so that a child could go up to the keyboard, put on the headphones, and experiment with touch keys and listening to the sounds produced.
Then, to further conscious awareness of sound, a set of Montessori Sound Cylinders can be set out in the classroom. See the activities for the use of sound cylinders starting on the next page. The sound cylinders will then be followed by other materials and activities which help prepare children for playing musical instruments.

Sound CylindersChildren have always enjoyed shakers and rattles. The sound cylinders are filled with different substances, so that each gives a different sound when shaken. One shaker may contain rice, another salt, or beans, etc. In order to keep the children's attention focused on listening to sounds, each cylinder is sealed so the children don't get distracted by taking the shakers apart. Initially, six shakers are provided in a box. Children can take out the shakers and listen to the sound that each makes.
�After listening to the sounds of the
various shakers, children can be given two matching sets of shakers. The two sets are distinguished by color. Usually, one set is color coded red, while the other is color coded blue.With two matching sets of sound cylinders, the challenge is to find the cylinders in one set that match the cylinders in the other set. For example, a child tries to find a blue cylinder that sounds like a red cylinder. Having found two cylinders that make the same sound, the child then places them together and tries to find two other cylinders that sound the same.In the beginning a child is usually given only three cylinders out of each set so as to not become overwhelmed. After the child gets the idea, the child can work with a complete set, consisting of six blues and six reds.Loud and SoftWhen children can discriminate and match sounds successfully, they enjoy taking one set of cylinders and attempting to place them in a sequence from loud to soft.

MATERIAL:A blue box containing six blue cylinders all of the same size.These are partially filled with different substances so that eachgives a different sound when shaken. Rice, semolina, sand, small stones, beads of the same size,beans, corn, lentils, etc. may be used. The cylinders are sealed; they cannot be opened. A red box containing six red cylinders which are identical to theblue cylinders in all respects except for color.
� Note: In filling the cylinders put the same amount by weight ineach.PRESENTATION 1:The teacher takes one box of six cylinders to the child's tableand sits next to the child. The teacher takes the lid of the boxand places it under the box. The teacher then removes thecylinders, and places them on the table. Now, the teacher showsthe child how to take the cylinders one at a time and, using onlyone hand, shake them and listen to their sound. She does this by

carefully picking up one cylinder with her dominant hand andlistening intently as she shakes the cylinder. She then sets thecylinder back on the table and invites the child to listen to thecylinder. The teacher then proceeds to let the child listen toeach cylinder one at a time using only on hand. The child listensto the different sound each makes as he does so.EXERCISE:The child takes a box of cylinders whenever he likes and shakesthem and listens to them.PURPOSE:
1 To make the child consciously aware of sounds. 2 To train the ear.
PRESENTATION 2:The teacher takes three blue cylinders from the blue box. Shechooses the loudest, softest, and one in between. She then findsthe three red cylinders in the red box which match the soundof the chosen blue cylinders.
� She places the blue cylinders on one side of the child andthe red on the other. She then shakes one cylinder e.g. a red oneand listens to the sound with the child. She puts this cylinder in the middle.

She asks the child to shake the other cylinders in turn until he or shefinds one with the same sound as the one already shaken. (If the childforgets the sound of the first one, he or she can always shake it again.)When the child finds the matching cylinder the teacher shows the child to placethe pair side by side in the middle of the table. All thecylinders are paired in this way. When all the cylinders arepaired the teacher suggest to the child that he or she check the work bylistening to each of the pairs again by going down the line ofpairs left in the middle and listening to them.The child should not shake cylinders with both hands at the same time. Two sounds at the same time may blend in the child's mind and not sound different, or the child may shake less strongly with one hand than with the other which may make one cylinder sound different in comparison to the other when they actually should sound the same.EXERCISE:The child uses the material, pairing the cylinders by sound, asoften as he or she likes. When the child can match the three pairs easily, the child can have both boxes, containingall six pairs, to use in this way.

�CONTROL OF ERROR:When the child has finished pairing the cylinders he or she re-shakeseach pair listening to see if they are paired correctly. PRESENTATION 3:The teacher takes one box of 6 cylinders to the child's table and shakes. The teacher has checked earlier to make sure that each cylinder when shaken, produces a different volume of sound so they can be sorted from loudest to softest. The teacher has the child help take the sound cylinders out of the box. The teacher then shakes each cylinder, one at a time, and gets the child to choose the loudest. The teacher puts the loudest in front of the child and lets the child shake the remaining five and choose the loudest of these. The one chosen is placed next to the one previously selected. The teacher continues to let the child shake the cylinders and arrange them in a row in order of sound. They can be arranged from loudest to softest or vice versa. When the child has finished, the teacher has him or her shake the cylinders one after the other while listening to the gradations of sound from loud to soft and from soft to loud. Remember to have the child shake only one cylinder at a time.

VOCABULARYLoud - SoftLoud - Louder - LoudestSoft - Softer - Softest

The Silence GameChildren also enjoy playing a game called "The Silence Game" in which they try to see how quiet they can be. A group of children all try to be very quiet. They listen to see if they can hear any sounds. They then can share with the group sound they may have heard. They may have heard each other moving slightly. So, they will probably enjoy trying again and attempting to be so still that they don't make any sound at all.Children always enjoy challenges. Once they are attending to sound, they will enjoy attempting to carry things like chairs without making a sound. It is very hard to lift, carry, and the place a chair without making a sound. This can be a fun activity for a small group of children.
Dr. Montessori describes in The Secret of Childhood how she discovered the ability of the child to make silence, and to delight in the releasing of spirit. She brought a four month old sleeping baby into the classroom and asked the children to observe how very quiet she was. They couldn't even hear her delicate breathing. Dr. Montessori challenged the children to become as quiet as the baby. Willingly, the children obliged. Soon they were aware of drops of water falling outside in the courtyard, and of the song of a bird in a distant tree. The children each silenced their own movements and produced a collective quiet that was for them a profoundly spiritual experience.This meditative quiet creates a fourth state of consciousness. It is a liberation. Montessori thought of the silence lesson as a means for bringing children to this level of spiritual awareness. It calls upon the faculties of intellect, affection and emotion. This experience of willingly and consciously sublimating oneself to the group will release within the children a deeper knowledge of their own capacities.The Silence Lesson is a group lesson. In regard to the group, it is respect for others. It can be prepared for by many small exercises in listening. Through these exercises children can learn that silence is the cessation of every movement. To achieve silence requires effort and the attention of the will, and maximum control of self-the inhibition of every movement.

This silence of movement suspends normal life, and raises the person to another level-conquest of self.The Silence Lesson should never be played to calm chaos or disorder. Children who might be a disturbing influence can be sent into the garden or another room to do something special.There are many ways of inviting the children to silence. The teacher can whisper the word "Silence" very softly or turn over a prepared sign that says "Silence" in very beautiful lettering. At first just a few children are aware of the spreading quiet, but soon all the children are quieting their movements and making the collective quiet.After two or three minutes, when all are silent, the teacher can begin to whisper the children's names from back of the classroom or from just inside the door to another room or the garden. The children may tiptoe quietly to the teacher as their name is whispered. The teacher should call those children first who are least able to remain silent, although you can stretch their capacity for silence by beginning to call them second or third rather than first. Everyone must be called.After the children have been introduced to the lesson, they may also choose to turn over the sign from time to time when they wish to achieve this spiritual peace.

The BellsWhen children have developed their ability to distinguish between fine differences in sound, and they can organize a group of sound cylinders in a sequence from loud to soft or soft to loud, and understand the concepts of loud, louder, loudest, and soft, softer, and softest, they are ready to begin to distinguish between differences in pitch.The bells are a beautiful material designed to help children explore the attribute of sound referred to as pitch. The bells are designed to look alike. They are all the same height and appear to be the same size. In reality, they vary in thickness, which gives them each a different pitch. Each bell represents a note in the musical scale.To begin, children learn to ring each bell and listen to its beautiful tone.
�MATERIALS:There are eight bells which correspond to the white notes on the pianobetween middle C and high C, mounted on white stands. There are eightmatching bells mounted on brown stands.PRESENTATION:The teacher takes a bell and a striker and sits beside the child.She shows the child how to get a true note by striking the bell on therim. She listens to the note dying away. She repeats this once ortwice. Each time she strikes the bell she sings the note. Sheshows the child how to stop the sound by puttinga finger gently on the rim of the bell.EXERCISE:The child has the bell striker. The child chooses a bell andpractices striking it. He or she listens to the note and tries to sing

the note.Note:Most very young children do not sing it in tune. They mustnever be corrected or made to stop singing. With practice andthrough listening to simple notes, all children gradually sing intune.PURPOSE:To let the children have the experience of listening to singlenotes.
THE BELLSPairing The Bells
PRE-REQUISITE:The child has already listened to single notes and has learned howto strike the bells.PRESENTATION:The teacher places 4 bells, the white and brown G and C, on atable, with white to one side and brown to the other side. Shestrikes both Cs slowly. Then she strikes C and G. She strikes thetwo Cs and puts them together saying, "They are the same." Sherepeats for the two Gs. She strikes both pairs again, softlysinging the notes. She mixes the bells and encourages the child topair them. When the child understands the exercises, he or she can workalone.EXERCISE:The child pairs the bells. When the child can pair four bells, he or shecan take more pairs from the bell table. The child takes the bells he or shewants to pair off the bell table and places them on anothertable. The child arranges them in two groups according to color. The child pairs
the brown ones with the corresponding white ones until he or she can pairthem all. The teacher encourages the child to sing the note softly whenhe or she strikes a bell. When the child is pairing all the bells well, he or she canhave the black and brown bells corresponding to the sharps andflats to pair, also.PURPOSE:Musical trainingDevelopment of the sense of hearing Tone Bars
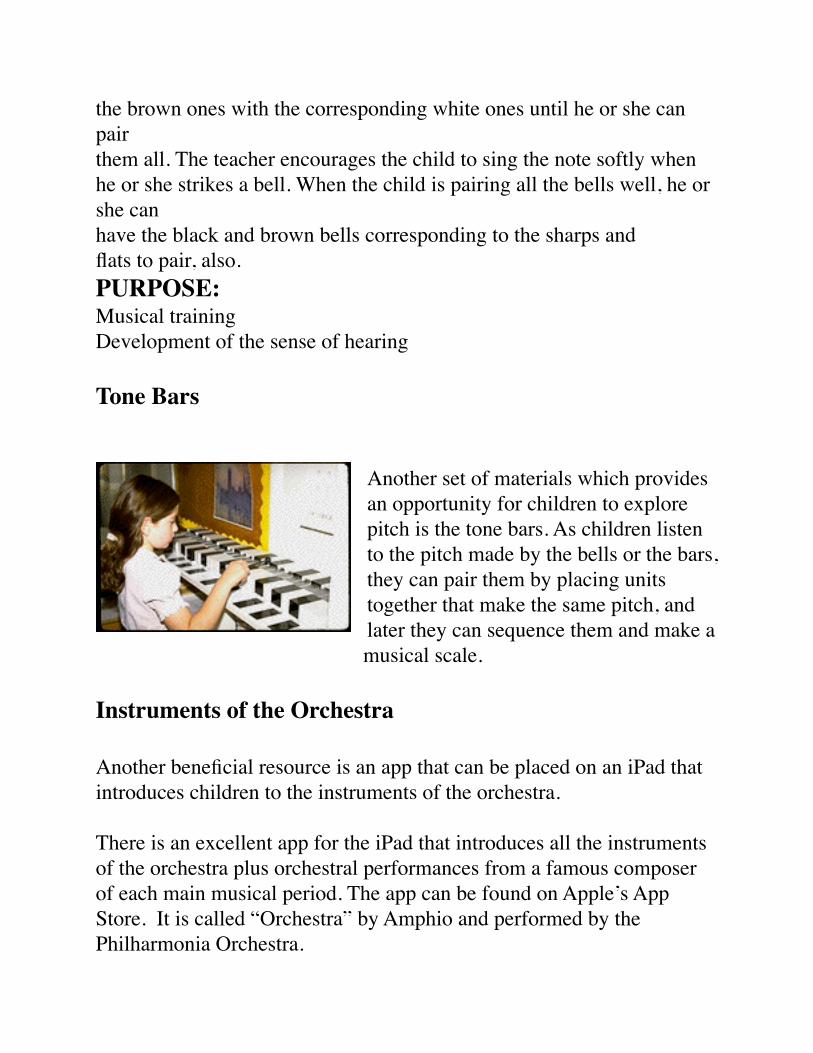
Another set of materials which provides an opportunity for children to explore pitch is the tone bars. As children listen to the pitch made by the bells or the bars, they can pair them by placing units together that make the same pitch, and later they can sequence them and make a musical scale.
Instruments of the Orchestra
Another beneficial resource is an app that can be placed on an iPad that introduces children to the instruments of the orchestra.
There is an excellent app for the iPad that introduces all the instruments of the orchestra plus orchestral performances from a famous composer of each main musical period. The app can be found on Apple’s App Store. It is called “Orchestra” by Amphio and performed by the Philharmonia Orchestra.

Introducing Children to the Dulcimer
The dulcimer is a particularly good vehicle for children learning music. Children like the instrument because they can hold it on their lap. They can place it on the floor or flat on a table. They can play up and down a linear scale. They can see and feel the interval patterns in different modes. They can see the relationship between harmony parts and melody, and the instrument has easy fingering for chords.
Purchasing and Building a Dulcimer for Classroom Use.
Buy a cardboard dulcimer kit to build from West Music.
There are many fine instruments and dulcimer kits available from a number of builders. The internet is a great resource for finding instruments. However, I have found many benefits to having children build their own instruments. Originally, I had children build their own instrument from scratch. Unfortunately, this took a lot of time and required very careful supervision. This led me to prepare my own dulcimer kits to facilitate the building process. However, I found several builders who provided very useful dulcimer kits that worked quite well. As a result, over time, I have used a number of different instruments from different builders. Recently however, I have used the "Cardboard" dulcimer kit available from West Music. I have found it to be a relatively inexpensive instrument that children can successfully build themselves in a fairly short amount of time. The instrument has a surprisingly pleasant tone and has proved to be a practical and durable instrument that is a good size and weight for children. The kit comes with cardboard to be used for the body of the instrument plus a wooden fret board. The instrument comes with a 3 string fret board with the traditional arrangement of frets. At first, I had my students build the body of the instrument out of wood and used only the fret board from the "Cardboard" dulcimer kit. However, I had a student who was in a
hurry and wanted to use the cardboard that came with the kit. Everyone liked the sound of her instrument. And, it was also much easier and faster to build. So, from then on, I've always had my students build their kits with the provided cardboard and everyone has been very satisfied with the results.
Build DulcimerThis sequence of pictures shows the steps for building a "Paper Tune" dulcimer.
String DulcimerThis sequence of pictures shows the steps for stringing the dulcimer
Tuning the Dulcimer
This video simply plays the notes for tuning a dulcimer to the key of "C" in Ionian tuning. The video requires you to use your ear to match the pitches you hear for each string in the video. Another option is to purchase a tuning app for an iPad that can be used to help tune the dulcimer. One such app is called Cleartune. It can be found on Apple’s app store.

Level I - For the Beginning Music Student
Before a child begins to learn to play a musical instrument, they first need to develop an ability to sing. This develops auditory imagination that enables the children to hear melodies in their head so they have a mental reference while learning an instrument. It helps for a child to already know a melody before attempting to figure it out on a musical instrument. To this end, children should learn to sing the songs in the following song book before they begin to learn to play them on the dulcimer.
Song Book for the Beginning Singer
This song book provides a sequence of songs that will help a young singer learn to sing in tune. These songs have been chosen based upon the work of Zoltan Kodaly. They are organized in a sequence that will be particularly useful for the young child as they start to learn to play the dulcimer. The songs are organized around simple melodic and rhythmic patterns. These songs are all real songs from the folk tradition. They have been passed down from generation to generation and are particularly appropriate for young children and the beginning singer. They have a narrow vocal range and contain only whole steps which are easier for a beginning singer to hear. The first songs are traditional children chants. They are songs that children often learn from other children. The book also contains simple games and activities that children enjoy doing along with the songs.
Be sure to read: "Singing with Young Children."Next read: "Two Note Songs."

How to Introduce the Dulcimer to a Child
First, music for children is a social process and it is participative. Children see other people enjoying music and want to be part of the activity. The rewards come from the intrinsic benefit of being able to join in and enjoy music with others - not from grades, praise, gold stars, or other rewards. At first they can join in by listening. If they want, they can clap their hands and dance. As they hear songs over and over, they pick up the words and start to sing along. The adults may give them some rhythm instruments such as spoons, shakers, rattles, or a wash board to strum. They are not being told to do music. They are given the opportunity and join in through their own interest and volition. Being able to participate in music becomes their goal rather than someone else's goal for them. As a result, they begin to enjoy music on their own and they can be seen singing songs and dancing when they are by themselves or with other children. As time passes, they show interest in the instruments and want to try to play them. For this, a dulcimer is a good introductory instrument. Children will want to learn how to play the dulcimer and they will show interest in the instrument if they see an adult play the instrument.
Step 1. The adult shows the dulcimer and plays it for the children. If the children see the adult using the instrument they will show interest in the instrument and will want to touch it and try it.
Step 2; Show the child how to hold a pick and strum.
The adult should support this interest. The adult can show the children how to hold a pick and how to strum toward themselves with the pick. They need to be shown to strum lightly across the strings with just the tip of the pick. For this purpose, it is helpful to give children an instrument tuned to an open tuning. The dulcimer is perfect for this.

The child can now be invited to strum along with one chord (2 note) songs that use the simple open tuning (doesn't require any fingering of a chord). Children can strum the beat or the rhythm of the words while they sing any of the two note songs along with the adult. This helps them get comfortable with strumming and helps develop the muscle coordination that will be useful when ready to learn more advanced and complicated strums. The adult simply strums the beat on a second dulcimer as the adult and child sing. If the child has developed the ability to keep a beat, the child will likely strum the beat along with the adult. This gives the child immediate success. They can strum along with any of the 2 note songs that they already know how to sing.
Step 3. Show the child how to use the Fretboard.
In addition to strumming, the children will be interested in the dulcimer fret board. So, the next step is to show the children how to place their index finger on the string closest to them (the melody string) and press the string down right next to the left side of the fret and pluck the string with the tip of a pick. You can have them see what happens if they place their finger to the right side of the fret and try to pick the string. They can also see what happens if they place their finger on top of the fret. In each case they will get a different result. However, they only get a good clear sound when they press the string all the way down next to the left side of a fret. They can also try pressing the string somewhere between the frets as well as pressing the string only part way down. It is important for them to realize that they can experiment. In the process they will discover what makes a good sound and what doesn’t. As they press the string against frets up and down the fret board they will also discover that the pitch changes. For these experiments it is best if they only pluck the melody string as they conduct these experiments. That helps them hear the sound of the one string. If they strum all the strings

at the same time, the sound of the one string is not as easy to discern. They should also try experiments with the other strings individually and then all together. At this point, the child should feel empowered to explore and experiment. However, the child should be asked not to touch or turn the tuning pegs because it might lead to a string breaking.
Now, the child can be left to explore and experiment. The child can try strumming as well as playing different sounds on a string with a pick. This is an important and valuable lesson. This will give the child a sense of how sounds are produced on the instrument, and the child will find that they are empowered to learn by tinkering (which children love to do).
The child may stay in this stage for a while. This is valuable. So, there is no rush. However, if a child sees the teacher, or another child, accompany songs on the dulcimer, and play tunes on the dulcimer, the child will eventually want to be shown how to play a piece.
If the child is interested in playing along, the teacher can show the child how to strum back and forth across the strings. The child is shown to first strum toward themselves and then back away from themselves. They can then strum back and forth. They can then be invited to strum along as the teacher strums various pieces. The child is not chording yet. However, on the dulcimer, it does not matter because by default, the dulcimer creates a background drone against which melodies can be played.
When my own child was around 2 years of age, he liked to place his dulcimer on the floor next to me and strum along. I had a friend who was a fantastic musician who would strum very interesting strum patterns and I would play along with him. One time, my friend went to an autoharp presentation at our local university and picked up an instrument to try it. The presenter from the auto harp company came over and wanted to know what he was doing for a strum. University

music professors gathered around as well. No one could match or figure out the pattern my friend was using. They were very excited by his strum. Well, I never could match it myself, but I could keep the beat. So, we enjoyed playing dulcimers together and my young son liked to strum along with us. Well, I looked down and I realized that my son had picked up my friend’s strum pattern and was matching it perfectly. He had just absorbed it. That is the natural way children can learn. So, show them how to hold the pick and how to strum back and forth with the tip of the pick strumming lightly across the top of the strings. But, don’t worry about going into details of strum patterns at this time. Just let the child strum and play along as he feels it.
Step 4. Showing a Child how to Pick Out a Melody.
Next, a child may express interest in learning how to play songs by playing the melody. The child is more likely to express this interest if they have witnessed an adult playing melodies on a dulcimer. For this purpose, it is helpful if the child already knows how to sing the songs from the Singing with Young Children book. The 2 note songs are perfect for a simple introduction to playing melody on a dulcimer.
Since the child already knows the 2 note songs, the child can learn to pick out the melodies for the beginning one chord (2 note) songs. I will ask the child if her or she knows how to sing the song “Cuckoo.” Fortunately, the child will know the song. So, the teacher tells the child to watch carefully where the teacher places his or her fingers on the fret board, and then, the teacher slowly plays the first simplest song (Cuckoo) by plucking only the melody notes without a strum. The teacher can then ask the child if the child would like to see the teacher play the piece again, or whether the child would like to try it. Since the child can already sing the melody, the child uses his or her ear plus his or her memory to try to pick out the tune. It is important to let the child try to use his or her ear to pick out the tune rather than the teacher teaching through rote memory. The teacher can show where the first

note is located and reviews where the second note is placed if necessary. If the child makes the request, the teacher may also replay the piece. But, it is important to have the child develop an approach of singing the melody and comparing it to what is played rather than have the child try to rote memorize a sequence.
At first, the child is simply figuring out the melody without a strum. When the child can play the melody, the teacher may accompany the child on a second dulcimer. First, the teacher also plays the melody by itself along with the child. If the child is comfortable, the teacher can then try quietly strumming along while the child plays the melody. That becomes the child’s first duet.
When the child gets the melody, the child may strum the rhythm of the words as they play the melody if they wish. The teacher should reflect the child's accomplishment back to the child - not through praise, but by pointing out what the child has done - "You figured it out!"
The child will quickly want to learn some other pieces. At this point, since the child already knows how to sing all the other introductory one chord songs (listed as 2 note songs), the child can be given another 2 note song to figure out. Usually, the best song to use is "The Counting Song." The teacher does not demonstrate this song, but instead, leaves it to the child to figure out. The child may ask if the song starts on the same note. Of course, the teacher can answer any questions. The child can be left to figure out the song. When the child can play the song, it is important to have the child get recognition for his or her accomplishment by being able to play it for the teacher and anyone else. In addition, it is always fun to play duets. At first the teacher plays along with the child matching exactly what the child is doing. When the child shows confidence and is comfortable, the teacher can say that he or she is going to do something a little different while playing a duet with the child. As the child plays, the teacher can strum the chord. The teacher can strum with the "bum diddy" strum at this time. The teacher can

strum on the open chord and then strum on chord one (C chord) in the first position.
Step 5. Show the child the “bum-diddy” strum.
The teacher can show the child how to play the "C" chord in the first position and then practice the "bum diddy" strum with it. The teacher can then show the child how to play the melody while using the "bum diddy" strum and let the child try it. “Cuckoo” and the “Counting Song” are good songs for this introduction because they each only require a bum-diddy once for each note.
While they are still strumming with an open tuning, the basic rhythmic strum (the “bum-diddy” strum) can be used and practiced with all the first learned songs. For our purposes, the best strum to use is the "bum diddy" strum. At first the child will need to practice this strum by itself. When the child can play it in a steady and consistent fashion, the child can then try the strum along with someone else while the other person plays and sings a song. As the child get comfortable, he or she can try singing along with the strum. Children often find it difficult to focus on singing and strumming at the same time. So, they may need to practice the strum pattern by itself a lot. They will also find it helpful to strum along while someone else also plays the strum and then starts to sing.
Step 6. Introducing simple duets with chording and harmony
When the child is comfortable using the strum with the melody, the teacher and the child can then play duets and the teacher and child can trade off parts. Later, the teacher can play a simple harmony part by playing the melody a third lower. This can then be shown to the child and the term "harmony" can be introduced. Then, the child can try playing the harmony part. When the child is comfortable playing the harmony part by him or herself, the child can then try playing the harmony part while the teacher plays the melody. However, it is
important not to introduce too much at one time. Each step should be taken one at a time giving the child time to get comfortable with the step before moving on to something new.
Now the child can play the melody, harmony, and chord a song with a simple "bum diddy" strum. The child then adapts what they have learned to all the other 2 note songs by working out all the pieces. As the child masters pieces, the teacher can point out that the child has figured the pieces out for him or herself, and ask the child how he or she figured it out? It is helpful to have the child feel a sense of self accomplishment as well as to consciously think about how they have figured out the pieces and what they have learned.
Dulcimer Reference DemonstrationsThis web resource contains video demonstrations of how to play the songs on the dulcimer listed in the song book Singing with Young Children. (The song book is re-printed in the chapter on singing with young children in this book). The video demonstrations show playing the melody, playing the strum, playing harmony, and playing duets.
At this point, it is helpful to bring the child's conscious attention to the idea of a beat versus the idea of the rhythm of the words. This can be accomplished through a fun activity that invites the children to clap the rhythm of the words of some of the first one chord (2 note) songs. Then, they can be shown how to clap to the beat of the songs. When they can do both confidently, they can be challenged to clap the rhythm of the words until the teacher holds up his or her hand. When the hand goes up, the children are to change to clapping the beat. When the teacher puts his or her hand down the children are to revert to the rhythm of the words. Later, they can try this activity as they strum their musical instrument. They can strum the beat with a simple stroke toward themselves, or they can strum the beat with a back and forth strum striking on the beat when they strike the strings toward themselves. They strum the rhythm of the words by strumming back and forth to the

rhythm of the words. They always begin with a stroke toward themselves.
This represents the pattern and principles for proceeding on to other songs. This is a developmental process. It represents engaging a child in pattern recognition rather than rote memorization. It is learner based more than teacher based. The teacher provides the tools, resources, model, goals, sequence, opportunity, challenges, and guidance and support, but the child must actively listen, figure out patterns, and use their understanding to experiment, self check and self correct, practice and review, and use self discipline to work toward perfection.
When a child is ready to move on and start learning to play the 3 note songs, the first song is “Rain, Rain, Go Away.”
For this song, the teacher tells the child he or she is going to play “Rain, Rain, Go Away.” The teacher tells the child the song contains a new note. The teacher wants the child to watch carefully to see if they can notice the new note. The teacher then plays the melody by itself for the child. The teacher asks if the child noticed the new note. Children usually do. And so, the teacher has the child point to where the new note is played. The teacher then asks if the child would like to try to play the piece, or whether they would like to see the teacher play it again. Either way, the child eventually gets to try to figure out the melody. Be sure to let the child figure it out. The child may make some mistakes. Hopefully, the child will experiment, tinker, and figure out the song by him or herself. This is very important. The child may ask to see you play the song again. That is fine. You can demonstrate again. But, don’t try to teach the song to the child. Let the child tackle the challenge of picking it out. We want the child to realize they can use what they know to figure out new things. They can match what they are hearing as they play on the keyboard to what they can hear in their minds auditory imagination. In this way, they become independent. They develop the
ability to learn on their own—to be independent learners who have developed learning competence.
Step 7. Proceeding to new songs
The child is now ready to proceed to learn any of the 3 note songs. From there, the child can go on to 4 note and 5 note songs and figure out how to play any of the songs they have learned to sing.
The children will run into a new rhythmic difficulty with “Rain, Rain, Go Away.” The word “some” in “come again some other day” is off the beat and requires them to sing and play it while they are strumming away from themselves on the “dy” part of the “Bum-Did-dy.” This is not a problem when they are simply picking out the melody by plucking the melody string. But, it becomes a new difficulty that is a challenge to master when trying to play the “Bum-did-dy” strum with the song. This is something a person has to get a feel for. It helps to hear others play the strum with the piece.
As children move through the sequence of songs, they will encounter new things to learn. But, it is a step at a time. This is useful for learning to sing, for learning to play an instrument, and for learning to notate music. This is why the 2 note, 3 note, 4 note, and 5 note songs are useful and important. They serve many purposes over time.
Note:
The 2 note songs are one chord songs. The chord is the “C chord assuming you are tuned to the key of “C.” The bass string is a wound string that is the furthest string from the player’s body. If you tune that string to “D” you will be in the key of “D” and the other two strings will have to be tuned up to an “A” instead of the “G” which is used in the key of “C.” Sometimes fiddle players, guitar players, and other musicians like to play in the key of “D.” If that is the case, and you

want to play with them, tune the base string to “D” and the other two strings to “A.” However, for normal use with children, tune the dulcimer to the key of “C” with the base string tuned to “C” and the other two strings tuned to a “G.” This is a good key for the songs children will be singing with their 2, 3, 4, and their 5 note songs.
In general, I do not teach chord progressions for the 3 note, 4 note, and 5 note songs until level 2 when chord progressions are taught. At that time, it is helpful to go back to the simpler songs to see how chords fit with melody. In the meantime, children can simply strum with an open tuning (without fingering any chord) if they want to strum along with one of those songs. The open tuning provides the same drone as is heard when a melody is strummed on the dulcimer. So, it fits.
For the Teacher’s information on chords
The 3 note songs introduce a new chord. In the key of “C” the new chord is the “F” chord. It is generally played when you go to the new note which is “A.” Sometimes, if you go through the note, quickly off the beat, the “A” is considered a passing note and the chord is not changed.
The 4 note songs do not introduce any new chords.
The 5 note songs introduce the “G” chord if you are in the key of “C.” In the 5 note songs the new note is a “D.” The “G” chord is played when you go to the note of “D.”
The scale pattern and notes of the dulcimer fret board.
For introducing the dulcimer to children, we initially tune the dulcimer to the ionian tuning in the key of “C.” The ionian tuning tunes the dulcimer to a major scale. All of the initial songs introduced to the

children are in the major scale. The dulcimer is useful for this purpose because it visually shows the relationship between the notes of the scale.
The first note on the dulcimer that you put your finger on to fret a note is the note “A.” The second note is “B.” The third note is “C” and so on through D, E, F, and G. And then the pattern repeats. This makes it easy for teaching the names of the notes to children. When you teach the first 2 note song, you can tell the child how the notes are named and tell them the first note they play in “Cuckoo” is “G” and the second note is “E.”Sometimes it is helpful to show them that the two notes are on either side of the small space that represents the note “F” to help them remember where to find the notes. It is helpful to see the visual pattern.
So, if “A” is the first fret, then “C” is the third fret. You will notice that the space to “D” is large as is the space to “E.” However, the next space to “F” is small. Then, you have a large space to “G,” a large space to “A,” and then a large space to “B.” However, there is then a small space to “C.” The large spaces are called whole steps, and the small spaces are called half steps. So, the major scale that starts on “C” consists of a whole step, whole step, half step, whole step, whole step, whole step, half step. We call that pattern a major scale. The nice thing about the dulcimer is that we can see it, and we can feel the distance between notes. And so, a child sees the distance between intervals, feels the distance, and hears the jump in pitch all at the same time. That multi- sensory input helps the child learn the pattern of intervals. The visual and kinesthetic experience helps inform the ear.
If you play the melody string by plucking the open string, you get the note “G.” If you play up the scale from “G” to “G” you get a slightly different pattern of whole and half steps. The pattern of steps from “G” to “G’ on the dulcimer is call a mixolydian scale pattern. It is sometimes called the “Mountain Minor.” If you play a scale going from “A” to “A” the scale is called the Aeolean scale or minor scale. If you play a scale from “D” to “D” it is called the “Dorian” scale or mode. Some folk

tunes are played in these other scales (modes). So, when children become more advanced, we introduce the children to these other scales, how to tune to these different scales, and how to play pieces in those scales.
Often, if you find a dulcimer in a music store, it may be tuned to the mountain minor (mixolydian) tuning. Sometimes the builder will add an extra fret after the “F” note so the dulcimer tuned in the mixolydian tuning can be played in both the mixolydian tuning and ionian tuning without having to retune the melody string.
For our purposes of helping children first become familiar with the major scale, and to be able to visually see the scale patterns of whole and half steps, I like to stick with the traditional fret board arrangement that does not have extra frets.
In brief, we normally tune the base string to the key in which we want to play. And, we tune the melody string (the string closest to us) to the scale we want to play. In the ionian (major scale) tuning, with the base note tuned to “C” and the other two strings tuned to “G,” you will find that placing your finger on the melody string for the note “C” the “C” note sounds one octave higher than the base string “C.” If you strum across the strings, that gives you a “C” chord. That is the sound you want when you tune the melody string to other modes (scales) as well. So, if you want to play in a minor scale (aeolian mode), you need to tune the melody string so that pressing the string on the “A” fret gives you the high “C” sound an octave above the base string “C.” That will give you the “C” sounding chord when you strum across the strings while holding down at the “A” fret. So, you have to retune the melody string to get that pitch at the “A” fret. Then you are tuned to the Aeolian mode. The same thing is true for the other modes as well. You would tune to get that sound at the “D” fret to get the Dorian Mode. You want to get that sound for the open “G” to get the Mixolydian mode.

I mention this in case you run across a dulcimer tuned to a different tuning.
For reference, here are short video clips showing the different tunings:
Mixolydian Mode - http://www.montessoriworld.org/MusicEducation/Media/DulcimerLevel3Published/Old_Joe_Clark.html
Aeolian Mode -http://www.montessoriworld.org/MusicEducation/Media/DulcimerLevel3Published/Greensleeves.html
Ionian Mode -http://www.montessoriworld.org/MusicEducation/Media/DulcimerLevel3Published/Tuning.html
Dorian Mode -http://www.montessoriworld.org/MusicEducation/Media/DulcimerLevel3Published/Scarborough_Fair.html
Summary of some key links for level 1:Sing and learn songs.Begin to learn how to play and accompany the 2 note preschool songs on the dulcimer.Learn the first Dulcimer Strum
View Song List (A complete listing of level I songs with links to a different set of dulcimer demonstrations)
Learn to play three note songs on the dulcimerUse Dulcimer examples to learn four note songs.Learn to play five preschool note songs on dulcimer Review songs on dulcimer.

Dulcimer Level 2 - For the Intermediate Music Student
Dulcimer Level 2 is an intermediate level that builds upon the skills developed in Level 1. In Level 1 students were limited to the pentatonic scale. In level 2 students will play pieces covering all of the notes of the major scale (Ionian mode). At this level, students should now be able to work independently. They should listen to a song or piece and then try to figure it out. Ideally, they should be encouraged to attempt to work out a piece from only hearing it. If they get stuck, they can then look at a video demonstration for additional help. They will have to figure out where a piece starts, they will have to hear half steps as well as whole notes, they will have to remember longer and more complex sequences, and they will have to figure out more complex rhythmic patterns, and they will have to play and sing notes over a much wider singing range.
In addition, in Level 2 students will also focus on learning to hear chord progressions. In each section of level 2 there are several pieces listed that should be sung and accompanied only with chords. These songs are organized by chord progression. Students should be taught to recognize that they are playing in the key of C. In actuality, they tune their dulcimer to the key to which they want to sing. The bottom string is tuned to the key of a piece. Through level 1 and level 2 all the pieces are in the Ionian tuning and the key of "C." This tunes the bottom string to C (below middle C on the piano), the middle string to G (one fifth above the C), and the closest string to the same G. See Tuning
In level 1 and level 2 the dulcimers are kept in the key of C for several reasons. One, this helps in ear training. In this way, each note represents a specific sound. These sounds and notes can be named. The child can be taught that the first fret can be called "A," the second fret can be referred to as "B," etc. This can aid learning to read and write music. Children can be shown where these notes are placed on the musical staff and children can write out the songs they figure out. In addition to ear training, and facilitating writing and reading of music,

keeping the dulcimer in one key minimizes having to re-tune the instrument. Later, in level 3 children will be introduced to tuning the dulcimer to different keys and different modes.
In any case, in addition to picking out new and longer melodies, children are being introduced to hearing and recognizing chord progressions.
Since the dulcimer is kept in the same key in level 1 and 2, it is easier to help children recognize basic patterns in music. They can learn some general rules that will hold mostly true for the pieces they are going to learn.
Rule 1: When chording a piece, the first chord is usually the chord of the key. For level 1 and 2 in which the dulcimer is in the key of "C," this means the pieces will start with the "C" chord.
Rule 2: Chords can be named by number. The chord of the key (in the key of "C" this is the "C" chord) can be called the 1 chord. In the key of "C" the 4 chord would be based 4 notes higher. This is the "F" chord which would be called the 4 chord. The chord based 5 frets higher would be the "G" chord and would be called the 5 chord. "A minor" would be the 6 minor chord.
Rule 3: Chords can be played in different positions on the fret board. It is the individual notes in a chord that define a chord.
Rule 4: You keep playing a chord until it isn't going to sound right anymore, and then you change to a different chord. For the two chord songs introduced in level 2, the two chords are "C" and "G7". When the "C" chord isn't going to sound right, you change to the "G7" chord. When the "G7" chord is no longer going to be right, you change back to the "C" chord (the 1 chord) if you are in a two chord song.

Rule 5: If the piece uses more than two chords, most likely it will either shift to either the 4 chord or the 5 chord. Sometimes, the piece will move to the 6 chord or a substitute chord (a chord that substitutes for one of the basic chords by changing one of the notes in the chord.
Rule 6: Pieces usually end on the first chord ("C" chord when tuned in the key of "C.").
Rule 7: In order for a chord to sound right with a melody, it has to have the melody note in it or be passing to a melody note.
These rules can not be effectively taught all at once. So, the patterns are taught a little at a time. To facilitate the discovery of these patterns, the songs are played in the same key and a number of songs using the same pattern are utilized so the pattern becomes clear. So, the first songs in level 1 were one chord songs (all the 2 note songs and 4 note songs are one chord songs). The 3 note songs in level 1 are two chord songs using a 1 - 4 (C and F) chord progression. The first 5 note songs introduce a different 2 chord progression of 1 - 5 (C - G7). The last 5 note songs utilize a 3 chord progression 1 - 5 - 4 (C - G7 - F). In level 2 the first songs that focus on just chording are two chord progressions using the 1 -5 (C - G7) chord progression. The Lyrics page lists all the songs with lyrics. It also lists additional 2 chord, 3 chord, and 4 chord songs by group. Next, students are introduced to 3 chord songs and then 4 chord songs and are given a number of songs using these progressions so they develop the ability to anticipate chord changes by ear rather than by memorization.
In Level 2 students focus on a number of 2 chord songs, a few 3 chord songs, and some 4 chord songs. In level 3, students review some two chord songs, play a number of 3 chord songs, some 4 chord songs, and are introduced to the concept of "substitute" chords. They also are introduced to tuning to different keys and different modes.

All the basic dulcimer chords in both the first and second positions are shown on the next page for reference. The chords in the first position are usually taught first. The labels show the finger positions and the names of the individual notes that make up the chord. A bigger image for viewing or printing out can be found at:http://www.montessoriworld.org/MusicEducation/Media/DulcimerLevel3Published/Basic_Chords.html
Dulcimer Level 2
Below is the progression and links to resources for Level 2 for the Intermediate dulcimer student.
http://www.montessoriworld.org/MusicEducation/Media/Level2/Level2Pieces.html
Dulcimer Level 3 - For the More Advanced Music Student
Dulcimer Level 3Dulcimer Level 3 follows Levels 1 and 2.
In level 3 students learn more complex songs, review some two chord songs, play a number of 3 chord songs, some 4 chord songs, and are introduced to the concept of "substitute" chords. They also are introduced to tuning to different keys and different modes.
Below are links to a sequence of pieces that are useful for this level.
http://www.montessoriworld.org/MusicEducation/Media/DulcimerLevel3Published/index.html
Other Musical Instruments
After children have developed the ability to sing songs on pitch, and can sing the 2 note, 3 note, 4 note, and 5 note songs, and they have worked with the sound cylinders and bells, the dulcimer provides a wonderful first musical instrument for young children. The nature of the fret board makes it easy for children to pick out and play melodies. The arrangement of frets on the fret board enables children to be able to visualize the relationship of intervals. The instrument is easy to chord. It fits children’s natural inclination to want to place it on the floor, table, or lap, and press down on the fret board. And, it is easy to show children how to find and play harmony. It is very helpful for introducing children to other scales in addition to the major scale. The naming of the frets is self explanatory and easy to remember, and makes it easy to introduce notation to children. It has a nice pleasant sound. It is an inexpensive and easy to make musical instrument. And, each child can make a dulcimer for themselves.
Now, once a child can pick out melodies, can accompany singing with appropriate chord progressions, can add a harmony part, and enjoys joining with others to play together, the child is ready to be introduced to addition musical instruments.
The AutoHarp
Once children can hear and anticipate chord changes while playing songs, I like to introduce them to the autoharp. It is an easy instrument to use for playing chords to accompany singing. The names of the chords are written on top of keys which can be pressed to sound the chords as a child strums.
After working with a dulcimer, children can apply what they already know and immediately be able to start playing the autoharp. They know

the chords they want in a song, it is easy to press the buttons to get the chords, and they can use the strum patterns they already have learned on the dulcimer to strum across the strings on the autoharp.
The children can set the autoharp down on the floor, a table, or their lap to play it. That is easy and children will tend to want to do that naturally. However, I like to show them how to play it Appalachian style. This means they learn to hold the autoharp vertically on their lap against their torso with their left arm wrapped around it so they can push the keys with their left hand and strum across the strings against their chest with their right hand.
The children can strum with a felt pick, or they can strum using the back of their finger nails and thumb nail. I like to start them off with either of these two methods. Later, they can be shown how to use finger picks.
After the children get used to strumming chords, they can be shown how to strum higher and lower across the strings to bring out the melody as they play. They already know whether a melody is going higher or lower by having played melodies on the dulcimer. Fortunately, on the autoharp, you can simply strum in broad strokes as you chord and the melody will sound out of the chord.
Introducing the autoharp expands the children’s experience and lets them apply what they already know to be able to do something new. This also adds a new richness to the ability to play together in a group. Now, one child can play melody on the dulcimer, while another plays harmony on the dulcimer, another can chord on the dulcimer, and another child can chord on the autoharp. This can also be a good time to teach the children how to chord in the second position on the dulcimer if they have not already learned the second position chords. The combination of children contributing different components adds to the fullness of sound. The string sound of multiple dulcimers plus an autoharp provides for a very pleasant and rich sound that everyone enjoys.

A video sequence demonstrating the Appalachian style of strumming can be found at: www.montessoriworld.org/MusicEducation/autoharp.html.
Other Instruments for Chording
After children have been introduced to the dulcimer and autoharp, they can be introduced to other stringed instruments that can be used to chord accompaniments to singing.
Ukulele
After the autoharp, I like to introduce children to the ukulele. Ukuleles come in different sizes from the soprano, concert, tenor, to baritone. The chord finger positions are the same on the smaller 3 ukuleles. And, the standard tuning makes the smaller ukuleles easy to play in the key of C. This is a benefit because the dulcimers are initially tuned to the key of C. Meanwhile, the standard tuning on a baritone ukulele makes it easy to play in the key of G. This means that, if you use the chord positions you know on the smaller ukuleles for playing in the key of C, on the baritone ukulele you will be playing in the key of G. One benefit of this is that the strings and their sound then matches the top 4 strings on the guitar. So, the baritone ukulele makes a nice bridge to playing the guitar. However, if you want to play in the key of C on the baritone ukulele, in addition to the chords you learn for the smaller ukuleles, you will have to learn the chord for F which is a new and more difficult chord to play.
Helpful information about ukuleles is provided at BeginnerUkuleles.com. The information about different sizes at the following link:
https://www.beginnerukuleles.com/ukulele-sizes/

Therefore, I like to introduce children to one of the smaller ukuleles. In doing so, they can easily play in the key of C and play with friends who are playing on dulcimers and the autoharp. It requires a little practice to get familiar with the fingering of chords on the ukulele. The fingering is more difficult on the ukulele than on a dulcimer. However, the smaller ukuleles are slightly easier to play than the baritone ukulele in the key of C, and they are much easier than a banjo which is easier than a guitar.
Below is the fingering for the basic chords on the smaller ukuleles.

The wonderful thing is that all the children initially have to learn is how to finger the chords on the ukulele. They already know songs to accompany. They already know a basic strum. They already know about chord progressions and can anticipate chord changes. So, the only new challenge is mastering the chord fingering. Then, once they have done that, they are ready to learn new songs that are particularly fun on the ukulele. These will introduce them to new strum patterns that are used on ukuleles.
Later, once they are comfortable with playing a smaller ukulele, they can be introduced to the baritone ukulele. Initially, they can use the chords they already learned on a smaller ukulele, but the key will be different. So, they won’t be able to play with an instrument tuned in the key of C.
In order to play in the key of C on the baritone ukulele, they will need to be given a new chord chart that basically renames the chords they already learned on the smaller ukulele to the key names used on the baritone ukulele. In addition, they will need to learn a new chord - the chord for F. That is a more difficult chord to learn and will take some practice.

Once a child has learned the F chord and the chord sequence for playing in the key of C on the baritone ukulele, they can accompany friends who are playing on a dulcimer in the key of C.
Guitar
From here, most children are interested in moving on to a guitar. In fact, they often think of the baritone ukulele as a small guitar. For those interested, they could also learn how to chord on a banjo or mandolin. But, in general, I like to move children to the acoustic guitar that uses nylon strings.
The guitar has 6 six strings versus the 4 strings on the ukulele. However, the top 4 strings of the guitar match the 4 strings on the baritone ukulele. So, a child that has learned to play the baritone ukulele can accompany songs on the guitar using just the top 4 strings without having to learn anything new. They will be able to accompany songs in either they key of C or the key of G.
Of course, children are going to want to learn to use all 6 of the guitar strings to get a fuller sound. So, they can be shown how to build onto the chords they already know by adding one or two more fingers to include the additional strings. Children like challenges and they like to build on what they know. So, if they have been successful in the what they have previously learned, they will be eager to learn more.
In addition to learning how to finger full chords on the guitar, they will be ready to learn additional strum patterns that work well on the guitar as well as finger picking patterns.
For demonstrations of introductory lessons for the guitar, refer to the following web resource:

www.montessoriworld.org/MusicEducation/guitar.html (coming soon)
More Instruments
From here, the foundation has been laid. Students can proceed in many directions. One school, in which I taught, had a band room that had a string double base. My students were performing together in small ensembles consisting of multiple dulcimers, an autoharp, guitar and several instruments which students brought from home because they were taking private lessons. So, we had a student improvising on a violin and another student playing a flute. They wanted to use something for a base and realized that there was a string base in the band room. So, we got permission to borrow it and discovered that it had 4 strings that matched the bottom 4 strings on a guitar - except an octave lower. The result was that they realized that they could play the root base note of chords they knew on the guitar in order to play a base note on the string base. Immediately, they were wanting to trade off playing the string base to accompany the rest of the group as they played through songs that they knew.
So, you can see the advantage of building a foundation of musical knowledge by progressing through string instruments from dulcimer, to autoharp, to a concert ukulele, to a baritone ukulele, to a guitar.
Instruments for Melody or Harmony
At the same time, it is helpful to build upon the foundation learned about melody on the dulcimer by moving to other instruments designed for melody. I like to progress from the dulcimer to recorder (or penny whistle), and harmonica because those instruments are relatively inexpensive and easy to play. The harmonica is interesting because you

have to blow air out and draw air in to get all the notes of the scale. The patterns learned on the dulcimer help understand the patterns you need on the harmonica. On the harmonica, for example, it is easy to play all the 2 note songs. You just blow out for the G note and move one hole down to blow out the to get the E note. When you move to the 3 note songs, you use blowing through those 2 holes and then suck air in through the hole though which you blew out to get the G in order to get the A note. You can go back and forth between the G note and the A note by simply moving the air out and in through the same hole. So, it is fun for students to find the patterns for playing the 2 note, 3, note, 4 note, and 5 note songs on the harmonica.
Piano
In another direction, children can also take the patterns they have been learning to the piano. They know how to pick out melodies and it is simple for them to pick out melodies on the piano. It is helpful for them to match the notes on the piano to the notes they have on the dulcimer. Since they have been mainly playing the dulcimer in the key of C, they will find the C scale on the dulcimer matches the white keys on the piano. That makes it very easy.
Next, it is helpful for them to learn the chords for the key of C on the piano. That will give them a lot of insight into the nature of chords. Starting on middle C, it is helpful to show them the C chord consisting of the C, E, and G (known as a triad). Then, since we are exploring the key of C which uses all white notes, I like to move up to the D minor triad on D ( the next note in the scale). From there, you can move up to E minor and then F major, G major, A minor, B Minor diminished, and then high C major. Those are all the chords they learned to play on the dulcimer. I also show them G7. You can point out the whole steps and half steps. The black notes provide for the half steps. If you are playing

in the key of C, you don’t use any black notes. All the notes in the key of C are white notes.
You can point out the C chord is the 1 chord because it is the first chord in the key of C. The F chord is called the 4 chord because it is based 4 notes higher than the C. The G chord is the 5 chord. And, A minor, is the 6 chord. So, you can refer to chord progressions by number. Two Chord songs usually are a 1 - 5 -1 chord progression. They usually start on the 1 chord, stay on that chord until it isn’t going to sound right, and then switches to the 5 chord until it sounds like it needs to move back to the 1 chord.
If you are playing a 3 chord progression song, you start with the 1 chord and when it sounds like it needs a change, you have to decided whether it is going to sound right to go to the 5 chord, or the 4 chord. Eventually, you will end back up on the 1 chord.
After playing enough pieces on the dulcimer, children can begin to anticipate chord changes, and hear what chord will come next. That is part of developing their ear. It results from playing lots and lots of songs and hearing the patterns over and over again. This ability can then be applied and utilized in playing other instruments. And, it is a great preparation for playing the piano.
So, the child will be able to pick out melodies, and identify the chords to go with them. Now, all they have to learn is efficient fingering for playing melodies with the right hand, and different patterns to use for playing chords with their left hand. For this I like to stick with the key of C until they get the patterns down. Then, those patterns can be translated to other keys.
Notice, the children are developing the ability to speak the language of music. They are learning the patterns of the language. It is an aural process. They are learning by using their ear rather than their eye

reading music. But, once they have learned to use their ear, they are ready to start learning to write and read music. You can read about this process in chapter 7 of this book. Learning to read and write music is very important. In fact, it is a critical part of a good music education. And so, it is actually started as soon as students have learned to play the 2 note songs on the dulcimer. But, it is used for enabling children to notate what they know and have learned. Experience comes first, and then ways to represent what has been learned comes next when they have something they are ready to record.
This is a developmental process. Children proceed when they are ready. Children are prepared for what comes next. Age does not determine what activities are presented. Mastering pre-requisites is the requirement. An adult uses observations of what a child can do, and is doing, and is interested in doing, to determine what comes next. Sometimes, a child’s activity shows that the child is ready for something that is usually several steps ahead. If children are deeply engaged, and if they are given the resources, the time, support, and opportunity, we don’t know the limits as to what they are capable. So, it is important that we don’t become obstacles to children’s progress. We don’t want to hold them back. We must not underestimate them. We must not limit them due to stereotypes of what children are thought to do or like at a given age. We try to light the flame and fan the spark.