chapter 19- working with nodes - central dauphin school
TRANSCRIPT
Nodes are relatively new to Blender and open the door to new rendering and post-production possibilities. Nodes are used as a way to add effects to your materials and renders in the final output. Nodes are changing quickly. For the most up-to-date information and detailed discussions of nodes, review the information at www.blender.org on the wiki.
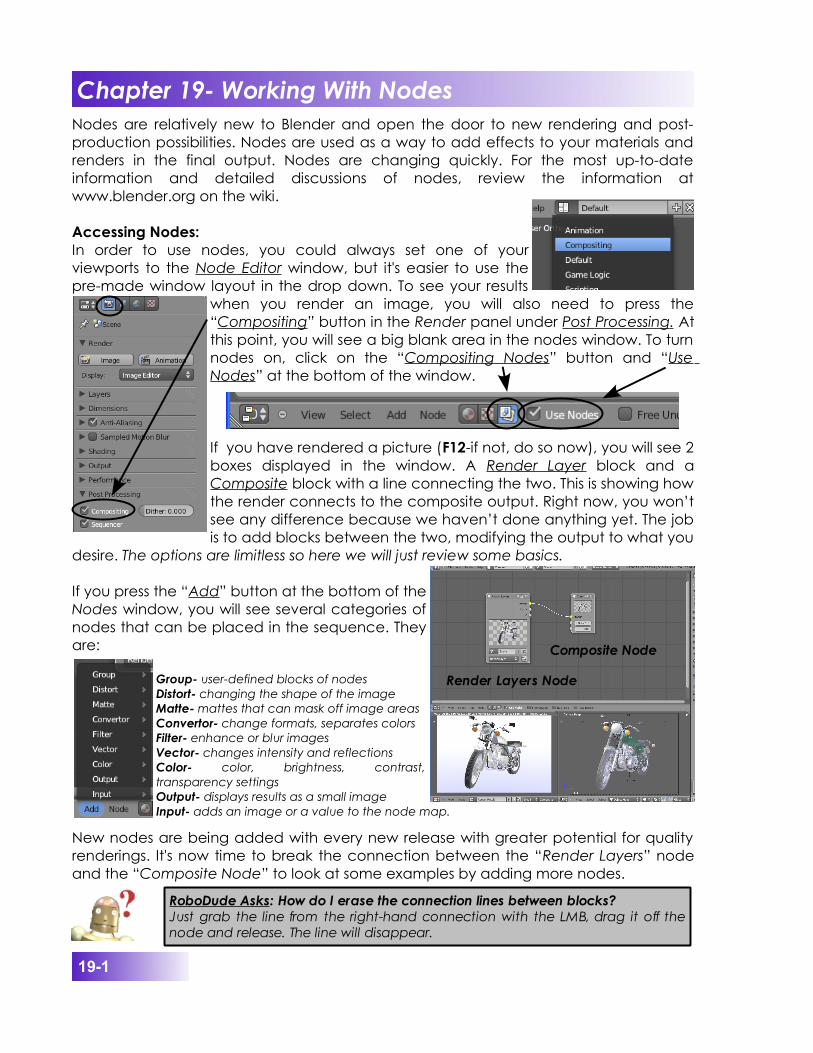
Accessing Nodes:In order to use nodes, you could always set one of your viewports to the Node Editor window, but it's easier to use the pre-made window layout in the drop down. To see your results
when you render an image, you will also need to press the “Compositing” button in the Render panel under Post Processing . At this point, you will see a big blank area in the nodes window. To turn nodes on, click on the “Compositing Nodes” button and “Use Nodes” at the bottom of the window.
If you have rendered a picture (F12-if not, do so now), you will see 2 boxes displayed in the window. A Render Layer block and a Composite block with a line connecting the two. This is showing how the render connects to the composite output. Right now, you won’t see any difference because we haven’t done anything yet. The job is to add blocks between the two, modifying the output to what you
desire. The options are limitless so here we will just review some basics.
If you press the “Add” button at the bottom of the Nodes window, you will see several categories of nodes that can be placed in the sequence. They are:
Group- user-defined blocks of nodesDistort- changing the shape of the imageMatte- mattes that can mask off image areasConvertor- change formats, separates colorsFilter- enhance or blur imagesVector- changes intensity and reflectionsColor- color, brightness, contrast, transparency settingsOutput- displays results as a small imageInput- adds an image or a value to the node map.
New nodes are being added with every new release with greater potential for quality renderings. It's now time to break the connection between the “Render Layers” node and the “Composite Node” to look at some examples by adding more nodes.
Chapter 19- Working With Nodes
19-1
Render Layers Node
Composite Node
RoboDude Asks: How do I erase the connection lines between blocks?Just grab the line from the right-hand connection with the LMB, drag it off the node and release. The line will disappear.
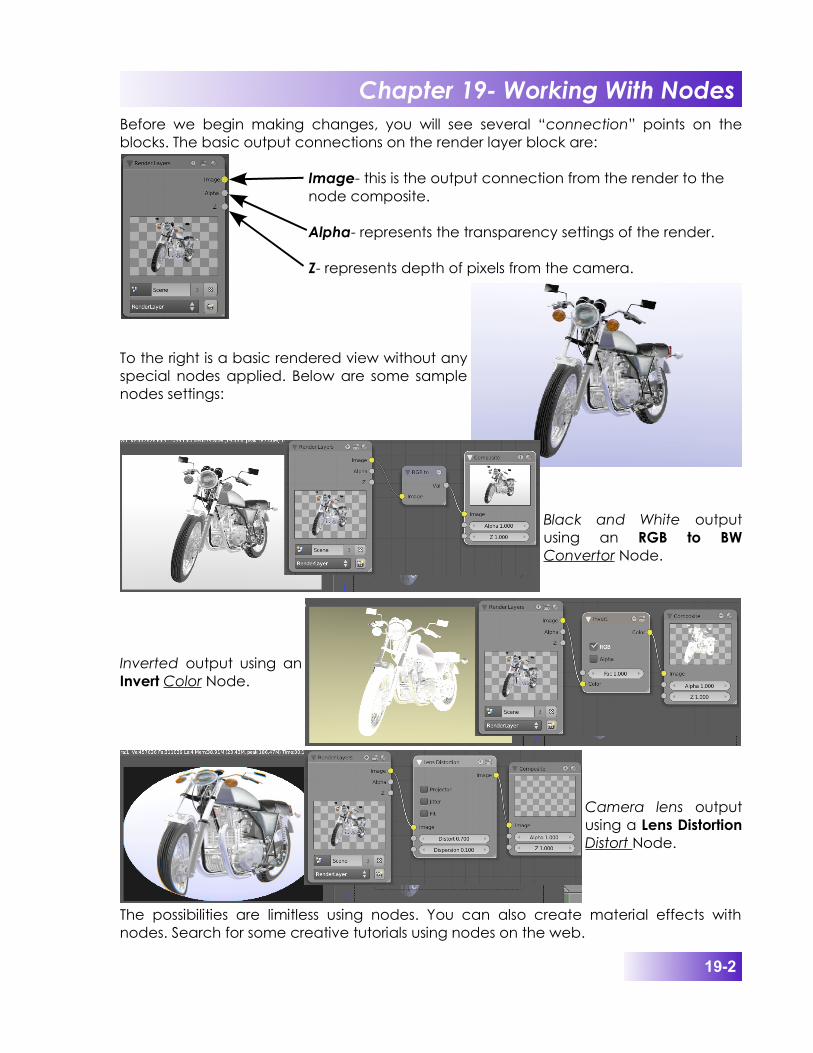
Before we begin making changes, you will see several “connection” points on the blocks. The basic output connections on the render layer block are:
Image- this is the output connection from the render to the node composite.
Alpha- represents the transparency settings of the render.
Z- represents depth of pixels from the camera.
To the right is a basic rendered view without any special nodes applied. Below are some sample nodes settings:
Black and White output using an RGB to BW Convertor Node.
Inverted output using an Invert Color Node.
Camera lens output using a Lens Distortion Distort Node.
The possibilities are limitless using nodes. You can also create material effects with nodes. Search for some creative tutorials using nodes on the web.
Chapter 19- Working With Nodes
19-2
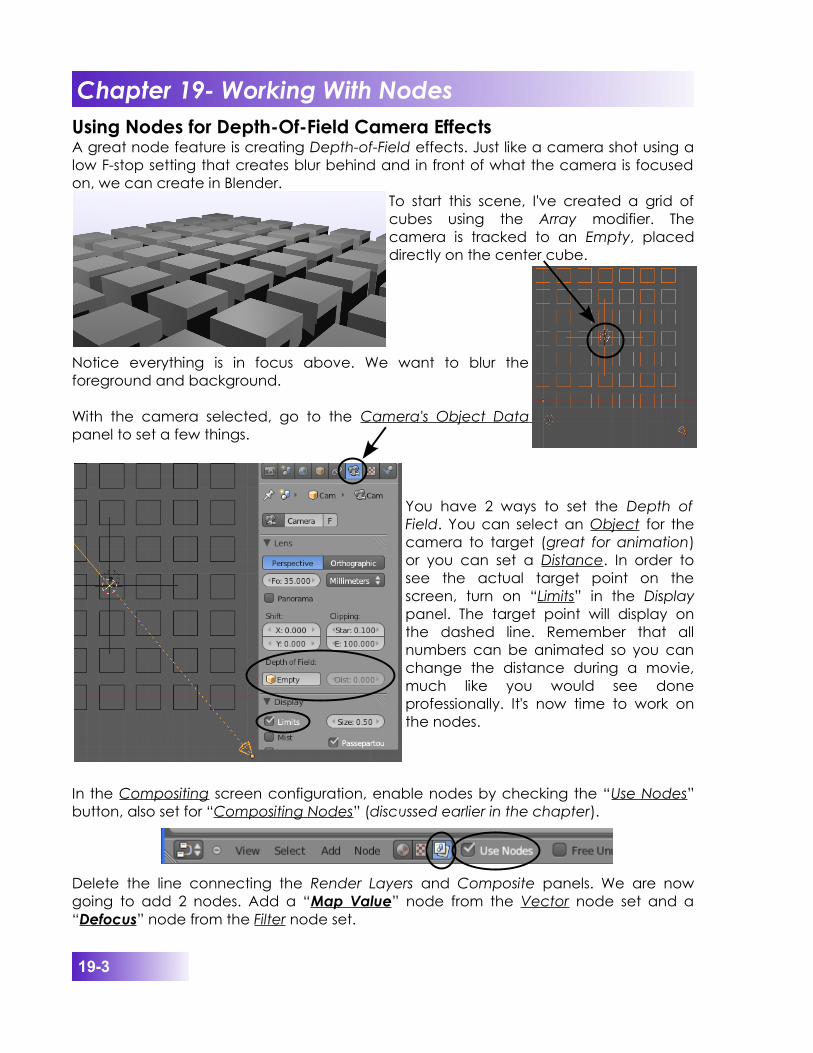
Using Nodes for Depth-Of-Field Camera EffectsA great node feature is creating Depth-of-Field effects. Just like a camera shot using a low F-stop setting that creates blur behind and in front of what the camera is focused on, we can create in Blender.
To start this scene, I've created a grid of cubes using the Array modifier. The camera is tracked to an Empty, placed directly on the center cube.
Notice everything is in focus above. We want to blur the foreground and background.
With the camera selected, go to the Camera's Object Data panel to set a few things.
You have 2 ways to set the Depth of Field. You can select an Object for the camera to target (great for animation) or you can set a Distance. In order to see the actual target point on the screen, turn on “Limits” in the Display panel. The target point will display on the dashed line. Remember that all numbers can be animated so you can change the distance during a movie, much like you would see done professionally. It's now time to work on the nodes.
In the Compositing screen configuration, enable nodes by checking the “Use Nodes” button, also set for “Compositing Nodes” (discussed earlier in the chapter).
Delete the line connecting the Render Layers and Composite panels. We are now going to add 2 nodes. Add a “Map Value” node from the Vector node set and a “Defocus” node from the Filter node set.
Chapter 19- Working With Nodes
19-3
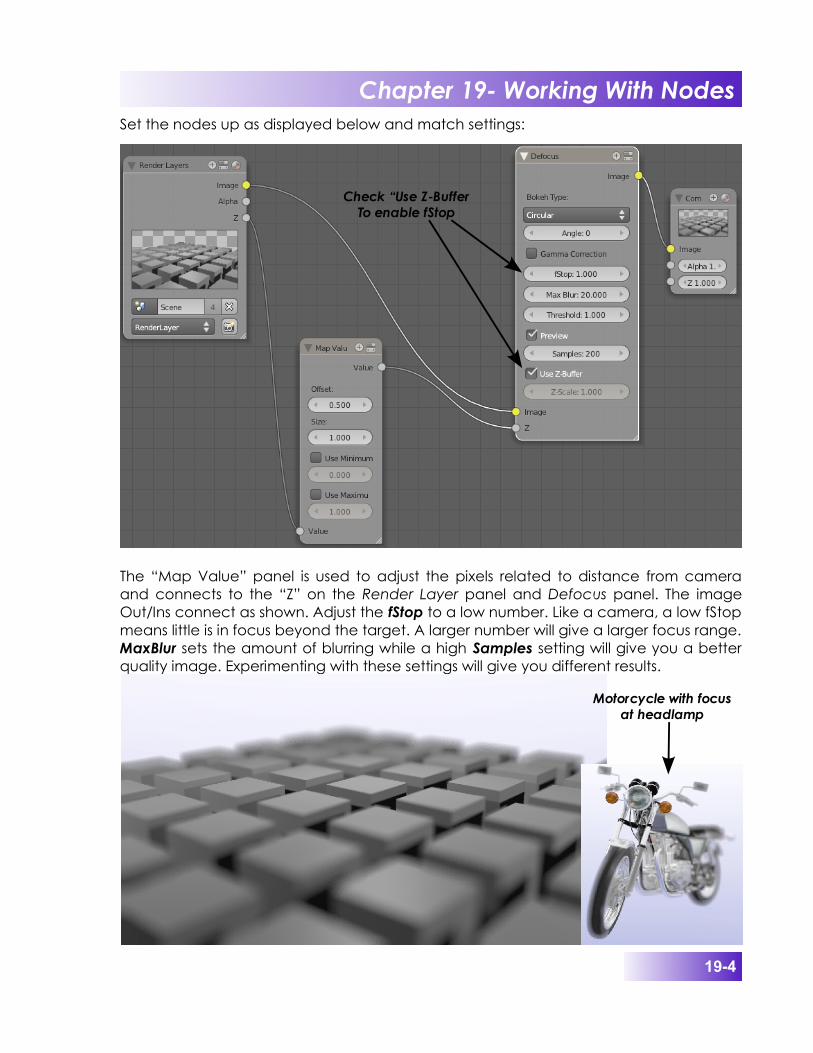
Set the nodes up as displayed below and match settings:
The “Map Value” panel is used to adjust the pixels related to distance from camera and connects to the “Z” on the Render Layer panel and Defocus panel. The image Out/Ins connect as shown. Adjust the fStop to a low number. Like a camera, a low fStop means little is in focus beyond the target. A larger number will give a larger focus range. MaxBlur sets the amount of blurring while a high Samples setting will give you a better quality image. Experimenting with these settings will give you different results.
Check “Use Z-BufferTo enable fStop
Chapter 19- Working With Nodes
19-4
Motorcycle with focus at headlamp
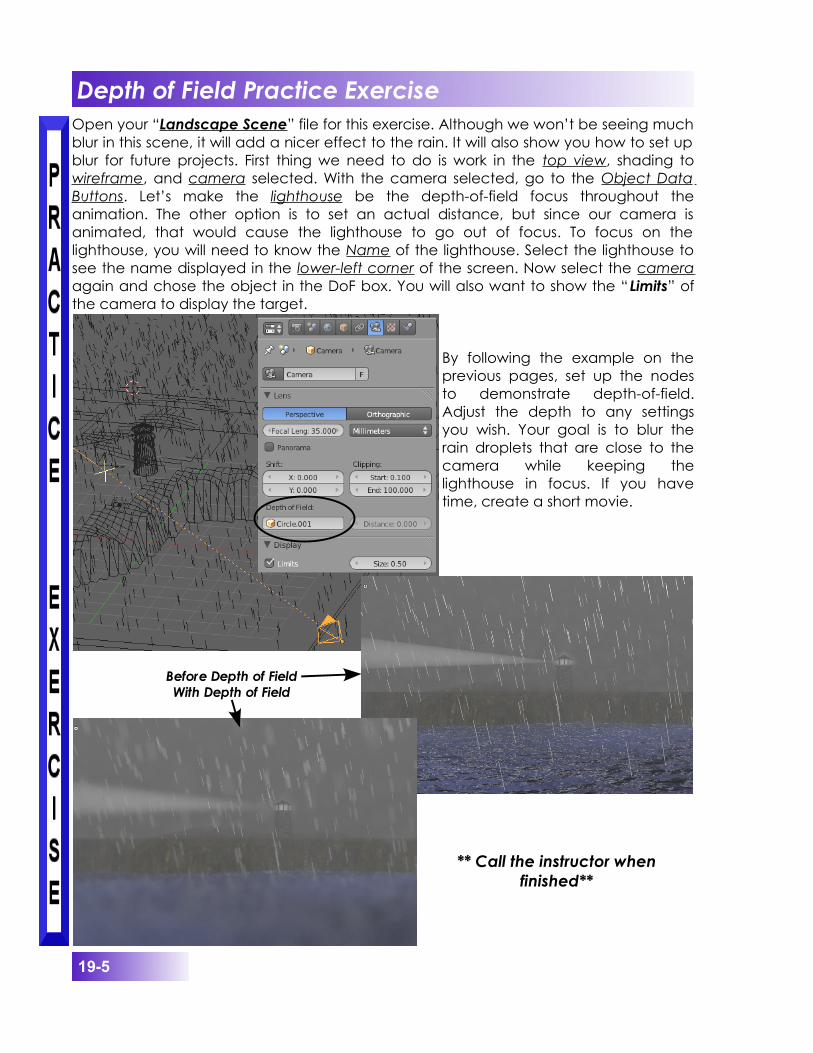
Open your “Landscape Scene” file for this exercise. Although we won’t be seeing much blur in this scene, it will add a nicer effect to the rain. It will also show you how to set up blur for future projects. First thing we need to do is work in the top view, shading to wireframe, and camera selected. With the camera selected, go to the Object Data Buttons. Let’s make the lighthouse be the depth-of-field focus throughout the animation. The other option is to set an actual distance, but since our camera is animated, that would cause the lighthouse to go out of focus. To focus on the lighthouse, you will need to know the Name of the lighthouse. Select the lighthouse to see the name displayed in the lower-left corner of the screen. Now select the camera again and chose the object in the DoF box. You will also want to show the “Limits” of the camera to display the target.
By following the example on the previous pages, set up the nodes to demonstrate depth-of-field. Adjust the depth to any settings you wish. Your goal is to blur the rain droplets that are close to the camera while keeping the lighthouse in focus. If you have time, create a short movie.
** Call the instructor when finished**
Depth of Field Practice Exercise
19-5
Before Depth of FieldWith Depth of Field