central venous catheters slp - fraser health · 5 what is a central venous catheter? central venous...
TRANSCRIPT

Central Venous
Catheters
In Adult Patients
Self-Learning Module
Image courtesy of Telelflex®
Images courtesy of Bard®
Patty Hignell, RN, BSN, MN, ENC(C)
Vascular Access Clinical Practice Committee
Fraser Health Authority Printshop #256260
June 2018 – Version 9

The 9th Edition (current) of this document replaces all previous versions.
This publication has been created for the express use of Fraser Health and
its Partners. Permission to reprint or electronically reproduce any
document or graphic in whole or in part for any reason is expressly
prohibited, unless prior written consent is obtained from the respective
copyright holder(s).
Please send any requests for use of this material to:
Fraser Health Authority
Clinical Quality & Patient Safety
Central City Tower, 5th Floor
13450 – 102nd Avenue,
Surrey, British Columbia
Canada V3T 0H1

TABLE OF CONTENTS
INTRODUCTION ........................................................................................................... 3
PURPOSE...................................................................................................................................3 LEARNING INSTRUCTIONS ............................................................................................................3 OBJECTIVES ...............................................................................................................................4 WHAT IS A CENTRAL VENOUS CATHETER?........................................................................................5 INDICATIONS FOR USE.................................................................................................................5 WHERE ARE CENTRAL VENOUS CATHETERS INSERTED? ......................................................................6
TYPES OF CENTRAL VENOUS CATHETERS .................................................................... 9
CENTRAL VENOUS CATHETERS: SINGLE LUMEN VS. MULTI-LUMEN ......................................................11 CENTRAL VENOUS CATHETERS: NON-VALVED OR VALVED .................................................................11
SHORT-TERM CVCS .................................................................................................... 16
SUGGESTED LUMEN CHOICE FOR INFUSIONS ..................................................................................18 MULTI-LUMEN SHORT-TERM CATHETERS .......................................................................................18 HEMODIALYSIS CATHETERS ........................................................................................................19 NURSING CARE: PRE/POST INSERTION OF SHORT-TERM CVCS .........................................................20
PERIPHERALLY INSERTED CENTRAL CATHETER (PICC) ............................................ 26
NURSING CARE: PRE/POST INSERTION OF PICCS ..........................................................................27
TUNNELED CATHETERS .............................................................................................. 32
NURSING CARE: PRE/POST INSERTION OF TUNNELED CATHETERS .....................................................33
IMPLANTABLE VENOUS ACCESS DEVICE (IVAD) ....................................................... 38
NURSING CARE: PRE/POST INSERTION ........................................................................................39
POWER-INJECTION CAPABLE CVCS ........................................................................... 44
COMPLICATIONS ASSOCIATED WITH CENTRAL VENOUS CATHETERS ...................... 46
INFECTION ..............................................................................................................................46 AIR EMBOLISM .........................................................................................................................49 CATHETER EMBOLISM ................................................................................................................51 CATHETER-RELATED THROMBOSIS (CRT) OR CATHETER-ASSOCIATED VENOUS THROMBUS .....................53 PHLEBITIS AND THROMBOPHLEBITIS ............................................................................................55 INFILTRATION AND EXTRAVASATION ............................................................................................56 OCCLUSIONS ............................................................................................................................61 CVC MEASUREMENT AND DEVICE MALPOSITION .............................................................................64 BROKEN/ DAMAGED CVCS .........................................................................................................65
CARE AND MAINTENANCE OF CENTRAL VENOUS CATHETERS ................................... 70
PATIENT POSITIONING ..............................................................................................................70 MANAGEMENT OF PATIENTS WITH A CVC ......................................................................................70 MEDICATIONS AND TUBING ........................................................................................................71 NEUTRAL DISPLACEMENT CAPS....................................................................................................71 CLAMPS (BUILT INTO THE CVC) ..................................................................................................71 FLUSHING ...............................................................................................................................72 CLEANSING ..............................................................................................................................73 SECUREMENT ...........................................................................................................................74 DRESSINGS .............................................................................................................................74 SKIN CARE ..............................................................................................................................76 BLOOD SAMPLING .....................................................................................................................77 REMOVAL OF SHORT-TERM CVCS AND PICCS ................................................................................79 INFECTION CONTROL .................................................................................................................80 TROUBLESHOOTING A BLOCKED CVC ............................................................................................81 MONITORING CENTRAL VENOUS PRESSURE (CVP) ..........................................................................81
REFERENCES .............................................................................................................. 85

2
APPENDIX A: CVC SKILLS SCOPE OF PRACTICE ........................................................ 88
APPENDIX B: VASCULAR ACCESS DEVICE SELECTION ALGORITHM .......................... 89
APPENDIX C: CENTRAL VENOUS CATHETER INSERTION AND REMOVAL FORM ........ 90
APPENDIX D: REGIONAL CVC MAINTENANCE RECORD – ADULT, ACUTE CARE AND
RESIDENTIAL............................................................................................................. 91
APPENDIX E : IV TUBING LINE SETUP, CONFIGURATIONS, AND CHANGE FREQUENCY
.................................................................................................................................. 92
APPENDIX F: CENTRAL VENOUS CATHETER (CVC) SKILLS INVENTORY .................... 93

3
INTRODUCTION
The use of Central Venous Catheters (CVCs) has increased dramatically over recent years. Once seen
only in critical care areas, these catheters are now commonplace in the medical/surgical and
community environment. Depending on the patient’s needs, there are a variety of central venous
catheters available. A CVC can be inserted for short-term or long-term I.V. therapy.
Central venous catheter management requires evidence-based, best practice standards to minimize
complications and maximize patient outcomes. CVC management is a specialized skill performed by IV
practitioners who have demonstrated the required competencies.
Purpose This self-learning module will provide you:
Information about CVCs
Information about nursing care and management of CVCs in the adult patient
Information on complications associated with CVCs
This self-learning module along with return skill demonstration will assist you in meeting
the competencies of CVC management.
Please see Appendix A (Responsibility for CVC management)
Learning Instructions The learning activities in this self-learning module are based on the objectives and will help you to
understand and apply what you have learned. It is recommended that you complete the learning
activity after each section.
If you are using this self-learning module for the purpose of review, you may wish to attempt the
learning activities first to find out what material you need to review.
4
Objectives
Upon completion of this module the learner will be able to:
Define “central venous catheters”
Identify types of CVCs and indications for use
List advantages and disadvantages for a short-term or long-term CVC.
Identify common insertion sites
Describe the difference between open-ended and closed-ended (valved) catheters
Describe the difference between proximally valved and distally valved catheters
Identify the nursing responsibilities for pre-insertion, insertion and post-insertion for short-term
and long-term CVCs.
List possible complications of CVCs and the nursing actions for each complication.
List safety considerations when caring for a patient with a CVC, and provide the rationale
Let’s get started……

5
What is a Central Venous Catheter?
Central Venous Catheter (CVC) – [also known as a central line or a Central Venous Access Device
(CVAD)] A CVC is an indwelling device that is inserted into a vein of the central vasculature. CVCs are
being used increasingly in inpatient, outpatient, and community settings to provide long-term venous
access. CVCs disrupt the integrity of the skin, making infection with bacteria and/or fungi possible.
Infection may spread to the bloodstream and hemodynamic changes and organ dysfunction (severe
sepsis) may ensue, possibly leading to death. (Center for Disease Control and Prevention, 2011) (Hunter &
Hunter, 2012) (Safer Healthcare Now, 2012) (Provonost, et al., 2006)
CVC insertion puts the patient at risk from a number of complications and unintended outcomes, at the
time of insertion, after insertion, and upon removal. These include pneumothorax, hemothorax, cardiac
tamponade, cardiac perforation, cardiac arrhythmias, erosion of the vessel wall, occlusion, infection,
and catheter dysfunction.
There are 2 CVC type classifications: Short-term CVCs and Long-Term CVCs, which includes Implanted
Venous Access Devices (IVAD), Peripherally Inserted Central Catheters (PICC), and Tunneled CVCs
(Alexander, Corrigan, Gorski, Hankins, & Perucca, 2010) (Bishop, et al., 2007) (Infusion Nurses Society, 2011)
(Infusion Nurses Society, 2016).
Indications for Use Administer intravenous fluids and blood products
Administer medications
Administer hypertonic solutions (Total Parental Nutrition [TPN]), vesicants (e.g. chemotherapy),
irritants (e.g. cloxacillin), and solutions with extreme pH values (e.g. vancomycin).
Obtain venous blood samples
Provide long term intravenous therapy
Administer large volumes of intravenous fluid quickly
Administer vasopressor or vasodilator therapy (e.g. dopamine)
Monitor central venous pressure (CVP)
Provide access for transvenous pacemaker or pulmonary artery catheters
Access venous circulation when a patient has difficult or impossible peripheral access
Provide hemodialysis access
6
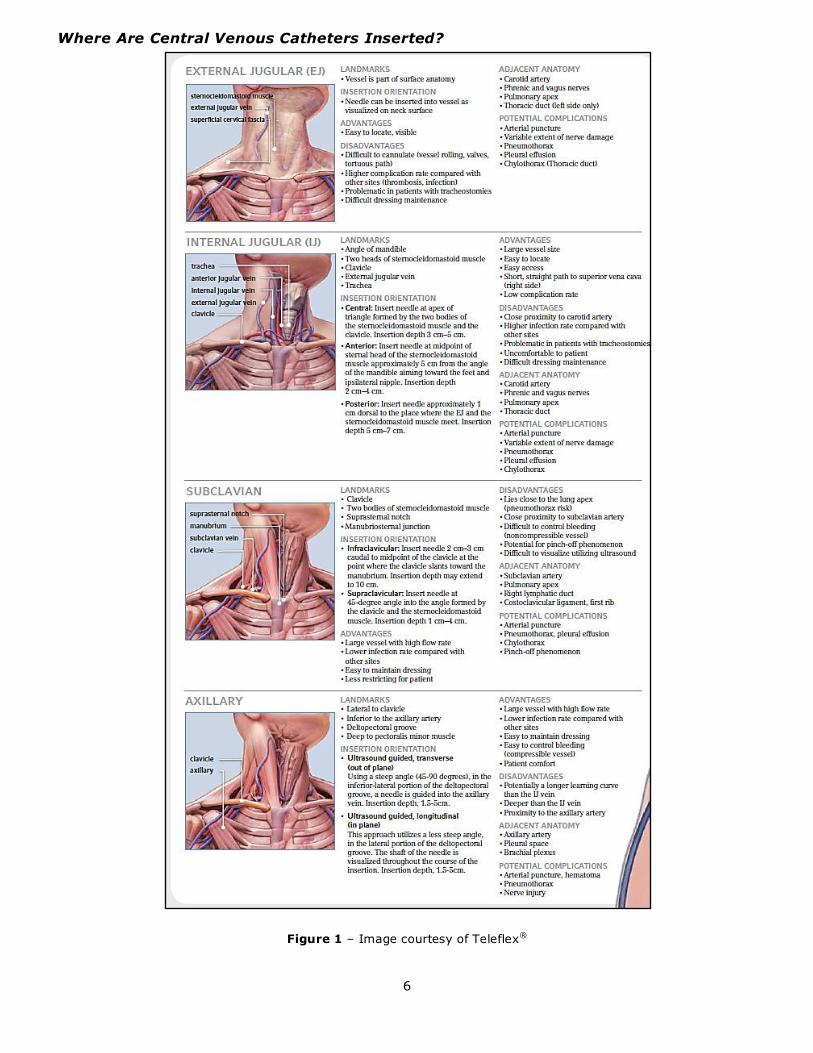
Where Are Central Venous Catheters Inserted?
Figure 1 – Image courtesy of Teleflex®
7
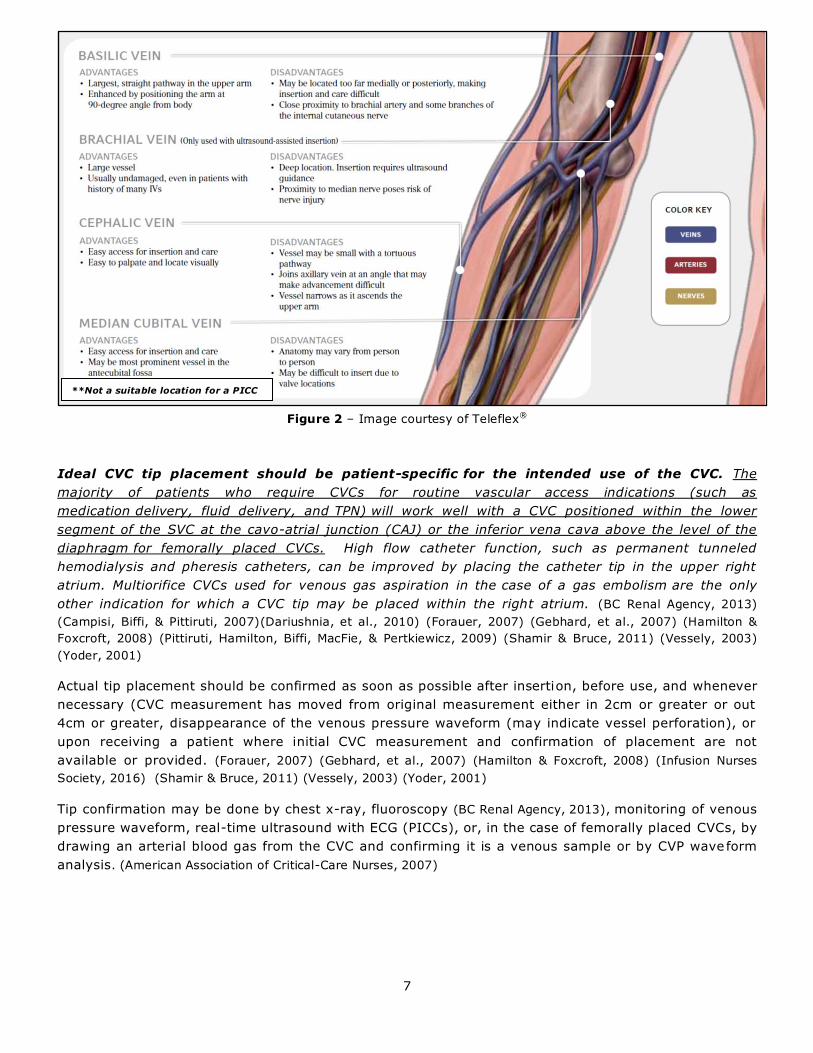
Figure 2 – Image courtesy of Teleflex®
Ideal CVC tip placement should be patient-specific for the intended use of the CVC. The
majority of patients who require CVCs for routine vascular access indications (such as
medication delivery, fluid delivery, and TPN) will work well with a CVC positioned within the lower
segment of the SVC at the cavo-atrial junction (CAJ) or the inferior vena cava above the level of the
diaphragm for femorally placed CVCs. High flow catheter function, such as permanent tunneled
hemodialysis and pheresis catheters, can be improved by placing the catheter tip in the upper right
atrium. Multiorifice CVCs used for venous gas aspiration in the case of a gas embolism are the only
other indication for which a CVC tip may be placed within the right atrium. (BC Renal Agency, 2013)
(Campisi, Biffi, & Pittiruti, 2007)(Dariushnia, et al., 2010) (Forauer, 2007) (Gebhard, et al., 2007) (Hamilton &
Foxcroft, 2008) (Pittiruti, Hamilton, Biffi, MacFie, & Pertkiewicz, 2009) (Shamir & Bruce, 2011) (Vessely, 2003)
(Yoder, 2001)
Actual tip placement should be confirmed as soon as possible after insertion, before use, and whenever
necessary (CVC measurement has moved from original measurement either in 2cm or greater or out
4cm or greater, disappearance of the venous pressure waveform (may indicate vessel perforation), or
upon receiving a patient where initial CVC measurement and confirmation of placement are not
available or provided. (Forauer, 2007) (Gebhard, et al., 2007) (Hamilton & Foxcroft, 2008) (Infusion Nurses
Society, 2016) (Shamir & Bruce, 2011) (Vessely, 2003) (Yoder, 2001)
Tip confirmation may be done by chest x-ray, fluoroscopy (BC Renal Agency, 2013), monitoring of venous
pressure waveform, real-time ultrasound with ECG (PICCs), or, in the case of femorally placed CVCs, by
drawing an arterial blood gas from the CVC and confirming it is a venous sample or by CVP wave form
analysis. (American Association of Critical-Care Nurses, 2007)
**Not a suitable location for a PICC

8
Types of Central
Venous Catheters
Images courtesy of Teleflex®

9
Types of Central Venous Catheters
Short-term (Percutaneous, Non-Tunneled, Non-Cuffed) Short Term
PICC (Peripherally Inserted Central Catheters) Long Term
Tunneled Catheters Long Term
Implanted Venous Access Devices (IVAD) Long Term
Short-Term CVC – [also known as a percutaneous CVC, non-tunneled CVC, or percutaneous
sheath/introducer)] A CVC inserted by puncture directly through the skin and to the intended location
without passing through subcutaneous tissue. (Infusion Nurses Society, 2016) Site placement is typically
in either the subclavian vein or the internal jugular vein, though it may also be inserted into the
femoral vein. If the CVC will be needed for greater than 2 weeks, consider a referral for a Long -term
CVC. The femoral site should be avoided whenever possible due to the high risk of infection,
thrombosis, and arterial cannulation and is relatively contraindicated as a route for parenteral nutrition.
Femoral CVCs inserted under emergency circumstances should be re-sited to another CVC site within
48 hours of insertion. (O'Grady, et al., 2011) (Pittiruti, Hamilton, Biffi, MacFie, & Pertkiewicz, 2009) (Safer
Healthcare Now, 2012) (Sydney South West Area Health Service, 2007) (Wheeler, Wong, & Shanley, 2007)
Note: Percutaneous Sheath Introducers are only for use in Critical Care Areas.
Whether or not patients with short-term CVCs are appropriate for admission at sites without
24/7 Internal Medicine coverage is a site-based decision taking into consideration patient
safety, staff competency, and patient flow.
Long-Term CVC – A CVC that stays insitu for months to years. Includes Implantable Venous Access
Devices (IVADs), Peripherally Inserted Central Catheters (PICCs), and Tunneled CVCs.
1) Implanted Venous Access Device (IVAD) – [also known as a “port”] A catheter that is
surgically placed into a vessel, body cavity, or organ and is attached to a reservoir or “port”
located under the skin. (Infusion Nurses Society, 2016)
2) Peripherally Inserted Central Catheter (PICC) – A central venous catheter inserted by a
physician or an RN with advanced training and established competency, into an extremity,
typically in the cephalic, basilic or brachial veins of the upper arm. (Infusion Nurses Society, 2016)
3) Tunneled CVC – A long-term CVC whose proximal end is tunneled subcutaneously from the
insertion site and brought out through the skin at an exit site. (Infusion Nurses Society, 2016)
Note: Hemodialysis catheters may be Short-term and temporary or Tunneled and permanent
and may only be accessed by a Renal Nurse. [Exception: In situations that require emergent
or code blue interventions Registered Nurses who work in Critical Care settings (i.e. ER, CCU
and ICU) and have undergone the required education and competency assessment may
access the hemodialysis catheters.]
COMPOSITION
Polyurethane or Silicone

10
COATINGS
May have antimicrobial or antiseptic coating to protect against bacterial seeding
May have heparin coating to reduce fibrin formation
Radiopaque to confirm tip placement by X-ray
The type of CVC inserted depends on the:
Type of therapy to be administered
Length of therapy (i.e. Short term or Long term)
Complex or unusual vascular anatomy
Previous devices and complications
Clinical diagnosis and assessment
Clinical situation
Care setting
Patient/family preference
What alternatives are there?
Always advocate for Best Practice!
Site selection includes an assessment of the patient’s condition, age, diagnosis, comorbidities, condition
of the vasculature at the insertion site and proximal to the intended insertion site, condition of skin at
intended insertion site, history of previous venipunctures and access devices, type and duration of
infusion therapy, and patient preference. (Infusion Nurses Society, 2016)
A device with the smallest gauge and least number of lumens needed in order to infuse the prescribed
therapy, length of treatment, duration of dwell, vascular integrity, patient preference, and patient
ability and resources to care for the device should be inserted in an effort to reduce central line-
associated bloodstream infections (CLA-BSIs). (Infusion Nurses Society, 2016) (Safer Healthcare Now, 2012)
Devices inserted for patients in the Residential setting should be single lumen, close-ended, with a
distal valve whenever possible.
When selecting a CVC type, consideration should be given as to whether the device will be used for
high-pressure injection and a suitable device chosen for this purpose. (Infusion Nurses Society, 2016)
A physician’s order is not required to access a CVC, including IVADs.
Reassess the continued need for the CVC daily. Obtain a physician’s order is required to remove the
CVC or provide alternate route for therapy if no longer needed. (Center for Disease Control and Prevention,
2011) (Safer Healthcare Now, 2012)

11
Central Venous Catheters: Single Lumen vs. Multi-lumen Single, double and triple lumen catheters are available in most catheter types
Each lumen must be treated as a separate catheter
Incompatible medications can be infused simultaneously via separate lumens
Exit ports are approximately 2cms apart on the short-term catheter
Central Venous Catheters: Non-Valved or Valved
Non-Valved
The catheter is open through the whole catheter to the distal tip
The catheter requires clamping before entry into the system
Clamps are usually built into the catheter
Requires periodic flushing (see Pg. 66)
Non-valved CVCs are open-ended
Valved
Valves may be placed distally (at the tip) or proximally (at the hub).
Clamps are not required or built into the catheter as the valve is closed except during infusion
or aspiration.
May be present on Tunneled Catheters, Implanted Ports and PICCs, but NOT Short-term CVCs.
Valved CVCs may be open-ended or closed-ended
How the Valve Works
Valves may be placed distally (at the tip) or proximally (at the hub).
When negative pressure (suction) is applied, the valve opens inward and blood flows into the
syringe.
When positive pressure is applied (fluid infusion or flush) the valve opens outward and fluid
enters the bloodstream.
The valve works when pressure is applied to it. With no pressure the valve remains closed.
When TPN is being infused a lumen MUST be dedicated and labeled for this
use. It is discouraged to administer anything else via that lumen due to
increased incidence of occlusions and infections associated with this practice.
(In a triple lumen catheter, the Medial lumen is typically used)

12
Figure 3 – Distal Valve - Image courtesy of Bard® Figure 4 – Proximal Valve - Image courtesy of Bard®
Example of a closed-ended catheter with a
proximal valve in the hub of the catheter:
Figure 5 – Image courtesy of Bard®
13
Test Your Learning
1) Which of the following would not be considered a CVC? A catheter
placed:
a) in the radial artery
b) in the superior vena cava
c) so its tip is at the junction between the superior vena cava and the
radial artery
d) with its tip in the external jugular vein
A. a & b
B. b & d
C. a, c, d
D. All of the above
2) Uses for a CVC include which of the following?
a) TPN administration
b) IV drug and fluid administration
c) Blood product
d) Blood sampling
e) Measurement and monitoring of Central Venous Pressure
f) All of the above
3) List four types of CVCs
a) _____________
b) _____________
c) _____________
d) _____________
4) Open-ended CVC’s requires clamping? T or F?
5) With a proximally valved CVC, clamping is _____ required as the valve is ____ except during
infusion or aspiration.
For all CVC’s, it is important to know catheter type, design
(open–ended or closed–ended), and tip location

14
Answers
1) C
2) F
3) Short Term, PICC, Tunneled, and IVAD
4) True
5) Not, Closed
Congratulations! You have just completed the first section.
Let’s keep moving…..

15
Short-Term CVCs
Images courtesy of Teleflex®
16
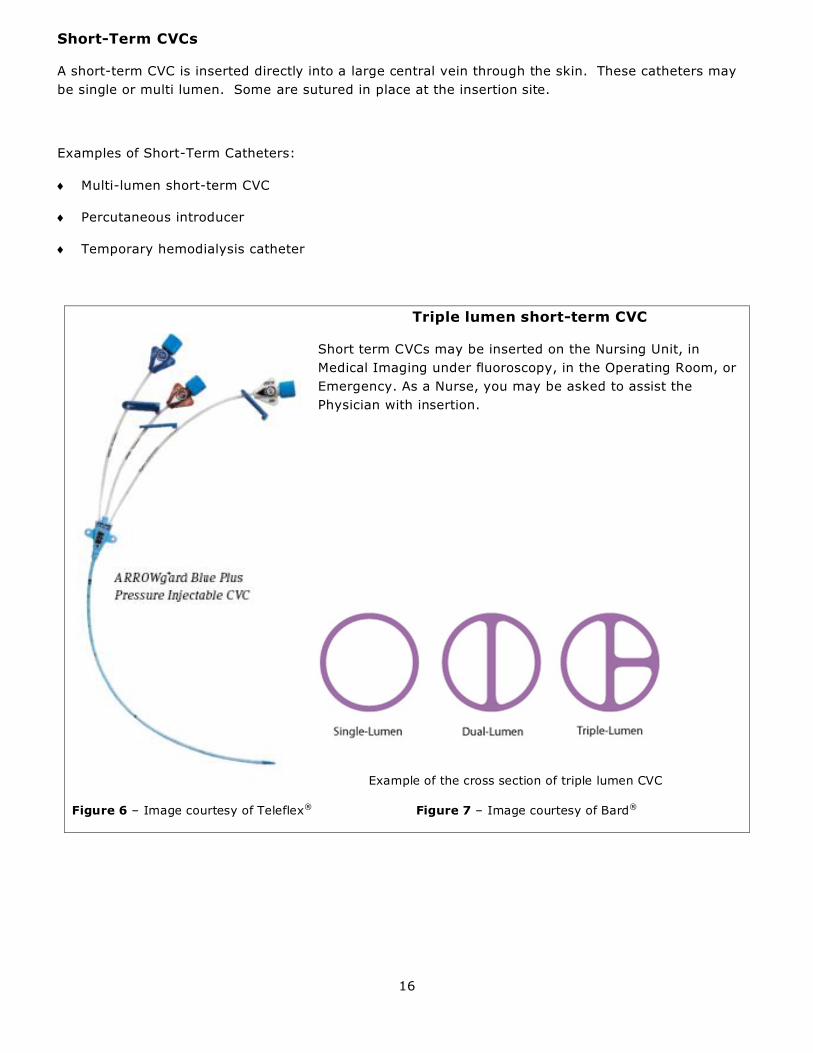
Short-Term CVCs
A short-term CVC is inserted directly into a large central vein through the skin. These catheters may
be single or multi lumen. Some are sutured in place at the insertion site.
Examples of Short-Term Catheters:
Multi-lumen short-term CVC
Percutaneous introducer
Temporary hemodialysis catheter
Triple lumen short-term CVC
Short term CVCs may be inserted on the Nursing Unit, in
Medical Imaging under fluoroscopy, in the Operating Room, or
Emergency. As a Nurse, you may be asked to assist the
Physician with insertion.
Example of the cross section of triple lumen CVC
Figure 6 – Image courtesy of Teleflex® Figure 7 – Image courtesy of Bard®
17
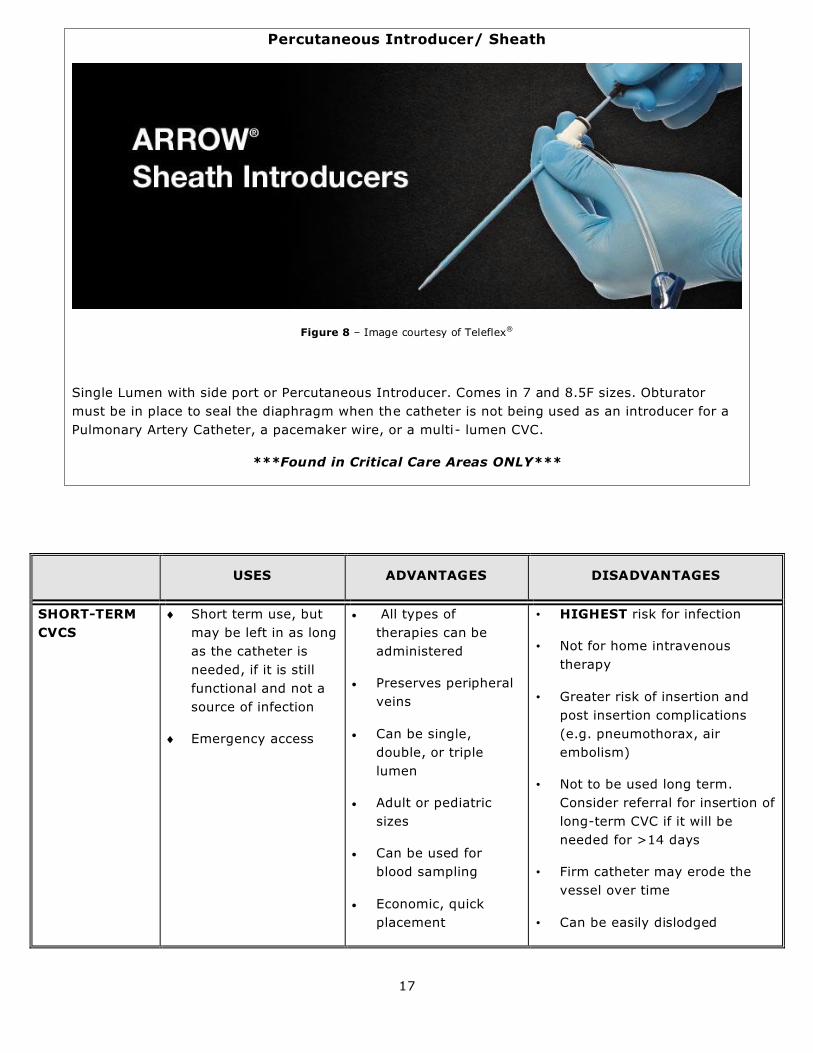
Percutaneous Introducer/ Sheath
Figure 8 – Image courtesy of Teleflex®
Single Lumen with side port or Percutaneous Introducer. Comes in 7 and 8.5F sizes. Obturator
must be in place to seal the diaphragm when the catheter is not being used as an introducer for a
Pulmonary Artery Catheter, a pacemaker wire, or a multi- lumen CVC.
***Found in Critical Care Areas ONLY***
USES ADVANTAGES DISADVANTAGES
SHORT-TERM
CVCS
Short term use, but
may be left in as long
as the catheter is
needed, if it is still
functional and not a
source of infection
Emergency access
All types of
therapies can be
administered
Preserves peripheral
veins
Can be single,
double, or triple
lumen
Adult or pediatric
sizes
Can be used for
blood sampling
Economic, quick
placement
• HIGHEST risk for infection
• Not for home intravenous
therapy
• Greater risk of insertion and
post insertion complications
(e.g. pneumothorax, air
embolism)
• Not to be used long term.
Consider referral for insertion of
long-term CVC if it will be
needed for >14 days
• Firm catheter may erode the
vessel over time
• Can be easily dislodged
18
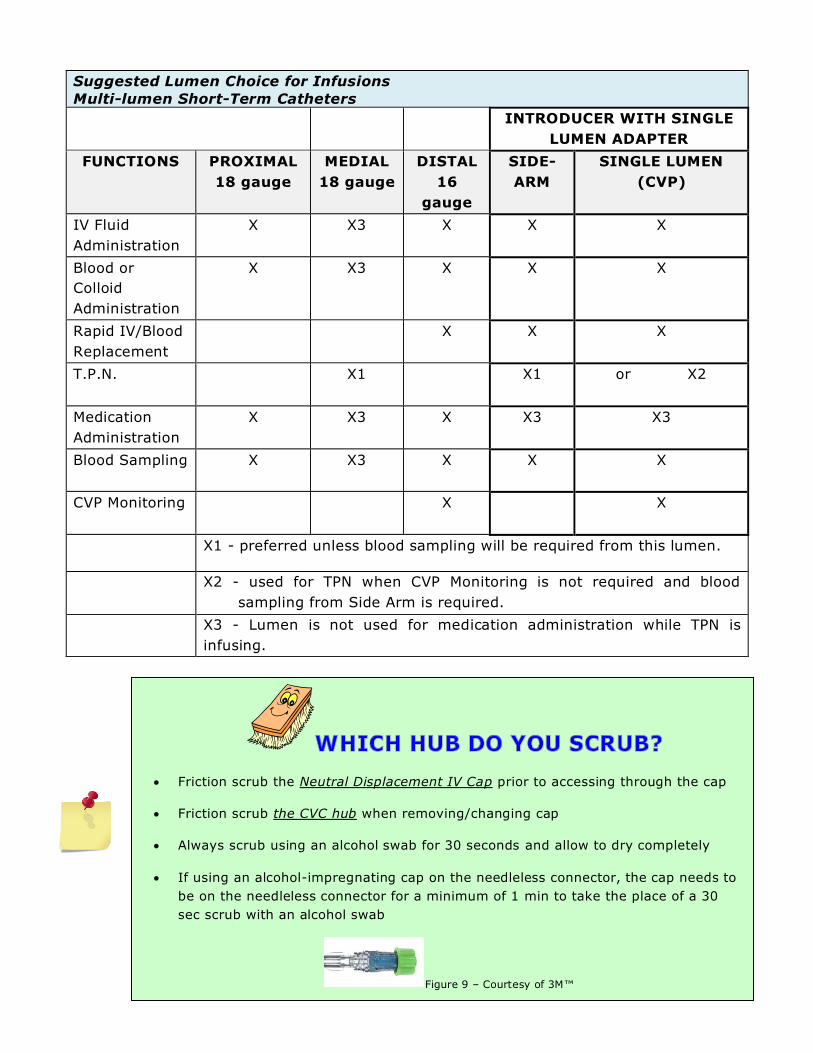
Suggested Lumen Choice for Infusions
Multi-lumen Short-Term Catheters
INTRODUCER WITH SINGLE
LUMEN ADAPTER
FUNCTIONS PROXIMAL
18 gauge
MEDIAL
18 gauge
DISTAL
16
gauge
SIDE-
ARM
SINGLE LUMEN
(CVP)
IV Fluid
Administration
X X3 X X X
Blood or
Colloid
Administration
X X3 X X X
Rapid IV/Blood
Replacement
X X X
T.P.N. X1 X1 or X2
Medication
Administration
X X3 X X3 X3
Blood Sampling X X3 X X
X
CVP Monitoring X X
X1 - preferred unless blood sampling will be required from this lumen.
X2 - used for TPN when CVP Monitoring is not required and blood
sampling from Side Arm is required.
X3 - Lumen is not used for medication administration while TPN is
infusing.
Friction scrub the Neutral Displacement IV Cap prior to accessing through the cap
Friction scrub the CVC hub when removing/changing cap
Always scrub using an alcohol swab for 30 seconds and allow to dry completely
If using an alcohol-impregnating cap on the needleless connector, the cap needs to
be on the needleless connector for a minimum of 1 min to take the place of a 30
sec scrub with an alcohol swab
Figure 9 – Courtesy of 3M™

19
Hemodialysis Catheters
A hemodialysis catheter (HD line) is a type of Central Venous Catheter used for patients requiring
hemodialysis. The lumens of these catheters are larger allowing for large volumes of blood to be
processed and returned to the patient.
The Renal Program has specific policies and procedures related to these catheters.
HD lines may be accessed by Critical Care Nurses in a Code/ Trauma situation or with
Continuous Renal Replacement Therapy (CRRT).
HD lines are central venous catheters/ Maintain aseptic technique as they are the
patient’s life lines.
Catheter lumens must never be left unattended when open to air.
If there are problems with withdrawing from a lumen do not push locking agent or clot into the
patient.
Once patient stabilizes, plan for use of an alternative access.
The HD line can be used for:
o blood samples
o infusing a medication
o IV infusion
Procedure:
Place patient supine
Create a sterile field/ Don sterile
gloves/mask
Ensure both clamps closed
Scrub the Tego™ connector hub
with alcohol swab and leave to dry
Attach a 10 mL luer syringe,
unclamp and withdraw 5 mL locking
agent, and discard.
Using a second 10 mL syringe,
withdraw and instill blood 2-3 times
(ensures locking agent is cleared)
Flush line with the NS 0.9% 10 mL pre-filled syringe for a total of 20 mL per lumen.
Infusing Medication/ IV infusion
Clamp. Discard syringe. Attach solution tubing
Blood samples
Withdraw 10ml discard from the lumen, clamp and discard. Attach a Vacutainer™ or syringe,
unclamp and take blood samples. Re-clamp. After use flush catheter with 20ml NS 0.9%.
Once you are finished, run an IV 0.9% NS solution at 20 ml/hr.
Notify the Renal Unit that the dialysis line has been accessed.
***A Renal Nurse must flush and re-cap the catheter after the dialysis line has
been accessed.
Exception: ICU Nurses performing Continuous Renal Replacement (CRRT) may
access and de-access a dialysis line.
Figure 10 – Image courtesy of ICU Medical®
20
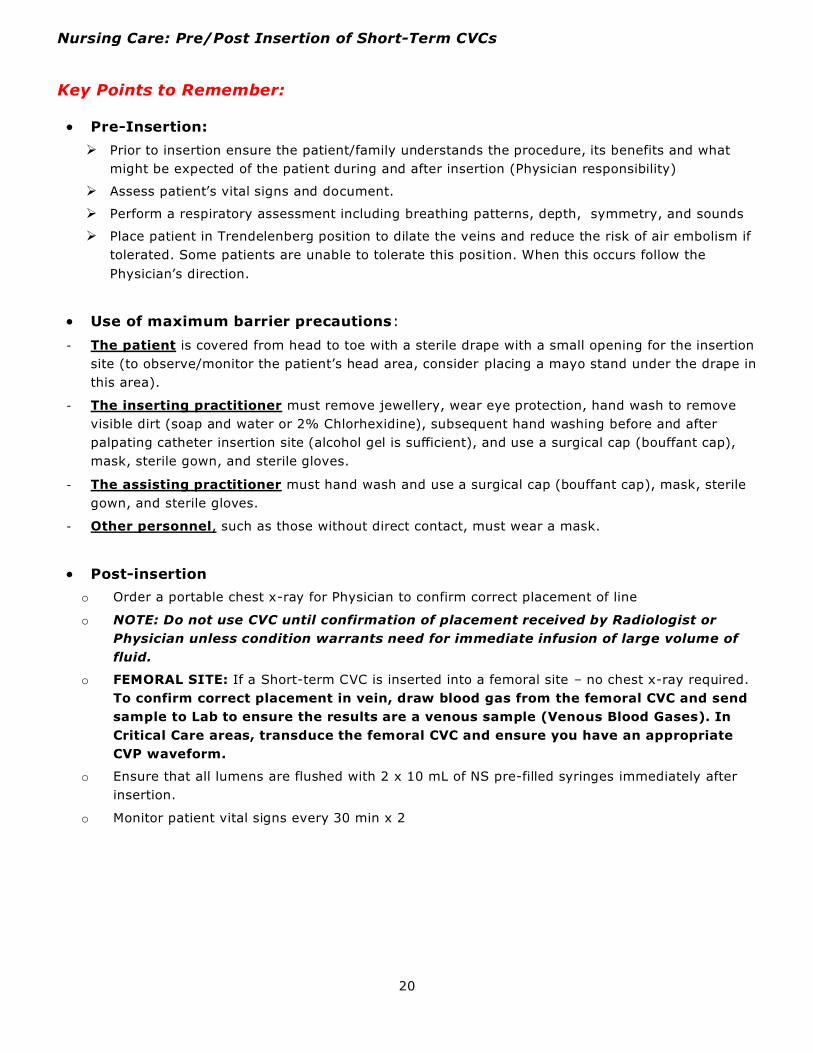
Nursing Care: Pre/Post Insertion of Short-Term CVCs
Key Points to Remember:
Pre-Insertion:
Prior to insertion ensure the patient/family understands the procedure, its benefits and what
might be expected of the patient during and after insertion (Physician responsibility)
Assess patient’s vital signs and document.
Perform a respiratory assessment including breathing patterns, depth, symmetry, and sounds
Place patient in Trendelenberg position to dilate the veins and reduce the risk of air embolism if
tolerated. Some patients are unable to tolerate this position. When this occurs follow the
Physician’s direction.
Use of maximum barrier precautions:
- The patient is covered from head to toe with a sterile drape with a small opening for the insertion
site (to observe/monitor the patient’s head area, consider placing a mayo stand under the drape in
this area).
- The inserting practitioner must remove jewellery, wear eye protection, hand wash to remove
visible dirt (soap and water or 2% Chlorhexidine), subsequent hand washing before and after
palpating catheter insertion site (alcohol gel is sufficient), and use a surgical cap (bouffant cap),
mask, sterile gown, and sterile gloves.
- The assisting practitioner must hand wash and use a surgical cap (bouffant cap), mask, sterile
gown, and sterile gloves.
- Other personnel, such as those without direct contact, must wear a mask.
Post-insertion
o Order a portable chest x-ray for Physician to confirm correct placement of line
o NOTE: Do not use CVC until confirmation of placement received by Radiologist or
Physician unless condition warrants need for immediate infusion of large volume of
fluid.
o FEMORAL SITE: If a Short-term CVC is inserted into a femoral site – no chest x-ray required.
To confirm correct placement in vein, draw blood gas from the femoral CVC and send
sample to Lab to ensure the results are a venous sample (Venous Blood Gases). In
Critical Care areas, transduce the femoral CVC and ensure you have an appropriate
CVP waveform.
o Ensure that all lumens are flushed with 2 x 10 mL of NS pre-filled syringes immediately after
insertion.
o Monitor patient vital signs every 30 min x 2

21
Documentation
o Documentation to be done on the Central Venous Catheter Insertion and Removal Form
(see Appendix C) including:
- Date & time
- RN who assisted with the insertion
- Physician who inserted the line and their initials
- The nature of the insertion
- Type of catheter
- Preparation
- Insertion procedure
- Vein used
- How the catheter was secured
- If a transparent dressing was applied
- Initial complications
- Completion of chest x-ray
- Placement confirmation
o CVC Weekly Maintenance Record (See Appendix D):
- Date routine flushes are due
- Date IV cap and/or tubing changes are due
- Daily need for CVC reviewed
- Patency Assessment
- How much of the catheter is showing above the insertion site (in centimetres)
o Fluid Balance Record:
- Amount of infused solution
- Type of IV solution
o Multi-disciplinary Progress Notes
- Appearance of the entrance site
- Patient tolerance of procedure
- Post-insertion patient assessment

22
23
Test your Learning
a. Short-Term catheters are inserted ___________into a ___________ through the
_____________________.
b. Short-term catheters have the ___________ rate of infection.
c. Short-term catheters are ________ ended.
d. What position is the patient placed in for a short-term catheter insertion?
_____________________________
e. List two responsibilities of the primary nurse post-insertion of a short-term CVC?
f. Assessment is done post-insertion of a short-term CVC Q____min x ____.
g. Post-insertion, check for signs of:
a) _______________
b) _______________
c) _______________
d) _______________

24
Answers
1. directly, vein, skin
2. highest
3. open
4. Trendelenberg
5.
- Order a portable chest x-ray for physician to confirm correct placement of line.
- Ensure that all lumens of a CVC are flushed with 20 mL of NS post-insertion
- Document
- Post-insertion assessment and vital signs
6. Q30min x 2
7.
a) Subcutaneous emphysema
b) Bleeding
c) Air embolus
d) Pneumothorax
Congratulations! You have just completed the second section.
Let’s keep moving…..
25
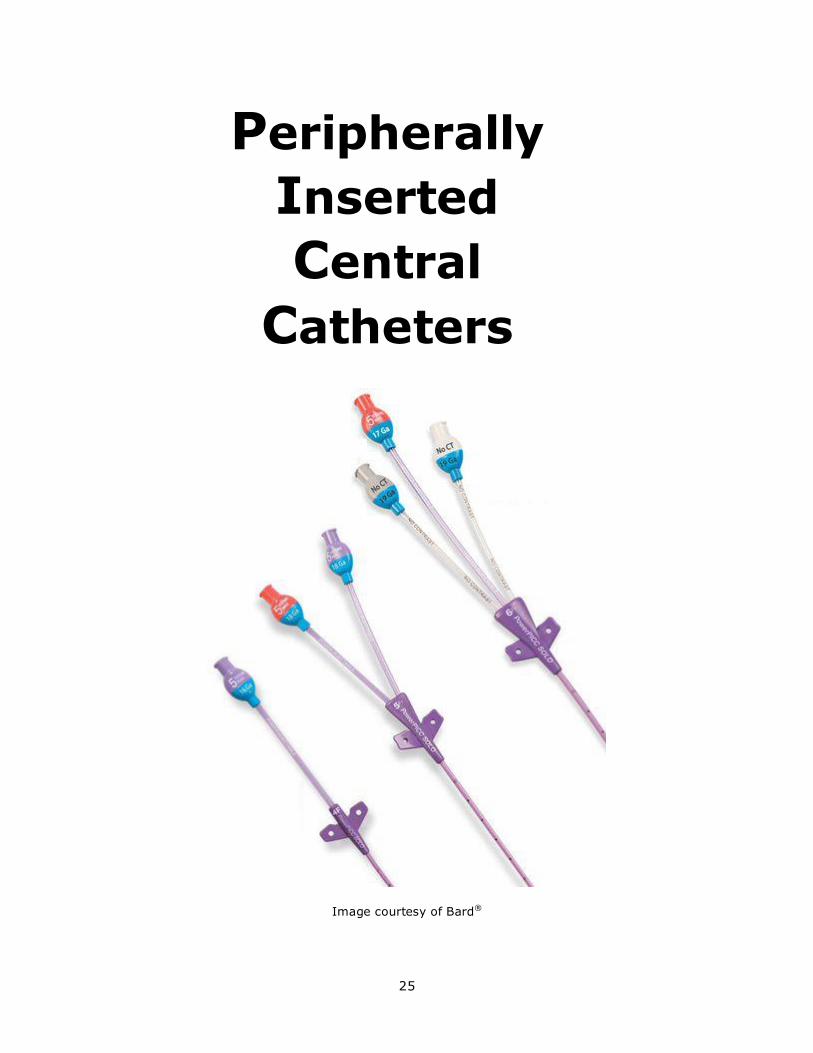
Peripherally
Inserted
Central
Catheters
Image courtesy of Bard®

26
Peripherally Inserted Central Catheter (PICC)
Peripherally Inserted Central Catheter (PICC) – A central venous catheter inserted by a physician or an
RN with advanced training and established competency, into an extremity, typically in the cephalic,
basilic or brachial veins of the upper arm. (Infusion Nurses Society, 2016)
Venous access is obtained by puncturing the brachial, cephalic, or basilic vein just above the
antecubital fossa.
The catheters are approximately 40-60 cm long, but are usually individually sized upon insertion.
PICCs are usually chosen for patients requiring IV therapy for more than six days and up to one year,
although a PICC may stay in longer than a year as long as it is still required, functional, and not a
source of sepsis.
Figure 11 – Image courtesy of Bard®
27
USES ADVANTAGES DISADVANTAGES
Peripherally
Inserted
Central
Catheter
• Intended for
days to a year of
IV access
• Peripheral
insertion may be
needed for
patients with
chest injuries,
radical neck
dissection or
radiation
therapy to chest.
• PICCs are inserted by Advanced
Competency Assessed RNs (i.e. PICC
Nurses)
• Can remain in place
for several weeks to a year or more
• Easily removed by a Competency
Assessed RN
PICCs eliminate the risks associated
with neck, chest & femoral insertion
Low infection rate
External portion can sometimes be
repaired if damaged
• Requires a dressing
& frequent
assessments
• External device
• Not ideal for rapid
infusions
• Not recommended
route for some
medications (e.g.
phenytoin). Check
Parenteral Drug
Therapy Manual
prior to use
Nursing Care: Pre/Post Insertion of PICCs (For Removal – See Removal of Short-Term CVCs and PICCs pg. 73)
Pre-Insertion
Ensure patient/family understands reasons for insertion, benefits and risk of procedure.
If possible, provide an opportunity for the patient to see pictures, and handle a demo catheter.
Administer a sedative prn as ordered prior to the pre-scheduled procedure time
Ensure the patient is in the department where the PICC is to be inserted 15 minutes prior to
scheduled time (if applicable)
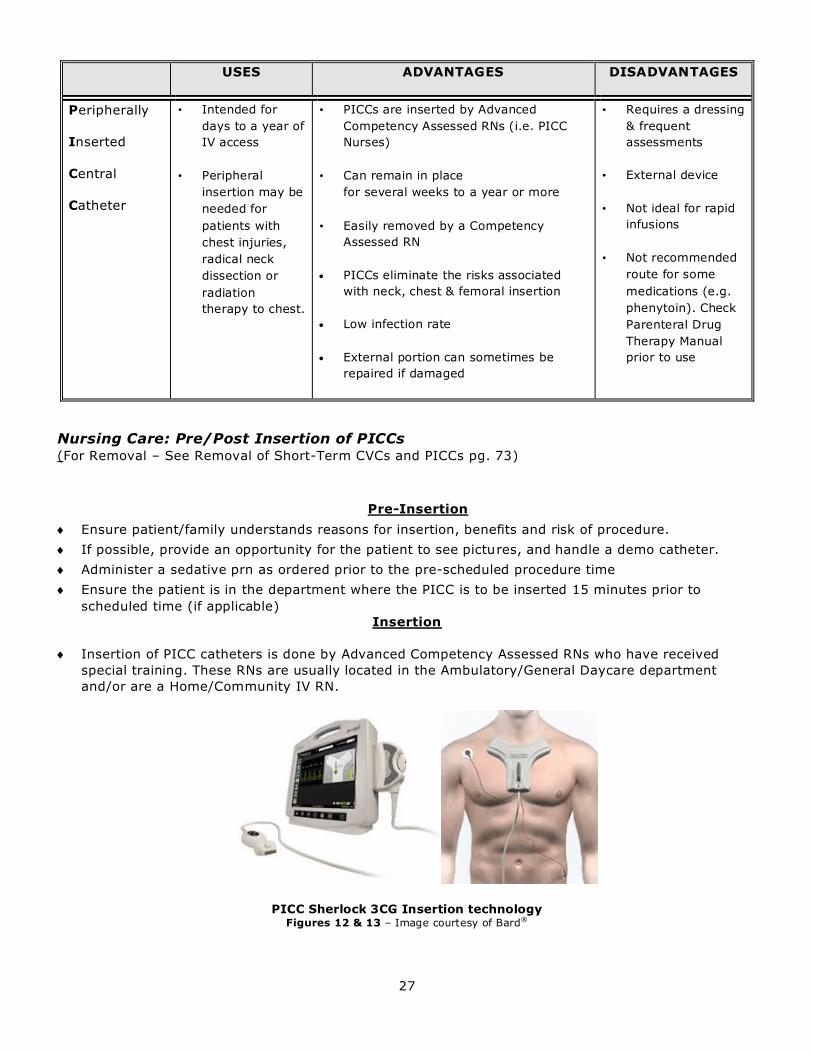
Insertion
Insertion of PICC catheters is done by Advanced Competency Assessed RNs who have received
special training. These RNs are usually located in the Ambulatory/General Daycare department
and/or are a Home/Community IV RN.
PICC Sherlock 3CG Insertion technology Figures 12 & 13 – Image courtesy of Bard®

28
Post-Insertion
Vital signs Q1H: BP, HR and RR
Respiratory assessment including: breathing patterns, depth, symmetry and breath sounds
Check for signs of:
o Subcutaneous emphysema
o Bleeding
o Air embolus
o Pneumothorax
Ventilated patients:
o Ensure ventilator system pressures are unchanged
Cardiac monitored patients:
o Observe for the occurrence of cardiac dysrhythmias
Prior to using the PICC catheter, ensure placement has been confirmed by PICC RN by ECG or by
Chest X-Ray
May apply warm compress to arm above PICC venipuncture site QID x 20 minutes for 3 days PRN
(to prevent mechanical phlebitis)
Do not take blood pressures or venipuncture the arm with a PICC inserted.
Monitor for swelling, tenderness
Monitor catheter patency and rate of IV infusion
PICC Nurses will be also applying a topical hemostasis agent
(StatSeal™) on select patients who experience difficulties with
sanguinous drainage post PICC insertion.
StatSeal® quickly forms a seal to
stop the flow of blood and exudates
and help protect the site from
contamination. The mechanism of
action is a simultaneous two-step action:
The polymer rapidly dehydrates the blood, stacking up the solid blood components.
The potassium ferrate agglomerates the blood solids creating a physical barrier.
Beneath the seal, the blood clots naturally and creates a seal that stops bleeding and oozing:
Seal forms instantly
Does not rely on the body’s clotting cascade
Works with any protein-filled fluid
Minimizes dressing changes
Seals sites from insertion to 7 days, virtually eliminating 24 or 48 hour
dressing changes
Helps minimize unplanned dressing changes due to bleeding and oozing
Helps follow CDC guidelines by keeping sites dry and intact
Helps improve outcomes for patients and staff
Less exposure of site - Improves delivery of atraumatic care
Saves nursing time and costs
Figure 14 – Image courtesy of CardioMed™
and BioLife™
Figure 25 – Image courtesy of
CardioMed™ and BioLife™
Figure 36 – Image courtesy
of CardioMed™ and BioLife™

29
Test Your Learning
1. PICCs should be placed when a therapy will be longer
than__________________________ (time period).
2. The tip of a PICC rests in the:
a) radial artery
b) jugular vein
c) superior vena cava at the junction of the right atrium
d) femoral artery at the junction of the right atrium
3. List 2 advantages of PICC lines
a) _________________________
b) _________________________
4.) List 2 disadvantages of PICC lines
a) ________________________
b) ________________________
5. PICC catheters are approximately ____________ cm in length.
6. Pre-insertion, administer __________ as ordered.
7. Post –insertion prior to using the PICC, ensure placement has been done to confirm by the
_____________ or ____________.
8. Apply warm compresses to arm above PICC site Q______ X ______minutes for 3 days PRN.
9. List two things you should not take from the arm where the PICC is inserted:
a)____________
b)____________

30
Answers
1. six days
2. c
3. - PICCs are inserted by PICC RN
- Can remain in place for up to a year
- easily removed by the Competency Assessed RN
- PICCs eliminate the risks associated with neck, chest & femoral insertion
- lower rates of infection
- the external portion can sometimes be repaired if damaged.
4. Requires a dressing & frequent assessments, external device, some PICCs (small gauge), not
recommended for blood sampling, difficult for self-care
5. 40-60 cm long
6. sedative
7. PICC nurse or chest x-ray
8. QID X 20 minutes
9 a. blood pressure b. venipuncture
Congratulations! You have just completed the Third
section.
Let’s keep moving…..
31
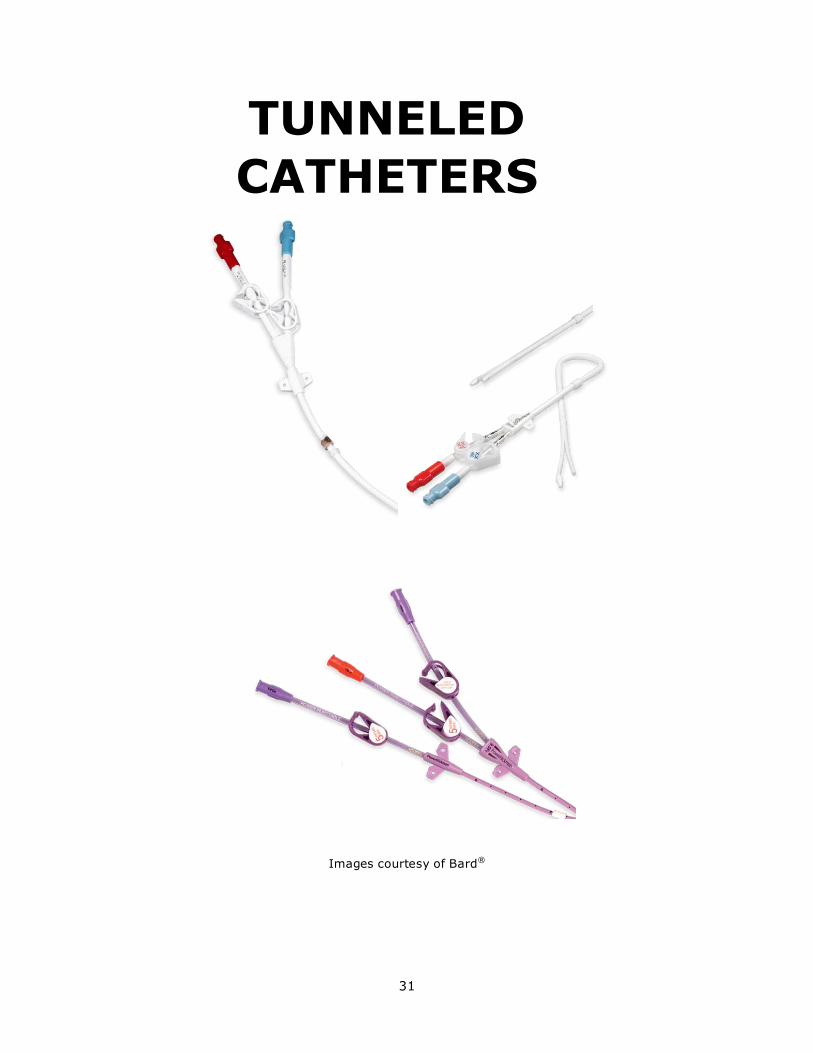
TUNNELED
CATHETERS
Images courtesy of Bard®

32
Tunneled Catheters
Tunneled CVC – A long-term CVC whose proximal end is tunneled subcutaneously from the insertion
site and brought out through the skin at an exit site. (Infusion Nurses Society, 2016)
Most tunneled catheters have one or two cuffs, one of which is a dacron cuff on the tunneled
portion of the catheter. and sit 3 - 5 inches above the skin exit site. The cuffs facilitate anchoring of
the catheter through granulation with the tissue and acts as a barrier to infection.
Tunneled catheters may be single, double, or triple lumen.
Examples of Tunneled Catheters are Hickmans®, Broviac® and permanent hemodialysis catheters
(e.g. Perm-Cath®, Hemosplit®, or Equistream®).
Figures 17 & 18 – Images courtesy of Bard®
CUFFS

33
USES ADVANTAGES DISADVANTAGES
Tunneled
Catheters
Used for long-term
intermittent or
continuous access for:
• Medication
administration
(including vesicants)
• Parenteral nutrition
• Blood/blood product
administration and
sampling
• Hemodialysis
• Can be left in place
indefinitely (if no
infection, blockage or
thrombosis)
• External portion of
some types may be
repaired
• Self-care by patient
• Once site healed, no
dressing is needed at
home
• Inserted in the OR or
Medical Imaging
under Fluoroscopy
• External device
• Physician must
remove
Nursing Care: Pre/Post Insertion of Tunneled Catheters Tunneled catheters may be inserted in the Operating Room under a local anaesthetic or in Radiology
under fluoroscopy.
The Nurse’s role in the insertion of a tunneled catheter involves pre-insertion teaching, assessment,
and post-operative site care.
PRE-INSERTION
Ensure patient/family understands reasons for insertion, benefits and risk of procedure.
If possible, provide an opportunity for the patient to see pictures, and handle a demo catheter.
Discuss feelings about potential body image changes (external device).
Perform baseline vital sign assessment.
INSERTION PROCEDURE
This procedure is performed in the Operating Room or Interventional Radiology under sterile
technique
The patient is placed in Trendelenberg position to dilate the veins and reduce the risk of air
embolism
The surgeon accesses the subclavian or internal jugular vein using a percutaneous approach and
inserts the central venous catheter over a guide wire. Once the catheter is placed in the
appropriate vein and the guide wire has been removed, the surgeon selects the exit site. The
surgeon then tunnels the catheter subcutaneously away from the insertion site. Catheters are
typically tunneled for several inches (4-6”) from the location where they enter the vein and usually
exit the body midway between the nipple and the sternum.

34
POST INSERTION OF TUNNELED CATHETERS
Post-Insertion and q30 minutes x 2:
Vital signs: BP, HR and RR
Respiratory assessment including: breathing patterns, depth, symmetry and breath sounds
Check for signs of:
o Subcutaneous emphysema
o Bleeding
o Air embolus
o Pneumothorax
Ventilated patients:
o Ensure ventilator system pressures are unchanged
Cardiac monitored patients:
o Observe for the occurrence of cardiac dysrhythmias
Q1H:
Monitor site patency and rate of IV infusion
Sutures are usually removed from the entrance site after seven to ten days, exit site after 14
days, or as per Physician’s Order.
DRESSING: Newly inserted tunneled CVCs have 2 insertion sites. The upper insertion site will have
sutures and needs to have a TSM securement dressing applied until it is well-healed. Sutures are
removed may be removed when the upper and lower incisions are well-healed (usually 7-10 days). The
lower insertion site which the CVC comes out of needs to have a TSM securement dressing to keep the
line from migrating until the insertion site is well-healed and the skin growth into the Dacron cuff holds
it firmly insitu (i.e. 4 – 6 weeks). If the insertion site shows signs of infection (e.g. redness, warm to
touch, purulent discharge, etc.) consult with a physician.
Tunneled CVCs can be left open to the air (with no dressing) after the insertion sites are well healed in
Outpatient and Community settings. (Center for Disease Control and Prevention, 2011) (Olsen, Hanson, Gilpin,
& Heffner, 2004)
35
Test Your Learning
1. Tunneled catheters may only be single or double lumen. T or F
2. What are the 3 types of tunneled catheters?
_________________________________________
_________________________________________
_________________________________________
3. List some uses for tunneled catheters
_________________________________________
_________________________________________
_________________________________________
4. What position should the patient be placed in for insertion and why?
____________________________________________________
5. List possible post insertion complications.
_________________________________
_________________________________
_________________________________
6. Once the insertion site is healed, the dressing and sutures are removed and the site is left
uncovered. T or F

36
Answers
1. F, single, double, or triple
2. Hickmans®, Broviac® and permanent hemodialysis catheters (e.g. Perm-Cath®,
Hemosplit®, or Equistream®).
3. Used for long-term intermittent or continuous access for medication administration, parenteral
nutrition, blood/blood product administration and sampling, hemodialysis.
4. The patient is placed in Trendelenberg position to dilate the veins and to reduce the risk of air
embolism.
5. Subcutaneous emphysema, bleeding, air embolus, pneumothorax
6. T
Congratulations! You have just completed the Fourth section.
Let’s keep moving…..

37
Implantable
Venous
Access
Device
(IVAD)
Images courtesy of Bard®

38
Implantable Venous Access Device (IVAD)
IVADs are long-term (months to years) single or dual
chamber “port” surgically implanted in the subcutaneous
tissue, usually in the upper chest.
Each chamber must be managed as a separate lumen in
IVADs with more than 1 septum.
A non-coring point needle is required to access the device.
(see Figure 15)
When de-accessing an IVAD, a 5 mL of heparin 10 units/mL (dose
to be administered = 30 to 50 units) pre-filled syringe is used.
The surgical technique to place an IVAD is similar to that used
to place a tunneled catheter. This procedure is done in the Operating Room or Interventional
Radiology.
IVAD Components
Portal body - May be stainless steel, titanium, or plastic. May be single or double port.
Septum - Self sealing silicone septum which may stay in as long as the device is required, functional,
and is not a source of sepsis.
Reservoir - Inside the port. Volume (of reservoir) is dependant on the size of the port and ranges from
0.2-1.5mL.
Catheter - Tip in superior vena cava. Radiopaque, may be open-ended or close-ended (valved)
Figures 20 & 21 – Images courtesy of Bard®
Figure 19 – Image courtesy of Bard®

39
USES ADVANTAGES DISADVANTAGES
Implantable
Venous
Access
Devices
Used for long-term
intermittent or
continuous access for:
• Medication
administration
(including
vesicants)
• Parenteral nutrition
• Blood/blood
product
administration and
sampling
• Internal device, no dressing or
site care
• Can be permanent
• Unrestricted activity
• Decreased risk of infection
• No external components to
break
• Less body image impact
• May be used as long as the
device is required, functional,
and is not a source of sepsis.
• Needle access
is required
• Surgical
procedure
required to
insert/remove
Nursing Care: Pre/Post Insertion Pre-Insertion
The nurse’s role in pre-insertion care includes patient education:
Provide information about the surgical insertion of an IVAD to the patient and family. This is a
shared responsibility between the Physician and the RN.
Pamphlets, videos and/or demo catheters may be available at some sites for patient teaching.
Female patients are sent with their bras to the OR/Medical Imaging to aid the surgeon with site
selection.
Advise the patient to carry identification of the port model and composition with them at all
times. The implantable ports can cause minor distortion of the MRI and other x-ray procedures.
Insertion
IVADs are inserted in the OR/MI under a local anesthetic and sterile technique.
A cut down method is used and the catheter is introduced through a venotomy into the subclavian
or internal jugular vein.
The catheter is then positioned with the distal end positioned at the junction of the superior vena
cava and the right atrium.
The portal body is placed over a bony prominence (e.g. ribcage), to ensure easy palpation.
Appropriate site selection is essential.
Once the site is selected, the portal body may be sutured to the fascia on all 4 sides with non-
absorbable sutures to prevent it from twisting or moving. Most are now placed in a small
subcutaneous pocket that does not require suturing.
The port is flushed in the OR/MI. First access usually occurs about one week post-insertion.
The entire procedure takes 30-60 minutes.

40
Post-Insertion
Post-Insertion and q30 minutes x 2:
Vital signs BP, HR and RR
Respiratory assessment including: breathing patterns, depth, symmetry and breath sounds
Check for signs of:
o Subcutaneous emphysema
o Bleeding
o Air embolus
o Pneumothorax
Ventilated patients:
Ensure ventilator system pressures are unchanged
Cardiac monitored patients:
Observe for the occurrence of cardiac dysrhythmias
Q1H:
Monitor site patency and rate of IV infusion
The incision dressing may be removed when there is no evidence of drainage (unless
otherwise directed by physician)
Once healed if accessed, a transparent dressing is applied to the site and then the IVAD is
treated as any other CVC. When not accessed, no dressing is required.
Observe and document site condition including:
Wound hematoma, swelling, infection, device rotation and skin necrosis
Slight edema and tenderness around the port implantation site is normal for the first few
days post operatively and does not prevent use unless it is excessive
Most Physicians prefer to wait a few days before accessing, although this is not always
possible if no other access routes are available
“Twiddler’s Syndrome” occurs when a port is dislodged within the subcutaneous
pocket because of trauma to the site or manipulation (twiddling) of the port by the
patient. When this occurs, the port is noted to move easily under the skin. Resistance
may also be noted when attempting to infuse and swelling may occur at the site. If this
occurs, stop using the IVAD and notify the Physician to re-stabilize or re-insert the IVAD.

41
Test your Learning
1. IVADs are surgically placed in the ____________, usually in the ______________.
2. What type of needle is used to access the device? _______________
3. Each chamber must be managed separately. T or F
4. Name the four components of the IVAD.
1)______________________
2)______________________
3)______________________
4)______________________
5. List two advantages of using IVADs.
1)______________________
2)______________________
6. List two disadvantages of using IVADs.
1)______________________
2)______________________
7. What is the role of the nurse for pre-insertion of an IVAD?
___________________________________________________________________________________________
___________________________________________________________
8. Post insertion assessment of IVAD is completed q ___ minutes x _____.
9. Monitor catheter patency and rate of IV infusion q ___.
10. Heparin is only used when _________________ an IVAD.

42
Answers:
1. subcutaneous tissue, upper chest.
2. Non-coring needle
3. T
4. Portal body, Septum, Reservoir, Catheter
5. Internal device, no dressing or site care, can be permanent, unrestricted activity, decreased risk of infection, no
external components to break, no body image impact, may be used as long as the device is required, functional,
and is not a source of sepsis.
6. Needle access is required, surgical procedure required to insert/remove
7. Patient education
8. q 30 minutes, x 2
9. q 1 hour
10. De-accessing
Congratulations! You have just completed the fifth section.
Let’s keep moving…..
Remember to replace all caps that come with a non-coring needle set with
neutral displacement caps to prevent occlusions!
Figure 22 – Image courtesy P. Hignell©

43
Power-Injection
Capable CVCs
Image courtesy of Teleflex®
Images courtesy of Bard®
44
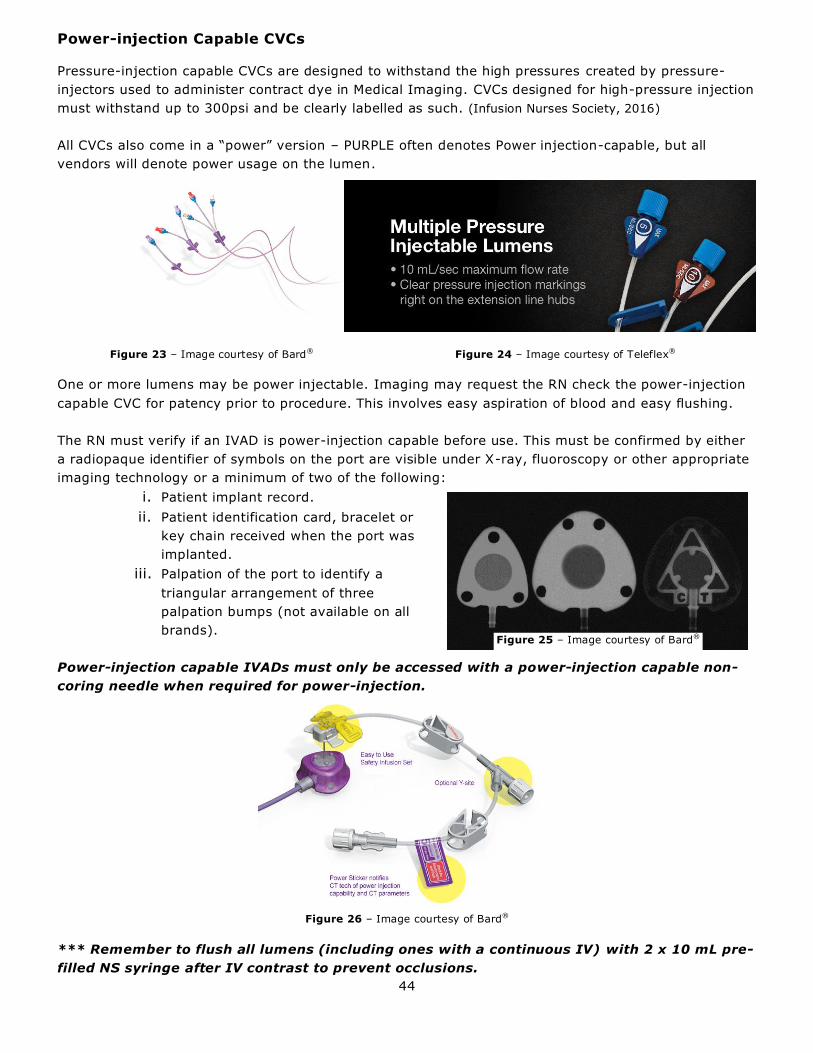
Power-injection Capable CVCs
Pressure-injection capable CVCs are designed to withstand the high pressures created by pressure-
injectors used to administer contract dye in Medical Imaging. CVCs designed for high-pressure injection
must withstand up to 300psi and be clearly labelled as such. (Infusion Nurses Society, 2016)
All CVCs also come in a “power” version – PURPLE often denotes Power injection-capable, but all
vendors will denote power usage on the lumen.
Figure 23 – Image courtesy of Bard® Figure 24 – Image courtesy of Teleflex®
One or more lumens may be power injectable. Imaging may request the RN check the power-injection
capable CVC for patency prior to procedure. This involves easy aspiration of blood and easy flushing.
The RN must verify if an IVAD is power-injection capable before use. This must be confirmed by either
a radiopaque identifier of symbols on the port are visible under X-ray, fluoroscopy or other appropriate
imaging technology or a minimum of two of the following:
i. Patient implant record.
ii. Patient identification card, bracelet or
key chain received when the port was
implanted.
iii. Palpation of the port to identify a
triangular arrangement of three
palpation bumps (not available on all
brands).
Power-injection capable IVADs must only be accessed with a power-injection capable non-
coring needle when required for power-injection.
Figure 26 – Image courtesy of Bard®
*** Remember to flush all lumens (including ones with a continuous IV) with 2 x 10 mL pre-
filled NS syringe after IV contrast to prevent occlusions.
Figure 25 – Image courtesy of Bard®

45
Complications
Associated
With
Central Venous
Catheters
Infection Occlusion Air Embolism
Catheter Related Thrombus
Infiltration/ Extravasation
Catheter Embolism
Phlebitis/ Thrombophelbitis
Malposition Broken/ Damaged

46
COMPLICATIONS ASSOCIATED WITH CENTRAL VENOUS CATHETERS
Infection
Central Line Associated Bloodstream Infections (CLA-BSI) are a preventable nosocomial infection and
adverse event. (Stevens & Schulman, 2012) These infections increase hospital length of stay and facility
costs.
Central Line Associated Bloodstream Infection (CLA-BSI) – This term is specific to CVC
associated bloodstream infections. A CLA-BSI is a bacteremia or fungemia in a patient with a CVC
and no apparent source for the bloodstream infection other than the CVC. There must be at least one
positive blood culture (obtained from a peripheral vein) in addition to the clinical manifestations of
infection (i.e. fever, chills, and/or hypotension) AND had a CVC in use anytime during the 48-hour
period before development of the BSI.
A definitive diagnosis of CLA-BSI requires that the same organism grow from at least 1 percutaneous
blood culture and from a culture of the CVC tip, OR that 2 types of blood samples be drawn (one from
each CVC lumen and the other from a peripheral vein) that, when cultured, meet CLA-BSI criteria for
quantitative blood cultures. Central Line Associated Bloodstream Infections (CLA-BSI) are common,
costly, and potentially lethal. Clinical Practice Guidelines and interventions aimed at decreasing the
infection rate are needed to reduce the mortality, morbidity, and increased patient length of stay, and
increased costs of this hospital-acquired infection. (Center for Disease Control and Prevention, 2011)
(Chittick, et al., 2013) (Chopra, O'Horo, Rogers, Maki, & Safdar, 2013) (Fraser Health Authority, 2009) (Infusion
Nurses Society, 2016) (Mermal, et al., 2009) (O'Grady, et al., 2011) (Safer Healthcare Now, 2012) (Provonost, et
al., 2006)
Infective organisms may access the vascular access device surface by either:
- Invasion of the percutaneous tract
- Contamination of the catheter hub
- Seeding from a remote source of localized infection
(Association for Professionals in Infection Control and Epidemiology, 2009)
Increased CLA-BSI rates in adults are associated with CVCs placed in the jugular and femoral vein
(Center for Disease Control and Prevention, 2011) (Doellman, 2011) (Safer Healthcare Now, 2012) and PICCS in
an inpatient setting (Chopra, O'Horo, Rogers, Maki, & Safdar, 2013).
The nurse and/or IV Therapy Practitioner should assess patients for suspected infusion related and CLA-
BSIs and document signs and symptoms, interventions implemented and patient response to treatment
in the patient’s permanent health record and the Patient Safety Learning System (PSLS). (Infusion
Nurses Society, 2016)
Signs and symptoms of CLA-BSI include:
- Erythema, edema, induration, or drainage at the vascular device insertion site
- Elevated body temperature

47
Purulent drainage from the catheter-skin junction of a CVC should be collected using the Levine
Technique (cleanse site with normal saline prior to collecting swab for culture and twirl the end of the
cotton-tipped applicator on a 1-cm2 area of the wound bed with enough pressure to cause minimal
bleeding). Rationale: Obtaining the culture from properly cleaned and prepared tissue avoids obtaining
only a culture of surface contamination. (Spear, 2014)
Routine culturing of all CVC tips upon removal is not recommended. Catheter colonization may be
detected, but does not indicate the presence of a bloodstream infection. (Infusion Nurses Society, 2016)
Immediate removal of a functioning CVC is not recommended solely based on temperature elevation.
Clinical findings, such as temperature elevation with or without chills or inflammation and purulence at
the insertion site, are unreliable indicators of bloodstream infection. (Infusion Nurses Society, 2016)
Prior to insertion of a new CVC in a patient with documented CLA-BSI (i.e. positive cultures), it is
recommended the patient receive treatment for the CLA-BSI for 48-72 hours. A negative blood culture
is recommended before a new CVAD is inserted. Rationale: If a new CVC is placed with a bacteremia
present, the device could become seeded and result in continuing infection. Consideration should be
given to the risk versus benefit to the patient when deciding to replace the CVC prior to obtaining
negative cultures. (Daneman, Downing, & Zagorski, 2012)
CVC salvage (avoiding removal of CVC in presence of infection) should be a collaborative decision with
the physician, nurse, and patient based on:
a) The type of CVC (inserted vs surgically implanted)
b) Difficulty with insertion
c) Presence of bleeding disorders
d) CLA-BSI infecting organisms confirmed by at least 2 blood cultures
e) The presence of other complicating conditions including, but not limited to, severe sepsis,
suppurative thrombophlebitis, endocarditis, or the presence of vascular hardware, such as a
pacemaker or implanted defibrillator.
Infection of a subcutaneous tunnel or IVAD pocket requires removal of the CVC; however,
uncomplicated exit-site infection without systemic infection, positive blood cultures, or purulence may
be treated with topical antimicrobial ointment as indicated by culture and sensitivity results. If an IVAD
is removed for suspected infection, the port body should be sent for culture of the reservoir contents as
well as the catheter tip. (Infusion Nurses Society, 2016)
Implementations of “Bundles” are associated w ith decreased infection rates. Bundles are a group of
evidence-based interventions that, when implemented together, result in better outcomes than when
implemented individually. Components of these bundles may include (but are not limited to):
a) Hand hygiene
b) Maximal barrier precautions during CVC insertion
c) Chlorhexidine skin asepsis
d) Optimal catheter type and site selection
e) Daily review of CVC necessity
f) Aseptic lumen access
g) Routine catheter and tubing site care
(Center for Disease Control and Prevention, 2011) (Pennsylvavia Patient Safety Authority, 2007) (Royer,
2010) (Safer Healthcare Now, 2012)

48

49
Air Embolism
Air embolism is the presence of air in the vascular system. (Infusion Nurses Society, 2016) A venous air
embolism occurs when air is introduced into the venous system and travels to the right ventricle and/or
pulmonary circulation. An arterial air embolism results from air entry into the arterial system and can
produce ischemia of and organ with poor collateral circulation. (Broadhurst, 2013, p. 17) Air embolism is
reported to occur more frequently during catheter removal than during insertion. (Truscott, 2013)
The minimum amount of air that is lethal to humans is not known, however, the risks from smaller
amounts increase with a device closer to the central vasculature (CVC) or with pediatric and neonatal
patients, particularly in presence of a patent foramen ovale. (Cook, 2013)
The introduction of microbubbles into the vascular system is also related to the development of an air
embolism and may go unnoticed. Cardiopulmonary bypass, hemodialysis, mechanical heart valves,
major surgeries, warming of cold infusates, and high IV infusion flow rates during trauma resuscitation
can produce large amounts of microbubbles. (Broadhurst, 2013) (Cook, 2013)
Interventions to prevent air embolism include:
1. Minimize CVC manipulations.
2. Remove all air from syringes, IV administration sets, needleless connectors, stopcocks, and all
other devices added to the CVC.
3. Trace all IV lines from the catheter hub to the IV fluid container to prevent misconnections.
4. Remove air bubbles detected during an IV infusion. Infrequent tiny pinhead bubbles, even
though not desirable, can be left but should be monitored.
5. Never use scissors near a CVC to prevent accidental severing of the catheter.
6. Carefully fill and prime IV administration sets and filters and ensure vented tubing in clamped
off before the container is completely empty.
7. Use IV infusion pumps with air sensing technology for IV fluid and medication infusions.
8. Place patient in trendelenberg position during CVC insertion at axillo-subclavian or jugular sites.
9. During CVC insertion stop ventilation during insertion of the needle and increase right atrial
pressure during tunneling of the catheter
10.Have patient perform Valsalva maneuver during insertion of dilator unless they have a condition
which may contradict it (e.g. aortic stenosis, recent MI, glaucoma, and retinopathy).
11.Ensure a catheter clamp is present and clamped before changing administration sets or
needleless connectors on open-ended CVCs.
12.During CVC removal, ensure the catheter exit site is lower than the height of the patient’s
heart.
13.Apply a sterile occlusive petroleum based dressing when removing a CVC and cover that with a
TSM dressing. Leave dressing in place for at least 24 hours.
14.Instruct the patient to lie flat for 30 minutes post CVC removal.
15.Instruct patients and caregivers to not disconnect and reconnect any IV administration sets or
connectors from the catheter hub to properly prime tubing, to check connections frequently,
how to prevent displacement/disconnection, and actions to take in case of CVC displacement or
damage. (Broadhurst, 2013) (Cook, 2013) (Infusion Nurses Society, 2016)

50
Risks for air embolism include:
1. Failure to occlude the needle hub and/or catheter during insertion or removal
2. An improperly primed IV administration set
3. An incorrect technique when administering drugs via the IV route
4. Inadvertent infusions of air
5. An accidental disconnection at the catheter hub, connector, or IV administration set
6. A stopcock placed in the wrong position
7. A ruptured catheter
8. Poor technique during cap changes
9. Poor technique via the track from the removal of a CVC
10.The use of vented IV administration sets
11.IV fluid infusions that are completed or rapid infusion through an air-filled drip chamber with an
IV administration set that is unclamped
12.Passive air entry via a CVC during the inspiratory phase of spontaneous respiratory
Sign and symptoms of air embolism:
1. Sudden onset of dyspnea
2. Continued coughing
3. Breathlessness
4. Agitation or irritability, often expressed as a feeling of impending doom
5. Shoulder and chest pain
6. Lightheadedness
7. Hypotension
8. Jugular venous distention
9. Tachyarrhythmias
10.Wheezing
11.Tachypnea
12.Altered mental status
13.Symptoms that emulate stroke including altered speech, changes in facial appearance,
numbness and paralysis (Cook, 2013) (Infusion Nurses Society, 2016)
Diagnosis may not be straightforward but prompt diagnosis and treatment will decrease potential
mortality and morbidity. Radiological techniques including transthoracic echocardiography and
precordial ultrasonography have been used to detect air embolisms. (Cook, 2013)
Treatment should begin immediately even if an air embolism is only suspected to prevent further air
from entering the vasculature:
1. Close, fold, or clamp the existing catheter to occlude entry of passive air.
2. Occlude the puncture site of a catheter that had been removed.
3. Place the patient in Trendelenberg left lateral decubitus position (left side, head flat, feet up,
right side uppermost) if not contraindicated by other conditions such as increased intracranial
pressure or respiratory illness. The goal of this positioning is to trap the air in the lower portion
of the right ventricle and prevent it from travelling to the pulmonary arteries.
4. Administer oxygen at 100%
5. If possible, attempt to aspirate air from catheter.
6. Monitor vital signs.
7. Notify physician.
(Broadhurst, 2013) (Cook, 2013) (Infusion Nurses Society, 2016) (Wilkins & Unverdorben, 2012)

51
Catheter Embolism
Catheter embolism is the result of catheter damage or rupture, resulting in the breaking off of a portion
of the CVC into the bloodstream. (Canadian Vascular Access Association, 2013) See also CVC Occlusion
Management Algorithm.
The most frequent causes for catheter embolism are pinch-off syndrome, damage during catheter
exchange, separation of the catheter from an implanted port body, and fracture of a distal portion of an
IVAD. (Infusion Nurses Society, 2016)
Interventions to prevent catheter embolism include (Infusion Nurses Society, 2016):
1. Do not withdraw a catheter through a needle during insertion.
2. Never use vascular access devices for power-injection that are not rated for this purpose.
3. The size of the flush syringe should be in accordance with the type of vascular access device
and its intended use.
4. Be aware of the early signs of pinch-off syndrome in subclavian CVC insertion sites (when the
subclavian vein is compressed between the clavicle and the first rib). Up to 40% of these cases
may develop catheter fragmentation and embolization of catheter fragments into the pulmonary
artery or heart. Pinch-off syndrome may be asymptomatic or may present as the intermittent or
constant inability to aspirate blood from a CVC. Occasionally it may present as chest pain or
arrhythmias during infusion procedures or if the patient has to maintain an unnatural position
(e.g. arm raised) in order to infuse a solution or medication. To identify pinch-off syndrome, a
specific CXR is required (with patient arms kept down at sides). (Canadian Vascular Access
Association, 2013) (Infusion Nurses Society, 2016)
Catheter dysfunction, such as the inability to aspirate blood or fluid with localized pain and/or
subcutaneous swelling, may be a precursor to catheter embolism. Leaking at the catheter insertion may
indicate catheter rupture. CVCs which exhibit these signs should be evaluated further for integrity
before use (e.g. CXR for fragmentation or pinch-off syndrome). (Infusion Nurses Society, 2016)
Catheter embolism should be suspected when the patient exhibits symptoms such as palpitations,
arrhythmias, dyspnea, cough, or thoracic pain not associated with patient’s diagnosis or comorbidities.
(Infusion Nurses Society, 2016)
Upon removal, inspect all catheters for damage and possible fragmentation. When vascular access
device removal is difficult or if damage to the catheter is seen:
1. Carefully assess the patient for signs and symptoms of catheter fragmentation and;
2. Save catheter and report via PSLS and BCCSS Product Concern Form.

52
Pulmonary Embolism
Pulmonary Embolism occurs when a substance (usually a blood clot) becomes free and circulates to the
pulmonary artery causing occlusion. Even small recurrent emboli may cause pulmonary hypertension
and right heart failure.
Risk Factors:
Irrigation of a clogged IV
Debris in IV solution (some may require filter -refer to PDTM)
Debris caused by incompletely dissolved, reconstituted drugs
Unfiltered blood or plasma
Prevention:
NEVER irrigate the catheter if the IV is not
flowing
Use in-line filters where applicable (see PDTM)
Thoroughly inspect medication and solution
containers for particulate matter prior to use
Signs and Symptoms:
Apprehension
Pleuritic discomfort
Dyspnea, tachypnea
Cyanosis
Cough, unexplained
Hemoptysis
Diaphoresis
Tachycardia
Low-grade fever
Chest pain radiating to neck and shoulders
Treatment:
Place patient on strict bed rest in semi-
Fowler’s position
Notify physician immediately
Monitor vital signs
Administer Oxygen
Assess CVC for patency (for emergency drugs)
Document in patient’s permanent health record
Figure 27 – Image courtesy Natalie Design Co.©

53
Catheter-Related Thrombosis (CRT) or Catheter-Associated Venous Thrombus
This term refers to a thrombus that has attached to the CVC and has also adhered to the vessel wall.
CRT is associated with CLA-BSI. CRT increases the risk and incidence of CLA-BSI. Conversely, CLA-BSI
also increases the risk and incidence of CRT. (Canadian Vascular Access Association, 2013) Any catheter
inserted into the vasculature has the potential to cause a venous thrombosis (Trerotola, et al., 2010).
PICCs are especially prone to Upper Extremity Deep Vein Thrombosis (UEDVT).
CRT is associated with CR-BSI. CRT increases the risk and incidence of CR-BSI. Conversely, CR-BSI
also increases the risk and incidence of CRT. (Canadian Vascular Access Association, 2013)
Risk factors for CRT include:
1. Sub-optimal CVC tip placement
2. Difficult, previous, or traumatic insertions
3. PICCs with multiple lumens or larger gauges or inserted in the ACF
4. Children and adults over 60 years of age
5. Chronic illnesses such as lupus, irritable bowel syndrome, or end-stage renal failure
6. History of previous DVT (Yacopetti, 2008)
Signs and symptoms are related to the obstruction of venous blood flow and include:
1. Pain in the extremity, shoulder, neck, or chest
2. Edema in the extremity, shoulder, neck, or chest
3. Engorged peripheral veins in the shoulder, neck, or chest wall (Infusion Nurses Society, 2016)
(Yacopetti, 2008)
4. Children and adults over 60 years of age
5. Chronic illnesses such as lupus, irritable bowel syndrome, or end-stage renal failure
6. History of previous DVT (Yacopetti, 2008)
CVC flushing and locking procedures have no effect on CRT as the solutions and technique are directed
at the internal lumen of the CVC rather than the vein lumen. (Infusion Nurses Society, 2016)
Usual management of CRT includes thrombolysis and systemic anti-coagulation with or without CVC
removal. Consider removal of CVC with caution as this may be their only vascular access and systemic
anti-coagulation increases their risk for bleeding. Despite a lack of direct evidence proving safety and
efficacy of anticoagulation for upper extremity deep vein thrombosis, anticoagulant therapy with a goal
of relieving acute symptoms and preventing embolization remains the cornerstone of therapy.
Anticoagulant therapy is generally effective for preventing pulmonary embolism in patients with lower
extremity deep vein thrombosis. In patients with acute UEDVT involving the axillary or more proximal
veins, anticoagulation is recommended as for lower extremity DVT, provided there are no
contraindications, with or without catheter removal. In patients who have UEDVT that is associated with
a CVC that is not removed, the American College of Chest Physicians (ACCP) guidelines recommend
that anticoagulation is continued as long as the CVC remains over stopping after 3 months of
treatment. This is consistent with guidelines from the ACCP and other International guidelines. (Berube
& Zehnder, 2016) (Kearon, et al., 2012)
54
Routine removal of the catheter is not recommended. In most patients with UEDVT that is associated
with a CVC, it is suggested that the catheter not be removed if it is functional and there is an ongoing
need for the catheter. In patients who have UEDVT that is associated with a central venous catheter
that is removed, the ACCP guidelines recommend 3 months of anticoagulation over a longer duration of
therapy.
This approach has been associated with good clinical outcomes in small series of patients, including
patients with cancer. (Berube & Zehnder, 2016) (Kearon, et al., 2012)
CVCs should be removed in cases of:
1. Infected thrombus;
2. Malposition of the tip (radiologic reposition of the tip often fails, as a consequence of the
inability to reach it inside the thrombus); or
3. Irreversible occlusion of the lumen.
(Campisi, Biffi, & Pittiruti, 2007) (Infusion Nurses Society, 2016) (Yacopetti, 2008)
Prophylactic anti-coagulation is controversial and compliance has been shown to be poor. Focus
should therefore be on prevention of CRT:
1. Insertion of longer-term CVCs in applicable patients earlier in their course of treatment
2. Use of advanced technology on insertion (e.g. ultrasound, modified Seldinger technique, tip
placement technology)
3. Right-sided placement is preferred as the required CVC length is shorter and more likely to lie
parallel in the vessel
4. Insert the smallest gauge CVC with the least number of lumens required for the patient’s
course of treatment
(Campisi, Biffi, & Pittiruti, 2007)(Yacopetti, 2008)
55
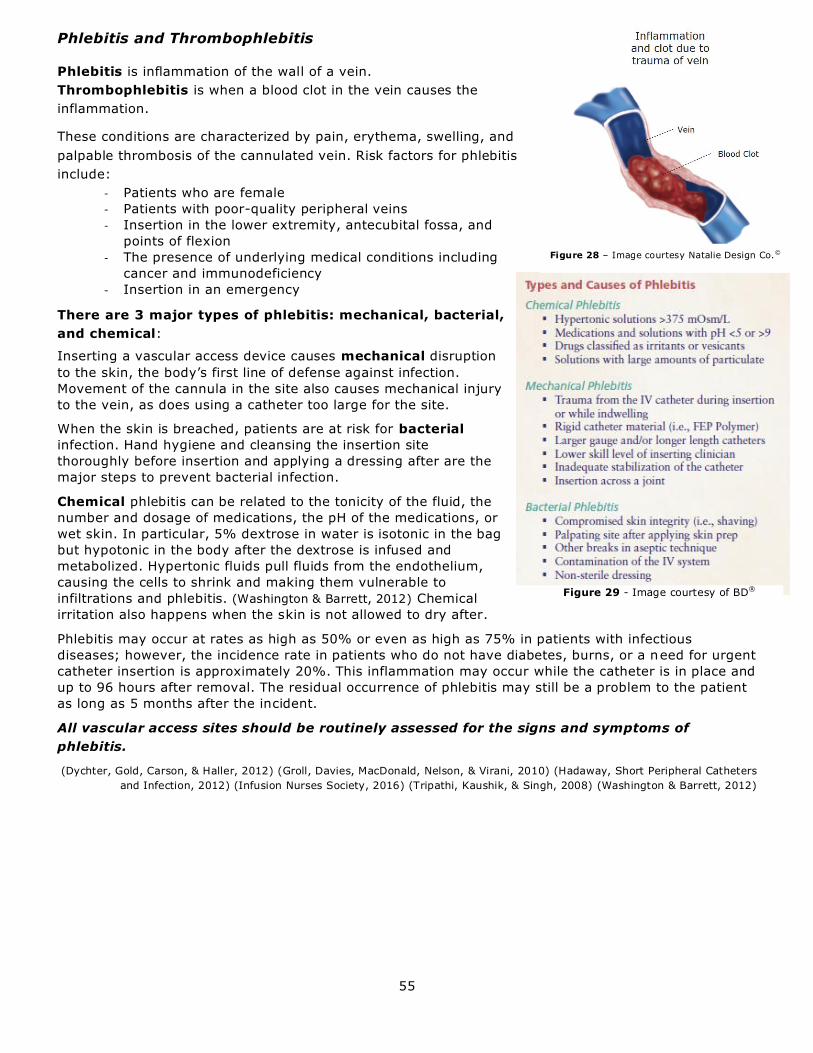
Figure 29 - Image courtesy of BD®
Phlebitis and Thrombophlebitis
Phlebitis is inflammation of the wall of a vein.
Thrombophlebitis is when a blood clot in the vein causes the
inflammation.
These conditions are characterized by pain, erythema, swelling, and
palpable thrombosis of the cannulated vein. Risk factors for phlebitis
include:
- Patients who are female
- Patients with poor-quality peripheral veins
- Insertion in the lower extremity, antecubital fossa, and
points of flexion
- The presence of underlying medical conditions including
cancer and immunodeficiency
- Insertion in an emergency
There are 3 major types of phlebitis: mechanical, bacterial,
and chemical:
Inserting a vascular access device causes mechanical disruption
to the skin, the body’s first line of defense against infection.
Movement of the cannula in the site also causes mechanical injury
to the vein, as does using a catheter too large for the site.
When the skin is breached, patients are at risk for bacterial
infection. Hand hygiene and cleansing the insertion site
thoroughly before insertion and applying a dressing after are the
major steps to prevent bacterial infection.
Chemical phlebitis can be related to the tonicity of the fluid, the
number and dosage of medications, the pH of the medications, or
wet skin. In particular, 5% dextrose in water is isotonic in the bag
but hypotonic in the body after the dextrose is infused and
metabolized. Hypertonic fluids pull fluids from the endothelium,
causing the cells to shrink and making them vulnerable to
infiltrations and phlebitis. (Washington & Barrett, 2012) Chemical
irritation also happens when the skin is not allowed to dry after.
Phlebitis may occur at rates as high as 50% or even as high as 75% in patients with infectious
diseases; however, the incidence rate in patients who do not have diabetes, burns, or a need for urgent
catheter insertion is approximately 20%. This inflammation may occur while the catheter is in place and
up to 96 hours after removal. The residual occurrence of phlebitis may still be a problem to the patient
as long as 5 months after the incident.
All vascular access sites should be routinely assessed for the signs and symptoms of
phlebitis.
(Dychter, Gold, Carson, & Haller, 2012) (Groll, Davies, MacDonald, Nelson, & Virani, 2010) (Hadaway, Short Peripheral Catheters
and Infection, 2012) (Infusion Nurses Society, 2016) (Tripathi, Kaushik, & Singh, 2008) (Washington & Barrett, 2012)
Figure 28 – Image courtesy Natalie Design Co.©

56
Infiltration and Extravasation
Infiltration is defined as the inadvertent leakage of a non-vesicant solution or medication into
surrounding tissue.
Extravasation is the leakage of a drug or fluid from a vein into the surrounding tissue during
intravenous administration (NHS Cheshire and Merseyside Strategic Clinical Networks, 2016). These
injuries range from less significant erythematous reactions to skin sloughing and necrosis. Whilst
extravasation is possible with any intravenous injection it is considered to be especially problematic
with compounds known to have irritant or vesicant properties. The onset of symptoms may occur
immediately or several days to weeks after administration. If left undiagnosed or inappropriately
treated, necrosis and functional loss of tissue and limb concerned may ensue. (WOSCAN Cancer
Nursing and Pharmacy Group, 2012)
Extravasation is associated with cytotoxic chemotherapy agents such as doxorubicin, paclitaxel, and
vinca alkaloids, as well as a number of non-cytotoxic drugs, including phenytoin, sodium bicarbonate
(>5%), calcium chloride and gluconate, amphotericin B, acyclovir, ganciclovir, digoxin, diazepam,
potassium (>40 mmol/L), dextrose 50%, cefotaxime, IV contrast media, and mannitol, that can also
cause tissue necrosis. The incidence of infiltration and extravasation is hard to determine because of
limited reporting; however, extravasation injury from cancer chemotherapy is reported to be 11% in
children and 22% in adults. One study found that, of all the complications associated with PIVs, 33.7%
occurred as a result of infiltration. Rates of extravasation with cancer chemotherapy infused through
implanted ports range from 0.3% to 6%. (Dychter, Gold, Carson, & Haller, 2012) (Hadaway, 2007)
***See also Extravasation Drug and Antidote Table on the FH Pulse.
1. Vesicant - A drug which has corrosive properties and has the potential to cause tissue
destruction if extravasated. Varying degrees of pain, edema, erythema, blistering and necrosis
may occur. Vesicants are further divided into two groups. When extravasated, non-DNA binding
agents (vinblastine, vinorelbine, vincristine) are inactivated or quickly metabolized and follow the
normal healing process whereas DNA binding agents (epirubicin, mitomycin, doxorubicin,
daunorubicin, idarubicin) remain in the tissues resulting in long-term injury.
2. Exfoliant - A drug capable of causing inflammation and shedding of skin but less likely to cause
tissue death.
3. Irritant - This has the potential to cause pain, aching, tightness and phlebitis with or without
inflammation, rarely progressing to tissue breakdown.
4. Inflammitant - Drug with the potential to cause mild to moderate inflammation and flare in local
tissues.
5. Neutral Drugs – Drugs that cause very little or no tissue damage when extravasation occurs.
(BC Cancer Agency, 2016) (NHS Royal Cornwall Hospitals, 2014)(WOSCAN Cancer Nursing and Pharmacy Group,
2012)
All vascular access sites should be routinely assessed for the signs and symptoms of infiltration and
extravasation. Children and infants are vulnerable populations requiring special attention and the use of
appropriate assessment tools. Pediatric assessment has been incorporated into this tool.
NOTE: For administration of oncologic agents for chemotherapy, please differ to the BCCA
Systemic Therapy Guidelines for drug categories and administration procedures.

57
Figure 30 - Image courtesy of BD®
Measures to prevent infiltration and extravasation include:
- Selection of an appropriate site for catheter insertion - Avoid areas of joint flexion such as wrist and
antecubital fossa
- Selection of an appropriate size catheter - Use the smallest size catheter needed for the prescribed
therapy
- Use of appropriate fluids depending on vascular access type – Medications/fluids with an osmolarity of
greater than 900 mOsm/L, a pH of less than 5 or greater than 9, and vesicants need to be given via a
CVC.
- Stabilization of the catheter – Always use a securement
device/dressing. Avoid circumferential taping of the limb.
- Use of proper administration techniques - The patency of
the catheter and vein should be assessed frequently so that
infiltration or extravasation can be prevented. Before
administering each dose of medication, the nurse should
visually inspect and palpate the site, checking for vein
cording, edema, skin temperature, and tenderness or
discomfort. Check for a positive blood return. Each drug
should be diluted in a separate syringe. When dilution is
done either in a syringe or by slow injection through an
infusing, compatible IV fluid, according to the PDTM, the
injection can be stopped if the patient complains of any
problems. (Hadaway, 2007)
- More frequent site assessments:
Every 5 to 10 minutes for patients receiving peripheral
intermittent infusions of vesicants (NOTE: The nurse
should advocate for central vascular access
administration of vesicant medications whenever
possible. The peripheral infusion of vesicant agents
should be limited to less than 30 to 60 minutes. In
addition to visual assessment of the site, a blood
return should be verified every 5 to 10 minutes during
the infusion.) (Infusion Nurses Society, 2012)
Patients receiving chemotherapeutic vesicants: The RN
will remain with the patient, and will check blood
return and assess the IV site every 2 minutes
throughout the procedure. (BC Cancer Agency, 2014)
Common signs and symptoms of IV infiltration include:
- Cool skin temperature at the insertion site
- Skin that looks blanched, taut, or stretched or that the
patient says feels “tight”
- Edema at the insertion site
- Discomfort and/or tenderness
- Change in quality and flow of the infusion
- Frequent IV infusion pump downstream occlusion alarms (do not rely on an IV infusion pump to alert
you to an infiltration as this alarm is often a late sign; an IV infusion pump will exacerbate the
problem until the IV infusion pump is stopped) (Pennsylvavia Patient Safety Authority, 2007)
- IV fluid leaking from the insertion site
(Amjad, Murphy, Nylander-Housholder, & Ranft, 2011) (Dychter, Gold, Carson, & Haller, 2012)
(Hadaway, 2007) (Infusion Nurses Society, 2011) (Simona Pop, 2012)

58
Signs and symptoms of extravasation are the same as those of infiltration but also include
burning/stinging pain, redness followed by blistering, tissue necrosis, and ulceration. Both infiltration
and extravasation can have serious consequences including full-thickness skin loss, compartment
syndrome, and muscle and tendon necrosis. The patient may need surgical intervention resulting in
large scars, experience limited function, or even require amputation. Another long-term effect is
complex regional pain syndrome, a neurologic syndrome requiring long-term pain management. (Amjad,
Murphy, Nylander-Housholder, & Ranft, 2011) (Dychter, Gold, Carson, & Haller, 2012) (Hadaway, 2007) (Infusion
Nurses Society, 2011) (Simona Pop, 2012)
For extravasation of contrast media, see Extravasation of Non-Ionic Intravascular Contrast:
Patient Management Guidelines
Table 2 - Distinguishing Extravasation from other conditions:
Characteristic
Flare reaction
Vessel
irritation
Venous
shock
Extravasation
Immediate
Symptoms
Itchy blotches or hives;
pain and burning
uncommon
Aching and
tightness
Muscular
wall of the
blood vessel
in spasm
Severe pain or burning at the
insertion site and/ or anywhere
along the vein or catheter that
lasts minutes or hours and
eventually subsides; usually
occurs while the drug is being
given.
Colouration
Raised red streak,
blotches or “hive-like”
erythema along the
vessel; diffuse or
irregular pattern
Erythema or
dark
discolouration
along vessel
Erythema around area of needle
or around the venipuncture site
Timing
Transient and usually
resolves with or
without treatment
within 30 min,
sometimes within 1 – 2
hours, and rarely takes
up to 24 hrs.
Usually appears
within minutes
after injection.
Colouration may
only appear later
in the process.
Usually
appears
right after
injection
Symptoms start to appear right
after injection, symptoms
endure
Swelling
Unlikely
Unlikely
Occurs often; does not dissipate
for several days
Blood return
Usually, but not always
intact
Usually, but not
always intact
Often
absent
Usually absent or sluggish
(BC Cancer Agency, 2016) (European Oncology Nursing Society, 2007)
FLARE: painless local reaction along the vein or near the intact injection site characterised by:
- Immediate, red blotches or streaks (histamine release phenomenon), or local wheals; edema
may sometimes occur
- With or without pruritus or irritation
- Symptoms usually subside with or without treatment 30 min after the infusion is stopped,
although they may last for 1-2 hours and rarely more than 24 hours

59
VESSEL IRRITATION: Aching and tightness occurs along the vein. Seen with drugs such as
vinorelbine and dacarbazine. Applying warmth to dilate the vein can relieve this. Blood return is usually
intact although erythema or redness may be present.
VENOUS SHOCK: Rapid administration or the administration of very cold drugs can cause the muscle
wall of the vein to go into spasm. Blood return may be lost. Heat can help to relax and dilate the vein.
IMMEDIATE TREATMENT
If extravasation is suspected, it is important to act quickly to prevent tissue necrosis. In the event of a
CVC extravasation please follow steps 1-5 and discuss immediately with the patient’s MRP. A Plastic
Surgery consult is recommended for further advice to discuss removal of the device and immediate and
future treatment as this may differ with each event.
1. Stop the infusion or injection immediately – DO NOT remove the CVC at this point.
2. Seek assistance if needed.
3. Disconnect the infusion (not the CVC catheter or non-coring needle).
4. Leave the CVC catheter or non-coring needle in place and try to aspirate as much of the drug
as possible from the cannula using a 10 mL syringe. Avoid applying direct manual pressure to
suspected extravasation site.
5. Remove the non-coring needle. Elevate and apply gentle pressure to site till hemostasis is
achieved. Consult MRP regarding removal of CVC. Exception: With extravasation of
Mechlorethamine the antidote Sodium Thiosulfate is to be given through the existing IV line
immediately after the extravasation and preferably though the same needle to insure
injection into the same tissue plane as the extravasation.
6. Mark the affected area and take digital images of the site (with patient consent).
7. Obtain extravasation kit or appropriate antidote and notify the MRP, and PCC or Charge
Nurse.
8. Decide on how the extravasation should be treated. (See below)
9. Apply warm towel or ice pack wrapped in towel/cold compresses to the extravasation site for
1 hour as per Extravasation Drug and Antidote Recommendation Table. Care must be taken
to avoid tissue injury from excessive heat or cold.
10. Administer pain relief as needed.
11. For vesicants, consult Plastic Surgery ASAP.
12. Document the injury with a digital image if possible. See Fraser Health Media Consent
Form.
13. Provide patient education and complete all documentation, including PSLS. See Also FH
Policy: Disclosure of Unintended Medical Outcomes
(BC Cancer Agency, 2016) (NHS Cheshire and Merseyside Strategic Clinical Networks, 2016) (NHS Royal Cornwall
Hospitals, 2014) (NHS Wales, 2008) (Reynolds, MacLaren, Mueller, & Fish, 2014)
Extravasation kits should be stocked on or available to all inpatient and outpatient Oncology Units.
For access to the medications on other sites/units, contact the Oncology Unit or Site Pharmacy. They
may include the following:
Pain Ease® spray
25 gauge needles
Dimethylsulfoxide (DMSO) 99% topical solution
3 mL syringes
Hyaluronidase 1500 units /mL injection (HYALASE®) ampoule**
Black indelible ink marker

60
Hydrocortisone 1% cream
Phentolamine 10 mg
Ice pack - in freezer
Sodium thiosulfate 25% injection, 10 mL vial***
Sterile gauze dressings and tape
10 mL syringe (for preparing sodium thiosulfate)***
** Available through Health Canada Special Access Program
*** Only if intravenous mechlorethamine is available for use
(BC Cancer Agency, 2016) (Reynolds, MacLaren, Mueller, & Fish, 2014)
All vascular access sites should be routinely assessed for the signs and symptoms of
infiltration and extravasation.

61
Occlusions (Canadian Vascular Access Association, 2013) See also CVC Occlusion Management Algorithm
Standards - Immediately after a CVC is inserted into a vessel, the coagulation cascade begins.
Thrombus formation may occur within 24 hours of insertion. CVC occlusions can result in interruptions
or delays in therapy, infection, embolism, or loss of vascular access. Proper care, maintenance,
continued assessment, and early recognition of the pending signs of occlusions can improve patient
outcomes and minimize organizational costs. CVCs may remain insitu for as long as the device is
functional and required. Restoration of catheter patency supports the longevity of the device’s lifespan.
CVC replacement costs include cost of the device, supplies, and nursing, clinic, and physician time. The
cost of thrombolysis is markedly less than device replacement, both in terms of patient access to
treatment and safety and well as financial impacts to the healthcare facility. Catheter salvage and
restoring patency (rather than device removal) is the preferred approach to the management of CVC
occlusions. Catheter patency is the ability to easily aspirate blood from a CVC lumen and to easily
infuse or flush fluid through a CVC lumen. Catheter patency can be compromised by any type of
occlusion.
Signs and Symptoms of CVC occlusions:
i. Upon infusion or flushing:
1. Resistance when flushing
2. Sluggish flow
3. Inability to infuse fluids or medications
4. Frequent downstream or patient-side occlusion alarms on IV infusion pump
5. Infiltration, extravasation, swelling, or leaking at the insertion site
ii. Upon aspiration of blood:
1. Inability to withdraw blood
2. Sluggish blood return
Types of CVC Occlusions:
i. Thrombotic Occlusions - Thrombotic occlusions are responsible for approximately 58% of all
occlusions. Occlusions develop as fibrin builds on and around the catheter and vessel. In
addition to causing catheter dysfunction, thrombotic occlusions can lead to catheter-related
thrombosis (CRT). (See also Catheter-Related Thrombus)
ii. Chemical Occlusions – Non-thrombotic causes of occlusion account for 42% of all occlusions
and are related to medication or drug precipitate. They can specifically be the result of
precipitate from the mixing of incompatible medications and solutions or lip id residue.
iii. Mechanical Occlusions – Mechanical occlusions are related to internal or external problems
with the CVC. They include CVC or tubing kinks, (see also CVC Measurement and Device
Malposition), a clogged needleless connector or filter, and incorrect placement of a non-coring
needle into an IVAD.
Degree/Type of Occlusion – There are three degrees/types of occlusion:
i. Partial – Decreased ability to infuse fluids/medications into the CVC; resistance with flush ing
and aspiration; Sluggish flow through the CVC. Causes: Chemical, Mechanical, or Thrombotic
occlusion.
ii. Withdrawal – Inability to aspirate blood through the CVC, but ability to infuse without any
resistance; Lack of free-flowing blood return. Causes: Mechanical or Thrombotic occlusion.
iii. Complete – Inability to infuse or withdraw blood or fluid into the CVC. Causes: Chemical,
Mechanical, or Thrombotic occlusion.
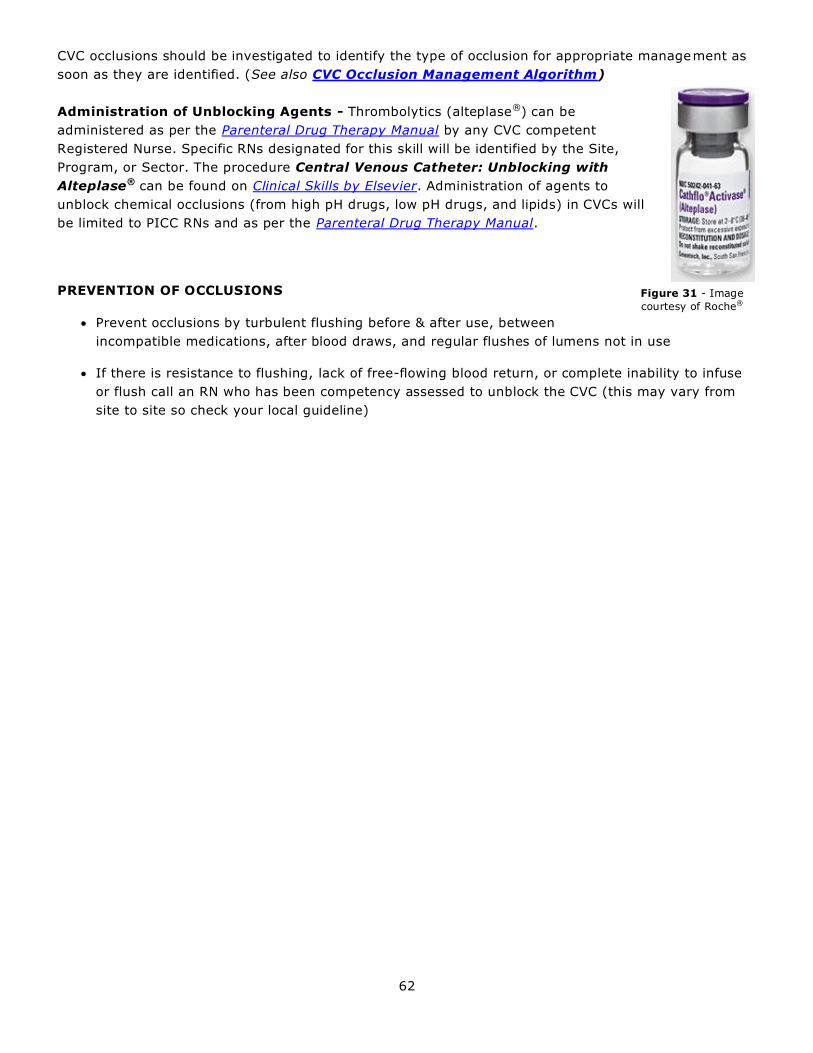
62
CVC occlusions should be investigated to identify the type of occlusion for appropriate management as
soon as they are identified. (See also CVC Occlusion Management Algorithm)
Administration of Unblocking Agents - Thrombolytics (alteplase®) can be
administered as per the Parenteral Drug Therapy Manual by any CVC competent
Registered Nurse. Specific RNs designated for this skill will be identified by the Site,
Program, or Sector. The procedure Central Venous Catheter: Unblocking with
Alteplase® can be found on Clinical Skills by Elsevier. Administration of agents to
unblock chemical occlusions (from high pH drugs, low pH drugs, and lipids) in CVCs will
be limited to PICC RNs and as per the Parenteral Drug Therapy Manual.
PREVENTION OF OCCLUSIONS
Prevent occlusions by turbulent flushing before & after use, between
incompatible medications, after blood draws, and regular flushes of lumens not in use
If there is resistance to flushing, lack of free-flowing blood return, or complete inability to infuse
or flush call an RN who has been competency assessed to unblock the CVC (this may vary from
site to site so check your local guideline)
Figure 31 - Image
courtesy of Roche®

63
Figure 32 - Reprinted with permission from the Canadian Vascular Access Association.
(Canadian Vascular Access Association, 2013, p. 30)

64
CVC Measurement and Device Malposition
The external segment of all CVCs (except IVADs and Tunneled CVCs) must be measured a minimum of
daily in acute care settings and with each use in community care settings.
If the daily external CVC measurement is altered:
i. Greater than 4 cm out from the baseline insertion length:
- STOP infusion
- Reconfirm placement with CXR and consult with PICC RN or Most Responsible Physician
(MRP) before re-starting infusion
ii. 2 cm in from insertion site:
- STOP infusion
- Consult PICC RN or MRP before re-starting infusion
- A PICC RN or Competency Assessed RN may “withdraw” the CVC back to the original
measurement.
If the CVC migrates greater than 4 cm outwards from the insertion baseline, the CVC must not be used
until placement is confirmed radiographically (e.g. ultrasound, x-ray, or fluoroscopy) by a PICC nurse
or a physician. (Registered Nurses Association of Ontario, 2008)
Secondary CVC malposition, also known as tip migration, may occur at any time during the CVC dwell
time and is related to sporadic changes in intrathoracic pressure (e.g. coughing, vomiting), presence of
CHF, neck or arm movement, positive pressure ventilation, high pressure injection (e.g. contrast
media), or flushing techniques. PICC tip migration is associated with arm adduction and flexion. CVC
dislodgement is caused by arm movement, body posture, lifestyle, and patient manipulation (IVADs
and Twiddler’s Syndrome). (Infusion Nurses Society, 2016)
Do not advance any portion of the CVC that has been in contact with the skin into the insertion site.
Rationale: Skin cannot be rendered sterile. (Infusion Nurses Society, 2016)
Infusions through a malpositioned CVC should be withheld or alternate access established until proper
tip position has been confirmed. (Infusion Nurses Society, 2016)
Figure 33 & 34 – CVC Measurement courtesy of P. Hignell ©

65
Broken/ Damaged CVCs
The use of a blood pressure cuff on the extremity with a CVC (i.e. PICC) in place is not specifically
stated as a standard. However, based on anatomy and physiology, the pressure resulting from the
application of a tourniquet or blood pressure cuff may result in damage to the catheter and/or vessel
that is accessed. Best practice remains that the blood pressure cuff should be placed distal to the
catheter’s location. A tourniquet can be placed and lab work drawn below a PICC insertion site. (Infusion
Nurses Society, 2013)
Immediately upon discovery of catheter damage, the CVC should be clamped or sealed (e.g. closing an
existing clamp, adding a non-toothed clamp, covering the damaged area with a TSM dressing, folding
the external segment, and securing) between the patient and the damaged area. Rationale: To prevent
air embolism or bleeding from the device. (Infusion Nurses Society, 2016)
Not all CVCs can be repaired. To determine if the patient’s CVC can be repaired, see site specific
algorithms. If the CVC cannot be repaired it should be removed and alternate vascular access
established (if needed). (Gorski, 2007) (Infusion Nurses Society, 2016)
Repairs of a CVC shall only be completed by a PICC RN competency-assessed in CVC repairs. (Gorski,
2007)
CVC damage increases the risk for catheter fracture and embolization, air emboli, bleeding, CVC lumen
occlusion, and CLA-BSI. If CVC repair is possible, it should be performed as soon as possible to reduce
the risk of these complications. (Infusion Nurses Society, 2016)
Causes of device damage should be reported through PSLS and a BCCSS Product Concern Form (in
the case of device failure). Data should be analyzed to identify the root cause(s) including, but not
limited to, device failure, flushing technique, syringe size, and using scissors during a dressing change.
(Infusion Nurses Society, 2016)

66
67
Test your Learning
1. What is potentially the most common complication associated with CVCs?
_________________________________________
2. List 3 ways of minimizing the chance of air entering the system?
1) ______________________
2) ______________________
3) ______________________
3. List 3 of the most frequent causes for catheter embolism:
1) ______________________
2) ______________________
3) ______________________
4. Usual management of Catheter Related Thrombus includes ____________________ and
____________________________________________________________________________.
5. List 3 types of phlebitis
1) __________________________________
2) __________________________________
3) __________________________________
6. Inability to flush or withdraw blood from a CVC is a sign of __________________.
7. What is the best way to prevent occlusions? _________________________
8. CVCs occluded for >24 hours puts the patient at increased risk for______________.
9. If the CVC migrates greater than 4 cm outwards from the insertion baseline, the CVC may be
used until placement is confirmed radiographically T F
10. List 3 things CVC damage increases the risk for:
1) __________________________________
2) __________________________________
3) __________________________________
68
Answers
1. Central Line Associated Bloodstream Infection (CLA-BSI)
2. – ensure the lumen is clamped prior to opening the system
- use luer-lock connections
- keep blue clamps/padded forceps with patient in case of
catheter breakage
- have patient perform valsalva maneouver when risk of air
embolism is high
- trendelenberg or flat positioning during insertions and
removal of catheter
3. pinch-off syndrome, damage during catheter exchange, separation of the catheter from an
implanted port body, and fracture of a distal portion of an IVAD
4. includes thrombolysis and systemic anti-coagulation with or without CVC removal. Consider
removal of CVC with caution as this may be their only vascular access and systemic anti -
coagulation increases their risk for bleeding.
5. mechanical, bacterial, and chemical
6. occlusion
7. turbulent flushing technique
8. infection
9. False, If the CVC migrates greater than 4 cm outwards from the insertion baseline, the CVC
must not be used until placement is confirmed radiographically
10. catheter fracture and embolization, air emboli, bleeding, CVC lumen occlusion, and CLA-BSI.
Congratulations! You have just completed the fifth section.
Let’s keep moving…..
You’re almost there!

69
CARE AND
MAINTENANCE OF
CENTRAL
VENOUS
CATHETERS
Image courtesy of 3M©

70
Care and Maintenance of Central Venous Catheters
Patient Positioning When caring for open-ended catheters patients should be positioned:
Flat, supine with no pillow for:
o Changing IV tubing or extension tubing
o Repositioning/removing catheter
o Initial capping/flushing
o Insertion
Any position for:
o Blood work using vacutainer method
o Flushing capped lines
o Dressing changes
Closed-ended catheters or IVADs do not require positioning to prevent air-entering catheter. The
relatively long length and small diameter of an open-ended PICC significantly reduces but does not
eliminate the risk of air embolus.
Management of Patients with a CVC Pre-Insertion Assessment:
Vital Signs including BP, HR and RR
Respiratory assessment including: breathing patterns, depth and symmetry of breath sounds
Post-Insertion Assessment and q30 minutes x 2:
Vital signs (as above)
You may apply warm compress to arm above PICC insertion site – QID x 20 minutes for 3
days. This is to prevent mechanical phlebitis.
NO blood pressures or venipunctures to be completed on arm where a PICC has been inserted
Check for signs of and report to Physician:
- Subcutaneous emphysema
- Bleeding
- Air embolus
- Pneumothorax
The two most frequent reasons for loss of central venous access are occlusion and infection.
Therefore, pay particular attention to flushing and catheter care techniques
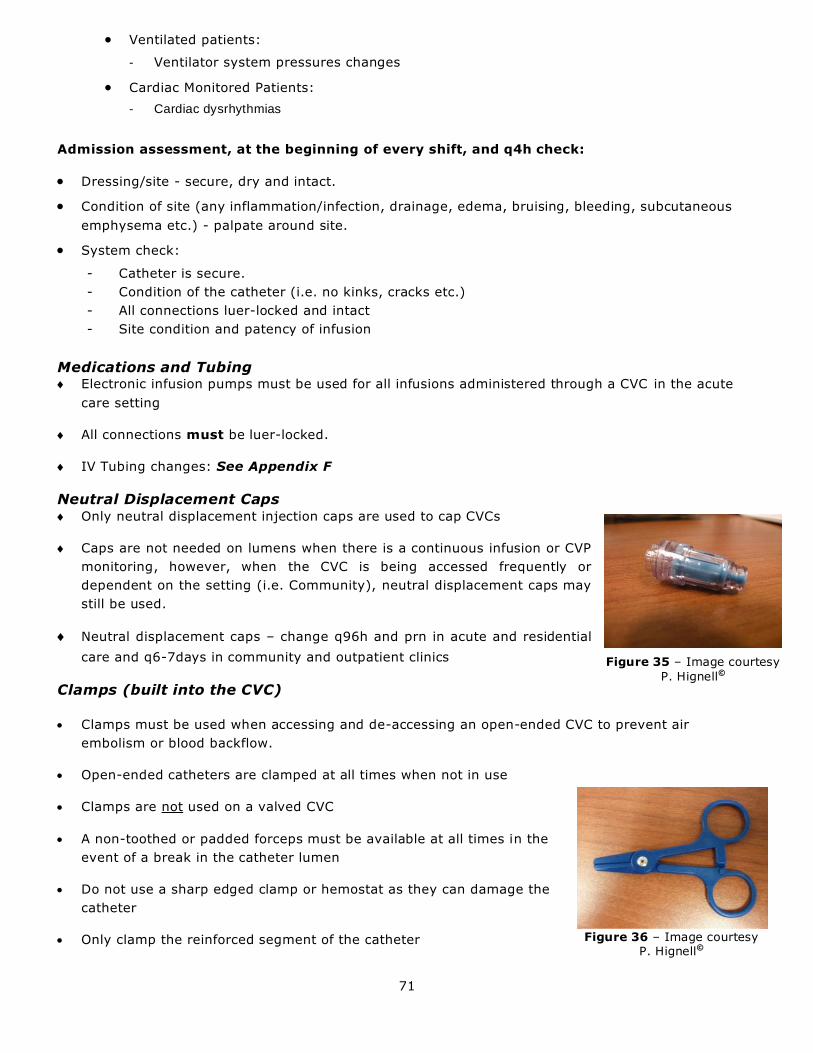
71
Figure 35 – Image courtesy
P. Hignell©
Figure 36 – Image courtesy P. Hignell©
Ventilated patients:
- Ventilator system pressures changes
Cardiac Monitored Patients:
- Cardiac dysrhythmias
Admission assessment, at the beginning of every shift, and q4h check:
Dressing/site - secure, dry and intact.
Condition of site (any inflammation/infection, drainage, edema, bruising, bleeding, subcutaneous
emphysema etc.) - palpate around site.
System check:
- Catheter is secure.
- Condition of the catheter (i.e. no kinks, cracks etc.)
- All connections luer-locked and intact
- Site condition and patency of infusion
Medications and Tubing Electronic infusion pumps must be used for all infusions administered through a CVC in the acute
care setting
All connections must be luer-locked.
IV Tubing changes: See Appendix F
Neutral Displacement Caps Only neutral displacement injection caps are used to cap CVCs
Caps are not needed on lumens when there is a continuous infusion or CVP
monitoring, however, when the CVC is being accessed frequently or
dependent on the setting (i.e. Community), neutral displacement caps may
still be used.
Neutral displacement caps – change q96h and prn in acute and residential
care and q6-7days in community and outpatient clinics
Clamps (built into the CVC)
Clamps must be used when accessing and de-accessing an open-ended CVC to prevent air
embolism or blood backflow.
Open-ended catheters are clamped at all times when not in use
Clamps are not used on a valved CVC
A non-toothed or padded forceps must be available at all times in the
event of a break in the catheter lumen
Do not use a sharp edged clamp or hemostat as they can damage the
catheter
Only clamp the reinforced segment of the catheter
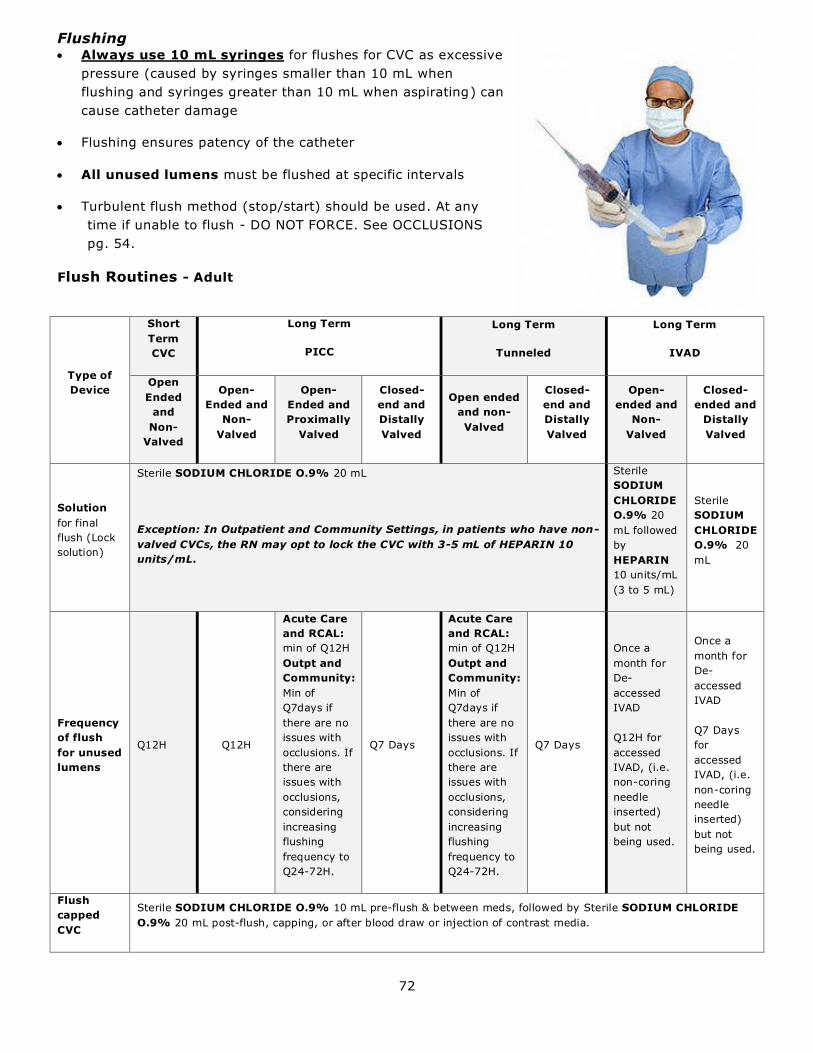
72
Flushing Always use 10 mL syringes for flushes for CVC as excessive
pressure (caused by syringes smaller than 10 mL when
flushing and syringes greater than 10 mL when aspirating) can
cause catheter damage
Flushing ensures patency of the catheter
All unused lumens must be flushed at specific intervals
Turbulent flush method (stop/start) should be used. At any
time if unable to flush - DO NOT FORCE. See OCCLUSIONS
pg. 54.
Flush Routines - Adult
Type of
Device
Short
Term
CVC
Long Term
PICC
Long Term
Tunneled
Long Term
IVAD
Open
Ended
and
Non-
Valved
Open-
Ended and
Non-
Valved
Open-
Ended and
Proximally
Valved
Closed-
end and
Distally
Valved
Open ended
and non-
Valved
Closed-
end and
Distally
Valved
Open-
ended and
Non-
Valved
Closed-
ended and
Distally
Valved
Solution
for final
flush (Lock
solution)
Sterile SODIUM CHLORIDE O.9% 20 mL
Exception: In Outpatient and Community Settings, in patients who have non-
valved CVCs, the RN may opt to lock the CVC with 3-5 mL of HEPARIN 10
units/mL.
Sterile
SODIUM
CHLORIDE
O.9% 20
mL followed
by
HEPARIN
10 units/mL
(3 to 5 mL)
Sterile
SODIUM
CHLORIDE
O.9% 20
mL
Frequency
of flush
for unused
lumens
Q12H Q12H
Acute Care
and RCAL:
min of Q12H
Outpt and
Community:
Min of
Q7days if
there are no
issues with
occlusions. If
there are
issues with
occlusions,
considering
increasing
flushing
frequency to
Q24-72H.
Q7 Days
Acute Care
and RCAL:
min of Q12H
Outpt and
Community:
Min of
Q7days if
there are no
issues with
occlusions. If
there are
issues with
occlusions,
considering
increasing
flushing
frequency to
Q24-72H.
Q7 Days
Once a
month for
De-
accessed
IVAD
Q12H for
accessed
IVAD, (i.e.
non-coring
needle
inserted)
but not
being used.
Once a
month for
De-
accessed
IVAD
Q7 Days
for
accessed
IVAD, (i.e.
non-coring
needle
inserted)
but not
being used.
Flush
capped
CVC
Sterile SODIUM CHLORIDE O.9% 10 mL pre-flush & between meds, followed by Sterile SODIUM CHLORIDE
O.9% 20 mL post-flush, capping, or after blood draw or injection of contrast media.
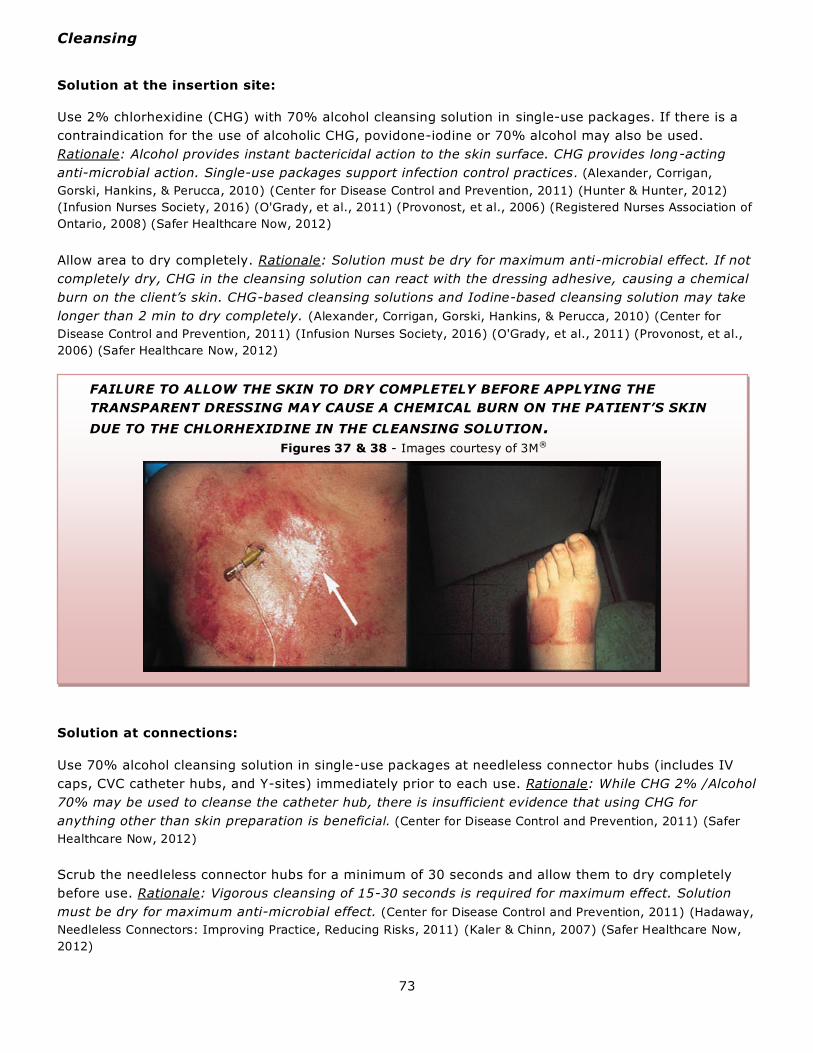
73
Cleansing
Solution at the insertion site:
Use 2% chlorhexidine (CHG) with 70% alcohol cleansing solution in single-use packages. If there is a
contraindication for the use of alcoholic CHG, povidone-iodine or 70% alcohol may also be used.
Rationale: Alcohol provides instant bactericidal action to the skin surface. CHG provides long-acting
anti-microbial action. Single-use packages support infection control practices. (Alexander, Corrigan,
Gorski, Hankins, & Perucca, 2010) (Center for Disease Control and Prevention, 2011) (Hunter & Hunter, 2012)
(Infusion Nurses Society, 2016) (O'Grady, et al., 2011) (Provonost, et al., 2006) (Registered Nurses Association of
Ontario, 2008) (Safer Healthcare Now, 2012)
Allow area to dry completely. Rationale: Solution must be dry for maximum anti-microbial effect. If not
completely dry, CHG in the cleansing solution can react with the dressing adhesive, causing a chemical
burn on the client’s skin. CHG-based cleansing solutions and Iodine-based cleansing solution may take
longer than 2 min to dry completely. (Alexander, Corrigan, Gorski, Hankins, & Perucca, 2010) (Center for
Disease Control and Prevention, 2011) (Infusion Nurses Society, 2016) (O'Grady, et al., 2011) (Provonost, et al.,
2006) (Safer Healthcare Now, 2012)
Solution at connections:
Use 70% alcohol cleansing solution in single-use packages at needleless connector hubs (includes IV
caps, CVC catheter hubs, and Y-sites) immediately prior to each use. Rationale: While CHG 2% /Alcohol
70% may be used to cleanse the catheter hub, there is insufficient evidence that using CHG for
anything other than skin preparation is beneficial. (Center for Disease Control and Prevention, 2011) (Safer
Healthcare Now, 2012)
Scrub the needleless connector hubs for a minimum of 30 seconds and allow them to dry completely
before use. Rationale: Vigorous cleansing of 15-30 seconds is required for maximum effect. Solution
must be dry for maximum anti-microbial effect. (Center for Disease Control and Prevention, 2011) (Hadaway,
Needleless Connectors: Improving Practice, Reducing Risks, 2011) (Kaler & Chinn, 2007) (Safer Healthcare Now,
2012)
FAILURE TO ALLOW THE SKIN TO DRY COMPLETELY BEFORE APPLYING THE
TRANSPARENT DRESSING MAY CAUSE A CHEMICAL BURN ON THE PATIENT’S SKIN
DUE TO THE CHLORHEXIDINE IN THE CLEANSING SOLUTION.
Figures 37 & 38 - Images courtesy of 3M®

74
When cleansing the hub with cap changes, remove old cap, then scrub the CVC hub for a minimum of
30 seconds and allow to dry completely. Rationale: Particulate matter trapped under the old cap is not
removed unless you take off the old cap to access this area, leading to an increased risk of infection.
(Alexander, Corrigan, Gorski, Hankins, & Perucca, 2010) (Center for Disease Control and Prevention, 2011)
(Infusion Nurses Society, 2016) (Safer Healthcare Now, 2012)
Technique for skin preparation:
Use a friction technique in a back-and-forth pattern for at least 30 seconds. Cleanse an area larger than
the intended dressing and allow solution to air-dry completely prior to applying dressing.
Rationale: Friction allows the CHG to penetrate the lower layers of the epidermis, killing a greater
number of skin organisms. (Alexander, Corrigan, Gorski, Hankins, & Perucca, 2010) (Center for Disease Control
and Prevention, 2011) (Infusion Nurses Society, 2016) (O'Grady, et al., 2011) (Provonost, et al., 2006) (Safer
Healthcare Now, 2012)
Securement Use a securement device on all CVCs. The device may be a stand-alone device or integrated into a
dressing specified by the manufacturer to have securement properties. Rationale: Catheter stabilization
shall be used to preserve the integrity of the access device and to prevent catheter migration and loss
of access. (Infusion Nurses Society, 2016)
Sutures/staples/tape should be replaced with a manufactured stabilization dressing and/or device
whenever feasible. Rationale: The use of sutures, staples and tape have been shown to increase the
risk of skin breakdown and infection at the CVC site. (Bishop, et al., 2007) (Infusion Nurses Society, 2016)
Dressings Types of dressings
Transparent semi-permeable membrane (TSM) dressings are recommended as the first choice for CVC
dressings. The dressing used in FH for CVCs already has incorporated material for sensitive skin as a
standard. Rationale: TSM dressings assist in securement and assessment by allowing for continuous
visualization of the CVC site and optimal moisture vapor transfer to prevent skin breakdown from
prolonged dressing use. (Center for Disease Control and Prevention, 2011) (Infusion Nurses Society, 2016)
(Safer Healthcare Now, 2012)
Gauze dressings can be used as a second choice if indicated (i.e. bleeding, drainage, diaphoresis, skin
sensitivity or allergy), but are not preferred.
The use of Chlorhexidine-impregnated dressing with CVCs should be considered as an additional CLA-
BSI prevention measure and for the dressing’s absorptive qualities. (Infusion Nurses Society, 2016)
(Mermal, et al., 2009) (Ho & Liton, 2009) (Perencevich & Pittet, 2009) (Ruschulte, et al., 2009) (Timsit, et al.,
2009) CHG-impregnated dressings shall be applied on all newly inserted CVC sites.

75
Figure 39 - Image courtesy of 3M©
Frequency of dressing changes
When a Chlorhexidine-impregnated dressing is applied on initial insertion of the CVC, it is acceptable to
do the initial dressing change in 6-7 days. A non-Chlorhexidine-impregnated dressing may be used for
subsequent dressing changes. Dressings on newly inserted CVCs should be assessed 24 hrs post CVC
insertion. Rationale: Assess dressings in the first 24 hours for accumulation of blood, fluid or moisture
beneath the dressing. (Bishop, et al., 2007) (Safer Healthcare Now, 2012) Rationale: The risk of
dislodgement outweighs the risk of infection. (Center for Disease Control and Prevention, 2011)
TSM dressings must be changed at least every 6-7 days and gauze-only and gauze+TSM dressings at
least every 48 hrs. Change dressings more frequently if indicated (i.e. if the dressing becomes damp,
loose, soiled, saturated, when the site needs to be assessed, or to coordinate care). Rationale: Gauze
dressings that prevent visualization of the insertion site should be changed routinely every 48 hours
and immediately if the integrity of the dressing is comprised. (Alexander, Corrigan, Gorski, Hankins, &
Perucca, 2010) (Infusion Nurses Society, 2016)
If gauze is used to support the wings of a non-coring needle during IVAD access and it does not cover
the insertion site under the TSM dressing, it can be considered part of the TSM and changed every 7
days.
Newly inserted tunneled CVCs have 2 insertion sites. The upper insertion site will have sutures and
needs to have a TSM securement dressing applied until it is well-healed. Sutures are removed may be
removed when the upper and lower incisions are well-healed (usually 7-10 days). The lower insertion
site which the CVC comes out of needs to have a TSM securement dressing to keep the line from
migrating until the insertion site is well-healed and the skin growth into the Dacron cuff holds it firmly
insitu (i.e. 4 – 6 weeks). If the insertion site shows signs of infection (e.g. redness, warm to touch,
purulent discharge, etc.) consult with a physician.
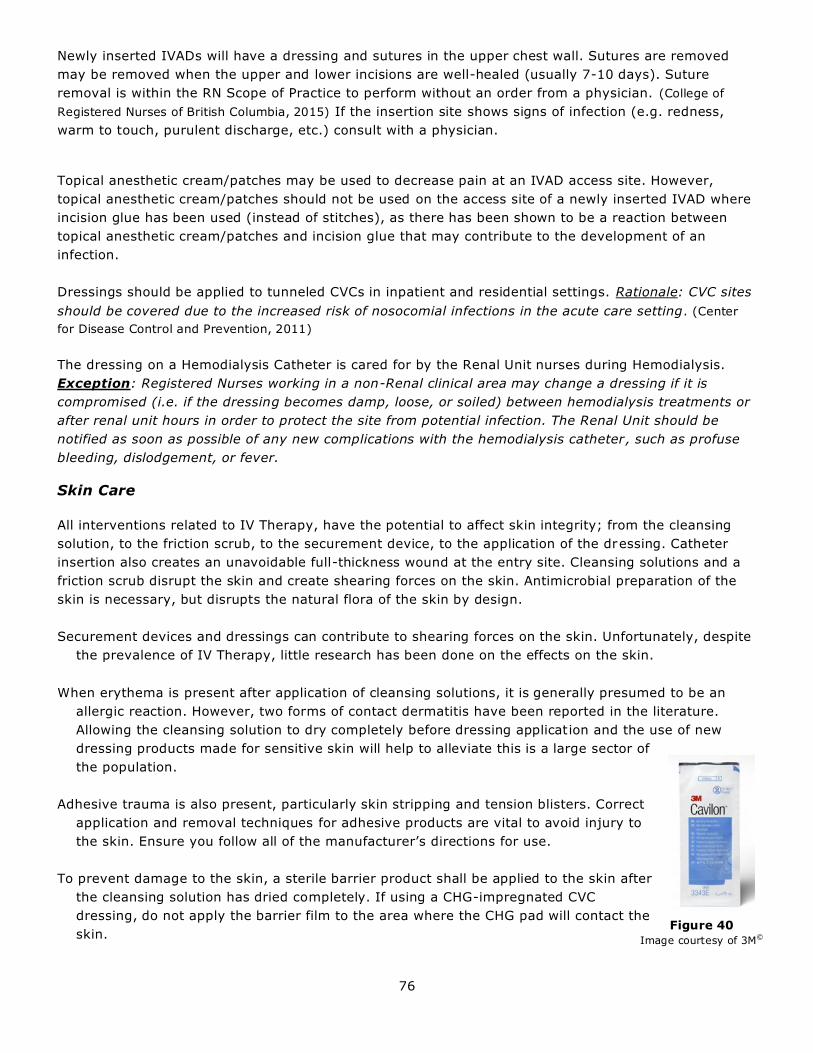
76
Newly inserted IVADs will have a dressing and sutures in the upper chest wall. Sutures are removed
may be removed when the upper and lower incisions are well-healed (usually 7-10 days). Suture
removal is within the RN Scope of Practice to perform without an order from a physician. (College of
Registered Nurses of British Columbia, 2015) If the insertion site shows signs of infection (e.g. redness,
warm to touch, purulent discharge, etc.) consult with a physician.
Topical anesthetic cream/patches may be used to decrease pain at an IVAD access site. However,
topical anesthetic cream/patches should not be used on the access site of a newly inserted IVAD where
incision glue has been used (instead of stitches), as there has been shown to be a reaction between
topical anesthetic cream/patches and incision glue that may contribute to the development of an
infection.
Dressings should be applied to tunneled CVCs in inpatient and residential settings. Rationale: CVC sites
should be covered due to the increased risk of nosocomial infections in the acute care setting . (Center
for Disease Control and Prevention, 2011)
The dressing on a Hemodialysis Catheter is cared for by the Renal Unit nurses during Hemodialysis.
Exception: Registered Nurses working in a non-Renal clinical area may change a dressing if it is
compromised (i.e. if the dressing becomes damp, loose, or soiled) between hemodialysis treatments or
after renal unit hours in order to protect the site from potential infection. The Renal Unit should be
notified as soon as possible of any new complications with the hemodialysis catheter, such as profuse
bleeding, dislodgement, or fever.
Skin Care
All interventions related to IV Therapy, have the potential to affect skin integrity; from the cleansing
solution, to the friction scrub, to the securement device, to the application of the dressing. Catheter
insertion also creates an unavoidable full-thickness wound at the entry site. Cleansing solutions and a
friction scrub disrupt the skin and create shearing forces on the skin. Antimicrobial preparation of the
skin is necessary, but disrupts the natural flora of the skin by design.
Securement devices and dressings can contribute to shearing forces on the skin. Unfortunately, despite
the prevalence of IV Therapy, little research has been done on the effects on the skin.
When erythema is present after application of cleansing solutions, it is generally presumed to be an
allergic reaction. However, two forms of contact dermatitis have been reported in the literature.
Allowing the cleansing solution to dry completely before dressing application and the use of new
dressing products made for sensitive skin will help to alleviate this is a large sector of
the population.
Adhesive trauma is also present, particularly skin stripping and tension blisters. Correct
application and removal techniques for adhesive products are vital to avoid injury to
the skin. Ensure you follow all of the manufacturer’s directions for use.
To prevent damage to the skin, a sterile barrier product shall be applied to the skin after
the cleansing solution has dried completely. If using a CHG-impregnated CVC
dressing, do not apply the barrier film to the area where the CHG pad will contact the
skin.
Figure 40
Image courtesy of 3M©

77
Use of a sterile clear acrylic absorbent dressing product underneath the TSM dressing has been shown
to be effective in managing skin tears without compromising the efficacy of a TSM dressing with
securement properties. See also Clinical Skills by Elsevier for application procedure.
In cases of more severe or complex skin damage, complete a Wound Assessment and consult with your
Wound Care Clinician as required.
(Thayer, 2012)
Blood Sampling
Blood sampling for laboratory testing from a CVC should be considered based on an evaluation
of benefits versus risks. (Infusion Nurses Society, 2016)
Blood must be drawn in a certain order. Refer to the Fraser Health Lab Accessioning Manual for
further information.
The discard method of drawing blood will be used [Exception: Venous Arterial blood
Management Protection (VAMP) system in Critical Care areas]. Rationale: Other methods have
the potential to cause hemolysis and/or re-infuse clots. (Registered Nurses Association of
Ontario, 2008)
Use the largest lumen (usually distal) of multi-lumen CVCs whenever possible. Rationale:
Decreases the risk of a thrombus occluding the lumen. (Registered Nurses Association of
Ontario, 2008)
Have a dedicated lumen for blood draws if able. Rationale: Reduces risk of contaminated sample
due to catheter biofilm, including Parenteral Nutrition. (Alexander, Corrigan, Gorski, Hankins, &
Perucca, 2010) (Edwards Lifesciences, 2002) (Infusion Nurses Society, 2016) (Infusion Nurses
Society, 2011) (Registered Nurses Association of Ontario, 2008)
Stop all infusions prior to blood sampling. For drug levels, it is not recommended to draw the
level from the same lumen being used for the drug infusion, but caution should still be taken
when interpreting results of therapeutic drug levels draw through a CVC. Rationale: Drug levels
may be inaccurate when obtained through the same catheter lumen
used for drug infusion. (Infusion Nurses Society, 2016)
When drawing blood from a CVC with a continuous infusion running
without the use of a connector/ neutral displacement cap, stop the
infusion(s), remove the administration set, and attach the luer lock
Vacutainer® (see Figure 29) directly to the catheter lumen.
Exception: Blood Cultures must be done using syringe method ONLY. See Blood
Cultures.
Figure 41
Image courtesy of 3M©
Figure 42
Image courtesy of BCCSS©
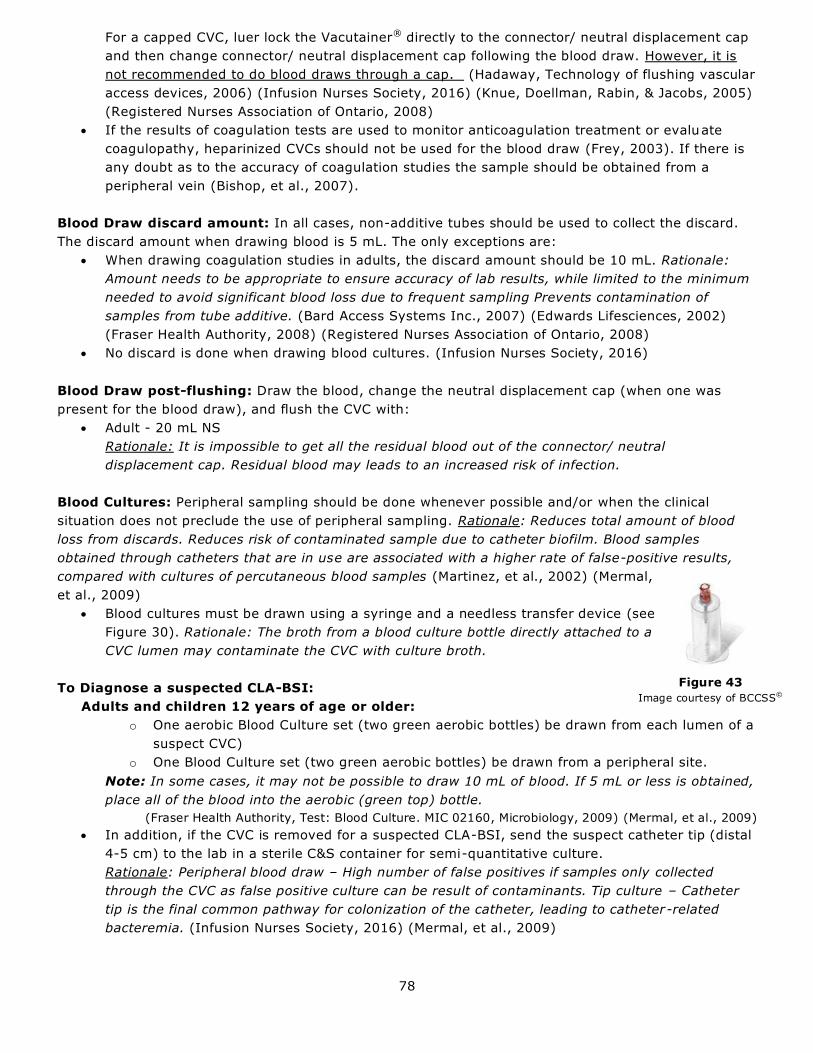
78
For a capped CVC, luer lock the Vacutainer® directly to the connector/ neutral displacement cap
and then change connector/ neutral displacement cap following the blood draw. However, it is
not recommended to do blood draws through a cap. (Hadaway, Technology of flushing vascular
access devices, 2006) (Infusion Nurses Society, 2016) (Knue, Doellman, Rabin, & Jacobs, 2005)
(Registered Nurses Association of Ontario, 2008)
If the results of coagulation tests are used to monitor anticoagulation treatment or evaluate
coagulopathy, heparinized CVCs should not be used for the blood draw (Frey, 2003). If there is
any doubt as to the accuracy of coagulation studies the sample should be obtained from a
peripheral vein (Bishop, et al., 2007).
Blood Draw discard amount: In all cases, non-additive tubes should be used to collect the discard.
The discard amount when drawing blood is 5 mL. The only exceptions are:
When drawing coagulation studies in adults, the discard amount should be 10 mL. Rationale:
Amount needs to be appropriate to ensure accuracy of lab results, while limited to the minimum
needed to avoid significant blood loss due to frequent sampling Prevents contamination of
samples from tube additive. (Bard Access Systems Inc., 2007) (Edwards Lifesciences, 2002)
(Fraser Health Authority, 2008) (Registered Nurses Association of Ontario, 2008)
No discard is done when drawing blood cultures. (Infusion Nurses Society, 2016)
Blood Draw post-flushing: Draw the blood, change the neutral displacement cap (when one was
present for the blood draw), and flush the CVC with:
Adult - 20 mL NS
Rationale: It is impossible to get all the residual blood out of the connector/ neutral
displacement cap. Residual blood may leads to an increased risk of infection.
Blood Cultures: Peripheral sampling should be done whenever possible and/or when the clinical
situation does not preclude the use of peripheral sampling. Rationale: Reduces total amount of blood
loss from discards. Reduces risk of contaminated sample due to catheter biofilm. Blood samples
obtained through catheters that are in use are associated with a higher rate of false-positive results,
compared with cultures of percutaneous blood samples (Martinez, et al., 2002) (Mermal,
et al., 2009)
Blood cultures must be drawn using a syringe and a needless transfer device (see
Figure 30). Rationale: The broth from a blood culture bottle directly attached to a
CVC lumen may contaminate the CVC with culture broth.
To Diagnose a suspected CLA-BSI:
Adults and children 12 years of age or older:
o One aerobic Blood Culture set (two green aerobic bottles) be drawn from each lumen of a
suspect CVC)
o One Blood Culture set (two green aerobic bottles) be drawn from a peripheral site.
Note: In some cases, it may not be possible to draw 10 mL of blood. If 5 mL or less is obtained,
place all of the blood into the aerobic (green top) bottle.
(Fraser Health Authority, Test: Blood Culture. MIC 02160, Microbiology, 2009) (Mermal, et al., 2009)
In addition, if the CVC is removed for a suspected CLA-BSI, send the suspect catheter tip (distal
4-5 cm) to the lab in a sterile C&S container for semi-quantitative culture.
Rationale: Peripheral blood draw – High number of false positives if samples only collected
through the CVC as false positive culture can be result of contaminants. Tip culture – Catheter
tip is the final common pathway for colonization of the catheter, leading to catheter-related
bacteremia. (Infusion Nurses Society, 2016) (Mermal, et al., 2009)
Figure 43
Image courtesy of BCCSS©

79
Removal of Short-Term CVCs and PICCs
Central venous catheters (CVCs) including peripherally inserted central catheters (PICCs) are removed
when therapy is completed, when the catheter’s presence could cause complications (e.g. the catheter
is malpositioned), or when the patient has developed a catheter-related infection. Central venous
catheters should be removed when no longer necessary to decrease the risk of infection. If a line was
placed under non-sterile technique, such as during an emergency, the line should be removed within 48
hours.
POINTS TO REMEMBER BEFORE REMOVAL:
Ensure presence of a physician’s order for removal.
Assess vital signs and neurovascular status of the extremity distal to the catheter insertion
site.
Assess the current coagulation values. (consult physician before removing if patient has
elevated coagulation values, is on anti-coagulants, or has a pacemaker).
Assess the catheter site for signs of infection (i.e., redness, warmth, tenderness, swelling, and
presence of drainage.)
POINTS TO REMEMBER FOR THE REMOVAL PROCEDURE:
Place the patient supine in a slight Trendelenburg position. The level of the catheter site should
be below the heart to prevent air embolus during removal. Place the patient flat if
Trendelenburg is contraindicated or not tolerated by the patient, or if a femoral CVC
will be removed. If the CVC is in the femoral vein, extend the patient’s leg and ensure
that the groin area is adequately exposed.
If removing an internal jugular or subclavian catheter, ask the patient to take a deep breath in
and hold it. This causes a valsalva response. If a valsalva response is contraindicated, such as
with glaucoma or retinopathy, the patient should be asked to exhale during the removal. If
the patient is receiving positive-pressure ventilation, withdraw the catheter during
the inspiratory phase of the respiratory cycle or while delivering a breath via a bag
valve mask device.
Gently withdraw the catheter, pulling parallel to the skin and using a constant, steady motion.
If resistance is met, do not continue to remove the catheter. Notify practitioner
immediately.
As the introducer exits the site, apply pressure with petroleum-based ointment and sterile
gauze (or a petroleum impregnated sterile gauze dressing). The distal end of a multi-lumen
catheter should be removed quickly because the exposed proximal and medial
openings could permit the entry of air.
Upon removal of the catheter, inspect the tip for integrity & length. Place the catheter on a
moisture-proof pad and dispose of properly. If an infusion-related infection is suspected,
a segment of the catheter may be sent for culture. If damage to or fragmentation of
the catheter is observed, additional assessment, such as a chest radiograph, is
warranted.

80
Continue applying firm, direct pressure over the insertion site with petroleum-based ointment
and sterile gauze (or a petroleum impregnated sterile gauze dressing), sealing the site until
bleeding has stopped. Because CVCs are placed in large veins, it may take up to 10
minutes for hemostasis to occur. Pressure may be needed for a longer period of time
if the patient has been receiving anticoagulant therapy or if coagulation studies are
abnormal.
Apply a sterile dressing to the site. Use either a transparent, semi-permeable dressing or
gauze dressing overtop of the petroleum impregnated sterile gauze dressing. If the patient is
diaphoretic or if the site is bleeding or oozing, a gauze dressing is preferred.
Maintain bed rest for at least 30 minutes after catheter removal. Assess the site for signs of
bleeding every 15 minutes times 2, and prn (i.e. every 30 minutes times 2, then 1 hour later as
needed).
Change dressing and assess site every 24 hours after catheter removal until site is
epithelialized.
Infection Control
All staff will follow the latest Infection Control Guidelines for Principles of Infection Prevention
and control, Routine Practices (including hand hygiene, application of personal protective
equipment, and sharps handling and disposal) and Additional Precautions, and blood and body
fluid spills clean-up.
Prior to all procedures, clean dressing cart or bedside table using bactericidal wipes.
Hand hygiene - cleanse hands using hospital approved alcohol hand gel as per Infection Control
protocol.
Mask and wear sterile gloves for all times that the line is opened (e.g. cap change), the site is
uncovered, and with all immunocompromised patients.
All neutral displacement IV caps and injection ports must be cleansed with a 70% Alcohol swab
for 30 seconds and let dry completely prior to accessing.
Positive displacement IV caps are changed q96 hours, after blood draws, or when contamination
is suspected.
CVC dressings are changed q7days and prn.
Routine culture of CVC catheter tips is not recommended.
Blood Cultures:
For the diagnosis of a Central Line Associated Bloodstream Infection (CLA-BSI), it is
recommended that one aerobic Blood Culture set (two green aerobic bottles) be drawn from
each lumen of the suspect CVC AND one Blood Culture set (two green aerobic bottles) be drawn
from a peripheral site
HOWEVER, if the source of sepsis is unknown, samples need to be collected from at least 2
sites; one set drawn percutaneously from a peripheral vein and one set drawn through the CVC.
One set is drawn with two aerobic bottles, the other set with one aerobic and one anaerobic
bottle.
Additionally, with a suspect CLA-BSI, once the CVC is removed send the suspect catheter tip
(distal 4-5 cm) to the lab in a sterile C&S container for semi-quantitative culture (see FH
Laboratories Microbiology Manual).
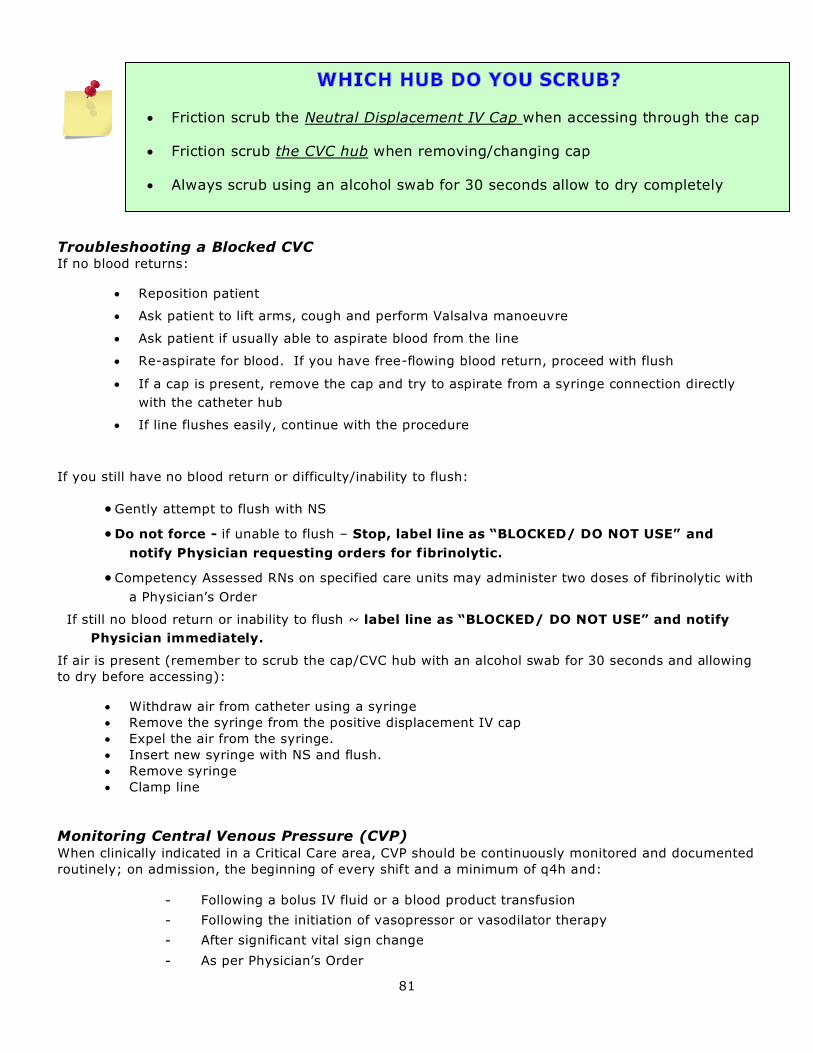
81
Troubleshooting a Blocked CVC If no blood returns:
Reposition patient
Ask patient to lift arms, cough and perform Valsalva manoeuvre
Ask patient if usually able to aspirate blood from the line
Re-aspirate for blood. If you have free-flowing blood return, proceed with flush
If a cap is present, remove the cap and try to aspirate from a syringe connection directly
with the catheter hub
If line flushes easily, continue with the procedure
If you still have no blood return or difficulty/inability to flush:
Gently attempt to flush with NS
Do not force - if unable to flush – Stop, label line as “BLOCKED/ DO NOT USE” and
notify Physician requesting orders for fibrinolytic.
Competency Assessed RNs on specified care units may administer two doses of fibrinolytic with
a Physician’s Order
If still no blood return or inability to flush ~ label line as “BLOCKED/ DO NOT USE” and notify
Physician immediately.
If air is present (remember to scrub the cap/CVC hub with an alcohol swab for 30 seconds and allowing
to dry before accessing):
Withdraw air from catheter using a syringe
Remove the syringe from the positive displacement IV cap
Expel the air from the syringe.
Insert new syringe with NS and flush.
Remove syringe
Clamp line
Monitoring Central Venous Pressure (CVP) When clinically indicated in a Critical Care area, CVP should be continuously monitored and documented
routinely; on admission, the beginning of every shift and a minimum of q4h and:
- Following a bolus IV fluid or a blood product transfusion
- Following the initiation of vasopressor or vasodilator therapy
- After significant vital sign change
- As per Physician’s Order
Friction scrub the Neutral Displacement IV Cap when accessing through the cap
Friction scrub the CVC hub when removing/changing cap
Always scrub using an alcohol swab for 30 seconds allow to dry completely

82

83
Test your Learning
True or False (If False, please write correct answer):
1. Patient must be in Trendelenberg for routine dressing changes. T F ____________
2. Primary IV tubing is changed q96hours (except blood, TPN). T F ____________
3. Two small smooth-edged clamps are to be at the bedside. T F ____________
4. Positive displacement caps are changed q72hours. T F ____________
5 CVC site dressings are changed q10days and prn. T F ____________
6. Capped short-term CVCs should be flushed immediately after capping, blood work, IV
medications, and q12hours in acute care. T F ____________
7. Blue dead-ended caps are acceptable to cap a CVC in the FHA. T F ____________
8. A clampable portion of tubing is not necessary for open-ended catheters. T F
9. When should an electronic infusion device be used? ____________________
10. State 4 situations when a capped CVC should be flushed.
a) ______________________________
b) ______________________________
c) ______________________________
d) ______________________________
11. How often should an un-accessed IVAD be flushed? Q__________
12. When performing a blood draw from a CVC, ___ tubes(s) of blood must be discarded.

84
Answers:
1. False - patient may be in any position for a dressing change
2. True
3. False - one smooth edge clamp is required at bedside
4. False – caps are changed q96h
5. False
6. True
7. False - only neutral displacement caps are used to cap CVCs in FHA - patients transferred from
other facilities may not have them
8. False - all open-ended CVCs must have a clampable portion
9. An electronic infusion device must be used for all IV infusions administered through a CVC
10. a) q12h (Acute and Residential)
b) following CVC capping
c) following IV medications
d) following blood work
11. monthly or q28days
12. 0 – when drawing blood cultures
1 – when patient has bloodwork with NO coagulation studies
2 – when the patient has bloodwork with coagulation studies ordered
You have just completed a self-learning module that has outlined
the basic principles of central venous catheters!

85
REFERENCES
Alexander, J., Corrigan, A., Gorski, L., Hankins, J., & Perucca, R. (2010). Infusion Nursing An Evidence-Based Approach. St.
Louis: Saunders Elsevier.
American Association of Critical-Care Nurses. (2007). AACN Procedure Manual for Critical Care (5 ed.). Philadelphia: W.B.
Saunders Company.
Amjad, I., Murphy, T., Nylander-Housholder, L., & Ranft, A. (2011). A New Approach to Management of Intravenous Infiltration in
Pediatric Patients: Pathophysiology, Classification, and Treatment. Journal of Infusion Nursing, 34(4), 242-249.
Association for Professionals in Infection Control and Epidemiology. (2009). An APIC Guide. Guide to the Elimination of Catheter-
Related Bloodstream Infection. Washington, DC.
Bard Access Systems Inc. (2007). Nursing Procedure Manual. Salt Lake City, UT.
BC Cancer Agency. (2014, November). CHEMOTHERAPEUTIC DRUGS, ADMINISTRATION OF:. Nursing Practice Reference.
Vancouver, BC, Canada. Retrieved September 21, 2015, from http://www.bccancer.bc.ca/nursing-
site/Documents/C252ChemotherapeuticAgentsAdministrationOf.pdf
BC Renal Agency. (2013, January). Vascular Access Guideline: Insertion and Removal of Tunneled Hemodialysis Catheters.
Retrieved from BC Renal Agency: http://www.bcrenalagency.ca/node/796
Berube, C., & Zehnder, J. (2016, April 18). Catheter-related upper extremity venous thrombosis. (D. Cull, Ed.) Retrieved from
https://www.uptodate.com/contents/catheter-related-upper-extremity-venous-thrombosis
Bishop, L., Dougherty, L., Bodenham, A., Mansi, J., Crowes, P., Kibbler, C., . . . Treleaven, J. (2007). Guidelines on the insertion
and management of central venous access devices in adults. International Journal of Laboratory Hematology, 29, 261-
278.
Broadhurst, D. (2013). Death by Air: How Much is Too Much? Vascular Access, 7(1), 16-25.
Campisi, C., Biffi, R., & Pittiruti, M. (2007). Catheter-Related Central Venous Thrombosis: The Development of a Nationwide
Consensus Paper in Italy. Journal of the American Vascular Association, 12(1), 38-46.
Canadian Patient Safety Institute. (2008). Outcomes and Risk Factors for Central Venous Catheter-Related Bloodstream
Infections in Critical Care and Hematopoietic Stem Cell Transplant Pateints Hospitalized in Canadian Acute Care
Hospitals. Canadian Patient Safety Institute.
Canadian Vascular Access Association. (2013). Occlusion Management Guideline for Central Venous Access Devices (CVADs).
Vascular Access, 7(S1).
Center for Disease Control and Prevention. (2011). Guidelines for the Prevention of Intravascular Catheter-Related Infections.
Atlanta: Center for Disease Control and Prevention.
Chittick, P., Azhar, S., Movva, K., Keller, P., Boura, J. A., & Band, J. (2013). Early Onset versus Late Onset Peripherally Inserted
Central Venous Catheter Infections: An Analysis of Risk Factors and Microbiology. Infection Control and Hospital
Epidemiology, 34(9), 980-983.
Chopra, V., O'Horo, J. C., Rogers, M. A., Maki, D. G., & Safdar, N. (2013). The Risk of Bloodstream Infection Associated with
Peripherally Inserted Central Catheters Compared with Central Venous catheters in Adults: A Systematic Review and
Meta-Analysis. Infection Control and Hospital Epidemiology, 34(9), 908-918.
College of Registered Nurses of British Columbia. (2015). Scope of Practice for Registered Nurses: Standards, limits and
conditions. Retrieved September 6, 2013
Cook, L. S. (2013). Infusion-Related Air Embolism. Journal of Infusion Nursing, 36(1), 26-36.
Daneman, N., Downing, M., & Zagorski, B. M. (2012). How long should peripherally inserted central catheterizat ion be delayed in
the context of recently documented bloodstream infection? Journal of Vascular and Interventional Radiology, 23(1), 123-
125.
Dariushnia, S. R., Wallace, M. J., Siddiqi, N. H., Towbin, R. B., Wojak, J. C., Kundu, S., & Cardella, J. F. (2010). Quality
Improvement Guidelines for Central Venous Access. Journal of Vascular Interventional Radiology, 21, 976-981.
Doellman, D. (2011). White Paper: The Role of Technology in Reducaing Risks Accociated with CRBSI. Ivera Medical Corporation.
Dychter, S. S., Gold, D. A., Carson, D., & Haller, M. (2012). Intravenous Therapy: A Review of Complications and Economic
Considerations of Peripheral Access. Journal of Infusion Nursing, 35(2), 84-91.
Edwards Lifesciences. (2002). Quick Guide to Central Venous Access. Author. Edwards Lifesciences.
Forauer, A. R. (2007). Pericardial Tamponade in Patients with Central Venous Catheters. Journal of Infusion Nursing, 30(3), 161-
167.
Fraser Health Authority. (2008). Accessioning Protocol for Pre-Analytical Handling of Blood Collection Tubes and Capillary
Microcollection Samples. Fraser Health Authority.
Fraser Health Authority. (2009). Test: Blood Culture. MIC 02160, Microbiology. Laboratory Medicine and Pathology Sample
Collection and Dispatch Instructions.
Frey, A. (2003). Drawing Blood Samples from Vascular ACcess Devices. Journal of Infusion Nurisng, 26(5), 285-296.
Gebhard, R. E., Szmuk, P., Pivalizza, E. G., Melnikov, V., Vogt, C., & Warters, R. D. (2007). The Accuracy of Electrocardiogram-
Controlled Central Line Placement. International Anesthesia Research Society, 104(1), 65-70.
Gorski, L. (2007). Ethical Decision Making in the Repair of a Patient's Catheter. Journal of Infusion Nursing, 30(4), 203-204.
Groll, D., Davies, B., MacDonald, J., Nelson, S., & Virani, T. (2010). Evaluation of the Psychometric Properties of the Phlebitis and
Infiltration Scales for the Assessment of Complications of Peripheral Vascular Access Devices. Journal of Infusion
Nursing, 33(6), 385-390.
Hadaway, L. (2006). Technology of flushing vascular access devices. Journal of Infusion Nursing, 29(3).
Hadaway, L. (2007). Infiltration and Extravasation: Preventing a complication of IV catheterization. American Journal of Nursing,
107(8), 64-72.
Hadaway, L. (2011). Needleless Connectors: Improving Practice, Reducing Risks. Journal of the Association for Vascular Access,
16(1), 20-33.
Hadaway, L. (2012). Short Peripheral Catheters and Infection. Journal of Infusion Nursing, 35, 4, 230-240.
Hamilton, H. C., & Foxcroft, D. (2008). Ventral venous access sites for the prevention of venous thrombosis, stenosis and
infection in pateints requiring long-term intravenous therapy. The Cochrane Library(2).
Ho, K., & Liton, E. (2009). Chlorhexidine-impregnated dressing to prevent vascular and epidural catheter colonization and
infection: A Meta-analysis. Journal of Antimicrobial Chemotherapy, 58, 281-287.
86
Hunter, A., & Hunter, M. R. (2012). Reducing the Risk for Infection: Nursing Diagnosis. Vascular Access, 6(2), 26-30.
Infusion Nurses Society. (2011). Infusion Nursing Standards of Practice. Journal of Infusion Nursing.
Infusion Nurses Society. (2011). Policies and Procedures for Infusion Nursing (4 ed.). Norwood, MA: Infusion Nursing Society.
Infusion Nurses Society. (2012). INS Position Paper: Recommendations for Frequency of Assessment of the Short Peripheral
Catheter Site. Journal of Infusion Nursing, 35(5), 290-292.
Infusion Nurses Society. (2013, January 18). PICC Management. INS Infusion Spotlight. Infusion Nurses Society.
Infusion Nurses Society. (2016). Infusion Therapy Standards of Practice. Journal of Infusion Nursing, 39(1S).
Kaler, W., & Chinn, R. (2007). Successful Disinfection of Needleless Access Ports: A Matter of Time and Friction. Journal of the
Association of Vascular Access, 12(3), 140-142.
Kearon, C., Akl, E., Comerota, A., Prandoni, P., Bounameaux, H., Goldhaber, S., . . . Kahn, S. (2012). Antithrombotic Therapy for
VTE Disease: ntithrombotic Therapy and Prevention of Thrombosis, 9th ed: American College of Chest Physicians
Evidence-Based Clinical Practice Guidelines . Chest, 14(2 Suppl), e419s-e494s.
Knue, M., Doellman, D., Rabin, K., & Jacobs, B. (2005). The efficacy and safety of blood sampling through peripherally insert ed
central catheter devices in children. Journal of Infusion Nursing, 28(1), 30-35.
Martinez, J., DesJardin, J., Aronoff, M., Supran, S., Nasraway, S., & Snydman, D. (2002). Clinical utility of blood cultures drawn
from central venous or arterial catheters in critically ill surgical patients. Critical Care Medicine, 30(1), 7-13.
Mermal, L. A., Allon, M., Bouza, E., Craven, D. E., Flynn, P., O'Grady, N. P., . . . Warren, D. K. (2009). Clinical practice guidelines
for the diagnosis and management of intravascular catheter-related infection: 2009 update by the Infectious Diseases
Society of America. Infectious Diseases Society of America.
O'Grady, N. P., Alexander, M., Burns, L. A., Dellinger, E. P., Garland, J., Heard, S. O., . . . HICPAC. (2011). Guidelines for the
prevention of intravascular catheter-related infections. American Journal of Infection Control, 39, S1-S34.
Olsen, K., Hanson, J., Gilpin, J., & Heffner, T. (2004). Evaluation of a no-dressing intervention for tunneled central venous
catheter access exit sites. Journal of Infusion Nursing, 27(1).
Pennsylvavia Patient Safety Authority. (2007). IV infiltration: Be alarmed even when your pump isn't. Patient Safety Advisory, 4,
1-4.
Perencevich, E. N., & Pittet, D. (2009). Preventing Catheter-Related Bloodstream Infections: Thinking Outside the Checklist.
Journal of the American Medical Association, 301(12), 1285-1287.
Pittiruti, M., Hamilton, H., Biffi, R., MacFie, J., & Pertkiewicz, M. (2009). ESPEN Guidelines on Parenteral Nutrition: Central Venous
Catheters (access, care, diagnosis, and therapy of complications). Clinical Nutrition, 28, 365-377.
Provonost, P., Needham, D., Bereholtz, S., Sinopoli, D., Chu, H., Cosgrove, S., . . . Goeschel, C. (2006). An intervention to
decrease catheter-related bloodstream infections in the ICU. New England Journal of Medicine, 355(26), 2725-2732.
Registered Nurses Association of Ontario. (2008). Nursing best practice guideline: Care and maintenance to reduce vascular
access complications. Toronto: Registered Nurses Association of Ontario.
Royer, T. (2010). Implementing a Better Bundle to Achieve and Sustain a Zero Central Line-Associated Bloodstream Infection
Rate. Journal of Infusion Nursing, 33(6), 398-406.
Ruschulte, H., Franke, M., Gastmeier, P., Zenz, S., Mahr, K. H., Buchholz, S., . . . Piepenbrock, S. (2009). Prevention of central
venous catheter related infections with chlorhexidine gluconate impregnated wound dressings: A randomized controlled
trial. Annals of Hematology, 88, 267-272.
Safer Healthcare Now. (2012). Central Line-Associated Bloodstream Infection (CLABSI). Retrieved from Safer Healthcare Now:
http://www.saferhealthcarenow.ca/EN/Interventions/CLI/Pages/default.aspx
Shamir, M. Y., & Bruce, L. J. (2011). Central Venous Catheter-Induced Cardiac Tamponade: A Preventable Complication.
International Anesthesia Research Society, 112(6), 1280-1282.
Simona Pop, R. (2012). A Pediatric Peripheral Intravenous Infiltration Assessment Tool. Journal of Infusion Nursing, 35(4), 243-
248.
Spear, M. (2014). When and how to culture a chronic wound. Wound Care Advisor, 3(1), 23-25.
Stevens, T. P., & Schulman, J. (2012). Evidence-based approach to preventing central line-associtaed bloodstream infection in
the NICU. Acta Paediatrica, Supp 464, 11-16.
Sydney South West Area Health Service. (2007). Central Venous Access Device (CVAD) Position Confirmation. Sydney South
West Area Health Service.
Thayer, D. (2012). Skin Damage Associated with Intravenous Therapy. Journal of Infusion Nursing, 35(6), 390-401.
Timsit, J.-F., Schwebel, C., Bouadma, L., Geffroy, A., Garrouste-Orgeas, M., Pease, S., . . . Lucet, J.-C. (2009). Chlorhexidine-
Impregnated Sponges and Less Frequent Dressing Changes for Prevention of Catheter-Related Infections in Critically Ill
Adults: A Randomized Controlled Trial. Journal of the American Medical Association, 301(12), 1231-1241.
Trerotola, S., Stavropoulos, S., Mondschein, J., Patel, A., Fishman, N., Fuchs, B., . . . Chittams, J. (2010). Triple -lumen
peripherally inserted central catheter in patients in the critical care unit: prospective evaluation. Radiology, 256(1), 312.
Tripathi, S., Kaushik, V., & Singh, V. (2008). Peripheral IVs: Factors Affecting Complications and Patency—A Randomized
Controlled Trial. Journal of Infusion Nursing, 31(3), 182-188.
Truscott, W. (2013). Preventing Central Line Complications - Common and Not-Yet-Common Approaches: Part 1. Vascular
Access, 7(2), 22-26.
Vessely, T. M. (2003). Central Venous Catheter Tip Position: A Continuing Controversy. Journal of Vascular Interventional
Radiology, 14, 527-534.
Washington, G. T., & Barrett, R. (2012). Peripheral Phlebitis: A Point Prevalence Study. Journal of Infusion Nursing, 35(4), 252-
258.
Wheeler, D., Wong, H., & Shanley, T. (2007). Pediatric Critical Care Medicine: Basic Science and Clinical Evidence. London:
Springer-Verlag.
Wilkins, R. G., & Unverdorben, M. (2012). Accidental Intravenous Infusion of Air. Journal of Infusion Nursing, 35(6), 404-408.
WorkSafe BC. (2012). Getting the full benefits if safety-engineered medical sharps. WorkSafe Bulletin. Workers' Compensation
Board of BC.
Yacopetti, N. (2008). Central Venous Catheter-Related Thrombosis: A Systematic Review. Journal of Infusion Nursing, 31(4),
241-248.
Yoder, D. (2001). Cardiac Perforation and Tamponade: The Deadly Duo of Central Venous Catheters. International Journal of
Trauma Nursing, 7(3), 108-112.

87
APPENDICES
APPENDIX A: CVC Skills Scope of Practice
APPENDIX B: Vascular Access Device Selection Algorithm
APPENDIX C: Central Venous Catheter Insertion and Removal Form
APPENDIX D: Regional CVC Maintenance Worksheet
APPENDIX E: IV Tubing Line Setup, Configurations, and Change Frequency
APPENDIX F: CVC Skills Inventory
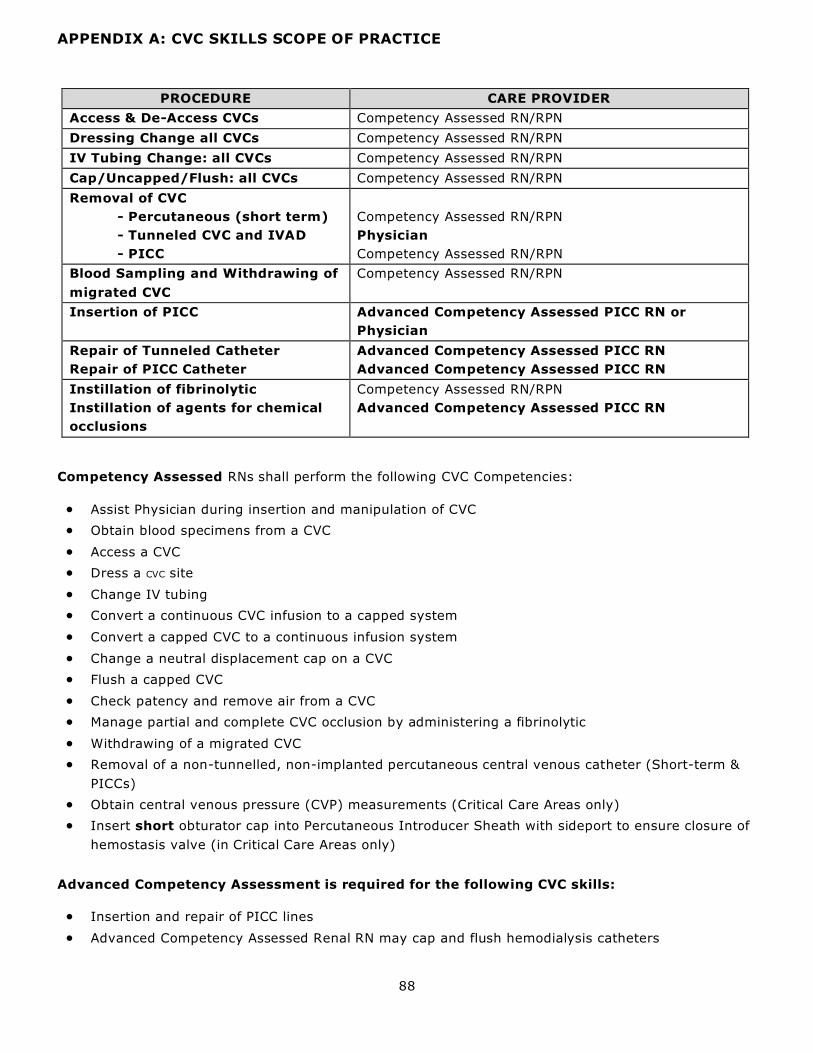
88
APPENDIX A: CVC SKILLS SCOPE OF PRACTICE
PROCEDURE CARE PROVIDER
Access & De-Access CVCs Competency Assessed RN/RPN
Dressing Change all CVCs Competency Assessed RN/RPN
IV Tubing Change: all CVCs Competency Assessed RN/RPN
Cap/Uncapped/Flush: all CVCs Competency Assessed RN/RPN
Removal of CVC
- Percutaneous (short term)
- Tunneled CVC and IVAD
- PICC
Competency Assessed RN/RPN
Physician
Competency Assessed RN/RPN
Blood Sampling and Withdrawing of
migrated CVC
Competency Assessed RN/RPN
Insertion of PICC Advanced Competency Assessed PICC RN or
Physician
Repair of Tunneled Catheter
Repair of PICC Catheter
Advanced Competency Assessed PICC RN
Advanced Competency Assessed PICC RN
Instillation of fibrinolytic
Instillation of agents for chemical
occlusions
Competency Assessed RN/RPN
Advanced Competency Assessed PICC RN
Competency Assessed RNs shall perform the following CVC Competencies:
Assist Physician during insertion and manipulation of CVC
Obtain blood specimens from a CVC
Access a CVC
Dress a CVC site
Change IV tubing
Convert a continuous CVC infusion to a capped system
Convert a capped CVC to a continuous infusion system
Change a neutral displacement cap on a CVC
Flush a capped CVC
Check patency and remove air from a CVC
Manage partial and complete CVC occlusion by administering a fibrinolytic
Withdrawing of a migrated CVC
Removal of a non-tunnelled, non-implanted percutaneous central venous catheter (Short-term &
PICCs)
Obtain central venous pressure (CVP) measurements (Critical Care Areas only)
Insert short obturator cap into Percutaneous Introducer Sheath with sideport to ensure closure of
hemostasis valve (in Critical Care Areas only)
Advanced Competency Assessment is required for the following CVC skills:
Insertion and repair of PICC lines
Advanced Competency Assessed Renal RN may cap and flush hemodialysis catheters

89
APPENDIX B: Vascular Access Device Selection Algorithm

90
APPENDIX C: Central Venous Catheter Insertion and Removal Form
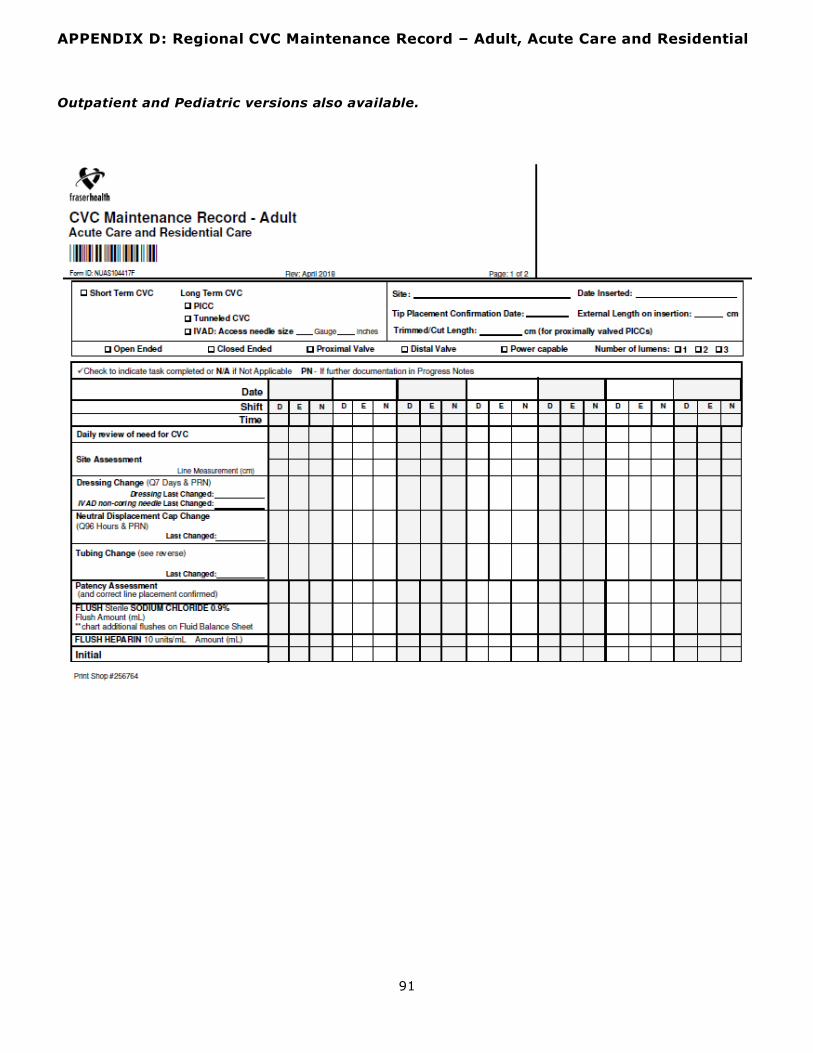
91
APPENDIX D: Regional CVC Maintenance Record – Adult, Acute Care and Residential
Outpatient and Pediatric versions also available.

92
APPENDIX E : IV Tubing Line Setup, Configurations, and Change Frequency
PRIMARY IV ADMINISTRATION SETUP ONLY (e.g. 2/3 1/3 @ 125 mL/hr): Acute Care & Residential: Date and change primary administration tubing every 96 hours, when
contaminated, or whenever indicated by the solution/medication that is being administered (e.g. proPOFol, lipids), and/or after each use.
Community Care: Change tubing every 24 hours in clinic setting, Change tubing every 72 hours
and prn in home setting
PRIMARY ADMINISTRATION SETUP WITH SECONDARY ADMINISTRATION SET
(“piggyback”) (e.g. QID antibiotic, etc.) Acute Care & Residential: Date and change primary administration tubing every 96 hours, when
contaminated, or whenever indicated by the solution/medication that is being administered (e.g.
proPOFol, lipids), and/or after each use. Community Care: Change tubing every 24 hours in clinic setting, Change tubing every 72 hours
and prn in home setting
Secondary: change Q24H
PRIMARY ADMINISTRATION SETUP WITH CONTINUOUS INFUSION SET (e.g.
continuous infusion of heparin, nitroglycerin, etc.) Acute Care & Residential: Date and change primary administration tubing every 96 hours, when
contaminated, or whenever indicated by the solution/medication that is being administered (e.g. proPOFol, lipids), and/or after each use.
Community Care: Change tubing every 24 hours in clinic setting, Change tubing every 72 hours
and prn in home setting
INTERMITTENT INFUSION (with no Primary Administration Setup) (e.g. BID antibiotic,
etc.) Intermittent infusion: change tubing after each dose
ADD-ON DEVICES (Needleless Connectors, Extension tubing, dead end caps) PIVs
Acute Care & Residential: Change needleless connectors and/or extension tubing every 7 days
Community Care: Change needleless connectors and/or extension tubing every 6-7 days CVCs
Acute Care: Change needleless connectors and/or extension tubing every 96 hours
Residential & Community Care: Change needleless connectors and/or extension tubing every 6-
7 days
SPECIALTY PRODUCTS Blood Products: Change blood tubing after 4 hours or after 4 units of blood, whichever comes first.
(Refer to Blood Administration Clinical Practice Guidelines for further details)
Parenteral Nutrition: For infusions containing amino acids/dextrose, change the tubing every 96 hours.
Infusions containing lipid emulsion (proPOFol): change the tubing with each dose or a
minimum of every 6 to 12 hours.

93
APPENDIX F: Central Venous Catheter (CVC) Skills Inventory
NAME: __________________________________ UNIT: _____________________
CNE/MENTOR: ____________________________
1) Specialized Skill: Capping a CVC/ Changing a neutral displacement IV cap
Date of Theory & Lab CNE Signature Clinical Evaluation date CNE/Mentor Signature
2) Specialized Skill: Flushing a capped CVC
Date of Theory & Lab CNE Signature Clinical Evaluation date CNE/Mentor Signature
3) Specialized Skill: CVC Dressing Change
Date of Theory & Lab CNE Signature Clinical Evaluation date CNE/Mentor Signature
4) Specialized Skill: Changing CVC solution tubing
Date of Theory & Lab CNE Signature Clinical Evaluation date CNE/Mentor Signature
5) Specialized Skill: Blood sampling from a CVC (vacutainer and/or syringe method)
Date of Theory & Lab CNE Signature Clinical Evaluation date CNE/Mentor Signature
6) Specialized Skill: Accessing an IVAD
Date of Theory & Lab CNE Signature Clinical Evaluation date CNE/Mentor Signature
7) Specialized Skill: De-accessing an IVAD
Date of Theory & Lab CNE Signature Clinical Evaluation date CNE/Mentor Signature
8) Specialized Skill: Removing a Short-term CVC or PICC
Date of Theory & Lab CNE Signature Clinical Evaluation date CNE/Mentor Signature
9) Specialized Skill: De-clotting with Alteplase®
Date of Theory & Lab CNE Signature Clinical Evaluation date CNE/Mentor Signature

94

95

96
Fraser Health Authority©
2018