cb500x adventure engine guard rrp 437 engine... · remove all 3 rubber grommets and spacers from...
TRANSCRIPT

Honda Engine Guardv5 1 06 February 2018
Fitting Instructions for
CB500X Adventure Engine Guard RRP 437
NOTE: BEFORE COMMENCING WORK ON THE CONVERSION, TAKE TIME TO READ THE INSTRUCTIONS CAREFULLY. ALL WORK CAN BE CARRIED OUT BY A COMPETENT MECHANIC, BUT IF YOU ARE UNSURE PLEASE CONTACT US OR A MECHANICAL
PROFESSIONAL.
KEEP ALL PARTS THAT ARE REMOVED, AS IT IS POSSIBLE TO REMOVE OUR KITS AND RETURN THE BIKE TO STANDARD, IF REQUIRED
1. You may find it useful to watch the YouTube Video showing Juan Browne installing the Rally Raid Engine Guard before starting your installation.
https://youtu.be/yPT6G3Y3GnI
2. Place bike on the Side stand. Remove plastic and stainless OEM belly pan.
3. Remove OEM centre stand, if fitted, and discard the OEM pivot tube for centre stand. Check free fit of new pivot tube in frame, if it is tight, remove burrs in frame tube with a large round file. The new pivot tube must be able to go in freely.
4. Using 14mm socket, remove both OEM front engine mount bolts, and discard. DO NOT LOSE OEM ALUMINIUM SPACERS that fit between frame and engine, these sometimes fall out when OEM bolts are removed.

Honda Engine Guardv5 2 06 February 2018
5. Fit new Engine Guard at rear centre stand mounting and insert new Pivot Pin from left. It is preferable to grease the new tube before inserting it into the frame.
6. Rotate up Engine Guard and check for clearance between front header screw bracket and tubing, if there is not enough clearance, use grinder to remove required material.
7. Offer up Engine Guard and insert new M10 x 50 Hex Bolt and washer into r/hand engine mount, then repeat operation on l/hand of engine guard, but use 6mm stainless steel spacer provided between inside of left hand engine mounting lug on Engine Guard, and outside of OEM frame lug. Ensure both OEM aluminium spacers are replaced between engine and OEM frame. Use Loctite, or similar, on both these bolts, but DO NOT TIGHTEN FULLY.
Honda Engine Guardv5 3 06 February 2018
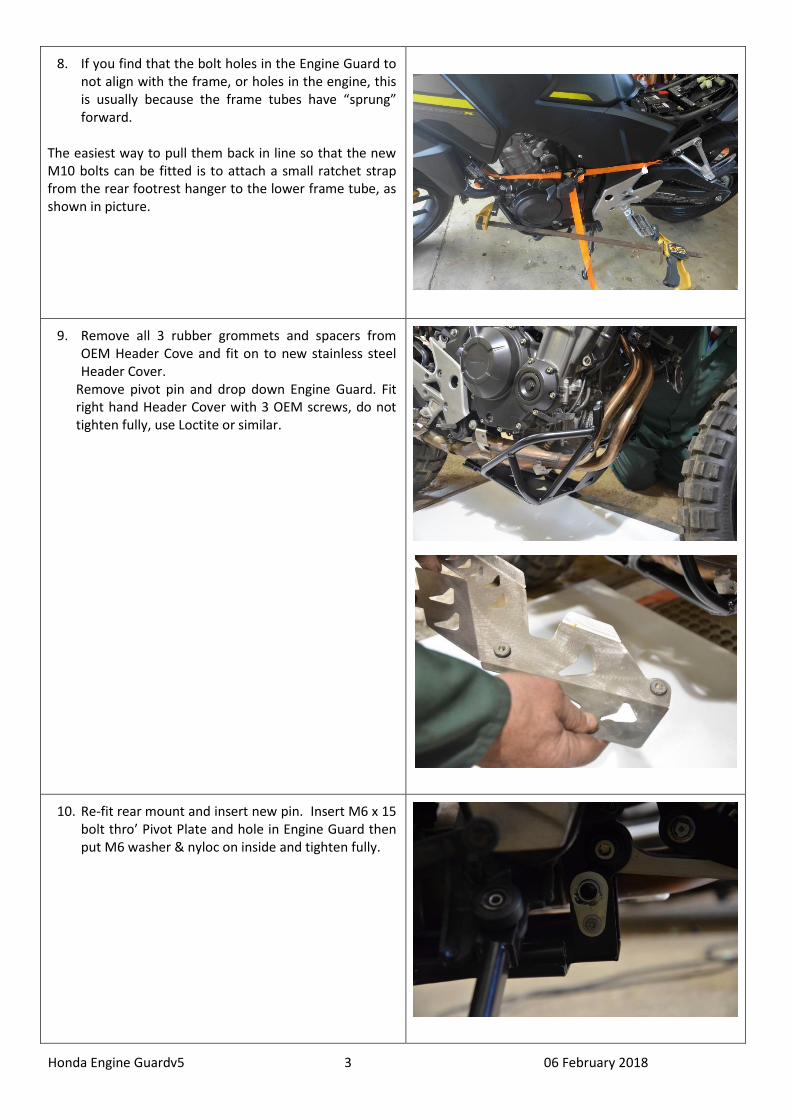
8. If you find that the bolt holes in the Engine Guard to not align with the frame, or holes in the engine, this is usually because the frame tubes have “sprung” forward.
The easiest way to pull them back in line so that the new M10 bolts can be fitted is to attach a small ratchet strap from the rear footrest hanger to the lower frame tube, as shown in picture.
9. Remove all 3 rubber grommets and spacers from OEM Header Cove and fit on to new stainless steel Header Cover.
Remove pivot pin and drop down Engine Guard. Fit right hand Header Cover with 3 OEM screws, do not tighten fully, use Loctite or similar.
10. Re-fit rear mount and insert new pin. Insert M6 x 15 bolt thro’ Pivot Plate and hole in Engine Guard then put M6 washer & nyloc on inside and tighten fully.
Honda Engine Guardv5 4 06 February 2018
11. Tighten all 3 screws fully on Header Cover.
12. Tighten both bolts to 40Nm, using 17mm socket.
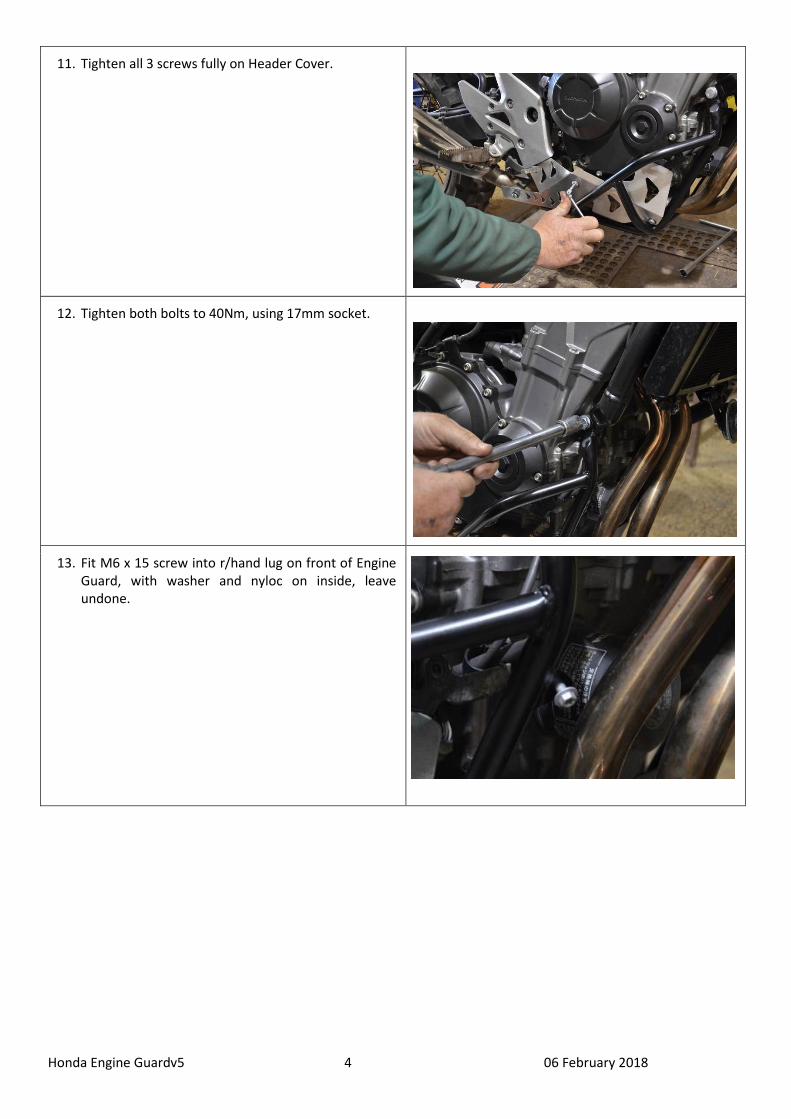
13. Fit M6 x 15 screw into r/hand lug on front of Engine Guard, with washer and nyloc on inside, leave undone.
Honda Engine Guardv5 5 06 February 2018
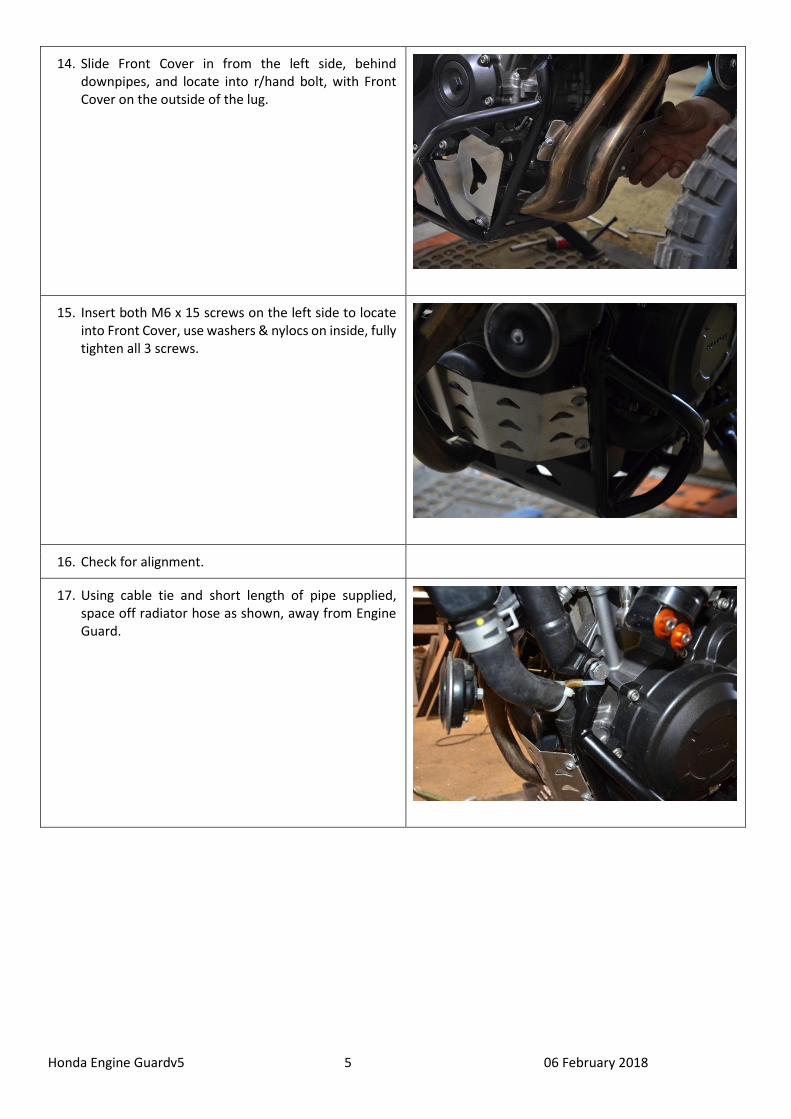
14. Slide Front Cover in from the left side, behind downpipes, and locate into r/hand bolt, with Front Cover on the outside of the lug.
15. Insert both M6 x 15 screws on the left side to locate into Front Cover, use washers & nylocs on inside, fully tighten all 3 screws.
16. Check for alignment.
17. Using cable tie and short length of pipe supplied, space off radiator hose as shown, away from Engine Guard.

Honda Engine Guardv5 6 06 February 2018
Oil change procedure with Rally-Raid Products Engine Guard fitted to CB500X/F models:
You may find watching Juan Browne’s YouTube Guide to changing the oil well worth watching before you
start you own oil change
https://youtu.be/BNzNRg5VLzc
1) Remove oil filter shield plate.
2) Loosen front [engine] mounting bolts a couple of turns, but do not remove.
3) Remove mounting pin from rear of engine guard, and pivot rear of engine guard down as per the photo below.
4) Access is then available to the oil sump plug (2nd photo), and the oil drains backwards into an oil plan placed in
front of the rear wheel. Note the final dribble of oil is neatly directed into the oil pan by the trailing engine of the
engine guard (as per 2nd photo).
5) Once oil is drained, refit and torque sump plug (a new washer is recommended by Honda, and comes supplied
with the OEM oil filter), and pivot the engine guard back into position and secure with the frame pin and M6 bolt.
6) Remove oil filter and replace with new.
7) Refit oil filter shield plate, and torque forward engine mounting bolts.
Honda Engine Guardv5 7 06 February 2018
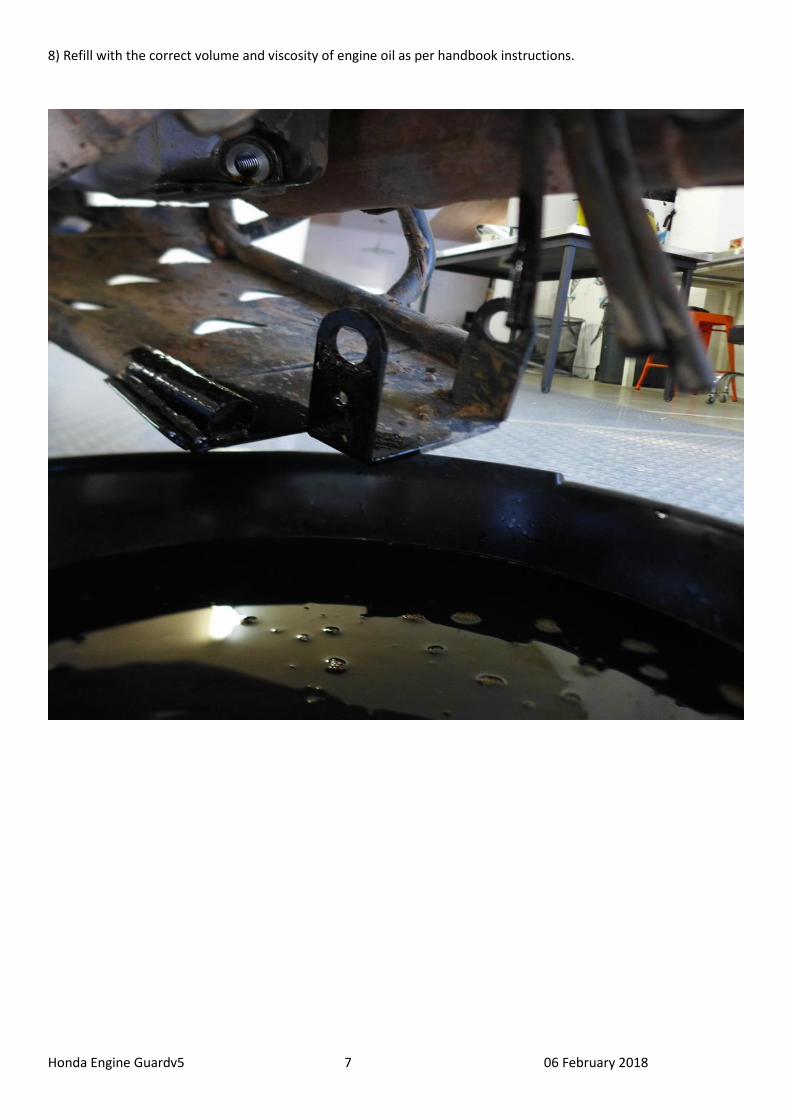
8) Refill with the correct volume and viscosity of engine oil as per handbook instructions.