care and handling of rotors · • inspect rotor body and tube cavities - pitting, rough spots,...
TRANSCRIPT

Care and Handling of Rotors

Today’s Objectives• Help you to use centrifuge systems
safely
• Ensure maximum life of your investment
• Avoid unbudgeted lab expenses
• Maximize experiment integrity
Table of Contents• Proper Rotor Use• Proper Use of Tools• Rotor Care and Maintenance• After-Sales Support• Out-of-Warranty Rotors/Rotor Retirement• What’s in it for you?

Centrifugation around since 1948
The First The First UltracentrifugeUltracentrifuge SpincoSpinco Model LModel L

There is a wide variety of centrifugation systems

Correct Rotor Use
Correct Rotor Use depends on Several Factors
Use rotors only as part of approved systems
Properly balance loads
Understand sample density
Correct attachment of rotor lids and buckets
Proper use of tubes, adapters, accessories, and tools
Consult your Operators Manual

Use rotors only with Approved Systems• Instruments and rotors are tested as a
System (IEC-10-10-2)• Only approved Rotor-Instrument Systems
are proven to be safe• Using non-approved components can
result in- Instrument or rotor damage- Unbudgeted expense- Personal injury

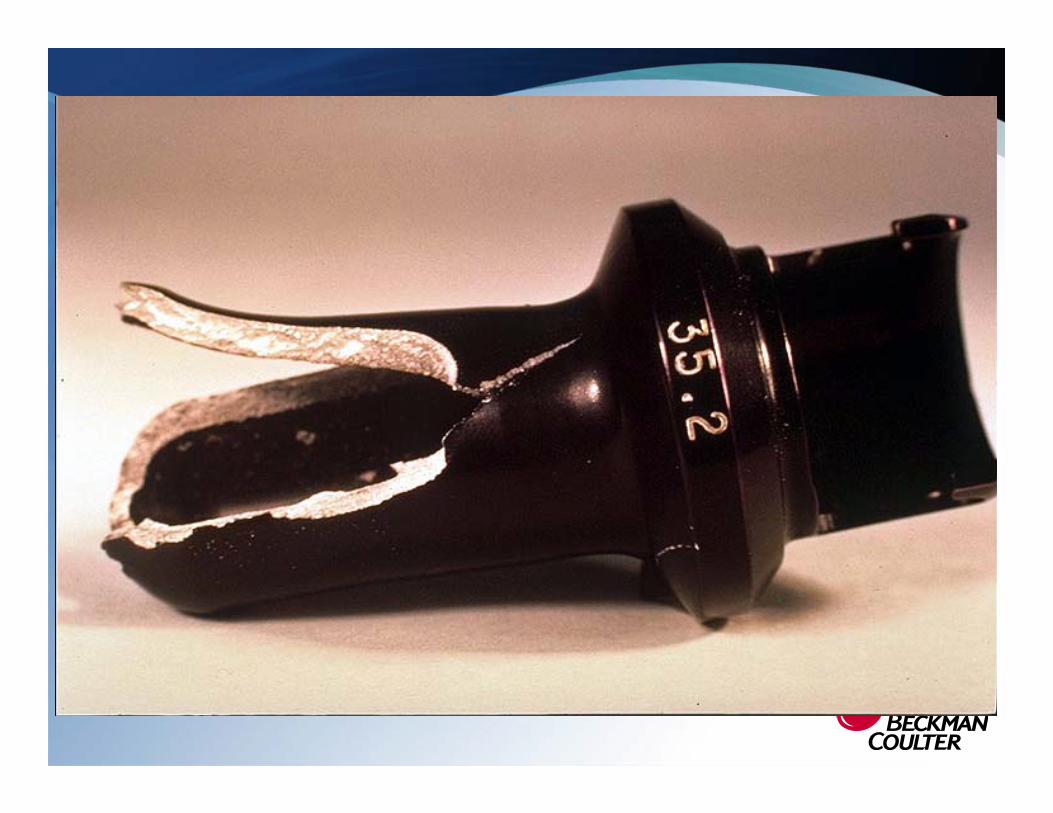
The energy of an operating centrifuge is enormous . . .
• Situations such as this emphasize the importance of following centrifuge safety and rotor use and care procedures

Correctly Balance Rotor LoadsAt 1,000,000 x g,
1 gram weighs 1,000 kg
The Weight of a Mini CooperWhich Equals . . .

For Ultracentrifuges...• Balance opposing sample loads within 0.5
grams for fixed angle rotors
• Balance opposing sample loads within 0.2 grams for swinging bucket rotors
Consult your Operators Manual

For High Performance and BenchtopCentrifuges…
• Balance specification is instrument / rotor dependent
• Some rotors offer imbalance correction- 50 to 100 grams!
Consult your Operators Manual

1.2 g/mL for most rotors
1.7 g/mL for VTi and NVT rotors
Consult your Operators Manualfor information on precipitating
gradients
Maximum Sample Density for Rotors Is...

Any Guesses ??

How About This One ??
Proper Rotor Handling• SW Rotors
- Buckets: Inspect for proper attachment- Handling: Hold SW rotors correctly- Installation: Properly attach rotor to Spindle
• Fixed Angle Rotors- Lid: Tighten correctly- Installation: Properly attach rotor to Spindle

Proper Handling of SW rotors
• Improper handling can lead to - Mishooked buckets- Disturbed gradients
INCORRECT

Proper Handlingof SW rotors
• Hold rotor with both hands
CORRECT

Proper Handlingof SW rotors
• Mis-hooked buckets are the leading cause of rotor mishaps in Ultracentrifuges
Inspect Buckets Prior to the Run

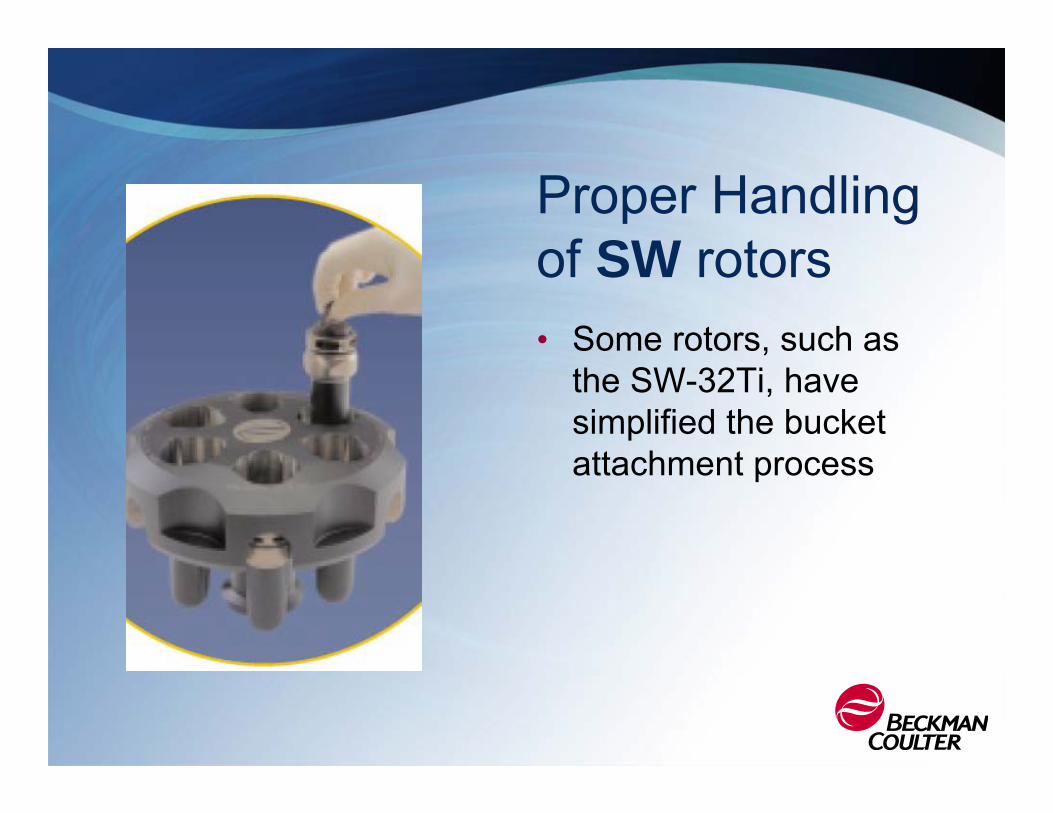
Proper Handlingof SW rotors• Some rotors, such as
the SW-32Ti, have simplified the bucket attachment process

Lid Attachment:Optima Series

Rotor Attachment:Optima Series
• Place the rotor straight down onto the spindle
• The rotor is self locking
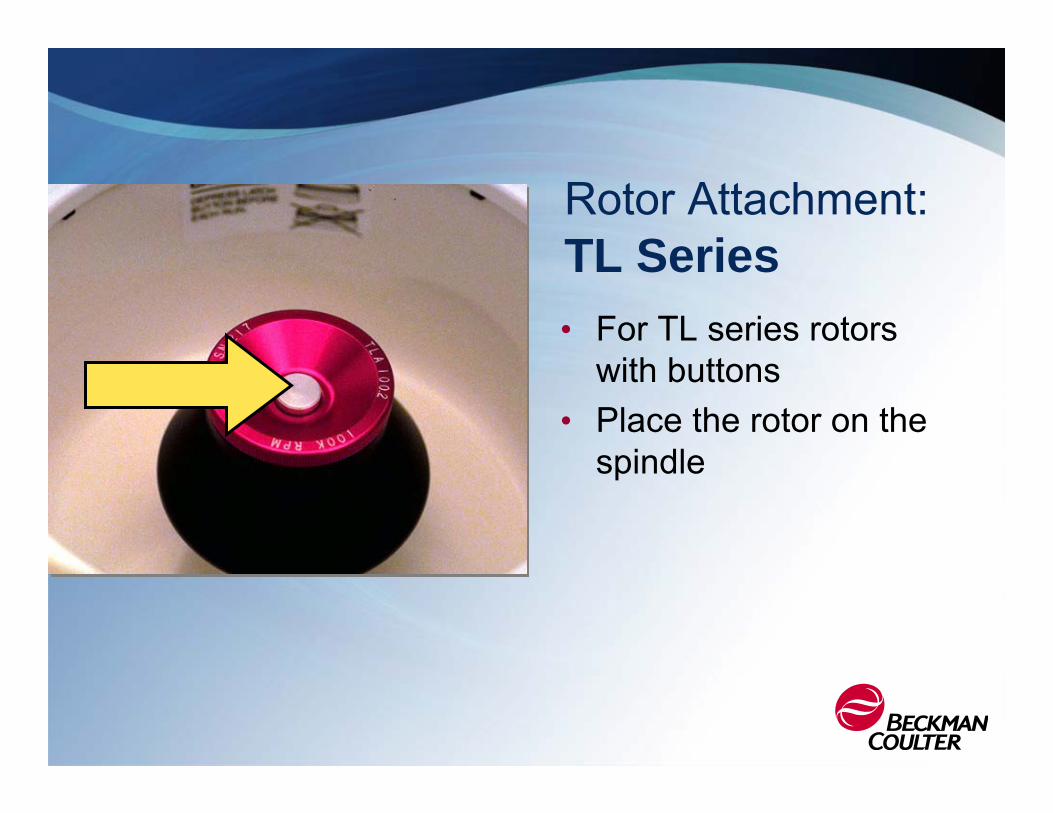
Rotor Attachment:TL Series• For TL series rotors
with buttons• Place the rotor on the
spindle

Rotor Attachment:TL Series• Push the button to lock
the rotor onto the spindle

Rotor Attachment:TL Series• Check to ensure
proper attachment• Rotors without locking
buttons are self-locking

Lid Attachment:Bio-safe Rotors• For rotors with dual knobs:• First, turn the lower knob
clockwise to attach the lid to the rotor
• When the rotor is placed in the centrifuge, tighten the center knob clockwise

Rotor Attachment:
• For rotors with single knobs:
• When the rotor is placed in the centrifuge, tighten the knob clockwise
• The single knob locks the rotor to the spindle and attaches the lid to the rotor


Rotor Attachment:
• Turn the locking handle clockwise to attach the rotor to the centrifuge spindle

Rotor Preparation:Vertical Rotors• Consult the rotor
manual for each vertical rotor for correct use of tools

Tubes, Bottles and Adapters• A vast selection of tubes,
bottles, adapters and other accessories are available for use in your centrifuge
• Consult the rotor manual for correct use of tubes, bottles, and adapters
• Improper labware use is a leading cause of rotor mishaps

Tubes, Bottles and Adapters• Use only the tubes, bottles,
and adapters listed in the rotor manual or Rotors and Tubes guides
• Third-party tubes and bottles may not handle the high g-forces of your centrifuges
• Be aware of proper filling levels and cap usage instructions


Proper Use of Tools
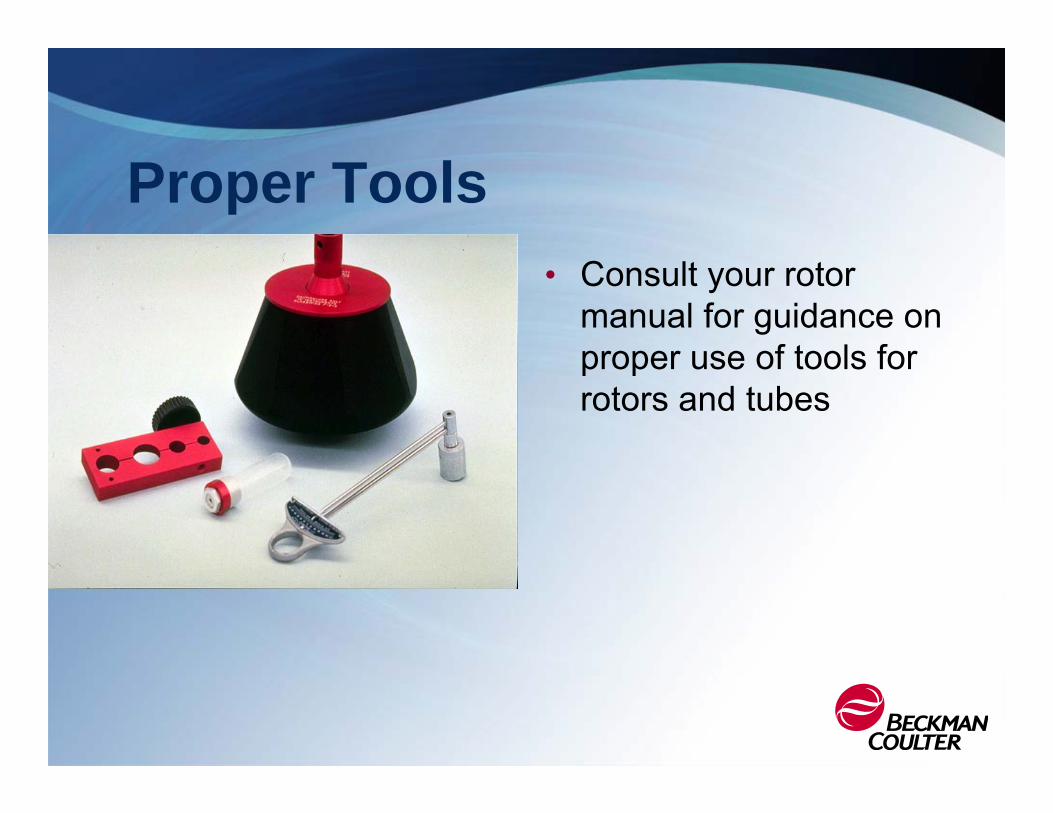
Proper Tools• Consult your rotor
manual for guidance on proper use of tools for rotors and tubes

Improper Tools• Improper tool use can
damage parts and cause a safety hazard for centrifuge users

Rotor Care and Maintenance

Proper Cleaning Utensils
BCI Rotor Cleaning Kit

Cleaning procedure• Wash rotor frequently – at least weekly• Remove O-rings before washing• Use mild detergent, such as Solution 555, and
soft brushes (both are available in the BCI Rotor Cleaning Kit)
• Thoroughly rinse with distilled water• Air-dry upside down• Re-lubricate O-rings with vacuum grease • Re-lubricate metal threads with Spinkote
Consult your Operators Manual

Proper Brushes
• Improper bushes can scratch and damage rotor tube cavities

Inspect Periodically• Inspect rotor body and tube cavities
- Pitting, rough spots, cracks or damage- White deposits may indicate stress corrosion- Discoloration
• Lubricate rotor and components as indicated in rotor manual
• Inspect O-rings for cuts, abrasions, or flattened areas; replace if damaged
• Inspect and replace overspeed disk if damaged• Contact Field Service if you have questions
Consult your Operators Manual

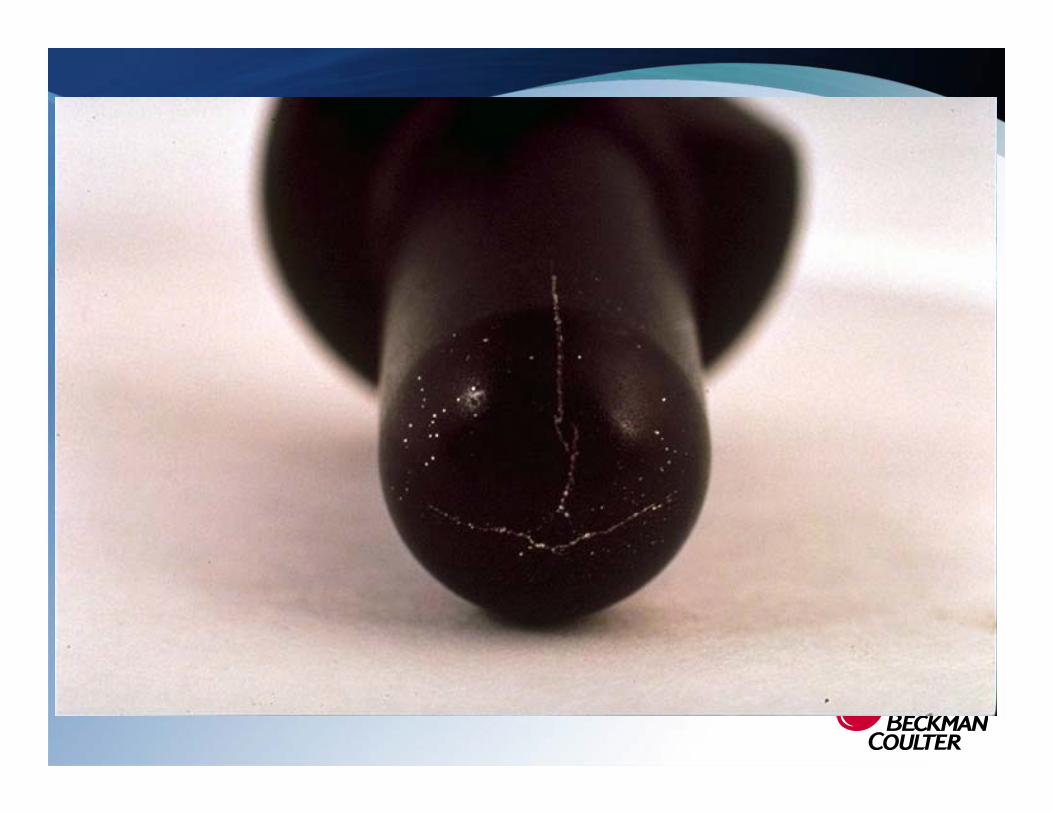
Stress CorrosionOver time, the combination of tensile load and environment creates stress corrosion, which significantly reduces the service life of the metal, specifically aluminum alloys.

CORROSION can destroy aluminum rotors

NO CORROSIVE ATTACK
LOAD = 6000 lbsLOAD = 26,700 N
AREA = 1.00 sq inAREA = 6.45 x 10⁻⁴ m2
STRESS = 6000 lbs/sq inSTRESS = 4.14 x 10⁷ N/m2
STRESS = 41.4 MPa

CORROSIVE ATTACK
LOAD = 6000 lbsLOAD = 26,700 N
AREA = 0.60 sq inAREA = 3.87 x 10⁻⁴ m2
STRESS = 10,000 lbs/sq inSTRESS = 6.90 x 10⁷ N/m2
STRESS = 69.0 MPa


Points to Remember• Anodized aluminum is corrosion resistant,
not corrosion proof• Although titanium and carbon composite
rotors are highly corrosion resistant, these rotors may have anodized aluminum components
• Consult chemical compatibility charts


Proper Lubrication is Important• Periodically lubricate O-
rings with vacuum grease• Lubricate threaded
portions of rotor with Spinkote
• Lubrication maintains vacuum sealing and enhances smooth operation of components
Consult your Operators Manual

Overspeed Disk Replacement
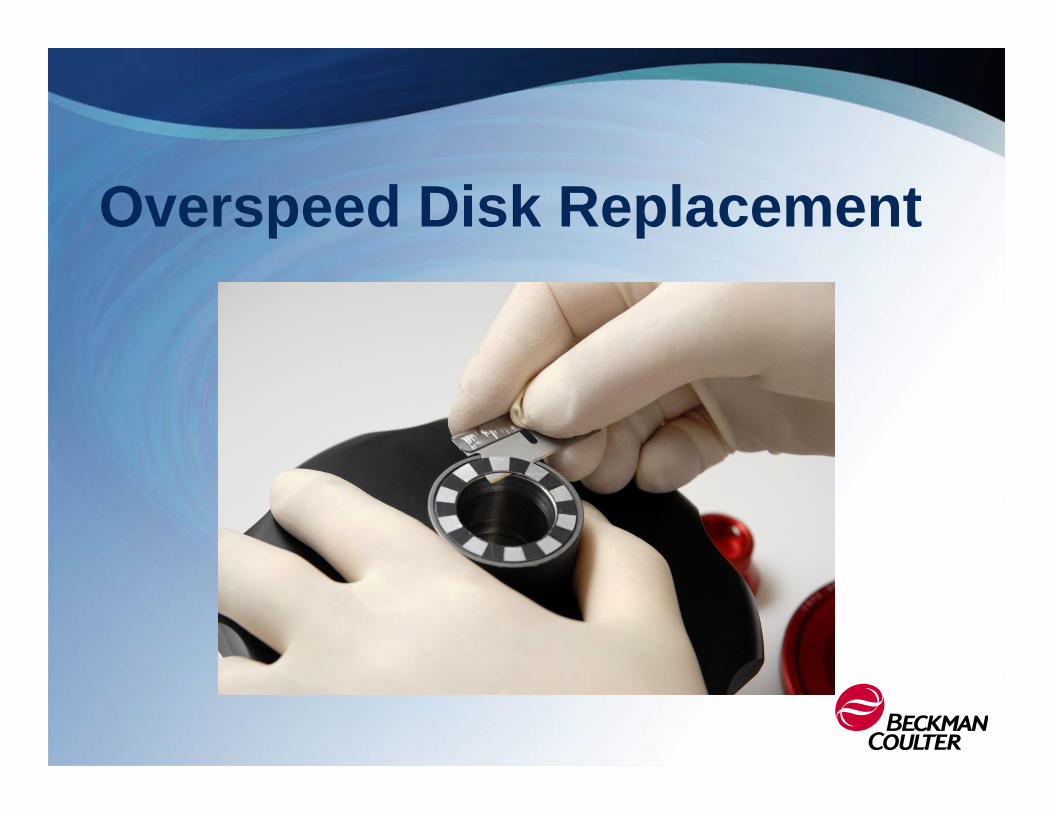
Overspeed Disk Replacement

Overspeed Disk Replacement

Overspeed Disk Replacement

Periodically Inspect Rotor Hub Pins

Decontamination• Radioactive material
- Use a cleaning agent that will not harm anodized aluminum
• Toxic or Pathogenic contamination- Follow appropriate procedures outlined by
your Laboratory Safety Officer

Sterilization• Follow procedures outlined by your
Laboratory Safety Officer- Most metal components can be autoclaved up
to 1 hour at 121◦C (up to 30 minutes for most composite rotors; see manual)
- Cold methods – 70% ethanol, 6% hydrogen peroxide – can be used
Bleach may discolor anodized surfaces

Rotor Storage• Store rotors upside-down to ensure that
condensation does not collect in tube cavities
• Store rotors in a dry environment• Remove all tube adapters from tube
cavities before storage

Run Logging• Run Logging is not
required for warranty• Using a logbook can
help lab managers track rotor and instrument usage patterns

Rotor Care ReviewUse proper cleaning solutions
Use proper cleaning brushes
Use proper storage techniques
Read the rotor instruction manual
Ask your Field Engineer

Out-of-Warranty Rotors and Rotor Retirement

Rotor Life and Rotor Warranty• Rotor life is not related to warranty period• Rule-of-thumb rotor lifetimes
- Optima Ultracentrifuge rotorsFA and VTi rotors:12 yearsSW rotors: 10 years
- High Performance Centrifuge rotorsJA rotors: 15 years
When in doubt, consult with Service to determine safe rotor usage

After Sales Support

Field Rotor Inspection Program
Check if available as part of your service agreement
Ensures a long service life for your rotors
Increases lab safety
Minimizes lab down time
Minimizes repair and replacement expenses

Rotor Inspection by Factory-Trained InspectorsThe inspector will
Examine your rotors with non-destructive techniquesIndicate possible repairs or modifications to run protocolsRecommend rotor retirement based on condition, run cycles, or ageAdvise on care and handling techniques

What’s In It For You?• Helps you use centrifuge systems safely
• Ensures maximum life of your investment
• Avoids unbudgeted lab expenses
• Helps assure experiment integrity
• Helps insure against loss of valuable sample and lab preparation time

Any Questions ?

Thank You!