campus network design and man in the middle attack725799/fulltext01.pdf · campus network design...
TRANSCRIPT
Campus Network Design and Man-In-The-Middle
Attack
Bachelor’s Thesis in Computer Science and Engineering
Author: Mahmood Nazari &Kun Zhou
Supervisor: Dr. Annette Böhm
Examiner: Dr. Pererik Andreasson
School of Information Science, Computer and Electrical Engineering
Halmstad University
June 2014
I
Abstract
Security is at the front line of most networks, and most companies apply an exclusive security
policy enclosing many of the Open Systems Interconnection (OSI) layers, from application layer
all the way down to Internet Protocol (IP) security. On the other hand, an area that is often not
protected with high level of security is the second layer of OSI model and this can compromise
the entire network to a diversity of attacks.
This report presents an experimental performance analysis within the real environment. It focuses
on understanding and preventing the Man-In-The-Middle (MITM) also known as Address
Resolution Protocol (ARP) Poisoning on the Cisco Catalyst 3560 series switches with Cisco IOS
Software. The Linux Command Line (CLI) tools and Ettercap tool were used to launch the Layer
2 attacks that you might come up against. Mitigation methods to stop this attack are evaluated and
concluded. Finally we will answer if Secure Socket Layer (SSL) is enough to protect the users’
data against MITM in the network.
A HP laptop and two DELL PCs were utilized for these tests and acted as the attacker, the Server
and the victim. Victim PC runs Windows 7, attacker’s Laptop and server run Linux.
Finally, three different case studies were analyzed and compared with each other and different
solutions that might help to solve or detect the issue of MITM attack are concluded.
Key words: phishing, HTTPS, HTTP, SSL, Man-In-The-Middle, MITM, ARP Poisoning
II
Contents
Campus Network Design and Man-In-The-Middle Attack .............................................................. I
Abstract ............................................................................................................................................ I
Contents ........................................................................................................................................... II
1 Introduction............................................................................................................................. 3
1.1 Background ..................................................................................................................... 3
1.2 Project Goal ..................................................................................................................... 4
2 Theoretical Background .......................................................................................................... 5
2.1 HTTPS ............................................................................................................................. 5
2.2 Man-in-the-Middle .......................................................................................................... 7
2.3 ARP Poisoning ................................................................................................................ 7
2.3.1 What is ARP? .......................................................................................................... 7
2.3.2 What is ARP poisoning? ......................................................................................... 8
2.4 Penetration Tools ............................................................................................................. 8
3 Topology ............................................................................................................................... 10
4 Methods ................................................................................................................................ 12
4.1 Test Equipment .............................................................................................................. 12
4.2 Static IP address both for attacker and victim machines over HTTP and HTTPS ........ 12
4.2.1 HTTPS ................................................................................................................... 15
4.2.2 HTTP ..................................................................................................................... 19
4.3 Dynamic IP address both for attacker and victim machines over HTTP and HTTPS ... 20
4.3.1 HTTPS ................................................................................................................... 22
4.3.2 HTTP ..................................................................................................................... 22
4.4 Dynamic IP address both for the attacker and victim machines over WIFI .................. 23
5 Mitigation ............................................................................................................................. 25
6 Results and Analysis ............................................................................................................. 27
7 Conclusions........................................................................................................................... 29
References ..................................................................................................................................... 30
Appendix ....................................................................................................................................... 32

Theoretical Background
3
1 Introduction
As the internet and the number of devices connected to it are developing excessively and the
messages being transferred are becoming critical for the companies, the need of providing the
users as well as the companies for some certain level of privacy and authentication become
compulsory. On 2015, 25 Billion devices will be connected to each other while by 2020 this
number will be doubled to 50 billion things according to the Cisco CEO. [1] This might explain
why the computer networks are a need in our future life but what is the vital of a computer
network?
Cisco hierarchical network design model [2] proposes to divide the local network into three layers:
core, distribution and access layer. The core layer provides high speed, highly redundant
forwarding services to carry the traffic of distribution layer devices into different areas of the
network. The distributed layer is the place for network policy implementation and to provide high
redundancy for the access layer devices as first hop gateways. Network clients are connected to
the access layer and most of the layer 2 security is implemented at this layer. [3] But even the
good level of design, security is the vital of a network. High level of security can guarantee the
integrity and authenticity of the communication.
In this project, a small network with multilayer switches, firewall Cisco Adaptive Security
Appliance (ASA) and Linux servers as server farm is was designed. The design is inspired by
Cisco campus design and was used to test the particular layer 2 attacks in which Man-In-The-
Middle (MITM) can easily compromise the integrity of the communication channel between two
systems.
In this project we intend to test if MITM could be stopped in the local area of the network as well
as the entire path over internet to the web server. Moreover, we found out that MITM could be a
highly security issue and it might be no solution to stop it.
Remark that the attacks were applied in a private lab and were done in a controlled environment.
1.1 Background
Analysis on MITM Attack on Secure Socket Layer (SSL) at Computer Science Department
Lovely Professional University, Punjab, India [4] is providing two solutions to detect MITM
attack over Hypertext Transfer Protocol Secure (HTTPS) with the “fake certification attack over
SSL” and Address Resolution Protocol (ARP) poisoning methods. However, shell script detection
solutions can only check the possibility of the MITM in the local network between the default
gateway and the client web browser. On the other hand, shell script over web server might result
into total overloading the server’s resources if many web users at the same time are connected to
the web server which is a likely situation. Moreover, the fake certification method could not be
considered as a general solution. A web server might change its certification over time leading the
change in certification finger print or what happens if the time that browser sample the finger

Theoretical Background
4
print of the web server the MITM attack is already in process. In both cases the Browser will
issue false warning notification over legitimate connection for the next time.
Furthermore, their method of validating the certification cannot be valid as we describe later on
based on the recursive lookup of certification validation when the attacker issue a new
certification as a child on the CA parent certification using a tool such as SSLSNIFF in target
mode.
Joshi, Y [5] is also suggesting the detection method of MITM by writing an Add-on on the client
web browser. This add-on has the same mechanism as shell scrip mentioned above but on the
client side. This method can implement better mechanism for the client side just to detect MITM
over local network.
Another paper done by “Ross, B., Jackson, C., Miyake, N., Boneh, D., Mitchell, and J.C” [6] is
suggesting a solution by using a method called “PwdHash”: “To tackle such attacks we propose
hashing the user password with the public key of the server’s digital certificate”. They propose to
encrypt the password with the public key of the certification. Their solution cannot be general as
we describe later in this report when the MITM attacker hijacks the HTTPS session. In this case
the attacker has full knowledge of the SSL criteria to decrypt the password. If the method is
implemented with a method such as SSLSNIFF, the browser actually has established SSL
connection with the attacker device as web server [6]
“ARP Poisoning (MITM) Attack and Mitigation Techniques White Paper” done by CISCO was
done only on plain text data traffic on wired network and it did not cover the penetration test of
the encrypted data by SSL. [7]
We show in this project and case studies the comparison and examination of the MITM methods
implementation and how to try to stop them in some practical way.
1.2 Project Goal
This project is done to prove that solely SSL used for HTTPS cannot stop a MITM attack.
Moreover, to demonstrate how easily this type of attack can be launched on the network
especially if the user does not bother about checking the certification warning issued on the
browser if the browser can detect any warning against forged certifications.
The goal of this work is to do the MITM attack over HTTPS, secured by SSL encryption in the
today’s real internet world security mechanism and also to try to find a solution to mitigate it.

Theoretical Background
5
2 Theoretical Background
2.1 HTTPS
Hypertext Transfer Protocol (HTTP) is an application protocol (Layer 7 on OSI model) to transfer
information such as text, graphic, video etc. over WWW (World Wide Web) on the internet
between HTTP server and HTTP client. This protocol runs on top of Transmission Control
Protocol (TCP). Any machine that has a HTTP daemon service installed and can wait for HTTP
request from client called HTTP server. Any machine that has a web browser or web application
installed is defined as HTTP client. [8]
Because HTTP does not encrypt the information and send/receive them on the plain test HTTPS
was introduced. HTTPS is a communication protocol for secure communication. HTTP runs on
top of SSL / Transport Layer Security (TLS) to make an encrypted data. In other words, HTTPS
is the procedure to encode data and to exchange them. [8]
SSL, is an industrial security technology used to establish an encrypted channel between a HTTP
server and a HTTP client to guarantee the confidentiality and integrity of the information. [9] SSL
needs a SSL certification on the HTTP Web server to achieve this target. SSL encrypts the whole
packet of HTTPS including the HTTPS header except the SSL setup and D/H key exchange. [10]
A HTTPS server creates two different cryptographic keys, Private Key and public Key. The
Private Key stays secure in the HTTPS server and would not be exchanged with the HTTPS client.
Public key on the other hand, placed into the Certificate Signing Request (CSR) as part of SSL
certification. The certification Authority (CA) will after checking the information provides the
client with SSL certification and allowance to use SSL.
For HTTPS to establish a secure channel over SSL/TLS a series of procedure called “Hand
Shaking” has to be followed. Figure 2.1 shows the steps that required to establish a SSL
connection called “Transport Requirements” [10]. SSL is not a separated protocol and therefore it
needs lower protocol TCP to transport the data between web server and web client.
HTTPS has two important security related elements:
Web server authentication – Authentication defines by any action or process which by an
object or person would be verified as they claim they are. The browser authenticates the
identity of the Web server validation with the server’s certificate against the certificate of
the CA (Certificate Authority) in recursive method.
Communication privacy – The browser generate a random secrete key and encrypt it with
the public key of the server defined in the server certification and send it to the server
called Premaster Key. If the server agrees on this premaster key it then generates the
“master key” using its own private key and sends it over to the client. The master key is
used on both server and client to create a session key and start a symmetric encrypted
session. From this moment on, all the communication data will be encrypted based on
this session key [8].

Theoretical Background
6
Figure 2.1 HTTPS session establishment
AS shown in Figure 2.2. An encryption protocol such as SSL is encapsulated into lower protocol
as data, which does not analyze these data. Consequently, higher protocols have no understanding
of lower protocols.
Figure 2.2 SSL protocol Stack [11]
Before SSL/TLS session is established, the server sends certificate using TCP protocol which
contains the public key of the server. Most web browsers have already preinstalled the public
keys of all the well-known certificate authorities. Web browser can verify the web server’s
certification by using the public key sealed inside the certification against those preinstalled

Theoretical Background
7
certification and to identify that the server’s certification truly was signed by trusteed CA. If the
browser fails to pass this step a red error sign warns the user.
Next step after the certification validation is that the web browser generates a session symmetric
key and shares it with the web server. This key is used for the encryption of all the data over this
secure channel. Once the session is terminated, both server and client have to go through the
whole procedure to establish another secure channel. [11]
Obviously before year 2013 SSL/TLS could be considered as fundamental security for HTTPS
but afterwards the trust worthy of the CA authority is questionable under the disclosure of the
mass surveillance program. [12, 13]
2.2 Man-in-the-Middle
The MITM attack in computer cyber security is a form of malicious act to eavesdrop the
conversation between victims. MITM can be done in different communication channels such as
GSM, Bluetooth, NFC (Network File System), and DNS Cache poisoning and web applications.
The attack launches when an attacker makes separate connections with the victims and route their
messages, persuade them that they are communicating straight to each other over a private
connection. [14] Here are some types of MITM
Side Jacking: The attacker sniffs information and data to snatch cookies and hijack the
session.
Evil Twin: This can be done with a rogue wireless access point emerge as a legitimate
one to lunch the MITM
Sniffing: By taking advantage of available software to intercept the information over
channel.
A MITM attack can occur when an attacker poisons the ARP cache of two devices with its own
48 bit Media Access Control (MAC) address. As soon as the ARP cache is poisoned the traffics
from victims redirect to the attacker and from there to designated address. This method locates
the attacker in the middle of the communication and makes the attacker to intercept the data
which jeopardize the confidentiality of the channel. Afterwards, the attacker takes over a session
which makes him able to easily monitor the data that passed between two ends of the channel.
2.3 ARP Poisoning
2.3.1 What is ARP?
Address Resolution Protocol is a simple protocol working for mapping IPv4 to the physical
machine’s address MAC, constructed of four basic message types [15]:

Theoretical Background
8
1. ARP Request Message. Network Device X on the network asks the network, "Who has
this IP address?" from the network devices in a broadcast.
2. ARP Reply Message. Device Y responds to device x (Unicast), "I have that IP. My MAC
address is [xx:xx:xx:xx:xx:xx]."
3. Reverse ARP Request massage (RARP). Similar abstraction as ARP Request message
type though this time device x is asking, "Who has this MAC address?" from the network
devices in a broadcast.
4. A RARP Reply message. Device y tells device X, "I have that MAC. My IP address is
[11.22.33.44.55]"
A MAC address is a unique identifier of network nodes (Devices). In other words, every Network
Interface Controller (NIC) has a unique address associated with, called MAC.
A network device uses MAC (ARP) table to keep all IP addresses and MAC addresses that the
device has bind. If a record of ARP table would match to a packet’s destination IP address, the
device does not need to repeat an ARP request. The ARP table’s records would be flushed after
10 minutes to make sure they are kept updated. [16]
2.3.2 What is ARP poisoning?
ARP poisoning [17] is when an attacker changes its own MAC address with the victim’s MAC
address to prevent legitimate access to services. With this method, an attacker can redirect the
direction of the communication between victims by compromising their ARP table to point them
to itself in purpose of intercepting the information or to change them. This frightening simple
procedure empowers the attacker to seed a diversity of networking woes. In this project, the
command line tool ARPSPOOF was used as a tool for the ARP poisoning.
2.4 Penetration Tools
Eavesdropping is an omnipresent threat to any network-based software. Well-known, free
network monitoring tools like Wireshark [23] and Ettercap [24] can intercept plain text network
traffic to acquire web application sessions off the wire, revealing any authorization data to
disclosure and replay.
SSLSTRIP and SSLSNIFF [25] [19]
SSLSTRIP is a tool written by Moxie Marlinspike in Python programming typically used by
individual users to mostly intercept username and password in the MITM attack over HTTPS
session. It works by striping the HTTPS connection. SSLSTRIP forces a victim's browser to
communicate over HTTP with the attacker machine. It then makes a secure connection with the
web server to pretend itself as user’s browser with SSL connection.
SSLSNIFF is another tool used for MITM attack. It is much powerful and can be used by
organizations and maybe Government’s agencies. The mechanism is to take advantage of the SSL
chaining certificate. SSLSNIFF intercept HTTPS traffic and generate a certificate for the site that
Theoretical Background
9
a client is connecting to. It signs this certificate with anything an attacker specifies then acts as a
proxy server for the client. On the other hand, on the server side, SSLSNIFF makes a normal
HTTPS connection on behalf of the client to send and receive data in a normal way and
continuously.
There are generally two types of certificates as follows:
Root CA certificate: they are embedded in the browser and are to certify that a site
certification is authentic.
Site Certificate: it identifies an individual Uniform Resource Locator (URL) by
authentication of CA certificate’s signature.
However there can be one or many Intermediate CA between these two certifications (as a third
party). This kind of certification is not embedded in the browser. It is not powerful as Root CA
certification but it still is power full. Its job is also to certify that a site is authentic.
In Firefox for instance, there can be usually up to 20 intermediate certificates between the root
certificate and the site certificate. This type of hierarchical certification is called chain of
certificates.
For a browser to validate a certification a chain of trust verification as a procedure should be
followed. A certification chain of trust is initiation of validating each certification of from the
bottom up in hierarchical method. The procedure starts from the leaf (of the chain) by checking if
the certification has the name of the site a user is connecting to. The second verification is to
check if the leaf certification has not expired. Furthermore, the procedure checks if the signature
of the certification is in trusted zone of the browser. If yes then stop the procedure. Nevertheless,
if the procedure would not stop, it will move up to the chain and repeat the procedure until
reaches the root CA [18].
SSLSTRIP uses this recursive function to exploit the certification chain of trust by adding one
extra intermediate certification of its own in this chain with a valid certification. This certification
introduces itself as a child of a parent in the chain, and the parent for the real parent’s child. As
the result, the recursive function would not detect any error or misinformation in the chain
because of firstly, all signatures are valid secondly, nothing has expired thirdly, and the chain is
unbroken just with one extra node and finally, the root CA is embedded in the browser! [19] As
the result on the client’s browser, the icon of trusted certificate would appear and the user would
not be warned of the MITM attack.

Topology
10
3 Topology
The topology of the network was designed based on the Cisco campus design just to represent a
smaller scale of a real network that most organizations have. Generally, we tried to have a
network as close as possible to the reality to have better results of the experiments and case
studies. Figure 3.1 demonstrates the big picture of the topology while figure 3.2 shows the layer 3
topology on the network.
Enhanced Interior Gateway Routing Protocol (EIGRP), the Cisco proprietary was implemented as
a dynamic routing protocol inside the local area. As a firewall an ASA cisco 5510 divided the
network into 3 different areas. INSIDE area with security level of 100, Demilitarized Zone (DMZ)
area with security of 50 and OUTSIDE area with security level of 0.
Virtual Local Area Network (VLAN) 10 was used for wired network in this project, VLAN 20
for wireless network and VLAN 1 as the native VLAN. The Dynamic Host Configuration
Protocol (DHCP) server was configured on the Router in the INSIDE area.
HTTPS server used a self-signed certification with a Domain name www.thesis.com. The domain
name was just used for inside area access and it was not set for any other connection from outside
since it was not a genuine Domain name. APACHE was the HTTP service installed on the LTS
Linux version. Lo0 on the outside area’s router was used to play the role of internet connection in
scenario 1 and 2 but in the scenario 3 this router was connected to the Internet.
Figure 3.1 the picture of the topology

Topology
11
Figure 3.2 Main layer 3 topology
Methods
12
4 Methods
The scenarios that were used are three, each scenario tested with HTTP and HTTPS traffic and
are as follows:
1. Static IP addresses both for attacker and victim machines over HTTP and HTTPS
2. Dynamic IP addresses both for attacker and victim machines over HTTP and HTTPS
3. Dynamic IP addresses both for attacker and victim machines over WIFI
4.1 Test Equipment
Victim 1: a DELL pc which ran Windows 7 Enterprise OS with Intel core 5 and 8GB
RAM with Gigabit network connection Intel 82579LM model.
Victim 2: Cisco Catalyst 3560 switch with Cisco IOS Software, C3560 Software
(C3560-IPSERVICESK9-M), Version 12.2(55) SE1, RELEASE SOFTWARE (fc1).
Attacker: HP laptop which ran a Linux BacktrackR3 with 6GB RAM and Intel core 3
with 100MB RJ45 LAN
HTTP server: a DELL PC running 32 bit LTS 12.04 LINUX with 2GB RAM, AMD
DUAL CORE 4600+ , Gigabit NetXtreme BCM5754 as NIC, APACHE 2.2.22 as HTTP
Daemon service
FIREWALL: CISCO ASA 5510 with Cisco Adaptive Security Appliance Software
Version 9.0(1), Device Manager Version 7.0(2), and 256 MB RAM, CPU Pentium 4
Celeron 1600 MHz
Routers: Cisco 2800 series, IOS Software, 2801 Software (C2801-
ADVENTERPRISEK9-M), Version 12.4(4) T8, RELEASE SOFTWARE (fc3) is used.
4.2 Static IP address both for attacker and victim machines over
HTTP and HTTPS
The network configuration detail for the attacker as well as victims is given as follows:
Victim 1:
IP Address: 192.168.10.200
MAC Address: 18:03:73:1a:c4:c2
Victim 2:
Switch Port: GE 0/5
IP Address: 192.168.10.1/24 (Interface VLAN 10)

Methods
13
MAC Address: 2c:54:2d:ac:28:79
Attacker:
Attack Tool: Ettercap
IP Address: 192.168.10.100/24 (Static IP)
FAKE MAC Address: 00:11:22:33:44:55
Figure 4.1 demonstrates how everything was connected for this scenario test. Screen shots
(snapshots) were taken during each test covered in this report. These screen shots are proves of
the attack and process of the attack.
Figure 4.1 attacker and victim over VLAN 10
Check victim’s network and ARP cache
To begin, the NIC configuration of victim 1 is reviewed Figure 4.2. Victim 1 has a static IP
address of 192.168.10.200 with a default gateway and DNS server manually configured to
192.168.10.1. The IP address of the DNS server 10.10.1.2 is also configured as the second DNS
server.
Figure 4.3 shows the path using Trace route tool that victim 1 passed to get to the DMZ area and
the HTTP server with the IP address of 10.10.1.2. This shows that there is not any MITM attack
run on the network.

Methods
14
Figure 4.2 victim network adapter
Figure 4.3 trace route from victim1 to HTTP server
Fake attacker’s MAC address
The attacker machine used ETH0 interface with a fake MAC address 00:11:22:33:44:55 manually
configured. The manual IP address of 192.168.10.100 is configured for this machine. Figure 4.4
shows its network configuration
Figure 4.4 attacker network adapter
By setting the value 1 in the ip_forward file the attacker machine’s setting changed to act as a
router. Figure 4.5. Therefore this machine can act as a route to forward the traffic between 2
victims’ devices.

Methods
15
Figure 4.5 activation of routing on attacker machine
4.2.1 HTTPS
Find victim’s IP
First step is to find the victims IP address with the help of NMAP command (Figure 4.6) this tool
scanned the whole local network for the specified network address 192.168.10.0/24 to find active
network devices. Figure 4.7 shows the result of NMAP on the network 192.168.10.0/24 on
VLAN 10.
Figure 4.6 network mapper scanner
Figure 4.7 result of scanning network

Methods
16
As the result of scanning the whole network with NMAP the information about victim 1 was
discovered.
By changing Ettercap configuration, the setting of routing policy was configured to
redirect the TCP traffic from specified first port number to the second specified port
number.
Figure 4.8 Ettercap configuration on attacker machine
Figure 4.9 set the configuration of IPTABLE
Figure 4.9 specifies the redirection rule to redirect the HTTP traffic from port 80 to the port
10000 which is the default port for SSLSTRIP.
Run SSLSTRIP
Figure 4.10 is how SSLSTRIP was run. The options are K: Kill A: All F: Force
Using SSLSTRIP with these options make the SSL encryption system sessions to be disconnected
and run all over again. This will give the opportunity for SSLSTRIP to sniff all the SSL setup
communication between the victim browser and the HTTPS server hence; SSLSTRIP is able to
issue its own fake certification.

Methods
17
Figure 4.10 running SSLSTRIP
Start ARP poisoning
At this stage ARP poisoning was run to poison the CAM table of victim 2(switch) and the MAC
table of victim 1 (victim machine). Figure 4.11 has been taken from attacker machine which
demonstrate the ARP poisoning between victim 1 (192.168.10.200) and victim 2 (192.168.10.1).
Figure 4.12 shows the inverse ARP poisoning between 2 victims.
Figure 4.11 ARP poisoning

Methods
18
Figure 4.12 ARP poisoning
Start Ettercap
Figure 4.13 running Ettercap

Methods
19
Test in victim
Figure 4.14 shows the browser on victim machine
Figure 4.14 browser on victim1 over HTTPS
Get username and password
After we enter the username and password figure 4.15 shows how Ettercap helped to sniff them.
As figure 4.15 shows how Domain name, user name and password were intercepted without any
notification or warning indicating the attack on the victim browser (Figure 4.14).
Figure 4.15 intercepted information on attacker
4.2.2 HTTP
Sniffing over HTTP is easier to be implemented. Since there is not any encryption over the
channel, simpler tools can be used to intercept the communication. In this part tools called
URLSNARF and DRIFTNET were used. Furthermore, there is no need of IPTABLE to redirect
the ports or SSLSTRIP. Moreover, the steps are very similar to what they are mentioned above
but after Figure 4.7, the procedure moved to figure 4.14 and 4.15.

Methods
20
Test in victim
Figure 4.16 browser on victim1 over HTTP
Get information through Urlsnarf
Figure 4.17 shows the run for Urlsnarf tool. The sniff tool reveals the data over html channel. The
username “test2” and the password “test23456” were intercepted for the URL http://thesis.com .
Figure 4.17 intercepted information on attacker
4.3 Dynamic IP address both for attacker and victim machines over
HTTP and HTTPS
The network configuration detail for the attacker as well as victims is given as follows:
Victim 1:
IP Address: 192.168.10.12 (Dynamic)
MAC Address: 18:03:73:1a:c4:c2

Methods
21
Victim 2:
Switch Port: GE 0/5
IP Address: 192.168.10.1/24 (Interface VLAN 10)
MAC Address: 2c:54:2d:ac:28:79
Attacker:
Attack Tool: Ettercap
IP Address: 192.168.10.13/24 (Dynamic)
MAC Address: 00:11:22:33:44:55
Figure 4.18 demonstrates how everything was connected for this scenario test. Screen shots were
taken during each test covered in this report. These screen shots are proves of the attack and
process of the attack.
Figure 4.18 attacker and victim over VLAN 10
To begin, the ARP table of victim 1 is reviewed (check appendix A figure 1). As the figure shows,
the victim 2 has the IP address of 192.168.10.12/24 assigned by DHCP server. In addition, the
attacker machine used ETH0 interface with a fake MAC address of 00:11:22:33:44:55 to get IP
address 192.168.1.13 from the DHCP server. Appendix A figure 2 is the screenshot of its network
configuration. Next step is to enable the attacker machine’s setting to act as a router. (Appendix A
figure 3). The value of 1 is overwritten in ip_forward file to set this machine as a router.
Methods
22
4.3.1 HTTPS
Configure Ettercap
The routing table configuration for the attacker machine and the configuration of Ettercap are
shown in Appendix A figure 4 and 5 as it is describe in previous section. Appendix A figure 5
defines the rude of IPTABLE configuration to redirect the HTTP traffic from port 80 to the port
10000 which is the default port for SSLSTRIP. In addition, Appendix A figure 6 is how
SSLSTRIP was run. The options were K: Kill A: All F: Force. The reason of using Kill option is
to terminate already established HTTPS sessions and to force the web browser in victim 2
machine to establish a new HTTPS session. In other words, using SSLSTRIP with this options
make the SSL encryption system sessions to be disconnected and run all over again. This will
give the opportunity for SSLSTRIP to sniff all the SSL setup communication between the victim
browser and the HTTPS server hence; SSLSTRIP is able to issue its own fake connection to the
HTTPS server.
Start ARP poisoning
At this stage ARP poisoning was run to poison the CAM table of victim 2(switch) and the MAC
table of victim 1 (victim machine). Appendix A figure 7 has been taken from attacker machine
which demonstrate the ARP poisoning between victim 1 (192.168.10.200) and victim 2
(192.168.10.1). Appendix A figure 8 shows the inverse ARP poisoning between 2 victims. By
using both way ARP poisoning, both traffic from the victim one and victim 2 has to pass through
the attacker machine.
Test on victim machine
Appendix A figure 9 shows the browser on victim machine. This figure shows that the vicitim 2
in connected to the webserver in DMZ zone via HTTPS session. The username “https-dynamic”
and password “123456789” was input for this step in the web browser.
Get username and password through Ettercap
After entering the username and password Appendix A figure 10 shows how SSLSTRIP helped
to sniff them. The username and password as it is mentioned above was intercepted. It also shows
what was the IP address of the HTTP server (10.10.1.2).
4.3.2 HTTP
The steps are very similar as they are mentioned above but after Appendix A figure 3, the
procedure moved to Appendix A figure 7 and Appendix A figure 8, the ARP poising process. In
addition, Appendix A figures 11 and 12 show the web browser in victim 2 and Urlsnarf tools. It
reveals the detail of the browser on the victim 1 which was connected to the WWW.thesis.com .

Methods
23
4.4 Dynamic IP address both for the attacker and victim machines
over WIFI
Because of the wireless access point both victims’ machines were changed. The network
configuration detail for the attacker as well as victims is given as follows:
Victim 1:
Hardware: SAMSUNG laptop
Software: Windows 8.1
IP Address: 192.168.1.4
MAC Address: C8:F7:33:F1:27:81
WLAN: Intel N 6235 Advanced
Victim 2:
Hardware: NETGEAR WNR2200
Software: V1.0.1.88
IP Address: 192.168.1.1/24 (VLAN 1)
MAC Address: 28:C6:8E:18:FD:A3
Attacker:
Hardware: HP laptop
Software: Running Ubuntu 9.04 OS
Attack Tool: SSLSTRIP
IP Address: 192.168.10.100/24 (Static IP)
FAKE MAC Address: 00:11:22:33:44:55
The Wireless network added as VLAN 1 on this scenario with the subnet ID of 192.168.1.0/24.
DHCP server has the pool of 192.168.1.2 - 192.168.1.254. The SSLSRTIP was the tool used in
this scenario as part of the penetration test. As the result we discovered that ARP poisoning was
not detected properly in this scenario if the MITM happed between the victim 1 and victim 2.
Figure 4.19 demonstrates how everything was connected for this scenario test. Screen shots
(snapshots) were taken during each test covered in this report. These screen shots are proves of
the attack and process of the attack.
Check ARP cache
After reviewing the configuration the attack started similar as scenario 2 for HTTPS case over
WIFI. Appendix A figure 13 shows the configuration of attacker machine and Appendix A figure
14 shows the victim 1 MAC table after ARP poisoning by attacker machine.
As Appendix A figure 14 showed, victim 1 had the MAC address of attacker machine as the
default gateway instead of the real MAC address of the Vitim 2 (WIFI access point).

Methods
24
Consequently, the victim 1’s machine had to forward all the data traffic to the attacker machine.
The attacker machine could intercept and forward the traffic to the real default gateway afterward.
Test in victim
Appendix A figure 15, 16, 17 and 18 have been taken from different websites on the IE browser
and chrome browser in the victim 1which were using SSL over HTTP. The username and
password were used as random just to demonstrate how SSLSTRIP logs them for these particular
websites.
Get username and password
The Appendix A figure 19 is the log of Appendix A figure 15 on the attacker machine. Note that
user names and passwords are underlined in red just to make them easier to read. Appendix A
figure 20, 21 and 22 represent Appendix A figure 16, 17 and 18 respectively.
Figure 4.19 attacker and victim over VLAN 20

Results and Analysis
25
5 Mitigation
Dynamic ARP Inspection (DAI) is one of the security features. DAI assists prevention of ARP
poisoning by checking all ARP requests and responses to make sure they are authorized. This
process happens before updating the switch ARP cache.
DAI verifies MAC addresses by comparing the IP address against the MAC-IP binding that has
been cached on the trusted binding table. Any ARP packet that is not verified would be dropped.
Trusted binding table is populated by DHCP snooping. In the case that static IP addresses were
used, DAI can get help of ARP access lists to verify the ARPs.
One of the verification methods that DAI is taking advantage of is to check the Ethernet headers
and drop any packet that has a different MAC address for the packet IP address. This can be done
on both Source MAC address and destination MAC address. DAI can check the source MAC in
the Ethernet with the sender MAC address already in switch ARP table. If the validation does not
become true, DAI drops the packet. The same concept is true for destination MAC address.
The default rate limit of DAI on untrusted port is 15 Packet per Second (PPS) although this ratio
is changeable. Changing this ration to higher number can increase the risk of Denial-Of-Service
(DOS) on the switch. If the number of receiving ARP packet overreaches this number, the port
will be placed in error-disabled status. Figure 5.1 shows that DAI is activated on switch 1 (S1) for
VLAN 10.
Figure 5.1 configuration of DAI on victim2 (switch)
As soon as this feature was activated for VLAN 10, Error messages were logged as it is shown in
figure 5.2 and 5.3 for both scenario 1 and 2. Figure 5.2 was taken in scenario 1 and figure 5.2 was
taken in scenario 2.
As the result in both scenarios, FastEthernet 0/5, the port that attacker and victim1 on VLAN 10
were connected to immediately was put in Error mode and disabled. Because of that the victim 1
lost the connection with the rest of the network and internet which clearly demonstrated that this
feature can stop MITM attack.
Figure 5.2 log of DAI on victim2 (switch) scenario 1

Results and Analysis
26
Figure 5.3 log of DAI on victim2 (switch) scenario 2
In scenario 3 the result was different. Figure 5.4 shows the configuration on switch 2 (S2) and
how DAI was configured on VLAN 20 where wireless access point was connected. Figure 5.5 is
the confirmation of DAI on the VLAN 20.
Figure 5.4 DAI configuration for VLAN 20 on scenario 3
Figure 5.5 verification of VLAN 20 on victim2 (switch)
After this step no error were logged to notify that any ARP poisoning was in process nor the
related switch port was disabled. As it was notified the process of MITM attack was not 100%
successful either (2 out of 10 try failed). Furthermore, because FastEthernet 0/7 was not shutdown
on S2, victim 1 still had connection to the rest of the network and outside to the internet. This
result suggests that DAI might not be convenient enough to stop MITM over WIFI [20] Cisco
suggests that if the switch disable the port connected to wireless vlan, any ARP poisoning can
result to DOS attack.

Results and Analysis
27
6 Results and Analysis
On the particular enterprise Cisco switch (Cisco Catalyst 3560), the implementation of the DAI
on first scenario (Static IP addresses) and second scenario (Dynamic IP addresses) could stop the
MITM attack with ARP poisoning method. This was done by the switch automatically by
disabling the related port on which the attack was launched. This port was set as untrusted port
and the default rate limitation of DAI on untrusted port is 15 PPS. The limit was reached
immediately after performing the attack and the port was put in “Err_Disable” error status.
But what about if the switch used in a local network does not support DAI or what about the time
that CPU utilization of the switch is high enough that enabling this feature causes total failure.
Since processing each ARP header in the local network with many devices could be very resource
consuming!
Moreover, DAI was not that effective on the 3rd scenario when wireless channel network was
implemented. In this scenario, if the attack launches between two different devices over a
wireless Local Area Network (LAN), since no ARP packet was forwarded to the switch, DAI is
not effective. In addition, when ARP poisoning was run between a victim on the wireless LAN
and the default gateway, sometimes some log messages were shown in the console management
of the switch but the switch did not disable the port. The reason might be that the switch did not
detect the attack in progress or the ratio of 15ppt did not exceed. Another explanation relies on
the prevention of DOS for Wireless LAN. If the switch disables the port that is connected to WIFI
LAN, an attacker can shut down the whole Wireless local LAN with a simple ARP poisoning.
Furthermore, it was shown that MITM attack can be done frighteningly easy on the network
especially if the organization does not use the switch brands that can support DAI nor if they do
not have the desire to stop it. Even with DAI implementation on the switches MITM cannot be
totally avoided in wireless network based on our case study.
To overcome for the situation that DAI is not performed, a solution could be as “Joshi, Y”
proposes to install an add-on script on the browser to detect and report this attack along the path
of the HTTPS channel. [5] This method can give better client side support which can result only
to detect any traffic redirection between web client and the default gateway. The process is that
the script can check the ARP header for IP address of default gateway and its MAC address
within different time interval and compare with the first sample in the client with using “ARP –a”
command. If any changes are detected, a warning message can be issued on the user web browser
to notify the MITM attack in progress. However this method can only detect the MITM inside
local area i.e. not the entire path between web client and web server. Another disadvantage of this
method is that if the default gateway of the network changes for any reason such as redundancy
or topology the script will issue a false notification. Another drawback can be overloading of
resources that can be caused due to consequence ARP verification on the client side.
Shell script could provide the same mechanism as add-on can offer to simulate DAI detection
option but in this method all the overload of detection is on the web server. There can be many
users who are already connected to the web server which is most likely. Therefore, MITM
detection mechanism can put the web server under the possibility of being crashed due to

Results and Analysis
28
overload of server resources utilization. Also, any legitimate changes of the default gateway IP
address on the client side can cause a false warning notification.
In all the above mentioned, in any situation if the MITM accrues, SSL method of encrypting of
HTTP data is supposed to protect the confidentiality of the web communication channel. As we
could provide in the previous chapters, it is very clear that SSL fails to avoid any interception
over HTTP traffic. One reason can be unlike VPN, SSL uses two different random keys to
establish the encrypted session. In most of VPN technology a pre-defined secret key is used to be
employed in encryption process so at any point of the session establishment process if the channel
is intercepted, the secret key cannot be revealed and to be implied for decryption on attacker
machine.
Additionally, over last months the thoughts of Government spying on their citizen become more
creditable. Having that in mind, based on this report clearly SSL could not be considered alone as
a security tool to stop MITM attack since these kind of attacks can be launched anywhere on the
path of the HTTPS communication channel.
The other solution likely to decrease the risk of MITM is what University of Toronto has
published based on a research called “ transparency project” [21] based on PIPEDA (Personal
Information Protection and Electronic Documents Act) against “Canadian ISPs 'boomerang
routing’ ” defined as rotating the Canadian users’ traffic from Canada to USA and back to Canada
to another Canadian users . [22]
This research supplies a collective map and measures 20 different Canadian ISPs (Internet
Service provider) based on 10 numbers of data privacy of transparency criteria. One of these
criteria is “Publicly visible steps to avoid U.S. routing of Canadian data.” For example, the ISPs
that warn the users about routing the traffic to US got higher grades.
Another consideration that could enhance security which is not currently much in use is the
verification of client certificates. Web servers can verify the identity of the client as it was
explained in the HTTPS handshaking process. With this mechanism, web server can make sure
that the web client is identified to avoid the MITM of attack using fake certification. But, this
needs significant changes to the existing Public Key infrastructure (PKI) and it cannot be
implemented sometime soon. PKI is used currently for other purposes such as VPN, Bank card
(for ATM), driving licenses and passports.
Finally, we mentioned in this section the different methods that can effectively detect or decrease
the risk of MITM attack over web traffic. The last and foremost method could be to educate the
web client users by teaching them to notify any sign of breach, to check the certification
verification by browser and to understand the meaning of different warnings. The sessions can
easily be hijacked when the services of the web server offered just over HTTPs using TCP port
443, then frequently diverts to the HTTP traffic on TCP port 80 to immune port 443. In other
words, if HTTPS is relaying on HTTP to establish a secure session it is at the risk of vulnerability.
In this scenario the MITM attacker can easily stop the request of port 443 requested by the server
and do not let the client know that port 443 was needed for this service and use port 80 for client
side.

Conclusions
29
7 Conclusions
HTTPS is much more secure than HTTP because of the SSL encryption mechanism but it cannot
be a total prevention mechanism against web traffic interception. If anywhere on the path from
client browser to the HTTPS server MITM attack occurs, SSL alone cannot protect the
confidentiality of the communication channel. For instance, if your ISP provider or some
agencies want to intercept the data, it is possible without the user being notified. Tools such as
SSLSTRIP or SSLSNIFF can be used for such purposes. On the other hand, web users cannot
make sure that even taking advantage of Virtual Private Network (VPN) could eliminate this
threat if the communication channel between the VPN server and HTTPS server is not set up as
VPN channel. MITM attack can be eliminated over wired local network either small network or
enterprise network using specified Cisco switch if the DAI is active for the VLANs. But even
with this feature activated the users over local Wireless network would not be completely
protected against this kind of attack.
Client verification could be considered as another technique. It can implement better security but
it cannot happen any time soon. It needs some fundamental changes for PKI (Public Key
infrastructure) session process establishment and it might violate the user’s privacy.
Furthermore, if the web site uses HTTP to secure HTTPS session for some services, the session
could be easily hijacked. A solution to this treat is to use HTTPS at the beginning of the session
establishment but this might result into “page not found error” on the client web browser. The
reason is that many web servers do not support HTTPS for all the web services that they can
provide to the web users.
Recommendation: It might not be wrong to say the best interest of facing MITM is to educate
web users. Most people do not check if the certifications of websites are right and in the right
order. Many of those who might check might not have enough knowledge to verify them.
Therefore; they would not find out that the SSL has been broken. So people should be more
carefully when they visit the websites with HTTPS especially over sensitive data such as banking.
Future work: Being exempt from MITM is mostly unlikely. ARP poisoning is a typical way of
doing this attack. We found that we can detect the ARP poisoning by checking ARP Cache. So
possibly we can develop software to detect the attack and not to avoid it. MITM might currently
be a challenge that users all over world are facing and so far there is not a particular solution that
can eliminate the threat.
This could be a good reason why most of banks started the use of Bank ID applications which
offers the user a mechanism such as VPN because of PKI that is embedded inside the bank IDs.
Redirecting the HTTPS traffic from the countries or regions that is proven as security treat might
be a temporary option to such attack as Canadian ISPs (Internet Service Provider) are urged to
implement this strategy.

30
References
[1] Plamen N. “The Internet of Everything Is the New Economy”, Cisco Systems, January 2014.
[Online]. Available: http://www.cisco.com/c/en/us/solutions/collateral/enterprise/cisco-on-
cisco/Cisco_IT_Trends_IoE_Is_the_New_Economy.pdf [Accessed: 2 May 2014].
[2] B. Sivasubramanian, Implementing Cisco IP Switched Networks (SWITCH) Foundation
Learning Guide. Cisco Press, 2010.
[3] Cisco Validated Design, Campus Network for High Availability Design Guide. Cisco
Systems, 2008. [E-book] Available:
http://www.cisco.com/c/en/us/td/docs/solutions/Enterprise/Campus/HA_campus_DG/hacampusd
g.html [Accessed: 12 March 2014].
[4] P. K. Pateriya and S. S. Kumar, “Analysis on Man in the Middle Attack on SSL”,
International Journal of Computer Applications (0975 – 8887), May 2012.
[5] Joshi, Y., Das, D. and Saha, S. "Mitigating man in the middle attack over secure sockets
layer." In Internet Multimedia Services Architecture and Applications (IMSAA), 2009 IEEE
International Conference on, pp. 1-5.
[6] Ross, B., Jackson, C., Miyake, N., Boneh, D., and Mitchell, J. C. "Stronger password
authentication using browser extensions." In Proceedings of the 14th USENIX Security
Symposium, Baltimore, vol. 31., August 2005.
[7] Jeff K. and Kevin L., “Layer 2 Attacks and Mitigation Techniques for the Cisco Catalyst 6500
Series”, Cisco Systems, 2010. [Online]. Available:
http://www.cisco.com/c/en/us/products/collateral/switches/catalyst-6500-series-
switches/white_paper_c11_603839.html [Accessed: 21 March 2014].
[8] Gourley, D., & Totty, B. HTTP: the definitive guide. O'Reilly Media, Inc., 2002.
[9] McKinley, Holly Lynne. "SSL and TLS: A Beginners’ Guide." SANS Institute, 2003.
[Online]. Available:
http://www.sans.org/rr/whitepapers/protocols/1029.php [Accessed: 22 March 2014] .
[10] Thomas, S. A. SSL & TLS essentials. New York: Wiley, 2000.
[11] Apache, “SSL/TLS Strong Encryption: An Introduction,” http://httpd.apache.org/. [Online].
Available:
http://httpd.apache.org/docs/2.2/ssl/ssl_intro.html [Accessed: 22 March 2014].
[12] Claude Moraes, “Committee on Civil Liberties, Justice and Home Affairs”, EUROPEAN
PARLIAMENT, p. 17, January 2014.
[13] Estelle Masse, “Conclusions of the European Parliament on mass-surveillance programs -
Part 1”, December 2013. [Blog entry]. Available:

31
https://www.accessnow.org/blog/2013/12/17/libe-series-12-and-13-conclusions-of-the-european-
parliament-on-mass-survei [Accessed: 2 April 2014].
[14] Thomas, S. A. SSL & TLS essentials. New York: Wiley, 2000.
[15] Ortega, A. P., Marcos, X. E., Chiang, L. D. and Abad, C. L. “Preventing ARP cache
poisoning attacks: A proof of concept using OpenWrt.” In Latin American Network Operations
and Management Symposium, 2009. (LANOMS 2009), pp. 1-9. IEEE, 2009.
[16] Plummer, D. “Ethernet Address Resolution Protocol: Or converting network protocol
addresses to 48. bit Ethernet address for transmission on Ethernet hardware.” (1982).
[17] Stephen F. ARP Poisoning: An investigation into spoofing the Address Resolution Protocol.
[E-book] Available:
http://www.harmonysecurity.com/files/HS-P004_ARPPoisoning.pdf [Accessed: 4 April 2014].
[18] Cooper, D. “Internet X. 509 public key infrastructure certificate and certificate revocation
list (CRL) profile.”, 2008.
[19] Moxie Marlinspike, “Introduction of sslsniff”, github. [Online]. Available:
https://github.com/moxie0/sslsniff/blob/master/README [Accessed: 25 March 2014].
[20] Cisco Validated Design, Enterprise Mobility 4.1 Design Guide, 2008. [E-book]. Available:
http://www.cisco.com/c/en/us/td/docs/solutions/Enterprise/Mobility/emob41dg/emob41dg-
wrapper.html [Accessed: 10 April 2014].
[21] Andrew C., Jonathan O. Data Privacy Transparency of Canadian Internet Service Providers,
2014. [E-book]. Available:
http://ixmaps.ca/transparency/img/DataPrivacyTransparencyofCanadianISPs.pdf [Accessed: 21
April 2014].
[22] Lisa Vaas, “Canadian ISPs 'boomerang routing' traffic through the snoopy US”.
NakedSecurity. Available:
http://nakedsecurity.sophos.com/ [Accessed: 23 April 2014].
[23] Wireshark, “About Wireshark”, wireshark.org. [Online]. Available:
http://www.wireshark.org/about.html [Accessed: 17 April 2014].
[24] Ettercap, “ABOUT THE ETTERCAP PROJECT”, ettercap.github.io. [Online]. Available:
http://ettercap.github.io/ettercap/about.html [Accessed: 17 April 2014].
[25] Moxie Marlinspike, “Introduction of sslstrip”, github. [Online]. Available:
https://github.com/moxie0/sslstrip/blob/master/README [Accessed: 25 March 2014].

32
Appendix
Appendix A: Pictures
The victim 1 has the IP address of 192.168.10.12/24 and the Default Gateway IP address
192.168.10.1 assigned via DHCP. This machine has the MAC address of 18-03-73-1A-C4-C2
Figure 1 victim network adapter
The attacker machine has the IP address of 192.168.10.13/24 assigned via DHCP. This machine
has the MAC address of 00-11-22-33-44-55
Figure 2 attacker network adapter
Configuring the attacker machine to act as a router
Figure 3 activation of routing on attacker machine
Specification of the rule for IPTABLE in the attacker machine: to redirect the traffic on the TCP
protocol from the first port to the second port over an interface.

33
Figure 4 Ettercap configuration on attacker machine
The specification of the IPTABLE rule: Redirecting the traffic form port 80 to the port 10000
Figure 5 set the configuration of IPTABLE
This figure shows that SSLSTRIP was launched and started to listen for the HTTPS traffic.
Figure 6 running SSLSTRIP
This figure shows the ARP poisoning in progress between the attacker machine and the victim
1.The attacker introduced itself as the Default Gateway to the victim 1.

34
Figure 7 ARP poisoning
This figure shows the ARP poisoning in progress between the attacker machine and the victim
2(switch). The attacker introduced itself as the victim1 to the victim 2.
Figure 8 ARP poisoning

35
This figure shows the browser on the victim 1. The protocol used in this connection is HTTPS
between the browser and the network HTTP server using the domain name www.thesis.com.
Figure 9 browser on victim1 over HTTPS
This figure shows the output of SSLSTRIP. The username was captured as “hhtps-dynamic” and
the password as “123456789” for the domain name www.thesis.com on the IP address of
10.10.1.2 port 80 .
Figure 10 intercepted information on attacker
This figure shows the browser on the victim 1. The protocol used in this connection is HTTP
between the browser and the network HTTP server using the domain name www.thesis.com.
Figure 11 browser on victim1 over HTTP

36
This figure shows the captured traffic on the URLSNARF tool over plain text traffic, the HTTP
communication channel. It reveals the detail of the browser on the victim 1 which was connected
to the WWW.thesis.com .
Figure 12 intercepted information on attacker
The attacker has the IP address of 192.168.1.5/24 and the Default Gateway IP address
192.168.1.1 assigned via DHCP. This machine has the MAC address of 00-11-22-33-44-55
Figure 13 victim network adapter
This figure was captured in victim 1. It shows the IP address of 192.168.1.4 assigned to this
machine as well as the ARP table records. In addition, first record shows that this machine(victim
1) considers the attacker machine with MAC address of 00-11-22-33-44-55 as the Default
Gateway.

37
Figure 14 ARP table on victim1
This figure was capture in the victim 1. It shows the login web page for gmail.com on the Firefox.
Figure 15 browser on victim1 for Gmail
This figure was capture in the victim 1. It shows the login web page for mail.yahoo.com on the
Firefox.

38
Figure 16 browser on victim1 for yahoo
This figure was capture in the victim 1. It shows the login web page for appleid.apple.com on the
Chrome.
Figure 17 browser on victim1 for apple
This figure was capture in the victim 1. It shows the login web page for facebook.com on the
Chrome.

39
Figure 18 browser on victim1 for Facebook
This Figure is the screenshot of the SSLSTRIP output while user on the victim 1 was visiting the
gmail.com website. The username was captured as [email protected] and password as
“password12345”.
Figure 19 intercepted information from Gmail
This Figure is the screenshot of the SSLSTRIP output while user on the victim 1 was visiting the
login.yahoo.com website. The username was captured as [email protected] and password as
“password12345”.

40
Figure 20 intercepted information from yahoo
This Figure is the screenshot of the SSLSTRIP output while user on the victim 1 was visiting the
appleid.apple.com website. The username was captured as [email protected] and password as
“testfor+thesis”.
Figure 21 intercepted information from apple
This figure is the screenshot of the SSLSTRIP output while user on the victim 1 was visiting the
facebook.com website. The username was captured as [email protected] and password as
“o123456789”.

41
Figure 22 intercepted information from Facebook

42
Appendix B: ASA configuration
hostname ASA
enable password acpVpnfrERy1z/0k
encrypted
xlate per-session deny tcp any4 any4
xlate per-session deny tcp any4 any6
xlate per-session deny tcp any6 any4
xlate per-session deny tcp any6 any6
xlate per-session deny udp any4 any4 eq
domain
xlate per-session deny udp any4 any6 eq
domain
xlate per-session deny udp any6 any4 eq
domain
xlate per-session deny udp any6 any6 eq
domain
passwd 2KFQnbNIdI.2KYOU encrypted
names
dns-guard
!
interface Ethernet0/0
nameif inside
security-level 100
ip address 192.168.2.1 255.255.255.0
!
interface Ethernet0/1
security-level 50
ip address 10.10.10.1 255.255.255.252
!
interface Ethernet0/2
nameif outside
security-level 0
ip address 209.168.1.1 255.255.255.252
!
interface Ethernet0/3
shutdown
no nameif
no security-level
no ip address
!
interface Management0/0
management-only
nameif management
security-level 100
ip address 192.168.1.1 255.255.255.0
!
boot system disk0:/asa901-k8.bin
ftp mode passive
dns domain-lookup dmz
dns server-group DEFAULT
name-server 10.10.1.2
object network SERVER
subnet 10.10.1.0 255.255.255.0
access-list dns_inside_dmz standard permit
any4

43
pager lines 24
logging asdm informational
mtu inside 1500
mtu dmz 1500
mtu outside 1500
mtu management 1500
icmp unreachable rate-limit 1 burst-size 1
asdm image disk0:/asdm-702.bin
no asdm history enable
ARP timeout 14400
no ARP permit-nonconnected
nat (inside,outside) source static any any
nat (inside,dmz) source static any any
destination static SERVER SERVER
route outside 0.0.0.0 0.0.0.0 209.168.1.2 1
route dmz 10.10.1.0 255.255.255.0 10.10.10.2
1
route inside 192.168.10.0 255.255.255.0
192.168.2.2 1
route inside 192.168.20.0 255.255.255.0
192.168.2.2 1
timeout xlate 3:00:00
timeout pat-xlate 0:00:30
timeout conn 1:00:00 half-closed 0:10:00 udp
0:02:00 icmp 0:00:02
timeout sunrpc 0:10:00 h323 0:05:00 h225
1:00:00 mgcp 0:05:00 mgcp-pat 0:05:00
timeout sip 0:30:00 sip_media 0:02:00 sip-
invite 0:03:00 sip-disconnect 0:02:00
timeout sip-provisional-media 0:02:00 uauth
0:05:00 absolute
timeout tcp-proxy-reassembly 0:01:00
timeout floating-conn 0:00:00
dynamic-access-policy-record
DfltAccessPolicy
user-identity default-domain LOCAL
http server enable
http 192.168.1.0 255.255.255.0 management
no snmp-server location
no snmp-server contact
crypto ipsec security-association pmtu-aging
infinite
crypto ca trustpool policy
telnet 192.168.2.0 192.168.2.0 inside
telnet 192.168.10.0 255.255.255.0 inside
telnet timeout 5
ssh timeout 5
console timeout 0
dhcpd address 192.168.1.2-192.168.1.254
management
dhcpd enable management
!
threat-detection basic-threat
threat-detection statistics access-list
no threat-detection statistics tcp-intercept
!
class-map global-class
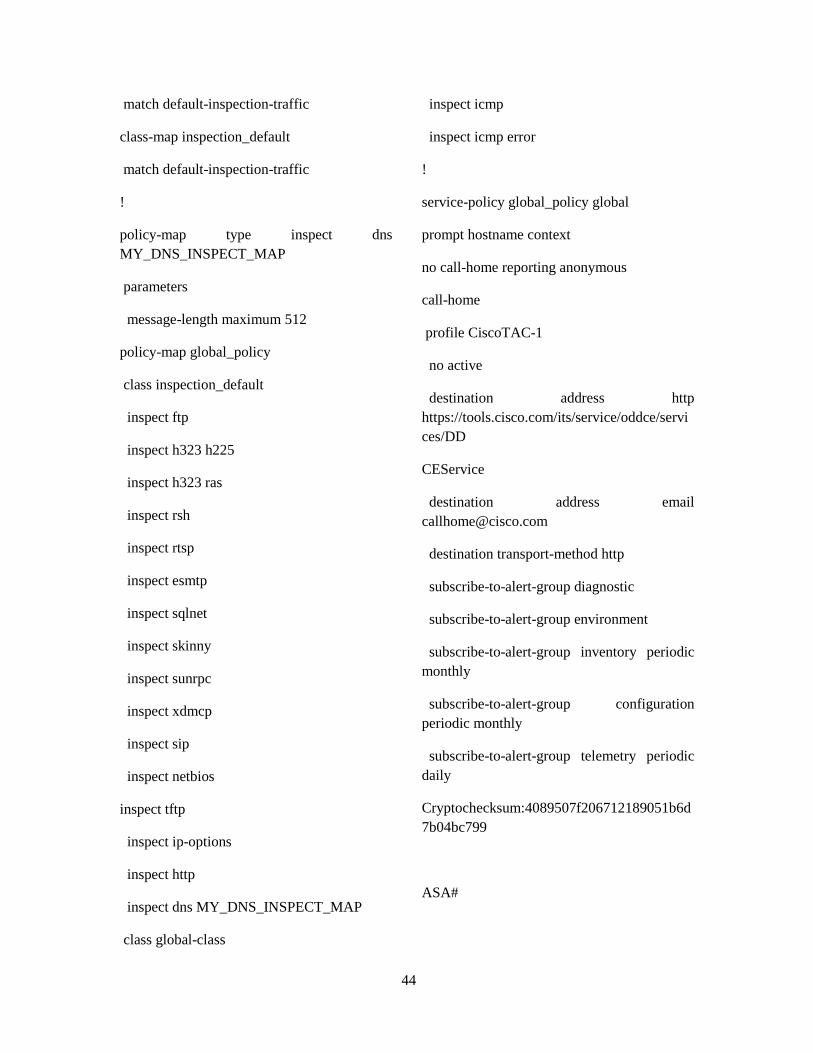
44
match default-inspection-traffic
class-map inspection_default
match default-inspection-traffic
!
policy-map type inspect dns
MY_DNS_INSPECT_MAP
parameters
message-length maximum 512
policy-map global_policy
class inspection_default
inspect ftp
inspect h323 h225
inspect h323 ras
inspect rsh
inspect rtsp
inspect esmtp
inspect sqlnet
inspect skinny
inspect sunrpc
inspect xdmcp
inspect sip
inspect netbios
inspect tftp
inspect ip-options
inspect http
inspect dns MY_DNS_INSPECT_MAP
class global-class
inspect icmp
inspect icmp error
!
service-policy global_policy global
prompt hostname context
no call-home reporting anonymous
call-home
profile CiscoTAC-1
no active
destination address http
https://tools.cisco.com/its/service/oddce/servi
ces/DD
CEService
destination address email
destination transport-method http
subscribe-to-alert-group diagnostic
subscribe-to-alert-group environment
subscribe-to-alert-group inventory periodic
monthly
subscribe-to-alert-group configuration
periodic monthly
subscribe-to-alert-group telemetry periodic
daily
Cryptochecksum:4089507f206712189051b6d
7b04bc799
ASA#

45
Appendix C: Router 1
configuration
!
hostname R1
!
boot-start-marker
boot-end-marker
!
enable secret 5
$1$x4bw$nTsoguQtbQ9Q2VoOrtWa80
!
no aaa new-model
!
resource policy
!
memory-size iomem 5
mmi polling-interval 60
no mmi auto-configure
no mmi pvc
snmp-timeout 180
ip subnet-zero
ip cef
!
no ip dhcp use vrf connected
ip dhcp excluded-address 20.20.10.1
20.20.10.10
!
ip dhcp pool 20.20.10
network 20.20.10.0 255.255.255.0
default-router 20.20.10.1
!
interface Loopback0
ip address 20.20.20.1 255.255.255.255
!
interface FastEthernet0/0
ip address 209.168.1.2 255.255.255.252
duplex auto
speed auto
no shut
!
interface FastEthernet0/1
ip address 20.20.10.1 255.255.255.0
duplex auto
speed auto
no shut
!
interface Serial0/1/0
no ip address
shutdown
clock rate 2000000
!
interface Serial0/1/1
no ip address

46
shutdown
clock rate 2000000
!
interface Serial0/2/0
no ip address
shutdown
clock rate 2000000
!
interface Serial0/2/1
no ip address
shutdown
clock rate 2000000
!
ip classless
ip route 0.0.0.0 0.0.0.0 FastEthernet0/0
Appendix D: Router 2
configuration
version 12.4
service timestamps debug datetime msec
service timestamps log datetime msec
service password-encryption
!
hostname R2
!
boot-start-marker
boot-end-marker
!
enable secret 5
$1$mDO7$dwfKsxFTcDdDzh46zVJ1f1
!
no aaa new-model
!
resource policy
!
memory-size iomem 5
ip cef
!
ip dhcp excluded-address 10.10.1.1
10.10.1.10
!
voice-card 0
!
password encryption aes
!
interface FastEthernet0/0
ip address 10.10.10.2 255.255.255.252
duplex auto
speed auto
no shut
!
interface FastEthernet0/1
ip address 10.10.1.1 255.255.255.0
duplex auto

47
speed auto
no shut
!
interface Serial0/1/0
no ip address
shutdown
clock rate 2000000
!
interface Serial0/1/1
no ip address
shutdown
clock rate 2000000
!
ip route 0.0.0.0 0.0.0.0 10.10.10.1
Appendix E: Router 3
configuration
hostname R3
!
boot-start-marker
boot-end-marker
!
enable secret 4
zqx41LB0PDWLOwD83WC2N1ncA0PcuK7
1.j1sri9Xkwg
!
no aaa new-model
!
memory-size iomem 5
!
no ipv6 cef
ip source-route
ip cef
!
no ip domain lookup
!
multilink bundle-name authenticated
!
password encryption aes
crypto pki token default removal timeout 0
!
voice-card 0
!
license udi pid CISCO2911/K9 sn
FCZ161920NJ
license accept end user agreement
license boot module c2900 technology-
package securityk9
license boot module c2900 technology-
package uck9
license boot module c2900 technology-
package datak9
!
redundancy
!

48
interface Embedded-Service-Engine0/0
no ip address
shutdown
!
interface GigabitEthernet0/0
ip address 192.168.2.2 255.255.255.0
duplex auto
speed auto
!
interface GigabitEthernet0/1
ip address 192.168.10.1 255.255.255.0
duplex auto
speed auto
!
interface GigabitEthernet0/2
ip address 192.168.20.1 255.255.255.0
duplex auto
speed auto
!
interface Serial0/0/0
no ip address
shutdown
no fair-queue
clock rate 2000000
!
interface Serial0/0/1
no ip address
shutdown
clock rate 2000000
!
interface Serial0/1/0
no ip address
shutdown
clock rate 2000000
!
interface Serial0/1/1
no ip address
shutdown
clock rate 2000000
!
interface GMPLS0
no ip address
no fair-queue
no keepalive
!
router ospf 1
network 192.168.10.0 0.0.0.255 area 0
network 192.168.20.0 0.0.0.255 area 0
default-information originate always
!
no ip http server
no ip http secure-server

49
!
ip route 0.0.0.0 0.0.0.0 192.168.2.1
!
mgcp profile default
!
line con 0
logging synchronous
line aux 0
line 2
no activation-character
no exec
transport preferred none
transport input all
transport output lat pad telnet rlogin lapb-ta
mop udptn v120 ssh
stopbits 1
line vty 0
password 7 07082E4B410E16
login
transport input all
line vty 1 4
login
transport input all
!
scheduler allocate 20000 1000
R3#
Appendix F: Switch 1
configuration
version 12.2
no service pad
service timestamps debug datetime msec
service timestamps log datetime msec
no service password-encryption
!
hostname S1
!
boot-start-marker
boot-end-marker
!
enable secret 5
$1$YAdY$NpIud8ttbIjXsN78SSYXH0
!
no aaa new-model
system mtu routing 1500
ip routing
!
crypto pki trustpoint TP-self-signed-
1829464832
enrollment selfsigned
subject-name cn=IOS-Self-Signed-
Certificate-1829464832
revocation-check none
rsakeypair TP-self-signed-1829464832
!

50
crypto pki certificate chain TP-self-signed-
1829464832
!
spanning-tree mode pvst
spanning-tree extend system-id
!
vlan internal allocation policy ascending
!
interface Port-channel1
switchport trunk encapsulation dot1q
switchport mode trunk
!
interface FastEthernet0/1
switchport trunk encapsulation dot1q
switchport mode trunk
channel-group 1 mode desirable
!
interface FastEthernet0/2
switchport trunk encapsulation dot1q
switchport mode trunk
channel-group 1 mode desirable
!
interface FastEthernet0/3
switchport access vlan 20
!
interface FastEthernet0/5
switchport access vlan 10
!
interface Vlan1
ip address 192.168.1.1 255.255.255.0
!
interface Vlan10
ip address 192.168.10.2 255.255.255.0
!
router ospf 1
log-adjacency-changes
network 192.168.1.0 0.0.0.255 area 0
network 192.168.10.0 0.0.0.255 area 0
network 192.168.20.0 0.0.0.1 area 0
!
ip classless
ip http server
ip http secure-server
!
ip sla enable reaction-alerts
!
Appendix G: Switch 2
configuration
version 12.2
no service pad
service timestamps debug datetime msec
service timestamps log datetime msec
no service password-encryption
!

51
hostname S2
!
boot-start-marker
boot-end-marker
!
enable secret 5
$1$VG2r$aAsIfTHjaSnnpDeDDXzOu0
!
no aaa new-model
system mtu routing 1500
ip subnet-zero
ip routing
no ip domain-lookup
!
crypto pki trustpoint TP-self-signed-
1970003456
enrollment selfsigned
subject-name cn=IOS-Self-Signed-
Certificate-1970003456
revocation-check none
rsakeypair TP-self-signed-1970003456
!
crypto pki certificate chain TP-self-signed-
1970003456
certificate self-signed 01
!
spanning-tree mode pvst
spanning-tree extend system-id
!
vlan internal allocation policy ascending
!
interface Loopback0
ip address 10.10.10.100 255.255.255.0
!
interface Port-channel1
switchport trunk encapsulation dot1q
switchport mode trunk
!
interface FastEthernet0/1
switchport trunk encapsulation dot1q
switchport mode trunk
channel-group 1 mode desirable
!
interface FastEthernet0/2
switchport trunk encapsulation dot1q
switchport mode trunk
channel-group 1 mode desirable
!
interface FastEthernet0/3
switchport access vlan 20
!
interface Vlan1
ip address 192.168.1.2 255.255.255.0
!

52
interface Vlan20
ip address 192.168.20.2 255.255.255.0
!
router ospf 1
log-adjacency-changes
network 10.10.10.0 0.0.0.255 area 1
network 192.168.1.0 0.0.0.255 area 0
network 192.168.10.0 0.0.0.255 area 0
network 192.168.20.0 0.0.0.255 area 0