business solutions navision 4.0 course 8424a: job costing
TRANSCRIPT

MICROSOFT® BUSINESS SOLUTIONS NAVISION® 4.0
COURSE 8424A: JOB COSTING

Last Revision: January 2005 The information contained in this document represents the current view of Microsoft Corporation on the issues discussed as of the date of publication. Because Microsoft must respond to changing market conditions, it should not be interpreted to be a commitment on the part of Microsoft, and Microsoft cannot guarantee the accuracy of any information presented after the date of publication.
This document is for informational purposes only. MICROSOFT MAKES NO WARRANTIES, EXPRESS, IMPLIED OR STATUTORY, AS TO THE INFORMATION IN THIS DOCUMENT.
Complying with all applicable copyright laws is the responsibility of the user. Without limiting the rights under copyright, no part of this document may be reproduced, stored in or introduced into a retrieval system, or transmitted in any form or by any means (electronic, mechanical, photocopying, recording, or otherwise), or for any purpose, without the express written permission of Microsoft Corporation.
Microsoft may have patents, patent applications, trademarks, copyrights, or other intellectual property rights covering subject matter in this document. Except as expressly provided in any written license agreement from Microsoft, the furnishing of this document does not give you any license to these patents, trademarks, copyrights, or other intellectual property.
© 2005 Microsoft Corporation. All rights reserved. Microsoft Business Solutions – Navision, Microsoft Excel, and Microsoft Word are either trademarks or registered trademarks of Microsoft Corporation or Great Plains Software, Inc. or their affiliates in the United States and/or other countries. Great Plains Software, Inc. is a subsidiary of Microsoft Corporation. The names of actual companies and products mentioned herein may be the trademarks of their respective owners.
The names of actual companies and products mentioned herein may be the trademarks of their respective owners.

Table of Contents
Introduction 1 Welcome ............................................................................................................... 1 Microsoft Business Solutions Courseware Contents............................................. 2 Student Objectives ................................................................................................ 3
Chapter 1: Setup Operations 5 Training Objectives................................................................................................ 5 Overview ............................................................................................................... 6 What are Jobs? ..................................................................................................... 6 General Posting Setup .......................................................................................... 7 Job Posting Group Setup ...................................................................................... 9 Job Card.............................................................................................................. 11 Job Card Setup ................................................................................................... 15 Test Your Skills − Create a New Job................................................................... 17 Job Budgets ........................................................................................................ 18 Job Budget Setup................................................................................................ 20 Test Your Skills − Create a New Job Budget ...................................................... 22 Test Your Skills − Create Another Job and Budget ............................................. 23 Quick Interaction: Lessons Learned.................................................................... 24
Chapter 2: Usage Posting 25 Training Objectives.............................................................................................. 25 Overview ............................................................................................................. 26 Recording Job Costs ........................................................................................... 26 Purchase Order Posting ...................................................................................... 27 Test Your Skills − Create a Purchase Order ....................................................... 29 Job Journals ........................................................................................................ 30 Job Journal Posting............................................................................................. 32 Correcting Entries posted with incorrect Phases, Tasks, and Steps ................... 34 Test Your Skills − Create a Job Journal for Resources and Expense................. 35 Test Your Skills − Create a Job Journal for Resources and Items ...................... 36 Purchase Order and Job Journal Posting Review............................................... 38 Actual to Budget Review ..................................................................................... 39 Quick Interaction: Lessons Learned.................................................................... 41
Chapter 3: WIP Posting and Review 43 Training Objectives.............................................................................................. 43 Overview ............................................................................................................. 44 Job WIP of Job Costs.......................................................................................... 44 Calculate Job WIP Value..................................................................................... 46 Test Your Skills − Run the Calculate Job WIP Value Batch Job ......................... 48 Post Job WIP Value to G/L.................................................................................. 49 WIP Posting Review............................................................................................ 51 WIP Posting Breakdown...................................................................................... 52 Actual to Budget Review ..................................................................................... 53 Test Your Skills − Run the Post WIP Value to G/L Batch Job and Review ......... 54 Quick Interaction: Lessons Learned.................................................................... 55
Page i

Microsoft Navision Job Costing
Chapter 4: Usage and Sales Posting 57 Training Objectives.............................................................................................. 57 Overview ............................................................................................................. 58 Job Journal Posting − Usage............................................................................... 58 Test Your Skills − Create a Job Journal for Resources and Items ...................... 61 Recording Job Sale Entries................................................................................. 62 Sales Posting ...................................................................................................... 62 Job Journal and Sales Invoice Posting Review................................................... 64 Actual to Budget Review ..................................................................................... 66 Test Your Skills − Create a Sales Invoice ........................................................... 67 Test Your Skills − Create Another Sales Invoice................................................. 68 Quick Interaction: Lessons Learned.................................................................... 69
Chapter 5: Job Recognition and Review 71 Training Objectives.............................................................................................. 71 Overview ............................................................................................................. 72 Recognition of Job Costs .................................................................................... 72 Calculate Job Recognition................................................................................... 74 Test Your Skills − Run the Calculate Job Recognition Batch Job ....................... 76 Post Job Recognition to G/L................................................................................ 77 Recognition Posting Review................................................................................ 79 Recognition Posting Breakdown ......................................................................... 80 Test Your Skills − Run the Post Job Recognition to G/L batch job and review ... 81 Closing the Job.................................................................................................... 82 Quick Interaction: Lessons Learned.................................................................... 83
Appendix A: Test Your Skills Solutions 85
Test Your Skills − Create a New Job (CH1) ........................................................ 85 Test Your Skills − Create a New Job Budget (CH1)............................................ 86 Test Your Skills − Create Another Job and Budget (CH1) .................................. 87 Test Your Skills − Create a Purchase Order (CH2)............................................. 89 Test Your Skills − Create a Job Journal for Resources and Expense (CH2) ...... 90 Test Your Skills − Create a Job Journal for Resources and Items (CH2) ........... 92 Test Your Skills − Run the Calculate Job WIP Value Batch Job (CH3)............... 94 Test Your Skills − Run the Post WIP Value to G/L Batch Job and Review (CH3)95 Test Your Skills − Create a Job Journal for Resources and Items (CH4) ........... 96 Test Your Skills − Create a Sales Invoice (CH4)................................................. 98 Test Your Skills − Create Another Sales Invoice (CH4) .................................... 100 Test Your Skills − Run the Calculate Job Recognition Batch Job (CH5)........... 102 Test Your Skills − Run the Post Job Recognition to G/L Batch Job and Review (CH5)................................................................................................................. 103
Page ii

Introduction
INTRODUCTION Welcome
We know training is a vital component of retaining the value of your Microsoft® Business Solutions investment. Our quality training created by industry experts keeps you up-to-date on your solution and helps you develop the skills necessary to maximize the value of your solution. Whether you choose Online Training, Classroom Training, or Training Materials, there is a type of training to meet your needs and learning style. Choose the training that best suits you so you can stay ahead of the competition.
Online Training Online Training delivers convenient, in-depth training to you in the comfort of your own home or office. Online training provides immediate access to training 24 hours a day. It is perfect for the customer who does not have the time or budget to travel. Our newest online training options, eCourses, combine the efficiency of online training with the in-depth product coverage of classroom training, and provide at least two weeks to complete each course.
Classroom Training Classroom Training provides serious, in-depth learning through in-class interaction. From demonstrations to presentations to classroom activities, you will gain hands-on experience with instruction from our certified staff of experts. Regularly scheduled throughout North America, you can be sure you will find a class convenient for you.
Training Materials Training Materials enable you to learn at your own pace, on your own time, with information-packed training manuals. Our wide variety of training manuals feature an abundance of tips, tricks, and insights you can refer to again and again. Microsoft Business Solutions Courseware: These detailed Microsoft Business Solutions training materials are designed by experienced trainers. These manuals include basic through advanced topics as well as training objectives, exercises, interactions, and quizzes. Look for a complete list of manuals available for purchase on the Microsoft Business Solutions website: www.microsoft.com/BusinessSolutions.
Page 1

Microsoft Navision Job Costing
Microsoft Business Solutions Courseware Contents Test Your Skills Within the Microsoft Business Solutions Training Courseware you will find a variety of exercises. These exercises are offered in three levels to accommodate the breadth of knowledge and expertise of each student.
Challenge Yourself! (Level 3) Challenge Yourself! (Level 3) exercises are the most challenging. These exercises are designed for the experienced student who requires little instruction to complete the required task.
Need a Little Help? (Level 2) Need a Little Help? (Level 2) exercises are designed to challenge students, while providing some assistance. These exercises do not provide step-by-step instructions, however, do provide the user with helpful hints to complete the exercise.
Step-by-Step (Level 1) Step-by-Step (Level 1) exercises are geared towards novice users who require detailed instructions and explanations to complete the exercise. Step-by-step (Level 1) exercises will guide the user through the task, step-by-step, including navigation.
Quick Interaction: Lessons Learned At the end of each chapter within the Microsoft Business Solutions Training Courseware there is a Quick Interaction: Lessons Learned page. This page is designed to provide the student with an opportunity to reflect on the material they have just been exposed to. By outlining three key points from the chapter, the student can maximize knowledge retention, and provide themselves with an excellent resource for review.
Page 2

Introduction
Student Objectives What do you hope to learn by participating in this course? List three main objectives below. 1.
2.
3.
Page 3

Microsoft Navision Job Costing
Page 4
Chapter 1: Setup Operations
CHAPTER 1: SETUP OPERATIONS Training Objectives
This chapter discusses:
• Overview • What are Jobs? • General Posting Setup
– Job Sales Adjustment Account – Job Cost Adjustment Account
• Job Posting Groups – WIP Cost Account – WIP Sales Account – Cost Account – Sales Account – GL Expense Account
• Job Card • Job Card Setup • Job Budget • Job Budget Setup
Page 5

Microsoft Navision Job Costing
Overview This chapter defines Jobs and describes the posting groups that must be set up to successfully use Microsoft® Business Solutions–Navision® Job Costing. You then create Job Cards and a Job Budget, after defining the fields on each respective form.
What are Jobs? Jobs provide the ability to keep track of various costs associated with a long term project or Job; track the profitability of a Job; and compare budgeted costs and revenues to actual Job costs and revenue. Each Job is tracked using a Job Card, and each Job Card is unique by its Job number, Budget, and Ledger. The Job Budget is an estimate of costs and selling prices for a Job. Item, Resource, and G/L Account costs posted to the Job Budget become budgeted costs and budgeted prices. In the Job Ledger, the actual costs of Items, Resources, and G/L Accounts attached to a Job are tracked when a purchase invoice is posted (with a Job No. on it) and/or a Job Journal is posted. These costs are posted on the Job Ledger as a “usage” entry type. The actual sell price of Items, Resources, and G/L Accounts attached to a Job are tracked when a sales invoice is posted (with a Job No. on it). These prices are posted on the Job Ledger as a “sales” entry type.
Job Information Flow
Page 6

Chapter 1: Setup Operations
General Posting Setup On the Financial Management menu, click SETUP→POSTING GROUPS→GENERAL→POSTING SETUP. The General Posting Setup window appears. The General Posting Setup option is used to construct a matrix associating each Business Posting Group (assigned to Customers and Vendors) with every relevant Product Posting Group (assigned to Inventory Items and Resources). This is where the valid combinations of Business Group and Product Groups are made. Typically, the Job Sales Adjustment Account and Job Cost Adjustment Account fields are hidden on this window. To view these fields, click VIEW→SHOW COLUMN. When the Show Column window appears, locate the fields, select the check box next to both fields, and click OK. In the General Posting Setup window, scroll to the right to view the fields:
Field Description Job Sales Adjustment Account
Enter the number of the G/L account to which you want Microsoft Navision to credit the value of work in process (for job sales) when you run the Post WIP Value to G/L batch job for jobs in this posting group.
Job Cost Adjustment Account
Enter the number of the G/L account to which you want Microsoft Navision to credit the value of work in process (for job costs) when you run the Post Job WIP Value to G/L batch job for jobs in this posting group.
Page 7

Microsoft Navision Job Costing
Setup for G/L Expense Scenario In later chapters you will post a G/L Expense which requires you to set up a General Posting combination and make a quick change to the G/L Account Card you will be using.
1. While in the General Posting Setup window, locate the line for the NATIONAL / NO VAT combination. Note that it is near the bottom of the window.
2. In the Job Sales Adjmt. Account field, type 6620.
3. In the Job Cost Adjmt. Account field, type 7620.
NOTE: In a typical setup, these accounts are not used since they are used in the Job Posting Setup as the Job Costs and Job Sales accounts−which are where the usage and sales entries are moved after the Job Recognition periodic activity has been run. These accounts are just being used so new G/L accounts do not need to be setup.
4. Escape out the General Posting Setup window.
5. On the Financial Management menu, click GENERAL LEDGER→CHART OF ACCOUNTS. The Chart of Accounts window appears.
6. Find No. 6610 (Sales, Other Job Expenses).
7. Press SHIFT+F5 to open the G/L Account Card.
8. On the General tab, select the Direct Posting check box.
9. Click the Posting tab.
10. In the Gen. Bus. Posting Group field, type National.
11. In the Gen. Prod. Posting Group field, type No VAT.
12. Close the G/L Account Card and Chart of Accounts windows.
NOTE: The setup on this G/L Account card is only necessary because this database is not set up completely for these processes.
Page 8

Chapter 1: Setup Operations
Job Posting Group Setup On the Resource Planning menu, click JOBS→SETUP→POSTING GROUPS. The Job Posting Groups window appears:
Job Posting Groups define the relationship between jobs and the General Ledger. Each job must belong to a posting group because the job’s posting group tells Microsoft Navision where to post the transactions associated with that job. You can create as many posting groups as you like. A posting group lets you define the Work in Process (WIP) accounts, Cost and Sales accounts, and G/L Expense Sales Accounts. Posting groups are very useful because they automate the account selection for WIP and Recognition periodic functions.
Field Description Code Enter a unique code for this posting group. This
alphanumeric code can be up to 10 characters. Choose the account to post unrecognized work in process costs. This is usually a balance sheet asset account.
WIP Cost Account
When you should record WIP Job Costs (JOBS→PERIODIC ACTIVITIES→POST WIP VALUE TO G/L):
• For item and resource type entries, Microsoft Navision debits the selected WIP Cost Account and credits the account entered in the Job Cost Adjustment Account column in the General Posting Setup table.
• For account (G/L) type entries, Microsoft Navision debits the selected WIP Cost Account and credits the account entered in the Job Cost Adjustment Account column in the General Posting Setup table.
• When you recognize costs for a job (JOBS→PERIODIC ACTIVITIES→POST JOB RECOGNITION TO G/L), Microsoft Navision reverses all the entries in the WIP Cost Account and debits the account you specify in the Cost Account field.
Page 9

Microsoft Navision Job Costing
Field Description
Select an account to post unrecognized WIP sales. This is usually a balance sheet liability account.
WIP Sales Account
When you should record WIP Job Sales (JOBS→PERIODIC ACTIVITIES→POST WIP VALUE TO G/L):
• For items and resources, Microsoft Navision credits the WIP Sales Account and debits the account entered in the Job Sales Adjustment Account column in the General Posting Table.
• For account (G/L) type entries, Microsoft Navision credits the WIP Sales Account and debits the account entered in the Job Sales Adjustment Account column in the General Posting Setup table.
• When you recognize revenue (JOBS→PERIODIC ACTIVITIES→POST JOB RECOGNITION), Microsoft Navision reverses all entries in the WIP Sales Account and credits the account specified in the Sales Account field.
Enter the account to post cost recognition. This is usually an income statement direct expense account or cost of sales.
Cost Account
When you recognize costs (JOBS→PERIODIC ACTIVITIES→POST JOB RECOGNITION TO G/L), Microsoft Navision credits the WIP Cost Account and debits the Cost Account. Enter the amount to post sales recognition. This is usually an income statement direct sales account.
Sales Account
When you recognize revenue (JOBS→PERIODIC ACTIVITIES→POST JOB RECOGNITION), Microsoft Navision debits the WIP Sales Account and credits the Sales Account.
G/L Exp. Sales Acc.
Enter an account to use when posting miscellaneous job expenses charged to a customer. This is usually an income statement sales account. This account is entered on the Sales Invoice line when the “Get Job Usage” function is run on the sales invoice.
Page 10

Chapter 1: Setup Operations
Job Card This section defines the fields on the Job Card. On the Resource Planning menu, click JOBS→JOBS. The Job Card window appears:
There are three tabs on the Job Card: General, Posting, and Duration.
General Tab The General tab is for entering information such as a job name and Bill-to Customer.
Field Description No. Enter a number for the Job. This number can be
automatically assigned from the No. Series by pressing ENTER or manually by typing in an alphanumeric code. This field is limited to 20 characters.
Description Enter a description for the Job. This field has a 50 character limit.
Bill-to Customer No.
Select a Customer from the Customer List. Once a customer is selected, the other fields related to this customer are automatically populated. The Customer selected is defaulted in to be invoiced for the Job.
Search Description
This field populates automatically with the Description field entry, but can be edited.
Page 11

Microsoft Navision Job Costing
Field Description Status Enter a status for the current job. The status can only be
changed in the sequential order given below starting with Planning and ending with Completed. Setting the status in reverse sequence is not possible. All postings and invoicing to customers is only possible when the status is Order. Final calculations are possible on completed jobs. The options are:
• Planning − Use Planning to set up a budget template. During Planning, you can only fill in the Job Card and plan your budget, but you cannot enter any entries into the job journal. Posting is not possible during the planning phase of a job. You would use this status option before you submit a quote to a customer.
• Quote − Use Quote when you have job that has been planned, but not begun yet. A job budget can be entered here to see how it affects your resource capacity. Posting is not possible during the quote phase of a job.
• Order − Use Order to indicate that a job is active. This is the only step during which posting is possible. You can use sales invoices and credit memos to customers for various posted job entries and to invoice the cost.
• Completed − You can no longer post entries when the status is Completed. Invoicing is no longer possible. The purpose of this step is to close the job. You can use the statistics on a completed job for comparison purposes and for the planning of future jobs. The actual costs of the completed job can be compared to the budgeted figures.
Person Responsible
Enter the name of the person responsible for the job. The responsible person is retrieved from the Resource table.
Blocked If selected, the posting of any transactions to this Job is prevented.
Last Date Modified
This field contains the date of the most recent change of information on this Job Card.
Page 12

Chapter 1: Setup Operations
Posting Tab The Posting tab is used for entering information such as recognition method and posting group codes.
Field Description Application Method
In this field, you select the method used to post invoices against usage entries. Your options are:
• Apply to Oldest − Applies invoices against the oldest entry. This is the preferred method as there are no options to apply transactions after posting.
• Manual − This application method always requires manual assignment from one entry in the job journal or the sales lines to an open entry in the Job Ledger Entry window.
Job Usage Posting
This field is related to the Calculate Job WIP Value batch job and determines how entries with the entry type “Usage” can be posted. Your options are:
• None − No posting to the general ledger is possible.
• Costs − Posting of job usage is based on unit costs.
• Prices − Posting of job usage is based on unit prices.
Page 13

Microsoft Navision Job Costing
Field Description Recognition Method
This field determines what to post to the general ledger when you recognize revenue. Your options are:
• Percentage of Completion − This option allows you to use the Calculate Job Recognition and Post Job Recognition to G/L batch jobs at any time during the course of the Job.
• Completed Contract − This option prevents you from recognizing actual costs and revenue until the Job Status field is set to “Completed.”
Job Posting Date Displays the date when the Post Job WIP Value to
G/L batch job was started. Recognition Date Displays the date when the Post Job Recognition to
G/L batch job was started. Job Posting Group
Select the appropriate Job Posting Group for this job.
Duration Tab The Duration tab is used for entering information about the time frame for a job.
Field Description Creation Date Enter the date on which you set up the Job. Starting Date Enter the date on which this Job actually starts.
Page 14

Chapter 1: Setup Operations
Field Description Ending Date Enter the date on which you expect to complete this Job. Completion Date This field is filled in automatically with the date on which
the Status field is marked as “Completed.”
Job Card Setup Scenario 1: Your customer, Fairway Sound, has contracted with Cronus International, Ltd. to set up five conference rooms. You must create a new Job using the following criteria:
Field Value No. Fairway, 5 CR Description Set up five Conference Rooms Bill-to Customer No. 61000 Status Order Application Method Apply to Oldest Job Usage Posting Costs Recognition Method Percentage of Completion Job Posting Group Setting Up Creation Date 11/01/04 Starting Date 11/15/04 Ending Date 12/22/04
1. On the Resource Planning menu, click JOBS→JOBS. The Job Card
window appears.
2. Press F3 to insert a new Job.
3. In the No. field, type Fairway,5 CR.
4. In the Description field, type Set up five Conference Rooms.
5. In the Bill-to Customer No. field, type 61000.
6. Press ENTER.
7. In the Status field, press F6 and select Order from the option list.
8. A warning message appears, click Yes.
9. Click the Posting tab.
10. In the Application Method field, leave Apply to Oldest.
Page 15

Microsoft Navision Job Costing
11. In the Job Usage Posting field, press F6 and select Costs from the option list.
12. In the Recognition Method field, leave Percentage of Completion.
13. In the Job Posting Group field, look up to the Job Posting Groups list and select SETTING UP.
14. Press ENTER, or click on OK.
15. Click the Duration tab.
16. In the Creation Date field, type 110104.
17. In the Starting Date field, type 111504.
18. In the Ending Date field, type 122204.
The Job Card set up is complete.
Page 16

Chapter 1: Setup Operations
Test Your Skills − Create a New Job Scenario: Today, November, 15, 2004, your customer, John Haddock Insurance Co., contracted with Cronus International, Ltd. to set up four work areas. You will want to post WIP entries but you want to post prices rather than costs to the general ledger. You will also want to run the Job Recognition jobs throughout the course of the Job. The estimated starting date will be 11/21/04 with an estimated completion date of 12/08/04. Create a new Job based on the above, using the following Job Number and Description:
No. JHaddock, 4 WA Description Set up four Work Areas
Challenge Yourself! Your task is:
• Create a job using the information provided above.
Need a Little Help?
• Go to RESOURCE PLANNING→JOBS • Create a new job card • Use the above data to complete the job card
HINT: Pay attention to the requirements in the scenario that affect the Posting tab.
Page 17

Microsoft Navision Job Costing
Job Budgets Job Budgets allow you to estimate how many hours the job is expected to take and the materials it may use. If your Budget is accurate, then your Job Journal and the actual customer invoice should reflect these same entries, although generally not all at once. Budgets include cost and price fields that allow you to determine your estimated budgeted costs as well the estimated price that would be charged to the customer. You can assign an entry to phases, tasks, or steps within a job, allowing you to compare what you budgeted to what you actually used. Reports can be run which contain information from this table. In this section, you will see how to define the fields on the Job Budget. On the Resource Planning menu, click JOBS→BUDGETS. The Job Budget window appears:
By clicking the AssistButton in the Job No. field you can select a different Job No. from a list of jobs.
NOTE: You can also access Job Budgets directly from Job Cards by clicking PLANNING→JOB BUDGET.
Page 18

Chapter 1: Setup Operations
Field Description Phase, Task, and Step
A job can be divided into three levels of activity: phases, tasks, and steps. There are no limitations on the number of activities in a job. You do not have to use all three kinds of activities for every job. They are meant to provide flexibility whenever needed. Activities do not depend on each other or on a particular job. For example, a phase called Planning can be used in all jobs that involve the planning phase. The same activities can then be compared across several different jobs. The use of activities provides you with detailed information about jobs. On each line in a job journal, sales invoice or purchase invoice, you can see the phases, tasks and steps that have been budgeted for the particular job. Phases are the major activities in a job; Tasks are sub-activities in phases; and Steps are activities within the tasks.
Type Select the type of entry. The options are:
• Resource − Labor or Equipment • Item − Materials and Items used • Account (G/L) − G/L Accounts • Group (Resource) − a Resource Group
No. This field contains the Resource, Item, G/L account, or
Resource Group number you want to appear on the current line.
Starting Date This is the date on which you begin the task or need the resource or item. The program copies this date from the Job card, but it can be overridden. It may be changed at any time during the project.
Description In this field contains the description that you entered in Type field. This information can be overridden.
Quantity This field contains the quantity that you have entered into the budget for the phase, task or step on the line. If you click the AssistButton in the field, you can see all the Job Budget Entries that relate to the quantity.
Direct Unit Cost
This field is automatically filled with the direct unit costs of the selected Type and No. field. You can also enter the amounts manually in these fields.
Page 19

Microsoft Navision Job Costing
Field Description Unit Cost This field is automatically filled with the unit costs of the
selected Type and No. field. You can also enter the amounts manually in these fields.
Total Cost This field displays the accumulated values of the Total Cost field in the Job Budget Entry table.
Unit Price This field is automatically filled with the unit price of the selected Type and No. field. You can also enter the amounts manually in these fields.
Total Price This field displays the accumulated values of the Total Price field in the Job Budget Entry table.
Job Budget Setup Scenario 2: Now that you have set up your Job Card for the Fairway Sound job, you need to set up a Job Budget for the five conference rooms. You must create a new Job Budget using the following criteria:
Phase Code Resource / Item Starting Date Hours / Quantity 1-SPEC MARY 11/15/04 4 2-FURN MARY 11/22/04 6 3-APPR MARY 11/29/04 3 4-ASSEMB LIFT
MARK Item 1920-S Item 1928-S Item 1964-S Item 1984-W
12/13/04 12/13/04 12/13/04 12/13/04 12/13/04 12/13/04
6 32 5 5 30 5
5-CLOSE MARY 12/22/04 2.5
1. On the Resource Planning menu, click JOBS→JOBS. The Job Card window appears.
2. Locate Job No. Fairway, 5 CR.
3. Click PLANNING→JOB BUDGET.
4. In the Phase Code field, press F6 and select 1-SPEC from the Phases window.
Page 20

Chapter 1: Setup Operations
5. Press ENTER.
NOTE: It is very important when entering Job Budgets that the Sorting Key be followed very closely. You must enter data in the following sequence: “Phase, Task, Step, Type, and No.” In this scenario, you can tab or click from the Phase Code to the Type field.
6. In the Type field, press F6 and select Resource from the option list.
7. In the No. field, press F6 and select MARY from the Resource List window.
8. Press ENTER.
9. In the Starting Date field, leave 11/15/04.
10. In the Quantity field, type 4.
11. Go to the next line.
12. Repeat steps 1-11 for the above Resources and Items listed above.
13. Escape back to the Job Card and press F9 to open the Job Statistics window.
14. On the Budget tab, notice that all the budgeted amounts appear. The Miscellaneous column would contain G/L amounts.
15. Click the Realized tab. All the fields are empty since nothing has been posted to this job yet.
The Job Budget setup is complete.
Page 21

Microsoft Navision Job Costing
Test Your Skills − Create a New Job Budget Scenario: Now that you have set up your Job Card for John Haddock Insurance Co., you need to set up a Job Budget for the four work areas. Create a new Job Budget using the following criteria:
Phase Code Resource / Item Starting Date Hours / Quantity 1-SPEC MARY 11/21/04 2 2-FURN MARY 11/22/04 2 3-APPR MARY 11/27/04 1.5 4-ASSEMB LIFT
MARK Item 1896-S Item 1906-S Item 1908-S Item 1928-W Item 1964-S Item 1976-W Item 1984-W
12/07/04 12/07/04 12/07/04 12/07/04 12/07/04 12/07/04 12/07/04 12/07/04 12/07/04
4 10 4 4 4 2 1 2 1
5-CLOSE MARY 12/09/04 1
Challenge Yourself! Your task is as follows:
• Create a job budget using the information provided above.
Need a Little Help?
• Go to RESOURCE PLANNING→JOBS. • Locate the JHaddock, 4 WA job card. • Click PLANNING→JOB BUDGET. • Use the above data to complete the job budget.
HINT: To make data entry quicker, use the Copy (F8) function key to copy data from the field above and remember that you can always type data directly into the fields instead of using the Lookup.
Page 22

Chapter 1: Setup Operations
Test Your Skills − Create Another Job and Budget Scenario: Today, January, 4, 2005, your customer, The Device Shop, contracted with Cronus International, Ltd. to set up a small conference room. Since this is a small job you do not need to calculate WIP. The estimated starting date will be 1/6/05 with an estimate completion date of 1/24/05. Create a new Job based on the above, using the following Job Number and Description:
No. Device, 1 CR Description Set up a Conference Room
Create a Budget for this job using the following criteria:
Phase Code Resource / Item Starting Date Hours / Quantity 1-SPEC MARY 1/6/05 1 2-FURN MARY 1/11/05 1 3-APPR MARY 1/14/05 1 4-ASSEMB LIFT
MARK Item 1900-S Item 1920-S Item 1928-S Item 1996-S
1/20/05 1/20/05 1/20/05 1/20/05 1/20/05 1/20/05
2 8 6 1 1 1
5-CLOSE MARY 1/24/05 1
Challenge Yourself! Your tasks are:
1. Create a job using the information provided above.
2. Create a job budget using the information provided above.
Need a Little Help?
• Go to RESOURCE PLANNING→JOBS. • Create a new job card. • Use the above data to complete the job card. • Click PLANNING→JOB BUDGET. • Use the above data to complete the job budget.
Page 23

Microsoft Navision Job Costing
Quick Interaction: Lessons Learned Take a moment to write down three Key Points you have learned from this chapter: 1.
2.
3.
Page 24

Chapter 2: Usage Posting
CHAPTER 2: USAGE POSTING Training Objectives
This chapter discusses:
• Overview • Recording Job Costs • Purchase Order Posting • Job Journals • Job Journal Posting • Making Corrections to Entries posted with incorrect Phases, Tasks,
and Steps • Purchase Order and Job Journal Posting Review • Actual to Budget Review
Page 25

Microsoft Navision Job Costing
Overview In this chapter you will post job usage entries using Purchase Order and Job Journals, after defining the fields on the Job Journal form. You then review the results of posting the Purchase Order and Job Journals. Finally, you review the updated job Actual to Budget comparisons report and window.
Recording Job Costs In Microsoft® Business Solution–Navision®, you post usage in two ways:
• Using Purchase Orders and Invoices in the Purchases application area.
• Using Job Journals in the Jobs application area.
Purchase Orders and Invoices You can choose to record items ordered specifically for a job in Purchases or you can record invoices that have overhead expenses charged directly to G/L accounts. If you need to charge for items purchased directly for a job when you invoice a purchase order, an entry is created in the job ledger and in the vendor ledger. No entry is created in the item ledger, because the item is never part of your inventory. It is not possible to post a resource entry using the purchase orders or invoices.
Job Journals You can use the job journals to record:
• Miscellaneous expenses related to a job • Usage of resources and items from inventory
You can assign an entry to phases, tasks, or steps within a job, allowing you to compare your budget to your actual usage.
Page 26

Chapter 2: Usage Posting
Job Usage Posting Flow
Purchase Order Posting Scenario 1: It is time to order an item for the Fairway Sound job. You currently have all the items in stock except for item 1984-W, the “SARAJEVO Whiteboard, blue.” You need to create and post the Order for this item using the following criteria:
Field Value Buy-from Vendor 30000 Posting, Document, and Order Date
11/29/04
Vendor Invoice No. 877 Item No. 1984-W Quantity 5 Job No. FAIRWAY, 5 CR
1. On the Purchase menu, click ORDER PROCESSING→ORDERS. The
Purchase Order window appears.
2. In the header, press F3 and ENTER to create a new Order.
3. In the Buy-from Vendor field, type 30000.
4. Press ENTER.
5. In the Posting Date and Order Date fields, type 112904.
6. In the Vendor Invoice No. field, type 877.
Page 27

Microsoft Navision Job Costing
7. Go to the lines area.
8. In the Type field, select Item.
9. In the No. field, type 1984-W.
10. In the Quantity field, type 5.
11. Use the VIEW→SHOW COLUMN functionality to display the Job No. field.
12. In the Job No. field, type FAIRWAY, 5 CR.
Since you will be comparing this actual job cost with the costs on the job budget, you need to select the Phase, Task, and Step related to this purchase.
13. Click FUNCTIONS→GET PHASE/TASK/STEP.
The Job Budget (Phase/Task/Step) window for the job number on the line displays for you to select the relevant budget line entry.
14. Click in the line for item 1984-W and then click OK.
The Phase, Task, and Step values are copied into the order line. You can check this by pressing CTRL+F8 to use the Zoom function on the line. (Remember, you did not set up Task and Steps for this budget.)
15. While using the Zoom function, look at the General Business and General Product Posting Group combination. The combination should be: NATIONAL / RETAIL. You will need this combination later for reviewing purposes.
16. Escape back to the Purchase Order window.
17. Click POSTING→POST.
18. Select Receive and Invoice and click OK to post the order.
Page 28

Chapter 2: Usage Posting
Test Your Skills − Create a Purchase Order Scenario: You need to order items for your John Haddock Insurance Co. job. You currently have all the items in stock except for items 1976-W, “INNSBRUCK Storage Unit/W.Door” and 1984-W, the “SARAJEVO Whiteboard, blue.” You need to create and post the Order for this item using the following criteria:
Buy-from Vendor 30000 Posting, Document, and Order Date 11/29/04 Vendor Invoice No. S7775 Item No. 1976-W Quantity 2 Item No. 1984-W Quantity 1 Job No. JHADDOCK, 4 WA
Challenge Yourself! Your tasks are:
1. Create a purchase order using the information provided above.
2. Use the Get Phase/Task/Step function.
3. Post the Purchase Order.
Need a Little Help?
• Go to PURCHASES→ORDER PROCESSING→ORDERS. • Create a new purchase order. • Use the above data to complete the purchase order header and lines. • Add the Job No. to both lines. • Click FUNCTIONS→GET PHASE/TASK/STEP for both lines. • Post the order.
Page 29

Microsoft Navision Job Costing
Job Journals In job journals, you can record what has happened on a job. If you look at a job ledger entry, you will see that it is a record of activities over a period of time. For example, you can record the time employees have spent on a job; items used on a job that were originally bought for inventory; and/or miscellaneous expenses that were incurred for this job using a G/L account. This section defines the most commonly used fields in the Job Journal. On the Resource Planning menu, click JOBS→JOB JOURNALS. The Job Journal window appears:
Field Description Posting Date This is the date the usage of resources or materials was
incurred. Document No. Enter a document number for the journal line. This can
be entered manually or defaulted in using a No. Series. Job No. This field must be filled in with the related job. The
job must have the status Order. Type Enter an account type for job usage to be posted in the
job journal choosing from the following options: Resource, Item, or G/L Account.
No. Select the resource, item, or G/L account number that this entry applies to. The No. must correspond to your selection in the Type field.
Page 30

Chapter 2: Usage Posting
Field Description Description The application automatically displays the name of the
resource, item, or G/L account that this entry applies to. You can change the resource description to make it more descriptive. You can enter a maximum of 50 characters, both numbers and letters.
Location Code Enter a location code for an item. The location code indicates which location the item should be posted from.
Work Type Code This field shows which work type the resource applies to (when applicable). The program automatically updates prices based on this entry.
Phase Code Contains the number of the phase linked to the journal entry. It is a good idea to link each entry to its corresponding job budget (using the Get Phase/Task/Step function). You can also retrieve the relevant phases manually from the Phase table by clicking the AssistButton to the right of the field.
Quantity Enter the quantity of units that you intend to post. Unit of Measure Code
Enter a unit of measure for the job (for example, hours or km).
Direct Unit Cost This field is automatically filled in with the direct unit cost of one unit of the selected Type and No. The program retrieves the amounts from the resource costs. In the case of a G/L account, the field must be filled in manually.
Unit Cost This field is automatically filled in with the unit costs of the selected Type and No. In the case of a G/L account, the field must be filled in manually.
Total Cost This field shows the total cost for this journal line. The program calculates the amount as Quantity * Unit Cost. If you change one of these fields, the entry in the Total Cost field changes accordingly.
Profit % This field contains the profit percentage for this entry. This percentage reflects the difference between the unit price and the unit cost. If you change this percentage, the program will automatically calculate a new unit price. Profit % = (1 - (Unit Cost / Unit Price)) * 100.
Unit Price This field is automatically filled in with the unit prices of the selected Type and No. In the case of a G/L account, the field must be filled in manually.
Page 31

Microsoft Navision Job Costing
Field Description Total Price This field shows the total price on the journal line.
The program calculates the amount as Quantity * Unit Price. If you change one of these fields, the entry in the Total Price field changes accordingly.
Chargeable Indicate if the journal line is chargeable. If this field is not selected, entries posted in the journal line cannot be invoiced.
Job Journal Posting Resource Posting Scenario 2: As Mary Dempsey, the designer for the Fairway Sound job, you need to post the time you have spent working on this job. As of 11/30/04, you have spent the following hours working with the customer, as well as the necessary planning and design hours:
Date Phase Code Description Hours 11/15/04 1-SPEC MD-Determining Specifications 2 11/18/04 1-SPEC MD-Determining Specifications 2.5 11/22/04 2-FURN MD-Furnishing the Premises 2 11/23/04 2-FURN MD-Furnishing the Premises 2 11/24/04 2-FURN MD-Furnishing the Premises 2 11/29/04 3-APPR MD-Obtaining Customer Approval 3.25
1. On the Resource Planning menu, click JOBS→JOB JOURNALS. The Job
Journal window appears.
2. Delete the existing job journal lines, if necessary.
3. In the Posting Date field, type 111504.
4. In the Document No. field, type FS0001.
5. In the Job No. field, type FAIRWAY, 5 CR.
6. In the Type field, leave Resource.
7. In the No. field, type Mary.
8. In the Description field, type MD-Determining Specifications.
9. In the Quantity field, type 2.
10. Click on FUNCTIONS→GET PHASE/TASK/STEP.
11. Select the line with the appropriate Phase Code and click OK.
Page 32

Chapter 2: Usage Posting
12. Repeat steps 1-11 for the remaining entries.
13. Verify that the Chargeable option is selected and that the Unit Price field is populated for all entries.
14. Click POSTING→POST.
15. A message appears asking if you want to post the journal lines. Click Yes.
16. A message appears that journal lines have successfully posted. Click OK.
G/L Expense Posting Scenario 3: Fairway Sound has asked that you ship the design documents to them before the meeting, and have stated that they will pay the postage charge. You need to post this postage expense to the job, using the job journal:
Date Phase Code
G/L Account
Description Quantity Unit Cost/Price
11/23/04 3-APPR
8240 Design Documents to Customer
1 21.25
NOTE: When you post a usage job journal for a G/L Account, you must make sure you enter a Quantity, Unit Cost, and Unit Price. If you forget to enter the unit price and post the job journal, you are not able to create charges to the customer.
1. On the Resource Planning menu, click JOBS→JOB JOURNALS. The Job
Journal window will appear.
2. Delete the existing job journal lines, if necessary.
3. In the Posting Date field, type 112304.
4. In the Document No. field, type FS0002.
5. In the Job No. field, type FAIRWAY, 5 CR.
6. In the Type field, press F6 to display the option list and select G/L Account.
7. In the No. field, type 8240.
8. In the Description field, type Design Documents to Customer.
9. In the Quantity field, type 1.
10. In the Direct Unit Cost, Unit Cost, and Unit Price fields, type 21.25.
11. Select FUNCTIONS→GET PHASE/TASK/STEP.
12. Select the line with Phase Code 3-APPR and click OK.
Page 33

Microsoft Navision Job Costing
13. Verify the Chargeable option is selected.
14. Click POSTING→POST.
15. A message appears asking if you want to post the journal lines. Click Yes.
16. A message indicates that journal lines have successfully posted. Click OK.
Correcting Entries posted with incorrect Phases, Tasks, and Steps
Sometimes when you use the Get Phase/Task/Step function, you may accidentally assign a job usage or sales entry to the incorrect line in the Job Budget window. This is more common if the phase/task/step information is entered manually in journals and documents. Alternatively, you may forget to assign the phase/task/step codes. One way to check if you have made errors in phase/task/step information and see which entries do not relate to a budget entry by running the Job - Actual to Budget report, which you will run shortly.
1. Go to the Fairway Sound job card and press CTRL+F5 to open the Job Ledger Entries window.
2. Zoom (CTRL+F8) on a line and locate the Related to Budget field.
This field indicates if the job budget, at the time of posting, contained a budget line with the same combination of phase, task, and step as the job ledger entry. If it did not, then the field contains No.
3. Escape back to the Job Ledger Entries.
4. If the Phase Code field does not appear in the Job Ledger Entries window, use the Show Column functionality.
You can edit the Phase, Task, and Step fields on the job ledger entries by pressing F2 in the relevant field and then clicking the AssistButton to select the correct Phase/Task/Step codes.
This does not immediately update the contents of the Related to Budget field. The contents of this field are only updated when you run the Job - Actual to Budget report.
Page 34
Chapter 2: Usage Posting
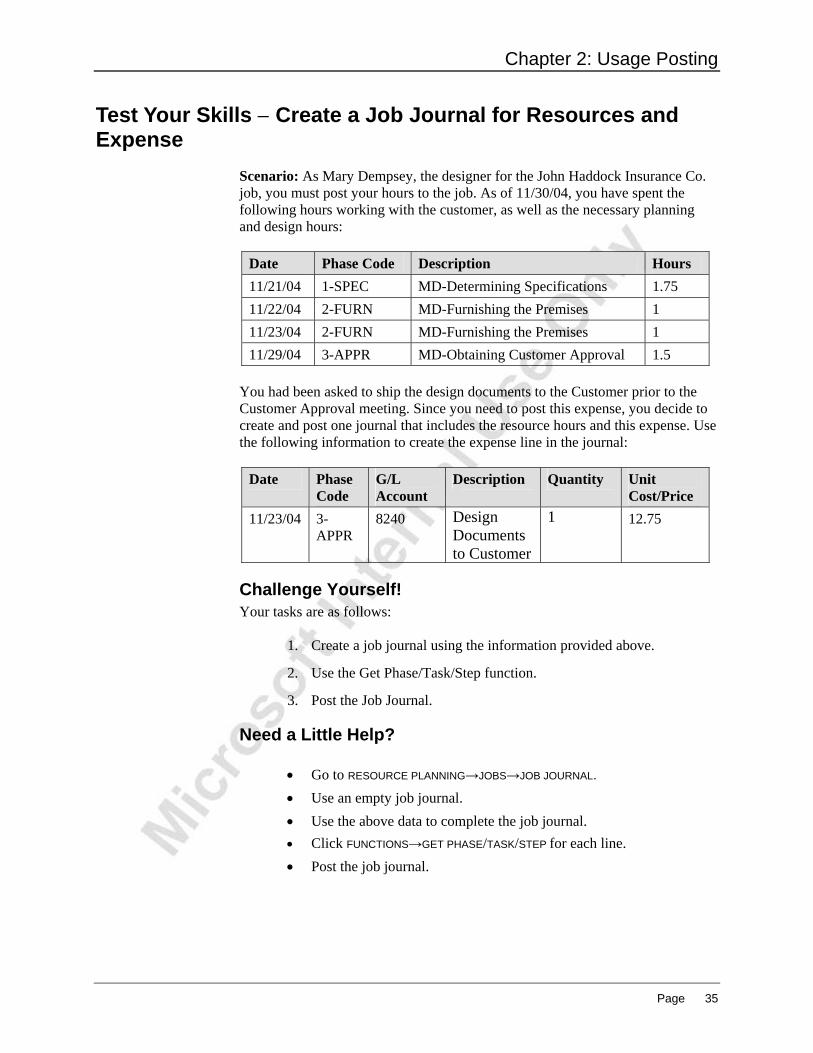
Test Your Skills − Create a Job Journal for Resources and Expense
Scenario: As Mary Dempsey, the designer for the John Haddock Insurance Co. job, you must post your hours to the job. As of 11/30/04, you have spent the following hours working with the customer, as well as the necessary planning and design hours:
Date Phase Code Description Hours 11/21/04 1-SPEC MD-Determining Specifications 1.75 11/22/04 2-FURN MD-Furnishing the Premises 1 11/23/04 2-FURN MD-Furnishing the Premises 1 11/29/04 3-APPR MD-Obtaining Customer Approval 1.5
You had been asked to ship the design documents to the Customer prior to the Customer Approval meeting. Since you need to post this expense, you decide to create and post one journal that includes the resource hours and this expense. Use the following information to create the expense line in the journal:
Date Phase Code
G/L Account
Description Quantity Unit Cost/Price
11/23/04 3-APPR
8240 Design Documents to Customer
1 12.75
Challenge Yourself! Your tasks are as follows:
1. Create a job journal using the information provided above.
2. Use the Get Phase/Task/Step function.
3. Post the Job Journal.
Need a Little Help?
• Go to RESOURCE PLANNING→JOBS→JOB JOURNAL. • Use an empty job journal. • Use the above data to complete the job journal. • Click FUNCTIONS→GET PHASE/TASK/STEP for each line. • Post the job journal.
Page 35

Microsoft Navision Job Costing
Test Your Skills − Create a Job Journal for Resources and Items
Scenario: As the project manager for The Device Shop job, you must post all the resource hours to the job, as well as all the necessary inventory items. As of 1/31/05, the following hours have been turned into you:
Date Phase Code
Resource No.
Description Hours
1/6/05 1-SPEC MARY MD-Determining Specifications
1
1/11/05 2-FURN MARY MD-Furnishing the Premises
1
1/14/05 3-APPR MARY MD-Obtaining Customer Approval
1
1/24/05 5-CLOSE MARY MD-Meeting with the Customer
1
1/20/05 4-ASSEMB
MARK MH- Delivering and Assembling the Furniture
7.5
1/20/05 4-ASSEMB
LIFT Lift for Furniture 2
You decide to create and post one journal for all entries. As of 1/14/05, you have the following items available in inventory:
Item No. Description Location Quantity Needed
1900-S PARIS Guest Chair, black YELLOW 6 1920-S ANTWERP Conference
Table GREEN 1
1928-S AMSTERDAM Lamp YELLOW 1 1996-S ATLANTA Whiteboard, base YELLOW 1
Challenge Yourself! Your tasks are as follows:
1. Create a job journal using the information provided above.
2. Use the Get Phase/Task/Step function.
3. Post the Job Journal.
Page 36

Chapter 2: Usage Posting
Need a Little Help?
• Go to RESOURCE PLANNING→JOBS→JOB JOURNALS. • Use an empty job journal. • Use the above data to complete the job journal. • Click FUNCTIONS→GET PHASE/TASK/STEP for each line. • Post the job journal.
Page 37

Microsoft Navision Job Costing
Purchase Order and Job Journal Posting Review To confirm that the amounts were posted to the various ledgers as indicated in the Job Usage Posting Flow diagram below, on the Resource Planning menu, click JOBS→JOBS. Locate the Fairway Sound job and press CTRL+F5 to open the Job Ledger Entries.
Job Usage Posting Flow
Purchase Order Usage Entries
1. Locate the line with Item “SARAJEVO Whiteboard, blue”. This line was created in the Job Ledger by posting the Purchase Order.
2. Click Navigate. The Navigate window appears.
3. In Table Name section, click G/L Entry and then Show.
4. The General Ledger Entries created by posting the Purchase Order will appear.
5. Escape back to the Navigate window.
6. In the Table Name section, ARROW DOWN to the Vendor Ledger Entries and click Show.
7. The Vendor Ledger Entries created by posting the Purchase Order appear.
8. Escape back to the Job Ledger Entries window.
Page 38

Chapter 2: Usage Posting
Job Journal Usage Entries
1. Locate the line with Resource “MARY.” This line was created in the Job Ledger by posting the Job Journal.
2. Click Navigate. The Navigate window appears.
3. In Table Name section, click Res. Ledger Entry and then Show.
4. The Resource Ledger Entries created by posting the Job Journal appear.
5. Escape back to the Job Ledger Entries window.
NOTE: Each individual Resource line in the Job Ledger Entries window appears in the appropriate Resource Ledger Entries window.
At this point, nothing has been posted to the Item Ledger. In Chapter 5, the Item Ledger will be affected when the Items needed for the Fairway Sound job are posted through the job journal. At that time, inventory for those items will be reduced by the quantities posted on the job journal.
6. Close the Job Ledger Entries and Job Card windows.
Actual to Budget Review Now that you have posted usage for the Fairway Sound job, we will review the Job − Actual to Budget report.
1. On the Resource Planning menu, click JOBS→REPORTS→JOB − ACTUAL TO BUDGET. The Job − Actual to Budget window appears.
2. On the Job tab, type FAIRWAY, 5 CR.
3. On the Options tab, select Usage.
4. Click Preview.
Notice that the Realized Costs and Prices fields are populated for only those Resources and Items that you have posted using the Purchase Order and the Job Journal.
Page 39

Microsoft Navision Job Costing
Job Statistics Another way of reviewing the Actual to Budget comparisons on a job is to view the Job Statistics from the Job Card.
1. On the Resource Planning menu, click JOBS→JOBS. The Job Card window appears.
2. Locate the Fairway Sound job card.
3 Press F9 to open the Job Statistics window.
4. Click the Realized tab.
Notice that this tab is now populated with the amounts that you have posted using the Purchase Order and the Job Journal. The Invoiced Price fields will be populated once you post an invoice to the Customer (Sale Entry).
Page 40

Chapter 2: Usage Posting
Quick Interaction: Lessons Learned Take a moment to write down three Key Points you have learned from this chapter: 1.
2.
3.
Page 41

Microsoft Navision Job Costing
Page 42

Chapter 3: WIP Posting and Review
CHAPTER 3: WIP POSTING AND REVIEW Training Objectives
This chapter discusses:
• Overview • Job WIP of Costs • Calculate Job WIP Value • Post Job WIP Value to G/L • WIP Posting Review • WIP Posting Breakdown • Actual to Budget Review
Page 43

Microsoft Navision Job Costing
Overview This chapter defines the Job Work in Process (WIP) Periodic Activities, including Calculate WIP Value and Post WIP Value to G/L. You will run these two Periodic Activities and view the results of running these batch jobs.
Job WIP of Job Costs When you posted the purchase order and job journals in the previous chapter, the job costs for the items were initially posted to the Retail Purchases account in the general ledger by posting the invoice. If a job runs over a long period, you may need to transfer these costs to a Work in Process (WIP) account on the balance sheet while the job is being completed. To transfer job costs to a WIP Balance Sheet account, you can use the Job WIP value and the Job Recognition functions on the Periodic Activities menu. Each option should be run in the order found on the menu. Each option is a step in the process of properly calculating the value of and moving job transactions to the general ledger. The calculation and posting steps have been separated to provide you with flexibility to make modifications and review your data before posting to the general ledger. This chapter only covers the WIP Value functions. On the Resource Planning menu, click JOBS→PERIODIC ACTIVITIES. The following menu items appear:
• Calculate Job WIP Value − This batch job calculates the value of all recorded usage and sales.
• Post WIP Value to G/L − This batch job posts the usage and sales amounts calculated by the Calculate Job WIP Value batch job to Balance Sheet WIP accounts. The program also posts the balancing entry to the corresponding cost of resources and purchase accounts, and removes the sales value from the sales account to which it was posted in sales invoicing.
NOTE: The batch jobs can only be run in the order shown on the menu and the process cannot be reversed. Ensure that all information looks correct after running the calculation batch jobs before you run the posting batch jobs. It is now possible to preview the batch job without posting it.
Page 44

Chapter 3: WIP Posting and Review
Job WIP Posting The diagram below shows the posting flow that occurs when the Job WIP process runs.
Job WIP Posting Flow
1. Posting the Purchase Order creates a Usage Entry in the General Ledger and Job Ledger. The result of posting to the general ledger is a Job Usage entry into the Income Statement.
2. When the Calculate Job WIP Value batch job is run, the Amt. to Post to G/L field in the Job Ledger Entries is updated with the appropriate cost or price (determined by the Job Usage Posting specified on the Job Card). No general ledger activity occurs during this step.
3. When the Post Job WIP Value to G/L batch job is run, the value in the Amt. to Post to G/L field on the Job ledger is used to determine the amount that will be posted in the G/L. The Amt. Posted to G/L field is then updated with this amount in the Job Ledger Entries.
Page 45

Microsoft Navision Job Costing
This value is then removed (credited) from the Income Statement and added (debited) onto the Balance Sheet.
NOTE: The above diagram follows the flow of Usage postings ONLY since the scenarios in this manual have only included usage entries. In the case that Sale entries have been posted, this process could include them.
Calculate Job WIP Value Scenario 1: It is November 30, 2004 and as the Accounting Manager for Cronus International, Ltd., it is your responsibility to run the WIP Periodic Activities for outstanding jobs. You first need to run the Calculate Job WIP Value batch job for the Fairway Sound job. On the Resource Planning menu, click JOBS→PERIODIC ACTIVITIES→CALCULATE JOB WIP VALUE. The Calculate Job WIP Value batch job appears:
1. On the Job tab, in the No. field, type Fairway, 5 CR; or look up to the Job list and select the Fairway job.
2. On the Job Ledger Entry tab you can select the type (usage or sale) and a posting date range.
3. In the Entry Type field, press F6 to display the option list. Since you have only posted usage entries, select Usage.
4. The Posting Date field can be blank since there have only been postings in November so you do not need to filter on specific dates. Alternatively, you could type “..113004” to capture all postings made through November 30, 2004.
Page 46

Chapter 3: WIP Posting and Review
5. Click OK.
NOTE: A message does not appear when the batch job process is complete.
6. Open the Fairway, 5 CR Job Card and press CTRL+F5 to view the Job
Ledger entries.
7. Select the first job ledger entry and press CTRL+F8 to zoom on the line.
8. Locate the Amt. to Post to G/L field.
The Calculate Job WIP Value batch job has filled in the Amt. to Post to G/L field with the Total Cost for Usage entries.
REMEMBER: The Total Cost amount is calculated using the Quantity * Unit Cost fields.
9. Close the Job windows.
Page 47

Microsoft Navision Job Costing
Test Your Skills − Run the Calculate Job WIP Value Batch Job Scenario: It is still November 30, 2004 and you now need to run the Calculate Job WIP Value batch job for the John Haddock Insurance Co. job. Once the batch job has been run, look at the Job Ledger Entries to verify the accuracy of what will post to the general ledger.
Challenge Yourself! Your tasks are as follows:
1. Run the Calculate Job WIP Value batch job.
2. Review the Amt. to Post to G/L field for accuracy.
Need a Little Help?
• On the Resource Planning menu, click JOBS→PERIODIC ACTIVITIES→CALCULATE JOB WIP VALUE.
• Filter and run the batch job. • Go to the Job Card for John Haddock Insurance Co. • View the Amt. to Post to G/L field in the Job Ledger Entries
window.
REMEMBER: The Job Usage Posting on this Job was set to Prices so the prices are posted to the General Ledger based on the value in the Unit Price field.
Page 48

Chapter 3: WIP Posting and Review
Post Job WIP Value to G/L Scenario 2: Now that you have reviewed the Job WIP Value calculations for the Fairway Sound job, it is time to post the calculated usage to the WIP accounts in the general ledger.
1. On the Resource Planning menu, click JOBS→PERIODIC ACTIVITIES→POST WIP VALUE TO G/L. The Post Job WIP Value to G/L batch job appears.
2. On the Job tab, in the No. field, type Fairway, 5 CR; or look up to the Job list and select the Fairway job.
3. On the Job Ledger Entries tab, you can filter the entries you have selected by sales or usage entry type and/or by posting date range. For this scenario, in the Entry Type field, select Usage.
4. Click the Options tab:
Field Description Posting Method Here you can choose between posting per job ledger
entry or per entire job.
• When you chose the per job ledger entry option, you can keep track of each posting in the Job Ledger Entry window.
• If you wish to minimize the number of entries posted to the general ledger, you should select the per job option.
Posting Date Enter the date when the postings should be done in the
general ledger.
Page 49

Microsoft Navision Job Costing
Field Description Document No. Enter a document number for the entire posting process. Posting Description
There are some standard texts that you can use in the description. For more information on these, use F1 Help.
Post You must select this check box if you want the batch job to post when you click Print or Preview.
WARNING: If you have selected the Post option, the batch job posts when you click Print or Preview. The program fills in the Amt. Posted to G/L field in the job entries. As a result, you should make sure the job calculation information is correct before you select the Post option when you run the Post Job WIP Value to G/L batch job.
5. In the Posting Method field, keep per job ledger entry selected.
6. In the Posting Date field, type 113004.
7. In the Document No. field, type FSUP.
8. In the Posting Description field, leave the default description.
9. You want to post the entries, so in the Post field, select the option.
10. Click Preview. These are the amounts posted to the general ledger.
11. Open the Fairway Sound Job Card and press CTRL+F5 to view the job ledger entries again. Select the first entry and press CTRL+F8 to zoom on the line and locate the Amt. Posted to G/L field.
You can see that the Amt. Posted to G/L field has now been filled in with the contents of the Amt. to Post to G/L field.
12. Escape back to the Job Card and click the Posting tab.
13. Note that the Job Posting Date field is populated with the posting date used on the Post WIP Value to G/L batch job.
14. Close the Job Card.
Page 50

Chapter 3: WIP Posting and Review
WIP Posting Review To confirm that the amounts were posted to the General Ledger, on the Financial Management menu, click GENERAL LEDGER→HISTORY→REGISTERS. The G/L Registers window appears.
1. Go to the end of the list by pressing CTRL+END. Verify the Source Code is POSTVALUE.
2. While on this line, click REGISTER→GENERAL LEDGER. The General Ledger Entries window appears:
Here you see the accounts that were credited and debited after running the Post Job WIP Value to G/L batch job.
General Ledger Account Costs and Sales When you run the Post Job WIP Value to G/L batch job, job usage and sales entries relating to General Ledger accounts result in the following General Ledger postings:
Debit Credit Usage WIP Costs Job Cost Adjustment account
from General Posting Setup for usage entry general ledger account.
Sales Job Sales Adjustment account from General Posting Setup for G/L Exp. Sales account.
WIP Sales
Page 51

Microsoft Navision Job Costing
WIP Posting Breakdown The diagram below provides a breakdown of the accounts which are debited and credited after the Post WIP Value to G/L batch job has run. Notice that the costs have been debited to the WIP cost account (2220) and credited to a job adjustment account in the retail purchases accounts (7180); resource cost account (7480); and G/L expense account (7620) groups. These postings have effectively transferred the job costs to the WIP accounts.
NOTE: For those unfamiliar with T-Accounts, debits are in the left column and credits are in the right column.
The table below displays how the General Business Posting Group and General Product Posting Group combinations were used to determine which G/L Accounts to use as contra accounts. Remember this setup is done in the General Posting Setup window. Recall the WIP Cost Account was set up in the Job Posting Setup window.
General Bus. Posting Group
Source Card
General Prod. Posting Group
Source Card
Job Cost Adjmt. Account
NATIONAL Vendor (30000)
RETAIL Item (1984-W)
7180
SERVICES Resource (MARY)
7480
NATIONAL G/L Account (8240)
NO VAT G/L Account (8240)
7620
Page 52

Chapter 3: WIP Posting and Review
Actual to Budget Review Now that you have run WIP for the job, take another look at the Job − Actual to Budget report.
1. On the Resource Planning menu, click JOBS→REPORTS→JOB − ACTUAL TO BUDGET. The Job − Actual to Budget window appears.
2. On the Job tab, type FAIRWAY, 5 CR.
3. On the Options tab, select Usage.
4. Click Preview.
Notice that nothing has changed on this report since you last viewed it. This is because the WIP process does not affect the Job, only the General Ledger.
Job Statistics Now review the Job Statistics window again.
1. On the Resource Planning menu, click JOBS→JOBS. The Job Card window appears.
2. Locate the Fairway Sound job card.
3 Press F9 to open the Job Statistics window.
As seen on the Job − Budget to Actual report, Job Statistics is also unchanged after running WIP.
Page 53
Microsoft Navision Job Costing
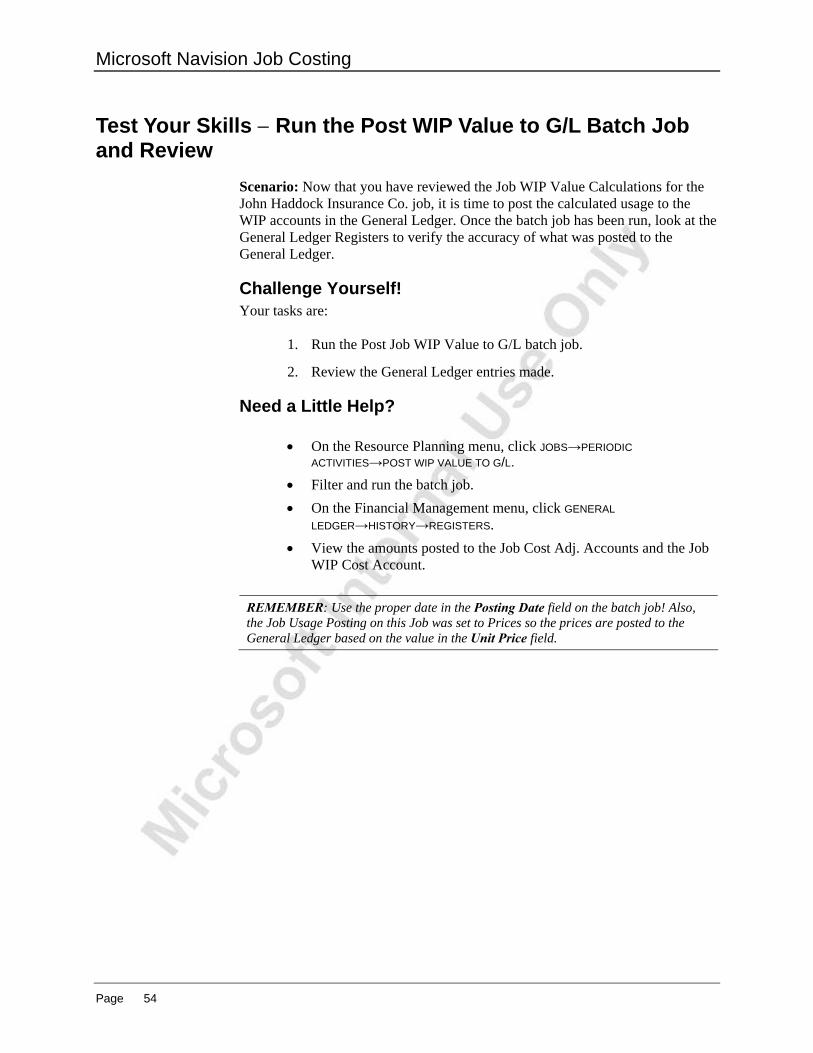
Test Your Skills − Run the Post WIP Value to G/L Batch Job and Review
Scenario: Now that you have reviewed the Job WIP Value Calculations for the John Haddock Insurance Co. job, it is time to post the calculated usage to the WIP accounts in the General Ledger. Once the batch job has been run, look at the General Ledger Registers to verify the accuracy of what was posted to the General Ledger.
Challenge Yourself! Your tasks are:
1. Run the Post Job WIP Value to G/L batch job.
2. Review the General Ledger entries made.
Need a Little Help?
• On the Resource Planning menu, click JOBS→PERIODIC ACTIVITIES→POST WIP VALUE TO G/L.
• Filter and run the batch job. • On the Financial Management menu, click GENERAL
LEDGER→HISTORY→REGISTERS. • View the amounts posted to the Job Cost Adj. Accounts and the Job
WIP Cost Account.
REMEMBER: Use the proper date in the Posting Date field on the batch job! Also, the Job Usage Posting on this Job was set to Prices so the prices are posted to the General Ledger based on the value in the Unit Price field.
Page 54

Chapter 3: WIP Posting and Review
Quick Interaction: Lessons Learned Take a moment to write down three Key Points you have learned from this chapter: 1.
2.
3.
Page 55

Microsoft Navision Job Costing
Page 56

Chapter 4: Usage and Sales Posting
CHAPTER 4: USAGE AND SALES POSTING Training Objectives
This chapter discusses:
• Overview • Job Journal Posting − Usage
– Items – Resources
• Recording Job Sale Entries • Sales Posting
– Get Job Usage • Job Journal and Sales Invoice Posting Review • Actual to Budget Review
Page 57

Microsoft Navision Job Costing
Overview In this chapter you will first complete posting the usage entries to the jobs created in previous chapters. Then you will create a Sales Invoice to the job Customer using the Get Job Usage functionality. Posting the invoice creates job sale entries in the Job Ledger Entry; closes the open usage entries in the Job Ledger Entry; and provides an invoice to be sent to the customer. You will then review the results of posting the Job Journal and Sales Invoices. Finally, you will review the updated job Actual to Budget comparisons report and window.
Job Journal Posting − Usage Item Posting Scenario 1: It is December 10, 2004 and the assembly and installation of the five conference rooms for Fairway Sound is scheduled to begin on December 13, 2004. As the project manager for the Fairway Sound job, you need to reserve and post the items that you currently have in inventory to this job.
Item No. Description Location Quantity Needed
1920-S ANTWERP Conference Table
BLUE 5
1928-S AMSTERDAM Lamp BLUE 5 1964-S TOKYO Guest Chair, blue BLUE 30
1. On the Resource Planning menu, click JOBS→JOB JOURNALS. The Job
Journal window will appear.
2. In the Posting Date field, type 121004.
3. In the Document No. field, type FS0002.
4. In the Job No. field, type FAIRWAY, 5 CR.
5. In the Type field, press F6 to display the option list. Select Item.
6. In the No. field, type 1920-S.
7. In the Description field, leave the default item description.
8. In the Location Code field, type Blue.
9. In the Quantity field, type 5.
10. Click \ FUNCTIONS→GET PHASE/TASK/STEP.
11. Select the line with the appropriate Phase Code and click OK.
12. Repeat steps 1-11 for the remaining entries.
13. Verify that the Chargeable option is selected for all entries.
Page 58

Chapter 4: Usage and Sales Posting
14. Click POSTING→POST.
15. A message appears asking if you want to post the journal lines. Click Yes.
16. A message states that journal lines have successfully posted. Click OK.
Resource Posting Scenario 2: As the project manager for the Fairway Sound job, final hours worked by Mary Dempsey, Mark Hanson, and the Lift usage have been sent directly to you. As of 12/23/04, the following hours need to be posted to the job:
Date Phase Code Resource Description Hours 12/13/04 4-ASSEMB LIFT Lift for Furniture 2 12/14/04 4-ASSEMB LIFT Lift for Furniture 1 12/15/04 4-ASSEMB LIFT Lift for Furniture 1 12/16/04 4-ASSEMB LIFT Lift for Furniture 1 12/17/04 4-ASSEMB LIFT Lift for Furniture 1 12/13/04 4-ASSEMB MARK MH-Assembling the
Furniture, etc. 6
12/14/04 4-ASSEMB MARK MH-Assembling the Furniture, etc.
8
12/15/04 4-ASSEMB MARK MH-Assembling the Furniture, etc.
8
12/16/04 4-ASSEMB MARK MH-Assembling the Furniture, etc.
8
12/17/04 4-ASSEMB MARK MH-Assembling the Furniture, etc.
4
12/22/04 5-CLOSE MARY MD-Closing the Job 2
1. On the Resource Planning menu, click JOBS→JOB JOURNALS. The Job Journal window appears.
2. In the Posting Date field, type 121304.
3. In the Document No. field, type FS0003.
4. In the Job No. field, type FAIRWAY, 5 CR.
5. In the Type field, leave Resource.
6. In the No. field, type LIFT.
7. In the Description field, leave the default description.
8. In the Quantity field, type 2.
9. Click FUNCTIONS→GET PHASE/TASK/STEP.
Page 59

Microsoft Navision Job Costing
10. Select the line with the appropriate Phase Code and click OK.
11. Repeat steps 1-10 for the remaining entries.
12. Verify that the Chargeable option is selected for all entries.
13. Click POSTING→POST.
14. A message appears asking if you want to post the journal lines. Click Yes.
15. A message states that journal lines have successfully posted. Click OK.
Page 60

Chapter 4: Usage and Sales Posting
Test Your Skills − Create a Job Journal for Resources and Items
Scenario: As the project manager for the John Haddock Insurance Co. job, you need to post the items that you had available in inventory. As of December 6, 2004, you have the following items available in inventory:
Item No. Description Location Quantity Needed
1896-S ATHENS Desk GREEN 4 1906-S ATHENS Mobile Pedestal GREEN 4 1908-S LONDON Swivel Chair, blue GREEN 4 1928-W ST.MORITZ Storage Unit/Drawers GREEN 2 1964-S TOKYO Guest Chair, blue GREEN 1
In addition, final hours worked by Mary Dempsey, Mark Hanson, and the Lift usage have been sent directly to you. You decide to create and post one journal for all entries. The following hours need to be posted to the job:
Date Phase Code Resource Description Hours 12/07/04 4-ASSEMB LIFT Lift for Furniture 1.5 12/08/04 4-ASSEMB LIFT Lift for Furniture 1.5 12/07/04 4-ASSEMB MARK MH-Assembling the
Furniture, etc. 7
12/08/04 4-ASSEMB MARK MH-Assembling the Furniture, etc.
3.5
12/09/04 5-CLOSE MARY MD-Closing the Job 1.5
Challenge Yourself! Your tasks are as follows:
1. Create a job journal using the information provided above.
2. Use the Get Phase/Task/Step function.
3. Post the Job Journal.
Need a Little Help?
• On the Resource Planning menu, click JOBS→JOB JOURNALS. • Use the above data to complete the job journal. • Click FUNCTIONS→GET PHASE/TASK/STEP for each line. • Post the job journal.
Page 61

Microsoft Navision Job Costing
Recording Job Sale Entries In Microsoft® Business Solutions−Navision®, you post sale entries using a Sales Invoice. Similar to Purchase Orders and Job Journal entries, you can assign a sale entry to phases, tasks, or steps within a job, allowing you to compare your budget to your actual sale. But with Sales Invoices, you can post a resource entry.
Job Sale Posting
Sales Posting Scenario 3: It is December 30, 2004, and as the accounting clerk for Cronus International, Ltd., you have received notice that the Fairway Sound job is complete and is ready to be billed to the customer. You must create and post the Sales Invoice which will provide a bill to the customer and add sale entries to the job.
1. On the Sales & Marketing menu, click ORDER PROCESSING→INVOICES. The Sales Invoice window appears.
2. In the header, press F3 and ENTER to create a new Invoice.
3. In the Sell-to Customer No. field, type 61000 and press ENTER.
4. If a Check Credit Limit warning message appears, click Yes.
5. In the Posting Date field, type 123004.
Page 62

Chapter 4: Usage and Sales Posting
6. On the Shipping tab, in the Location Code field, delete the WHITE location.
In previous chapters, you posted Purchase Orders and Job Journals to the Fairway Sound job, which created usage entries in the Job Ledger Entries. You now want to transfer those usage entries recorded in the job ledger to the Sales Invoice. This is done using the Get Job Usage batch job.
7. Click FUNCTIONS→GET JOB USAGE. The Get Job Usage batch job window appears:
8. In the Job No. field, type FAIRWAY, 5 CR; or look up to the Job list and select the Fairway Sound job.
9. The Posting Date field can remain empty since you want to capture all entries.
10. Click OK to run the batch job.
The Get Job Usage batch job copies the usage entries for the Fairway Sound job onto the sales lines, and you can bill the customer for these particular entries. The Job No., Phase, Task, and Step fields for the sales invoice lines are also copied from the usage entries. You can confirm this using the Zoom function (CTRL+F8) on any line. You can also edit and delete the lines that you do not want to bill at this time.
11. Review the lines and verify that the billings are correct.
12. Click POSTING→POST. A message appears asking if you want to post the Invoice. Click Yes.
Once you create and post the invoice, the program posts the sales entries to the job ledger, in addition to the other normal general ledger and customer ledger postings.
Page 63

Microsoft Navision Job Costing
13. Open the Fairway Sound job card and press CTRL+F5 to see the entries from the invoice you just posted.
You can see that the usage entries no longer have a check mark in the Open field since they were closed by the sales job entries. You can also manually create the invoice lines without using the batch job. Depending on the Application method you have selected for the job, you also may have to apply the sales lines to the specific usage entries manually. You do this in the Sales Invoice window by clicking the AssistButton in the Appl. -to Job Entry field and selecting the appropriate usage entry that you are charging the customer.
Posting Sales of G/L Account Usage Entries In chapter 1 you learned that if you are charging general ledger expenses to your customers, you should set up a General Ledger expenses sales account in the Job Posting Group for the job. If you run the Get Job Usage batch job and the usage entries include expenses posted to G/L accounts, the program first copies the usage entry to the sales invoice line. It then replaces the G/L account of the usage entry with the account contained in the G/L Exp. Sales Acc. field in the Job Posting Group.
NOTE: This account is only replaced if you use the Get Job Usage batch job. If you create the sales invoice line and apply it to the job manually, the program does not change the general ledger account when you post the invoice.
Recall the Postage expense G/L account was 8240, but the sale was posted to 6110, which is the G/L account used in the Job Posting Setup window for the G/L Exp. Sales Account.
Job Journal and Sales Invoice Posting Review To confirm that the amounts were posted to the Item Ledger Entry as well as the various ledgers indicated in the Job Sale Posting Flow diagram below, on the Resource Planning menu, click JOBS→JOBS. Locate the Fairway Sound job and press CTRL+F5 to open the Job Ledger Entries.
Job Journal Usage Entries (Item Ledger Entries)
1. Locate the line with Entry Type Usage for Item “AMSTERDAM Lamp.” This line was created in the Job Ledger by posting the Job Journal.
2. Click Navigate. The Navigate window appears.
3. In Table Name section, click Item Ledger Entry and then Show.
Page 64

Chapter 4: Usage and Sales Posting
4. Three items appear in the Item Ledger Entries because they were posted from the same journal.
5. Escape back to the Job Ledger Entries window.
Job Sale Posting Flow
Sales Invoice Posting Entries
1. Locate the line with Entry Type Sale for Item “AMSTERDAM Lamp.” This line was created in the Job Ledger by posting the Sales Invoice.
2. Click Navigate. The Navigate window appears.
3. In Table Name section, click G/L Entry and then Show.
4. The General Ledger Entries created by posting the Sales Invoice appear.
5. Escape back to the Navigate window.
6. In the Table Name section, ARROW DOWN to the Cust. Ledger Entries and click Show.
7. The Customer Ledger Entries created by posting the Sales Invoice will appear.
8. Escape back to the Navigate window.
Page 65

Microsoft Navision Job Costing
9. In the Table Name section, ARROW DOWN to the Res. Ledger Entries and click Show.
10. The Resource Ledger Entries created by posting the Sales Invoice will appear.
11. Close the Job Ledger Entries and Job Card windows.
Actual to Budget Review
Job − Actual to Budget Report Now that you have posted the remaining usage entries and the sale entries for the Fairway Sound job, take another look at the Job − Actual to Budget report.
1. On the Resource Planning menu, click JOBS→REPORTS→JOB − ACTUAL TO BUDGET. The Job − Actual to Budget window appears.
2. On the Job tab, type FAIRWAY, 5 CR.
3. On the Options tab, select Usage & Sale.
4. Click Preview.
Notice that both actual and budgeted costs and prices are now displayed.
Job Statistics Now review the Job Statistics window again.
1. On the Resource Planning menu, click JOBS→JOBS. The Job Card window appears.
2. Locate the Fairway Sound job card.
3 Press F9 to open the Job Statistics window.
As seen on the Job − Budget to Actual report, both actual (realized) and budgeted costs and prices are now displayed.
Page 66

Chapter 4: Usage and Sales Posting
Test Your Skills − Create a Sales Invoice Scenario: It is December 15, 2004 and as the Accounting Clerk for Cronus International Ltd., it is time to run the bi-monthly invoices. You have been notified by the project manager for the John Haddock Insurance Co. job that this job can now be billed to the customer. You need to create and post the Sales Invoice, using the Get Job Usage functionality. When finished, review the actual to budget comparisons.
Challenge Yourself! Your tasks are as follows:
1. Create a sales invoice.
2. Use the Get Job Usage function.
3. Post the sales invoice.
4. Review the Actual to Budget comparisons
Need a Little Help?
• On the Sales & Marketing menu, click ORDER PROCESSING→INVOICES.
• Create a new sales invoice for John Haddock Insurance Co. • Click FUNCTIONS→GET JOB USAGE.
• Post the invoice. • On the Resource Planning menu, click JOBS→REPORTS→JOB −
ACTUAL TO BUDGET. • On the Resource Planning menu, click JOBS→JOBS.
HINT: If an overdue balance warning message appears when creating the sales invoice, accept the message and continue. Also, if no lines appear after running the Get Job Usage batch job, verify that you used the correct job on the batch job, as well as the same customer on the Sales Invoice used on the Job Card.
Page 67

Microsoft Navision Job Costing
Test Your Skills − Create Another Sales Invoice Scenario: It is January 31, 2005 and you have been notified by the project manager for The Device Shop job that you can bill the customer for all work completed. You need to create and post the Sales Invoice, using the Get Job Usage functionality. Review the job actual to budget comparisons after posting.
Challenge Yourself! Your tasks are as follows:
1. Create a sales invoice.
2. Use the Get Job Usage function.
3. Post the sales invoice.
4. Review the Actual to Budget comparisons
Need a Little Help?
• On the Sales & Marketing menu, click ORDER PROCESSING→INVOICES.
• Create a new sales invoice for The Device Shop. • Click FUNCTIONS→GET JOB USAGE.
• Post the invoice. • On the Resource Planning menu, click JOBS→REPORTS→JOB −
ACTUAL TO BUDGET. • On the Resource Planning menu, click JOBS→JOBS.
REMEMBER: You need to remove the WHITE Location Code from the Sales Invoice header before running the Get Job Usage function.
Page 68

Chapter 4: Usage and Sales Posting
Quick Interaction: Lessons Learned Take a moment to write down three Key Points you have learned from this chapter: 1.
2.
3.
Page 69

Microsoft Navision Job Costing
Page 70

Chapter 5: Job Recognition and Review
CHAPTER 5: JOB RECOGNITION AND REVIEW Training Objectives
This chapter discusses:
• Overview • Recognition of Job Costs • Calculate Job Recognition • Post Job Recognition to G/L • Recognition Posting Review • Recognition Posting Breakdown • Closing the Job
Page 71

Microsoft Navision Job Costing
Overview This chapter defines the Job Recognition Periodic Activities, including Calculate Job Recognition and Post Job Recognition to G/L. You will run these two Periodic Activities and then view the results of running these batch jobs. There is also a short discussion of the choices of closing a job.
Recognition of Job Costs In the previous chapters you posted Purchase Orders and Job Journals to accumulate costs for particular jobs. You then ran the Job WIP Value batch job to transfer those costs to the WIP accounts while the jobs were in process. These jobs are now finished; you have posted the remaining costs to the job, as well as the sales by posting a Sales Invoice to the customer. It is time to complete the Job Costing procedure by recognizing the costs posted to the WIP accounts by transferring them back to the income statement accounts. To transfer job costs back to the costs income statement accounts, you can use the Job Recognition function on the Periodic Activities menu. In this chapter, we will focus on the Job Recognition functions. On the Resource Planning menu, click JOBS→PERIODIC ACTIVITIES. The following menu items appear:
• Calculate Job Recognition − This batch job calculates the value of all recorded usage and sales that have already been posted to the Balance Sheet WIP accounts.
• Post Job Recognition to G/L − This batch job posts the usage and sales amounts calculated by the Calculate Job Recognition batch job to job costs and sales income statement accounts. The program also posts the balancing entry to the Balance Sheet WIP accounts.
REMINDER: As stated in Chapter 3, the batch jobs can only be run in the order shown on the menu and the process cannot be reversed. As a result, you should ensure that all information looks correct after running the calculation batch jobs before you run the posting batch jobs. It is now possible to preview the batch job without posting it.
Page 72

Chapter 5: Job Recognition and Review
Job Recognition Posting The diagram below shows the posting flow that occurs when the Job Recognition process runs.
Job Recognition Posting Flow
1. When the Calculate Job Recognition batch job is run, the Amt. to Recognize field in the Job Ledger Entries is updated with the value that is in the Amt. Posted to G/L field from the Job Ledger Entry. No general ledger activity occurs during this step.
2. When the Post Job Recognition to G/L batch job is run, the value in the Amt. to Recognize field on the Job ledger is used to determine the amount to be posted in the G/L. The Amt. Recognized field is updated with this amount in the Job Ledger Entries. This value is removed (credited) from the Balance Sheet and added (debited) onto the Income Statement.
NOTE: The above diagram follows the flow of Usage postings ONLY since the scenarios in this manual have only included usage entries. In the case that Sales entries have been posted, this process could include them.
Page 73

Microsoft Navision Job Costing
Calculate Job Recognition Scenario 1: It is December 31, 2004 and as the Accounting Manager for Cronus International, Ltd., it is your responsibility to run the Recognition Periodic Activities for completed jobs. You first need to run the Calculate Job Recognition batch job for the Fairway Sound job. On the Resource Planning menu, click JOBS→PERIODIC ACTIVITIES→CALCULATE JOB RECOGNITION. The Calculate Job Recognition batch job appears.
1. On the Job tab, in the No. field, type Fairway, 5 CR; or look up to the Job list and select the Fairway job.
2. Click the Job Ledger Entry tab.
3. In the Entry Type field, press F6 to display the option list. Since you have only posted usage entries, select Usage.
4. The Posting Date field can be blank since there have only been postings made in November so you do not need to filter on specific dates. Alternatively, you could type “..123104” to capture all postings made through December 31, 2004.
5. Click OK.
NOTE: A message does not appear when the batch job process is complete.
6. Open the Fairway, 5 CR Job Card and press CTRL+F5 to view the Job
Ledger entries.
7. Select the first job ledger entry and press CTRL+F8 to zoom on the line.
Page 74

Chapter 5: Job Recognition and Review
The Calculate Job Recognition batch job has filled in the Amt. to Recognize field with the amount that was posted to the G/L from the WIP posting process.
8. Close the Job windows.
Page 75

Microsoft Navision Job Costing
Test Your Skills − Run the Calculate Job Recognition Batch Job
Scenario: It is still December 31, 2004 and you now need to run the Calculate Job Recognition batch job for the John Haddock Insurance Co. job. Once the batch job has been run, look at the Job Ledger Entries to verify the accuracy of what will post to the general ledger.
Challenge Yourself! Your tasks are as follows:
1. Run the Calculate Job Recognition batch job.
2. Review the Job Ledger Entries for accuracy.
Need a Little Help?
• On the Resource Planning menu, click JOBS→PERIODIC ACTIVITIES→CALCULATE JOB RECOGNITION.
• Filter and run the batch job. • Go to the Job Card for John Haddock Insurance Co. • View the Amt. to Recognize field in the Job Ledger Entries window.
REMEMBER: The Job Usage Posting on this Job was set to Prices so the prices are posted to the General Ledger based on the value in the Unit Price field.
Page 76

Chapter 5: Job Recognition and Review
Post Job Recognition to G/L Scenario 2: Now that you have reviewed the Job Recognition calculations for the Fairway Sound job, it is time to transfer the calculated values from the WIP accounts back to the income statement accounts in the general ledger.
1. On the Resource Planning menu, click JOBS→PERIODIC ACTIVITIES→POST JOB RECOGNITION TO G/L. The Post Job Recognition to G/L batch job appears.
2. On the Job tab, in the No. field, type Fairway, 5 CR; or look up to the Job list and select the Fairway job.
3. On the Job Ledger Entry tab, you can filter the entries you have selected by sales or usage entry type and/or by posting date range. For this scenario, in the Entry Type field, select Usage.
4. Click the Options tab:
Field Description Posting Method Here you can choose between posting per job ledger
entry or per entire job.
• When you choose the per job ledger entry option, you can keep track of each posting in the Job Ledger Entry window.
• If you wish to minimize the number of entries posted to the general ledger, you should select the per job option.
Page 77

Microsoft Navision Job Costing
Field Description Posting Date Enter the date when the postings should be done in the
general ledger. Document No. Enter a document number for the entire posting process. Posting Description
There are some standard texts that you can use in the description. For more information, use F1 Help.
Post Select this option if you want the batch job to post when you click Print or Preview.
WARNING: If you have selected the Post option, the batch job posts when you click Print or Preview. The program fills in the Amt. Recognized field in the job entries. As a result, you should make sure the job calculation information is correct before you select the Post option when you run the Post Job Recognition to G/L batch job.
5. In the Posting Method field, keep per job ledger entry selected.
Since this was the Posting Method selected when you ran the Post WIP Value to G/L batch job, this will keep the posting consistent.
6. In the Posting Date field, type 123104.
7. In the Document No. field, type FSUR.
8. In the Posting Description field, leave the default description.
9. You want to post the entries, so in the Post field, select the option.
10. Click Preview. These are the amounts posted to the general ledger.
11. Open the Fairway Sound Job Card and press CTRL+F5 to view the job ledger entries again. Select the first entry and press CTRL+F8 to zoom on the line. You can see that the Amt. Recognized field has now been filled in with the contents of the Amt. to Recognize field.
12. Escape back to the Job Card and click on the Posting tab.
13. Note that the Recognition Date field is populated with the posting date used on the Post Job Recognition to G/L batch job.
14. Close the Job Card.
Page 78

Chapter 5: Job Recognition and Review
Recognition Posting Review To confirm that the amounts were posted to the general ledger, on the Financial Management menu, click GENERAL LEDGER→HISTORY→REGISTERS. The G/L Registers window appears.
1. Go to the end of the list by pressing CTRL+END. The Source Code is POSTRECOG.
2. While on this line, click REGISTER→GENERAL LEDGER. The General Ledger Entries window appears:
Note the accounts that were credited and debited after running the Post Job Recognition to G/L batch job.
Page 79

Microsoft Navision Job Costing
Recognition Posting Breakdown The diagram below builds on the breakdown of the accounts that were debited and credited from running the Post WIP Value to G/L batch job by including the accounts affected after the Post Job Recognition to G/L batch job was run. Notice that the costs have been debited to the Job Cost account (7620) and credited to a WIP Cost account (2220). These postings have transferred the job costs from the WIP balance sheet accounts to the Job Cost income accounts.
NOTE: For those unfamiliar with T-Accounts, debits are in the left column and credits are in the right column.
NOTE: If Sales entries had been used in the Job Costing periodic activities, the Job Sales Adjustment, WIP Sales, and Job Sales accounts would be represented in the diagram above.
Page 80

Chapter 5: Job Recognition and Review
Test Your Skills − Run the Post Job Recognition to G/L Batch Job and Review
Scenario: Now that you have reviewed the Job Recognition calculations for the John Haddock Insurance Co. job, it is time to transfer the calculated usage from the WIP accounts to the income accounts in the general ledger. Once the batch job has been run, look at the G/L Registers to verify the accuracy of what was posted to the general ledger.
Challenge Yourself! Your tasks are as follows:
1. Run the Post Job Recognition to G/L batch job.
2. Review the General Ledger entries made.
Need a Little Help?
• On the Resource Planning menu, click JOBS→PERIODIC ACTIVITIES→POST JOB RECOGNITION TO G/L.
• Filter and run the batch job. • On the Financial Management menu, click GENERAL
LEDGER→HISTORY→REGISTERS. • View the amounts posted to the Job Costs Account and the WIP
Costs Account.
REMEMBER: Use the proper date in the Posting Date field on the batch job! Also, the Job Usage Posting on this Job was set to Prices so the prices are posted to the General Ledger based on the value in the Unit Price field.
Page 81

Microsoft Navision Job Costing
Closing the Job Now that the Job is completed, you have two choices to designate that the Job is closed. You can either:
• Complete the job by changing the Status field on the Job Card to Completed.
• Block the job by selecting the Blocked option on the Job Card. Once you change the job status to Completed it cannot be changed back. This means nothing further can be posted to this job and the job cannot be used again. The benefit of blocking a job is that the job can be unblocked and additional entries can be posted to it. While the job is blocked, however, users cannot post to it.
Page 82

Chapter 5: Job Recognition and Review
Quick Interaction: Lessons Learned Take a moment to write down three Key Points you have learned from this chapter: 1.
2.
3.
Page 83

Microsoft Navision Job Costing
Page 84

Appendix A: Test Your Skills Solutions
Page 85
APPENDIX A: TEST YOUR SKILLS SOLUTIONS
Test Your Skills − Create a New Job (CH1) Scenario: Today, November, 15, 2004, your customer, John Haddock Insurance Co., contracted with Cronus International, Ltd. to set up four work areas. You will want to post WIP entries but you want to post prices rather than costs to the general ledger. You will also want to run the Job Recognition jobs throughout the course of the Job. The estimated starting date will be 11/21/04 with an estimated completion date of 12/08/04.
Step-by-Step
1. On the Resource Planning menu, click JOBS→JOBS. The Job Card window appears.
2. Press F3 to insert a new Job.
3. In the No. field, type JHaddock, 4 WA.
4. In the Description field, type Set up four Work Areas.
5. In the Bill-to Customer No. field, type 30000.
6. Press ENTER.
7. In the Status field, press F6 and select Order from the option list.
8. A warning message appears, click Yes.
9. Click the Posting tab.
10. In the Application Method field, leave Apply to Oldest.
11. In the Job Usage Posting field, press F6 and select Prices from the option list.
12. In the Recognition Method field, leave Percentage of Completion.
13. In the Job Posting Group field, lookup to the Job Posting Groups list and select SETTING UP.
14. Press ENTER, or click OK.
15. Click the Duration tab.
16. In the Creation Date field, type 111504.
17. In the Starting Date field, type 112104.
18. In the Ending Date field, type 120804.
The Job Card setup is complete.

Microsoft Navision Job Costing
Page 86
Test Your Skills − Create a New Job Budget (CH1) Scenario: Now that you have set up your Job Card for John Haddock Insurance Co., you need to set up a Job Budget for the four work areas. Create a new Job Budget using the following criteria:
Phase Code Resource / Item Starting Date Hours / Quantity 2-FURN MARY 11/22/04 2 3-APPR MARY 11/27/04 1.5 4-ASSEMB LIFT
MARK Item 1896-S Item 1906-S Item 1908-S Item 1928-W Item 1964-S Item 1976-W Item 1984-W
12/07/04 12/07/04 12/07/04 12/07/04 12/07/04 12/07/04 12/07/04 12/07/04 12/07/04
4 10 4 4 4 2 1 2 1
5-CLOSE MARY 12/09/04 1
Step-by-Step
1. On the Resource Planning menu, click JOBS→JOBS. The Job Card window appears.
2. Locate Job No. JHADDOCK, 4 WA.
3. Click PLANNING→JOB BUDGET.
4. In the Phase Code field, press F6 and select 1-SPEC from the Phases window.
5. Press ENTER.
6. In the Type field, press F6 and select Resource from the option list.
7. In the No. field, press F6 and select MARY from the Resource List window.
8. Press ENTER.
9. In the Starting Date field, leave 11/21/04.
10. In the Quantity field, type 2.
11. Go to the next line.
12. Repeat steps 1-11 for the above Resources and Items listed above.
The Job Budget setup is complete.

Appendix A: Test Your Skills Solutions
Page 87
Test Your Skills − Create Another Job and Budget (CH1) Scenario: Today, January, 4, 2005, your customer, The Device Shop, contracted with Cronus International, Ltd. to set up a small conference room. Since this is a small job you do not need to calculate WIP. The estimated starting date will be 1/6/05 with an estimate completion date of 1/24/05. Create a new Job based on the above, using the following Job Number and Description:
No. Device, 1 CR Description Set up a Conference Room
Create a Budget for this job using the following criteria:
Phase Code Resource / Item Starting Date Hours / Quantity 1-SPEC MARY 1/6/05 1 2-FURN MARY 1/11/05 1 3-APPR MARY 1/14/05 1 4-ASSEMB LIFT
MARK Item 1900-S Item 1920-S Item 1928-S Item 1996-S
1/20/05 1/20/05 1/20/05 1/20/05 1/20/05 1/20/05
2 8 6 1 1 1
5-CLOSE MARY 1/24/05 1
Step-by-Step
1. On the Resource Planning menu, click JOBS→JOBS. The Job Card window appears.
2. Press F3 to insert a new Job.
3. In the No. field, type Device, 1 CR.
4. In the Description field, type Set up a Conference Room.
5. In the Bill-to Customer No. field, type 62000.
6. Press ENTER.
7. In the Status field, press F6 and select Order from the option list.
8. A warning message appears, click Yes.

Microsoft Navision Job Costing
Page 88
9. Click the Posting tab.
10. In the Application Method field, leave Apply to Oldest.
11. In the Job Usage Posting field, press F6 and select None from the option list.
12. In the Recognition Method field, leave Percentage of Completion.
13. In the Job Posting Group field, lookup to the Job Posting Groups list and select SETTING UP.
14. Press ENTER, or click OK.
15. Click the Duration tab.
16. In the Creation Date field, type 010405.
17. In the Starting Date field, type 010605.
18. In the Ending Date field, type 012405.
19. Click PLANNING→JOB BUDGET.
20. In the Phase Code field, press F6 and select 1-SPEC from the Phases window.
21. Press ENTER.
22. In the Type field, press F6 and select Resource from the option list.
23. In the No. field, press F6 and select MARY from the Resource List window.
24. Press ENTER.
25. In the Starting Date field, leave 01/06/05.
26. In the Quantity field, type 1.
27. Go to the next line.
28. Repeat steps 20-27 for the above Resources and Items listed above.
The Job Card and Job Budget setups are complete.
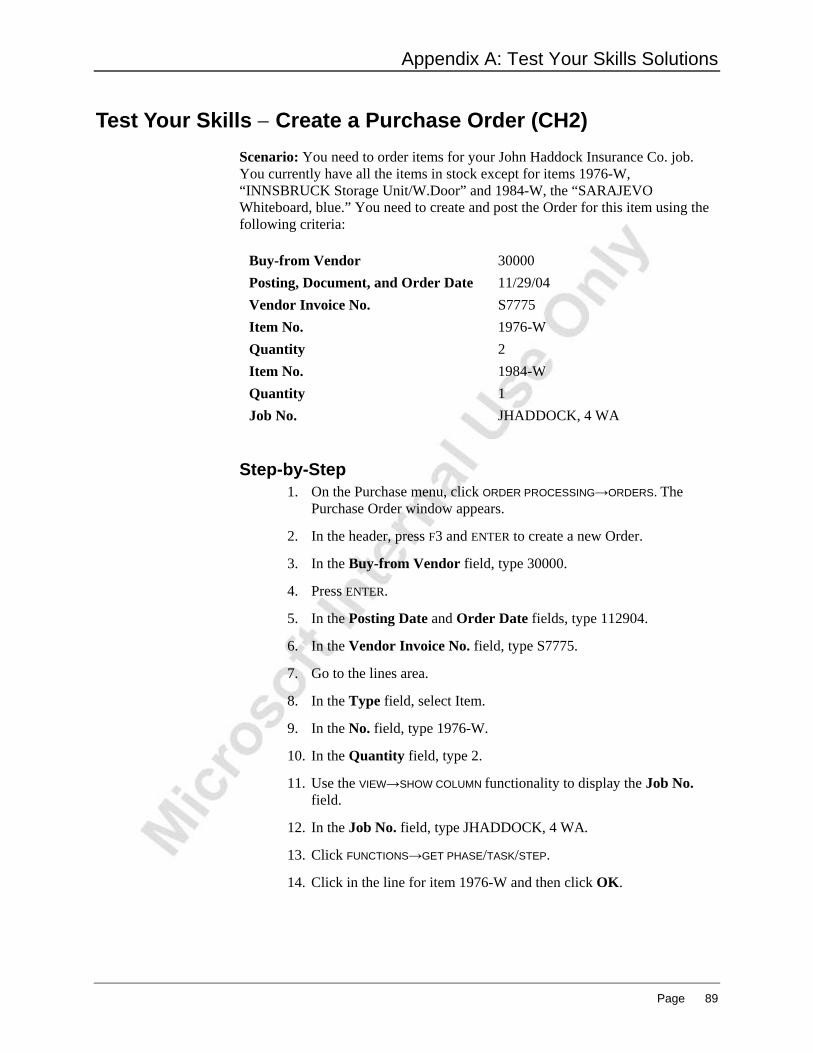
Appendix A: Test Your Skills Solutions
Page 89
Test Your Skills − Create a Purchase Order (CH2) Scenario: You need to order items for your John Haddock Insurance Co. job. You currently have all the items in stock except for items 1976-W, “INNSBRUCK Storage Unit/W.Door” and 1984-W, the “SARAJEVO Whiteboard, blue.” You need to create and post the Order for this item using the following criteria:
Buy-from Vendor 30000 Posting, Document, and Order Date 11/29/04 Vendor Invoice No. S7775 Item No. 1976-W Quantity 2 Item No. 1984-W Quantity 1 Job No. JHADDOCK, 4 WA
Step-by-Step 1. On the Purchase menu, click ORDER PROCESSING→ORDERS. The
Purchase Order window appears.
2. In the header, press F3 and ENTER to create a new Order.
3. In the Buy-from Vendor field, type 30000.
4. Press ENTER.
5. In the Posting Date and Order Date fields, type 112904.
6. In the Vendor Invoice No. field, type S7775.
7. Go to the lines area.
8. In the Type field, select Item.
9. In the No. field, type 1976-W.
10. In the Quantity field, type 2.
11. Use the VIEW→SHOW COLUMN functionality to display the Job No. field.
12. In the Job No. field, type JHADDOCK, 4 WA.
13. Click FUNCTIONS→GET PHASE/TASK/STEP.
14. Click in the line for item 1976-W and then click OK.

Microsoft Navision Job Costing
Page 90
15. Go to the next line.
16. In the Type field, select Item.
17. In the No. field, type 1984-W.
18. In the Quantity field, type 1.
19. In the Job No. field, type JHADDOCK, 4 WA.
20. Click FUNCTIONS→GET PHASE/TASK/STEP.
21. Click on the line for item 1984-W and then click OK.
22. Click POSTING→POST.
23. Select Receive and Invoice and click OK to post the order.
Test Your Skills − Create a Job Journal for Resources and Expense (CH2)
Scenario: As Mary Dempsey, the designer for the John Haddock Insurance Co. job, you must post your hours to the job. As of 11/30/04, you have spent the following hours working with the customer, as well as the necessary planning and design hours:
Date Phase Code Description Hours 11/21/04 1-SPEC MD-Determining Specifications 1.75 11/22/04 2-FURN MD-Furnishing the Premises 1 11/23/04 2-FURN MD-Furnishing the Premises 1 11/29/04 3-APPR MD-Obtaining Customer Approval 1.5
On 11/23/04, you were asked to ship the design documents to the Customer prior to the Customer Approval meeting. Since you need to post this expense, you decide to create and post one journal that includes the resource hours and this expense. The amount is 12.75.
Step-by-Step
1. On the Resource Planning menu, click JOBS→JOB JOURNALS. The Job Journal window appears.
2. Delete the existing job journal lines, if necessary.
3. In the Posting Date field, type 113004.
4. In the Document No. field, type JH0001.
5. In the Job No. field, type JHADDOCK, 4 WA.
6. In the Type field, leave Resource.

Appendix A: Test Your Skills Solutions
Page 91
7. In the No. field, type Mary.
8. In the Description field, type MD-Determining Specifications.
9. In the Quantity field, type 1.75.
10. Click FUNCTIONS→GET PHASE/TASK/STEP.
11. Select the line with the appropriate Phase Code and click OK.
12. Repeat steps 1-11 for the remaining entries.
13. In the Posting Date field, type 112304.
14. In the Document No. field, leave JH0001.
15. In the Job No. field, leave JHADDOCK, 4 WA.
16. In the Type field, press F6 to display the option list and select G/L Account.
17. In the No. field, type 8240.
18. In the Description field, type Design Documents to Customer.
19. In the Quantity field, type 1.
20. In the Direct Unit Cost, Unit Cost, and Unit Price fields, type 12.75.
21. Click FUNCTIONS→GET PHASE/TASK/STEP.
22. Select the line with Phase Code 3-APPR and click OK.
23. Verify that the Chargeable option is selected.
24. Click POSTING→POST.
25. A message appears asking if you want to post the journal lines. Click Yes.
26. A message states that journal lines have successfully posted. Click OK.
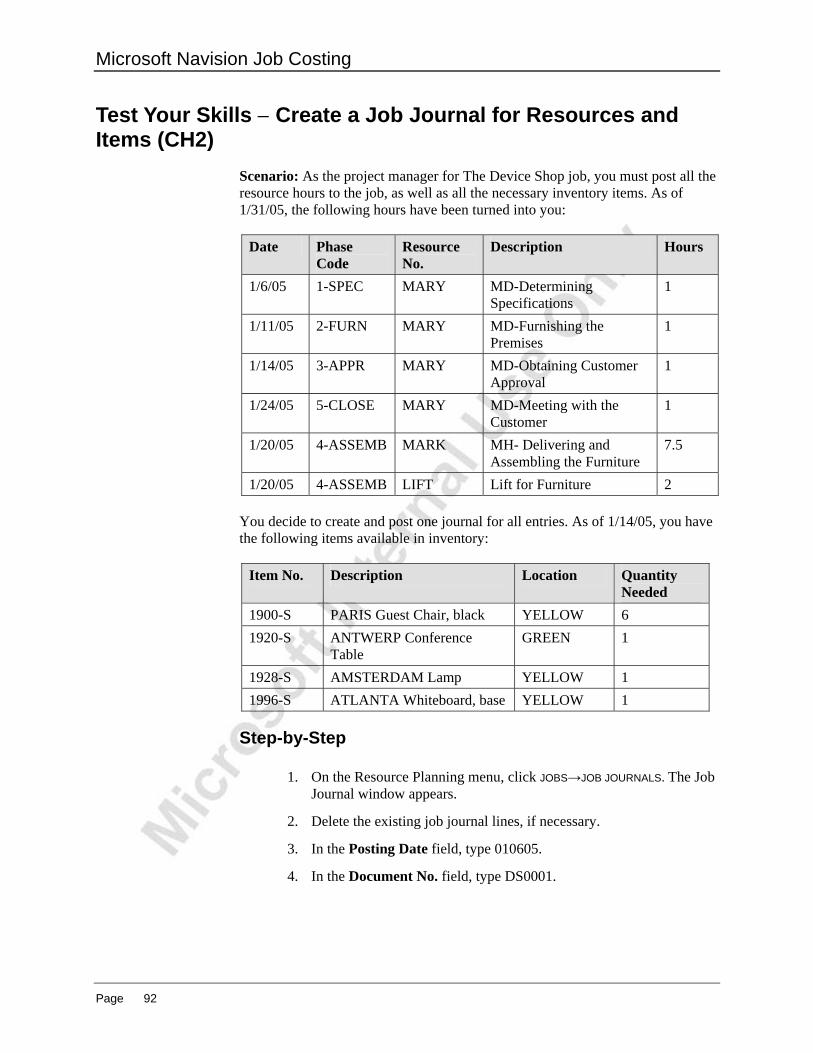
Microsoft Navision Job Costing
Page 92
Test Your Skills − Create a Job Journal for Resources and Items (CH2)
Scenario: As the project manager for The Device Shop job, you must post all the resource hours to the job, as well as all the necessary inventory items. As of 1/31/05, the following hours have been turned into you:
Date Phase Code
Resource No.
Description Hours
1/6/05 1-SPEC MARY MD-Determining Specifications
1
1/11/05 2-FURN MARY MD-Furnishing the Premises
1
1/14/05 3-APPR MARY MD-Obtaining Customer Approval
1
1/24/05 5-CLOSE MARY MD-Meeting with the Customer
1
1/20/05 4-ASSEMB MARK MH- Delivering and Assembling the Furniture
7.5
1/20/05 4-ASSEMB LIFT Lift for Furniture 2 You decide to create and post one journal for all entries. As of 1/14/05, you have the following items available in inventory:
Item No. Description Location Quantity Needed
1900-S PARIS Guest Chair, black YELLOW 6 1920-S ANTWERP Conference
Table GREEN 1
1928-S AMSTERDAM Lamp YELLOW 1 1996-S ATLANTA Whiteboard, base YELLOW 1
Step-by-Step
1. On the Resource Planning menu, click JOBS→JOB JOURNALS. The Job Journal window appears.
2. Delete the existing job journal lines, if necessary.
3. In the Posting Date field, type 010605.
4. In the Document No. field, type DS0001.

Appendix A: Test Your Skills Solutions
Page 93
5. In the Job No. field, type DEVICE, 1 CR.
6. In the Type field, leave Resource.
7. In the No. field, type Mary.
8. In the Description field, type MD-Determining Specifications.
9. In the Quantity field, type 1.
10. Click FUNCTIONS→GET PHASE/TASK/STEP.
11. Select the line with the appropriate Phase Code and click OK.
12. Repeat steps 1-11 for the remaining entries.
13. In the Posting Date field, type 011405.
14. In the Document No. field, leave DS0001.
15. In the Job No. field, leave DEVICE, 1 CR.
16. In the Type field, press F6 to display the option list and select Item.
17. In the No. field, type 1900-S.
18. In the Description field, leave the default description.
19. In the Location Code field, type Yellow.
20. In the Quantity field, type 6.
21. Click FUNCTIONS→GET PHASE/TASK/STEP.
22. Select the line with Phase Code 4-ASSEMB and click OK.
23. Repeat steps 13-22 for the remaining entries.
24. Verify that the Chargeable check box is selected.
25. Click POSTING→POST.
26. A message appears asking if you want to post the journal lines. Click Yes.
27. A message states that journal lines have successfully posted. Click OK.

Microsoft Navision Job Costing
Page 94
Test Your Skills − Run the Calculate Job WIP Value Batch Job (CH3)
Scenario: It is still November 30, 2004 and you now need to run the Calculate Job WIP Value batch job for the John Haddock Insurance Co. job. Once the batch job has been run, look at the Job Ledger Entries to verify the accuracy of what will post to the general ledger.
Step-by-Step
1. On the Resource Planning menu, click JOBS→PERIODIC ACTIVITIES→CALCULATE JOB WIP VALUE. The Calculate Job WIP Value batch job appears.
2. On the Job tab, in the No. field, type JHADDOCK, 4 WA; or look up to the Job list and select the John Haddock job.
3. On the Job Ledger Entry tab, in the Entry Type field, press F6 to display the option list. Since you have only posted usage entries, select Usage.
4. The Posting Date field can be blank. Since there have only been postings in November you do not need to filter on specific dates. Alternatively, you could type “..113004” to capture all postings made through November 30, 2004.
5. Click OK.
6. Open the JHaddock, 4 WA Job Card and press CTRL+F5 to view the Job Ledger entries.
7. Select the first job ledger entry and press CTRL+F8 to zoom on the line.
8. Locate the Amt. to Post to G/L field.
The Calculate Job WIP Value batch job has filled in the Amt. to Post to G/L field with the Total Price for Usage entries.
9. Close the Job windows.

Appendix A: Test Your Skills Solutions
Page 95
Test Your Skills − Run the Post WIP Value to G/L Batch Job and Review (CH3)
Scenario: Now that you have reviewed the Job WIP Value Calculations for the John Haddock Insurance Co. job, it is time to post the calculated usage to the WIP accounts in the general ledger. Once the batch job has been run, look at the General Ledger Registers to verify the accuracy of what was posted to the general ledger.
Step-by-Step
1. On the Resource Planning menu, click JOBS→PERIODIC ACTIVITIES→POST WIP VALUE TO G/L. The Post Job WIP Value to G/L batch job appears.
2. On the Job tab, in the No. field, type JHADDOCK, 4 WA; or look up to the Job list and select the John Haddock job.
3. On the Job Ledger Entries tab, in the Entry Type field, select Usage.
4. Click the Options tab.
5. In the Posting Method field, keep per job ledger entry selected.
6. In the Posting Date field, type 113004.
7. In the Document No. field, type JHUP.
8. In the Posting Description field, leave the default description.
9. We want to post the entries, so in the Post field, select the check box.
10. Click Preview. These are the amounts posted to the general ledger.
11. Open the John Haddock Job Card and press CTRL+F5 to view the job ledger entries again. Select the first entry and press CTRL+F8 to zoom on the line and locate the Amt. Posted to G/L field.
You can see that the Amt. Posted to G/L field has now been filled in with the contents of the Amt. to Post to G/L field.
12. Escape back to the Job Card and click on the Posting tab.
13. Note that the Job Posting Date field is populated with the posting date used on the Post WIP Value to G/L batch job.
14. Close the Job Card.

Microsoft Navision Job Costing
Page 96
Test Your Skills − Create a Job Journal for Resources and Items (CH4)
Scenario: As the project manager for the Job Haddock Insurance Co. job, you need to post the items that you had available in inventory. As of December 6, 2004 you have the following items available in inventory:
Item No. Description Location Quantity Needed
1896-S ATHENS Desk GREEN 4 1906-S ATHENS Mobile Pedestal GREEN 4 1908-S LONDON Swivel Chair, blue GREEN 4 1928-W ST.MORITZ Storage Unit/Drawers GREEN 2 1964-S TOKYO Guest Chair, blue GREEN 1
In addition, final hours worked by Mary Dempsey, Mark Hanson, and the Lift usage have been sent directly to you. You decide to create and post one journal for all entries. The following hours need to be posted to the job:
Date Phase Code Resource Description Hours 12/07/04 4-ASSEMB LIFT Lift for Furniture 1.5 12/08/04 4-ASSEMB LIFT Lift for Furniture 1.5 12/07/04 4-ASSEMB MARK MH-Assembling the
Furniture, etc. 7
12/08/04 4-ASSEMB MARK MH-Assembling the Furniture, etc.
3.5
12/09/04 5-CLOSE MARY MD-Closing the Job 1.5
All Skill Levels
1. On the Resource Planning menu, click JOBS→JOB JOURNALS. The Job Journal window appears.
2. In the Posting Date field, type 120604.
3. In the Document No. field, type JH0002.
4. In the Job No. field, type JHADDOCK, 4 WA.
5. In the Type field, press F6 to display the option list. Select Item.
6. In the No. field, type 1896-S.
7. In the Description field, leave the default item description.

Appendix A: Test Your Skills Solutions
Page 97
8. In the Location Code field, type Green.
9. In the Quantity field, type 4.
10. Click on FUNCTIONS→GET PHASE/TASK/STEP.
11. Select the line with the appropriate Phase Code and click OK.
12. Repeat steps 1-11 for the remaining entries.
13. In the Posting Date field, type 120704.
14. In the Document No. field, leave JH0002.
15. In the Job No. field, leave JHADDOCK, 4 WA.
16. In the Type field, press F6 to display the option list. Select Resource.
17. In the No. field, type LIFT.
18. In the Description field, leave the default description.
19. In the Quantity field, type 1.5.
20. Click on FUNCTIONS→GET PHASE/TASK/STEP.
21. Select the line with the appropriate Phase Code and click OK.
22. Repeat steps 13-21 for the remaining entries.
23. Verify that the Chargeable check box is checked for all entries.
24. Click POSTING→POST.
25. A message will appear asking if you want to post the journal lines. Click Yes.
26. A message will appear that journal lines have successfully posted. Click OK.

Microsoft Navision Job Costing
Page 98
Test Your Skills − Create a Sales Invoice (CH4) Scenario: It is December 15, 2004 and as the Accounting Clerk for Cronus International Ltd., it is time to run the bi-monthly invoices. You have been notified by the project manager for the John Haddock Insurance Co. job that this job can now be billed to the customer. You need to create and post the Sales Invoice, using the Get Job Usage functionality. When finished, review the actual to budget comparisons.
Step-by-Step
1. On the Sales & Marketing menu, click ORDER PROCESSING→INVOICES. The Sales Invoice window will appear.
2. In the header, press F3 and ENTER to create a new Invoice.
3. In the Sell-to Customer No. field, type 30000.
4. A Check Credit Limit warning message appears. Click Yes.
5. In the Posting Date field, type 121504.
6. Click FUNCTIONS→GET JOB USAGE. The Get Job Usage batch job window appears.
7. In the Job No. field, type JHADDOCK, 4 WA; or look up to the Job list and select the John Haddock job.
8. The Posting Date field can remain empty since you want to capture all entries.
9. Click OK to run the batch job.
10. Review the lines and verify the billings are correct.
11. Click POSTING→POST. A message appears asking if you want to post the Invoice. Click Yes.
11. Open the John Haddock job card and press CTRL+F5 to see the entries from the invoice you just posted.
You can see that some of the usage entries no longer have a check mark in the Open field since they were closed by the sales entries.

Appendix A: Test Your Skills Solutions
Page 99
12. On the Resource Planning menu, click JOBS→REPORTS→JOB – ACTUAL TO BUDGET. The Job – Actual to Budget window appears.
13. On the Job tab, type JHADDOCK, 4 WA.
14. On the Options tab, select Usage.
15. Click Preview.
Notice that both actual and budgeted costs and prices are now displayed.
16. Escape back to the John Haddock job card.
17. Press F9 to open the Job Statistics window.
As seen on the Job – Budget to Actual report, both actual (realized) and budgeted costs and prices are now displayed.

Microsoft Navision Job Costing
Page 100
Test Your Skills − Create Another Sales Invoice (CH4) Scenario: It is January 31, 2005 and you have been notified by the project manager for The Device Shop job that you can bill the customer for all work completed. You need to create and post the Sales Invoice, using the Get Job Usage functionality. Review the job actual to budget comparisons after posting.
All Skill Levels
1. On the Sales & Marketing menu, click ORDER PROCESSING→INVOICES. The Sales Invoice window appears.
2. In the header, press F3 and ENTER to create a new Invoice.
3. In the Sell-to Customer No. field, type 62000.
4. In the Posting Date field, type 013105.
5. Click FUNCTIONS→GET JOB USAGE. The Get Job Usage batch job window appears.
6. In the Job No. field, type DEVICE, 1 CR; or lookup to the Job list and select the John Haddock job.
7. The Posting Date field can remain empty since you want to capture all entries. Alternatively, you could type “..013105” to capture all postings through January 31, 2005.
8. Click OK to run the batch job.
9. Review the lines and verify that the billings are correct.
10. Click POSTING→POST. A message appears asking if you want to post the Invoice. Click Yes.
11. Open the Device Shop job card and press CTRL+F5 to see the entries from the invoice you just posted.
You can see that the usage entries no longer have a check mark in the Open field since they were closed by the sales job entries.

Appendix A: Test Your Skills Solutions
Page 101
12. On the Resource Planning menu, click JOBS→REPORTS→JOB – ACTUAL TO BUDGET. The Job – Actual to Budget window will appear.
13. On the Job tab, type DEVICE, 1 CR.
14. On the Options tab, select Usage & Sale.
15. Click Preview.
Notice that both actual and budgeted costs and prices are now displayed.
16. Escape back to the Device Shop Job Card.
17. Press F9 to open the Job Statistics window.
As seen on the Job – Budget to Actual report, both actual (realized) and budgeted costs and prices are now displayed.

Microsoft Navision Job Costing
Page 102
Test Your Skills − Run the Calculate Job Recognition Batch Job (CH5)
Scenario: It is still December 31, 2004 and you now need to run the Calculate Job Recognition batch job for the John Haddock Insurance Co. job. Once the batch job has been run, look at the Job Ledger Entries to verify the accuracy of what will post to the general ledger.
Step-by-Step
1. On the Resource Planning menu, click JOBS→PERIODIC ACTIVITIES→CALCULATE JOB RECOGNITION. The Calculate Job Recognition batch job appears.
2. On the Job tab, in the No. field, type JHADDOCK, 4 WA; or look up to the Job list and select the John Haddock job.
3. Click the Job Ledger Entry tab.
4. In the Entry Type field, press F6 to display the option list. Since you have only posted usage entries, select Usage.
5. The Posting Date field can be blank. Since there have only been postings made in November you do not need to filter on specific dates. Alternatively, you could type “..123104” to capture all postings made through December 31, 2004.
6. Click OK.
7. Open the JHaddock, 4 WA Job Card and press CTRL+F5 to view the Job Ledger entries.
8. Select the first job ledger entry and press CTRL+F8 to zoom on the line.
9. Locate the Amt. to Post to G/L field.
The Calculate Job Recognition batch job has filled in the Amt. to Recognize field with the amount that was posted to the G/L from the WIP posting process.
10. Close the Job windows.

Appendix A: Test Your Skills Solutions
Page 103
Test Your Skills − Run the Post Job Recognition to G/L Batch Job and Review (CH5)
Scenario: Now that you have reviewed the Job Recognition calculations for the John Haddock Insurance Co. job, it is time to transfer the calculated usage from the WIP accounts to the income accounts in the general ledger. Once the batch job has been run, look at the G/L Registers to verify the accuracy of what was posted to the general ledger.
Step-by-Step
1. On the Resource Planning menu, click JOBS→PERIODIC ACTIVITIES→POST JOB RECOGNITION TO G/L. The Post Job Recognition to G/L batch job appears.
2. On the Job tab, in the No. field, type JHADDOCK, 4 WA; or look up to the Job list and select the John Haddock job.
3. On the Job Ledger Entry tab, you can filter the entries you have selected by sales or usage entry type and/or by posting date range. For this scenario, in the Entry Type field, select Usage.
4. Click the Options tab.
5. In the Posting Method field, keep per job ledger entry selected.
6. In the Posting Date field, type 123104.
7. In the Document No. field, type JHUR.
8. In the Posting Description field, leave the default description.
9. You want to post the entries, so in the Post field, select the check box.
10. Click Preview. These are the amounts posted to the general ledger.
11. Open the John Haddock Job Card and press CTRL+F5 to view the job ledger entries again. Select the first entry, press CTRL+F8 to zoom on the line, and locate the Amt. Recognized field.
You can see that the Amt. Recognized field has now been filled in with the contents of the Amt. to Recognize field.
12. Escape back to the Job Card and click on the Posting tab.
13. Note that the Recognition Date field is populated with the posting date used on the Post Job Recognition to G/L batch job.
14. Close the Job Card.

Microsoft Navision Job Costing
Page 104