bumper and facia.pdf
TRANSCRIPT

2009 Chevrolet Aveo | Aveo, Wave, G3, Barina (VIN S/T) Service Manual | Body Repair | Bumpers and Fascias | Repair Instructions | Document ID: 1886774
Front Bumper Fascia Energy Absorber Replacement
Removal Procedure
1. Remove the front bumper fascia. Refer to Front Bumper Fascia Replacement . 2. Remove the front bumper energy absorber.
Installation Procedure
© 2010 General Motors Corporation. All rights reserved.
Page 1 of 2Document ID: 1886774
7/5/2010http://localhost:9001/si/showDoc.do?docSyskey=1886774&pubCellSyskey=9946&pubObj...

1. Install the front bumper energy absorber. 2. Install the front bumper fascia. Refer to Front Bumper Fascia Replacement .
Page 2 of 2Document ID: 1886774
7/5/2010http://localhost:9001/si/showDoc.do?docSyskey=1886774&pubCellSyskey=9946&pubObj...
2009 Chevrolet Aveo | Aveo, Wave, G3, Barina (VIN S/T) Service Manual | Body Repair | Bumpers and Fascias | Repair Instructions | Document ID: 1886762
Front Bumper Impact Bar Replacement (Hatchback)
Removal Procedure
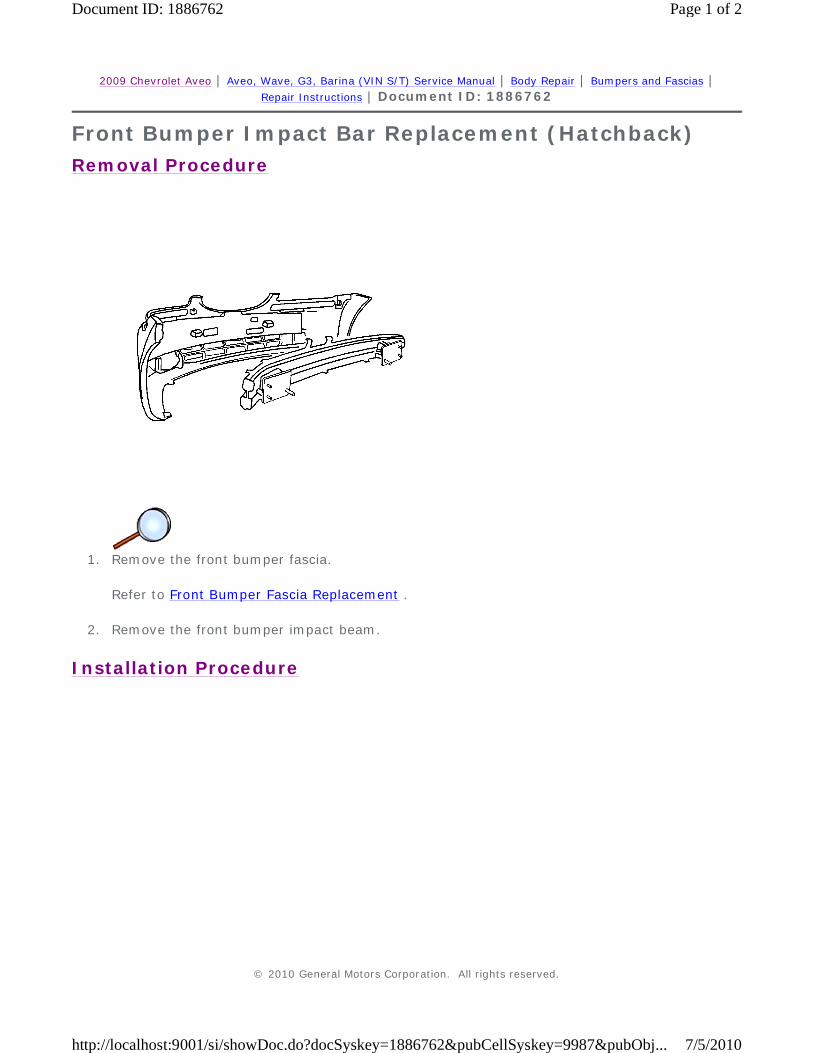
1. Remove the front bumper fascia.
Refer to Front Bumper Fascia Replacement .
2. Remove the front bumper impact beam.
Installation Procedure
© 2010 General Motors Corporation. All rights reserved.
Page 1 of 2Document ID: 1886762
7/5/2010http://localhost:9001/si/showDoc.do?docSyskey=1886762&pubCellSyskey=9987&pubObj...
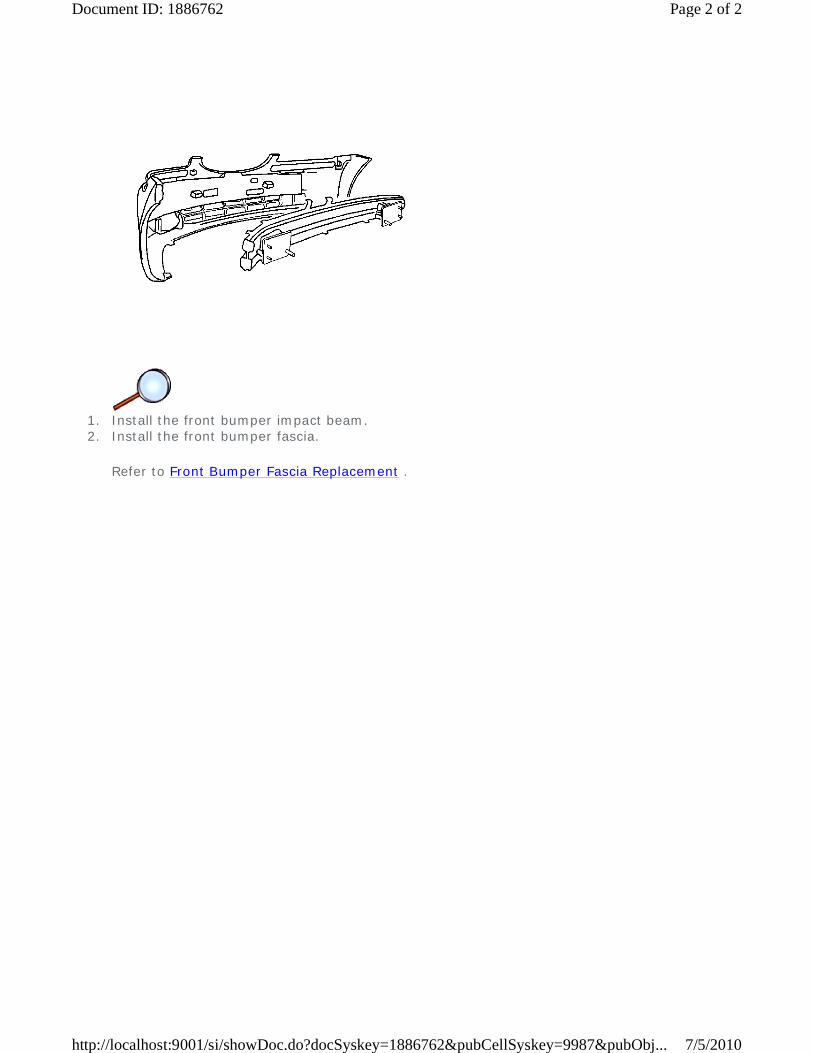
1. Install the front bumper impact beam. 2. Install the front bumper fascia.
Refer to Front Bumper Fascia Replacement .
Page 2 of 2Document ID: 1886762
7/5/2010http://localhost:9001/si/showDoc.do?docSyskey=1886762&pubCellSyskey=9987&pubObj...

2009 Chevrolet Aveo | Aveo, Wave, G3, Barina (VIN S/T) Service Manual | Body Repair | Bumpers and Fascias | Repair Instructions | Document ID: 1723844
Front Bumper Impact Bar Replacement (Notchback)
Removal Procedure
1. Remove the front bumper fascia. Refer to Front Bumper Fascia Replacement . 2. Remove the front bumper impact beam.
Installation Procedure
© 2010 General Motors Corporation. All rights reserved.
Page 1 of 2Document ID: 1723844
7/5/2010http://localhost:9001/si/showDoc.do?docSyskey=1723844&pubCellSyskey=9987&pubObj...
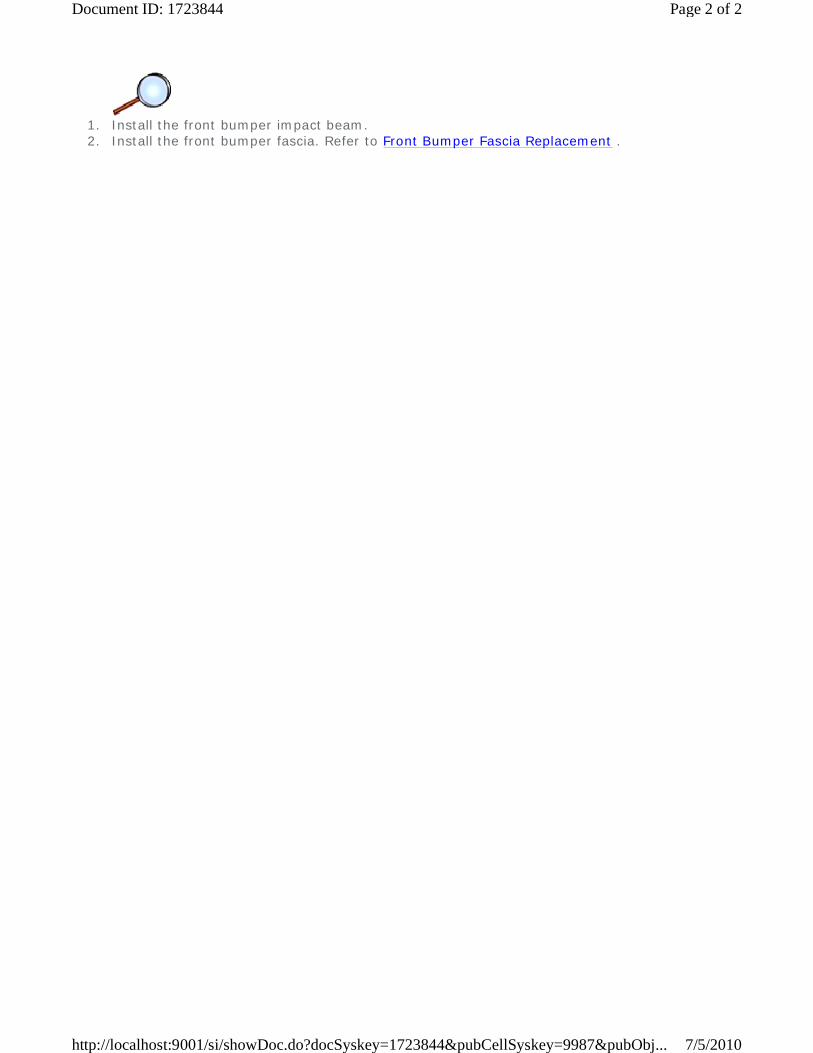
1. Install the front bumper impact beam. 2. Install the front bumper fascia. Refer to Front Bumper Fascia Replacement .
Page 2 of 2Document ID: 1723844
7/5/2010http://localhost:9001/si/showDoc.do?docSyskey=1723844&pubCellSyskey=9987&pubObj...
2009 Chevrolet Aveo | Aveo, Wave, G3, Barina (VIN S/T) Service Manual | Body Repair | Bumpers and Fascias | Repair Instructions | Document ID: 2096316
Front Bumper Fascia Replacement (Notchback)
Removal Procedure
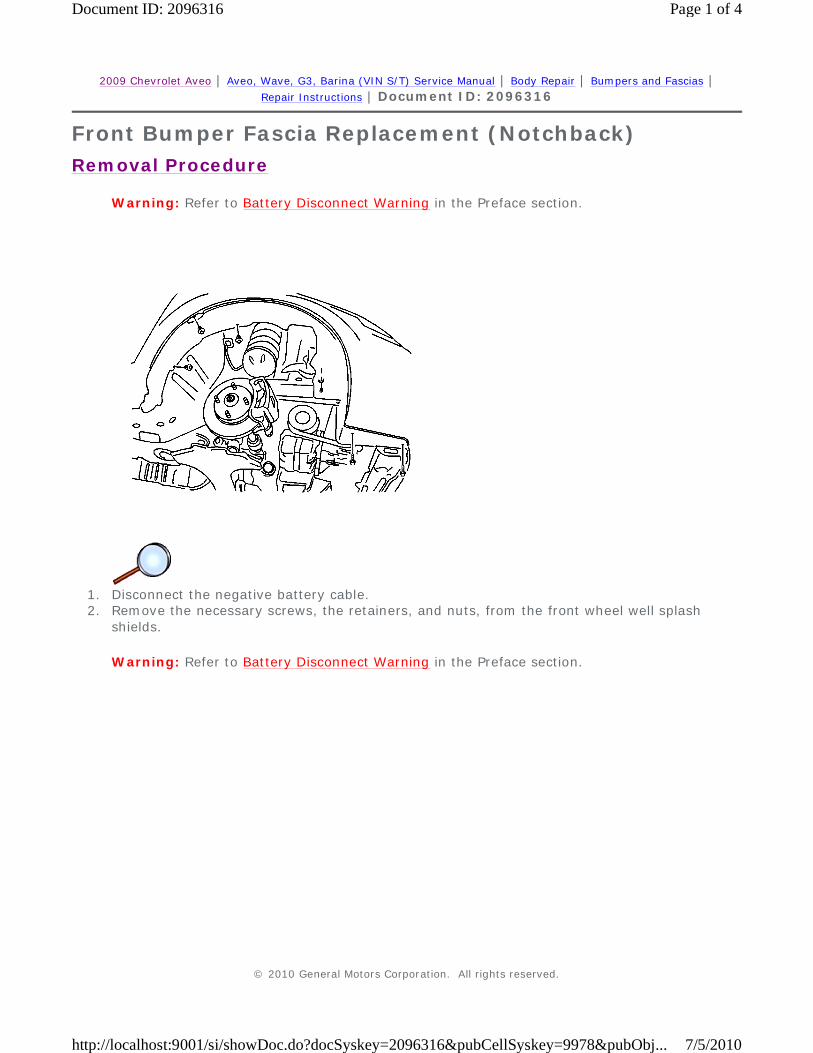
Warning: Refer to Battery Disconnect Warning in the Preface section.
1. Disconnect the negative battery cable. 2. Remove the necessary screws, the retainers, and nuts, from the front wheel well splash
shields.
Warning: Refer to Battery Disconnect Warning in the Preface section.
© 2010 General Motors Corporation. All rights reserved.
Page 1 of 4Document ID: 2096316
7/5/2010http://localhost:9001/si/showDoc.do?docSyskey=2096316&pubCellSyskey=9978&pubObj...
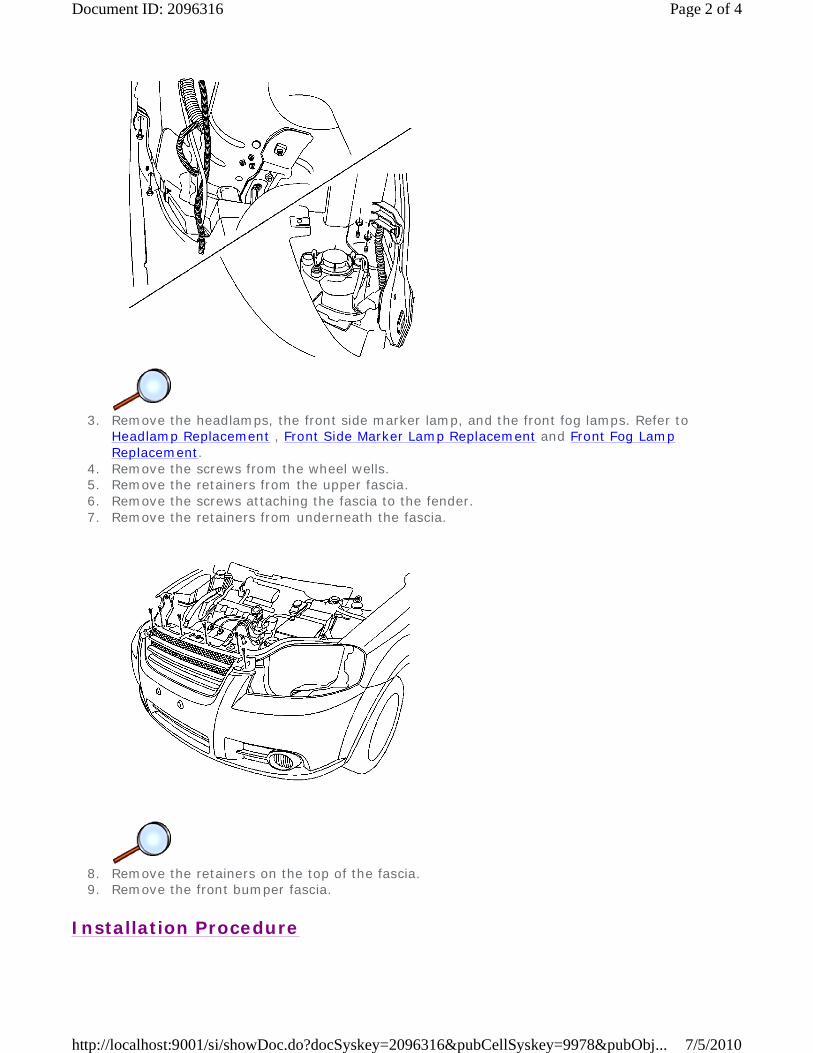
3. Remove the headlamps, the front side marker lamp, and the front fog lamps. Refer to
Headlamp Replacement , Front Side Marker Lamp Replacement and Front Fog Lamp Replacement.
4. Remove the screws from the wheel wells. 5. Remove the retainers from the upper fascia. 6. Remove the screws attaching the fascia to the fender. 7. Remove the retainers from underneath the fascia.
8. Remove the retainers on the top of the fascia. 9. Remove the front bumper fascia.
Installation Procedure
Page 2 of 4Document ID: 2096316
7/5/2010http://localhost:9001/si/showDoc.do?docSyskey=2096316&pubCellSyskey=9978&pubObj...
1. Install the bumper fascia. 2. Install the retainers on the top of the fascia.
Caution: Refer to Fastener Caution in the Preface section.
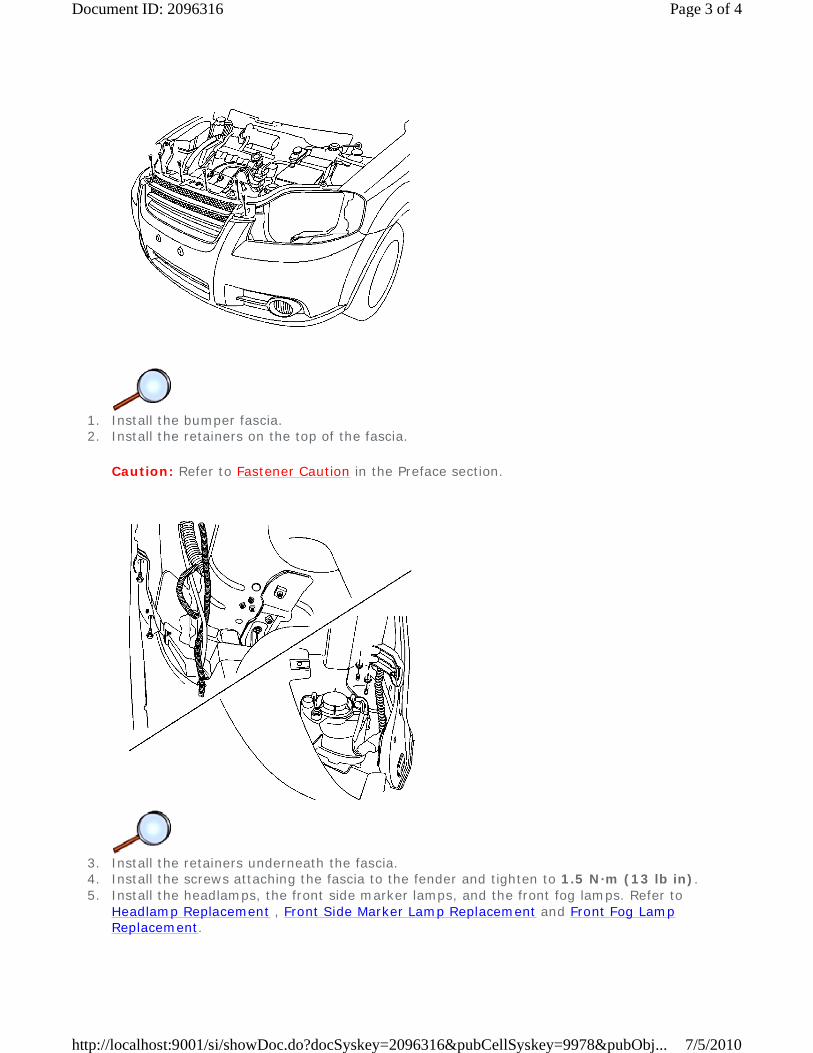
3. Install the retainers underneath the fascia. 4. Install the screws attaching the fascia to the fender and tighten to 1.5 N·m (13 lb in). 5. Install the headlamps, the front side marker lamps, and the front fog lamps. Refer to
Headlamp Replacement , Front Side Marker Lamp Replacement and Front Fog Lamp Replacement.
Page 3 of 4Document ID: 2096316
7/5/2010http://localhost:9001/si/showDoc.do?docSyskey=2096316&pubCellSyskey=9978&pubObj...

6. Install the screws, the retainers, and the nuts to the front wheel well splash shields.
Tighten
7. Connect the negative battery cable.
• Tighten the splash shield screws to 1.5 N·m (13 lb in).
• Tighten the splash shield nuts to 1.5 N·m (13 lb in).
Page 4 of 4Document ID: 2096316
7/5/2010http://localhost:9001/si/showDoc.do?docSyskey=2096316&pubCellSyskey=9978&pubObj...

2009 Chevrolet Aveo | Aveo, Wave, G3, Barina (VIN S/T) Service Manual | Body Repair | Bumpers and Fascias | Repair Instructions | Document ID: 2046759
Front Bumper Fascia Replacement (Hatchback)
Removal Procedure
Warning: Refer to Battery Disconnect Warning in the Preface section.
1. Disconnect the negative battery cable. 2. Remove the necessary screws, bolts, and nuts, from the front wheel well splash shields. 3. Remove the headlamps. Refer to Headlamp Replacement. 4. Remove the fascia grille. Refer to Fascia Grille Replacement.
5. Remove the clips (1) from the top of the front fascia.
© 2010 General Motors Corporation. All rights reserved.
Page 1 of 3Document ID: 2046759
7/5/2010http://localhost:9001/si/showDoc.do?docSyskey=2046759&pubCellSyskey=9978&pubObj...
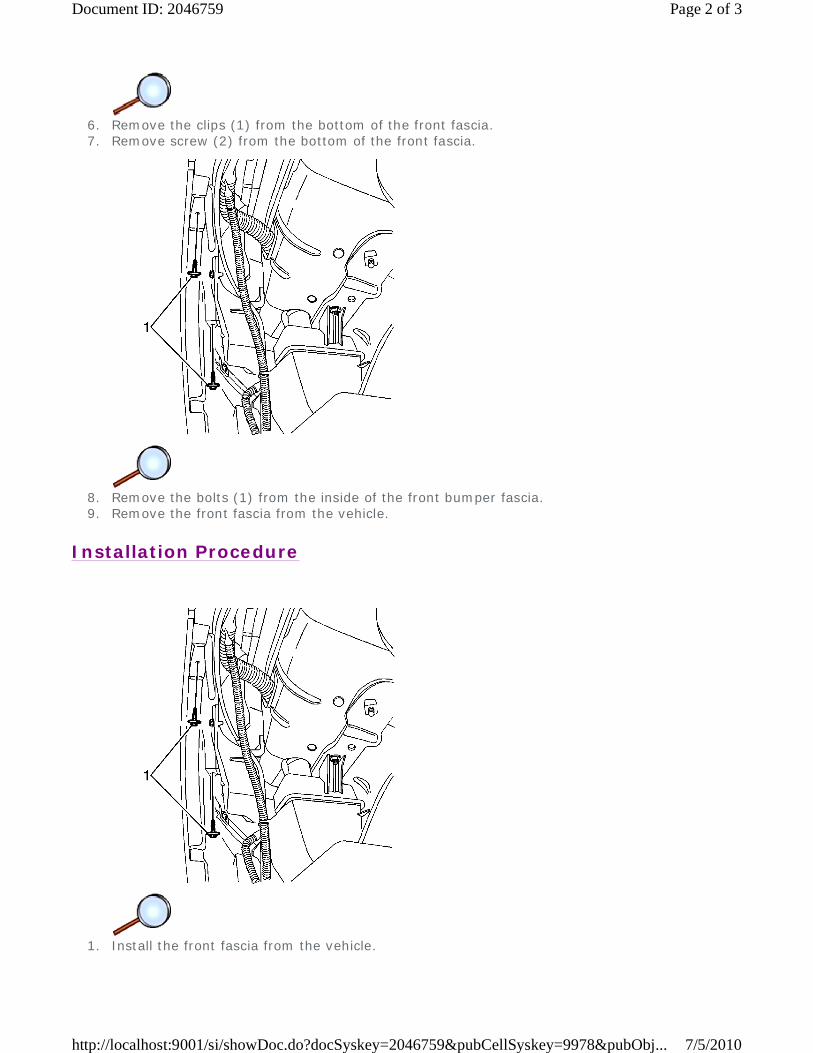
6. Remove the clips (1) from the bottom of the front fascia. 7. Remove screw (2) from the bottom of the front fascia.
8. Remove the bolts (1) from the inside of the front bumper fascia. 9. Remove the front fascia from the vehicle.
Installation Procedure
1. Install the front fascia from the vehicle.
Page 2 of 3Document ID: 2046759
7/5/2010http://localhost:9001/si/showDoc.do?docSyskey=2046759&pubCellSyskey=9978&pubObj...

Caution: Refer to Fastener Caution in the Preface section.
2. Install the bolts (1) to the inside of the front bumper fascia and tighten to 1.5 N·m (13 lb in).
3. Remove the clips (1) from the bottom of the front fascia.
4. Install screw (2) to the bottom of the front fascia and tighten to 1.5 N·m (13 lb in).
5. Install the clips (1) to the top of the front fascia. 6. Install the fascia grille. Refer to Fascia Grille Replacement. 7. Install the headlamps. Refer to Headlamp Replacement. 8. Install the necessary screws, bolts, and nuts, to the front wheel well splash shields. 9. Connect the negative battery cable.
Page 3 of 3Document ID: 2046759
7/5/2010http://localhost:9001/si/showDoc.do?docSyskey=2046759&pubCellSyskey=9978&pubObj...
2009 Chevrolet Aveo | Aveo, Wave, G3, Barina (VIN S/T) Service Manual | Body Repair | Bumpers and Fascias | Repair Instructions | Document ID: 2096335
Rear Bumper Fascia Replacement (Notchback)
Removal Procedure
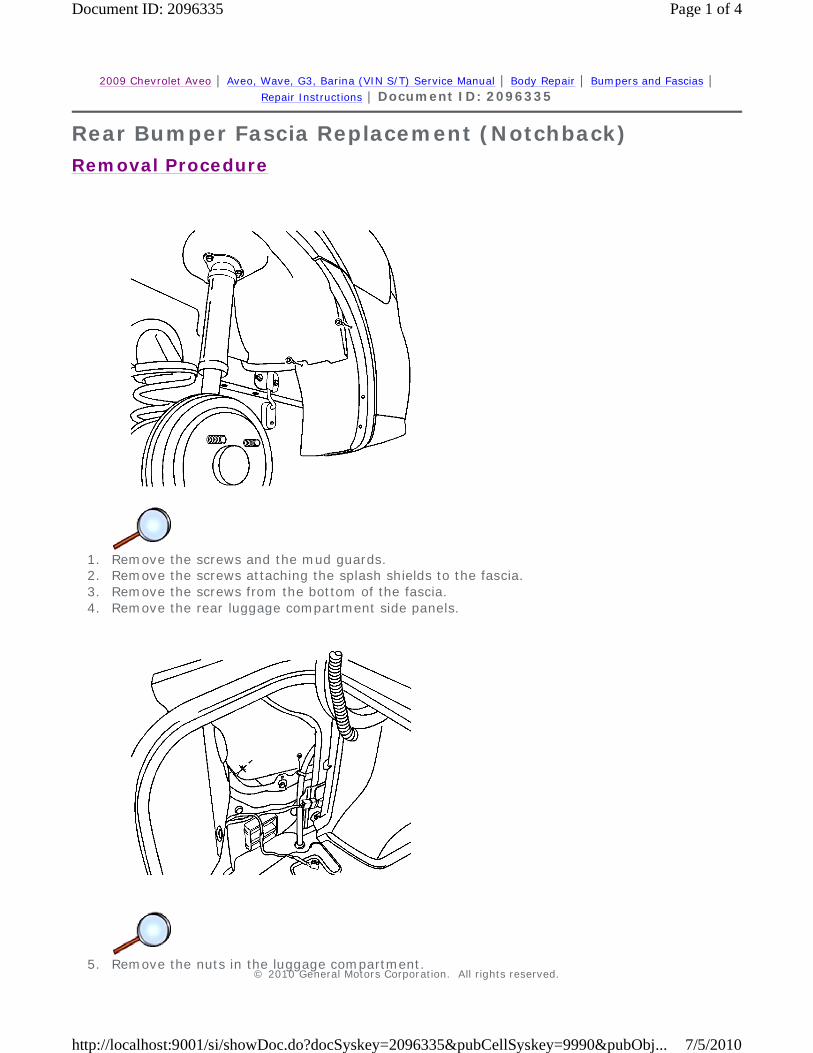
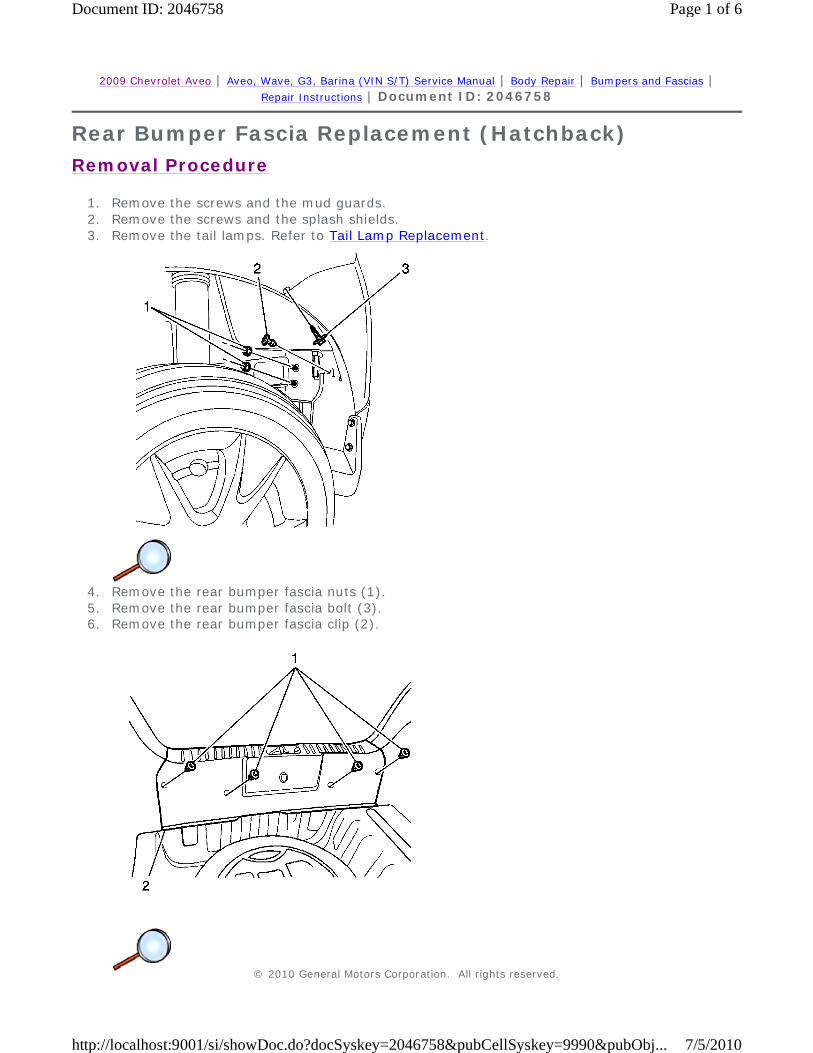
1. Remove the screws and the mud guards. 2. Remove the screws attaching the splash shields to the fascia. 3. Remove the screws from the bottom of the fascia. 4. Remove the rear luggage compartment side panels.
5. Remove the nuts in the luggage compartment.
© 2010 General Motors Corporation. All rights reserved.
Page 1 of 4Document ID: 2096335
7/5/2010http://localhost:9001/si/showDoc.do?docSyskey=2096335&pubCellSyskey=9990&pubObj...
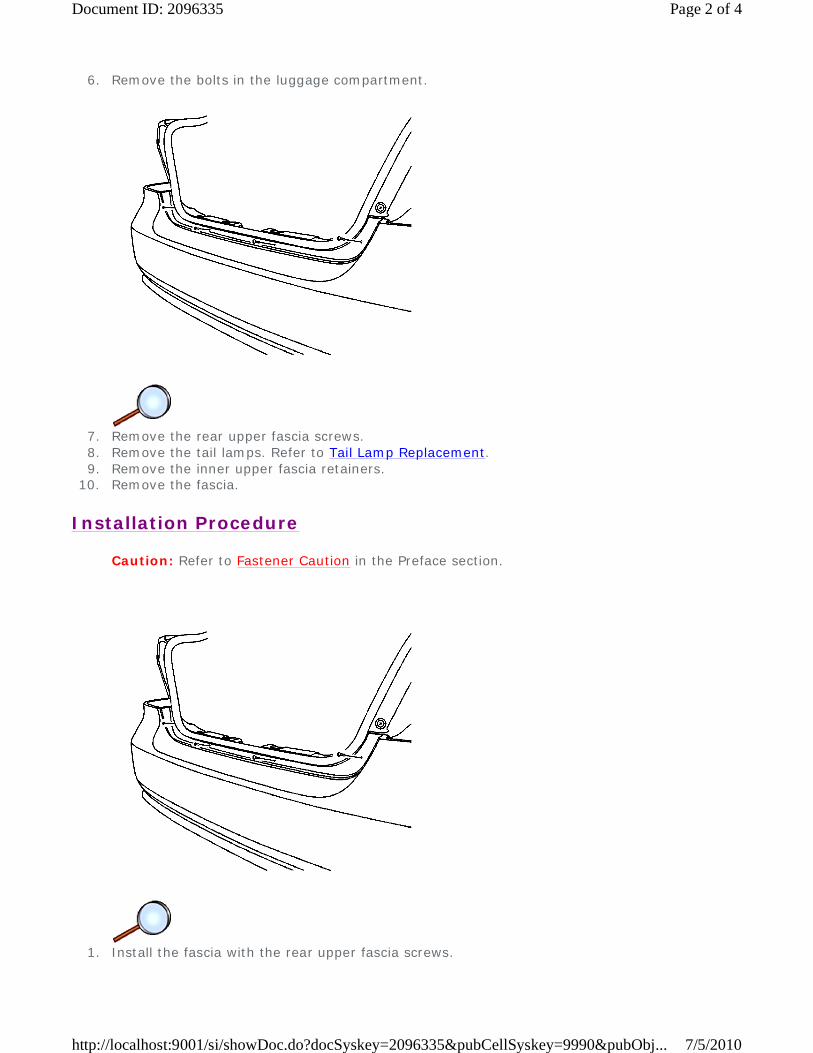
6. Remove the bolts in the luggage compartment.
7. Remove the rear upper fascia screws. 8. Remove the tail lamps. Refer to Tail Lamp Replacement. 9. Remove the inner upper fascia retainers.
10. Remove the fascia.
Installation Procedure
Caution: Refer to Fastener Caution in the Preface section.
1. Install the fascia with the rear upper fascia screws.
Page 2 of 4Document ID: 2096335
7/5/2010http://localhost:9001/si/showDoc.do?docSyskey=2096335&pubCellSyskey=9990&pubObj...

Tighten Tighten the rear upper fascia screws to 1.5 N·m (13 lb in).
2. Install the rear inner upper fascia retainers. 3. Install the tail lamps. Refer to Tail Lamp Replacement.
4. Install the bolts in the luggage compartment.
Tighten Tighten the luggage compartment fascia bolts to 4 N·m (35 lb in).
5. Install the nuts in the luggage compartment.
Tighten Tighten the luggage compartment fascia nuts to 4 N·m (35 lb in).
Page 3 of 4Document ID: 2096335
7/5/2010http://localhost:9001/si/showDoc.do?docSyskey=2096335&pubCellSyskey=9990&pubObj...
6. Install the splash shield screws.
Tighten Tighten the splash shield screws to 1.5 N·m (13 lb in).
7. Install the lower fascia screws.
Tighten Tighten the lower fascia screws to 1.5 N·m(13 lb in).
8. Install the mud guards with the screws.
Tighten Tighten the mud guard screws to 1.5 N·m (13 lb in).
Page 4 of 4Document ID: 2096335
7/5/2010http://localhost:9001/si/showDoc.do?docSyskey=2096335&pubCellSyskey=9990&pubObj...
2009 Chevrolet Aveo | Aveo, Wave, G3, Barina (VIN S/T) Service Manual | Body Repair | Bumpers and Fascias | Repair Instructions | Document ID: 2046758
Rear Bumper Fascia Replacement (Hatchback)
Removal Procedure
1. Remove the screws and the mud guards. 2. Remove the screws and the splash shields. 3. Remove the tail lamps. Refer to Tail Lamp Replacement.
4. Remove the rear bumper fascia nuts (1). 5. Remove the rear bumper fascia bolt (3). 6. Remove the rear bumper fascia clip (2).
© 2010 General Motors Corporation. All rights reserved.
Page 1 of 6Document ID: 2046758
7/5/2010http://localhost:9001/si/showDoc.do?docSyskey=2046758&pubCellSyskey=9990&pubObj...
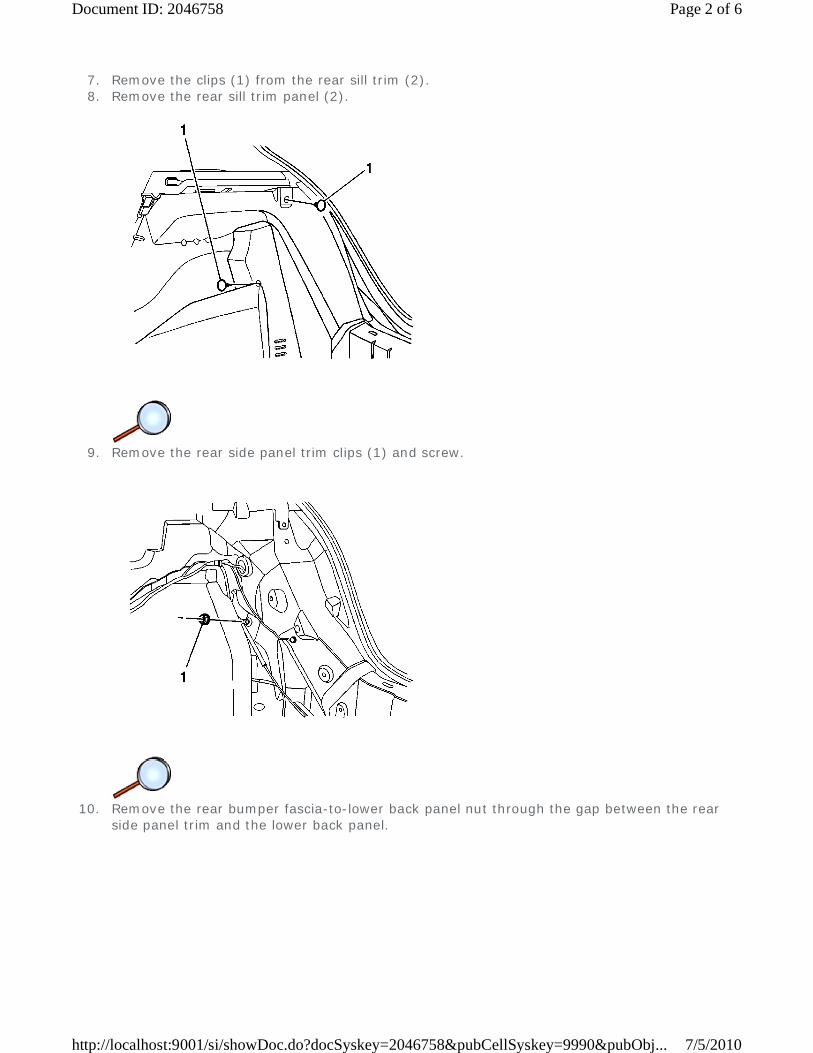
7. Remove the clips (1) from the rear sill trim (2). 8. Remove the rear sill trim panel (2).
9. Remove the rear side panel trim clips (1) and screw.
10. Remove the rear bumper fascia-to-lower back panel nut through the gap between the rear
side panel trim and the lower back panel.
Page 2 of 6Document ID: 2046758
7/5/2010http://localhost:9001/si/showDoc.do?docSyskey=2046758&pubCellSyskey=9990&pubObj...
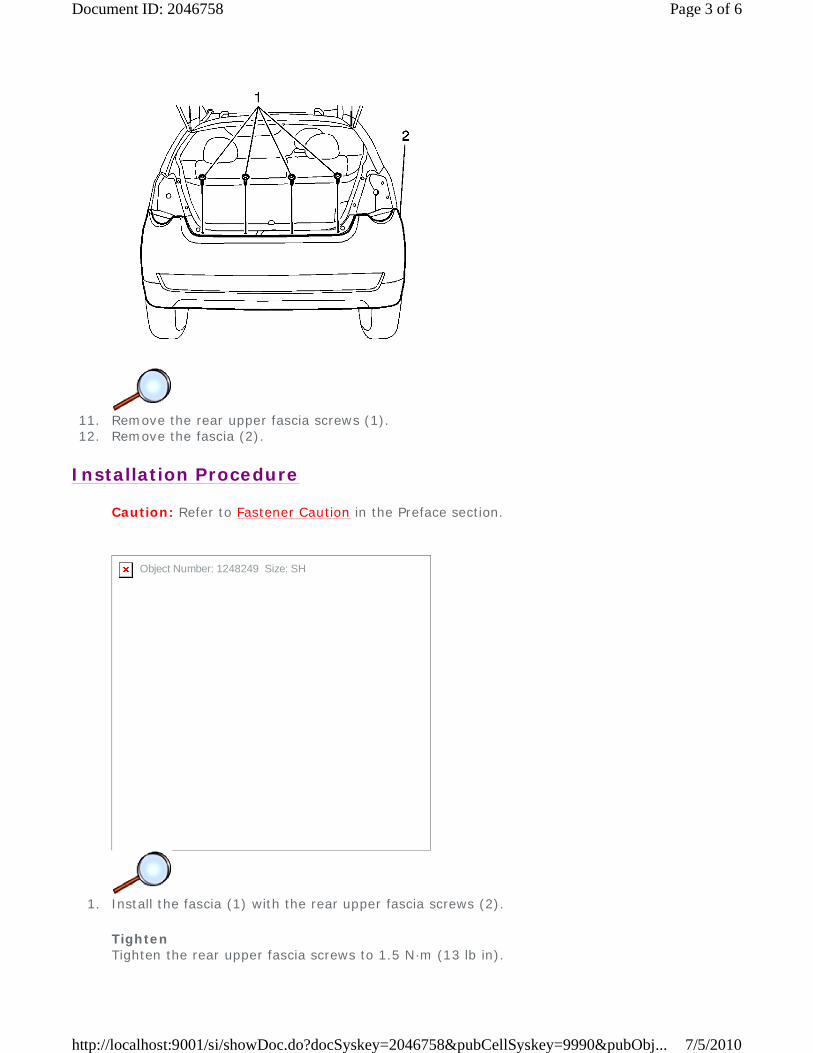
11. Remove the rear upper fascia screws (1). 12. Remove the fascia (2).
Installation Procedure
Caution: Refer to Fastener Caution in the Preface section.
1. Install the fascia (1) with the rear upper fascia screws (2).
Tighten Tighten the rear upper fascia screws to 1.5 N·m (13 lb in).
Object Number: 1248249 Size: SH
Page 3 of 6Document ID: 2046758
7/5/2010http://localhost:9001/si/showDoc.do?docSyskey=2046758&pubCellSyskey=9990&pubObj...

2. Install the rear bumper fascia-to-lower back panel nut (1) through the gap between the rear
side panel trim and the lower back panel.
Tighten Tighten the rear fascia nut to 4 N·m (35 lb in).
3. Install the rear side panel trim clips (1) and screw.
Tighten Tighten the rear side panel trim screw to 1.5 N·m (13 lb in).
Page 4 of 6Document ID: 2046758
7/5/2010http://localhost:9001/si/showDoc.do?docSyskey=2046758&pubCellSyskey=9990&pubObj...
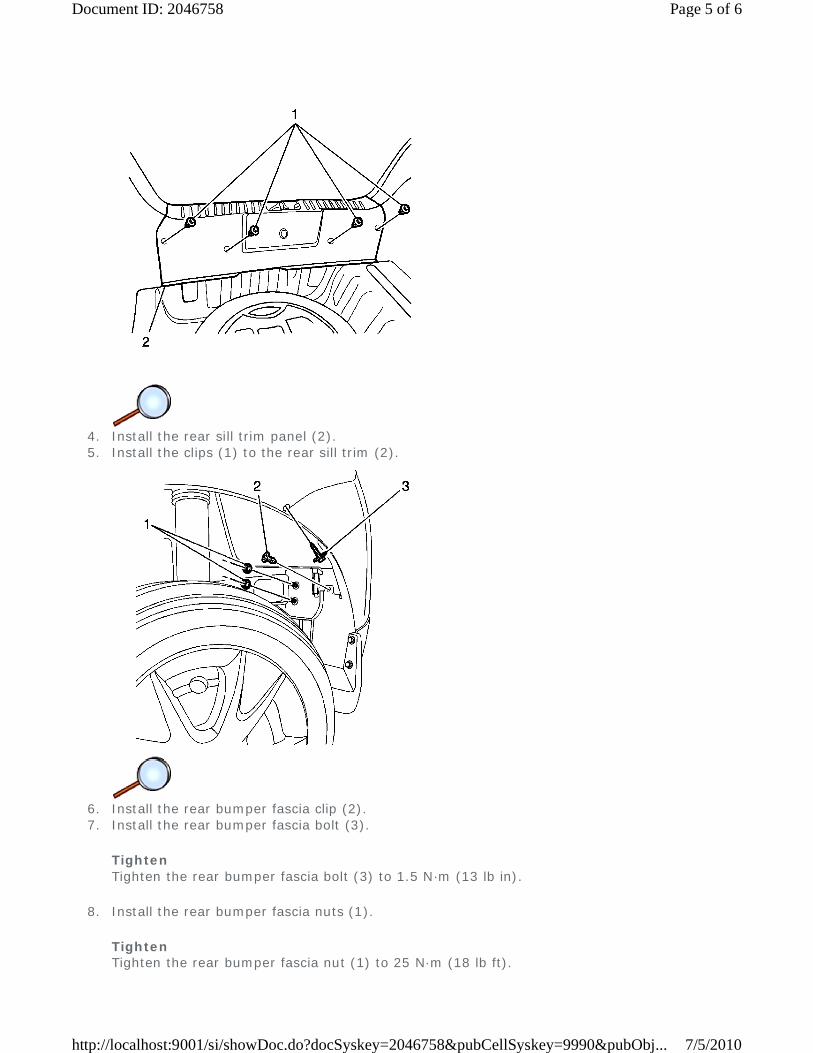
4. Install the rear sill trim panel (2). 5. Install the clips (1) to the rear sill trim (2).
6. Install the rear bumper fascia clip (2). 7. Install the rear bumper fascia bolt (3).
Tighten Tighten the rear bumper fascia bolt (3) to 1.5 N·m (13 lb in).
8. Install the rear bumper fascia nuts (1).
Tighten Tighten the rear bumper fascia nut (1) to 25 N·m (18 lb ft).
Page 5 of 6Document ID: 2046758
7/5/2010http://localhost:9001/si/showDoc.do?docSyskey=2046758&pubCellSyskey=9990&pubObj...
9. Install the tail lamps. Refer to Tail Lamp Replacement. 10. Install the screws and the splash shields. 11. Install the screws and the mud guards.
Page 6 of 6Document ID: 2046758
7/5/2010http://localhost:9001/si/showDoc.do?docSyskey=2046758&pubCellSyskey=9990&pubObj...

2009 Chevrolet Aveo | Aveo, Wave, G3, Barina (VIN S/T) Service Manual | Body Repair | Bumpers and Fascias | Repair Instructions | Document ID: 1420384
Rear Energy Absorber Replacement (North American)
Removal Procedure
1. Remove the rear bumper fascia. Refer to Rear Bumper Fascia Replacement . 2. Remove the energy absorber.
Installation Procedure
© 2010 General Motors Corporation. All rights reserved.
Page 1 of 2Document ID: 1420384
7/5/2010http://localhost:9001/si/showDoc.do?docSyskey=1420384&pubCellSyskey=9997&pubObj...
1. Install the energy absorber. 2. Install the rear bumper fascia. Refer to Rear Bumper Fascia Replacement .
Page 2 of 2Document ID: 1420384
7/5/2010http://localhost:9001/si/showDoc.do?docSyskey=1420384&pubCellSyskey=9997&pubObj...
2009 Chevrolet Aveo | Aveo, Wave, G3, Barina (VIN S/T) Service Manual | Body Repair | Bumpers and Fascias | Repair Instructions | Document ID: 1419792
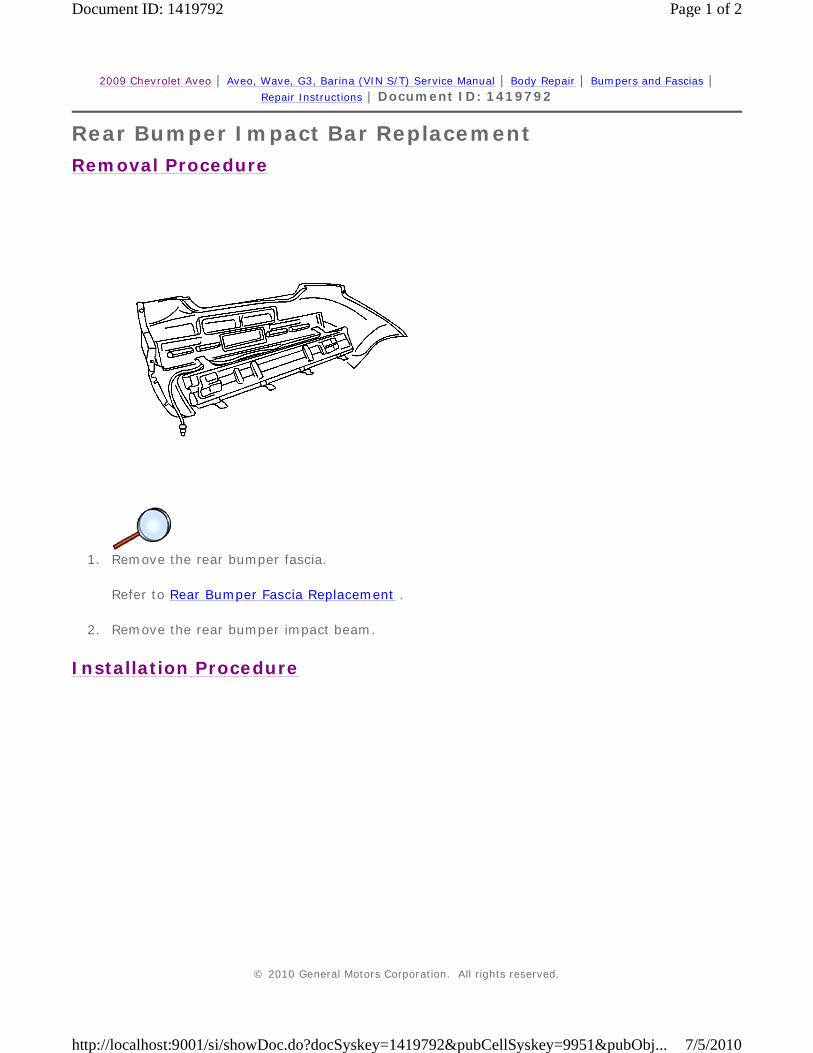
Rear Bumper Impact Bar Replacement
Removal Procedure
1. Remove the rear bumper fascia.
Refer to Rear Bumper Fascia Replacement .
2. Remove the rear bumper impact beam.
Installation Procedure
© 2010 General Motors Corporation. All rights reserved.
Page 1 of 2Document ID: 1419792
7/5/2010http://localhost:9001/si/showDoc.do?docSyskey=1419792&pubCellSyskey=9951&pubObj...
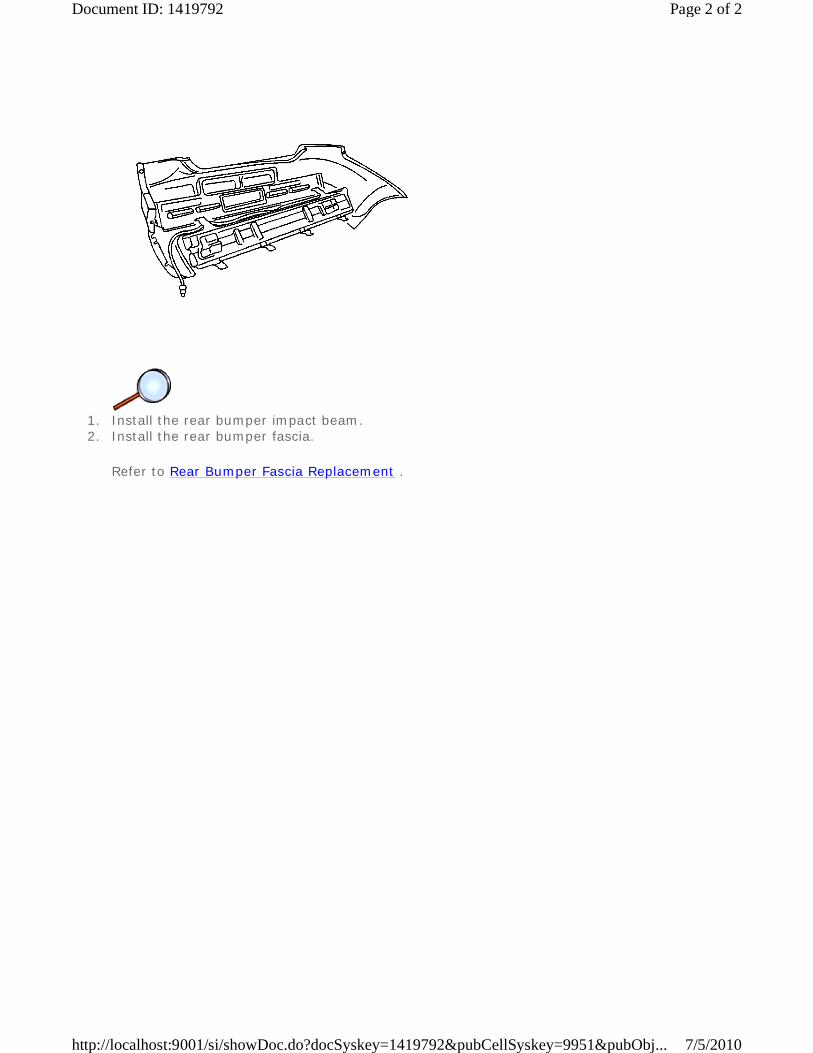
1. Install the rear bumper impact beam. 2. Install the rear bumper fascia.
Refer to Rear Bumper Fascia Replacement .
Page 2 of 2Document ID: 1419792
7/5/2010http://localhost:9001/si/showDoc.do?docSyskey=1419792&pubCellSyskey=9951&pubObj...