build your own electric car or truck
TRANSCRIPT
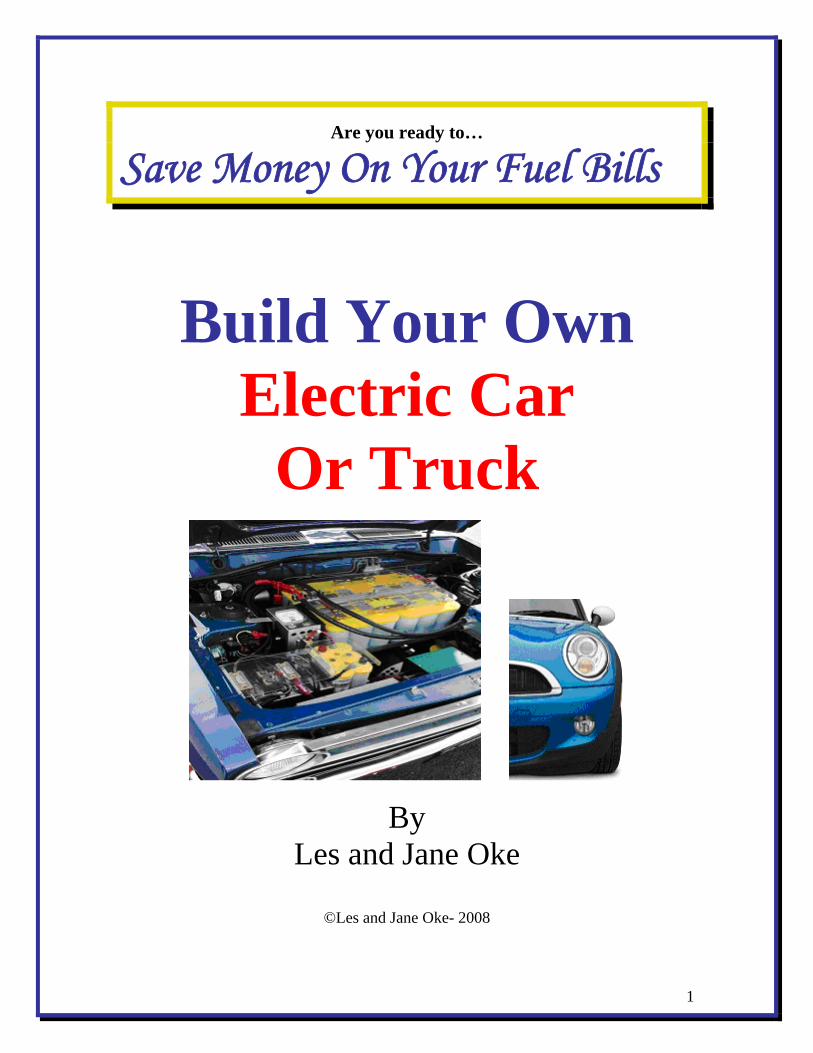
Are you ready to…
Save Money On Your Fuel Bills
Build Your Own
Electric Car Or Truck
By Les and Jane Oke
©Les and Jane Oke- 2008
1

Legal stuff our lawyers made us say. Let’s get this out of the way first, so we can get to the good stuff… No Part of this document shall be reproduced or resold without permission from the authors. Violators will be prosecuted to the fullest extent of the law. The authors of this book assume no responsibility for accidents incurred while following the enclosed directions. There is always a certain amount of risk involved in any human building project. The following plans have worked for others in the past, but we assume no financial or legal responsibility should you not follow the directions exactly. Please be careful. These instructions as recorded have worked for others in the past and should work for you too. Use this document at your own risk. We know you can do this, as we have done all of the things outlined in this book, and many others have too. But if you are for any reason not comfortable with the procedures then ask a competent trades person (mechanic) to assist you. Contact us at our website and we will help you. The building advice given in this book is up to date and as accurate as we could possibly find. Of course, some (experts?) will disagree with our findings. That is fine. We know this system works and it will work for you. Of course as with any lifestyle change it does take time. We don’t believe in providing anything but the best advice we can. We want you to succeed and following the plan that has worked for our family for over 30 years and for other families is a great place to start. Don’t be afraid to contact us about anything. Use the contact form at www.convert-to-ev.com If you don’t understand something, just send us an email. We promise to respond promptly.
2

This book is intended to be easy to read and easy to navigate. Our purpose is to provide you with the very best guidance setting up your own Electric Car Conversion. This text is designed to be read from cover to cover, step by step in order to achieve that goal. You can bookmark later for your own reference, but for now read the whole thing. You will notice a number of text links that appear in blue, just like the preceding one, throughout the book. For those of you not familiar with text links, just by clicking on them, they will take you directly to a web page on the internet for you to read, or to a bookmarked section of this book, such as the following.
3
You have to be connected to the internet when you are viewing the document for the text links to work.

*** IMPORTANT***
Please Read This First
If you have any Problems, Questions or Concerns about this book, please contact us immediately. Use the Contact form on our website or you can send me a personal email at [email protected] We want you to know that you are important to us. Your success is important to us. That makes your questions important to us. Your total satisfaction with this book is our aim. Please remember that it does take some time to digest new information. There are times when it takes me 2 or even 3 times reading a book before I ‘get it’. You are not alone if you don’t get it the first time through. This can be a very complicated subject to understand, especially if it is new to you. Take your time and let us help you if you need it. We are here to help you and we will walk you through every step if you need us to.
4

Table of Contents
Preface – What will you need to get started and how will you begin. Chapter One – Finding a vehicle to convert. Using Cars or trucks is covered and where to find them. Chapter Two – Electric Motors, where to find them, AC vs DC, Advantages , Transmission considerations. Finding free electric motors is covered too. Helpful websites too. Chapter Three – Controllers for motors is covered, where to find them and which one is best. Chapter Four – Finding free batteries for your electric car conversion, how do you figure out the overall range of your vehicle too. Chapter Five – Many other components are necessary to make your electric car conversion work, we explore the diverse list of components. A parts list is covered too.
5

Chapter Six -Getting started with your conversion. Let’s take off the exhaust and the fuel system. Let’s carefully take out that old gas motor too. Measuring once, and getting it right. What about the power brakes and power steering? Chapter Seven - Electric motor mounting is next. Where does it go and how is it supported? Chapter Eight - Battery positioning is next, safety and layout considerations are all covered. How are they held in place? Supports and laying out the design. Wire routing is covered. Chapter Nine – Final layout of the controller and charger. Schematic drawings to get it right. Chapter Ten – Starting up your vehicle the first time. Safety concerns and having an expert check it out first. Let’s go.
6

Our Mission- Your Purpose And A bit of History…
Our mission is very simple- we will show you how to build your own electric car with detailed plans and pictures that any handyman or woman could follow. Congratulations on your investment in How to Build An Electric Car. We know you will have as much fun building your own as we did.
A Bit of History Back in 1994 our family moved off the grid to use only Renewable Energy to power our home. That decision has proven to be a good one for our family both financially and environmentally. We use mainly wind generators and solar panels that we built ourselves. You can read about these building projects later. After much research into the design and building of wind generators and battery systems it hit me one day like a brick. Why not use the same renewable energy technology to run our car, our off road vehicle or any vehicle for that matter? We had found sources of free industrial batteries, inexpensive DC motors and simple building techniques that anyone could use. The same sources could be used to build an electric car. All the best,
7
Les and Jane

The Building Begins This is not an original idea, to build an electric car; the idea has existed for many years. This is, however an original plan for building an electric car using inexpensive sources of parts and simple building techniques. One problem we met with was finding larger DC motors that were powerful enough to run a car, but we did find them and we will share them with you shortly.
You should know that the process can get technical at times. For that reason we, again recommend reading and rereading the plans until you get it. If you need help a friendly local mechanic or in our case the local high school shop (tech) teacher was a big help in designing this vehicle.
8

Build Your Own Electric Car Challenge Here at our off grid home we are always looking for new and better ways to use renewable energy in our lives. We took on this project as a challenge to all of those people who said it could not be done. We want to share this information with as many people as we can; the suppression of knowledge in the area of alternative fuels for vehicles has gone on too long. That is why we are in the energy crunch we now face. The electric car is the answer we think. You will find out why very soon. We had seen electric cars and hybrid electric vehicles on the roads for a few years and we knew that with our experience in the field of Renewable Energy, especially DC motors and battery systems that we could make it work.
What Will You Learn? • Convert your car to electric for under $500 • Sources of free industrial batteries • Safe installation of batteries and all parts • Documented conversion of our vehicle with pictures • Sources of DC motors and controllers • Sources of Electric Car Conversion kits • Where to find the right car or truck to start with • An off road electric vehicle conversion • Your electric car will travel 50 mph • You will be able to drive 200 miles between charges • Renewable Energy charging options
9

Parts List To Get Started
You will need a minimum amount of tools at the very least, a small work space area (we used a 10 foot by 10 foot shop for most of our work). It doesn’t need to be very large.
Tools Needed
Jigsaw, small grinder, various wrenches, socket set, various screw drivers, #80 sand paper. Work bench, welding equipment and a hoist and a big pile of initiative mostly.
Simple Wiring Diagram
10

Parts List
Motor – AC or DC Motor Controller Manual disconnect Motor adaptor Main contactor Inertia switch Charger Battery ends DC-DC power supply Amp meter shunt E-Meter or several digital meters Fuses Throttle control box Battery cables Cable cutters ( a must as they cut the cable properly) Lugs Battery ends A crimping tool to install cable ends Vacuum pump (to bleed power brakes) Batteries Battery boxes (make your own) Misc. nuts and bolt etc.
11

Before we get started let’s answer some frequently asked questions to set your mind at ease about this project. Q: Why Convert your car to electric in the first place? Answer- The first reason is the environment. Toxic fumes, greenhouse gas, toxic waste, you name it we have put it in the environment with our cars. Car and truck exhaust is one of the biggest contributors to air pollution that has ever existed. We all know that car companies have been forced to clean up their act, to a point. But, simple emission controls are not the answer. Finding new ways to fuel our cars is the answer. Using renewable energy to power our cars is the answer that we are pursuing here. An electric vehicle produces very close to zero emissions, which is an excellent solution. You can use conventional AC power from your home, which is more and more produced with renewable energy sources or… You can do as we have done and set up your vehicle charging system to be run completely from the sun and the wind. It is the right choice that we can all make. The Cost of Driving. Even if you can only charge your car with your own AC home outlets, it will only cost about $1 per charge. How far will $1 of gasoline take you? Gasoline prices vary widely, but you can be sure it costs less to run your car on electricity. We will show you ways to charge your vehicle with renewable energy sources as well, which will make your driving even cheaper.
12

Dependence on Foreign Oil. For most of us we are not personally connected with the oil industry, but in the back of our heads is always that nagging question- when will it all end? How can we keep using so much oil, the supply has to be finite and run out eventually. What will we do then? Why not work on solving the problem now? Practical Simplicity. Have you looked under the hood of your car lately? There are more bells and whistles all run by computer than the average person could figure out in a year, or perhaps a lifetime. I know I can’t. An electric motor has only one part that moves, it is simple and will run for hundreds of thousands of miles with hardly even looking at it. Just think, no more fiddly things to fix all the time that break on your car. No more exhaust system and no more gasoline leaks. No more oil changes, and no more engine breakdowns or maintenance. You can use this new technology, which is available to you today to convert your own vehicle to electric. What if we let the government fix the problem? Do we really have that much time? Climate change and global warming are reducing our world to a shambles every day. We have to take action now to reduce our dependence on oil. Reducing the number of vehicles dependent on gas is a great way to start. Have you seen the number of large SUV’s and trucks that the government continues to let American auto makers build. There are literally millions of dollars invested in the internal combustion engine and those dollars can’t be reinvested. The system has to change, the large car companies can do this, but why wait?
13

Let’s get started You might have noticed that some of the equipment used to do the electric car conversion are not normally found in your house. I will make an assumption here, that you either have some experience with building and fixing your own equipment at home or you know someone who can help you. You will need a good socket set which most people have and a set of wrenches both imperial measurement and metric, as some of the workings are metric. We have found that 3/8 inch drive equipment is large enough and quite inexpensive too. A small note of advice: We have found that watching the sales flyers of the major box stores, home depot or Canadian Tire (here in Canada) is a great way to add inexpensive tools to your home workshop. No, they are not professional quality, in most cases but will add more enjoyment to any building project. Put the word out that you would like tools for Christmas presents, birthdays etc. and give a list if you feel the need. People are always wondering what to buy, make it easier for them.
14

We have also bought high quality tools at auctions and yard sales. You never know when you will find something at these fun sales. You can find items like the bench grinder, or hand held grinder on sale all the time if you watch closely. All of the other tools listed are available from these ‘cheaper’ sources. You will need clamps and vise grips in assorted sizes. We have found that a vise that is clamped onto a bench is invaluable for any building project. Our trusty cordless drill which is rechargeable did all the drilling we needed done. Most home workshops have one of these. Since you will be working with electricity, you will need an electrical meter. A Simple hand held model with 2 leads that is battery operated will work fine. Another inexpensive tool you will need. I may not have mentioned it but a garage, shop or barn in which to do all this work is a real plus. You can do the work in your laneway, but it is nice to have everything inside in case of bad weather. We live in a rural area so most of the time we have no problem with neighbors, but you might want to ask yours if they mind you doing a major project in your drive way before you get started. Just make sure that you have room to do the work of the conversion before you start.
15

A lot of the work is grinding and fitting of metal and there are always flying particles of metal so you might consider doing most of that kind of work outside with proper safety gear on. Some Tool You might want to rent:
Some of the tools you will only need for a day and may never use again, so visit the local rent-all place and get a list of what they have available. I would say that engine hoist falls into this category. I would rather rent this tool for $20 per day than buy one for $300? A hoist is very handy for lifting the engine, or any heavy object and for lifting the quite heavy DC electric motor into your new electric car too. Remember to use your hoist for all heavy lifting.
16

At some point you will need to either weld or get some welding done. We were fortunate enough to have an interested high school teacher who took part in our project who let us use the welder at the school. Cultivate friends or make the acquaintance of a quality weld shop in your area. Learning how to weld is a skill that most people can learn if they want to. It takes a bit of time but you can do it, or find some friends with a welder. You can, of course bolt everything together if you want. But for real smooth fabrication of battery holders and other parts welding is preferred. Although this is an expense it is by far not the most expensive part so don’t sweat a few bucks spent having someone else do some work for you. Forget trying to use any welder that works with 110 volts of electricity. These smaller units will not work for welding the heavy duty frames you need for your batteries. An electric arc welder, or mig welder of at least 220 volts is needed to do the work. It will need to produce at least 100 amps of power output. This will easily weld the material you will be using. If it has been a while since you have welded anything or you are a complete novice, there are some serious safety considerations in welding. You are dealing with metal that is hot enough to melt.
17
Does that sound dangerous? Well, it can be, as any experienced welder will tell you. Be careful or ask for help. You will be amazed at how many people will volunteer.

Finding Batteries for Your Electric Car I mentioned expenses earlier, and one of the more expensive items can be your batteries. A large source of power storage is necessary to run your vehicle any length of time or distance. Your battery costs could easily reach the thousands of dollars but we have found a solution for you. Read on. Let’s Get Right to it! When I read a book I really dislike having to look for the good stuff, so here is some of the good stuff right off the top. You CAN find FREE batteries, if you just know where to look.
After we tell you where to find free batteries, which really are at the heart of every electric car conversion or renewable energy system, we’re going to get right at the building of your electric car.
18

Finding Free Batteries
Free is where you find it - Most of the time the goods and materials you need can be found with a little persistence and the simple direct method of just asking. Such is the case with free batteries. So far, we have found two great sources of free batteries for Renewable Energy systems.
Free batteries in your own backyard
For a few years our oldest son worked at a golf course for his summer job. One of his jobs was regular cleaning and maintenance of the golf carts, some gas powered, some electric. He usually rode his bike to work, but upon occasion he would ask me to drive him to work if it was raining or if his bike was in need of repairs. One particular morning that I dropped him off for work I spied one of the electric golf carts in the shop with the body taken off for repairs. They were going to replace the batteries. I looked at the large batteries that had ‘Deep Cycle’ written on the sides of them and they looked to be in good shape. I came away with an idea. After a bit of research I discovered that golf cart batteries are used and recommended for use with Renewable Energy systems, and more importantly for electric car conversions.
19

So I asked for the old batteries from the golf carts. Mike, the owner of the golf course said that he had to pay to have the old batteries taken away and that I could have them. Ok, so we had a source of free ‘old’ deep cycle batteries. Most of them didn’t work though. Could I find out how to recondition batteries? As a minimum, you should always aim for 10 volts minimum for every 12 volts that the batteries are rated for. For example, if they are rated for 24 volts, then check them and make sure they are at least running 20 volts. Note: Batteries that are below these minimum amounts are much harder to revive.
Free Batteries – Source #2
Do you live near a major industrial center? Surely there is a city within an hour’s drive of you. In every city there is an industrial section, big square buildings where they manufacture goods for sale. All of these manufacturing plants have forklifts, and it turns out, industrial forklift batteries are very good for Renewable Energy systems or converting your car to electric usage. Some of these batteries will last up to 20 years! They are made for industrial purposes and are very expensive. But, these large companies with regular maintenance schedules and capital depreciation schedules to follow usually only keep the batteries for 5 years!
20

Just ask to speak with the maintenance or operations manager. We have found this is the person to talk to. Ask for the old batteries. The good thing is that these batteries are usually in better shape than older golf cart batteries, even though they are used for industrial purposes. That‘s good for recyclers like us who want to find Renewable energy products at good prices or free. In a later section we show you how to revive these old batteries with a Battery Desulfator. You can even build one yourself ! Look for it in the bonus section.
Let’s Find A donor Vehicle
Here’s a picture of the 1995 Toyota Corolla we used for our first electric car conversion. We picked it up for only $200 as a parts car, as the engine was shot and would not pass the emissions test here in Ontario. A perfect candidate for a makeover, as this is a well built car.
21

Your criterion may be different. You will have to decide if you will be carrying passengers or cargo and how much. We do recommend smaller vehicles for the conversion as they are lighter and will give you more range per charge. The logic is that you should choose the lightest vehicle that will meet all of your demands. That is because it will require less power and therefore fewer batteries to perform the work of moving you and the vehicle where you want to go. You will also have to use a manual transmission vehicle to do your conversion exclusively. This is a must. Today’s automatic transmissions are used with vehicles that have the engine running constantly. It is needed to pump transmission fluid and make the transmission work properly all the time. The electric motor stops turning when the vehicle is at rest and will not work properly with an automatic transmission. Also the points at which an automatic transmission shift are much to high of revs to accommodate an electric motor. Automatic transmissions perform better at higher motor revolutions. You will have to balance light weight with strength in your choice of vehicle too. A lighter car may travel easier down the road but it will not be able to carry heavier weights of batteries. Of course, when you take the regular engine out, as is necessary, you free up space and you free up weight for your batteries.
22

After doing our conversion with a small car and using the back seat and the engine compartment for batter storage we believe either this alternative or a small truck offers the best balance between light weight and strong frame. Our next conversion will probably be a Toyota Tacoma or 4 Runner conversion, stronger and more battery capability with also a light weight. You will need to know the weight of your vehicle too, as this will determine the motor necessary, battery sizing and voltage you will need. You can get this done at any weigh station used to weigh trucks, gravel pits, and such will work fine. We will talk later about these requirements. Here is our list of small vehicles that we ‘KNOW’ have been converted to Electric successfully. Geo Metro and Storm Ford Festiva and Escort Toyota Corolla Volkswagen Beetle and Rabbit Dodge Colt and Neon Ford Probe Datson 280 Porsche 911 Ford Ranger Datson truck Toyota Tacoma Isuzu Mazda 3000 series
23

Once you decide on the type of vehicle it is time to get down to the nitty gritty of finding one. Remember that, if a vehicle is not drivable the price goes way down. There can be many reasons why it may not be drivable, but the one you should look for is a motor that doesn’t work. Recently we have been using the Auto Trader or we use Ebay Motors at times to find vehicles that meet our criteria. Most of you should be able to find a vehicle right in your own neighborhood though. Look for vehicles that have been parked for a while and look like they might have been for sale for a long time. These are the best bargains. It is most important to find one that has a good body and still works. If possible don’t buy a vehicle over about 10 years old, although some of the best bargains are in the 1995 range of vehicles. Our family lives in a rural area and we need a truck for most of our work around the place like hauling hay and wood for instance, but for our first conversion we decided to convert a small car to be used as a second vehicle for the time being. We wanted the car to still look like it was normal, just like everyone else’s so we chose to do the conversion with the small car. After purchasing our Toyota we started accumulating the necessary material to do the conversion, batteries, converters and the necessary steel rails to mount the batteries in the engine compartment, although we took out the back seat and put more batteries there too. Your range will depend on your battery storage.
24

The Toyota worked fine in that the frame allowed me to mount the batteries low and keep the weight down low which helps with handling. If you do a conversion of a pickup for instance, you will have even more room up front, or you have the option of using the truck bed for batteries which is nice. It does cut down on your carrying capacity, but it increases range too.
Finding Electric Motors
When converting your car to electric there are only two choices, DC and AC electric motors. Both have their good and bad points. DC motors are less expensive to purchase in the first place and are quite good in any conversion so we will deal with them first.
DC MOTORS
Each of the above mentioned items will be dealt with in turn, but let’s start with the heart of the matter- the DC motor that will produce all of this free power to run your car. Where in the World am I going to find one of those? You are probably asking. Fortunately there is a simple solution available right at your fingertips. Ebay offers for sale every imaginable piece of hardware out there, and fortunately the prices are usually very reasonable.
25

So let’s go to Ebay. Just use the blue text link and you are there. Remember that you have to be connected to the internet for this to work. Here is what you are looking for, and how to find it.
You are looking for a surplus permanent magnet DC motor to be used as a power generator. The attributes you will have to pay attention to are RPM, shaft size, amps and voltage. All of these will be explained in full as we go along.
The photo above shows the very first DC motor we bought from Ebay, it was 72 volts and cost us a mere $42 with shipping included. Awesome!
The best motor (made by Ametek) is a 99 volt DC motor that works great. Unfortunately, they are almost impossible to locate these days. There are a lot of other Ametek motors around though. So let’s start there.
So what you are looking for is a motor that is rated for high DC voltage, low rpms and high current. You want a motor that will put out over 12 Volts at a fairly low rpm, and a useful level of current.
26
So shop for motors accordingly.

As a general rule of thumb look for DC motor with RPM (revolutions per minute) ratings of under 400. The shaft size should be over 5/8 “because that will insure that your DC motor has adequate bearings or bushings to accommodate the constant spinning and harsh outdoor treatment it will receive. Look for a voltage between 50 and 80 volts.
You will have to sign up for a free eBay account, but that only takes a few minutes, this is a secure site that we have had no problems with. But, as with any website, use caution while shopping.
On the following page we show you what a listing looks like and how to go about purchasing on eBay.
Permanent magnet motors for sale on EBay now.
Not familiar with EBay?
Basically, this is an auction website, where buyer’s and seller’s meet. Prices are usually very decent, although we have seen some seller’s who were way out in left field on their pricing.
When you set up your eBay account, they will offer you all of the advice and instructions necessary to make your purchase. Just follow the instructions carefully and you will soon have a very good condition DC motor.
27

OTHER SOURCES OF DC MOTORS AND OTHER CHOICES
We promised readily available material for this project and thankfully there are many choices available to you for finding a DC motor.
You can find a DC motor anywhere for free, just for asking. Do you have a friend who likes working on cars? Or just ask at your local auto parts store. Our good friend, Larry Brown, who owns the auto parts plus outlet in our area, does this for us.
We are not very good at auto mechanics, but I can fix it if I know what to do. He just has a look and tells us what we need. He orders the parts and I do the work of fixing. It works great. Larry is the one who gave me all of these great ideas for free DC motors we could use.
He told us to go to the scrap metal places and ask around. Most manufacturing companies regularly scrap old forklifts etc (remember the forklift batteries) and look there.
That’s what we did and found a great source of DC motors, in fact we even eliminated the scrap metal dealer from the equation and started looking at our local industrial area. Just ask and you will find what you are looking for.
28

Another source of small DC motors we found that work great for small electric model cars. This was a fun project for our son and got him interested in the bigger projects of a real one, so we have included the source here for you too.
Your Local Contractor
Another source of DC motors we discovered ourselves. We use and love cordless power tools. We recharge the batteries and they are available for our use anytime.
All of these tools run on DC energy and have small, efficient DC motors that run at low RPM’s and low voltages. These little motors are perfect for building a nice starter version of an electric car. A class project or even a small project to get you started.
Most of these little motors will not produce more than 200 watts of power.
Oh, and your local contractor is always upgrading his tools, blowing batteries (which can be fixed) and in general just breaking tools. Ask him or her if he has any cordless tools that no longer work. Reciprocating saws, cordless saws and cordless drills all work great.
29
A great source of small DC motors.

We had this 14.4 volt cordless drill given to us
30
Notice the + (positive) wire is marked on the motor in left photo

Yes, it’s small, but it made a great little project for our son Andre’ for a model car project, not a car you drive!
What if you can’t find one?
Keep looking because we are sure you will find what you are looking for, but if you can’t or you just want to use a new motor then consider these sources.
There are 2 large suppliers in the US- they are Netgain, and AdvancedDC, you can find them on the internet.
They sell 9 inch DC motors and have even developed 11 and 13 inch motors for larger vehicles, if you are converting a truck for instance, or if you want your electric vehicle to go faster.
All you have to do is match the controller to the battery pack and figure out what voltage you want to run. All of that will be covered later.
31

We do recommend that you talk directly with someone who is familiar with Electric Car conversions about your specific project so I have selected some great sources of information and they are available at the end of this chapter.
We can’t stress enough how important it is that you have help along the way, and talking with one of these experts will be very helpful, and of course you can email us for support at any time.
Talking with someone who has been there and knows the battery voltage and motor combinations that work best is a great place to start.
One really nice thing about DC motors is that they can be connected directly to the transmission, which sometimes can be tricky.
You can be connected using the gears and you can get reverse quite easily.
You can also hook it directly to the drive axle and using relay switches you can go in reverse.
What about using AC drives?
32
You can use regular AC (alternating current) motors just like you have in your home appliances. They are, however quite a bit more expensive and come directly with the motor controller mechanism. It has to be specially made for each motor and voltage used.

Probably the biggest advantage of AC motors is that they can be used for braking as well, much like an engine or ‘jake’ brake on a big rig which slows the engine speed, thereby slowing the vehicle.
The real cool part is that the energy used in braking can be converted into power to charge your batteries giving you a longer charge.
It is called regenerative braking and is used on all of the newer electric cars developed by the car companies. The regenerative capacity is built into the controller, and that is why it is sold as a package, and also why the price is fairly steep.
Even more important is that AC motors can produce much higher power ranges for the same sized motor when compared to DC. If weight is a critical factor in your design you might want to use an AC motor.
33
Most AC motors are connected to the drive axle, but you can connect them to the transmission too.

Which motor you choose is up to you. Our own personal preference is for DC right now, because they can be used in any vehicle and they are cheaper.
Either will do the job, it just depends on your vehicle choice and how much you want to spend on the project.
With our first Toyota conversion we used a salvaged 9 inch DC electric motor and it works fine. We hooked it up to the 5 speed transmission of the vehicle. You don’t have to, but we kept the flywheel and the clutch.
For the most part the clutch isn’t necessary for normal city driving, which makes it easier on people who don’t know how to drive a stick, or are a little rusty.
The car acts like an automatic in that you don’t have to use your clutch when you stop. The engine just stops running. It is so nice just sitting there with no noise at all. The road noise from the tires starts up at about 20 mph.
Don’t worry, you can just choose one gear and stick with it. For in town we usually drive in second gear, which gives us a top speed of about 30 mph.
When driving out of town, lots of times we just stay in third or fourth which let’s us get up to about 50 mph in most conditions.
We are offering several links here for suppliers of both AC and DC motors for your convenience.
34

Finding motors websites-
http://www.electroauto.com/index.html http://www.grassrootsev.com/motor.htm http://www.electricvehiclesusa.com/category_s/45.htm http://www.ev-america.com/ http://www.metricmind.com/index1.htm http://www.evparts.com/shopping/mainpage.php?id=3
Motor Controllers You need a motor controller so that when you press the gas pedal (or how ever you control the engine) that your motor can convert it to the proper voltage and thereby control the speed of the vehicle. These devices handle amazing amounts of current, running up to 2000 amps between the battery and the motor, with voltages usually above 72 volts, and sometimes as high as 300 volts. Let’s deal with DC controllers first. Your selection of a DC controller is dependent on many factors- how you drive, the size of the motor and the size of your battery storage.
35

You can use smaller less expensive controllers for small cars that use under 100 volt battery storage. Now, as with everything you get what you pay for so the smaller controllers are very limited. You can expect slow acceleration and perhaps not as good of performance as the units designed for over 100 volts. When you get into this range the performance goes up, but so does the price. Handling up to 1500 or 2000 amps during acceleration draws a lot of current, these controllers will handle speedy accelerations rivaling the heaviest footed drivers on the road today. They are fast. If you think you are building a slow old clunky golf cart here, think again. Top speeds can go up over 100 mph if you want, but are usually governed to the 60 or 75 mph range for safety. You can be sure that in town, you will not be left behind at any stop light, that is for sure.
36

What about AC motor controllers? You really can’t buy an AC motor controller separately without knowing your motor. They come as a unit in almost all cases. Many suppliers of kits will provide you with the AC motor controller that they have tested and works with their system which has some serious advantages for you. You know it works without testing. They have mostly designed it to take the regenerative energy out of the braking to be used in charging the batteries for you, a great advantage for your system. This saves on wearing out your brakes and it gives you peace of mind that your system will perform well. I really think the future will be in the AC designs but for now we are using the DC for the various reasons already outlined. For our own vehicle conversion we are using a Zilla 1500 amp unit, which is shown in the picture above in the DC motor controller section. It is rated for over 150 volts and it works well. It is a bit large for our little Toyota car application but we really wanted to prove that a range of 200 miles was possible with an electric car. It is kind of neat that the unit is water cooled and runs a very small water pump to circulate the fluid. It requires a radiator, just a small transmission rad works well.
37

It is programmable, just like a remote control almost. It safeguards both the engine and the batteries, and provides smooth control of the motor in any circumstance. It works great. We have put together a comprehensive list of motor controller suppliers for you. If you are the least bit handy you can use a salvaged controller available at your industrial scrap yard. Where to find controllers- http://www.ev-america.com/ http://www.electricvehiclesusa.com/category_s/140.htm http://www.grassrootsev.com/control.htm http://cafeelectric.com/products/price/ http://www.metricmind.com/index1.htm
Batteries Your battery bank is truly the heart of your electric car system. Batteries are used to store DC electricity during your daily charging cycle for use at a future time. Choosing your batteries is a very critical decision in designing your electric car. If your battery bank is too small then your system will not perform well and your batteries will have a very short life. If your battery bank is too large it will be difficult to maintain a full charge, again resulting in poor system performance.
38

The batteries and other equipment should be accessible for maintenance and inspection, but safety must also be considered. Batteries may give off hydrogen gas during charging and can be a source of electric shock. In addition, other electrical components, which can also be a source of spark, should be kept separate from the battery housing. Do not locate batteries near sources of heat or possible sources of open flame or spark. Finally, read all of the manufacturer's recommendations and warnings about the safe and proper use and handling of batteries.
When you are choosing batteries for your electric car conversion there are many factors to consider- price and weight are the two most important followed by amp hours of performance. This will dramatically affect your system.
As we discussed earlier, you should be able to find a source of golf cart batteries and we highly recommend these. They come in many sizes but try and look for at least a 20 hour rating over 200 amps of power usage.
39
You will need in the range of 20 batteries to run your vehicle effectively.

We have never bought a battery for either our off grid home (run totally off of wind and solar power), or our electric cars. You can find used industrial batteries in many places and in our bonus section you will learn how to revitalize them.
Batteries can be a huge expense; the largest by far in the whole project so if you want to save some dollars this is the most cost effective way to do it.
We have listed sources of batteries for you to check out at the end of this section if you just can’t find what you need.
What are the most important things to consider when looking for batteries?
• Budget- what can you afford? • Weight- Lead acid batteries are heavy but less expensive • Amperage- your total amps will determine your range • Battery types- sealed batteries are nice, caps with vents
work good too. • Maintenance- is it necessary?
40

There is some debate as to whether sealed gel batteries are better than golf cart batteries, but they are much more expensive so the choice is yours. We have found that being able to regularly service and maintain our open vented cap batteries to be a real plus.
Sealed cell batteries require a bit more care in the charging cycle so that overcharging doesn’t occur.
You will need a Battery Charger too
Most people will want a battery charger mounted in their vehicle to eliminate the hassles of hauling out bulky equipment all the time. We highly recommend this practice.
You will need a special battery charger, not just an off the shelf one from the box store either.
We also have a bit of a surprise for you as we promised you that you would be able to charge your vehicle with Renewable Energy from the sun or the wind also. We will cover this option after covering the conventional methods of charging your batteries.
41

A charger that is mounted in your vehicle allows you to charge anywhere at anytime, a real convenience.
Make sure that you choose a charger that can be adjusted to whatever voltage you are running in your system. See if it lets you control the rate of charge (both high and trickle). This really helps.
Is it easily installed or removed if you decide to use it in another vehicle? And it has to come with a cut out, or charge controller device to shut off the charging process once your batteries are charged. This is an absolute must if you are going to maintain your batteries.
Battery and Charger websites
http://www.electricvehiclesusa.com/category_s/153.htm http://www.canev.com/KitsComp/Components/Chargers.html http://www.manzanitamicro.com/ http://www.metricmind.com/index1.htm
How Far will your Electric car go?
Calculating Range
There are many factors involved in calculating the range of your new electric vehicle. It would involve probably 100 pages more of formulas that we felt would detract from the smooth flow of the project, so we have included only 2 links to websites with calculator programs for figuring this out.
42

Needless to say, it is very complicated. If you want to take the time and figure this out, that is fine, but suffice it to say that with the figures and directions we give you your new electric car will have a range of around 200 miles. That should take you where you want to go between chargings. Remember that batteries don’t achieve their full charging capacity until they have been run through at least 15 charging cycles. Range Calculator Websites- http://www.geocities.com/CapeCanaveral/lab/8679/evcalc.html http://www.evconvert.com/tools/evcalc/
43

Putting It All Together- A Closer Look at the Parts There are a lot of different parts that make up your electric car working to convert battery power into motion and we will deal with each one in turn. The very first thing you will notice after you take out the gas engine from your vehicle is how will you connect the electric motor to the drive train? Most of the recommended sources of motors come with an adaptor kit that can be fitted quite easily onto your car to attach the electric motor to the drive train. What’s nice is that the adaptor bolts to the housing of the transmission or the transmission itself and the electric motor bolts to the other side. It must be mounted with the correct spacing so the adaptor will spin freely with the motor and it has to be aligned straight.
44

There will be a coupling device that comes with the adaptor to connect the motor shaft with the shaft of the transmission. There is a contact on the adaptor that runs from the motor controller. This is started with the ignition switch when you start your electric car. Somewhere along this circuit you will want a manual disconnect so that when you are working on your car, you won’t get zapped. Anyone who has installed an alternator or starter and got a shock knows what I mean. It also acts as an emergency switch to shut off power to the car. There is another safety feature that is installed too, and it is called an inertia switch, it activates and disconnects the batteries in case of an accident. It isn’t absolutely necessary but it doesn’t cost much either. We installed a shunt on the (-) negative battery lead to allow us to measure power output and the charging process. You might want to install some instrumentation too; a meter that measures amps, volts and total battery charge is a good idea. You can use just a simple ammeter and voltmeter if you want. There also needs to be a simple auxiliary 12 volt charging system to maintain your ordinary vehicle battery and your on board electrical systems. A simple DC converter will take the high voltage of your large DC motor and break it down to 12 volts, or you can mount an alternator on the motor assembly.
45

You don’t really have to have a 12 volt battery at all if you don’t want. It is an auxiliary system and can be run directly from the DC converter if you get one that is large enough. The alternator setup is what we like and a simple adaptor unit can be purchased that will run your system at about 13.5 volts, which is lots for lighting etc. All circuits should have fuses installed in line in case of short circuit. You want to blow a fuse, not your batteries or engine. Most smart electric car conversions have fuses installed in both the positive and negative feeds. They are inexpensive insurance, but carry extras with you. One blown fuse could have you sitting at the side of the road, as we found out. How does the throttle work, you are probably wondering? A variable resistor, called a throttle box is mounted near your throttle control (gas pedal linkage) and your foot controls the motor just like a gas car. It is connected to the throttle cable. Acceleration is very smooth and fast unlike your old gas engine. You will need about 35 feet of battery cable. Use large cable such as 2.o welding cable or bigger. It is flexible and large to carry a lot of current. The batteries connect to each other in series, which is to say (-) to (+) and (+) to (-). Remember the fuse in the contacts and it routes through the manual disconnect for easy maintenance. Color code your wire, red is positive and black is negative.
46

You will want to crimp the ends effectively and seal them too with a cable end sealer to prevent leaks of current which will reduce your power and range. How do I stop? One of the small problems associated with electric cars is that you will need a small vacuum pump to power your brakes along with a reserve tank for fluid. Easily solved and we will show you how. We have a special problem here in Canada, it gets cold… What do you do when your batteries are cold and they will only hold about 50% of their regular charge? We decided to mount a heater that we could run until the car was running and then it would produce heat for the cab too. It is simple and inexpensive to install and are sold everywhere. Also, you might want to consider a small heater for your battery boxes to keep them warm. Let’s start your conversion… First off, I want you to take some time and make some measurements of where everything will go before you get started. Once the engine is removed, it may seem like there is tons of room but you will quickly run out of space without proper planning.
47
Your first order of business is to decide on a starting point or reference point for installing your electric motor.
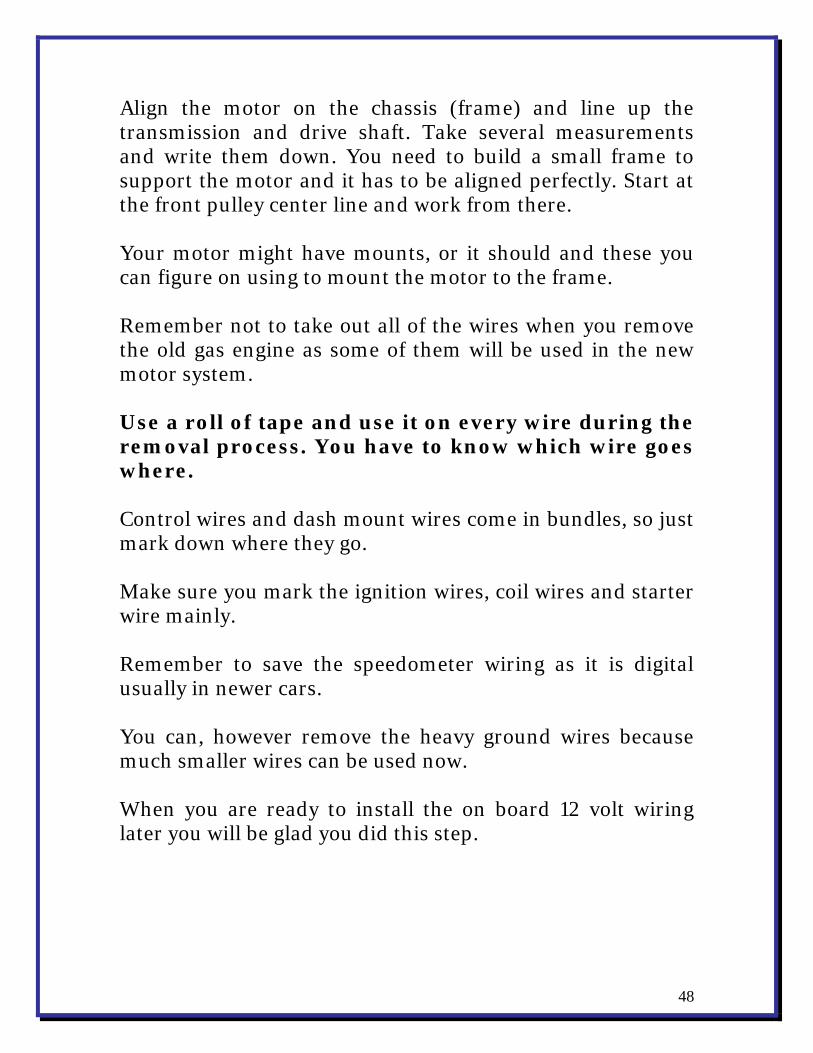
Align the motor on the chassis (frame) and line up the transmission and drive shaft. Take several measurements and write them down. You need to build a small frame to support the motor and it has to be aligned perfectly. Start at the front pulley center line and work from there. Your motor might have mounts, or it should and these you can figure on using to mount the motor to the frame. Remember not to take out all of the wires when you remove the old gas engine as some of them will be used in the new motor system. Use a roll of tape and use it on every wire during the removal process. You have to know which wire goes where. Control wires and dash mount wires come in bundles, so just mark down where they go. Make sure you mark the ignition wires, coil wires and starter wire mainly. Remember to save the speedometer wiring as it is digital usually in newer cars. You can, however remove the heavy ground wires because much smaller wires can be used now. When you are ready to install the on board 12 volt wiring later you will be glad you did this step.
48

What’s next? The next part of the process is to take out anything that doesn’t need to be there anymore. Your new electric car doesn’t produce exhaust anymore so your exhaust system can come off right away. It doesn’t use gas anymore either, so take out your fuel system and gas tank. Remember that gas is very flammable and to be careful of sparks of any sort while doing this.
Lucky enough to be doing your conversion on a truck you can just remove the 6 or 8 bolts of the bed while you do this. If there is any heavy lifting you can do it with the hoist if need be. And remember to do this part outside, it can get messy. Run your car nearly out of gas before you begin and try not to spill any toxic chemicals or gas on the ground which will hurt the environment.
49

Remember to remove the fuel lines which can also be full of gas and a fire hazard too. Be careful with all of the gasoline devices. If you are not lucky enough to be doing your conversion on a truck all of these items have to come out from underneath which can get messy under your car. Every accessory was removed, fans, air conditioning (be careful with the Freon and recycle it). Leave the small rad, if you have one, but remove the engine radiator carefully. The engine comes out easily by unbolting the mounts and using 2 chains on your hoist, one front and one back. Have someone help you with this for safety sake. The front of the engine has to clear the front of the engine compartment and that puts your engine at quite an angle. Make sure that all transmission fluid (if you are removing it) is drained. It might be easier to disconnect the transmission from the engine once it is out and mount the electric motor and then reinstall it with the hoist if you can. Do a bit of preliminary testing and measuring to see if this option is possible.
50

After doing several conversions we really think it is advisable to take out the old transmission and install the adaptor kit and motor on the shop floor. It is then a simple matter to hoist the whole outfit back in and bolt it to the transmission mounts once again. It looks like more work, but in the long run it is much easier to work ‘outside’ the vehicle, where knuckles aren’t smacked all the time. You also don’t have to crawl under there but once, which is good when you are approaching an age (like me) where you have to think about such things before you do them. Didn’t used to have to do that…just bulled ahead, now I think about every move before I do it. Those of you who are this age know what I am talking about. When reinstalling the transmission/motor assembly the only measurement that is important is the distance from the flywheel to the engine block. This distance must be maintained when hooking up the electric motor to the transmission. The adaptor kit provides a coupler (joiner) to fit the flywheel to the rear shaft of your motor. That means the flywheel must be removed from the transmission first. The coupler has a spacer that goes on first and this will provide the right distance to the housing for the flywheel. The adaptor is fitted on the motor first. Then you attach the flywheel and finally the clutch assembly is bolted on.
51
This whole assembly is then attached to the housing of the transmission.
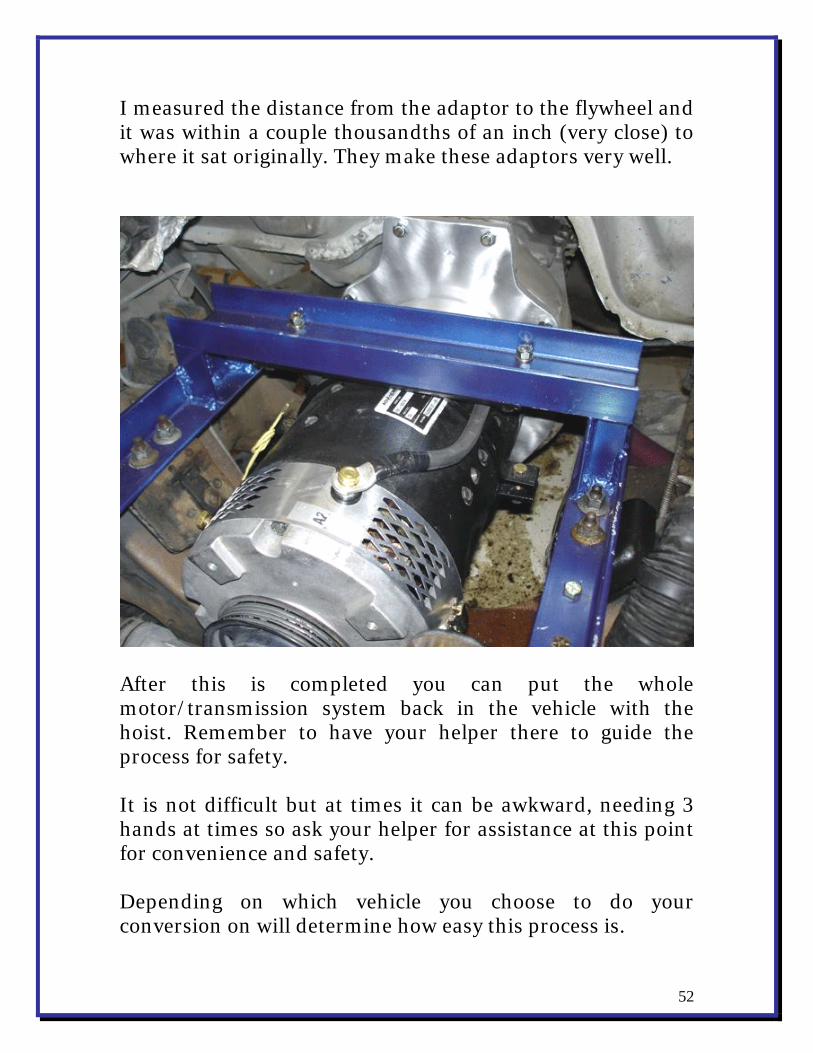
I measured the distance from the adaptor to the flywheel and it was within a couple thousandths of an inch (very close) to where it sat originally. They make these adaptors very well.
After this is completed you can put the whole motor/transmission system back in the vehicle with the hoist. Remember to have your helper there to guide the process for safety. It is not difficult but at times it can be awkward, needing 3 hands at times so ask your helper for assistance at this point for convenience and safety.
52
Depending on which vehicle you choose to do your conversion on will determine how easy this process is.

Front wheel drive vehicles are nice to install the electric motor, but there just isn’t as much room there under the hood. If you use a rear wheel drive vehicle like a truck you will find more room to operate under there. The nice part of all this is that the major vehicles used in conversions all have special adaptors made to do the conversion. It is a good idea to check with the adaptor supply houses and see what is a good choice in vehicle for you, before you make your decision. Companies that sell Adaptors- http://www.canev.com/KitsComp/Components/Components.html http://www.grassrootsev.com/catalog.htm http://www.evparts.com/shopping/mainpage.php?id=3#Adaptors%20&%20Kits The motor and transmission assembly is then hoisted back in the vehicle at the right height to align it with the drive shaft. The transmission support members are then bolted back in place. Most of the weight is supported by the front cross member after you attach the electric motor. You have to secure this assembly very well as the DC motor used is strong enough to torque it right out of there. The motor is supported by a simple frame member that is bolted across your existing frame. One or two pieces of angle iron will suffice to support the engine. A cradle assembly works well (Previous picture with blue framing).
53

There are motor mount holes on the DC electric motor and you can fashion an assembly across the frame from underneath that will incorporate these threaded holes or mounts. You will want to fit all the parts in place and do a test run before welding anything to assure that it fits. Do not weld near the electric motor as there is a real risk of damaging this device. Commercial motor mounts are available for popular vehicles too but you can build your own at a fraction of the cost. Next, you can tackle the sometimes tricky process of Battery Placement…
Battery Placement You have basically two options available to you depending on the vehicle that you are converting. They can go in the engine compartment, or in the frame somewhere. If you are lucky enough to convert a truck you can also place the batteries in the bed.
54

You will want to keep the weight forward if you can to keep the vehicle balanced. Weight in the back tends to throw off steering capabilities as we found out with one of our early experiments. You will just have to search around and find a place. If you don’t need the extra space you might even consider a backseat location? Either way you will have to build special racks to hold the batteries securely. The closer the placement to the motor assembly the less wire used too. You can either box the batteries to protect them or you can use some sort of removable cover. You can locate your batteries within the frame assembly very effectively if you have the room and the right batteries. Small cars do not offer this capability usually. You will have to have access, especially for lead acid batteries which require monthly maintenance. Keep that in mind. Please be careful that passengers are protected at all times, no safety issues with the batteries. You will probably want to consider the use of sealed batteries if you are converting a car, as they are safer in the case of accidents or with passengers close by. You can also use the trunk space effectively with most vehicles, although this cuts down on your hauling capabilities. Most cars have more room than you thought, so look around for the solution you are most comfortable with.
55

You can find battery boxes at the following websites.- http://www.driveev.com/jeepev/convpgs/tbatteries.php
http://www.timnolan.com/etruck/BatteryBoxes/BatteryBoxes.htm http://www.geocities.com/mathenybrian/mr2.htm
Building Racks for your Batteries Once you have chosen the location of your batteries you can build racks to hold them in place. Every assembly will be different, so we can’t give you exact dimensions here, but we can suggest materials. We used about 30 feet of 2 inch angle iron as the base of our frames, a great place to start. In our recent truck conversion we mounted the batteries in the frame on each side of the drive shaft. It worked well. Angle iron is welded across the frame members in a way that it holds the edges of the batteries exactly. A bottom plate of steel or stainless steel works well too. We used old discarded stainless steel chimney pipe that we obtained from the local chimney man who regularly replaces chimneys. The old stuff is tossed so we grab it for our projects.
56

After each installation, you need to actually fit the batteries in place to gauge how your suspension is holding up. Batteries are heavy. Most cars and trucks allow you to add variable load springs to the shocks or some form of lift kit that beefs up the suspension if necessary. It doesn’t cost much but will provide you with the ability to mount more batteries. You should aim for at least 20 batteries if possible, mounted in various locations. That may seem like a daunting task, but just get out your measuring tape and plan your course of action, they will fit in most vehicles, sometimes even up to 30 for larger vehicles. Why do you need so many? Well, the range of your vehicle is determined by your battery capacity. The larger that capacity is the farther you will travel in confidence between charges. Batteries are mounted in this truck frame using angle iron. Most cars and trucks will allow you to mount batteries above the motor assembly because it doesn’t take up nearly as much space as the gas engine you took out. After the motor is installed just fashion holder frames in this location. Remember that your controller and charger will need to be mounted in this area too so plan accordingly.
57

Where do you mount all of the other components? When you are designing your front battery mounts you can also design a system for holding your controller, contacts and battery charger. This makes sense so take a little time to design an efficient system. We used a piece of ¾ inch plywood that we painted with enamel paint as a backer board for our assembly. Put it on a slight tilt to level if possible so that water does not collect on the surface and will drain away properly. You will want to retain the old power steering pump and possibly the air conditioning depending on where you live. They will need to be remounted and your front shaft of the electric motor used to power them. More details on that later. You can start with the body members or your motor mounts, where you think would be best situated for the various components of the air conditioning and the power steering system. We located them just above the electric motor and were able to retain the original hoses from the former gas motor. These devices will run off of a pulley system that is powered off of the electric motor. The main concern is getting the pulleys aligned straight so they run smoothly. They must be kept on the same centerline or the belt will run off. This will take some trial and error with a straight edge and a small level to get it just right, but take the time to get it.
58

You can usually find the right pulley assembly from the old motor sitting in your driveway. The main problem is that the electric motor shaft will probably be a different size and require some grinding (of the pulley, not the shaft) to make it fit.
Now onto mounting those other component… We found that using plywood was a great way to cut and fit different locations and designs for our charger and controller assembly. Just check around and get everything to fit. You want to make it look nice so take your time. A jigsaw works well for cutting complex angles in the plywood to get it to fit snugly in place. After the plywood is fitted where you want it, you can securely bolt the components to it. Again, remember to get the batteries in place too. It might take some fiddling but it is worth it. While we were designing this part of our electric car we realized how difficult it must be for car designers to come up with efficient designs for their new cars. Fitting all that stuff in there can be difficult, but it is a fun challenge in the process too, knowing that you are nearly done.
59

You might consider variations of a shelf design that fits the components in place more securely. Put the charger on top though so it is easy to accept a plug in charge. The meter can also go on top, while the DC converter to charge your 12 volt system can go on the bottom along with the main contactor. The batteries were configured in a 120 volt design, (20 batteries at 6 volts). The DC converter was set to this voltage and the 12 volt car system made operational.
60

The preceding wiring diagram was used to get everything in its place. It was a bit difficult to get the components in place and still have room for the air conditioning and power steering pump. Of course the air conditioning could be discarded if you need more room.
It’s all there, charger, controller and all the rest. This is a truck conversion we did recently. The very last thing you will do is connect the batteries to each other in series as we explained earlier. Starting with the first battery connect positive to negative on the next battery, and negative to positive .
61
-
+
+
-
Series Connections of Batteries

The heavy welding cable we used for connecting the batteries is not easy to work with but does a good job of transferring current to the motor without losing charge. The cable is connected to each battery forming a series and finally to the motor controller. Please remember that you are working with very high voltages so use tools with rubber grips and do not cross your tools across the battery terminals. Rubber ended tools is a good idea, and perhaps you will want to wear leather gloves during this process to be safe. It is simple series wiring from battery to battery as we explained, positive to negative until they are all connected. In your gas powered car that you presently drive your electric supply is grounded. It is important to remember that in an electric car this is NEVER the case. Do not ground the wires, only connect them in series. We also took the precaution of using copper pipe insulation tubing at any point that the large wires looked like they might rub on any frame parts. It comes in 4 foot sections and is easily cut and managed into place with some electrical wire.
62

After that it is a simple matter to hook up your remaining wires, remember the ones you marked earlier for easy identification. If you are at all uncertain as to how to do this part, find a competent mechanical friend who can tackle the final wiring and overall check. Or simply take it to your automotive supply outlet or garage. They will be fascinated with your project and a trustworthy soul will let you know if you have done anything wrong. Remember you are dealing with high voltages here and you want to be careful. Do you know what it’s time for?
Starting up your Electric Car for the First time Again, make certain that there are no shorts in your batteries and all wires are hooked up properly. There is a very real danger that these high voltages can burn or hurt you, so be careful. Check your throttle connections and make sure they are closing properly. Remember that you can not have your foot on the gas pedal when you are starting or the controller interface will not open properly. This is a safety feature built into the controller that prevents the car from moving the instant it is turned on. Imagine if you were parallel parked and hit the gas when you first started up the car. Bang! Not good. Safety is important and your electric car is as safe as you could make it.
63

Also, if the throttle is not connected properly it will show and error message. If it is set properly there is about 150 ohms of resistance necessary to control the throttle. Check your total voltage and that the manual disconnect is set properly too. You might want to make a list of these items for the person doing the check. The trickiest part we thought was connecting the 12 volt wiring necessary to run all of the on board components of your car. This is an area that any garage mechanic will be able to help you with easily. Check all of the fuses for correct installation. The e-meter needs to have the high and low voltage leads hooked up properly too. Just use the factory manual for start up procedure of this device which monitors your on board electrical and charging system. Once you get the meter working it will tell you voltage and amps being used.
The Light Bulb Test The final test involves wiring a 100 watt light bulb to the positive lead of the batteries in line with the circuit. Just take an extension cord and wire a light socket in it or a trouble light will work fine. If the bulb burns bright and then goes out everything is fine after you turn on the switch. The whole idea of the light bulb test is that if there is a short in the system it will take the current and not harm the systems in your motor at all. Damaging a light bulb is no big deal, but your motor…
64

The light should only turn on briefly and then go out. If it stays on then there is a problem that you have to fix, most likely a short in your wiring. If everything is alright then you can remove the light bulb assembly from your batteries. You are ready to go. Hook up your final battery leads. There will be a spark as capacitors in the DC converter get charged up. Use gloves for the final connection.
Let’s go for a drive…
About the only thing you will have to remember at this point is that when the car is stopped the power steering pump is not running. This takes some getting used to, but easing on the power (gas?) pedal will get it turning easily. If you are stopped and need to turn the wheel, just push in the clutch which disengages the transmission and slowly hit the power pedal and make your turning. At this point just engage the clutch slowly to move the vehicle. After you make the turn, you can take your foot off the throttle for safety sake.
65

We didn’t hook up the air conditioning as it draws more power and will effectively shorten the distance you can drive between charges. The same is said for heating. You will not have radiator heat either, since there’s no rad. You will have to use, on board ceramic electric heaters which draw a lot of current. It works fine , but winter driving is effectively cut our range by one third of the summer driving.
Where are We Going? This is only the beginning. You have now done your own electric car conversion, and can drive right by those gas stations. Where will the price of gas end up? Who knows? But I can tell you this, interest in electric car conversions will continue to soar as the price goes up. Gas and oil is a limited resource and limited resources are driven by supply economics, reduce supply and the price goes up… way up. We expect fuel shortages and rationing to begin soon. This is a finite resource and it has to end soon. Aren’t you glad you took some action for your family? We feel it will start as the second car revolution. Families will have an electric car for in town and short trips so that the gas engine vehicle can sit more often. Really, how many trips do you take a week that could easily be taken with your electric car conversion?
66

How about the possibility of an electric car and a hybrid car in the laneway, doesn’t that make sense? When some of the battery technology now being used in rechargeable battery packs for tools, such as lithium catches up with the electric car revolution then we will see great strides in what is possible. Ranges will increase, charging cycles will decrease and overall efficiency will improve in this area as time goes on. Lithium batteries show promise to last twice as long as the projected 10 year limits on today’s batteries too. Who is doing work in this area? And where can you get more information? http://www.a123systems.com/newsite/index.php
What is this?
67

This is the future. We use electric solar panels to charge our batteries while we drive. Great strides have been made in renewable energy technology and there is no doubt that this is the future. We power our entire home from renewable energy produced from the sun and the wind. So when we plug in our electric car to charge, it is powered up by renewable energy. Learn more about Renewable Energy- Building Wind Generators, Installing Solar Panels.
BUILDING A BATTERY DESULFATOR I had heard that batteries could be brought back to life by using a device called a desulfator. So I consulted with my friends in the renewable energy battery business. Strangely enough, most of these guys had started out in the battery business before moving onto renewable energy. They all used to build batteries and knew just what to do to fix them.
68
Note:

Batteries are very dangerous. They can explode if mishandled and while charging they give off hydrogen gas. Be very careful.
A battery expert we met through our work installing renewable energy systems explained the process of reviving these batteries thoroughly so we set to work to do just that. It was a bit of a scary process at first and required two people to achieve success, but we soon worked out a process that was finally fairly safe.
OK, SO WHAT IS A DESULFATOR? WHY ARE BATTERIES SULFATED?
It is a safe bet that about 80% of all ‘dead’ batteries are merely sulfated according my battery expert friends. Most batteries are made up of plates inside, that when left in an undercharged state become sulfated. That means that they develop a layer of sulfate crystals on the surface of the plates. After years of hard use, as in the case of the large industrial batteries we are talking about here, there are only two ways to remove the sulfate crystals from the batteries. You could take the batteries apart and clean the plates. This is what my professional battery builder friends do, but it is very dangerous and requires a special setup in your shop. A much safer way they explained was to build a desulfator. This is basically an electronic device that does the ‘shake, rattle and roll’ at the plate level, without opening up the battery. This is Much safer, although still dangerous.
69

Don’t do this in the house, only in your shop environment.
What to do and How to do it
Basically, you are building a small musical instrument that resonates a sound inside the battery. Most work in a pulse fashion blasting sound at the battery plates. Being made of metal the plates vibrate and as they vibrate those nasty sulfate crystals drop away from the plates. They land back in the water in the battery and are reconverted into sulfuric acid. That’s right, sulfuric acid! Very dangerous. The desulfator circuit was built with an alternator diode from our old van, an AC dimmer switch, a small AC fan to cool the unit, a 40 micro farad run capacitor and my trusty multi-meter to monitor the process. We started with two simple 12 volt batteries to make sure all worked well. We first made a connection between the first battery’s positive terminal and the second battery’s negative terminal. The remaining terminals of the batteries were connected to the desulfator circuit. We slowly turn up the voltage until we were at 25 volts, and 3.2 amps of current.
70

A 25 micro farad capacitor will allow about 1 amp of power to flow across the circuit. Adjust according to the batteries you want to charge. An AC light can be placed across the AC side of the circuit to tell you when it is on.
This circuit can get very hot when it runs so a separate cooling fan is recommended.
71
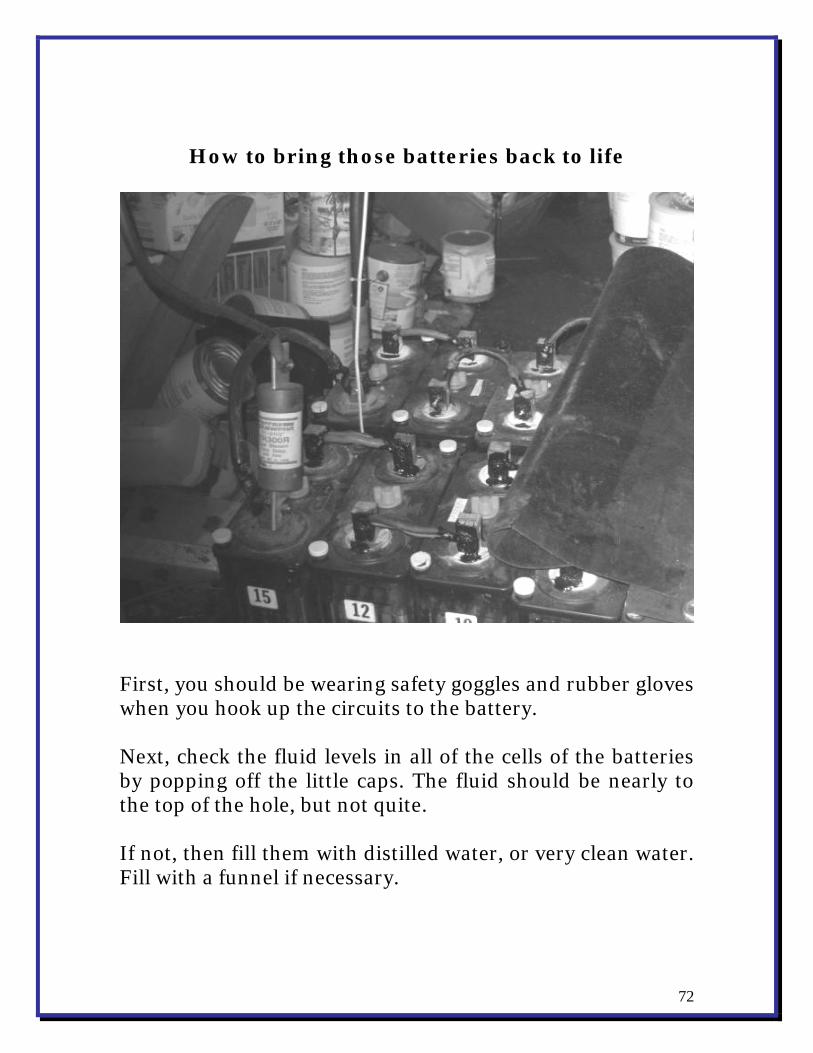
How to bring those batteries back to life
First, you should be wearing safety goggles and rubber gloves when you hook up the circuits to the battery. Next, check the fluid levels in all of the cells of the batteries by popping off the little caps. The fluid should be nearly to the top of the hole, but not quite. If not, then fill them with distilled water, or very clean water. Fill with a funnel if necessary.
72
Avoid any water with Chlorine or minerals as this can damage your batteries and are very dangerous. Avoid splashing the battery acid on yourself, it is very corrosive. Next, you will want to check the specific gravity of each cell with a small instrument called a hygrometer. It is available for about $7 from any auto parts store. Write this down and keep a record of each cell as you go along. Hook up your circuit to the battery. Careful to get the positive and negative terminals correct or your DC fuse will blow. With the dimmer switch turned down all of the way, now your DC volt meter will show the voltage of the battery. Check your AC voltage. Adjust the voltage with the dimmer until the DC volts is close to the AC volts. Be careful. Maintain this charge for a week or two, and then check the specific gravity again. Check the DC voltage with the desulfator off the batteries. You are aiming for voltages of – Battery Rating Actual DC voltage 12 volts 13.6 volts 24 volts 27.2 volts 48 volts 54.4 volts
73
After a couple weeks (this could be 2 days to a month) you will notice the Voltage and specific gravity remain the same. Now you need to jolt the battery slightly with an equalization charge.

For 3 hours maximum charge your batteries to the following levels. Battery Rating Charge to 12 volts 14.5 volts 24 volts 29 volts 48 volts 58 volts
WHAT’S WATTS ??
All this talk of watts and power usage could have you scratching your heads already so let’s take a few minutes to let our brains catch up and go back to school.
74

We call this section….
Electricity 101 For some of you it may be instructional to start at a basic level in understanding how electricity works in everyday life. Unless you work everyday in the electronics field or are a licensed Electrician you may want to get back to the basics first. Right now we will explain the terms used in this discussion of electricity as it pertains to your off grid home.
Watts
We started our discussion earlier asking you how many watts your appliances use everyday and your weekly wattage (power) consumption. Most people are fairly familiar with the term watt, but most don’t know what it describes. A watt is the power produced by current (amps) flowing through a wire multiplied by the pressure (voltage) at which it flows.
Volts
Like water pressure in a pipe, voltage is the pressure of electricity flowing through the wire.
Amps
This is the amount of electricity flowing through the wire.
75

Power Rates
We are most familiar with the term KWH (or Kilowatt Hour) as it appears on our monthly power bills. This is the rate of power flowing through a wire. As an example, if a 100 watt light bulb is turned on for ten hours the power rate would be 100 x 10 = 1,000 watt-hours or 1 Kilowatt hour (kilo means 1000)
Direct Current (DC)
We will be discussing both Direct Current (DC) power and Alternating Current (AC) in the planning of your renewable energy system. AC current is what you presently use in your home. The most important difference between AC and DC power is that DC current can be stored in a battery while AC power cannot. In the Renewable Energy system that you are designing to run your home DC power produced by your wind generator will be converted to AC power by using an inverter. Inverters will be discussed later in depth. In this way you can still use many of the same appliances that you currently depend on. Because of the blessings of capitalism, AC appliances are cheaper since there are so many units produced. For now you should know that you will be able to continue using most of the appliances you now own.
76
Common DC voltages are 12, 24 and 48. The advantages of DC appliances are many, but most important is that DC motors are more efficient than AC motors.

There are many applications for DC power and the benefit is that we can use this form of energy in our off grid home, while in your present tied to the grid home you cannot.
AC Current
Alternating current is called this because the current changes direction constantly. AC is the most common form of electricity usage today mostly because it is easier to work with than common DC current. As an added bonus we are sharing with you our own adventure in learning about Renewable Energy and how we started. Enjoy. OUR JOURNEY TO Living Off the Grid As an introduction to our own journey towards living off the grid we are reprinting here an article that Jane and I wrote for a well known magazine called Mother Earth News (circulation 300,000) in February 2003. This adventure really began at that time. Enjoy Our Handmade Home By Les and Jane Oke Copyright 2007 We cut our own lumber and built our off the grid home in 1994.
77
During the days of skyrocketing interest rates in the late 1980’s, my wife, Jane, and I realized that our dream of owning a home was slipping away.

For the first eight years of our marriage, we lived in a rented house in Southwestern Ontario, and we just could not save fast enough to buy our own place. We were determined to live Debt Free, so we learned how. At that time a friend of ours Steve gave us a box filled with old issues of Mother Earth News and Harrowsmith magazines. That box opened up a whole new world for us. Reading those magazines, we realized other people looked at the world the same way we did. In 1992, we purchased 20 acres of forested land in Eastern Ontario, about 150 miles away from our original home. The property was plowed in the winter and had school bus service, but it did not have electrical power. We were determined to live without the ‘monthly mortgage’, as Jane calls it, to the electric company, and stay debt free. The same friend introduced us to Living the Good Life, the classic homesteading book by Helen and Scott Nearing, and we discovered self-sufficiency. We began corresponding with Helen (Scott had died five years earlier) about our move and our worries. In her motherly way, she patiently guided us through our fears. I still have those letters.
78

Letter from Helen Nearing Harborside, Maine August 18, 1993 Dear Friend, You write and ask how one finds people of similar aims and congeniality. Sometimes one never does. After decades of expressing our opinions on our likes and dislikes there are very few people who agree with us entirely. With the vegetarians, and hygienists and theosophists we are too radical politically. With our political friends we are too queer with our vegetarian and ‘spiritual’ ideas. With conservative people we meet socially we are too far to the left in everything. So we go our way alone and maintain our own standards, let the chips fall where they may. You may have to learn to stand alone. Very best wishes, Helen Nearing So we stood alone and on May 5, 1994, we moved to our property, determined to build our home before the first snow. We had saved $5000 for this purpose- we soon learned that much more money would be needed or a new plan.
79

We lived in a tent trailer that I had bartered for working with a local carpenter. By June, we had the land cleared and the concrete footings and block walls done. We poured footing with the same wheelbarrow my father used to build his own house some 40 years before. A local contractor put in the septic and well, as well as clearing some more land. Early June saw us agonizing over the high price of lumber. The next week I was at our chain saw dealer to pick up oil and a new chain when I casually mentioned the price of lumber. Sometimes a casual word dropped to our chain saw dealer friend Dean can result in 2 hours of conversation so I am very careful. But this time he dropped a golden nugget of advice that literally saved our dream of building our home. He asked, “Have you seen these mill attachments that fit on your chainsaw? You can make your own lumber if you have the trees.” Excited, I told him, “I’ve got 20 acres of trees. Keep talking!” At this point I was certain that last statement would cost me the whole day, but it proved well worth it. He explained how it worked and I ordered one that day. When it arrived the next week, I set it up and went to work. The mill attachment cost about $250(Canadian dollars), but it literally paid for itself the first day! Throughout June and July we cut lumber. I’m proud to say that not one piece of store-bought lumber makes up our house frame.
80

We cut studs, 6 x 6 floor joists, 10 x 10 beams – some of them up to 20 feet long, 19 foot roof trusses and 12 inch wide roof boards, all with the chain saw mill. Granted it was smelly, hot and dirty work. But the chainsaw mill proved indispensable to this ‘cheap Scotsman’ as my wife (and father) called me. We only cut mature trees, and we used dead and damaged trees whenever possible. Because we cut the lumber right where the trees fell, all the waste was left to break down and fertilize the forest. In a healthy forest, there is no need to replant; simply let natural regeneration take place. Building the house turned out to be a slow process. Soon October was closing in on us and we only had the second floor done. A roof was two months’ work away. What should we do? After working for nearly five months without a day off, we took a trip to visit our parents’ home in Southern Ontario. While we were there, my dad mentioned a large greenhouse tomato grower who had suffered hail damage to half of his plastic greenhouses. His insurance was replacing all his greenhouses and he lots of 20 x 200 foot rolls of used plastic to give away. After we visited the site, the owner loaded two rather unwieldy rolls of plastic into our full-sized van.
81
The kids sat on the plastic for the five-hour trip home. The next day we installed two layers of plastic over the second floor as a makeshift roof, said a prayer thanking God for all He had given us, and we moved in. It was September 25, 1994.

Finally, we were warm and happy and we lived in the house like that for three years. During those years we started a market garden business and began selling organic produce just like we had before we moved. That provided most of our income, along with part-time jobs. We built a 60 foot greenhouse with dead cedar we had cut from the property (with the chainsaw mill) in order to enhance our produce business. We covered it with the left over plastic. From the beginning we experimented with Renewable Energy and we bought our first solar panel just after we moved in to the house. We spent the off-season cutting roof trusses and roof boards in order to finish the house as soon as we could. March 1997 was unseasonably warm and sunny, so we decided to put the roof on. This was a huge act of faith, as we would have to remove the covering of plastic on the second floor, in order to put up trusses. The rain could literally pour in any time it wanted. March in Ontario sees its fair share of snow as well. But we didn’t worry, we just worked. We all worked 22 days straight to put the roof on, with the help of our wonderful neighbor’s the O’Donnell’s who came over nearly every day. At 10:30 on Sunday morning, on the 23rd day we worked, my son Andrew and I pounded down the last shingle nail. Then it started to rain. Jane and I stood on the hill overlooking the house, holding hands, and holding back the tears. We rejoiced as water dripped off the eaves. We were done.
82

And we are happy. Anything is possible off grid. During slow times we work on other projects. In 1998, we built a root cellar from field stone, a wonderful building material. It is free for the taking and looks tremendous when the project is done. It’s also a great challenge to master a new art. Believe me, it is an art putting irregular stones together and imagining what they will look like when you are finished. After the root cellar, we tackled building our fireplace. The fireplace turned out beautiful and is the focal point of our first floor living area. Everyone remarks on how well the fireplace fits in with our timber frame design. When we are asked why we live the way we do, one event always springs to mind: the ice storm of 1998. Two full days of freezing rain in February put most of Eastern Ontario, southern Quebec and the northeast United States in the dark from downed power lines. It virtually paralyzed the area for over two weeks. In contrast, our children were ready at the school bus stop after the storm ended, but the school was closed for 12 days. We were relatively unaffected. The hubbub that followed the storm included a gigantic cleanup effort in the affected areas. Our 90 year old neighbor flatly refused to be removed from her home by rescue teams, and moved into an emergency shelter.
83

She unequivocally told her would-be rescuers, “I’ve lived more years than I care to remember with just my woodstove, my hand pump and bucket, and my outhouse. It’s you people who have the problem.” She then promptly went back into her house, closed the door and proceeded to fire the woodstove to make her supper. Our neighbor really makes us smile – our lifestyle is similar to how she grew up more than 80 years ago. She also smiles when she talks to us because we can relate to each other. Most people just don’t get it. (She died last year at the age of 93, still living at home. We are going to miss her) I know that anyone with a modest amount of energy and perseverance could do what we’ve done. I owe a great deal of credit to the people who have gone before us and shed light on our journey to self-sufficiency. Special thanks to Helen and Scott Nearing. I hope you are both smiling at our accomplishments, wherever you may be. We hope we can now help others just as you have. Hope you enjoyed this, our first article written on living off the grid. 1993
84

Your Recommended Resources More Helpful Books for You
Jane and I personally recommend all of these books as being helpful and well written. Only those books, products or services that we own or have used will be recommended. Some of the books are written by us. Many other companies have asked us to recommend their inferior products, but we will not. Only books and products that pass our ‘Seal of Approval’ will go in this book. Carefully follow these text links to continue your journey. Enjoy. http://www.evparts.com/firstpage.php http://www.evconvert.com/ http://www.electroauto.com/index.html http://www.ampmobileconversions.com/default.asp http://www.canev.com/index.html http://www.ev-america.com/ http://www.electroauto.com/catalog/ackits.shtml
85

Renewable Energy Solutions Guide This is the first book Jane and I wrote. The book will take you from an ordinary urban tied to the grid existence to living off the grid with renewable energy. We show you our own journey and our own choices in easy to read format with tons of photos. A great place to start.
Send us your Story
By the way, keep track of your story, take photos and send them into us. We love to hear about other families who are living debt free, making great investments. We may even publish your story on our website. Use the contact form on the website
Need Help? Need help with your writing abilities or photography? Want to make a nice income by writing articles and taking photos for the internet? Just look for Writing For Magazines or Taking Photos for the Internet It’s a great way to have fun and help people in the process.
86

DID YOU ENJOY THIS BOOK? WANT TO LEARN HOW TO SELL THIS AND OUR OTHER GUIDE BOOKS ?
We will pay you an amazing 50% commission for every book you sell. Guaranteed.
We work through an ‘affiliate’ program. If you are not familiar with affiliate programs, it's real simple... basically; a company called Clickbank administers the program. i.e. they take care of all payment processing, commission payments, etc.
The products are eBooks (just like this one) that are instantly downloaded after payment is made. It's FREE to become a Clickbank affiliate and they have over 10,000 downloadable products to choose from or sell. To browse Clickbank's many products and join up, click HERE.
If you are already a Clickbank affiliate or you just joined, here are some tools to help you start selling "How to build your own house”
First of all, the link that you will put on your web site will have the following format...
87

http://AFFILIATE.offgrid07.hop.clickbank.net (of course, you would replace "AFFILIATE" with your Clickbank nickname - don't change anything else like the "."s or slashes)
You can link the Clickbank "hoplink" to text on your web site, a banner ad or other graphic, or you can use the hoplink in a classified ad or maybe even something like a Google Adwords ad or Overture ad
Our Recommended Method of Affiliate Marketing
Ok, want to know the secret road to success that we discovered long ago. There are really three keys to success in this business.
1. Know and use your passions. What do you do that you are really passionate about?
2. Learn everyday how to do it better. Learning is a lifelong process. If you need help with your affiliate marketing of this and other books, just drop us an email and we can steer you in the right direction.
88
3. Always, always read the books you are selling. If it is plans, like how to build a house or a Homemade Wind Generator then go ahead and build it. Take photos of yourself and your helpers having fun doing it. Write about your experience and post it on your website with this affiliate link.

It is just that easy. Passion, Learn, Do it, Write and Photograph it, Sell it!
ARE YOU NEW TO AFFILIATE MARKETING?
The very best place to start is to learn about affiliate marketing, I strongly urge you to buy a book called "The Super Affiliate Handbook" by Rosalind Gardner. This book shows you how she made $436,797 in one year selling other people's stuff. I have read this "must have" book and she does not leave out any details. I thought I knew everything about marketing, but after I read her book, I realized that I had a lot to learn! If you think you can't afford it - you're wrong - you can't afford NOT to buy this book.
Click Here for Complete details
89

Setting the Record Straight about Opportunities in the Affiliate Marketing Industry
I get angry every time I hear someone say that there's no money to be made as an affiliate marketer.
What a pile of unadulterated cow dung! Those who try to tell you that affiliates can't make a living online:
a. Haven't tried affiliate marketing, or; b. . Haven't followed the right business plan, or; c. Are so greedy that they don’t want you to share in the
wealth
The Road to A Better Life starts with just one decision- the decision to do it.
90

Legal stuff the lawyers made me say… The information in this document is protected by one or more world wide copyright treaties and may not be reprinted, copied, redistributed, hosted, displayed or stored electronically or by any other means whatsoever, without the written permission from Les and Jane Oke). All rights reserved world wide. All names of people, trademarks, service marks, company names and brand names are property of their respective owners and are used in editorial commentary as permitted under constitutional law. This publication is not intended to provide exact or precise advice. The entire contents are opinions expressed by the authors, which were gathered over years of practical experience. The author and publisher disclaim any liability for personal loss caused by the use of, or misuse of, or inability to use any or all of the information contained within this publication. Use this information at your own risk. Copyright 2008 Les and Jane Oke- . All rights reserved world wide.
91