brake winch– 1600 lb. c apac ity - northern tool · 2017-05-24 · brake winches are suitable for...
TRANSCRIPT
WAINSTRUCmay resu
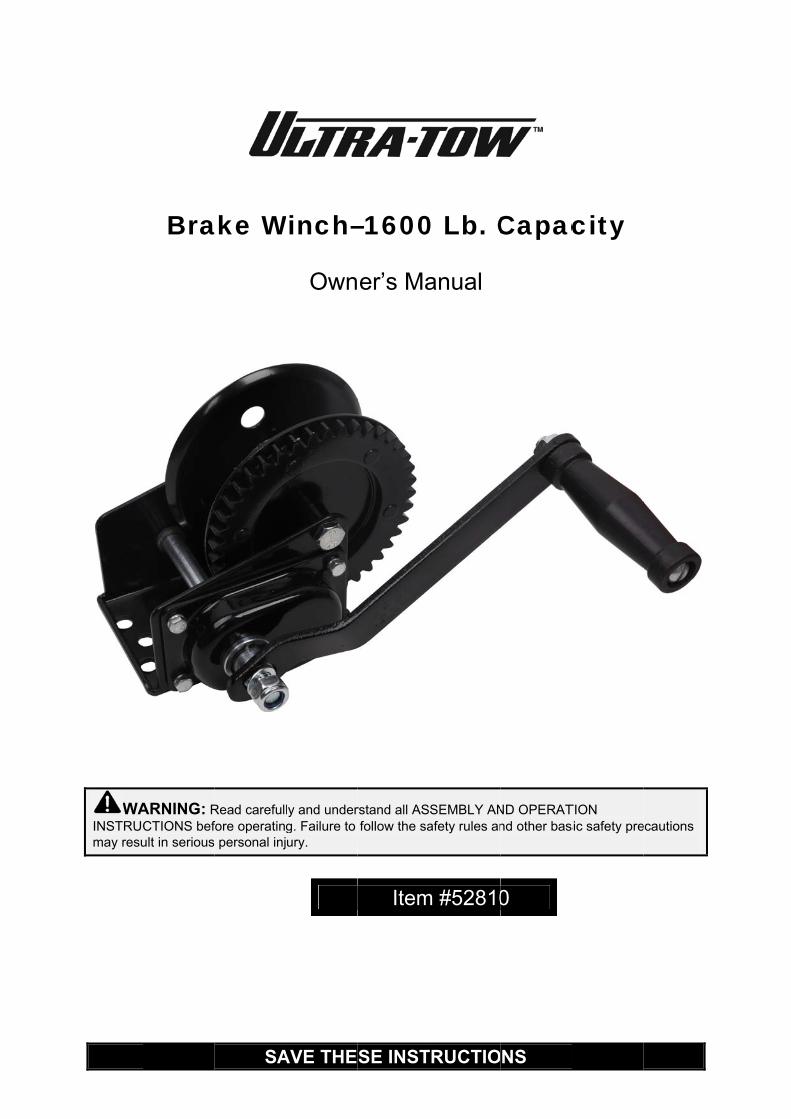
Bra
ARNING: RCTIONS befult in serious
SA
ake W
Read carefulfore operatin personal inj
AVE THE
Winch–
Own
ly and underg. Failure to ury.
SE INST
–1600
er’s Ma
rstand all ASfollow the sa
Item
TRUCTIO
0 Lb. C
anual
SEMBLY ANafety rules an
m #52810
NS
Capac
ND OPERATnd other bas
0
city
TION sic safety preecautions
Page 2 of 13
Thank you very much for choosing anUltra-Tow™product!
For future reference, please complete the owner’s record below:
Serial Number/LotDate Code: ________________________________
Purchase Date: ____________________________________________
Save the receipt, warranty, and this manual. It is important that you read the entire manual to become familiar with this product before you begin using it.
This winch is designed for certain applications only. Northern Tool & Equipment is not responsible for issues arising from modification or improper use of this product such as an application for which it was not designed. We strongly recommend that this product not be modified and/or used for any application other than that for which it was designed.
For technical questions, please call 1-800-222-5381.
Page 3 of 13
Table of Contents
Intended Use .......................................................................................................................................... 4
Technical Specifications ...................................................................................................................... 4
Important Safety Information ............................................................................................................... 4
Specific Operation Warnings ............................................................................................................... 5
Winch Mounting and Cable Attachment ............................................................................................. 6
Main Parts of Winch .............................................................................................................................. 7
Assembly Instructions .......................................................................................................................... 7
Before Each Use .................................................................................................................................... 7
Operating Instructions .......................................................................................................................... 8
Moving or Tensioning Loads ............................................................................................................... 8
After Each Use ....................................................................................................................................... 8
Maintenance .......................................................................................................................................... 8
Troubleshooting .................................................................................................................................... 9
Parts Diagram ...................................................................................................................................... 10
Parts List .............................................................................................................................................. 10
Replacement Parts .............................................................................................................................. 11
Limited Warranty ................................................................................................................................. 12
Page 4 of 13
Intended Use
This Ultra-Tow Brake Winch is designed for safer, easier boat loading and unloading.Winches are not to be used as hoists for lifting, supporting, or transporting people or for loads over areas where people can be present.
Brake Winches are suitable for many lifting and lowering applications. Self-locking brake winches provide additional safety and control for many lifting and pulling jobs. The automatic friction brake supplies constant, positive holding action and prevents a runaway load. The brake is fully automatic and the load remains in position any time the handle is released.
Technical Specifications
Property Specification Item No. 52810 (Empty) Rated Capacity 1600 lbs. Drum Capacity 5/16in. x 42ft. Wire Cable (not included) Gear Ratio 4.2:1 Speed 1-Speed Drum Size 5 1/4 in. Handle Size 9 4/9 in. Mounting Plate 5 1/3 X 3 1/2 in. Mounting Hardware 3 M10 Bolts
Important Safety Information
⚠WARNING
Read and understand all instructions. Failure to follow all instructions may result in serious injury or property damage.
The warnings, cautions, and instructions in this manual cannot cover all possible conditions or situations that could occur. Exercise common sense and caution when using this winch. Always be aware of the environment and ensure that the tool is used in a safe and responsible manner.
Do not allow persons to operate or assemble the winch until they have read this manual and have developed a thorough understanding of how it works.
Do not modify this winch in any way. Unauthorized modification may impair the function and/or safety and could affect the life of the product. There are specific applications for which the product was designed.
Use the right tool for the job. DO NOT attempt to force small equipment to do the work of larger industrial equipment. There are certain applications for which this equipment was designed. Products are safer and do a better job at the capacity for which they are intended. DO NOT use this equipment for a purpose for which it was not intended.
Industrial or commercial applications must follow OSHA requirements.
⚠WARNING
This product may contain chemicals known to the State of California to cause cancer, birth defects or other reproductive harm.
Page 5 of 13
⚠WARNING
WORK AREA SAFETY
Inspect the work area before each use. Keep work area clean, dry, free of clutter, and well-lit. Cluttered, wet, or dark work areas can result in injury.
Keep children and bystanders away from the work area while operating the tool. Do not allow children to handle the winch.
⚠WARNING
PERSONAL SAFETY
Stay alert, watch what you are doing, and use common sense when operating the winch. Do not use the tool while you are tired or under the influence of drugs, alcohol, or medication. A moment of inattention while operating the tool may result in serious personal injury.
Dress properly. Do not wear loose clothing, dangling objects, or jewelry. Keep your hair, clothing and gloves away from moving parts. Loose clothes, jewelry, or long hair can be caught in moving parts. Air vents on the tool often cover moving parts and should be avoided.
Wear the proper personal protective equipment when necessary. Use ANSIZ87.1 compliant safety goggles (not safety glasses) with side shields, or when needed, a face shield. Use a dust mask in dusty work conditions. Also use non-skid safety shoes, hardhat, gloves, dust collection systems, and hearing protection when appropriate. This applies to all persons in the work area.
Do not overreach. Keep proper footing and balance at all times.
⚠CAUTION
WINCH USE AND CARE
Do not force the winch. Products are safer and do a better job when used in the manner for which
they are designed. Plan your work, and use the correct product for the job.
Check for damaged parts before each use. Carefully check that the winch will operate properly
and perform its intended function. Replace damaged or worn parts immediately. Never operate the
winch with a damaged part.
Do not use a winch with a malfunctioning switch. Any power tool that cannot be controlled with the
power switch is dangerous and must be repaired by an authorized service representative before
using.
Store the winch when it is not in use. Store it in a dry, secure place out of the reach of children.
Inspect the tool for good working condition prior to storage and before re-use.
Use only accessories that are recommended by the manufacturer for use with your winch.
Accessories that may be suitable for one product may create a risk of injury when used with
another tool. Never use an accessory that has a lower operating speed or operating pressure than
the tool itself.
Specific Operation Warnings
⚠WARNING
Do not exceed the rated load capacity. Be aware of dynamic loading! Sudden load movement may briefly create excess load causing product failure.
Do n
Do n
Keewinc
Nev
Follo
AlwaNev
Ope
Afte
Do n
Not
Insp
crac
oper
Do n
perm
and
Do n
back
For was
Seletime
CABthe c
1) Placcoun
2) Loos
3) Rem
4) Rou
not use for o
not lengthen
p hands cleach.
ver leave win
ow all instruc
ays maintainver apply load
erate winch m
r moving the
not use to tra
for use by or
pect before e
cks, bends, d
ration of the
not use the w
manently wea
must not be
not use a rec
k towards the
maximum sthers, and loc
ect a winch lies stronger th
BLE REPLACcable clamp,
ce pawl in reenterclockwise
sen the nut a
move the old
ute new cable
verhead liftin
the handle f
ar from the g
ch unattende
ctions when
n a minimum d to winch fu
manually only
e item, be su
ansport peop
r around chil
Winch M
every use. Do
damage, fray
winch.
winch even if
akens the ca
e used.
covery strap
e operator du
trength and sck washers.
ne with breahan the line.
CEMENT: Us, and may sp
el out positioe.
and remove t
cable.
e end over b
ng.
for additional
ear, drum an
ed while sup
replacing the
of four (4) fully extended
y.
re to secure
ple of animals
dren.
Mounting
⚠o not use if d
yed or kinked
f minor dama
able, even af
while winchi
uring a winch
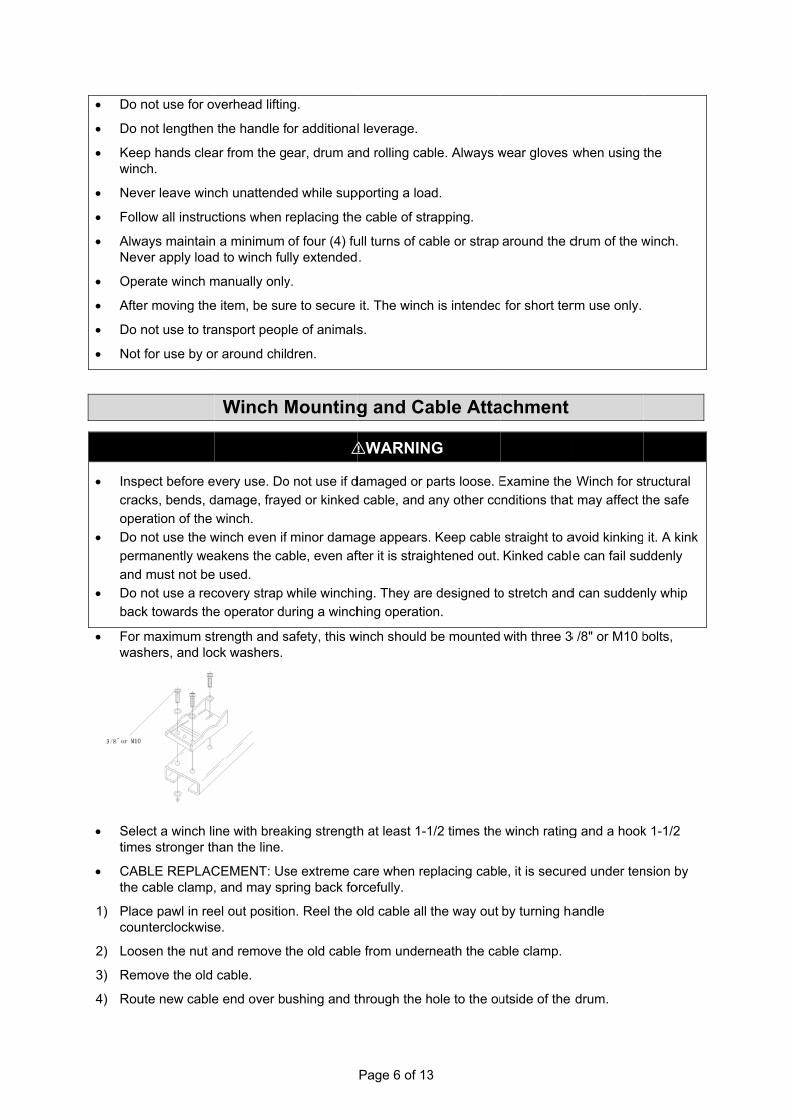
safety, this w
aking strength
se extreme cpring back fo
on. Reel the o
the old cable
ushing and t
Page 6 of 13
l leverage.
nd rolling cab
pporting a loa
e cable of str
ull turns of ca.
it. The winch
s.
g and Ca
⚠WARNIN
damaged or p
d cable, and a
age appears.
fter it is straig
ng. They are
hing operatio
winch should
h at least 1-1
care when reorcefully.
old cable all
e from under
through the h
3
ble. Always w
ad.
rapping.
able or strap
h is intended
able Atta
NG
parts loose. E
any other co
. Keep cable
ghtened out.
e designed to
on.
be mounted
1/2 times the
eplacing cabl
the way out
rneath the ca
hole to the ou
wear gloves w
around the d
for short ter
achment
Examine the
nditions that
straight to a
Kinked cabl
o stretch and
with three 3
e winch rating
e, it is secure
by turning ha
able clamp.
utside of the
when using
drum of the w
rm use only.
e Winch for st
t may affect t
avoid kinking
e can fail su
d can sudden
3 /8" or M10 b
g and a hook
ed under ten
andle
drum.
the
winch.
tructural
the safe
it. A kink
ddenly
nly whip
bolts,
k 1-1/2
nsion by
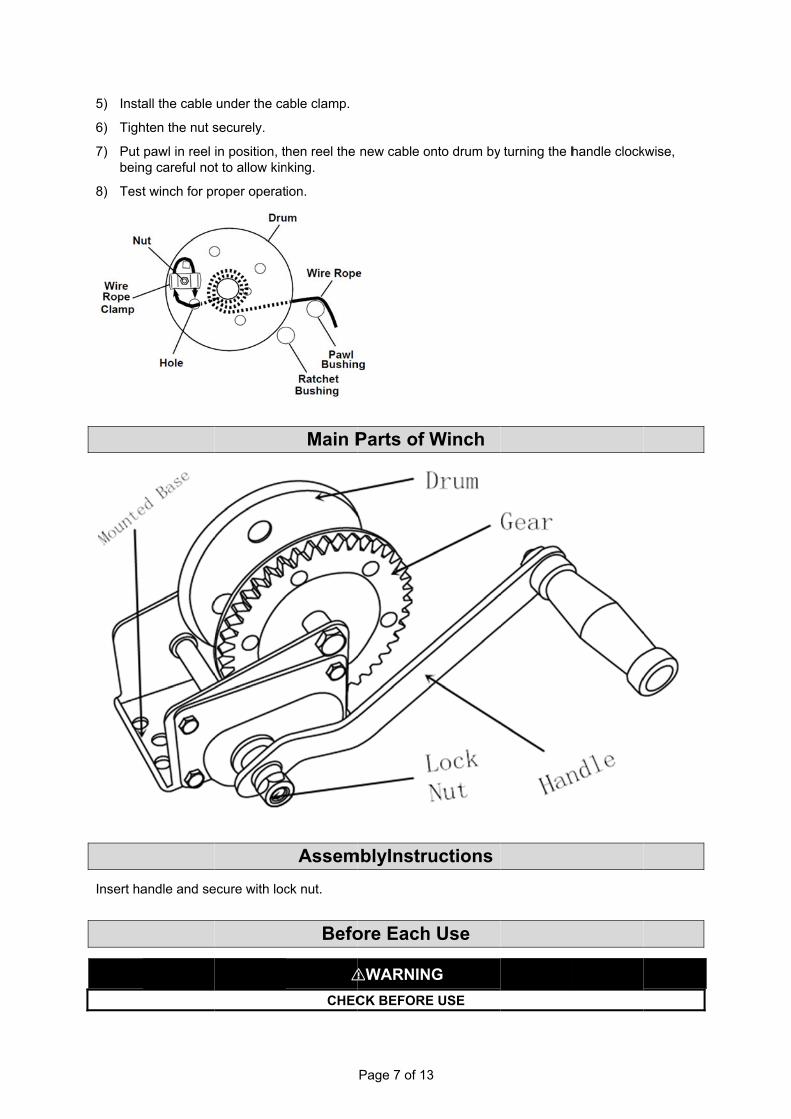
5) Insta
6) Tigh
7) Put bein
8) Test
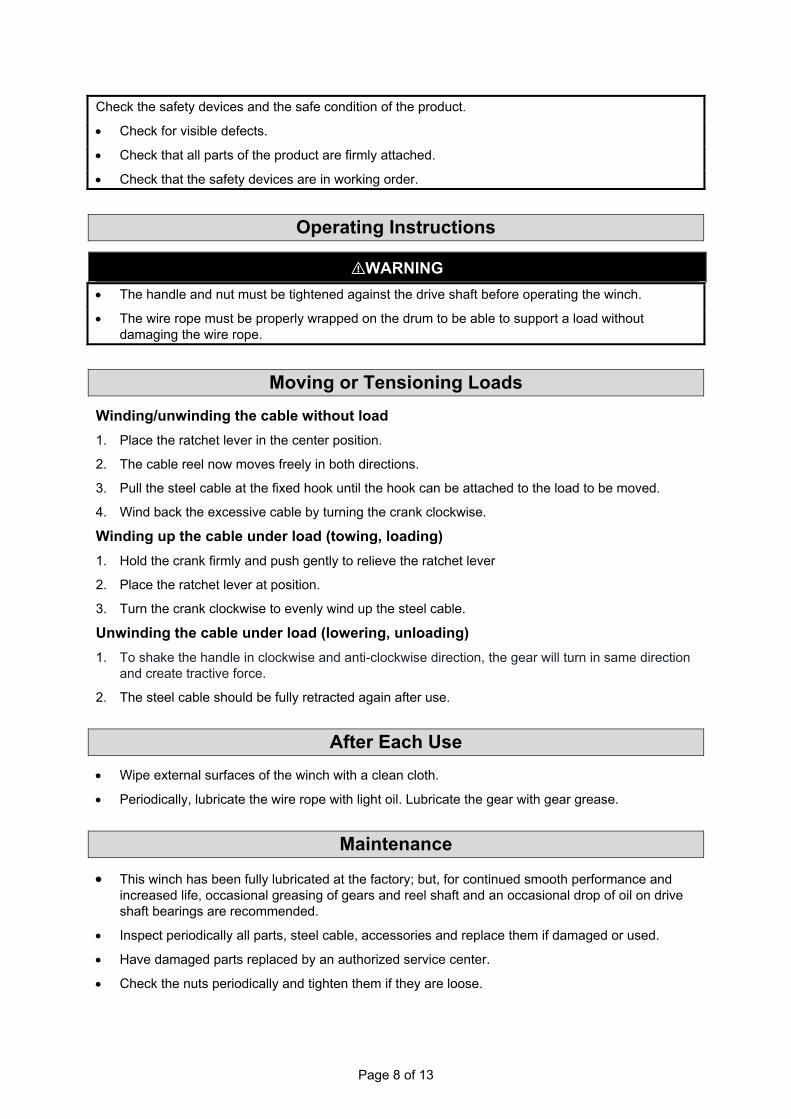
Insert ha
all the cable
hten the nut s
pawl in reel ng careful no
t winch for p
andle and se
under the ca
securely.
in position, tt to allow kin
roper operat
ecure with loc
able clamp.
hen reel the nking.
ion.
Main P
Assem
ck nut.
Befo
⚠CHEC
Page 7 of 13
new cable o
Parts of
mblyInstru
ore Each
⚠WARNIN
CK BEFORE
3
onto drum by
Winch
uctions
h Use
NG
E USE
turning the hhandle clockkwise,
Page 8 of 13
Check the safety devices and the safe condition of the product.
Check for visible defects.
Check that all parts of the product are firmly attached.
Check that the safety devices are in working order.
Operating Instructions
⚠WARNING
The handle and nut must be tightened against the drive shaft before operating the winch.
The wire rope must be properly wrapped on the drum to be able to support a load without damaging the wire rope.
Moving or Tensioning Loads
Winding/unwinding the cable without load
1. Place the ratchet lever in the center position.
2. The cable reel now moves freely in both directions.
3. Pull the steel cable at the fixed hook until the hook can be attached to the load to be moved.
4. Wind back the excessive cable by turning the crank clockwise.
Winding up the cable under load (towing, loading)
1. Hold the crank firmly and push gently to relieve the ratchet lever
2. Place the ratchet lever at position.
3. Turn the crank clockwise to evenly wind up the steel cable.
Unwinding the cable under load (lowering, unloading)
1. To shake the handle in clockwise and anti-clockwise direction, the gear will turn in same direction and create tractive force.
2. The steel cable should be fully retracted again after use.
After Each Use
Wipe external surfaces of the winch with a clean cloth.
Periodically, lubricate the wire rope with light oil. Lubricate the gear with gear grease.
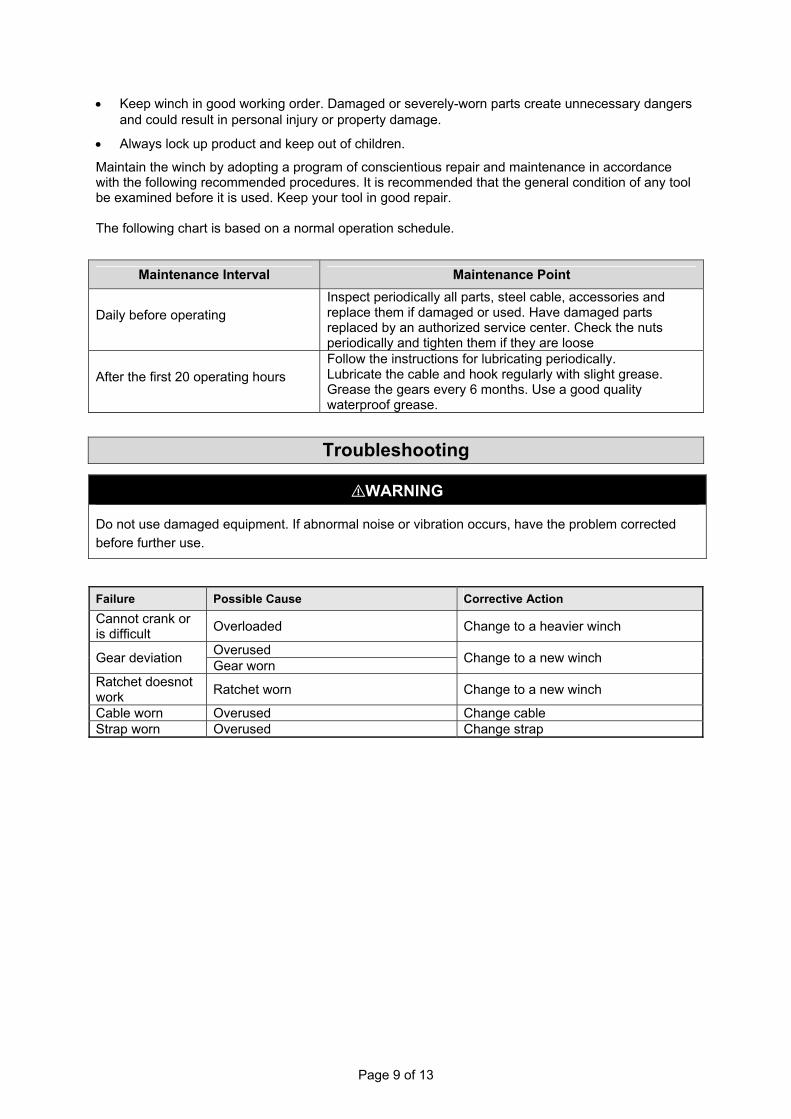
Maintenance
This winch has been fully lubricated at the factory; but, for continued smooth performance and increased life, occasional greasing of gears and reel shaft and an occasional drop of oil on drive shaft bearings are recommended.
Inspect periodically all parts, steel cable, accessories and replace them if damaged or used.
Have damaged parts replaced by an authorized service center.
Check the nuts periodically and tighten them if they are loose.
Page 9 of 13
Keep winch in good working order. Damaged or severely-worn parts create unnecessary dangers and could result in personal injury or property damage.
Always lock up product and keep out of children.
Maintain the winch by adopting a program of conscientious repair and maintenance in accordance with the following recommended procedures. It is recommended that the general condition of any tool be examined before it is used. Keep your tool in good repair. The following chart is based on a normal operation schedule.
Maintenance Interval Maintenance Point
Daily before operating Inspect periodically all parts, steel cable, accessories and replace them if damaged or used. Have damaged parts replaced by an authorized service center. Check the nuts periodically and tighten them if they are loose
After the first 20 operating hours Follow the instructions for lubricating periodically. Lubricate the cable and hook regularly with slight grease. Grease the gears every 6 months. Use a good quality waterproof grease.
Troubleshooting
⚠WARNING
Do not use damaged equipment. If abnormal noise or vibration occurs, have the problem corrected
before further use.
Failure Possible Cause Corrective Action
Cannot crank or is difficult
Overloaded Change to a heavier winch
Gear deviation Overused
Change to a new winch Gear worn
Ratchet doesnot work
Ratchet worn Change to a new winch
Cable worn Overused Change cable Strap worn Overused Change strap
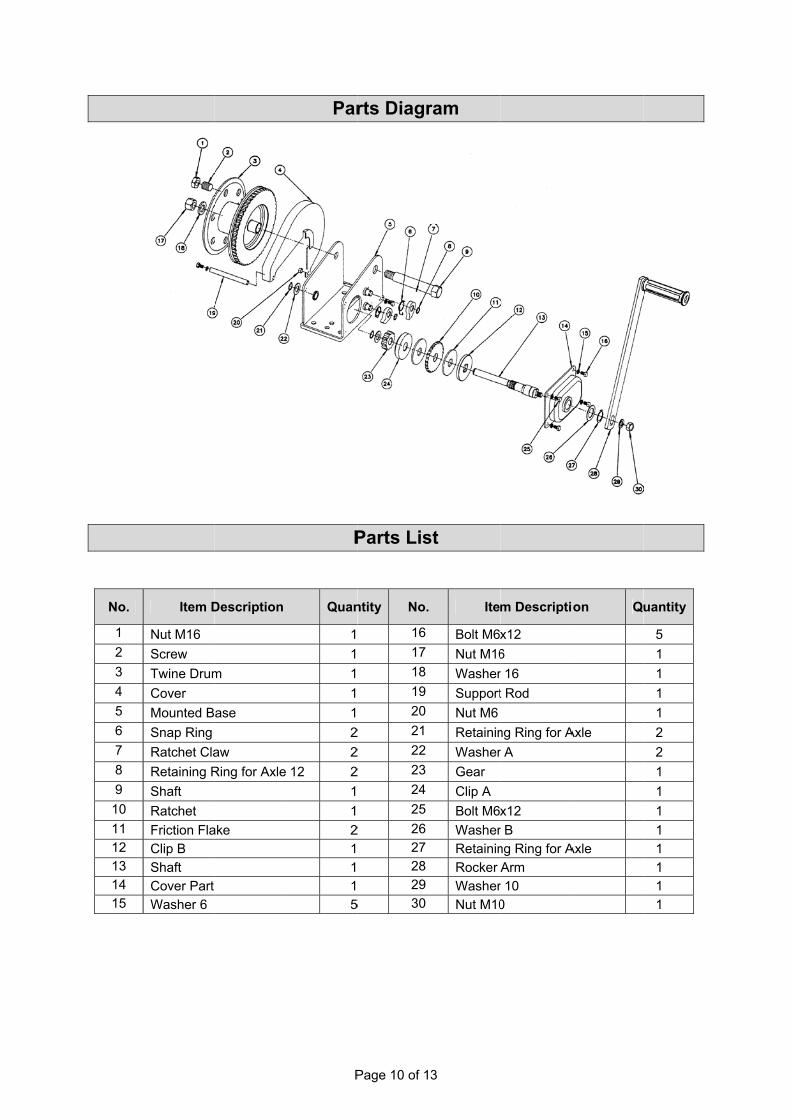
No.
1
2
3
4
5
6
7
8
9
10
11
12
13
14
15
Item D
Nut M16
Screw
Twine Drum
Cover
Mounted B
Snap Ring
Ratchet Cla
Retaining R
Shaft
Ratchet
Friction Fla
Clip B
Shaft
Cover Part
Washer 6
Description
m
ase
aw
Ring for Axle
ake
P
Par
P
Quan
1
1
1
1
1
2
2
12 2
1
1
2
1
1
1
5
Page 10 of 1
rts Diagr
Parts Lis
ntity No.
16
17
18
19
20
2 21
2 22
2 23
24
25
2 26
27
28
29
5 30
3
ram
st
Ite
Bolt M6
Nut M16
Washer
Support
Nut M6
Retainin
Washer
Gear
Clip A
Bolt M6
Washer
Retainin
Rocker
Washer
Nut M10
m Descripti
x12
6
r 16
t Rod
ng Ring for A
r A
x12
r B
ng Ring for A
Arm
r 10
0
on Q
Axle
Axle
uantity
5
1
1
1
1
2
2
1
1
1
1
1
1
1
1

Page 11 of 13
Replacement Parts
For replacement parts and technical questions, please call Customer Service at 1-800-222-5381.
Not all product components are available for replacement. The illustrations provided are a convenient reference to the location and position of parts in the assembly sequence.
When ordering parts, the following information will be required: item description, item model number, item serial number/item lot date code, and the replacement part reference number.
The distributor reserves the rights to make design changes and or improvements to product lines and manuals without notice.

Page 12 of 13
Limited Warranty
Northern Tool and Equipment Company, Inc. ("We'' or '"Us'') warrants to the original purchaser only ("You'' or “Your”) that the Ultra-Tow product purchased will be free from material defects in both materials and workmanship, normal wear and tear excepted, for a period of one yearfrom date of purchase. The foregoing warranty is valid only if the installation and use of the product is strictly in accordance with product instructions. There are no other warranties, express or implied, including the warranty of merchantability or fitness for a particular purpose. If the product does not comply with this limited warranty, Your sole and exclusive remedy is that We will, at our sole option and within a commercially reasonable time, either replace the product or product component without charge to You or refund the purchase price (less shipping). This limited warranty is not transferable.
Limitations on the Warranty
This limited warranty does not cover: (a) normal wear and tear; (b) damage through abuse, neglect, misuse, or as a result of any accident or in any other manner; (c) damage from misapplication, overloading, or improper installation; (d) improper maintenance and repair; and (e) product alteration in any manner by anyone other than Us, with the sole exception of alterations made pursuant to product instructions and in a workmanlike manner.
Obligations of Purchaser
You must retain Your product purchase receipt to verify date of purchase and that You are the original purchaser. To make a warranty claim, contact Us at 1-800-222-5381, identify the product by make and model number, and follow the claim instructions that will be provided. The product and the purchase receipt must be provided to Us in order to process Your warranty claim. Any returned product that is replaced or refunded by Us becomes our property. You will be responsible for return shipping costs or costs related to Your return visit to a retail store.
Remedy Limits
Product replacement or a refund of the purchase price is Your sole remedy under this limited warranty or any other warranty related to the product. We shall not be liable for: service or labor charges or damage to Your property incurred in removing or replacing the product; any damages, including, without limitation, damages to tangible personal property or personal injury, related to Your improper use, installation, or maintenance of the product or product component; or any indirect, incidental or consequential damages of any kind for any reason.
Assumption of Risk
You acknowledge and agree that any use of the product for any purpose other than the specified use(s) stated in the product instructions is at Your own risk.
Governing Law
This limited warranty gives You specific legal rights, and You also may have other rights which vary from state to state. Some states do not allow limitations or exclusions on implied warranties or incidental or consequential damages, so the above limitations may not apply to You. This limited warranty is governed by the laws of the State of Minnesota, without regard to rules pertaining to conflicts of law. The state courts located in Dakota County, Minnesota shall have exclusive jurisdiction for any disputes relating to this warranty.

No
P
D
orthern Tool &
Burnsvil
www
M
Page 13 of 1
Distributed by
& Equipment
lle, Minnesot
w.northerntoo
Made in Chin
3
y:
t Company,
ta 55306
ol.com
na
Inc.