bonus chapter: venetian plaster transfer -...
TRANSCRIPT
B3
Bonus Chapter
Venetian Plaster transfer
I ’ve always admired artists who work with plaster in fresco or sculp-tures. The work appears almost like marble or stone and adds depth and texture without being overbearing. But my respect goes
beyond artists—a master plasterer working with real Venetian plaster to finish a wall or create an architectural feature is fascinating to watch. Those features have a lustrous surface rather than the flat finish of a fresco—and when you add colors to the layers, you can achieve a unique, old-world look.
I took inspiration from both of those artisans to create this new process. We’ll use Venetian plaster and an inkjet transfer process to bring a level of detail never before possible. But then we’ll finalize it with the same soap wax that’s been used for centuries to finish this medium. The nice thing is that you can now buy ready-made Venetian plaster from your local paint store—we can skip the whole complicated mixing process and just get down to the art.
For a current and updated list of products and resources (since products may change over time), you can check the book’s website: www.hackingthedigitalprintbook.com.

Bonus Chapter: Venetian plaster transferB4
About Venetian Plaster Transfers Nearly any absorbent surface that can receive a coat of plaster can have an image applied to it, so don’t limit your ideas to pictures that hang on a wall. Think about applying images to the wall itself, to decorative furniture, and to picture blocks. I found a nesting table set in a paint store with an unfinished wood top. They have a great surface to hold a Venetian plaster transfer (Figure B.1). To really capture the feel of an old work, we’ll be using both black and white plaster along with an inkjet precoat to create a cracked antique surface. For this example, I’m using a simple birch box to show the process of making a cracked Venetian surface, the same process that you can apply to a tabletop or other furniture. Now you’ll just need to collect a few supplies (Figure B.2).
figure B.1 Nesting tables like this are perfect for applying a photo finish.
figure B.2 Any wooden surface is perfect for the cracked plaster surface—you could even try a large pizza platter or a slice of a tree trunk!
B5Abo ut VenetiAn PlAster trAnsfers
To prepare the wood surface:
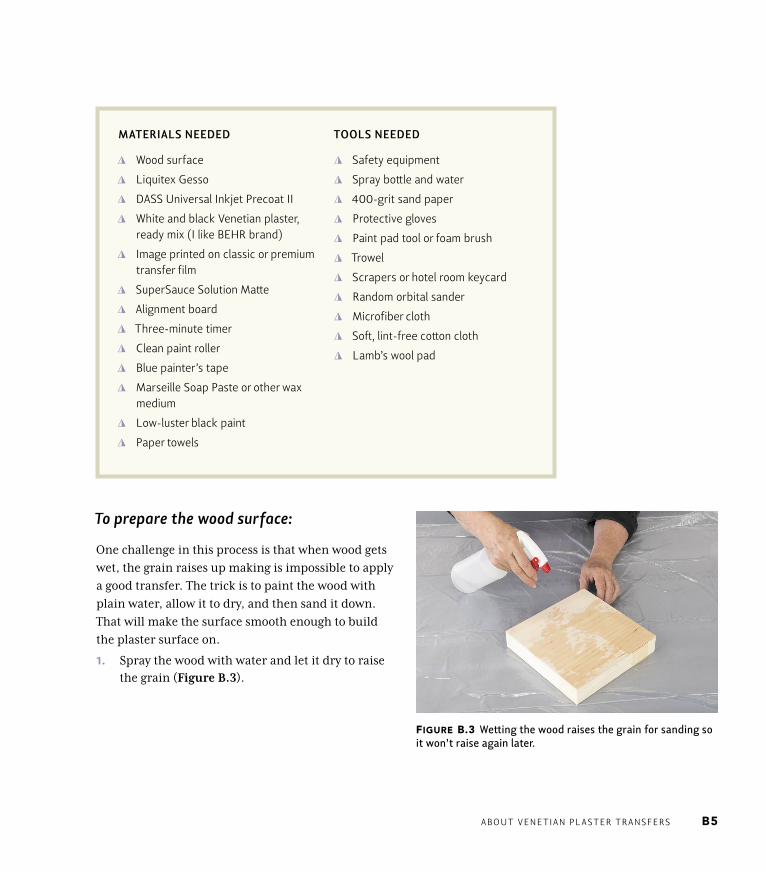
One challenge in this process is that when wood gets wet, the grain raises up making is impossible to apply a good transfer. The trick is to paint the wood with plain water, allow it to dry, and then sand it down. That will make the surface smooth enough to build the plaster surface on.
1. Spray the wood with water and let it dry to raise the grain (Figure B.3).
Materials Needed
YY Wood surface
YY Liquitex Gesso
YY DASS Universal Inkjet Precoat II
YY White and black Venetian plaster, ready mix (I like BEHR brand)
YY Image printed on classic or premium transfer film
YY SuperSauce Solution Matte
YY Alignment board
YY Three-minute timer
YY Clean paint roller
YY Blue painter’s tape
YY Marseille Soap Paste or other wax medium
YY Low-luster black paint
YY Paper towels
tools Needed
YY Safety equipment
YY Spray bottle and water
YY 400-grit sand paper
YY Protective gloves
YY Paint pad tool or foam brush
YY Trowel
YY Scrapers or hotel room keycard
YY Random orbital sander
YY Microfiber cloth
YY Soft, lint-free cotton cloth
YY Lamb’s wool pad
Figure B.3 Wetting the wood raises the grain for sanding so it won’t raise again later.
Bonus Chapter: Venetian plaster transferB6
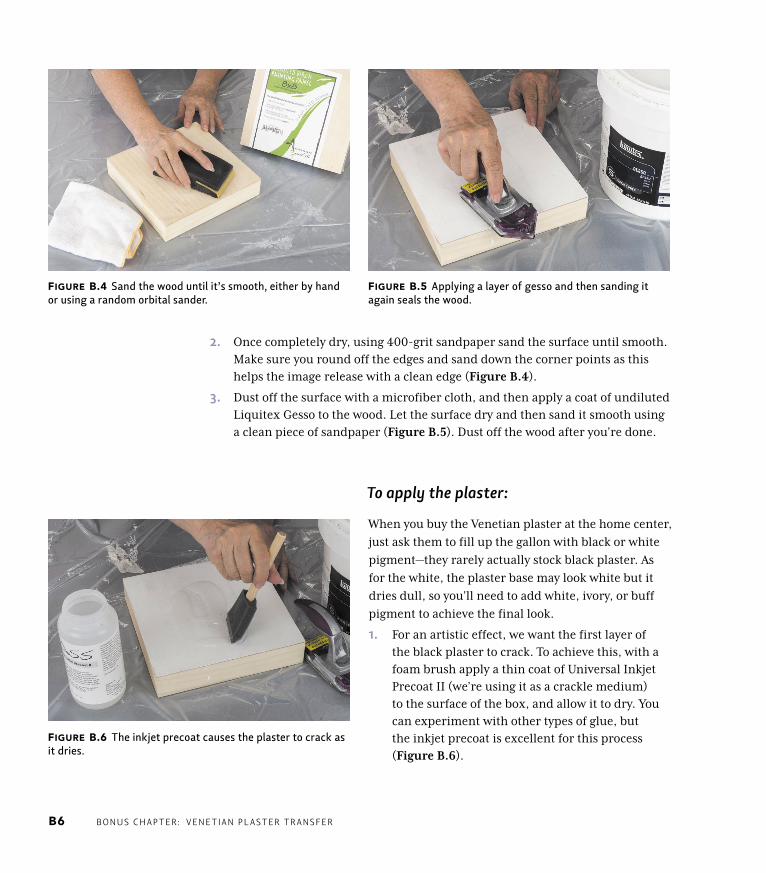
2. Once completely dry, using 400-grit sandpaper sand the surface until smooth. Make sure you round off the edges and sand down the corner points as this helps the image release with a clean edge (Figure B.4).
3. Dust off the surface with a microfiber cloth, and then apply a coat of undiluted Liquitex Gesso to the wood. Let the surface dry and then sand it smooth using a clean piece of sandpaper (Figure B.5). Dust off the wood after you’re done.
figure B.4 Sand the wood until it’s smooth, either by hand or using a random orbital sander.
figure B.5 Applying a layer of gesso and then sanding it again seals the wood.
figure B.6 The inkjet precoat causes the plaster to crack as it dries.
To apply the plaster:
When you buy the Venetian plaster at the home center, just ask them to fill up the gallon with black or white pigment—they rarely actually stock black plaster. As for the white, the plaster base may look white but it dries dull, so you’ll need to add white, ivory, or buff pigment to achieve the final look.
1. For an artistic effect, we want the first layer of the black plaster to crack. To achieve this, with a foam brush apply a thin coat of Universal Inkjet Precoat II (we’re using it as a crackle medium) to the surface of the box, and allow it to dry. You can experiment with other types of glue, but the inkjet precoat is excellent for this process (Figure B.6).
B7aBo ut Venetian plaster transfers
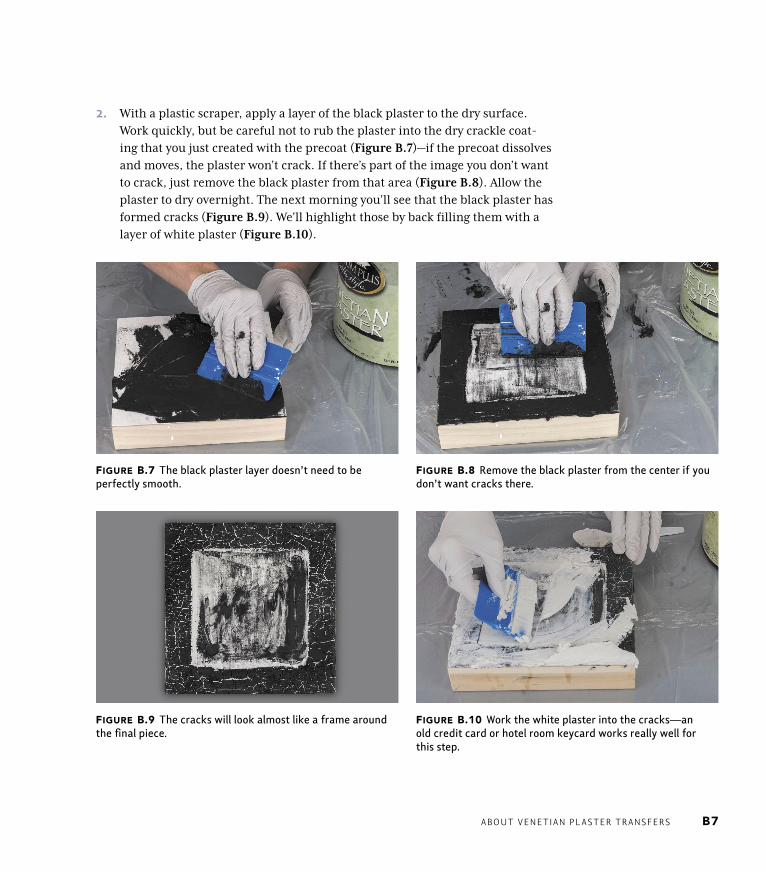
2. With a plastic scraper, apply a layer of the black plaster to the dry surface. Work quickly, but be careful not to rub the plaster into the dry crackle coat-ing that you just created with the precoat (Figure B.7)—if the precoat dissolves and moves, the plaster won’t crack. If there’s part of the image you don’t want to crack, just remove the black plaster from that area (Figure B.8). Allow the plaster to dry overnight. The next morning you’ll see that the black plaster has formed cracks (Figure B.9). We’ll highlight those by back filling them with a layer of white plaster (Figure B.10).
figure B.9 The cracks will look almost like a frame around the final piece.
figure B.8 Remove the black plaster from the center if you don’t want cracks there.
figure B.7 The black plaster layer doesn’t need to be perfectly smooth.
figure B.10 Work the white plaster into the cracks—an old credit card or hotel room keycard works really well for this step.

Bonus Chapter: Venetian plaster transferB8
3. Use a wide trowel to level the surface across the board. If the trowel sticks, add a light mist of water to the surface and slide across the wet plas-ter without dragging (Figure B.11).
4. Allow the plaster to dry completely, and then use a random orbital sander to sand the two lay-ers smooth (Figure B.12). Sand until you get the effect you like—more sanding means more black (Figure B.13). Blow off the surface, and then wipe it down with a microfiber cloth to remove the plaster dust. It’s really important to remove as much dust as you can.
figure B.13 Sand until you get the pattern you’re looking for.
figure B.12 Sand the surface until it’s smooth. Make sure you wear appropriate safety gear for this step—there’s a lot of dust!
figure B.11 Mist the surface with water to make the trowel slide across better.
To transfer and finish the image:
Now we’re ready to apply the film to the prepared surface and then finish the piece.
1. Set up the cracked box, your printed film, and the alignment box accord-ing to the alignment box procedure in Chapter 3. Apply a coat of SuperSauce Solution Matte to the plaster (Figure B.14).
B9aBo ut Venetian plaster transfers
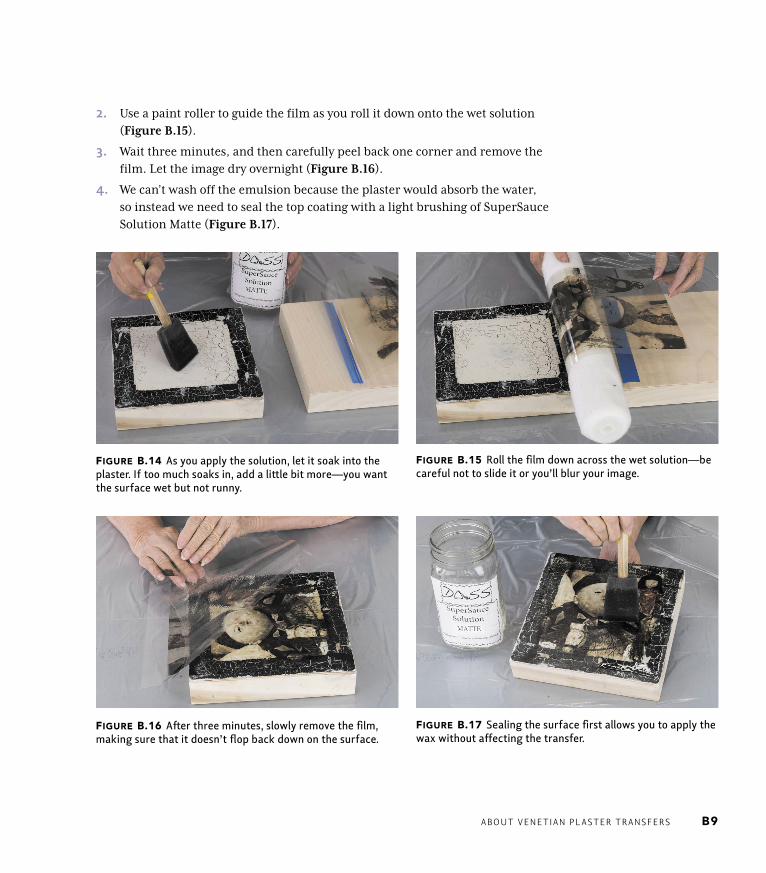
2. Use a paint roller to guide the film as you roll it down onto the wet solution (Figure B.15).
3. Wait three minutes, and then carefully peel back one corner and remove the film. Let the image dry overnight (Figure B.16).
4. We can’t wash off the emulsion because the plaster would absorb the water, so instead we need to seal the top coating with a light brushing of SuperSauce Solution Matte (Figure B.17).
figure B.15 Roll the film down across the wet solution—be careful not to slide it or you’ll blur your image.
figure B.14 As you apply the solution, let it soak into the plaster. If too much soaks in, add a little bit more—you want the surface wet but not runny.
figure B.17 Sealing the surface first allows you to apply the wax without affecting the transfer.
figure B.16 After three minutes, slowly remove the film, making sure that it doesn’t flop back down on the surface.
Bonus Chapter: Venetian plaster transferB10
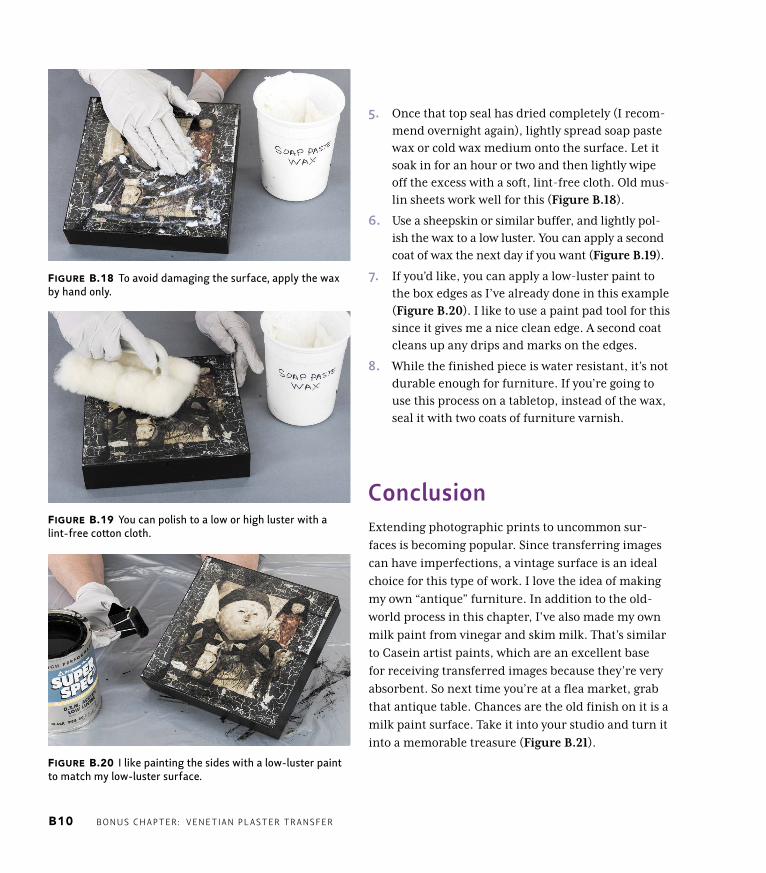
5. Once that top seal has dried completely (I recom-mend overnight again), lightly spread soap paste wax or cold wax medium onto the surface. Let it soak in for an hour or two and then lightly wipe off the excess with a soft, lint-free cloth. Old mus-lin sheets work well for this (Figure B.18).
6. Use a sheepskin or similar buffer, and lightly pol-ish the wax to a low luster. You can apply a second coat of wax the next day if you want (Figure B.19).
7. If you’d like, you can apply a low-luster paint to the box edges as I’ve already done in this example (Figure B.20). I like to use a paint pad tool for this since it gives me a nice clean edge. A second coat cleans up any drips and marks on the edges.
8. While the finished piece is water resistant, it’s not durable enough for furniture. If you’re going to use this process on a tabletop, instead of the wax, seal it with two coats of furniture varnish.
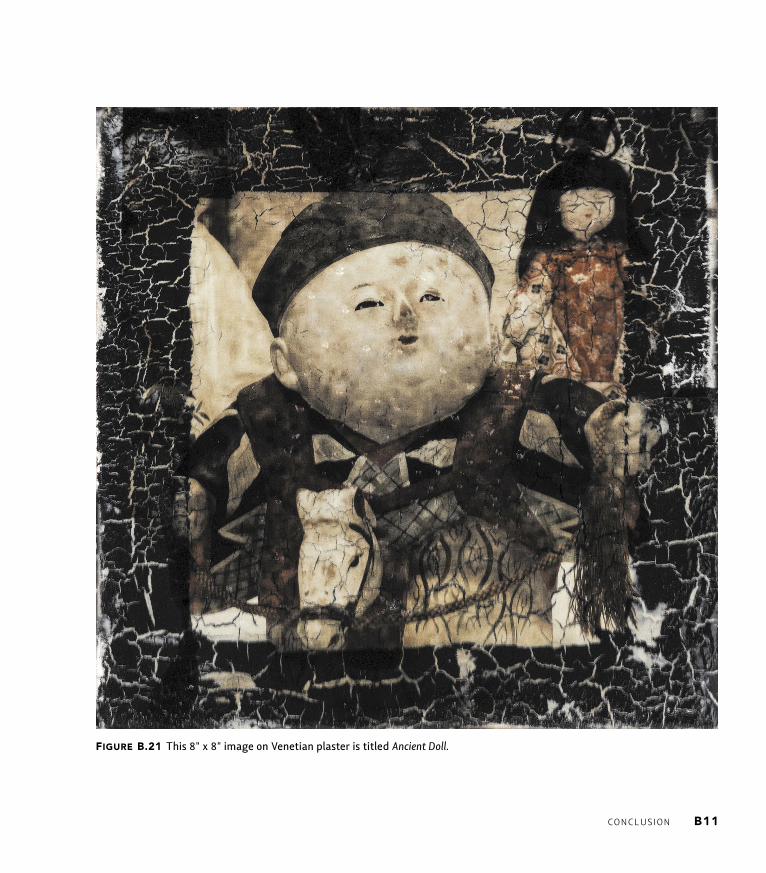
ConclusionExtending photographic prints to uncommon sur-faces is becoming popular. Since transferring images can have imperfections, a vintage surface is an ideal choice for this type of work. I love the idea of making my own “antique” furniture. In addition to the old-world process in this chapter, I’ve also made my own milk paint from vinegar and skim milk. That’s similar to Casein artist paints, which are an excellent base for receiving transferred images because they’re very absorbent. So next time you’re at a flea market, grab that antique table. Chances are the old finish on it is a milk paint surface. Take it into your studio and turn it into a memorable treasure (Figure B.21).
figure B.20 I like painting the sides with a low-luster paint to match my low-luster surface.
figure B.19 You can polish to a low or high luster with a lint-free cotton cloth.
figure B.18 To avoid damaging the surface, apply the wax by hand only.
B11ConClusion
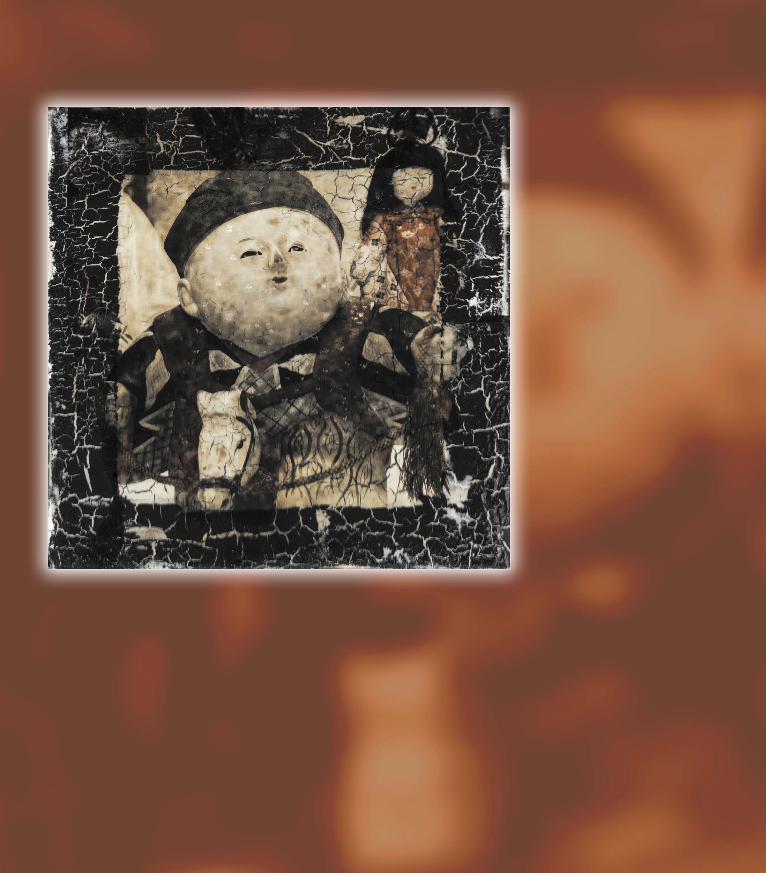
figure B.21 This 8" x 8" image on Venetian plaster is titled Ancient Doll.