bituminous flat roofing, underslating & shingles · the purpose of this leaflet is to ... 64...
TRANSCRIPT

ISSUE 02/11
Roof Design & Good PracticeIdeally all flat roofs should be inspected once every six months, in the Spring and Autumn. Only once you are satisfied that it is safe, should you go onto the roof. Always make sure someone reliable is either watching you or checking on your welfare every few minutes. Check the outlets, projections, gutters, rooflights and flashing. If any of the surface chippings have become displaced they should be swept back into position.
In Autumn it is important to check that fallen leaves do not block the gutters and outlets, which could cause water to pond. Do not flush anything down the outlets.
In Spring it is also the time to look for frost damage to the pointing which may allow the roof structure to become damp.
Prior to venturing onto the roof, look for evidence of sagging, leaks, condensation or decay from below and/or overlooking windows. If the decking is visible from below test the integrity of the deck by pushing from the underside with a blunt pole. Chipboard, particleboard, wood fibre and woodwool decks are particularly vulnerable to decay. Even if a roof has not leaked, decks (like certain grades of chipboard) may have been severely affected by condensation and may be unstable and fragile. It is quite possible to fall through a weakened roof structure and injure yourself. If in doubt, get expert advice before accessing your roof.
DOs & DON’Ts
DO deal with a leak as soon as it is noticed.
DO check with the original specification to identify the roof build up.
DO consider repair now rather than costly replacement later.
DO check before and after any work is carried out on or near the flat roof. In this way damage caused by other people will be easily identifiable.
DON’T use the roof as a working platform for adjoining buildings.
Where access is required, protection must be given so as not to damage the waterproofing membrane.
DON’T allow other people to fix units through the waterproofing membrane without proper advice. This is especially important when having television aerials, satellite dishes and telephone cables installed.
DON’T drop cement, paint or solvents on the roof, as these will damage the surface.
BItUmInoUS Flat RooFIng, UndERSlatIng & ShInglESRoofing systems and maintenance products have come a long way in recent years; with the high performance bitumen felt membranes now having a life expectancy of up to 20 years. We have seen the arrival of superior performance felts with new application techniques including torch-on and self adhesive, instead of the traditional ‘pour and roll’ method of bituminous flat roofing, which uses bitumen heated to over 200ºC. Traditional fibre based felts can age quickly, become brittle and be easily damaged through weathering. Repairs can always be made to extend the life of the roof
for a short while but in the long run, a complete re-covering is the only real answer.Today roofing felts are usually referred to as ‘bituminous reinforced membranes’ and while the felts may look much the same as yesterday’s, the performance and materials used in their development have improved dramatically, increasing resistance to aging and weathering. These developments have helped ensure that roofing felts meet customer needs and that of Building Regulations. One of the latest developments in roofing felt is
a high performance ‘cold applied’ Self Adhesive system, such as Wickes Easy Seal. This eliminates the need for hot bitumen, gas torches or liquid roofing adhesive.
The purpose of this leaflet is to introduce you to some of the roofing materials and application methods now available, advise on common problems and guide you through the Wickes flat roofing systems, enabling you to make informed choices, be confident using the products, safely, quickly and at a sensible cost.
64
KEEP INFORMED• LookforotherGoodIdea
Leafletsthatcouldhelpyouwith your current project.
• CheckthatyourGoodIdeaLeafletsarekeptuptodate.Leafletsareregularlychangedto reflect product changes so keep an eye on issue dates.
• Ifyouwouldliketobeputonour mailing list for the Wickes booklet, call our Freephone number which is:
0500 300 328• Visitourwebsiteat
www.wickes.co.uk

Leaking RoofShould you find a leak, don’t worry, one of the Wickes Roof Repair Products (shown in WickesGoodIdeaLeaflet99)willgetyouout of trouble in the short term. This should allow you to plan your project for a more convenient time - but don’t just ignore the leak, no matter how small, it will get larger, and possibly very quickly!
What next:• Decidewhethertocallina Trades person, do the job yourself, or get a friend to help. • Plan,andcostyourjob.• Makeashoppinglist.• Decideifyouneedtoreplacethedeck.• Ifit’sanewflatroofonahabitable building, it may be necessary to contact your local building control office.• DON’T be tempted to cut corners; this will probably cost you twice as much, in time, effort and money, later on. •DO the job correctly first time. With good preparation and materials it will last a long time.
Which system do I use?Roof covering options range from the traditional rag based bitumen based felts, to the most modern, technically advanced and very simple to use, self-adhesive coverings.
Our recommended solution is the cold lay method using the self-adhesive ‘Wickes Easy Seal’.
Roofing Felt Performance Selector* Minimum20ºroofpitch.** Minimum15ºroofpitchfornormal exposureroofwith1or2layerHigh Performance underlay - otherwise minimum20ºpitch.*** These products are suitable for use on habitable buildings
What do I need to Know?The first point to be made is, when re-covering a roof, all old felt must be removed and the surface on which it was laid must be carefully checked and if
necessary, made good. If roofing felt has been defective for some time, there is every chance that constant wetting may have caused damage, and rot may be present or developing. Any damaged timber or boarding must be replaced, including fascia timbers, angle fillets, drip battening, decking and occasionally the supporting joists. It is a costly mistake to put new covering over a less than perfect surface.
Building RegulationsIt is important to be aware of the existing Building Regulations concerning the design and construction of flat roof structures. In new constructions and some re-roofing projects, it may be necessary to consult your local council Building Control office with regards to compliance with Building Regulations. For information relating to current insulation requirements, refer to Part L1 and L2.
Design considerationsOn a flat roof, the waterproofing is always supported by a structural roof deck. This is usually a timber boarding of some type, which in turn is supported on joists.
With the exception of garages, most roofs above the habitable part of the house require insulation.
The most common method is where the insulation is located immediately above the ceiling. This is known as a cold roof (Fig. 1). In cold weather, the roof could be prone to condensation if adequate through-ventilation is not provided. Refer to BS 6229:2003.Alternatively,theinsulationmay be placed above the roof deck. This is known as the warm roof design (Fig. 2): If using the preferred Easy Seal System then the insulation used must be of an urethane/plywood composite board with the plywood face on the top surface.
DECK MATERIALS
It is important that the right materials are used for constructing or strengthening a flat roof deck.
The following are some commonly used types:
Plywood Deck (Recommended)This should be exterior grade type WBP bondedinaccordancewithBS6566:
Part8:1995.Aminimumthicknessof18mmis recommended. This can be purchased from any Wickes Store.
OSB 3 Bituminised & Conditioned DeckingOriented Strand Board (OSB) should be aminimumthicknessof18mmandbemanufactured in accordance with BS EN 300: Part 3: 1992.OSB3Bituminiseddeckingcanbepurchased from any Wickes stores.
OSB3Conditioneddecking–selected stores only.
Timber boardingWhere an existing deck comprises of minimum18mmcloseboardedtonguedand grooved timber, it is recommended that our Exterior WBP 6mm plywood be used to overlay the deck. This should be installed to provide a smooth homogeneous surface onto which the Easy Seal System can bond. This can be purchased from any Wickes Store. Should damage be discovered, and depending on the extent, it may simply be a case of replacing a board or two, assuming they are in a position that will allow for easy replacement. This then would be the preferred solution although you’ll still need the 6mm Plywood overlay.
If the damage to the timber tongued and grooved decking is extensive, it would make more sense to remove all the close boarded timberandreplacewith18mmPlywood.
Note: If any rot is found, or suspected, the timber must be removed. All surrounding wood should be treated, before fixing new timber/decking.
*Fine Green Mineral Shed
Felt
*Super Shed Felt
Trade Traditional
Roofing Felt
***High Performance
Polyester Roofing Felt
***Torch On ***Easy Seal Self Adhesive
**Wickes Roofing Shingles
***Reinforced Slaters Felt under slates
or tiles
***Wickes Breathable Membrane
under slates or tiles
Hutch/Kennel/Small Garden Shed
Yes
1 Layer (5 Years)
Yes
1Layer(15 Years)
Yes
2 or 3 Layer (10 Years)
Yes
1 Layer (10 Years)
No No Yes
25 Years
No No
Quality Garden Buildings/Detached Garages/
Workshops
No Yes
1 Layer (15 Years)
Yes
2 or 3 Layer (10 Years)
Yes
2 or 3 Layer (15 Years)
Yes
2 or 3 Layer (15 Years)
Yes
2 Layer (20 Years)
Yes
25 Years
Yes
1 Layer
Yes
1 Layer
Attached Garages/
Extensions/ Dormer
Windows
No No No Yes
2 or 3 layer (15 Years)
Yes
2 or 3 Layer (15 Years)
Yes
2 Layer (20 Years)
No Yes
1 Layer
Yes
1 Layer
Habitable Tiled Roofs
No No No No No No No Yes
1 Layer
Yes
1 Layer
Note: All life expectancies and performance assume fitting in accordance with manufacturers’ instructions, to a good sound base.
Ventilated roof void
Waterproofingsystem
Deck
Insulation
Ceiling
Vapour control layer
Fig. 1 Cold roof
Fig. 2 Warm roof

ChipboardAlthough frequently used for garden buildings, and some garages, it is not suitable for habitable building roofs, and as a rule of thumb, it is generally not suitable for roofs with ceilings.
If chipboard is to be used, it should be a moistureresistantP5grade.
ConcreteCommon in roofs to blocks of flats and some pre-war houses, concrete is a stable and reliable deck material. If this needs repair, provision should be made for drying out before any priming or waterproofing covering is laid.
Essential for a successful flat roofLikeanypartofabuilding’sexterior,flatroofsshould be constructed to withstand natural and human forces with the minimum of attention. If laying large sheets of decking such as 8ft by 4ft Plywood, do not tightly butt joint them. Leavea4mmgapontheshortlengthsand2mmgapalongthelongedgestoallowforexpansion.
Protection from rain & snowThe finished roof should have a slope that achievesatleast1in80.Withanewdeckitssensibletodesignitwitha1in40falltobesure. It is best to drain the roof to one or two edges. Conventional eaves gutters are better than internal outlets.
Internal outlets should be adequately sized to deal with storm conditions and be fitted with clamping rings, leaf and gravel guards.
The waterproofing should extend up adjacent wallsatleast150mmfromthefinishedroofsurface in all situations. The top edge of felt should be protected by a cover flashing.
Protection from sun and frostIt pays to insulate: heating bills will be lower in the winter, and rooms will be cooler in the summer. Insulation of new flat roofs must satisfy the Building Regulations, Part L1 and L2.
Protection from condensationCold roofs should have adequate through ventilation in the void space
All insulated roofs require a vapour control layer.
Protection from the windAll roofs should be constructed to resist wind forces.
For buildings in exposed locations, or areas prone to extremes of weather, you can obtain additional advice from your local Building Control Office.
Protection from peopleDon’t let people walk or work on your roof without first protecting the surface and supporting the structure if necessary.
If the use of the roof is changed, the structure may have to be strengthened.
Weather & TemperatureNow you have assembled all the materials, tools and equipment you need, the final consideration before beginning your roofing job is the weather. Try to ensure that the weather will be dry all day and if possible that conditions are warm.
NB. Do not start removing existing roof coverings until weather conditions have been confirmed and all the materials for the job have been assembled and checked ready for use.
Wickes Easy Seal Roofing System is easiest touseatatemperaturesabove10°C.Ifitis difficult to achieve this temperature whilst working on the roof, it is recommended that the material be stored in a warm environmentfor24hourspriortouse.Ifit is necessary to work on the roof in cold weather, then the gentle warming of the adhesive side of the felt with an electric hot air paint stripper or similar (not a naked flame) will help the adhesive properties of the material. Also warm the material prior to folding. If temperatures become extreme it is advisable to postpone the project until more favourable temperatures pertain.
Make good & mendInspect the condition of the existing roof structure and deck prior to commencement ofroofing.Makeanystructuralrepairsthatarenecessary and ensure that the surface area of the roof is free from obstructions, smooth, clean and dry prior to the beginning of the project.
The right sequenceIt is advisable to plan the sequence of your roofing job to ensure that you have the right materials at the right time. If in doubt, read the instructions through completely first noting the sequence in which you will use the materials.
Safe working practiceWhenworkingatheightHSEguidelinesdictate that a safety guardrail must be erected around the perimeter of the roof and ladders should be fixed to the guardrail and secured at the foot to prevent slipping. For further information, seek professional advice, contact the HSE on 0845 345 0055 or visit www.hse.gov.uk
Working at heights – The facts• AccordingtotheHealth&Safety Executiveapproximately4,000people per year suffer from serious injuries and 50arekilledasaresultoffalling from height.
• Fallsarethelargestcauseoffatalities in the work place.
• 60%ofallmajorinjuriesarecaused fromfallsbelow2metres.
• Nearlyaquarterofallfatalitiesandmajor injuries are caused by falls from ladders.
TheWorkingatHeightRegulations (WAHR),introducedduring2005, purpose is to reduce the number of accidents associated with Working atHeight.
To achieve this they adopt three basic principles:i) If practicable, avoid working at height
ii) Use the most suitable equipment and method of work to prevent falls
iii) Reduce the consequences of any fall by use of appropriate fall arrest systems.
Employers, Employees and the Self-employed, undertaking work at height, will be affected by the Regulations.
WICKES EASY SEAL SELF ADHESIVE ROOFING SYSTEM
The Easy Seal system has been developed to make flat roofing safe, straightforward and economical for the DIY’er, jobbing builder and the roofing professional. Only a few tools are required. Wickes Easy Seal System is a self-adhesive polyester based; SBS polymer modified bitumen coated roof covering. The cap sheet is surfaced with attractive green slate granules that requires no further treatment. The system has a BBA certificate 02/3916foruseonhabitablebuildings,andan external fire rating of F.A.C. The Wickes Easy Seal system complies with Building Regulations: England, Wales, Scotland and Northern Ireland.
It is one of the cleanest, simplest and quickest covering systems available. It is ideal for homeowners with only basic DIY skills and a limited tool kit, right through to experienced tradesman, who need a strong, long life, safe, flame free system.
Note: This system is not suitable for overlaying existing roof felts unless an isolating layer is fixed over on the flat roof area. Securely fixed 6mm minimum WPB plywood is suitable, available in store. The existing waterproofing to all of the details would still need to be removed. For Easy Seal to work properly it needs a smooth firm, clean and dry surface to adhere to.
Wickes Easy Seal S.A. (Self Adhesive) Primer The primer should be applied to all timber, concrete, screed, metal and masonry surfaces, prior to applying the Easy Seal Underlay.Leaveuntilitistouchdry.Pre-bituminised boards do not need priming. The upper surface of the underlay itself does not need priming prior to laying the cap sheet.
Suppliedin2.5and5litretins.Onelitreshould be sufficient for 4-6m2 of roof area.
Wickes High Performance Felt Lap Adhesive.This is used to seal the Easy Seal cap sheet where it is being applied to a green slate surface, i.e. end laps and upstand details. Suppliedin310mlcartridges.Thecartridgewill fit standard cartridge (skeleton) gun. Coverageisapproximately3linearmetres,atabeadwidthof8-10mm.
UpstandCheck kerb
Drip edge
FIG. 3

Wickes Easy Seal Self Adhesive Roofing System.The amount of materials required for any flat roof will depend on how simple or complex the roof construction is. The number of changes of surface level, water run-offs, curves, flashings, and gutters will determine the amount of material required. The following gives a rough guide to calculate the basic requirements.
Wickes Easy Seal Underlay and Wickes Easy Seal Cap SheetUnderlayissuppliedin8x1mrollsandcapsheetin6x1mrolls.Calculatetheflat area of your roof in square metres (see Fig. 3),lengthxwidth.Add10%forlaps and wastage. Add to this the total linear metreage of the upstand detail (the abutment with main house, if applicable) of yourroofmultipliedby0.3m.
Where there are larger upstand details such asparapetwallsthemultiplierof0.3mwillnot be adequate; additional material will have to be allowed for.
Divide total square metres by eight for underlay and six for cap sheet to give you the number of rolls you need.
Here is a helpful formula:Flat roof area (length x width) = m2
10%forlapsetc.
(area m2x0.1m) =m2
Roofperimeterx0.3m** =m2
Total = m2
Divide by 8 for underlay = rolls required Divide by 6 for cap sheet = rolls required
Note: m2 coverage is given as a general guide only.
Quantities of primer, membrane and mastic may need to increase if roof edges are long and shapes and details are intricate or complex.
Wickes Easy Seal S.A. Primer and Wickes HighPerformanceFeltLapAdhesiveshouldbe kept sealed in a cool, dry, well-ventilated environment. All practical precautions should be taken to protect from fire. For Safety data information call the helpline number at the end of this guide.
Use only in a well-ventilated area, and away from sources of ignition.
Read and follow all roofing product safety instructions, and use recommended personal protective equipment consisting of gloves, overalls and boots.
Additional materials required for detailing (All available at Wickes)
Galvanised Clout NailsCloutnailsshouldbe20mmlongwithextralarge heads, and calculated on the basis of twenty-one nails per linear metreage run of roof at the kerbs and gutter edges.
Angle FilletsTimber angle fillets can be bought already cuttoatriangularsection,75x75mm.Wickes Arris Fencing Rails are ideal. See Fig. 4 & 5.
Drip BattensLengthsoftimberApprox.,50x25mm.Wickesexteriorsawntreated22x47mmtimber is ideal. See Fig. 4 & 6.
Kerb Edge BattensLengthsoftimberApprox.,75x50mm.Wickesexteriorsawntreated47x75mmtimber is ideal. See Fig. 4.
Hardboard formers Cut hardboard formers from sheets available atWickes,75mmwide,andprimewithWickes Easy Seal S.A. Primer. See Fig. 4 & 6.
Tools Required (All available at Wickes)• Atapemeasure
• Trimmingknifecompletewithastraight edged blade and hooked blade
• StraightEdge
• ClawHammer
• 75mmto100mmwidepaintbrush
• Softheadedbroomorcloth
• Flatbladespreaderortrowel
• Cartridge(skeleton)gun
• Woodsaw
• Hotairguntoaidapplicationon cool days
General
Wickes Easy Seal Roofing components if used during the winter months should be storedatbetween10°Cand25°Cfor24hours prior to use. It should not be laid attemperaturesbelow5°.Ifappliedattemperaturesbetween5°Cand10°Cthemembrane should be gently warmed at all of the details that involve folding and at all side and end laps to ensure proper sealing. Use a Wickes hot air gun for this purpose. The heat should be just sufficient to warm the membranes, do not melt the components or make them hot.
New roofsFor new roof structures, first ensure that materials to be used are suitable for purpose (refer to Roof Design, felts and deckmaterials),orcalltheHelplinenumberat the end of this leaflet).
Existing roofsReadtheGeneralSectiononSafetyaboutthe risks of injury due to falling through or off the roof before venturing onto it.
For an existing roof, where the material needs replacing, strip off all old roofing felt and covering, then fill knots, large holes and gaps in the timber or other material deck surface. Flatten or cut off any projections that may interrupt or interfere with the smooth line of new roofing felt. If the surface is still too rough or uneven it may be possible to fix an overlay of WPB Plywood minimum 6mm thick so as to give an ideal flat smooth surface.
Check KerbsTimber kerbs firmly fixed to the deck along an edge of a roof to prevent water run-off and direct water to the drip/gutter edge. See Fig. 4.
The welted drip detail gives a neat matching finish and will reduce the risk of water that has been blown over the Check Kerb making its way into the roof structure. The welted drip is formed out of Easy Seal Capsheet, firmly fixed drip battens and hardboard strips. See Fig. 4.
UpstandsThe point on a roof where the deck meets a vertical surface such a wall. The internal angle should be filled with an angle fillet fixed firmly to the deck. The roofing felt must always be dressed up the vertical surface by atleast150mmabovetheroofsurface.Themembrane is usually fixed into a chase or underneath a flashing. See FIG. 5.
FlashingA lead or roofing material strip that has been let into a mortar line or cut into masonry and sealed to allow the run-off of rainwater from the wall surface. The lower edge of the flashing strip will overlap the top edge of roofing material to ensure a weathertight seal.
The Wickes Good Idea Leaflet No. 22“Howto use Wickes lead sheet and accessories” gives further information. See Fig. 5.
Welted Drip to Gutter EdgeThe drip/gutter edge is the point on the roof where the water runs off into the gutter. The welted drip is formed out of Easy Seal Capsheet, firmly fixed timber battens and hardboard strips. It is designed to ensure the effective run-off of rainwater into the gutter. See Fig. 6.
Underlay
Welted drip
Clout nail
HardboardFormer 75mmwide
Drip batten50 x 25mm
Fascia raisedto top of check kerb
Kerb Edge batten 75 x 50mm
Angle fillet 75 x 75mm
Capsheet
Deck
FIG. 4
Underlay
Capsheet
Angle Fillet
CapsheetStrip
Flashing
Wedge
150m
m m
in.
FIG. 5

PREPARATION & TRIMMING
Prime surfacesPrime all deck and detail surfaces with Wickes Easy Seal S.A. Primer, ready to receive the Wickes Easy Seal Roofing Felt. Prime all walls up to and including the chase following the instructions on the Wickes Easy SealS.A.Primercan.Generallytheproductis touch dry in one hour and is then suitable for the application of the underlay. In practice it’s normal to leave a section of the roof clear at the ladder point so as to act as a working and storage area until last underlay strips need to be laid.
Important: Wickes Easy Seal S.A. Primer is not a waterproof coating for flat roofs; it is only preparing the deck surface to receive the Wickes Easy Seal Underlay felt. Using other primers may result in incompatibility with the Easy Seal Underlay.
APPLYING THE WICKES EASY SEAL UNDERLAY
Measuring & laying outWicks Easy Seal underlay has a non-removable polythene top surface and an adhesive under surface protected by release paper.
Layouttheunderlaywiththereleasepaperintact and cut the underlay to the size required.
Note: It’s best to use a hooked blade and metal straight edge when cutting.
The underlay will usually be laid in strips running parallel with the gutter/drip edge. The first strip of underlay should be cut to half its width along its length. This will allow for staggered joints when applying the cap sheet. The length of each strip required should provide for covering angle fillets as necessary.
If the length of the roof is longer than an 8m roll, allowance should be made for overlaps of 75mmwheretwoendsofrolljoin.
Allowance should be made for roofing material to form the upstands. With the correct amount of underlay strips cut, you are ready to apply the self-adhesive underlay to the deck.
Start at the gutter edgeStarting from the lowest point of the roof (the gutter/drip edge) lay out the first felt strip in its correct position on the roof. This first strip of underlay should be laid as shown in fig. 6. Next, roll half of the strip back towards the centre to expose the release paper underneath.
At a point close to the centre of the strip that has been folded back, carefully cut the release paper across the width of the roll with a trimming knife using a new straight edged blade without cutting through the underlay. If the release paper is not cleanly cut all the way across, it will not separate properly.
Peel the paperPeel back some of the release paper to expose that part of the underlay, which is now ready for sticking to the deck. You will be, therefore, working from the centre of the strip towards a roof side edge.
Graduallypeelbackasectionofthereleasepaper at a time whilst pressing down the self-adhesive side of the underlay onto the decking, using a rag or softheaded broom to eliminate air bubbles.
Where two ends of strip need to be joined, overlaptheendsby75mmandensurethatall overlaps face the same direction.
All joins should be staggered so that no two overlaps appear in the same position on adjacent strips.
Securely press the underlay into any angles that are encountered; acute angles can be more easily stuck with pressure from a cloth, soft broom or, if necessary, a wallpaper roller or similar.
Repeat this procedure for the other half of the membrane.
Then repeat this procedure for each strip or strips, starting at the centre of the strip working to one side and then repeating the process to the other side.
Each additional strip should overlap each lowerstripalongitslengthby75mm.
Up the wallIf there is a vertical wall where the highest point of the deck ends, the underlay will needtogoupthewallby150mmfromthefinished roof surface. It is usually easier to do this with separate pieces of membrane cut to the required size.
Cover all areas Finally, check that all areas of the decking, kerbs and upstands are covered with underlay and that any trapped air bubbles have been removed to achieve as smooth a surface as possible.
Where there are internal and external corners to be waterproofed, the membrane will need to be cut and positioned according to instructions.
APPLYING WICKES EASY SEAL CAPSHEET TO EAVES & VERGES
The Gutter/Drip Edges formed in the capsheet. See Fig. 7.These strips form the welted drip edge at the lowest point of the roof i.e. where rainwater will be required to run off the roof into a gutter.
Underlay
Drip Batten
Capsheet
Clout Nail
Hardboard Former
75mm Wide
FIG. 6
Galvanisedcloutnailsapprox.50mmapart
Hardboardformer
Fascia
Drip batten
Position of cut-out
1m150mmmin
150mmmin
150mmmin
150mmmin
Lappingofwelts
Fold over of lower welt
50mm
Depthofdripbattenplus25mm
Depthofdripbattenplus25mm
150mmmin
Timber water check
Drip batten
Hardboardformer
Drip of depth batten plus25mm
Depth of drip batten and
watercheckplus25mm
Width of water checkDepth of water check
75mmmin
Welted drip at eaves or verge Junction of drip edge and check kerb
FIG. 7

The width measurement of the cap sheet strips will be twice the width of the hardboard formerplusaminimumof150mmtogoback onto the roof. The length of the strips is determined by the length of the drip edge with an allowance for overlaps. First cut sufficient strips to accommodate the length of the roof.
Next nail the capsheet strips, starting from one end of the roof and working along the drip edge, carefully nail, using clout nails, the first strip of capsheet to the drip batten, with the release paper peeled back slightly to expose the self-adhesive underside of the capsheet.
The top edge of the cap sheet will be flush with the top of the drip batten and the remainder of the strip is hanging down with the self-adhesive side facing away from the roof and the slate green mineral side facing the building. For the moment leave all the release paper in position only peeling back sufficient to expose enough of the self-adhesive side to nail onto the drip batten.
With all of the strips across the length of the gutter/drip edge in place, hanging down like a curtain off this edge, take the primed hardboard formers and nail them, using the large head clout nails, to the drip batten, so that the capsheet strips are sandwiched between the hardboard former and the drip edge batten.
The selvedge edgeAlong one edge, on the top (green slate mineral) surface of Wickes Easy Seal Capsheet, is a strip of release paper covering a self-adhesive strip. (This selvedge edge is for overlapping and sticking one piece of capsheet to another to form a weathertight seal). You should always ensure that the selvedge is on the side where your next piece of capsheet is to be applied.
Fold over weltsRemove the remainder of the release paper from the self-adhesive underside of the capsheet and draw the capsheet up over the hardboard former and onto the roof to stick to the Underlay that is already in place. At the point where these capsheet strips meet the kerb areas, the capsheet should be cut to avoid creases and folds. See Fig. 7.
Note: The portion of the capsheet strip that is on the roof will be covered by a further strip of capsheet, detailed in later steps, to form a tough, watertight seal. Corner detailing, See Figs. 8 & 9.
Kerb edgesFinishing the kerb edges is the same procedure as making the welted edge on the gutter/drip edge, but the finishing sheet will need to be bonded to the slate green surface with the lap mastic. See Section: Raised Roof Edges and Upstands.
Applying Wickes Easy Seal Capsheet to Main Roof Area.
Measure & layoutThe Capsheet is laid in the same direction as the underlay. The strip of capsheet should be laid out with the selvedge edge to the middle or where the next roll of felt is to come. Layoutandcutthecapsheetstripstosizeinexactly the same way as the underlay,
allowingforaminimum75mmlapoverthedrip/gutter detail that’s already been laid at thedrip/gutteredge.Layoutthecapsheetwith the release paper intact and cut the capsheet to the size required. Ensuring that end laps and side joints do not coincide with those of the underlay. Use the same method of applying as for underlay. The capsheet will be laid in strips running with the joints staggered but not overlapping any underlay joint.
Where two ends of strip need to be joined, overlaptheendsby75mmandensurethatall overlaps face the same direction. All joins should be staggered so that no two overlaps appear in the same position on adjacent strips.
Securely press the capsheet into any angles that are encountered. Repeat the procedure
for all strips of capsheet until the deck area is completely covered. Upstands are completed once the main area of the roof is done. See Figs. 10, 11 &12.
To seal the capsheet, where it is being applied to a green slate surface, i.e. drip/gutter edges, endlapsandupstanddetails,useWickesHighPerformanceFeltLapAdhesive.
Applying Wickes High Performance Felt Lap AdhesiveApplyageneroussnaking5mmbeadofWickesHighPerformanceFeltLapAdhesivetothetopside of the lower cap sheet surface, across a bandof75mmorso.Usingaspreader,spreadtheLapAdhesiveevenlyoverthesurfaceofthe capsheet.Firmly press the top strip of capsheet down ontotheLapAdhesivetojointhetwosurfaces together in a watertight bond.
On the typical flat roof the remaining areas to be finished are the edges and the upstands.
Tip–Ifyouhavespotsofadhesiveorexcessive bitumen spoiling another wise perfect job, rub together two pieces of waste capsheet and collect the resulting slate granules onto a sheet of paper material. Pour this onto any excess; it will stick leaving a professional looking finish.
Note: Additional advice for the Wickes Easy Seal Roofing System is available by contacting the helpline shown at the end of this leaflet.
Further advice on installing Wickes roofing products is available by contacting the helpline shown at the end of this leaflet.
RAISED ROOF EDGES & UPSTANDS See Figs. 10, 11 & 12.
Galvanisedcloutnailsapprox.50mmapart
Hardboardformer
Lappingofwelts
Fold over sequence
150mm
150mm
Fascia
Drip batten
Depth of drip batten plus 25 mm
Depth of drip batten plus 25 mm
50 mm
150 mm
Welted drip at external cornerFIG. 9
Galvanisedcloutnailsapprox.50mmapart
Lappingofwelts
Fold over sequence
150mmmin.
Fascia
Drip batten
150mmmin.
150mmmin.
150mmmin.
Hardboardformer
Depth of drip batten plus 25 mm
Depth of drip batten plus 25 mm
150 mm min.
100 mm
Welted drip at internal cornerFIG. 8

WICKES TORCH-ON CAPSHEET & UNDERLAY
These are excellent tough polyester based roofing felts, with an APP polymer modified bitumen coating applied during manufacture, so that a boiler and separate bonding bitumen are not required. All that is required is the heat from a suitable torch. The APP stands for atactic polypropylene , which offers improved flexibility over oxidised bituminous systems. They have on their reverse side a non-removable thermofusible film, this is to stop the membrane sticking prior to use and it should not be removed. Designed for use by experienced and competent roofers, it is generally not suitable for DIY’ers.
The system incorporates a polyester based underlay and the top cap sheet is surfaced with green slate granules. The system is suitable for use on habitable buildings, and an external fire rating of F.A.C. when tested toBS476Part3:2004.TheWickesTorch-On system correctly installed complies with Building Regulations: England, Wales, Scotland and Northern Ireland.
Never assume that a job is suitable for torch-applied materials. Some jobs are simply too dangerous. This applies particularly to details where combustible materials may be hidden from view or to material stored near the torching operation. For these jobs consider using the flame free Wickes Easy Seal Self Adhesive System also featured in this guide.
Torch-on products are installed using a purpose made roofing gas torch. They can be torched directly onto sound, unchipped, clean and dry existing waterproofing. See Fig. 14. Timber decks should not be torched to directly, due to the fire risk, A nailed torch receivable surface must be appliedpriortotorching.WickesHigh
Performance Polyester Underlay is ideal for this purpose. It should be random nailed at 150mmcentresoverthewholesurfaceandat50mmcentresalongtheminimum75mmside and end laps and exposed perimeters. Including all timber details. See Fig. 13.
Unsuitable surfaces for direct torch-on application
• Timber,Plywood,Chipboardandall Insulations other than those specifically designed, tested, and found to be safe
• Felts,traditional,Type3Gand lightweight polyester with a polyester weightoflessthan150gperm2
• Detailssuchasexpansionjointsfilled with fibreboard or foam
• Formingadetailunderpitchedroof where sarking/slaters’ felt may be hidden from view, and old debris such as birds nests may be present
• Formingadetailundercladdingwhere the insulation is combustible
• Formingdetailstoplasticrooflights
• Exposedfibreboardfillets
It is essential that the correct type of torch and set of equipment is used. This equipment must include the correct gas regulator and a torch that has a trigger control, which when released reduces the flame to a pilot. It is preferable that the torch should also incorporate a stand. There are 2typesoftorches,oneusedfordetailwork,with a low output burner and short stem, and another for the main area with high output burner and a long stem to allow the operative to stand upright during the torching operation. The hoses used must be a high pressuretypecomplyingwithBS3212,atleast3mlong.Crimpedtypeclipsmustsoundly secure all fittings to the torch and hose. All equipment must be suitable for purpose and inspected prior to use by a competent person. Further guidance is in theguideissuedbythe,LiquefiedPetroleumGasAssociation:CodeofPractice24TheuseofLPGcylinders.
Depending on the laying technique used it may be necessary to provide a roll bar for the application of torch-on materials and a round nosed trowel for the treatment of the angles.
Note: Torch-on membranes should only be installed by a competent applicator, who is used to using hot bonding methods. Care must be taken when applying torch-on membranes in close proximity to combustible materials, decorative coatings and heat sensitive materials, to avoid any fire risk. The necessary fire extinguishers and fire precautions must be on hand and the operatives trained or familiar with their use. There is also a risk of injury due to burns. Full protective clothing must be worn and a bucket of clean cold water or similar at hand as first aid treatment to cool burns. The contractor should always inform the client that a hot fixing method is to be used prior to commencement of work and should comply with any rules issued by the client with respect to this information and any risk assessment performed under the requirementsofapplicableHeathandSafetyand Fire Safety Regulations. Further advice on installing Wickes roofing products is available by contacting the helpline shown at the end of this leaflet.
Vertical
Angle
Flat
VerticalReverse for successivelayers to avoid build-upwhere roofing overlaps Angle
Flat
Wall and upstand external angleFIG. 10
Junction of welted apron and wall upstand
FIG. 11
Wall and upstand internal angleFIG. 12
Torch-on slatecap sheet (fully bonded by torching)
Torch-on sandsurfacedunderlay–an optional first layerwill give extra security
Existing asphalt
Wickes Quick Drying Roof Primer
Rem edial torching
FIG. 14
High performance polyester underlay(stagger nailed)
Torch-on slatecap sheet (fully bonded by torching)
Torch-on sand surfaced underlay
Deck (plywood or timber)
FIG. 13

ImportantIt is the responsibility of the client/houseowner/applicator/specifier to confirm that insurance is either in place and/or has not being invalidated by the use of hot works or gas torches with the respective insurers of the trading entity/building and/or its contents.
Wickes and their suppliers shall have no liability whatsoever to the client/houseowner/applicator/specifier in respect of any costs, losses or expenses arising from the use, application and specification of Wickes Torch-on systems.
Typical Systems & SpecificationsIn general specifications may take the following forms:• Onelayertorch-onfullybondedto existing sound and primed* built-up roofing or asphalt depending on surface condition
• Twolayertorch-onfullybondedto existing sound primed* roofing or to a nailed underlay on timber decks
• Twolayertorch-onwiththeunderlay part bonded by torching in patches to existing or to a safe deck such as primed concrete*
Wickes Quick Drying Roof Primer is suitable for preparing the surface prior to torch application. Applied in accordance with the instructions on the tin.
Torch ApplicationThe membrane should be cut so that when laid, the side and end laps are staggered. See Fig. 15.
Apply torch-on roofing by melting the heat dispersible backing and coating to create a molten flow in front of the roll. The flame of the torch should be applied at the low point where the roll meets the Underlay. As the film and bitumen melts, roll the roofing forward. NB. A bead of bitumen must exude from all lap joints to ensure a seal. There is no question of leaving clean laps. The sidelapsmustbeaminimumof75mmwith100mmminimumendlaps.
The detailing is done with the small torch.
WICKES HIGH PERFORMANCE POLYESTER CAPSHEET & UNDERLAY
This system is equally suitable for cold adhesive application using Wickes Bituminous Roofing Felt Adhesive or pour and roll application using hot bitumen. Please contact the helpline at the end of this guide for information about using hot bitumen.
The membranes are composed of a polyester base, saturated and coated with oxidised bitumen. This offers a higher degree of performance strength and stability compared to fibre based felts. Bonded with Wickes Bituminous (Cold-applied) Roofing Felt Adhesive or hot bonding bitumen, this is predominantly laid in two or three layers. The system is suitable for use on habitable buildings, and has an external fire rating of F.AC.whentestedtoBS476Part3:2004.TheWickesHighPerformancesystemcorrectly installed complies with Building Regulations: England, Wales, Scotland and Northern Ireland.
The products can also be used on garden buildings where increased performance/durability is required.
Typical Systems & Specifications
In general specifications may take the following forms:• Twolayersonprimed*concreteor PlywoodorType3OSB.Thefirstlayer WickesHighPerformancePolyester Underlay partially bonded in strips of Wickes Roofing Felt Adhesive with laps fully bonded in adhesive. The Top layer tobeWickesHighPerformance Polyester Capsheet fully bonded in Wickes Roofing Felt Adhesive. All side and end laps staggered. See Fig. 16.
• Threelayersconsistingofanailed underlay on timber plank decks then a layerofWickesHighPerformance Polyester Underlay followed by top layer ofWickesHighPerformancePolyester Capsheet both fully bonded in Wickes Roofing Felt Adhesive. All side and end laps fully sealed and staggered. See Fig. 17.
* Wickes Quick Drying Roof Primer is a suitable primer for preparing a concrete or cement screed surface prior to bonding the first layer in strips of adhesive.
WICKES TRADITIONAL CAPSHEET & UNDERLAY
It is composed of a fibre base, which is saturated and then coated with bitumen and surfaced with either sand or a slate finish. Used in a single, two-layer or three-layer application, these products are ideal for use as temporary waterproofing or for use on sheds or garden buildings. Traditional Roofing Felts are not permitted for use on habitable buildings, such as domestic extensions except as an emergency short-term repair.
Their application on flat roofs is very similarasfortheWickesHighPerformancePolyester System covered in detail in the previous section. See Fig. 18.
Beforeyoubegin.ReadtheGeneralSectiononRoofDesignandGoodPracticeatthebeginning of this leaflet.
These felts are usually applied using cold adhesive only.
A nailed preparation is not counted as a waterproofing layer because of the nailing. Howeverthreelayerscanbeusedtoachieve maximum life.
The advantage of cold adhesive is that it’s much safer and little formal skill is needed.
Wickes, Cold Applied, Roofing Felt AdhesiveWickes Roofing Felt Adhesive is a cold applied, black, bituminous roofing adhesive used for bonding bituminous roofing to itself and to wooden sheet decking, concrete asphalt, metal and similar surfaces. Wickes sell two types:
FIG. 16
Sand surfaced first layer(stagger nailed)
Slate surfacedcap sheet (fully bonded in Wickes Bituminous Felt Adhesive)
Sand surfaced underlay(fully bonded in Wickes Bituminous Felt Adhesive)
Deck (plywood or timber)
FIG. 17
FIG. 18
Side laps75 m m m in.
End laps75 m m m in.
Side laps75 mm min.
End laps75 mm min.
FIG. 15

Trowel Applied can be used straight from the container but because this product is quite thick, it cannot be applied with a brush. Trowel-on is harder to apply, especially when cold (keep the tin warm) but it has instant grab and can be used at higher temperatures without curl, or on steeper pitches without slippage.
The advantage with this product is that the roofing felt can be laid immediately, as there is no need to wait for it to become tacky. UnlikeHot-meltorTorch-on,theworkingtimes are extended, so the roofing felt can be lifted and repositioned if needed but this is not as easy as a Brush-on product.
Coverage: As a guide, one litre of Wickes Trowel Applied Roofing Felt Adhesive should besufficientfor1-1.5m2 of roof area, as a roofing adhesive.
0.7m2for12mmchippingsor1m2for3mmchippings as a gritting adhesive
Brush Applied can also be used straight from the container. It is thinner and easier to use than trowel-on but it must be allowed to go tacky before the felt is laid, or it won’t stick. It has a narrower usable temperature rangethantrowel-on–toocoldandittakesa long time to become tacky and usable. Too hot, and the roofing felt edges may curl if not held in place. If the pitch is steep, it could allow the felt to slide, until the solvent has evaporated. The length of time to become tacky is dependent on the prevailing weather conditionsandambienttemperature–undernormalconditions;15to60minutesshouldbe sufficient but it could take longer in cooler temperatures.UnlikeHot-meltorTorch-on, the working times are extended, so the roofing felt can be lifted and repositioned if needed.
Coverage: As a guide, one litre of Wickes Brush Applied Roofing Felt Adhesive should besufficientfor1-1.5m2 of roof area.
Guide to ApplicationAll surfaces onto which felt is to be fixed must be clean, sound, dry and free from grease, oil, dirt and loose, protruding or sharp material.
Wickes Roofing Felt Adhesives are ready for use and should not be thinned. Apply as per instructions, so that there is no surplus beyond the finished edge of the lap.
Unroll the roofing felt with consistent pressure; a broom is a useful tool, to avoid formation of air pockets. Firm pressure should be applied until overall adhesion is achieved. Note: Cold applied adhesive is only fully dry when all the solvent has evaporated - This can take weeks (which is quite normal) when under layers of roofing felt, so be careful if walking on the roof.
Weather & TemperatureTry to ensure that the weather will be dry all day and if possible that conditions are warm. Roofing Felt should be used at a temperatureabove5°Coritwillbecomestiffand hard to use.
Trowel Applied Adhesive should be used at atemperatureabove5°C.
Brush Applied Adhesive should be used between10°Cand25°C
Tip: Application will be easier if the adhesive and felt are placed in a warm environment for24hourspriortouse.Iftheexternaltemperatures become extreme, it is advisable to postpone the project until more favourable temperatures pertain.
Equipment CareTools should be cleaned with white spirit.
PackagingWickes Roofing Felt Adhesive is available in all stores and from www.wickes.co.uk.
UsageUse only in a well-ventilated area, and away from sources of ignition.
Read and follow all roofing product safety and application instructions. Always use recommended personal protective equipment (PPE).
Storage Wickes Roofing Felt Adhesive should be stored, sealed, in a cool, dry, well-ventilated environment. All practical precautions should be taken to protect from fire.
WICKES SUPER SHED FELT & SHED FELT
Bitumen coated roofing felt with a protective and decorative fine green mineral finish. It is specially suited for single layer application to the roofs of garden sheds, kennels, hutched and other non-inhabited buildings, which havearoofpitchof20ºormore.
It is designed to be nail fixed with the laps sealedwithWickesHighPerformanceFeltLapAdhesive.
Additional Tools Required (All available at Wickes)• Atapemeasure
• Trimmingknifecompletewitha straight edged blade and hooked blade
• StraightEdge
• ClawHammer
• 13mmlargeheadedgalvanised clout nails.
Fig. 19. Identify the roof parts as shown. Remove old roofing felt and check the surface. Ensure old uneven boards are hammered down and secure. Remove nails or hammer home.
Fig. 20. Cut each strip of felt so that it overhangstheedgesoftheroofby50mm.Place the first strip of felt at the lowest part of the roof so that it overhangs the eaves by 50mm.Fixinpositionbynailingthetopedgeofthefeltwithcloutnailsat500mmcentres.
Fig. 21. Slowly and carefully fold overhangs overtheedgesoftheroofandnailat50mmintervals. Fold and nail corners to make a neat appearance.
Fig. 22. Place each subsequent sheet so thatitoverlapstheprevioussheetby75mmand fix as before. Carefully apply Wickes HighPerformanceFeltLapAdhesivetothearea between the overlapping sheets and finishthejointbynailingat50mmintervals.
Ridge
EavesGable
FIG. 19
500mm FIG. 20
50mm
FIG. 21
Cold appliedroofing felt adhesive
FIG. 23
Cold appliedroofing felt adhesive
FIG. 22
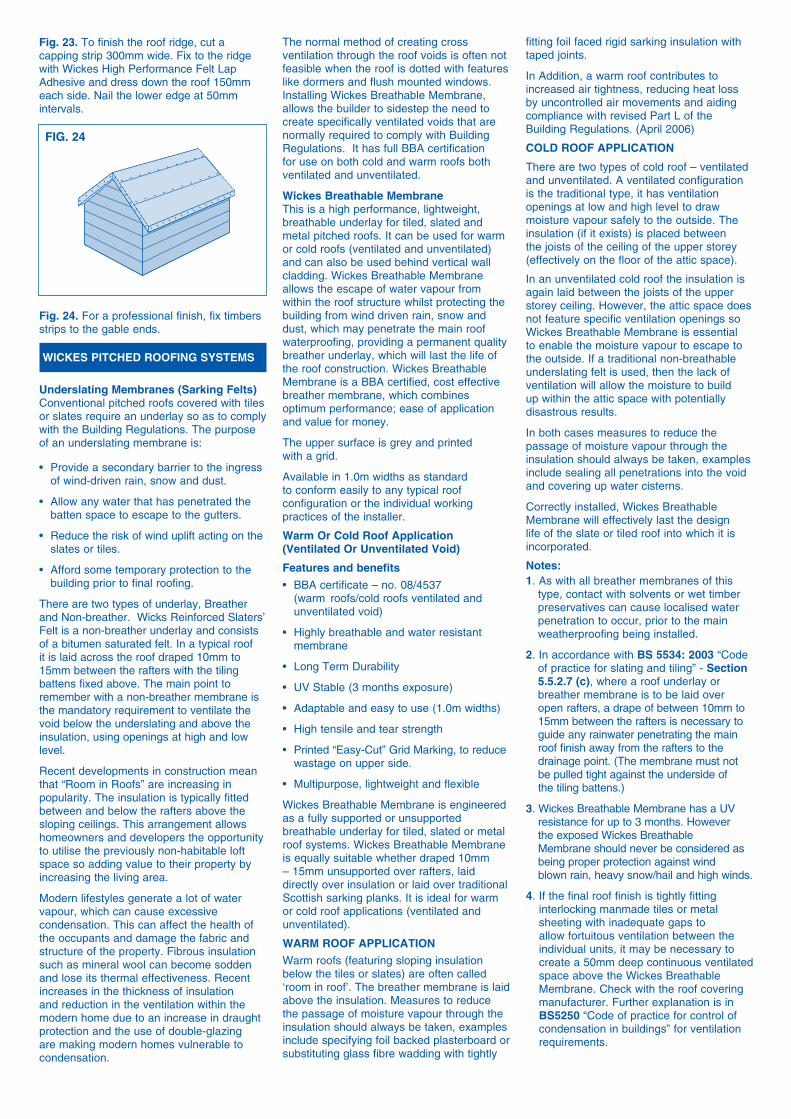
Fig. 23. To finish the roof ridge, cut a cappingstrip300mmwide.FixtotheridgewithWickesHighPerformanceFeltLapAdhesiveanddressdowntheroof150mmeachside.Nailtheloweredgeat50mmintervals.
Fig. 24. For a professional finish, fix timbers strips to the gable ends.
WICKES PITCHED ROOFING SYSTEMS
Underslating Membranes (Sarking Felts) Conventional pitched roofs covered with tiles or slates require an underlay so as to comply with the Building Regulations. The purpose of an underslating membrane is:
• Provideasecondarybarriertotheingress of wind-driven rain, snow and dust.
• Allowanywaterthathaspenetratedthe batten space to escape to the gutters.
• Reducetheriskofwindupliftactingonthe slates or tiles.
• Affordsometemporaryprotectiontothe building prior to final roofing.
There are two types of underlay, Breather and Non-breather. Wicks Reinforced Slaters’ Felt is a non-breather underlay and consists of a bitumen saturated felt. In a typical roof itislaidacrosstheroofdraped10mmto15mmbetweentherafterswiththetilingbattens fixed above. The main point to remember with a non-breather membrane is the mandatory requirement to ventilate the void below the underslating and above the insulation, using openings at high and low level.
Recent developments in construction mean that “Room in Roofs” are increasing in popularity. The insulation is typically fitted between and below the rafters above the sloping ceilings. This arrangement allows homeowners and developers the opportunity to utilise the previously non-habitable loft space so adding value to their property by increasing the living area.
Modernlifestylesgeneratealotofwatervapour, which can cause excessive condensation. This can affect the health of the occupants and damage the fabric and structure of the property. Fibrous insulation such as mineral wool can become sodden and lose its thermal effectiveness. Recent increases in the thickness of insulation and reduction in the ventilation within the modern home due to an increase in draught protection and the use of double-glazing are making modern homes vulnerable to condensation.
The normal method of creating cross ventilation through the roof voids is often not feasible when the roof is dotted with features like dormers and flush mounted windows. InstallingWickesBreathableMembrane,allows the builder to sidestep the need to create specifically ventilated voids that are normally required to comply with Building Regulations. It has full BBA certification for use on both cold and warm roofs both ventilated and unventilated.
Wickes Breathable Membrane This is a high performance, lightweight, breathable underlay for tiled, slated and metal pitched roofs. It can be used for warm or cold roofs (ventilated and unventilated) and can also be used behind vertical wall cladding.WickesBreathableMembraneallows the escape of water vapour from within the roof structure whilst protecting the building from wind driven rain, snow and dust, which may penetrate the main roof waterproofing, providing a permanent quality breather underlay, which will last the life of the roof construction. Wickes Breathable MembraneisaBBAcertified,costeffectivebreather membrane, which combines optimum performance; ease of application and value for money.
The upper surface is grey and printed with a grid.
Availablein1.0mwidthsasstandardto conform easily to any typical roof configuration or the individual working practices of the installer.
Warm Or Cold Roof Application (Ventilated Or Unventilated Void)
Features and benefits
•BBAcertificate–no.08/4537 (warm roofs/cold roofs ventilated and unventilated void)
•Highlybreathableandwaterresistant membrane
•LongTermDurability
•UVStable(3monthsexposure)
•Adaptableandeasytouse(1.0mwidths)
•Hightensileandtearstrength
•Printed“Easy-Cut”GridMarking,toreduce wastage on upper side.
•Multipurpose,lightweightandflexible
WickesBreathableMembraneisengineeredas a fully supported or unsupported breathable underlay for tiled, slated or metal roofsystems.WickesBreathableMembraneisequallysuitablewhetherdraped10mm–15mmunsupportedoverrafters,laiddirectly over insulation or laid over traditional Scottish sarking planks. It is ideal for warm or cold roof applications (ventilated and unventilated).
WARM ROOF APPLICATION
Warm roofs (featuring sloping insulation below the tiles or slates) are often called ‘room in roof’. The breather membrane is laid abovetheinsulation.Measurestoreducethe passage of moisture vapour through the insulation should always be taken, examples include specifying foil backed plasterboard or substituting glass fibre wadding with tightly
fitting foil faced rigid sarking insulation with taped joints.
In Addition, a warm roof contributes to increased air tightness, reducing heat loss by uncontrolled air movements and aiding compliancewithrevisedPartLoftheBuildingRegulations.(April2006)
COLD ROOF APPLICATION
Therearetwotypesofcoldroof–ventilatedand unventilated. A ventilated configuration is the traditional type, it has ventilation openings at low and high level to draw moisture vapour safely to the outside. The insulation (if it exists) is placed between the joists of the ceiling of the upper storey (effectively on the floor of the attic space).
In an unventilated cold roof the insulation is again laid between the joists of the upper storeyceiling.However,theatticspacedoesnot feature specific ventilation openings so WickesBreathableMembraneisessentialto enable the moisture vapour to escape to the outside. If a traditional non-breathable underslating felt is used, then the lack of ventilation will allow the moisture to build up within the attic space with potentially disastrous results.
In both cases measures to reduce the passage of moisture vapour through the insulation should always be taken, examples include sealing all penetrations into the void and covering up water cisterns.
Correctly installed, Wickes Breathable Membranewilleffectivelylastthedesignlife of the slate or tiled roof into which it is incorporated.
Notes:1. As with all breather membranes of this type, contact with solvents or wet timber preservatives can cause localised water penetration to occur, prior to the main weatherproofing being installed.
2. In accordance with BS 5534: 2003 “Code of practice for slating and tiling” - Section 5.5.2.7 (c), where a roof underlay or breather membrane is to be laid over openrafters,adrapeofbetween10mmto 15mmbetweentheraftersisnecessaryto guide any rainwater penetrating the main roof finish away from the rafters to the drainage point. (The membrane must not be pulled tight against the underside of the tiling battens.)
3.WickesBreathableMembranehasaUV resistanceforupto3months.However the exposed Wickes Breathable Membraneshouldneverbeconsideredas being proper protection against wind blown rain, heavy snow/hail and high winds.
4. If the final roof finish is tightly fitting interlocking manmade tiles or metal sheeting with inadequate gaps to allow fortuitous ventilation between the individual units, it may be necessary to createa50mmdeepcontinuousventilatedspace above the Wickes Breathable Membrane.Checkwiththeroofcoveringmanufacturer. Further explanation is in BS5250 “Code of practice for control of condensation in buildings” for ventilation requirements.
FIG. 24

ApplicationWickesBreathableMembraneislaidprintedside up, white side down. Wickes Breathable Membranemustbeinstalledinaccordancethe relevant sections of BS5534: 2003 and Wickes fixing instructions. Wickes BreathableMembrane,wheninstalledas a fully supported system, is laid over the support and secured with counter-battens, alternatively the membrane can be installed over counter-battens with a 10mm–15mmdrapeandfixedat200mmcentres using corrosion resistant staples or galvanised clout nails. Tiling battens are fixed to the counter-battens leaving a void between the membrane and tiling battens for drainage and ventilation. When using WickesBreathableMembraneundernormaldouble lapped slates or tiles in a warm roof configuration, no additional ventilation is required within the roof void.
WickesBreathableMembrane,ifinstalledina cold roof configuration and draped 10-15mmoveropenrafters,withnormalslates or tiles above, then the use of counter battens is not required and there is no requirement for ventilation of the void space.
Abutment flashings should be wedged into amortarjoint25mmdeepandatleast150mmabovetheleveloftheslatesortiles.TheWickesBreathableMembraneshouldbe turned up behind the flashing at least 100mmtopreventrainandsnowbeingblownintotheroof-space.TheWickesGoodIdeaLeafletNo.22“HowtouseWickeslead sheet and accessories” gives further information.
Lapjointsinthemembraneshouldbegenerally in accordance with the table set out below.
Lap Size Table
Where Wickes Breathable Slaters Felt is to drain into a half round external gutter, a robust eaves protection strip should be utilized.WickesHighPerformancePolyesterUnderlay cut to half its standard width i.e. 500mm,thenlaidparalleltothegutterensuring that water drains into the centre is ideal. This will ensure long-term performance of the membrane in this location, preventing water from running behind the gutter, rotting timber fascias, wall plates and rafter ends.
WICKES REINFORCED SLATERS’ FELT
Slaters’ Felt is manufactured specifically for use beneath tiles or slates in open rafter construction. Wickes Slaters’ Felt has a felt fibre base combined with a layer of open weave hessian, saturated and coated with bitumen, and surfaced with sand. Furthermore it complies with BS 8747:2007 Annex B. Formerly known as Type 1F.
Wickes Reinforced Slaters’ Felt (Sarking) should be used for tiled and slated pitched roofs, with void spaces ventilated in accordance with BS 5534; 2003. It conforms to current Building Regulations, and is a traditional secondary barrier against driving snow and rain.
Where Wickes Reinforced Slaters’ Felt is to drain into a half round external gutter, a robust eaves protection strip should be utilized.WickesHighperformancePolyesterUnderlay cut to half its standard width i.e. 500mm,thenlaidparalleltothegutterensuring that water drains into the centre is ideal. This will ensure long-term performance of the membrane in this location, preventing water from running behind the gutter, rotting timber fascias, wall plates and rafter ends. ForinformationonlapsseetheLapSizeTable in the previous section.
WICKES ROOFING SHINGLES
Wickes Roofing Shingles are ideal for use on a range of non-habitable buildings such as stables, garden sheds, garages, bus shelters, garden chalets, summerhouses, etc.
They consist of a glass fibre base, coated with oxidised bitumen and surfaced with attractive coloured mineral granules. If the building is shelteredtheycanbelaidaslowas15ºpitch.For more exposed sites the roof pitch should beaminimumof20º.Forsevereexposuresites such as beach huts we recommend that aminimumof30º.
They are designed to be nail fixed. For a robust long lasting job the minimum deck thicknessofthedeckshouldbe18mm.Details and perimeters should be sealed with WickesHighPerformanceFeltLapAdhesive.
Additional Tools Required (All available at Wickes)
• Atapemeasure
• Trimmingknifecompletewithastraight edged blade and hooked blade
• StraightEdge
• ClawHammer
When applied in accordance with the fixing instructions, shingles are easily installed and will provide a long lasting, highly decorative, weatherproof roof finish in a variety of pitched roof situations.
Roofing Shingles are factory cut into strip form. To improve adhesion of the tiles, the Square Butt Slates have a heat sensitive bituminous strip on the topside, on the reverse side there is a polyethylene strip to prevent sticking in the pack during transit. This strip does not need to be removed. The advantage of this product is that it is long lasting, economical, attractive, easy to install and is made with a non-rotting glass fibre base.
Wickes also supply a matching detailing strip which blends in perfectly with the roofing shingles and enables tricky detail areas such as eaves, verges, hips and ridges to be quickly and easily weatherproofed.
Materials Needed• WickesShingles
• WickesHighPerformancePolyester Underlay.
Note: on less important buildings a single layer of Wickes Traditional Underlay can be used
• WickesHighPerformanceFeltLap Adhesive
• 20mmLargeHeadedGalvanised Clout Nails •Undernormalconditionsallowonetubeof WickesHighPerformanceFeltLap Adhesive for each pack. If the tabs need to be fixed or complex detailing is involved allow an extra tube per pack. Note: These coverages are given as a general guide only.
FIXING INSTRUCTIONS
Preparation: Always strip off any old roofing material. Check that the roof decking is in good condition; if rotten replace it with a suitable roof deck
Underlay Always use an Underlay below Wickes Shingles. The exact choice depends on the building use andexpectedlifespan.ForHighValuebuildingssuch as garage/workshops use the rot proof WickesHighPerformancePolyesterUnderlay.ForstructuressuchasWendyHousesandtoolsheds it may be economical to use the cheaper Traditional Underlay.
Forroofswithpitchesabove20º,laythesinglelayerofWickesHighPerformancePolyester Underlay. See Fig. 25. It should be laid as flat as possible. Starting at the eaves, laywith80mmhorizontallapand150mmendlaps.SecuretheWickesHighPerformancePolyester Underlay with only enough nails to hold it in place. The Wickes Shingles once nail fixed will hold it in position.
Forroofswithlowpitchesof15to20º,fix2layersofWickesHighPerformancePolyester Underlay. See Fig. 26. Cut a 500mmstarterstripfirsttobelaidattheeaves.Laywith500mmhorizontallapandwithaminimum300mmendlap.
Product Dimensions Wickes Shingles 4 Tab Square Butt
Pack Weight kg
Strip Slate - Depth mm - Length mm
Strip Per pack
19
1000336
14
Shed size Wickes Shingles
No of boxes
Nails kg Wickes Easy Seal Lap Mastic
Cartridges (310ml)
6 x 4' 3 0.4 3*
8 x 6' 5 0.7 5*
10 x 6' 6 0.9 6*
10 x 8' 7 1.2 7*
12 x 10' 8 1.7 8*
8cm15cm
FIG. 25
Roof Pitch
Minimum Horizontal
Lap Partially
Supported (mm)
Minimum Horizontal Lap Fully Supported
(mm)
Minimum Vertical Lap
(mm)
12.5º - 14º
15º - 34º
35º +
225
150
100
150
100
75
100
100
100

A Apply Wickes Shingles Detailing Strip 300mmwide.Allow50mmforturnover. Fig. 27
BDressstripdown25mmbelowbottom edgeofroofdeck.Nailat50mmcentres, taking care not to overdrive nails.
C Tack-nail at top edge of Detailing Strip.
D In preparation for laying, the starting line of the first course of Shingles should be marked,setback15mmfromtheedges as shown. Use a well-chalked string or a straight edge to provide a guideline.
Repeat guideline every few courses to check alignment.
General FixingFor standard exposure conditions and slopes (15-60°pitch),placeonefixingnail25mmfrom each end and one fixing nail directly above the centre line of each cut out (See Fig. 28).
Allfixingsshouldbeonaline25mmabovethetopofthecutout.20mmcloutnailsare the ideal fixings to use. Proper fixing increases the strength and wind resistance of the Shingle roof, so do not skimp. If a fixing will not penetrate the decking, use another nearby location. In high wind areas and on steeproofs(60-85°pitch),use8nailsperShingleStrip,placingonefixingnail25mmfromeachendand2nailspercut-out,spaced25mmleftandrightaboveeachcut-out. See Fig. 29.
For additional security, a small blob of WickesHighPerformanceFeltLapAdhesiveshould be placed beneath the corners of each tab and over each nail head. Always leavea2mmgapbetweentheendsofindividual Shingle Strip, to allow for minor adjustments in alignment. Avoid excessive useofWickesHighPerformanceFeltLapAdhesive as this may result in runs down the roof.
First Shingle CourseWorking from the bottom corner, fix the first whole Shingle strip and continue with whole shingles for the rest of the course. Repeat this process for all odd numbered courses as shown in Fig. 30.
Second Course Trim124mmoftheShinglestripthencontinue with whole Shingle strips on this course, and all even numbered courses, thus creating a staggered effect, as shown.
The bottom edge of the Roof Tile Strip should just overlap the top of the cut outs of the underlying strip so there will be approximately143mmofeachtabexposed.
Note: If the site is severely exposed or the pitchisbelow24degrees,thentheoverlapshouldbeincreasedsothatonly130mmofthe shingle strip is left exposed.
Hips & Ridges
Adjust the last few courses of shingles so that the ridge capping will adequately cover the top courses of the shingles equally on both sides of the ridge. Fig. 31.
A FormfromDetailingStrip300mmwide. Cut and finish ends as shown.
BBondintopositionusingFeltLapAdhesive
Valleys
A Form valleys from Detailing Strip. Bond intopositionusingFeltLapAdhesive
Wherejointsoccur,lapsshouldbe100mm. Fig. 32.
BVisiblevalleyshouldnotexceed 100mmwidth.
Whilst every care has been taken to ensure that the product design, descriptions, specifications and techniques of constructing the products are accurate at the date of printing. Wickes products will inevitably change from time to time and the customer is advised to check that the design, descriptions, specifications and techniques of con-
structing any of the products described in this leaflet are still valid at the time of purchase or placing an order.©WickesBuildingSuppliesLimited2011
All rights reserved. No part of this publication may be produced or transmitted in any form or by any means electronic, mechanical, photocopying, recording or otherwise or stored in any retrieval system of any nature without the written permission of the copyright holder and the publisher.
WICKES ROOFING Helpline: 0844 412 8550
A
B
FIG. 32
30cm
50cm
50cm
FIG. 26
FIG. 27
15° - 60°25mm
25mm
FIG. 28
FIG. 30
A
B
FIG. 31
60° - 85°25mm
25mm
50mmFIG. 29