bioinformatics computing basics - bio.fsu.edustevet/introbioinfo/lab1.pdf · bioinformatics...
TRANSCRIPT

BSC4933(04)/ISC5224(01) Introʼ to BioInfoʼ Lab #1
BSC4933/ISC5224: Introduction to Bioinformatics Laboratory Section: Wednesdays from 2:30 to 5:00 PM in Dirac 152.
Bioinformatics Computing Basics Lab One, Wednesday, January 7, 2009
Author and Instructor: Steven M. Thompson
A very basic introduction to bioinformatics computing facilities at Florida State University:
This includes background information on computers in general, the fundamentals of the UNIX/Linux operating system and the X environment, client/server computing connections, and simple text editing.

2
Steve Thompson BioInfo 4U 2538 Winnwood Circle Valdosta, GA, USA 31601-7953 [email protected] 229-249-9751 © 2008 BioInfo 4U
3
Introduction
I write tutorials from a ʻlowest-common-denominatorʼ biologistʼs perspective. That is, I assume that youʼre
relatively inexperienced regarding computers, especially command line computing. As a consequence my
tutorials are written quite explicitly, and may even seem remedial. However, if you do exactly what is written,
it will work. This requires two things: 1) you must read very carefully and not skim over vital steps, and 2)
donʼt take offense if you already know what Iʼm discussing. Iʼm not trying to insult your intelligence. This also
makes the tutorials somewhat longer than otherwise necessary. Sorry.
I use three writing conventions. I use bold type for those commands and keystrokes that you are to type in at
your keyboard, or for buttons or menus that you are to click in a graphical user interface (GUI). I also use bold type for section headings. Screen traces are shown in a ʻtypewriterʼ style Courier font and
“////////////” indicates abridged data. The ʻdollarʼ symbol ($) indicates the system prompt and should
not be typed as a part of commands. Really important statements may be underlined. Furthermore, I urge
you to take notes of relevant points as you proceed through the tutorials — this will facilitate completing the
lab reports at their conclusion.
To begin at the beginning, a computer is an electronic machine that performs rapid, complex calculations, and
compiles and correlates data. It is minimally composed of five basic parts: at least one central processor unit
(CPU) that performs calculations, a data input device (such as a keyboard or mouse), a data output device
(such as a display monitor or printer), a data storage device (such as a hard drive, floppy disk, or CD/DVD
disk), and random access memory (RAM) where computing processes occur. Other necessary components
include networking and graphics modules (boards), as well as the main architecture that itʼs all plugged into
(the mother board). The quality, size, number, and speed of these components determine the type of
computer: personal, workstation, server, mainframe, or super, though the terms have become quite
ambiguous and somewhat meaningless, tending to blend into one another.
Computers have a set of utility programs, called commands, known as an operating system (OS) that enable
them to interact with human beings and other programs. OSs come in different ʻflavorsʼ with the major
distinctions related to the company that originally developed the particular OS. Three primary OSs exist today
with each having multitudes of variants: Microsoft (MS) Windows, Apple Macintosh OS, and UNIX. MS
Windows, originally based on MS-DOS, is not related to UNIX at all. Appleʼs Mac OS, since OS X (version
10), is a true UNIX OS; earlier Mac OSs were not. All UNIX OSs were originally proprietary, several are now
Open Source.
This course will extensively use CentOS version 5 Linux (based on RedHat Enterprise Linux) on the
workstations in the School of Computational Science (SC) Dirac 152 Computer Classroom, and on a high
performance cluster (HPC) system maintained by SC for Florida State University multidisciplinary research.
Many biocomputing functions are supported on both platforms, but large genetics databases and the tools for

4
accessing them are only located on HPC. CentOS and RedHat are commercial distributions of the free, UNIX
derived, Open Source Linux OS. Linux was invented in the early 1990ʼs by a student at the University of
Helsinki in Finland named Linus Torvalds as a part-time ʻhobby.ʼ FreeBSD (from the U.C. Berkley UNIX
implementation) is another popular Open Source UNIX OS. While all the various OSs have similar functions,
the functionsʼ names and their execution methods vary from one major class of OS to another. Most systems
have a GUI to their OS providing mouse driven buttons and menus, and most provide a command line ʻshellʼ
interface as well.
The original UNIX OS was developed in the USA, first by Ken Thompson (no relation) and Dennis Ritchie at
AT&Tʼs BELL Labs in the late 1960ʼs; it is now used in various implementations, on many different types of
computers the world over. All UNIXʼs are a line-oriented system similar conceptually to the old MS-DOS OS,
though many GUIs exist to help drive them. It is possible to use many UNIX computers without ever learning
command line mode. However, becoming familiar with some basic UNIX commands will make your
computing experience much less frustrating. Among numerous available on the Internet, thereʼs a very good
beginning UNIX tutorial at http://www.ee.surrey.ac.uk/Teaching/Unix/, if you would like to see an alternative
approach to what I will present here.
The UNIX command line is often regarded as very unfriendly compared to other OSs. Actually UNIX is quite
straightforward, especially its file systems. UNIX is the precursor of most tree structured file systems
including those used by MS-DOS, MS Windows, and the Macintosh OS. These file systems all consist of a
tree of directories and subdirectories. The OS allows you to move about within and to manipulate this file
system. A useful analogy is the file cabinet metaphor — your account is analogous to the entire file cabinet.
Your directories are like the drawers of the cabinet, and subdirectories are like hanging folders of files within
those drawers. Each hanging folder could have a number of manila folders within it, and so on, on down to
individual files. Hopefully all arranged with some sort of logical organizational plan. Your computer account
should be similarly arranged.
Computers are usually connected to other computers in a network, particularly in an academic or industrial
setting. These networks consist of computers, switching devices, and a high-speed combination of copper
and fiber optic cabling. Sometimes many computers are networked together into a configuration known as a
cluster, such as FSUʼs HPC, where computing power can be spread across the individual members of the
cluster (nodes). An extreme example of this is called grid computing where the nodes may be spread all over
the world. Individual computers are most often networked to larger computers called servers as well as to
each other. The worldwide system of interconnected, networked computers is called the Internet. Various
software programs enable computers to communicate with one another across the Internet. Graphics-based
browsers, such as Microsoftʼs Explorer, Netscapeʼs Navigator, Mozillaʼs Firefox, KDEʼs Konqueror, Opera
Software ASAʼs Opera, Appleʼs Safari, on ad infinitum, that access the World Wide Web (WWW), one part of
the Internet, are an example of this type of program, but only one of several.
5
The SC Computer Classroom has UNIX (Linux) workstations. Biology Department Computer Teaching
Laboratories are equipped with Macintosh and Microsoft (MS) Windows personal computers. Any computer
system can be used for the laboratory section of this course, as long as the key communication programs
described below are installed. Connecting from your home, apartment, or dorm room is entirely possible, as
long as you have these programs on your computer. (With one caveat — dial-up connections are inadequate
for the bandwidth requirements of X-Windowing [see below], but cable or DSL modem or direct ethernet LAN
[Local Area Network] work fine. And even with just dial-up, you can always use the command line.)
Most all computers have some type of a graphics-based Web browser; the exact one doesnʼt matter. You can
use whatever browser is available to connect to WWW sites, identified by their Uniform Resource Locator
(URL). Unfortunately a Web browser alone is not enough. Youʼll need to directly connect to server computers
using a command line, “terminal,” window where you can directly interact with the server computerʼs OS. The
ʻold wayʼ to do this was with a program named telnet. However, telnet is an insecure program from which
smart hackers can ʻsniffʼ connected account names and passwords. Therefore, in this age of the hacker,
most server computers no longer allow telnet connections. A newer program named ssh, for ʻsecure shell,ʼ
encrypts all connections, and is now required for command line access to most servers. ssh comes
preinstalled as a part of all modern UNIX OSs, but doesnʼt come with pre-OS X Macs or any MS Windows
machines and, therefore, must be installed on those platforms separately. Nifty Telnet-SSH (available on the
Internet at http://www.msi.umn.edu/user_support/ssh/nifty_os9.html) and Putty (available at the Web site
http://www.chiark.greenend.org.uk/~sgtatham/putty/) are two free, public-domain ssh clients available for
those respective platforms. ssh is already installed on all public use Biology Macs and MS Windows boxes
and on all SC machines.
Along the lines of secure connections, there are often times when youʼll need to move files back and forth
between your own computer and a server computer located somewhere else. The ʻoldʼ insecure way of doing
this was a program named ftp, for file transfer protocol. Just like telnet it has the unfortunate attribute of
allowing hackers to ʻsniffʼ account names and passwords. Therefore, an encrypted file transfer counterpart to
ssh is now required by most servers. That counterpart has two forms, sftp and scp, for ʻsecure file transfer
protocolʼ and ʻsecure copyʼ respectively. Itʼs also included in all modern UNIX OSs but not in pre-OS X Macs
nor in MS Windows. These programs are also installed on all the Biology and SC common use computers.
Furthermore, since ssh is strictly a non-graphical terminal program, and since Web browsersʼ graphics
capability is inadequate for the truly interactive graphics that much biocomputing software requires, another
type of graphical system needs to be present on the computer that you use for this course. That graphical
interface is called the X Window System (a.k.a. X11). It was developed at MIT (the Massachusetts Institute of
Technology) in the 1980ʼs, back in the early days of UNIX, as a distributed, hardware independent way of
exchanging graphical information between different UNIX computers. Unfortunately the X worldview is a bit
backwards from the standard client/server computing model. In the standard model a local client, for instance
a Web browser, displays information from a file on a remote server, for instance a particular WWW site. In

6
the world of X, an X-server program on the machine that you are sitting at (the local machine) displays the
graphics from an X-client program that could be located on either your own machine or on a remote server
machine that you are connected to. Confused yet?
X-server graphics windows take a bit of getting used to in other ways too. For one thing, they are only active
when your mouse cursor is in the window. And, rather than holding mouse buttons down, to activate X items,
just <click> on the icon. Furthermore, X buttons are turned on when they are pushed in and shaded,
sometimes itʼs just kind of hard to tell. Cutting and pasting is real easy, once you get used to it — select your
desired text with the left mouse button, paste with the middle. Finally, always close X Windows when you are
through with them to conserve system memory, but donʼt force them to close with the X-server softwareʼs
close icon in the upper right- or left-hand window corner, rather, always, if available, use the client programʼs
own “File” menu “Exit” choice, or a “Close,” “Cancel,” or “OK” button.
Nearly all UNIX computers, including Linux, but not including Mac OS X up to v.10.4 (v.10.5+ does include
X11 by default), include a genuine X Window System in their default configuration. MS Windows computers,
including the ones in the Biology Labs, are often loaded with X-server emulation software, such as the
commercial programs XWin32 or eXceed, to provide X-server functionality. Macintosh computers prior to OS
X required a commercial X solution; often the program MacX or eXodus was used. However, since OS X
Macs are true UNIX machines, they can use one of a variety of free open source packages such as XDarwin
to provide true X Windowing. Probably the best X solution for Max OS X is Appleʼs own X11 package
distributed as a custom install on their OS X pre-v.10.5 install disks (default configuration with v.10.5+), and
discussed on their support page: http://developer.apple.com/opensource/tools/X11.html.
Florida State Universityʼs HPC system (http://www.hpc.fsu.edu/) supports sequence analysis biocomputing,
among other multidisciplinary computational tasks. It is comprised of nine Dell PowerEdge 6950 and 2970
head nodes and 256 Dell PowerEdge SC1435 compute nodes, for a total of 1,536 cores (2.8 GHz 2220 and
2.3 GHz 2356 AMD Opteron CPUs), with two GBs of RAM per core, and 156 TBs of storage. This cluster is
managed by the Department of Scientific Computing (SC), and is available to university HPC account holders
through its general access head node (submit.hpc.fsu.edu). The HPC only allows ssh, scp, and sftp terminal
connections. In order to display X Windows on your local computer you will need to allow ssh X tunneling.
While in this course youʼll learn what all this means, and how to use a bunch of the biocomputing software
installed on the HPC. Youʼve been issued an SC Classroom account by merit of your enrollment in this
course, and youʼll personally request your HPC account today.
Computers only do what they have been programmed to do. Your interpretations entirely depend on the
software being used, the data being analyzed, and the manner in which it is used. In scientific biocomputing
research, this means that the accuracy and relevancy of your results depends on your understanding of the
strengths, weaknesses, and intricacies of both the software and data employed, and, probably most
importantly, of the biological system being being studied.

7
My example protein system
I use members of the same dataset throughout the courseʼs lab tutorials to help make them more interesting
and to provide continuity with a common focused objective. You will be doing the same starting next week
with your choice of one of four course ʻprojectʼ molecules. This is somewhat analogous to what one would do
in an actual laboratory setting, and will provide a basic framework on which you can build. My example molecule is the very well characterized and vitally important protein Elongation Factor subunit 1-Alpha (1α).
The entire elongation factor family of molecules is crucial to protein biosynthesis. They are ubiquitous to all of
cellular life and, in concert with the ribosome, must have been one of the very earliest enzymatic factories to
evolve. Three distinct subtypes of elongation factors all work together to help perform the vital function of
protein biosynthesis. In Bacteria (and Eukʼ and Archʼ plastids) and Eukaryota nuclear genomes they have the
following names (the nomenclature in Archaea has not been standardized and is sometimes contradictory):
Eukaryota Bacteria Function
EF-1α EF-Tu Binds GTP and aminoacyl-tRNA and delivers the latter to the A site of ribosomes.
EF-1β EF-Ts Interacts with EF-1α/Tu to displace GDP and thus allows the regeneration of GTP-EF-1α/Tu
EF-2 EF-G Binds GTP and peptidyl-tRNA and translocates the latter from the A site to the P site.
EF-1α/Tu has guanine nucleotide, ribosome, and aminoacyl-tRNA binding sites, and is essential to the
universal process of protein biosynthesis, promoting the GTP-dependent binding of aminoacyl-tRNA to the A-
site of the intact ribosome. The hydrolysis of GTP to GDP mediates a conformational change in a specific region of the molecule. This region is conserved in both EF-1α/Tu and EF-2/G and seems to be typical of
GTP-dependent proteins which bind non-initiator tRNAs to the ribosome.
In E. coli EF-Tu is encoded by a duplicated loci, tufA and tufB, located about 15 minutes apart on the
chromosome at positions 74.92 and 90.02 (ECDC). In humans at least twenty loci on seven different
chromosomes demonstrate significant similarity to the gene. However, only two of them are potentially active;
the remainder appear to be retropseudogenes (Madsen, et al., 1990). It is encoded in both the nucleus and
mitochondria and chloroplast genomes in eukaryotes and is a globular, cytoplasmic enzyme in all life forms.
The three-dimensional structure of Elongation Factor 1α/Tu has been solved in at least thirty cases. Partial
and complete E. coli structures have been resolved and deposited in the Protein Data Bank (1EFM, 1ETU,
1DG1, 1EFU, and 1EFC), the complete Thermus aquaticus and Thermus thermophilus structures have been determined (1TTT, 1EFT, and 1AIP), and even cow EF-1α has had its structure determined (1D2E). Most of
the structures show the protein in complex with its nucleotide ligand, some show the terniary complex.
The Thermus aquaticus structure is shown below on the following page, as drawn by NCBIʼs Cn3D molecular
visualization tool:

8
Notice that half of the protein has well defined alpha
helices and the rest is rather unordered coils partly
defined by beta strands. GTP fits right down in
amongst all the helices in the pocket. The Thermus
aquaticus structure has six well-defined helices that
occur from residue 24 through 38, 86 through 98,
114 through 126, 144 through 161, 175 through 184,
and 194 through 207. There are also two short
helices at residues 47 to 51 and 54 to 59. The
guanine nucleotide binding site involves residues 18
to 25, residues 81 to 85, and residues 136 to 139.
Residue 8 is associated with aminoacyl-tRNA
binding.
Because of strong evolutionary pressure resulting in very slow divergence and because of its ubiquity, EF-1α/Tu is an appropriate gene on which to estimate early life phylogenies and with which to ask early
branching order questions in ʻdeepʼ eukaryotic evolution. In fact, a series of papers in the early-90ʼs, notably
those by Iwabe, et al. (1989), Rivera and Lake (1992), and Hasegawa, et al. (1993) all base ʻuniversalʼ trees of life on this gene. Iwabe, et al. used the trick of aligning the EF-1α/Tu gene paralogue EF-1β/Ts to their EF-
1α/Tu dataset to root the tree. This protein, and your project molecule, will illustrate how different
biocomputing analyses can lead to different functional and structural insights. I will usually restrict my example dataset to a subset of ʻprimitiveʼ eukaryotic EF-1α sequences. These will include many protists and
algae but will exclude much of the ʻcrownʼ group, including all of the higher plants, true fungi, and metazoans.
Bioinformatics computing facilities at Florida State University
So how do you do bioinformatics? Often bioinformatics is done on the Internet through the WWW. This is
possible and easy and fun, but, beside being a bit too easy too get sidetracked upon, the Web can not readily
handle large datasets or large multiple sequence alignments. These datasets quickly become intractable in
the Web environment. I canʼt tell you exactly where youʼll hit the limit — youʼll know youʼre there when you try
— but Iʼm getting ahead of myself; weʼll deal with multiple sequence alignment in a few weeks. In spite of the
Webʼs inherent problems, letʼs begin with a couple of Web resources designed specifically for this course.
Activate the SC Classroom computer that you are sitting at by moving its mouse or by pressing the
return/enter key on its keyboard. Log onto it with the SC Class Account user ID and password given to you
today. Youʼll see a standard SC Linux desktop. Weʼll use the Classroom computers today to peruse some
local FSU campus WWW servers, the URLs http://www.bio.fsu.edu/, and http://www.sc.fsu.edu/, as well
http://www.hpc.fsu.edu.
Thermus aquaticus EF-Tu: 1EFT

9
Launch the Konqueror Web browser by selecting the world globe icon in the bottom banner menu with a
single mouse click. (If on a different system, use whatever WWW browser icon is available — on the desktop,
a <double-click> will launch it, if itʼs in a Mac, MS Window, or UNIX menu, a single <click> will do it.) When
your browser has opened, first go to the Course home page located at
http:/bio.fsu.edu/~stevet/IntroBioInfo/Lecture. Weʼll use this page as an entry point to a “BlackBoard”
repository for all of the course lectures and its syllabus. Next connect to the “Introduction to Bioinformatics
Laboratory” URL, http://bio.fsu.edu/~stevet/IntroBioInfo/Lab.html, and read it over. Iʼll use this page for
each weekʼs lab tutorial in Adobeʼs Portable Document Format (pdf, a device independent page description
language; get Adobeʼs free pdf Reader at http://www.adobe.com/ for your own personal computer, if you donʼt
already have it), and their respective lab reports, throughout the semester. It should look similar to what I
show below. Use the Mozilla “Edit” “Preferences” menu to designate this page as your SC account WWW
home page for now.
The page provides links to each weekʼs exercise tutorial and lab report throughout the semester. Explore the
navigation links in the sidebar. Notice the different remote Web server computers that different URLs connect
to. The computerʼs Internet name is that portion of the URL just after the http:// and before the next slash (/),
for instance, bio.fsu.edu for my Course Lab page. Go to my Home page, http://bio.fsu.edu/~stevet/cv.html,
and check out the biocomputing “Bookmark” list there. Donʼt spend too much time exploring Web resources
right now though; just realize that a huge spectrum is available. Next week we will explore several of these
sites in much greater detail while learning about many of the bioinformatics databases available.

10
Now use the “Biology Department” sidebar link to go to the main FSU Biology Department home page,
http://www.bio.fsu.edu/. Among all the helpful links in its sidebar, pay particular attention to “Research
Facilities;” press the button. Next, select “Computer Support Facilities” and then “Labs,” to see the
biology computer labs that can be used for student biocomputing. Additionally, Dirac Science Library has
computers available for student access, although these machines likely do not have X windowing installed.
Go back to the main “Computer Facilities” page and select “Help” there. Under “Internet and Email” select
“How to connect to HPC (submit.hpc.fsu.edu).” Alex Stuy, the Biology Departmentʼs senior computer
support person, has written excellent instructions there for using ssh to connect to FSUʼs HPC. Another very
helpful link on the Biology pagesʼ sidebar is “Seminars and Events;” select the entry. Pick BioNotes
“Current week” to see a listing of all of Biologyʼs seminars for the week. This is a great way to keep
informed. Return to my home page.
Next pick the link in my sidebar to visit the home page for the Department of Scientific Computing (SC) at
http://www.sc.fsu.edu/. SC provides much support for this course, including the classroom and computing
environment that we are using. Click on “Computing” under “Resources” in the sidebar there, and explore
the links briefly. Return to my home page and click on “Steve's DSC TWiki BioInfo' Portal” in my sidebar to
load http://www.sc.fsu.edu/twiki/bin/view/TechHelp/ScSBioinformatics and check out the biocomputing
software that I administer on the SC systems. Return to my home page and click on the “HPC @ FSU” link
there to get to its home page, http://hpc.fsu.edu/. Go to “Facility” “Software” in this sidebar to see all of the
software, including the bioinformatics resources, available on our HPC system. Next click on “Getting
Started” “Connecting” in the HPC sidebar menu. Click on “HPC Account Application Details” there to get
the account request page, and then push the “Apply for a general access account” button to take you to
https://www.hpc.fsu.edu/content/view/30/1/ where you can request your new HPC account. You may have
to allow your browser to connect to this secure page by checking “Continue” or something similar. Under
“Select an option” pick “Sponsored Account” and then choose either me, or your faculty advisor, if they are
on the list. Fill in all of the required fields (the “i” contextual help buttons explain further), accept the default
“bash” shell, and enter the “verification code” from the graphic. Push the “Request Account” button. Donʼt
forget the new HPC password you just assigned yourself! You should have your new account later this week,
and weʼll be actively using it next time. Leave your browser active, as we will use it later in the tutorial.
So, if Web based biocomputing can be problematic, what are the alternatives? Desktop biocomputing
software can be installed on your own personal computer to provide one alternative. Free, public domain
sequence analysis programs are available, but they can be somewhat complicated to install, configure, and
maintain. The user must be pretty computer savvy, especially to get all of the different programs to cooperate
with one another. Therefore, commercial software packages, such as MacVector, DNAsis, DNAStar, etc., are
sometimes employed, but license hassles, a big expense per machine, and database access all complicate
matters. Non-Web, UNIX server-based solutions are often used, because of all these reasons. Network
access to UNIX server computers can provide fast, powerful program usage, with convenient local database
access, all on the same server. Connections can be made from any networked computer anywhere! Again

11
free public domain solutions are available, but now a very cooperative systems administrator must build and
maintain the system for its users. I try to do that, and all such programs are listed under the HPC and SC
bioinformatics software headings that you just saw. Furthermore, commercial biocomputing server packages
now become viable, as they minimize systems management concerns, and only one license fee is required
for the entire institution, rather than individual licenses for every machine running the package. From an
economics point of view, itʼs a ʻno-brainerʼ for an institution to support a commercial UNIX server based
biocomputing solution. This was the situation with the ʻretiredʼ Accelrys Genetics Computer Groupʼs (GCG)
Wisconsin Package (1982–2008) that weʼll introduce next week.
Gaining an acceptable level of comfort in the UNIX environment
Therefore, if weʼre going to be using UNIX computers for biocomputing all semester long (and most likely in
the future as well), letʼs begin to explore that world so that weʼll be able to more easily cope with it. On any
UNIX system (including Linux, such as the SC Computer Classroom machines, or on Mac OS X machines),
launch a terminal program window with the appropriate icon from the desktop or from one of the menus
(“terminal” from “System Tools” on many Linux menus, usually in the “Dock” on Macs). You should now
have an interactive command line terminal session running on your local Classroom machineʼs desktop. The
OS runs your default shell program when the window launches, and it runs any startup scripts that you may
have, and then it returns the system prompt and waits to receive a command. The shell program is your
interface to the UNIX OS. It interprets and executes the commands that you type. Common UNIX shells
include the default SC bash (Bourne again shell) shell, the C shell, and a popular C shell derivative called
tcsh. tcsh and bash both enable command history recall using the keyboard arrow keys, accept tab word
completion, and allow command line editing.
You end up in your ʻhome directoryʼ upon entering a terminal session. This is that portion of SCʼs computing
disk space reserved just for you, and designated by you from anywhere on the system with the character string “$HOME.” “$HOME” is an example of what is know as an UNIX “environment variable.” It needs to be
pointed out that your “$HOME” is not physically located on the local machine that you are sitting at, rather it is
located on a large disk ʻfarmʼ maintained by SC and available to you from any SC common use computer.
This means that all of your files exist in your SC Classroom account independent of which Classroom
machine you log onto, and also exist on all the common use SC servers. That way you do not need to always
use the same Classroom computer to get to your work; in fact any SC common use UNIX/Linux computer will
work — either down here in the Dirac 150 suite area or upstairs on the fourth floor.
The system prompt may look different on different UNIX systems depending on how the system administrator
has set up the user environment. Commonly it will display the userʼs account name and/or the machine name
and some prompt symbol. Sometimes it will show your present location in the disk ʻfarmʼ as well. Here I will only use the ʻdollarʼ sign ($) to represent the system prompt in all of these tutorials. It should not be typed as
part of any command.

12
UNIX syntax and keystroke conventions
In command line mode each command is terminated by the ʻreturnʼ or ʻenterʼ key. UNIX uses the ASCII
character set and unlike some OSs, it supports both upper and lower case. A disadvantage of using both
upper and lower case is that commands and file names must be typed in the correct case. Most UNIX
commands and file names are in lower case. Commands and file names should generally not include spaces nor any punctuation other than periods (.), hyphens (–), or underscores (_). UNIX command options are
specified by a required space and the hyphen character ( -). UNIX does not use or directly support function
keys. Special functions are generally invoked using the ʻControlʼ key. For example a running command can
be aborted by pressing the ʻControlʼ key [sometimes labeled “CTRL” or denoted with the karat symbol (^)] and
the letter key “c” (think c for ʻcancelʼ). The short form for this is generally written CTRL-C or ^C (but do not
capitalize the “c” when using the function). Using control keys instead of special function keys for special
commands can be hard to remember. The advantage is that nearly every terminal program supports the
control key, allowing the UNIX OS to be used from a wide variety of different computer systems that might
connect to a particular UNIX server.
The general command syntax for UNIX is a command followed by some options, and then some parameters.
If a command reads input, the default input for the command will often come from the interactive terminal
window. The output from a system level command (if any) will generally be printed back to your terminal
window. General UNIX command syntax follows:
cmd
cmd -options
cmd -options parameters
The command syntax allows the input and outputs for a program to be redirected into files. To cause a
command to read from a file rather than from the terminal, the “<” sign is used on the command line, and the
“>” sign causes the program to write its output to a file (for programs that donʼt do this by default, also “>>”
appends output to the end of an existing file):
cmd -options parameters < input
cmd -options parameters > output
cmd -options parameters >> bottom_of_existing_file
cmd -options parameters < input > output
To cause the output from one program to be passed to another program as input a vertical bar (|), known as
the “pipe,” is used. This character is < shift > < \ > on most USA keyboards:
cmd1 -options parameters | cmd2 -options parameters
This feature is called “piping” the output of one program into the input of another.

13
Certain printing (non-control) characters, called “shell metacharacters,” have special meanings to the UNIX
shell. You rarely type shell metacharacters on the command line because they are punctuation characters.
However, if you need to specify a filename accidentally containing one, turn off its special meaning by preceding the metacharacter with a “\” (backslash) character or enclose the filename in “'” (single quotes).
The metacharacters “*” (asterisk), “?” (question mark), and “~” (tilde) are used for the shell file name
“globbing” facility. When the shell encounters a command line word with a leading “~”, or with “*” or “?”
anywhere on the command line, it attempts to expand that word to a list of matching file names using the following rules: A leading “~” expands to the home directory of a particular user. Each “*” is interpreted as a
specification for zero or more of any character. Each “?” is interpreted as a specification for exactly one of
any character, i.e.:
~ The tilde specifies the userʼs home directory (same as $HOME).
* The asterisk matches any string of characters zero or longer,
? The question mark matches any single character.
The latter two globbing shell metacharacters cause ʻwild card expansion.ʼ For example, the pattern “dog*”
will access any file that begins with the word dog, regardless of what follows. It will find matches for, among others, files named “dog,” “ʻdoggone,” and “doggy.” The pattern “d?g” matches dog, dig, and dug but not
ding, dang, or dogs; “dog?” finds files named “dogs” but not “dog” or “doggy.” Using an asterisk or question
mark in this manner is called using a “wild card.” Most often when a UNIX command expects a file name, “cmd filename,” itʼs possible to specify a group of files using wild card expansion.
A couple of examples using wild card characters along with the pipe and output redirection follow:
cmd */*.data | cmd2
cmd my.data? > filename
The first example will access all files ending in “.data” in all subdirectories one level below the current
directory and pass that output on to the second command. The second example will access all files named “my.data” that have any single character after the word data in your current directory and output that result to
a file named filename. Wild cards are very flexible in UNIX and this makes them very powerful, but you must be extremely careful when using them with destructive commands like “rm” (remove file). Extreme chaos
could result!
Four other special symbols should be described before going on to specific UNIX commands:
/ Specifies the base, root directory of the entire file system, and separates directory names.
. Specifies your current working directory.
.. Specifies the parent directory of your current working directory, i.e. one level up.
& Execute the specified command in another process, a.k.a. the ʻbackground.ʼ
14
The most important UNIX commands (IMHO ʻin my humble opinionʼ)
Remember: do things in the following sections that are in bold. Do things in the right order, without skipping
anything. That way it will work! Some may seem repetitive, but remember, repetition fosters learning. Also
keep in mind that most UNIX commands are actually some cryptic, abbreviated form of a real English word.
Sometimes the original UNIX programmers were rather obtuse with their naming conventions, and those
conventions have held through the years, but knowing what the abbreviations are will help you learn them.
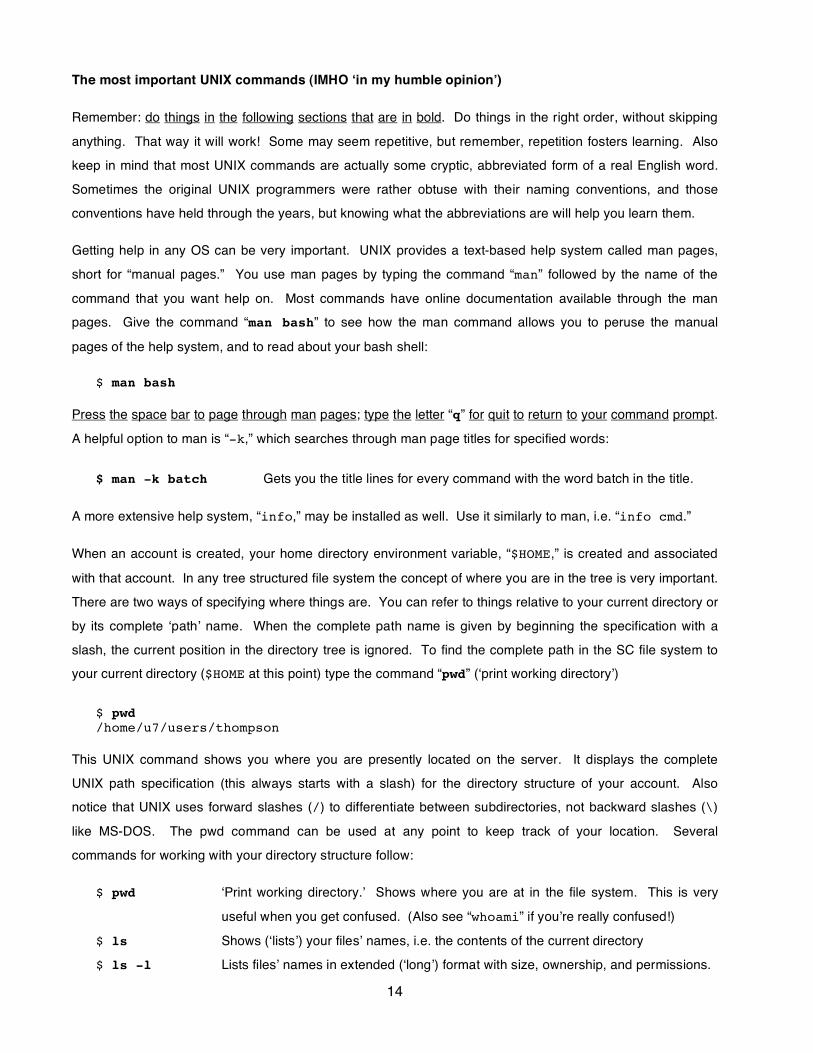
Getting help in any OS can be very important. UNIX provides a text-based help system called man pages,
short for “manual pages.” You use man pages by typing the command “man” followed by the name of the
command that you want help on. Most commands have online documentation available through the man pages. Give the command “man bash” to see how the man command allows you to peruse the manual
pages of the help system, and to read about your bash shell:
$ man bash
Press the space bar to page through man pages; type the letter “q” for quit to return to your command prompt.
A helpful option to man is “-k,” which searches through man page titles for specified words:
$ man -k batch Gets you the title lines for every command with the word batch in the title.
A more extensive help system, “info,” may be installed as well. Use it similarly to man, i.e. “info cmd.”
When an account is created, your home directory environment variable, “$HOME,” is created and associated
with that account. In any tree structured file system the concept of where you are in the tree is very important.
There are two ways of specifying where things are. You can refer to things relative to your current directory or
by its complete ʻpathʼ name. When the complete path name is given by beginning the specification with a
slash, the current position in the directory tree is ignored. To find the complete path in the SC file system to your current directory ($HOME at this point) type the command “pwd” (ʻprint working directoryʼ)
$ pwd /home/u7/users/thompson
This UNIX command shows you where you are presently located on the server. It displays the complete
UNIX path specification (this always starts with a slash) for the directory structure of your account. Also notice that UNIX uses forward slashes (/) to differentiate between subdirectories, not backward slashes (\)
like MS-DOS. The pwd command can be used at any point to keep track of your location. Several
commands for working with your directory structure follow:
$ pwd ʻPrint working directory.ʼ Shows where you are at in the file system. This is very
useful when you get confused. (Also see “whoami” if youʼre really confused!)
$ ls Shows (ʻlistsʼ) your filesʼ names, i.e. the contents of the current directory
$ ls -l Lists filesʼ names in extended (ʻlongʼ) format with size, ownership, and permissions.

15
$ ls -al Lists ʻallʼ files, including “dot” systems files, in your directory in the long format.
$ mkdir newdir ʻMake directoryʼ named “newdir” within your current directory.
$ cd newdir ʻChange directoryʼ down to a directory named “newdir” from your current directory.
$ cd Move back into your home directory from anywhere (with most shells).
$ rmdir newdir ʻRemove directoryʼ “newdir” from your current directory. Directory must be empty.
To list the files in your home directory, use the “ls” command. There are many options to the “ls” command.
Check them out by typing “man ls”. I think the most useful options are “-l,” “-t,” and “-a”. These options
can be used in any combination, e.g. “ls –alt.” The “-l” option will list the files and directories in your
current directory in a ʻlongʼ form with extended information. The “-t” option displays files ordered by ʻtime,ʼ
with the most recent first. The “-a” option displays ʻallʼ files, even files with a period (a.k.a. “dot files”) as the
first character in their name, a UNIX convention to hide important system files from normal listing.
This dot file convention has lead to a number of special configuration files with periods as the first character in
their name. Some of these are executed automatically when a user logs in, just like “AUTOEXEC.BAT” and
“CONFIG.SYS” are by the MS-DOS/Windows OS. Many UNIX systems execute files called “.bashrc,”
“.profile,” “.login,” “.cshrc,” or “.tcshrc” upon every login, depending on your shell. These set up
your shell environment and generally should not be messed with until you are more comfortable with UNIX. Three examples of the “ls” command in my SC account follow; yours will obviously be different:
$ ls 1J46.cn3 Bioinfo.HPC.ppt CompGen EF1a Maria public_html 1J46.pdb BlaberKLK Desktop Library OS.sh SPDBV archive Cn3D_User dumpster mail packages $ ls -l total 354 -rw-r--r-- 1 thompson faculty 98461 Sep 7 2006 1J46.cn3 -rw-r--r-- 1 thompson faculty 210114 Sep 7 2006 1J46.pdb drwxrwxr-x 3 thompson faculty 1024 Nov 6 14:05 archive -rw-r--r-- 1 thompson faculty 32768 Sep 19 21:41 Bioinfo.HPC.ppt drwxr-xr-x 2 thompson faculty 9216 Mar 17 2004 BlaberKLK drwxr-xr-x 2 thompson faculty 96 Jan 18 2007 Cn3D_User drwxr-xr-x 3 thompson faculty 1024 Nov 6 14:06 CompGen drwx------ 2 thompson faculty 1024 Nov 6 14:02 Desktop drwxr-xr-x 3 thompson faculty 96 Mar 29 2001 dumpster drwxr-xr-x 3 thompson faculty 1024 Nov 6 14:08 EF1a drwx------ 8 thompson faculty 1024 Jan 23 2007 Library drwx------ 2 thompson faculty 96 Sep 18 10:42 mail drwxr-xr-x 4 thompson faculty 1024 Dec 4 2006 Maria -rwxr-xr-x 1 thompson faculty 1415 Jan 11 2007 OS.sh drwxr-xr-x 6 thompson faculty 1024 Aug 31 10:04 packages drwxr-xr-x 3 thompson faculty 1024 Sep 5 2006 public_html drwxr-xr-x 7 thompson faculty 96 Jan 17 2000 SPDBV $ ls -a . .DS_Store Library .recently-used .. dumpster .local .scim 1J46.cn3 EF1a .login SPDBV 1J46.pdb .emacs.d mail .ssh archive .esd_auth Maria .t_coffee

16
.bash_history .fltk .mc .thumbnails Bioinfo.HPC.ppt .gconf .mcop .Trash BlaberKLK .gconfd .metacity .utopia Cn3D_User .gnome2 .mozilla .viminfo CompGen .gnome2_private .nautilus .Xauthority .cshrc .ICEauthority OS.sh .xsession-errors .DCOPserver_cdburn .java packages Desktop .kde public_html .dmrc .lesshst .qt
In the output from “ls -l” additional information regarding file permissions, owner, size, and modification
date is shown. In the output from “ls -a” all those dot systems files are now seen. Nearly all OSs have
some way to customize your login environment with editable configuration files; UNIX uses these dot files. An
experienced user can put commands in dot files to customize their individual login environment.
Another example of the “ls” command, along with output redirection is shown below. Issue the following
command to generate a file named “SC.program.list” that lists all of the file names in long format located
in the SC “/usr/common/i686-linux/bin” directory:
$ ls -l /usr/common/i686-linux/bin > SC.program.list
Rather than scrolling the “ls” output to the screen, this command redirects it into the file
“SC.program.list.” This file contains a list of all the programs that are maintained for all of the common
use SC Linux machines.
Another environment variable, your “$PATH,” tells your account what directories to look in for programs;
“/usr/common/i686-linux/bin” above, should be in your path, so you can run any of the programs in
the “SC.program.list” by just typing its name. You can see your complete path designation by using the
command “echo,” along with “$PATH,” which ʻechoesʼ its meaning to the screen. Each path, of the several
listed, is separated by a colon:
$ echo $PATH /opt/gridengine/bin/lx24-x86:/usr/lib/qt3.3/bin:/usr/kerberos/bin: /usr/local/bin:/bin:/usr/bin:/usr/X11R6/bin:/usr/common/i686-linux/bin
Subdirectories are generally used to group files associated with a particular project or files of a particular type.
For example, you might store all of your memorandums in a directory called “memo.” As seen above, the
“mkdir” command is used to create directories and the “cd” command is used to move into directories. The
special placeholder file “..” allows you to move back up the directory tree. Check out its use below with the
“cd” command to go back up to the parent of the current directory:
$ mkdir memo $ ls 1J46.cn3 Bioinfo.HPC.ppt CompGen EF1a Maria packages 1J46.pdb BlaberKLK Desktop Library memo public_html archive Cn3D_User dumpster mail OS.sh SPDBV

17
$ cd memo $ pwd /panfs/panasas1/users/thompson/memo $ cd .. $ pwd /panfs/panasas1/users/thompson
After the “cd ..” command “pwd” shows that we are ʻbackʼ in the home directory. Note that with most shells
“cd” all by itself will take you all the way home from anywhere in your account.
Next letʼs look at several basic commands that affect the file system and access files, rather than directories:
$ cat SC.program.list Displays contents of the file “SC.program.list” to screen
without pauses; also conʼcatʼenates files (appends one to another), e.g: “cat file1 file2 > file3” or “cat file1 >> file2.”
$ more SC.program.list Shows the contents of the file “SC.program.list” on the
terminal one page at a time; press the space bar to continue and see ʻmore.ʼ Type a “?” when the scrolling stops for viewing
options. Type “/pattern” to search for “pattern.” (“less” is
usually also available; itʼs more powerful than “more” — silly
computer systems programmersʼ humor). $ head SC.program.list Shows the first few lines, the ʻhead,ʼ of “SC.program.list,”
optionally “-N” displays N lines from the top of the file.
$ tail SC.program.list Show the last few lines, the ʻtail,ʼ of the file “SC.program.list,”
optionally “-N” displays N lines from the bottom of the file.
$ wc SC.program.list ʻWord countsʼ the number of characters, words, and lines in the
specified file, “SC.program.list.”
$ cp SC.program.list tmp1 ʻCopiesʼ the file “SC.program.list” to the file “tmp1.” Any
previous contents of a file named “tmp1” are lost.
$ mv SC.program.list tmp2 Renames, ʻmoves,ʼ the file “SC.program.list” to the file “tmp2.”
Any previous contents of a file “tmp2” are lost, and
“SC.program.list” no longer exists.
$ cp tmp2 memo Since “memo” is a directory name not a file name, this command
ʻcopiesʼ the specified file, “tmp2,” into the specified directory,
“memo,” keeping the file name intact. Use the “-R” recursive option
to copy all files down through a directory structure. $ rm tmp2 Deletes, ʻremoves,ʼ the file “tmp2” in the current directory.

18
$ rm memo/tmp2 Deletes the file “tmp2” in the directory “memo;” the directory
remains, but the file is unrecoverable and permanently gone!
More commands that deal with files (but donʼt do these today — theyʼre not in bold):
rm -r somedir ʻRemovesʼ all the files, and subdirectories of a directory and then removes the
directory itself — very convenient, very useful, and very dangerous. Be careful! chmod somefile ʻChange mode,ʼ i.e. the permissions of a file named “somefile.” See “man
chmod” and also “man chown” for further (and extensive) details.
lpr somefile ʻLine printsʼ the specified file on a default printer. Specify a particular print queue
with the “-P” option to send it elsewhere — “-Ppr152” is the Classroom printer.
Another example using the SC “/usr/common/i686-linux/bin” program list is shown here. This time the
“ls” output is piped to the “more” command rather than redirected into a file:
$ ls -l /usr/common/i686-linux/bin | more
A useful command that allows searching through the contents of files for a pattern is called “grep.”
Unfortunately the derivation of the command name is so obtuse that it probably wonʼt help you remember it (Globally search for a Regular Expression and Print). The first parameter to “grep” is a search pattern; the
second is the file or files that you want searched. For example, if you have a bunch of different data files whose file names all end with the word “.data” in several different subdirectories, all one level down, and you
wanted to find the ones that have the word zebra within them, you could “grep zebra */*.data” to find
the files. Use the following variation of the “grep” command to see all the programs in our SC program list
that have the word “pro” in them:
$ grep pro tmp1 Show the lines in the file “tmp1” that contain the specified pattern, here the word
“pro” (most are PHYLIP protein sequence specific phylogenetics programs).
Another file searching command, “find,” looks not within filesʼ contents, but rather at their names, to help you
find files that youʼve lost in your directory structure. Its syntax is a bit strange, not following the usual rules:
$ find . -name ‘*tmp*’ Finds files from the current directory ( . ) down containing the word “tmp”
anywhere within its filename. Note that the single quotes ( ‘ ) are
necessary for wild card expansion to occur with the find command.
Commands for looking at the system, other users, your sessions and jobs, and command execution follow:
$ uptime Shows the time since the system was last rebooted. Also shows the “load average”.
Load average indicates the number of jobs in the system ready to run. The higher the
load average the slower the system will run. $ w (or who) Shows who is logged in to the system doing what.

19
$ top Shows the most active processes on the entire machine and the portion of CPU cycles
assigned to running processes. Press “q” to quit.
$ ps Shows your current processes and their status, i.e. running, sleeping, idle, terminated,
etc. See “man ps” as options vary widely, especially the -a, -e, -l, and -f options).
$ ps –U user Perhaps (user is you) the most useful “ps” option — show me all of MY processes!
Some more process commands that we wonʼt be using today are shown below:
at Submit script to the at queue for execution later.
bg Resumes a suspended job in background mode.
fg Brings a background job back into interactive mode.
And the command to change your password (which wonʼt be needed today either):
passwd Change your login password (but donʼt do this on SC Linux systems! See
http://www.sc.fsu.edu/computing/tech-docs/177-changing-your-password-or-
environment).
Usually it is best to leave programs using a quit or exit command; however, occasionally itʼs necessary to
terminate a running program. Here are some useful commands for bailing out of programs:
< Ctrl c > Abort, ʻcancel,ʼ a running process (program); thereʼs no option for restarting it later.
< Ctrl d > Terminate a UNIX shell, i.e. exit present control level and close the file. Use
“logout” or “exit” to exit from your top-level login shell.
< Ctrl z > Pause (suspend) a running process and return the user to the system prompt. The
suspended program can be restarted by typing “fg” (foreground). If you type “bg”
(background), the job will also be started again, but in background mode.
$ kill –9 psid Kills a specific process using the “-9” “sure kill” option. The PSID (process
identification) number is obtained using some variation of the “ps” command.
Text editing — the good, the bad, and the ugly
Text editing is often a necessary part of computing. This is never that much fun, but it can be very, very
important. You can use your own favorite word processor like Microsoft Word, if you insist, but be sure to
“Save As” “Text Only” with “Line Breaks,” and specify UNIX line breaks, if you have the choice. Native word
processing format contains a whole bunch of binary control data specifying format and fonts and so forth; the
UNIX OS canʼt read it at all. Saving as text only avoids this problem. Using an ASCII text editor like BBEdit
on a Mac avoids the binary problem, but you still need to be careful to save with UNIX style line breaks.

20
Editing files on your own personal computer and then using them on a different computer is a two-step
process though. After all the editing is done, the file will need to be transferred with “scp” or “sftp” to the
UNIX machine where it will be used. Therefore, it makes sense to get comfortable with at least one UNIX text
editor. That will avoid the file transfer step, saving some hassle and time. There are several around, including some driven though a GUI, but minimally I recommend learning “nano” (which replaces the very
similar “pico” editor on many systems). Itʼs description, along with two alternatives follow. Launch “nano” on
the “tmp1” file with the following command:
$ nano tmp1 A simple text editor appropriate for general text editing, but not present on all
UNIX systems by default (however, it can be installed on any UNIX system). The “nano” editor is very easy to use — a command banner at the bottom of
the screen presents a menu of Ctrl Key command options. Type some sample text into the file, then press < Ctrl x > to exit, reply “y” for ʻyesʼ to
save the file, and then accept the fileʼs name by pressing < return or enter >.
Two other command line UNIX editors are described below, but do not use these today:
vi file The default UNIX text editor. This comes with all versions of UNIX and is
extremely powerful, but it is quite difficult to master. I recommend avoiding it
entirely unless you are interested in becoming a true UNIX expert. emacs file This is a very nice alternative text editor available on many UNIX machines.
This editor is also quite powerful but not nearly as difficult to learn as “vi.”
File transfer — getting stuff from here to there, and there to here
You will often need to move files back and forth between different computers. Remember “scp” from the
Introduction. Thatʼs the primary secure way to move files around within the Internet. I never use removable
media like floppy or Iomega disks, or CDs/DVDs, or USB memory sticks anymore — this is way more
efficient. I just copy files between machines over the Internet. The commands in the following table provide
simple access to a small subset of UNIX networking capabilities (host refers to a computerʼs fully qualified
Internet name or number):
ftp host ʻFile transfer protocol.ʼ Allows a limited set of commands (dir, cd, put,
get, help, etc.) for moving files between machines. Note: insecure method,
so usually restricted to particular servers that allow “anonymous ftp” only. See “sftp” and “scp” as alternatives.
scp ʻSecure copyʼ file, syntax: “scp file user@host:path” or “scp
user@host:path file.” Good for moving one or a few files at a time.
sftp ʻSecure file transfer protocol.ʼ Allows same subset of commands as “ftp,”
but through an encrypted connection. Good for moving lots of files.

21
telnet host Provides an insecure terminal connection to another Internet connected host
(discouraged and usually disabled!). See “ssh” for a secure alternative.
ssh user@host Connect to a host computer using a secure, encrypted protocol. This is often
the only allowed way to interactively log onto a remote computer.
Letʼs practice with “scp” to give you a feel for its syntax. It can be confusing. Weʼll use a couple of ridiculous
examples here to move a file back and forth between the SC portal PAMD server and your Classroom
workstation. Since, as I mentioned early on in todayʼs tutorial, all SC common use UNIX computers share the
same user disk space you never need to move files between any of them, so you would never actually have
to do this. However, the HPC system that you requested an account on earlier today uses a distinct and separate disk system, so you will need to use “scp” to move files between it and your SC account in the
future. Issue the following command to see how command line “scp” works (your SC Classroom account ID
replaces “user” below). Note the required colon, “:” in the syntax. To secure copy your current, ʻlocalʼ file
“tmp1” to a file on the “scp” connected, ʻremoteʼ PAMD (actually the same disk space) named “scp.test1”:
$ scp tmp1 [email protected]:scp.test1
You may get some sort of authenticity question when you do this the first time; answer “yes” (fully spelled out)
and then supply your SC Classroom account password. Letʼs do it the other way ʻround now, that is, from a
ʻremoteʼ PAMD to a your ʻlocalʼ Classroom machine, with a few extra twists:
$ scp [email protected]:tmp1 memo/scp.test2
OK, what does this command do? It logs you onto PAMD and looks for a file named “tmp1” in your home
directory there. Then it copies that file into your “memo” directory on the local Classroom workstation that
youʼre already logged onto, and it changes “tmp1”ʼs name to “scp.test2.” “scp” also supports a “-r”
recursive option, so that it can be used to secure copy down through the contents of a directory structure. Simple enough. Got it? To prove to yourself that this actually did work, look at your directories with the “ls”
command to see the new files in your account.
Microsoft Windows machines and Macs often have a GUI form of scp/sftp installed. In the MS Windows world
this may be called secure file transfer client, and on OS X Macs a great little free program named Fugu can be used (http://rsug.itd.umich.edu/software/fugu/). Letʼs get rid of those “tmp” and “test” files now before
proceeding. Note that you can remove more than one file specification at a time by separating their names
with a space. Issue the following command:
$ rm tmp* *test* */*test*
Account maintenance is your own responsibility. Be sure to always delete unnecessary files, and always
assign file names that make sense to you, so that youʼll be able to recognize what they are from a directory
listing. By the end of the semester youʼll be hopelessly confused, unless you take this advice seriously.
22
UNIX is not the easiest OS to learn. Have patience, ask questions, and donʼt get down on yourself just
because it doesnʼt seem as easy as other OSs that you may have used. The power and flexibility of UNIX is
worth the extra effort. Plus, UNIX is the de facto standard OS for most scientific computing, so the effort will
not be wasted.
After going through the above commands, making sure to do all of those in bold, itʼs time to complete your lab
report. Youʼll do this at the conclusion of every lab tutorial. They need to be completed anytime before the
following weekʼs lab session for full credit.
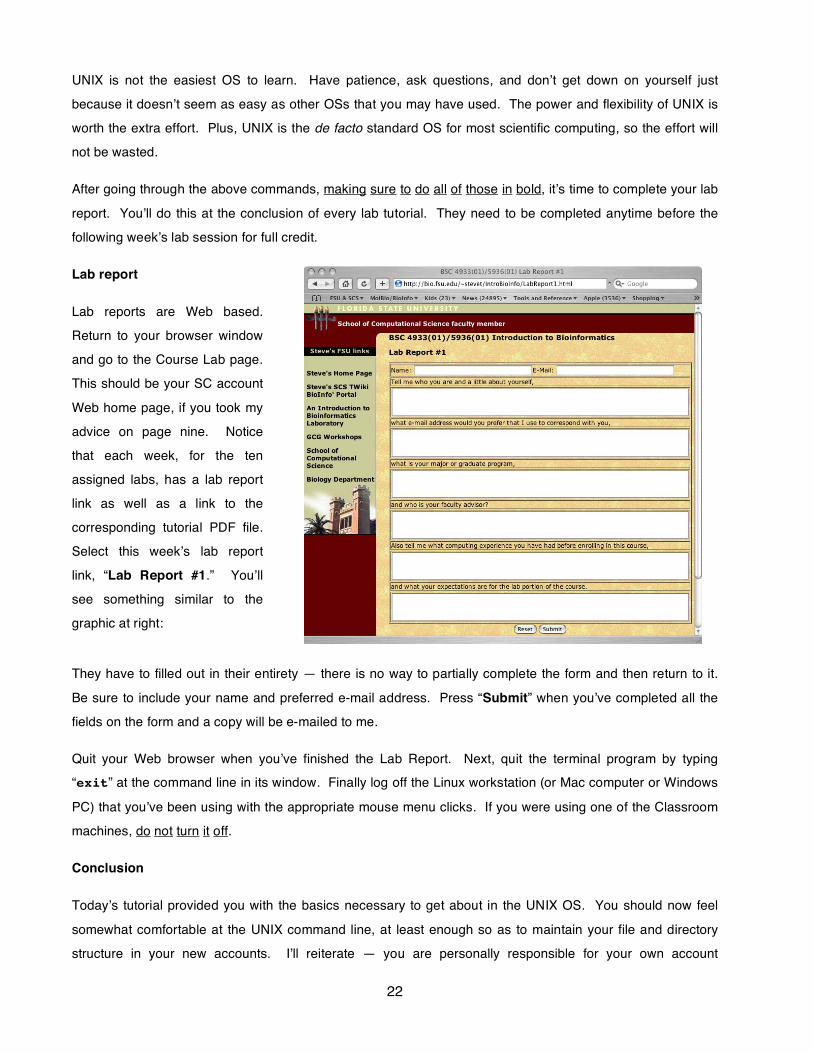
Lab report
Lab reports are Web based.
Return to your browser window
and go to the Course Lab page.
This should be your SC account
Web home page, if you took my
advice on page nine. Notice
that each week, for the ten
assigned labs, has a lab report
link as well as a link to the
corresponding tutorial PDF file.
Select this weekʼs lab report
link, “Lab Report #1.” Youʼll
see something similar to the
graphic at right:
They have to filled out in their entirety — there is no way to partially complete the form and then return to it.
Be sure to include your name and preferred e-mail address. Press “Submit” when youʼve completed all the
fields on the form and a copy will be e-mailed to me.
Quit your Web browser when youʼve finished the Lab Report. Next, quit the terminal program by typing “exit” at the command line in its window. Finally log off the Linux workstation (or Mac computer or Windows
PC) that youʼve been using with the appropriate mouse menu clicks. If you were using one of the Classroom
machines, do not turn it off.
Conclusion
Todayʼs tutorial provided you with the basics necessary to get about in the UNIX OS. You should now feel
somewhat comfortable at the UNIX command line, at least enough so as to maintain your file and directory
structure in your new accounts. Iʼll reiterate — you are personally responsible for your own account

23
maintenance — if you canʼt find your files or figure out what is what, you only have yourself to blame. Next
week you will learn what the ʻretiredʼ Accelrys GCG Wisconsin Package (1982–2008) for sequence analysis is
all about, and how to use its SeqLab GUI (based on The Genetic Data Environment [GDE], Smith, et al.,
1994), as well as how to access and use the various molecular biology databases available online, both
locally within the GCG system, and remotely at Web servers throughout the world.
You will also be asked to pick your ʻprojectʼ molecule choice from a list of four. The next nine lab tutorials will
all use whichever choice youʼve made, and they each build on the previous lab using the data and analyses
from that lab, so carefully think about the decision, it canʼt be changed.
Acknowledgements
Special thanks offered to Charles Severance for providing much of the material on which the basic UNIX
guide portion of this tutorial was based (http://www.hsrl.rutgers.edu/ug/unix_intro2.html). I also wish to
acknowledge Susan Jean Johns, my former colleague and supervisor at the Center for Visualization, Analysis
and Design at Washington State University, now at the University of California San Francisco, for providing
some of the introductory material for this tutorial — thank you Susan for teaching me so very much over my
early years in bioinformatics.
References
ECDC. The E. coli Data Collection. http://www.uni-giessen.de/~gx1052/ECDC/ecdc.htm.
Genetics Computer Group (GCG®), (Copyright 1982-2008) Program Manual for the Wisconsin Package®, version 11.0,
http://accelrys.com/company/ Accelrys Inc., San Diego, California, U.S.A.
Hasegawa, M., Hashimoto, T., Adachi, J., Iwabe, N., and Miyata, T. (1993) Early branchings in the evolution of Eukaryotes: ancient divergence of Entamoeba that lacks mitochondria revealed by protein sequence data. Journal of
Molecular Evolution 36, 380–388.
Iwabe, N., Kuma, K., Hasegawa, M., Osawa, S., and Miyata, T. (1989) Evolutionary relationship of Archaebacteria, Eubacteria, and Eukaryotes inferred from phylogenetic trees of duplicated genes. Proceedings of the National
Academy of Sciences, U.S.A. 86, 9355–9359.
Madsen, H.O. Poulsen, K., Dahl, O., Clark, B.F., and Hjorth, J.P. (1990) Retropseudogenes constitute the major part of the human elongation factor 1 alpha gene family. Nucleic Acids Research 18, 1513–1516.
National Center for Biotechnology Information (NCBI) CN3D, public domain software distributed by the authors. http://www.ncbi.nlm.nih.gov/ National Library of Medicine, National Institutes of Health, Bethesda, Maryland, U.S.A.
Rivera, M.C. and Lake, J.A. (1992) Evidence that Eukaryotes and Eocyte prokaryotes are immediate relatives. Science 257, 74–76.
Smith, S.W., Overbeek, R., Woese, C.R., Gilbert, W., and Gillevet, P.M. (1994) The Genetic Data Environment, an expandable GUI for multiple sequence analysis. Computer Applications in the Biosciences 10, 671–675.