beyond oz - marianna kistler beach museum of...
TRANSCRIPT

Beyond OZ :Children's Book Illustrations from the Region
Literacy Crate Curriculum Material
From the Marianna Kist ler Beach Museum of Ar t
Writ ten by Kathrine Walker Schlageck
Funded by MetLife Foundation Museum Connections Grant

Contents :
Introduction
Interactive Strategies for Reading Aloud from Picture Books
Crate 1 - Emergent Readers
Crate 2 - Beginning Readers
Crate 3 - Intermediate Readers
Crate 4 - Advanced Readers
Appendix A - Ties to the Kansas State Education Standards
Appendix B - Resource Lists
Appendix C - Reading an Illustration Worksheet
Appendix D - Making Picture Books
Funded by MetLife Foundat ion Museum Connect ions Grant
Beyond OZ :Children ' s Book I l lustrat ions from the Region
Literacy Crate Curr iculum Mater ia l
From the Marianna Kist ler Beach Museum of Ar t
Writ ten by Kathrine Walker Schlageck


1
Picture Books, Literacy and Visual Literacy
The Beyond Oz exhibition and the funding from a MetLife Foundation Museum Connections Grant
have allowed the Beach Museum of Art to develop special programming focusing on picture books,
visual literacy, and literacy. The Museum is pleased to be able to share the work of this grant by pro-
viding the Literacy Crates resources.
The components of the Beyond Oz program:
• A research project on children, picture books and visual literacy, resulting in a published
catalogue essay.
• Artists' residencies in 11 area schools and day care centers, including two children book
performances, and a public lecture series by children's book illustrators and authors.
• Tours and workshops for children and schools between July 21 and December 15, 2002.
Tours were developed at four different levels and focused on visual literacy, reading and
writing skills, and art production. The tours were used to test units for the Literacy Crates.
• The development of Literacy Crates that contain books from the exhibition, literacy/
visual litercy curriculum, and art activities which will be distributed to 18 schools.
Additional crates will be located at the Museum and can be borrowed for up to two weeks
by calling (785) 532-7718."
Introduction

2
• A new group of museum volunteers exists to assist schools and organizations with the
crates. Arrangements for outreach programs can be made by calling the Beach Museum
of Art at (785) 532-7718.
• Workshops for teachers, daycare providers, social service organizations, and community
literacy volunteers on visual literacy and literacy ties. Public workshops will be held once
or twice a year. Schools and organizations can book training sessions by contacting
Kathrine Schlageck at the Beach Museum of Art at (785)532-7718
The above components will allow the exhibition and programming to live on after the
closing of the exhibition. Additional access to the exhibition can be found on the Museum's website at
www.ksu.edu/bma.
Some thoughts on picture books and literacy:
Picture books are, for many people, their best and most extensive exposure to visual art. Surrounding
our children with beautiful books leads to a stronger sense of aesthetics. Picture books give a teacher
an art gallery in his or her classroom.
For pre-readers, reading picture books requires at least two people, a reader (most often an adult) and
the child. This means that to be really successful, the books should appeal to and involve both read-
ers. Some ways of doing this include: attractive illustrations, text that can be read on more than one
level, layered images that invite the viewer to look over and over again, and opportunities for discus-
sions between reader and child.
In his article "Book Illustration: Key to Visual and Verbal Literacy," John Warren Stewig says that
because 80% of information arrives to us visually, to be truly literate, especially today, we must be
able to decode messages in pictures, and to encode our findings into verbal
language (visual and verbal literacy). Research has also proven that success in reading is linked to
oral fluency and that students need to be able to describe, compare, and value both visual and written
communication.
According to Picture Books for Gifted Programs, by Nancy Polette, illustrations play a role in develop-
ing children's cognitive skills. Children learn about seriation (order), classification, reversibility, and
conservation (saving what happened in one picture to the next). Picture books can also help develop
visual and oral communication skills, productive thinking (what happens next, how can the problem be
solved), and books often teach important lessons and skills (tooth brushing, sharing, etc.) In addition,
there is a strong relation between visual literacy/aesthetic criticism and Higher Order Thinking Skills
(learning how to interpret art) which is more successful if children are exposed to these ideas at a
young age.

3
Concept books (books that teach with pictures such as ABC and 123 books) are very important.
These days children begin to learn about symbols by age 2. The first symbols are
colors, then shapes. Young children are quite visually literate! In fact, because the elements of art are
emphasized at the lower levels, early elementary students often are more aware of how illustrators
make their artwork than older students. Eventually, children learn about more complicated symbols
like numbers and letters and then go on to read. By 5th or 6th grade, children want to read chapter
books, and the artwork takes a back seat, and it may
be more difficult for older children to see what the artist is doing.
According to Perry Nodelman, author of The Pleasures of Children's Literature, pictures are a symbol
system, like words. While they are not necessarily easier for children to understand and require a
knowledge base to interpret, children seem to become sophisticated lookers long before they can han-
dle words. To interpret pictures as a symbol system in a book,
children may need to know the elements of art, composition, and artistic style, as well as have some
experience with the world. Picture books provide visual clues for non- and beginning readers, and
when it comes to description, pictures are often helpful in indicating nuances/differences of the physi-
cal world. An added value of picture books is that they are
a pleasurable experience for most children.
Research project conclusions:
The following findings are based on research with 34 children, ages 2-12, primarily looking at, but also
reading, books from the Beyond Oz exhibition. Additional insight comes from the gallery tours through
the Beyond Oz exhibition.
Children need colorful and intriguing illustrations to draw them to books. As young
children, they choose books with topics which seem related to their own lives. Beginning readers like
books that are humorous and even downright silly. As children reach age ten to twelve, they begin to
reject picture books, opting for "chapter" books and books on serious subjects. But given a "reason,"
even 6th graders enjoyed being read to and were quite engaged with the illustrations.
Children in preschool are learning aspects of visual literacy at an increasingly young age,
and are quite sophisticated viewers, with the ability to identify colors and shapes by age three.
Children age 3-6 could quickly identify illustrations made by combining shapes on tours of the exhibi-
tion. By age four or five they are beginning to question perceived texture in artwork. A few of the
younger children in the study responded to the artist's use of line to pull the eye through the picture.

4
Most of the older children did not actively talk about elements of art, except for noting
that bright colors were attractive. Some, but not all, of the older children were interested in techniques,
but only when brought up by the researchers. They were able to use the elments of art in a limited
fashion to help them interpret an illustration. During tours, the older
children often found the art projects more challenging than younger children, while they had better
writing skills. It is interesting to note that the younger children readily volunteered aesthetic informa-
tion and aesthetic discussion had to be initiated with the older children.
From an early age, children look for hints and details in the illustrations, and even for older children,
the details added by the illustrator add interest and excitement to the story. As expected, emergent
readers rely heavily on the pictures to help them develop vocabulary. Good concept books are very
important, and the use of objects that are not familiar to children can be quite frustrating. Children
begin to "read" with the pictures by age three or four, using them to tell the story. This relates closely
to aspects of cognitive development, and
the chance to "picture read" helps them with conservation, classification, seriation, and reversibility
concepts. Elementary school-aged children still refer to the pictures as they are reading for help with
vocabulary, and while our older readers were quite literate, it was obvious that funny or challenging
illustrations played a key role in engaging them in the story.
Literacy Crates
Crates have been developed on four reading levels: emergent, beginning, intermediate, and advanced.
Activities correspond with books by illustrators featured in the Beyond Oz
exhibition at the Beach Museum of Art, which ran July 21-December 15, 2002. Each trunk includes an
exhibition catalogue with color plates.
Since the trunks were developed by an art museum educator, there is an emphasis on visual literacy
as well as verbal and reading literacy. All of the trunks include art projects for
children, with simple directions for instructors. None of these projects require an art degree!
The trunks have been designed for classroom use by teachers, media/library specialists, social service
organizations, day care providers, home schoolers, or anyone interested in working with children.
Staff is available to help train individuals or organizations on how to use the trunks, and volunteers are
available to do activities in the Manhattan area with groups of children. Please call Kathrine
Schlageck (785) 532-7718 for more information.

5
Interactive Strategies for Reading Aloud from Picture Books
Before getting started :1. Make sure the child/children are comfortable.
2. Make sure they can see the illustrations.
3. Be familiar enough with the book that you can read it easily and fluidly.
Start with the cover :1. Tell children the title, author and illustrator - discuss what the author and illustrator do.
2. Ask the children what they think the book is about based on the title and the cover
illustration.

6
Story booksBegin reading the book
1. Use the pictures and the words together - it doesn't really matter which you begin with!
The two aspects of a picture book should be equally important.
2. Use the illustrations to discuss the story:
a. Ask questions about what is happening (the action).
b. Allow children to look for details that bring the story to life, e.g. the funny pickle/green
details in Picky Mrs. Pickle, what silly things the Krazees are doing.
c. Ask questions that draw on the illustrations to enhance the story - e.g. how does this
character feel? What in the picture makes you see/feel that?
d. When possible ask questions about or point out how the elements of art help - e.g. the dark
colors tell me it night/sad/stormy, etc.
3. If it seems appropriate, have children guess what happens next.
4. You do not need to have a detailed discussion of every page! Choose pages ahead of time that
you think will work well, or discuss pages where children seem particularly interested.
5. If you are working with older students, and they wish to do so, ask for volunteers to help you
read.
Final discussion1. Discuss the story, what happened, how the kids feel, their impressions.
2. Go back to the artwork and discuss (together!) how the pictures help us understand the book.
You can also talk about the media (how the pictures were made).
3. Ask about favorite parts of the book and favorite illustrations. Allow students to explain why.
4. Ask children to relate the story to their own lives - e.g. The Bravest of Us All: have you ever
been in a storm, how do you feel? The Krazees: What do you do when you get bored?
5. Allow children to ask you questions!

7
Concept Books1. Start with the cover, as above - Ask the children "What do you think we are going to learn about?"
2. On each page let the children use the book to learn with - e.g. identify the letter, objects and sounds;
count the items; identify colors, shapes or animals. This will vary depending on how the book is designed.
3. If there is text, determine when it is better to read it - before or after the learning process, or perhaps it
will work better to have children fill in the blanks or "help" you read.
4. Finish by reviewing the concepts - e.g. counting, singing the alphabet song, game of "I Spy."
Staying interactive
It is important for children to be involved in the reading process, whether they are listening or reading them-
selves. This can be achieved by allowing children to talk, guiding their discussion with a leading question,
or asking specific questions to help them understand a concept or idea.
It will be helpful to read material ahead of time and have some questions planned. A list of prompts for
meaning making is listed below. They are taken from Reading Helpers, a training handbook from the
America Reads program.
• What do you think this book is about?
• What might happen next?
• How can you tell that…?
• Why did … happen?
• Why did … behave that way?
• What would you have done?
• Did you ever…?
• How did … make you feel?
• What made … do (or say)…?
• How would you feel if…?
• What did you like about this book?
• How could we learn more about …?

8
PICTURE WALKING: Picture walking is useful when working on reading skills. When reading the booksin the crates to develop reading skills, you may want to walk through the pictures tohelp determine the action of the story which will help children with reading. Sincethe focus of most of the curriculum is on the illustrations and the relation of visualliteracy skills, the units do not typically use picture walking. This is closer to theintention of the book, and does not ruin the element of surprise.
Hints for reading out loud1. Use plenty of expression - don't be afraid to clown it up some with younger children.
2. Pay attention to patterns and rhythms - there should be a flow that carries through the story.
3. Don't read too fast.
4. Stop and discuss vocabulary that might be unfamiliar to children. Books are a great way to
build new vocabulary. For example, when reading Turtle Splash! by Cathryn Falwell, stop at
the word polliwog - most children would call a baby frog a tadpole. Why does Falwell choose
polliwog instead (rhymes with log!)?
5. Do stop to allow the children to investigate the illustrations. If there is a strong flow to the
book, such as a poem, you may want to read the book through once, and then go back to read
and look at the illustrations.

9
Crate 1Emergent Readers
Contents:Unit I - Building Concepts
Unit II - Alphabets
Unit III - Counting
Unit IV - Music
Books included in crate:Alphabet City by Stephen T. Johnson
Picture a Letter by Brad Sneed
Turtle Splash! Countdown at the Pond by Cathryn Falwell
Feast for 10 by Cathryn Falwell
My Little Book of Opposites by Bob Staake
Tractor by Craig Brown
On a Wintry Morning by Dori Chaconas, illustrated by Stephen T. Johnson
Cumbayah by Floyd Cooper
Beyond Oz: Children's Book Illustrations from the Region by Kathrine Walker Schlageck
Other items in crate:Instruments
Opposite's game
Shape picture magnets
Cathryn Falwell art project sheet
All for Freedom (music CD)
1 0
Unit I Building Concepts
Goals• Explore the concept of opposites
• Investigate symbol systems such as seasons and weather, colors, and shapes.
• Understand that events happen in a certain order.
Concept development is an important part of developing reading and counting skills. Children learn
smaller symbol systems like colors, shapes, and seasons before learning larger symbol systems like the
alphabet. Important cognitive skills such as order and conservation are also important to developing
reading skills.

1 1
Activity 1My Little Book of Opposites by Bob Staake
The Bob Staake book, along with the enclosed opposites game make a good practice session on opposites.
See if the children can come up with new/their own ideas for opposites (reinforces the concept and the dis-
cussion builds vocabulary and language skills).
The Staake book is also a good test of shapes and colors - all the illustrations are created from basic shapes
and primary colors. A magnetic picture building kit is included to help work with the idea of building from
shapes. After working as a group with the magnet shapes, create your own picture building kit from con-
struction paper, and children can make permanent pictures. Children will be able to make more sophisticat-
ed pictures with the construction paper because they can overlap the shapes.
Picture Building Kit• Pre-cut shapes of different sizes from different colors (avoid white and black) of construction
paper. When creating shapes keep in mind the size of your background paper. It's easiest to
start with your largest size of each shape and then cut progressively smaller versions.
• Glue Stick
• Background paper (white or black)
Activity 2Tractor by Craig Brown
This simple book is an excellent example of order. Each step of the agricultural process must happen in a
certain order, set out very clearly in the pages of this book. Each tool is described again at the end of the
book. Be sure to have students watch for recurring characters - the dog, the robins, and the farmer's son -
as you read it.
Like Bob Staake, Craig Brown builds his objects from shapes. Brown tells students that he uses squares, cir-
cles, rectangles, ovals, and triangles. To begin have students outline the shapes that make up the tractor on
the accompanying sheet in different color crayon. E.g. blue for squares, red for circles, yellow for triangles,
etc. Follow-up art activities could be to use the shape kit (instructions above) to make tractors, or to have
children create pictures from drawn shapes. Instructions for creating a dinosaur and a grasshopper out of
shapes have been provided by Craig Brown.

1 2

1 3

1 4

1 5
Activity 3On a Wintry Morning by Dori Chaconas,
illustrated by Stephen T. Johnson
After reading On a Wintry Morning, discuss the different things that happen only in winter.
This is a chance for students to tell stories about their winter activities. Do the same for spring, summer, and
fall. Using the original poem as a template, see if you can change it for each of the other seasons (spring,
summer, and fall).
Questions to ask:How do the plants, scenery, and animals change from season to season? (Animals tracks in winter, babies in
spring, flowers bloom, etc.)
What types of activities are common to the season? (In winter make snow angels; go for sleigh rides, etc.)
What type of weather is common to the season? (What falls in the autumn instead of snow?)
What special types of clothes do you wear? (Instead of a winter hat, what would you need for spring - e.g.
umbrella?)
Try creating illustrations for your new poem. Since younger children may have difficulty drawing, it may be
less frustrating for children to cut pictures out of magazines and catalogues.
Other Concept Books by regional folks:
Shape Space by Cathryn Falwell
My Little Color Zoo Book by Bob Staake
Barn Raising by Craig Brown
To the Tub by Peggy Perry Anderson
Clean Your Room Harvey Moon by Pat Cummings
Open Wide: Tooth School Inside by Laurie Keller
Snow Day by Barbara M. Joose, illustrated by Jennifer Plecas

1 6
Unit II Alphabets
Goals• Help children learn the alphabet through visual means
• Help children learn letter sounds and develop vocabulary
• Help children look at the world around them with keener eyes
Note: Perry Nodelman states in his book The Pleasures of Children's Literature, that alphabet and
number books teach through a puzzle solving process - e.g. an apple on a page for the
letter A is apple, but on the F page might be fruit. Both books included in this unit are good examples of
puzzle solving. In Picture a Letter, we solve the puzzle by finding as many words that start with a letter
sound as we can. In Alphabet City, the puzzle is finding the letter symbol itself.

1 7
Activity 1Picture a Letter by Brad Sneed
Brad Sneed's Picture a Letter is a terrific concept book which focuses on letters, sounds and voca-bulary.
The highly layered images will keep children busy for hours. The book can be used as part of the classroom
curriculum to learn the alphabet in several ways, but one of the most effective would be along with a letter of
the week program for preschoolers. Kindergartners can review the whole alphabet at the beginning of the
year.
Sneed has designed this book with phonemes in mind - each page features an upper case alphabet letter, in
color, in the shape of something that starts with the letter. Additional black and white drawings of objects
starting with the letter sound provide a background for the letter and assist in vocabulary development.
Sneed has been careful to avoid blends that will confuse young children.
Additional reinforcement of alphabetical order occurs at the bottom of each page - the preceding letters are
shown in order, with the current letter being added.
There is an important pattern to the illustrations. Where possible several words/objects starting with letter
are placed together - for example, A - an acrobat in argyle socks or P - a pitcher with a panda on his hat
and pencil behind his ear. In addition, the chosen words/objects form a coherent picture - it is not a totally
random grouping. While looking at the illustration, help the students notice these relationships (reinforces
concepts of order). In addition, students can search for the mouse which shows up in each illustration (the
mouse also adds the letters across the bottom of the page.)
Art Project
While young children will find it difficult to turn letters into objects that start with the letter, a simpler version
of the letter pages can be made in the classroom with collage.
Supplies and instructions:
• Sheets of white paper with a letter of the alphabet stenciled on them. The letters should be
large, but still allow for space to add collage - 3" stencils work well. Literacy crates have
masters for the alphabet sheets. XYZ can be placed together, since it is difficult to find a wide
variety of collage pieces for these words. If you are using this activity as part of a letter of
the week project, each child can work on the same letter. Older children who are creating
alphabets for younger classes should each choose a different letter - someone may need to
volunteer to do two.

1 8
• Magazines to cut objects out of. For young children you may want to precut items and
allow them to trim. Older children will enjoy the challenge of searching for the objects that
start with their letter sound. Younger children may need to have objects pre-sorted and
make their choices from a variety of objects starting with the correct letter (alphabetized file
folders work well for pre-sorting.)
• Crayons to color in the stenciled letter - hints: color the letters first. Children may want to think about using colors or decorative motifs that match their letter - e.g. pink or purple polka dots for P, blue for B, Zigzags for Z.
• Glue sticks - Have children choose collage objects first. Older children should try to put things together - e.g. a Bear Building with Blocks, a Bird in a Basket eating Berries. After the collage pieces have been laid out, have the children glue them down.
• Pencils - in addition to including the child's name on the back, it may be helpful to have them tell you what is in their artwork and write it down. This will re-emphasize the letter sounds and vocabulary development.
Hang the collages around the room in alphabetical order or laminate them to create a book for the class-room. Some simple methods for putting a book together are located in the appendix. 1st graders will havefun making these for the kindergarten or pre-K classes in their school.
Activity 2Alphabet City by Stephen T. Johnson
This alphabet books is for slightly older children and is a terrific review for kindergartners and can even be
challenging when used with 1st graders. Students have to "search" for the letters found in the world sur-
rounding them. This book works best when the letters are NOT done in order.
One important aspect of this book is its role in focusing children on really looking at the world around them.
Children need to develop keen observational skills, and seem to naturally have this as a very young child,
but loose the ability as they get older. Alphabet City refocuses children on looking.
Stephen Johnson says, "I hope that my paintings will inspire children and adults to look at their surroundings
in a fresh and playful way. In doing so they will discover for themselves juxtaposition of scale, harmonies of
shadows, rhythms, colorful patters in surface textures, and joy in the most somber aspects of a city, by tran-
scending the mundane and unearthing its hidden beauty."

1 9
K indergartners can use the idea of Alphabet City to create their own alphabet for the classroom, and older
students will have fun creating an alphabet for younger students. You will need a camera and keen eyes!
Art Project
Supplies:
• Camera(s) - You decide, but digital cameras make this project a whiz - and you can easily
produce multiple copies of your alphabet.
• Good eyes!
• Paper
• Glue
Each photograph should be mounted on paper. You decide whether to hang the art work in order or turn
them into a book. A book may need a new title (your school isn't a city!) Some simple methods for putting a
book together are located in Appendix D.
Other books to look for by regional folks:
Spooky ABC by Eve Merrian, illustrated by Lane Smith
My Little ABC Book by Bob Staake
Navajo ABC: A Dine Alphabet Book (Aladdin Picture Books) by Luci Tapahonso, illustrated by Eleanor Schick
The Letter Jesters by Cathryn Falwell
Alphabears by Kathleen Hague, illustrated by Michael Hague
Midnight in the Cemetery: A Spooky Search and Find Alphabet by Robin Brickman, illustrated by Cheryl
Harness

2 0
Unit III Counting
Goals• Practice counting skills, both forwards and backwards for 1-10• Investigate order of events• Investigate habitats and food chain

2 1
Activity 1Feast for 10 by Cathryn Falwell
This book features a family putting together a feast for 10. Students will count to ten twice and think about
the process (cognitive development of order) of putting together a meal - shopping, cooking, setting the
table. The illustrations are created with cloth collage which can be simulated with a felt board. If you want to
work with students creating pictures that look like cloth collage, wallpaper books, wrapping paper, and other
patterned paper will work well - much easier to cut and glue!
Activity 2Turtle Splash! Countdown at the Pond by Cathryn Falwell(Your Trunk includes a Turtle Splash! activity sheet developed by Cathryn Falwell)
Turtle Splash teaches counting skills and subtraction of 1. It is also a great opportunity to investigate habi-
tats and food chains at an early age.
Read Turtle Splash! and discuss how Cathryn Falwell gets the turtles to "countdown" - each one is scared off
by someone else who lives around the pond. At the back of the book Falwell discusses the animals and
pond environment. You can adapt the following discussion to included the habitats near where you live or
that you are currently studying.
1. Where do we live - For Kansas children: what is it called? What does the prairie look like?
Terrain, plants, etc.
2. What animals live on the prairie - create a list (for young children this will work best with
pictures). Where do they live (e.g. burrows, roam the grasses, nests, in the water, etc.)
3. Who are the "timid" animals - who are the "scary" animals? What is the food chain on
the prairie

2 2
Countdown on the Prairie Art Project - Using the above information, children will create a collage
similar to Falwell's, but based on the prairie. Note: you may have alter your supplies to fit the habitat you dis-
cussed above.
Supplies:
• Large sheets of tag board - the size you choose will depend on whether the "book" will be
hung or bound, but the bigger the sheets the more room the children have. I prefer at least
12"x24" but sheets can be bigger.
• Collage paper - gather different types of paper. You will need sky colors and prairie colors.
Tissue paper works beautifully for skies. Look for paper with textures, you can even use cloth
• Photocopies of a wide variety of prairie animals (children may draw their own, but others
may prefer to color in animals rather than be frustrated)
• Glue or glue sticks
• Decoupage/mod podge or glue thinned to the consistency of milk and sponge brushes
• Colored pencils and/or crayons
• Different grasses and grass colored paints (washable)
1. Use collage paper and crayons to create a prairie background for your animals. Things to think about
include seasons, weather, time of day. It is more successful to put down a sky first (tissue and mod podge
or glued paper), and then create the land with other types of paper. The land can
overlap the sky to create a cleaner line. Point out the horizon line where sky meets the land. In the
Manhattan, Kansas area, known as the Flint Hills, the horizon line is not flat! They want to fill in as much of
the background as possible - i.e. cover the paper. They may also add details like trees, ponds, creeks, holes
etc.
A nice detail that will play on Falwell's method of leaf printing is to use grasses dipped in paint and pressed
onto the prairie.
2. The whole class can do a "book" with descending numbers. For example if you have 18
students in the class, begin with 18 animals and count your way down. The whole class works together and
they will need to agree on what animal will be counted down, but each child will get to decide what "scares"
one off. (A less successful option is to have the children work on their own, choosing whatever number they
want and whatever animal they want.)
For each child:
1. Choose a prairie animal to be scared off. Cut out and color the correct number of that
animal. (use colored pencils or crayons).
2. Choose an animal that would scare your prairie animal and color it in.
3. Glue on the animals - make sure to show one of the animals being scared off!
4. Add any final details such as holes.
5. You can do more grass printing at this point so that animals can "hide" in the grasses.

2 3
3. Help the children create a verse to go with their picture. Work on the black board, reading back your
verse frequently. Write or print the verses out for them on small sheets of paper and
glue to the artwork. It is wonderful if you can get your verses to rhyme, but not necessary.
e.g. Ten little prairie dogs playing in a line,
A coyote chases one pup off
Leaving only nine.
Nine little prairie dogs chatter to each other,
A snake slithers through the grass,
Another joins his brother.
….
Two little prairie dogs, sitting in the sun
A hawk flies overhead
Now there is one
One little prairie dog
Frightened by storm, scurries down into his hole,
Now there are none.
Other Counting books to look for by regional folks:
My Little 123 Book by Bob Staake
Christmas for 10 by Cathryn Falwell
Nicky 1-2-3 by Cathryn Falwell
Numbears by Kathleen Hague, illustrated by Michael Hague
Ten Little Bears, A Counting Rhyme by Kathleen Hague, illustrated by Michael Hague
The City by Numbers by Stephen T. Johnson

2 4
Unit IV Music
Goals• Help children understand that the words to songs are like books. • Help children visualize "music." • Introduce the idea of rhythm, both in music and reading.
Note : A CD with “Cumbayah” is included in the truck

2
Activity 1Cumbayah by Floyd Cooper
Floyd Cooper's version of “Cumbayah” includes people of all races. The words andmelody may already be familiar to your students, but begin by reading it as a poem. Havethe children listen for the rhythm patterns and pat them out on their knees with their hands. Then try singingand patting. Finally, the rhythm instruments can be used to play along with the song.
All for Freedom features “Cumbayah” and other songs for children.
Other musical books by regional folkSummertime (from Porgy and Bess) illustrated by Mike WimmerMother Goose Songbook by Jane Yolen, illustrated by Rosekranz HoffmanThe Seals on the Bus by Lenny Hort, illustrated by G. Brian KarasMorning Has Broken by Eleanor Farjeon, illustrated by Tim LadwigMeet the Orchestra by Ann Hayes, illustrated by Karmen Thompson

2 6
Artists' Biographies:
Craig Brown was born on September 4, 1947 in Fairfield, Iowa, a rural farming community. Brown studied
at the Layton School of Art in Milwaukee, Wisconsin. Before he began writing and illustrating children's
books, he spent sixteen years working in advertising. The Talking Bird and the Story Pouch by Amy
Gordon, the first book illustrated by Brown, was published in 1988. Since then, Brown has worked on
eleven other books. The books that Brown has written and illustrated honor his rural childhood. Brown uses
a stippling technique to create his illustrations; he is unique among children's book illustrators for this
approach. After the black and white image is created, Brown colors it with pastels. His stippling technique
was influenced by the technique of pointillism developed by Georges Seurat.
My Barn by Craig Brown
Patchwork Farmer by Craig Brown
Cucumber Soup by Vickie Leigh Krudwig
The Ornery Morning by Patricia Demuth
Floyd Cooper was born in Tulsa, Oklahoma. He received a B.F.A. from the University of Oklahoma.
Cooper has worked as a Hallmark greeting card designer, a toy designer, and a freelance illustrator. He has
written biographies of Langston Hughes, Nelson Mandela, and Louis Armstrong. Two books illustrated by
Cooper, Meet Danitra Brown by Nikki Grimes and Brown Honey in Broomwheat Tea by Joyce C. Thomas,
received Coretta Scott King Honor Books for Illustration. His work has also received Oklahoma Book
Awards and awards from the Society of Illustrators. Cooper has illustrated over twenty-five books. His illus-
trations suggest a sense of place and emotion to their viewers.
I Have Heard of a Land by Joyce C. Thomas
(1999 ALA Notable Book, Coretta Scott King Honor Book)
Miz Berlin Walks by Jane Yolen
Faraway Drums by Virginia Kroll
On Marti Gras Day by Fatima Shaik
The Girl Who Loved Caterpillars: A Twelfth-Century Tale from Japan by Jean Merrill (Society of Illustrators
Award)
Cathryn Falwell was born in 1952 in Kansas City. She spent her early childhood in Kansas and St. Louis,
and still has family in Lawrence and Kansas City. In 1975, Falwell graduated from the University of
Connecticut with a B.F.A. in printmaking. Falwell decided in second grade that she wanted to illustrate chil-
dren's books, and in 1991 the first book that she illustrated, Where's Nicky, was published. She has created
a number of concept books for children and has won numerous awards for her books. Falwell created sim-
ple, direct images out of mixed media collage for her illustrations in Turtle Splash! Countdown at the Pond.
We Have a Baby by Cathryn Falwell
Six book Nicky series by Cathryn Falwell
Word Wizard by Cathryn Falwell
Shape Space by Cathryn Falwell

2 7
Stephen T. Johnson grew up in Lawrence, Kansas and has recently returned. He received a B.F.A. from
the University of Kansas. Johnson also studied at the Conservatoire de Beaux-Arts in Bordeaux, France.
Johnson creates colorful, highly textured, photorealistic illustrations in pastel, watercolor, gouache, and char-
coal. Two of his books, Alphabet City and City by Numbers, were Caldecott Honor Books, and Alphabet
City received a Gold Medal from the Society of Illustrators. Recently, Johnson has been experimenting with
creating three-dimensional books for children. His innovative 3-D book, My Little Red Toolbox, allows chil-
dren to manipulate tools, and will be followed by the release of My Little Blue Robot in the fall of 2002.
Hoops by Robert Burleigh (1998 ALA Notable Book)
The Samurai's Daughter: A Japanese Legend by Robert D. San Souci
The Tie Man's Miracle: A Chanukah Tale by Steven Schnur
Brad Sneed attended the University of Kansas and received his B.F.A. there in 1989. He grew up in
Newton, Kansas and his illustrations have been greatly influenced by his life there. Sneed uses Kansas
landscapes and experiences in his books and has been heavily influenced by America's regionalist painters
- John Steuart Curry, Thomas Hart Benton, and Grant Wood. Sneed's illustrations also appear in magazines.
His newest book, Picture a Letter, uses Bentonesque figures in the shapes of letters.
The Strange and Wonderful Tale of Robert McDoodle: The Boy Who Wanted to be a Dog
by Steven Bauer
I Heard Said the Bird by Polly Berends
Higgens Bend Song and Dance by Jacqueline Briggs Martin
The Pumpkin Runner by Marsha Diane Arnold (Smithsonian Notable Books for Children)
Bob Staake was born in California. He attended the University of Southern California where he concentrat-
ed in history, political science, and journalism. Staake currently lives in St. Louis, Missouri with his family. He
has written and illustrated over twenty-six books and his work has been nominated for a number of awards.
Staake has also worked as an editorial cartoonist, has done freelance commercial illustration, and worked
on the animated television program "Ren and Stimpy." Staake's illustrations are computer generated and
are characterized by their bright colors and geometric shapes.
The Mighty Little Lion Hunter by Bob Staake
Pop, Boing, and Swish by Bob Staake

2 8
Crate 2Beginning Readers
Contents:Unit I - Word Play
Unit II - Characterization
Books included in crate:The Krazees by Sam Swope, illustrated by Eric Brace
Hooray for Diffendoofer Day by Dr. Seuss with illustrations by Lane Smith
The Class Artist by G. Brian Karas
David's Drawings by Cathryn Falwell
The Chalk Box Kid by Clyde Robert Bulla, illustrated by Thomas B. Allen
The Paint Brush Kid by Clyde Robert Bulla, illustrated by Thomas B. Allen
Truman's Aunt Farm by G. Brian Karas
Picky Mrs. Pickle by Christine Schneider
Beyond Oz Catalogue
Other items in crate :
Scrabble (many of the word activities can turned into board games for small groups of
children)

2 9
Unit I World Play
Goals
• Learn about rhyming and alliteration
• Think about Onomatopoeia
• Explore the use of made-up/nonsense words and comprehension from context
Vocabulary
Review the following with students before reading the books
Rhyme - words that end with the same sound - cat and hat
Alliteration - words that begin with the same sound - slippery snake
Onomatopoeia - words that sound like sounds - e.g. Bang, boom, pop!
Nonsense - words that are made up
Context - ability to define a word based on its placement in a sentence

3 0
The Krazees and Hooray for Diffendoofer Day are wonderful books for word play. Thereare examples of rhyming, alliteration, Onomatopoeia, and nonsense words in each book.These provide opportunities for students to practice phonics and reading comprehension.Teachers will know best whether to read the books aloud to students or use them as read-ers or both. In all cases, the books should be read for enjoyment first, before beginningthe activities.
In order for students to enjoy the books and illustrations fully, do the activities after an ini-tial reading of the book.
Several activities related to word play follow:
Activity 1World Chart
Draw this chart on the board or on a flip chart. Have students record words as TheKrazees or Hooray for Diffendoofer Day is read. Note that rhymes and alliteration willhave more than one word per box.
Rhymes Alliteration Onomatopoeia Nonsense Word

3 1
Activity 2Onomatopoeia
After reading The Krazees, create your own list of Onomatopoeia words:
What other ways can you create sounds? Look around your classroom for items to makesome of the sounds you have listed above.

3 2
Activity 3Nonsense Words
List the nonsense words you hear/read in The Krazees on one side, and the possible meanings on the other.
(Dr. Seuss also uses nonsense words, but they are more likely to be proper nouns.)
Nonsense Word Meaning
Activity 4Alliteration
Start with a beginning word - e.g. Krazees
List as many words starting with the K or hard C sound as you can think of. Circle the ones that might apply
to Krazees.
E. G.
Kicking
Kooky
Crying
Crashing …
Now try it with “Flobbertown”...

3 3
Activity 5WorksheetCreating Rhymes - Real and Nonsensical
Chose a rhyming syllable
Add the following consonant sounds Add the following blends
B
C
D
F
G
H
J
K
L
M
N
P
QU
R
S
T
V
W
X
Y
Z
BL
BR
CH
CL
CR
DR
KL
KR
PL
PR
SCR
SH
SL
SN
ST
SW
TH
TR
SCH
SCL
SPL
SPR
STR
GR
GL

3 4
Unit II Characterization
Goals• Students will learn artistic tricks for making characters seem funny • Students will learn how to visually and verbally compare characters

3 5
Activity 1What Makes Characters Look Funny ?
Using the books in this crate (or any other funny books you have) read the books and look carefully at the
illustrations to see what makes them funny. Picky Mrs. Pickle is a good starting point. Some of the things
the children might notice are the use of color, the bright green eye shadow,
the use of caricature (shape of head, triple chins), etc
Look at the teachers in Hooray for Diffendoofer Day. How does Lane Smith help the viewer
identify each one? (emphasizes the body part involved, gives them silly props, etc.)
Artists use a variety of devices, including caricature (emphasizing unusual features), mixed-up parts, big
heads/little bodies, funny topics and props, animals in human clothes, or even unusual
art techniques.
Spend some time focusing on the work of Lane Smith (note there are two more Lane Smith books in the
intermediate level crates) - look carefully at how he creates his mixed media paintings (paint and collage).
Collage Art - This will use a method similar to Lane Smith
1. Discuss ways to change characters and props in a story to make it funny - For example
Cinderella tries on a baseball glove instead of a glass slipper. The "three little wolves and
the big bad pig." Whacky giants made out of all sorts of parts. Animals instead of humans
(but with human clothes). Characters doing silly things. Mixing body parts from different
cut outs - e.g. Cinderella with enormous feet. It is easiest for them to start with a character
that they know and try to make it funny.
2. Students will create a mixed media illustration of a story book character. Begin by having
each child choose a character. Then provide magazines and catalogues for students to cut
from. Remind them that sometimes a character needs props to create a whole illustration.
Allow students to use markers, crayons, colored pencils, etc. They can always draw
something that they can't find to cut out.
3. Have the children give their illustration a caption and share their illustrations with
each other.

3 6
Activity 2Sock Puppets
Student can continue to work with creating visual characters with sock puppets. Ideas include making more
"Krazees," creating the characters from Hooray for Diffendoofer Day, or making puppets that reflect their
new characters from the activity above. Puppets are three-dimensional and allow students to think in a dif-
ferent way.
Supplies
• Clean sock (you may want to purchase inexpensive sports socks in different colors)
• Stiff paper such as manila folder paper or light tag board
• Felt in assorted colors
• Good scissors (children's Fiskers work well)
• Glue guns (use low temp. or have adults assist in the gluing)
• Other assorted things - patterned cloth, yarn in various colors, google eyes, pipe cleaners,
feathers, fabric paint, etc.
The key to making good sock puppets is the addition of tag board inside the mouth to make the mouth stay
in place. Turn the sock inside out, glue the cardboard piece (see pattern+diagram below) over the toe of the
sock, and hold for a few minutes. Turn the sock right side out, keeping the mouth pushed in, and put your
hand in to work the mouth. Point out the heel of the sock to the kids - it should go over the top knuckles of
the hand. This is where hair should be placed. The rest of the face goes below. Eyes will be more effective
if they have black centers/pupils.
Thanks to puppeteer Paul Mesner, who shared is sock puppet techniques with Manhattan children.
F o l d
ins ide out sock
h o t g l u et o t o e
h e e l

3 7
Activity 3Comparing Character - Artists and Aunts
Make charts to compare the characters in two sets of books. Begin by reading the books to the
students without showing them the illustrations. Write down the characteristics of the different characters
found in the text.
Artists Class Artist David
AuntsMrs. Pickle Truman’s Aunt(s)
Finish by comparing illustrations of each - How do the illustrations differ? (use some of the things discussed
in Activity 1).

3 8
Artists' Biographies:
Thomas B. Allen was born on January 23, 1928 in Nashville, Tennessee. He showed an interest
in art from an early age and began taking art lessons at age nine. Allen attended Vanderbilt
University for two years before transferring to the Art Institute of Chicago where he studied
painting. After receiving his B.F.A., Allen moved to New York City to pursue a career as an artist. In addition
to illustrating children's books, Allen worked as a freelance illustrator, with his artwork appearing in various
magazines and on album covers. He also served in the Marines and taught illustration and design at several
art schools. Allen was a University of Kansas Hallmark Distin-guished Professor and is presently a depart-
ment head at the Ringling School of Art in Sarasota, Florida. Allen draws inspiration from his life experi-
ences to create his illustrations. He does not use models or photographs for the people in his illustrations,
preferring to work from memory.
The illustrations are executed in charcoal, colored pencil, and pastel, which gives them a soft, atmospheric
quality.
On Granddaddy's Farm by Thomas Allen
Blackberries in the Dark by Mavis Jukes
Time to Go by Beverly and David Fiday
The Days Before Now by Margaret Wise Brown
In Coal Country by Judith Hendershot (ALA Notable Book 1987)
The Paint Brush Kid and The Chalk Box Kid by Clyde Robert Bulla
Eric Brace grew up in Colorado, and received a B.F.A. from the Kansas City Art Institute. He has been
illustrating children's books for six years and also does work for Hallmark's Fresh Ink cards division. Brace's
illustrations are characterized by their humorous, three-dimensional quality.
In his newest book, Geeze Louise, Brace has begun using computer design programs to "collage" scanned
images of real objects into his paintings.
The Day My Dogs Became Guys by Merrill Markoe
A Monster in the House by Elisa Kelven
It's Disgusting-And We Ate It! True Food Facts from Around the World-
And Throughout History! by James Solheim
Monster Road by David Lubar
Cathryn Falwell was born in 1952 in Kansas City. She spent her early childhood in Kansas and
St. Louis, and still has family in Lawrence and Kansas City. In 1975, Falwell graduated from the University
of Connecticut with a B.F.A. in printmaking. Falwell decided in second grade that she wanted to illustrate
children's books, and in 1991 the first book that she illustrated, Where's Nicky, was published. She has cre-
ated a number of concept books for children and has won numerous awards for her books. Falwell created
simple, direct images out of mixed media collage for her illustrations in Turtle Splash! Countdown at the
Pond.
We Have a Baby by Cathryn Falwell
Six book Nicky series by Cathryn Falwell
Word Wizard by Cathryn Falwell

3 9
G. Brian Karas was born in Milford, Connecticut. He attended the Paier School of Art. After graduation,
Karas spent three years as a Hallmark greeting card artist and as a freelance commercial artist. In 1983,
Karas's first children's book was published. Since then he has illustrated over fifty books. About his deci-
sion to be a children's book artist, Karas said, "In a way there was never a question in my mind of what I
wanted to do in the field of art. There was never a defining moment when I said, I want to be a children's
book artist. I just was." (Penguin Putnam Catalogue Biography of G. Brian Karas). Karas works in gouache,
acrylic, pencil, and collage, and his illustrations are characterized by a humorous, cartoon style.
Throw Your Tooth on the Roof: Tooth Traditions from Around the World by Selby Beeler
Nobody's Mother is in Second Grade by Robin Pulver
Good Knight by Lynda Rymill
Penelope Jane by Roseanne Cash
The Seals on the Bus by Lenny Hort
Home on the Bayou by G. Brian Karas (Boston Globe-Horn Book Honor, 1997)
Christine Schneider graduated from the University of Kansas, where she studied with children's book illus-
trator Thomas B. Allen. Schneider currently works full time as a children's book author and illustrator. Picky
Mrs. Pickle, the first book both written and illustrated by Schneider was published in 1999, and was chosen
by Topeka school children for Laura Bush to read during her recent visit.
Horace P. Tuttle: Magician Extraordinaire by Christine Schneider
Jeremy's Muffler by Laura Nielson
Lane Smith was born on August 25, 1959 in Tulsa, Oklahoma. He received a B.F.A. in illustration and his
work has appeared in newspapers, magazines, and on album covers. Smith has collabo-rated with Jon
Scieszka on a number of children's books. Their book, The Stinky Cheese Man and Other Fairly Stupid
Tales, was a Caldecott Honor Book winner. Smith has also illustrated books by Roald Dahl and Dr. Seuss.
His unique work is funny and energetic, attracting children and adults of all ages.
The True Story of the Three Little Pigs by Jon Scieszka
The Time Warp Trio series by Jon Scieszka
The Big Pets by Lane Smith
Math Curse by Jon Scieszka (1997 ALA Notable Book)

4 0
Crate 3Intermediate Readers
Contents:Unit I - Parts of a StoryUnit II - Retelling the Classic
Books included in crate:From Pictures to Words by Janet StephensThe Stinky Cheese Man and Other Fairly Stupid Fairy Tales by Lane Smith and JonSciezkaLittle Red Riding Hood: A New Fangled Prairie Tale by Lisa Campbell ErnstOriginal version of Little Red Riding HoodThe True Story of the Three Little Pigs by A. Wolf by Lane Smith and Jon SciezkaCoyote in Love with a Star by Marty Kriepe de Montano, illustrated by Tom CoffinCoyote in Love retold and illustrated by Mindy DwyerBeyond Oz Catalogue
Other items in crate :Little Red Riding Hood Finger Puppets

4 1
Unit I Parts of a Story
• Students will review parts of a story.
• Students will learn more about the book making process.
Janet Stevens is an illustrator - she does not usually write the books that she illustrates. But she though
it would be fun to think about the writing process. Students will be able to review the parts of a story as
well as learn about the book making process.
1. Skim through the illustrations in the book - or focus on the illustration in the Beyond
Oz catalogue. Ask the students what they notice about the illustration (most students
will notice that the artist is in black and white and the animals are in color) Ask the
students what this means (she is reality, her imagination is in color) Stevens says she
borrowed this trick from the movie The Wizard of Oz.
2. Read the book and identify the different parts of a story - characters, setting, plot, and
props (costumes, special items like the tent and the pizza). Point out to the students
how the illustrator must pay careful attention to the details. He or she can add things
to bring the story to life, but must remain true to the book.
3. Outline the different steps of making a book - text, thumbnails, leaving space for the
words in the picture and other aspects of layout, the dummy, sending it to the publisher,
decisions on what media to use for the artwork, etc.
Activity 1

4 2
Unit II Retelling the Classic
• Students will think more carefully about the parts of a story.
• Students will think about the role of illustrations in a story.
• Students will rewrite and illustrate a classic tale.
Many authors have begun retelling classic tales - some have been updated to be more
"politically correct", others changed to relate better to the lives of contemporary children. Many of these
retellings are quite humorous.
Early fairy tales were often quite scary and violent. For example, the stories collected by Jacob and
Wilhelm Grimm in the early 1800s served up life as generations of central Europeans
knew it-capricious and often cruel. Once they saw how the tales bewitched young readers, the Grimms,
and editors aplenty after them, started "fixing" things. Tales gradually got a little
softer and sweeter, and the focus was placed on the moral lesson. Research has even shown that many
of these fairy tales - e. g. Hansel and Gretel - can cause moderate to severe anxiety in 4-7 year olds
(Fairy Tales and Anxiety in Young Children, Carl P. McKnight, Pepperdine University and Gary G. Ford
and Angela M. Bridwell, Austin State University, Annual Meeting of the American Psychological Society,
San Francisco, CA, June 30, 1996)
Retelling classic tales is a great story starter, and will emphasize the material discussed during the read-
ing of From Pictures to Words. Make sure to point out to students that certain aspects of the plot, the
lesson or moral of the story, and perhaps some of the props must stay the same in order for the reader
to recognize the original tale.

4 3
Activity 1
Lane Smith has worked with writer Jon Scieszka to retell a number of standard fairy tales in a hilarious fash-
ion (The Stinky Cheese Man and Other Fairly Stupid Fairy Tales). Smith's
illustrations make these retellings especially funny.
"The Frog Prince"
Do not look at the illustration first!!!!! Ask the children to tell you about the original fairy tale, "The Frog
Prince". (A prince is turned into a frog by a wicked witch's spell. The only way to be freed is to be kissed by
a princess. The frog meets a princess, who over time gets to like him. She eventually kisses the frog, he
turns back into a prince and they live happily ever after.) Read them Jon Sciezka's version. Ask them what
visual things come to mind? What descriptive words are in the text? Have them note specifically where the
change occurs (last paragraph). Ask the students to rate how funny the new story is.
Next discuss the tools that an artist would use:
Line: Can be drawn or implied (e.g. between two colors). Lines help to define space and shapes, can be
expressive, and can form patterns and textures.
Shape/Form: A shape is the two-dimensional (height and width) representation on a flat surface, form is
three-dimensional (height, width and depth) as in sculpture. A shape or form takes up
positive space and is surrounded by negative space. Form can also apply to the total design of an art work.
Color: 1. Hue - the name of a color. Primary colors - red, yellow, blue. Secondary colors - orange, green,
violet (purple). Colors are arranged according to the spectrum and are often displayed as a color wheel
(developed in the 19th century) in the following order: red, orange, yellow, green, blue, indigo/violet.
Complementary colors are located across from each other on the wheel. When mixed they create grey.
When used next to each other they create a resonance. Analogous colors are located next to each other on
the wheel. 2. Value - how light or dark a color is. A tint is achieved by adding white, a shade by adding
black. 3. Intensity is how bright a color appears and is altered by adding grey or complementary color until
grey is reached. Monochrome - tones of a single color.
Simultaneous contrast - the effect achieved by placing one color next to another, especially its complement.
Texture: The surface quality of an object as we see it or feel it. Visual texture is simulated, although the
media may have a texture of its own. Tactile texture is three dimensional, and can be felt. Dull or matte tex-
tures absorb light, while shiny surfaces reflect light. Smooth surfaces reflect light evenly, while rough sur-
faces reflect light unevenly.

4 4
Look carefully at Lane Smith's illustration.
1. How does Smith use the elements of art listed above to make the reader/viewer understand
exactly how gross this kiss is?
• The slimy splotches on the frog's skin - how do you think the artist made the texture?
• The sickening green background (made by adding red, the complimentary/
opposite color).
• The tongue - what does a frog's tongue really look like (brown, smaller, thin)? Why
does the artist make it red and look human (to make it stick out from the green, the
human tongue makes it seems grosser)?
• The bugs on the tongue - by using lots of cut out pictures they look more real and
there are a ton of them.
2. What are some of the special techniques that Smith uses? (collage)
Feel free to read other stories from The Stinky Cheese Man and examine the changes and how the illustra-
tions make them funnier.

4 5
Activity 2
Lisa Campbell Ernst talks about her method of retelling a story in detail with Little Red Riding Hood.
"An art teacher in Pittsburgh, Pennsylvania once asked me to talk to her students about retelling a fairy tale,
because she had given them that very assignment. I agreed to, and then realized I knew absolutely nothing
about retelling fairy tales, because it was something I had never done.
Determined not to let her down, I gave myself the same assignment. I chose the story Little Red Riding
Hood. I decided the most important idea I wanted to share with the students was how
crucially important it is to put yourself into your writing. Since I grew up in Oklahoma, not in a forest, I
placed Little Red on the prairie. I decided she would actually ride - a bicycle like mine when I was growing
up. Her "hood" would be that of a red zippered sweatshirt like the ones I had worn. Most importantly, the
grandmother became a character that represented the strength of the family and the ethics of hard work that
were so much a part of my childhood in Bartlesville, Oklahoma."
Read an original version of Little Red Riding Hood and Lisa Campbell Ernst's version of Little
Red Riding Hood. Review with the students how the tale has been changed, thinking about
characters, setting, plot, and props. The worksheet will help you, but note that the original/older versions
may vary slightly.
Finger Puppets have been included in the crate. As an additional activity students can create
different versions of Little Red Riding Hood and do performances for younger students. Felt and fabric
scraps can be used to "change" the costumes or students can create paper finger puppets or sock puppets.

4 6
Teacher's Key:
Original Title__Little Red Riding Hood
Setting
Original Version Updated Version
The woods to Grandmas House The Prairie with wheat fields
Characters
1. Little Red Riding Hood in a cape
Very feminine
2. Wolf that wants to eat people
Scary
3. Sick Grandma
4. Woodsman
Little Red with a sweatshirt
Tomboy
Wolf that wants to eat muffins
Not so scary
Grandma who drives a tractor
PlotLittle Red goes to visit sick grandma
Meets wolf in while walking in woods
Wolf finds sick grandma
Wolf eats grandma
Red finds wolf in grandma's clothes
and asks key ?s
Wolf eat Little Red
Woodsmen kills wolf
Moral of the story - don't talk to strangers
Little Red goes to see well grandma
Meets wolf in while walking in fields
Wolf finds grandma on tractor
Grama grabs wolf
Wolf ask grandma questions
Red saves wolf from a beating
Wolf works for Grandma
Stays the same!
“props”
Red cape and hood
Basket
Woods
Granny in bed
Red Sweatshirt with hood
Bike with basket
wheat fields
granny on tractor in fields
New Title: Little Red Riding Hood: A New Fangled Prairie Tale

4 7
Activity 3
Read The True Story of the Three Little Pigs by A. Wolf by Jon Scieszka and Lane Smith. Discuss how
Sciezka and Smith have changed the traditional story. Have students note the things that have not changed
and remind them that there are aspects of the story that can't change or the story won't be recognizable any
more.
Look for places in the illustrations where Lane Smith has used collage. (Letters and newspaper clippings,
magazine picture of a microphone)
Activity 4
1. Choose a classic children's story to reinterpret. The easy way - have the whole class use the
same story. Using the Retelling a Classic worksheet as a guide, identify the setting character,
plot and props together on the board. Transfer the information to a worksheet and give a
copy to each child. Then have each child do his/her own retelling. They will need to
change setting, characters, plots, and props. The hard way - have each child choose his/
her own story and fill out both sides of the blank sheet themselves.
2. Have them create the cover illustration for the new story. They should try to pick out the
most dramatic aspects they are changing. They may use colored pencils, markers, etc. They
can also use some collage supplies (catalogues will work beautifully) but don't tell them
until after they have started to create their new story. Once they get the collage supplies,
it may give them more ideas or help them if they are having a hard time. If they make
changes after seeing the collage materials, they will need to go back and change the infor-
mation on their sheet.
3. Have them briefly share their new stories with their classmates.
4. Optional - write the whole new story. This can be done before or after creating the cover
illustration.

4 8
Retelling a Classic WorksheetTo help develop your new version of a standard tale, fill out the following form.
Original Title
Setting
Original Version Updated Version
Characters1.
2.
3.
4.
plot
New Title
“props”

4 9
Other interesting versions of classics:
Lon Po Po: A Red Riding Hood Story from China, by Ed Young
The Frog Princess by Elizabeth Isele, illus. by Michael Hague
The Three Pigs by David Weisner
And the Dish Ran Away with the Spoon by Susan Stevens Crummel, illustrated by Janet Stevens
The House that Jack Built by Simms Taback
The Three Little Wolves and the Big Bad Pig by Eugene Trivizas, Helen Oxenbury (Illustrator)
The Three Little Cajun Pigs by Berthe Amoss
Three Little Hawaiian Pigs and the Magic Shark by Donivee M. Laird, Carol Jossem (Illustrator)
Alaska's Three Pigs by Arlene Laverde, Mindy Dwyer (Illustrator)
Ziggy Piggy: And the Three Little Pigs by Frank Asch (Illustrator)
Principal's New Clothes (Blue Ribbon Book) by Stephanie Calmenson, Denise Brunkus (Illustrator)
Cinderella Skeleton by Robert D. San Souci, David Catrow (Illustrator)
Cindy Ellen: A Wild Western Cinderella by Susan Lowell, Jane K. Manning (Illustrator)
The Cowboy and the Black-eyed Pea by Warren Ludwig

5 0
Activity 5Native American Tale
This unit will compare two versions of a Native American Creation story. All cultures seem to have creation
stories, which explain the creation of the natural world and the people, animals, and plants that live there.
These stories explain natural phenomena that modern man has used science to justify. But early culture did
not have these means, and they used their spiritual worlds - gods and goddesses, animal and nature pow-
ers, etc.- to explain. Native American stories usually involve animals in the creation.
Marty Kreipe de Montaño says that her story is an adaptation of a traditional tale that is told
in various ways. One version is from the Klamath of southern Oregon, who use it to explain the
creation of Crater Lake. De Montaño's version is partly autobiographical and has been modernized to
explain the creation of The Reservoir, a major body of water in New York's Central Park. Mindy Dwyer's ver-
sion is based on a story told by Coquelle Indian story teller Susan Walgamott, and tells the story of Crater
Lake
After reading the two stories and comparing and contrasting them, challenge your class to write and illustrate
the creation story of Tuttle Creek Reservoir (a major body of water near Manhattan, KS) or some other major
body of water near the school. Think carefully about the parts of the story that must remain the same so that
the tale is recognizable and what has to change to
"customize" the story for your body of water. Students do not have to make their tale Native American.
The Real Stories…
Crater Lake is located in southern Oregon on the crest of the Cascade Range, 100 miles east of
the Pacific Ocean. It lies inside a caldera, or volcanic basin, created when the 12,000 foot high Mount
Mazama collapsed 7,700 years ago after a large eruption. The lake is approximately 5 miles wide, and is
surrounded by steep rock walls that rise up to 2,000 feet above the lake's surface. Following the collapse of
Mount Mazama, lava poured into the caldera at several places even as the lake began to rise. These flows
created underwater features as well as Wizard Island, a cinder cone that rises 764 feet above the lake and
is surrounded by black volcanic lava blocks.
The Reservoir (named the Jacqueline Kennedy Onassis Reservoir in 1994), a 106-acre water body, which
holds over a billion gallons of water, is the largest feature in the Park that is not under the actual jurisdiction
of the Parks Department. The Reservoir was completed in 1862 while the Park was under construction.
Although it no longer distributes fresh water to Manhattan residents, its overflow is critical for providing fresh
water to the Pool, Loch, and Harlem Meer, the series of
connecting water bodies in the northern part of the Park.
Note: Manhattan author Jerri Garretson has been writing tall tales for Kansas children which also "explain"
many natural phenomena. These include Johnny Kaw - the Pioneer Spirit of Kansas, Kansas Katie, and
Twister Twyla.

5 1
Artists' Biographies:
Lisa Campbell Ernst was born on March 13, 1957 in Bartlesville, Oklahoma. She earned her B.F.A. from
the University of Oklahoma in 1978. Ernst currently lives in Kansas City, Missouri with her family. She is the
author and illustrator of over thirty children's books. Ernst's stories and illustrations are frequently about the
animals around her. Her book Little Red Ridding Hood: A Newfangled Prairie Tale was nominated for the
Show Me Readers Award. Ernst works in pastel, ink, and pencil. Her illustrations are characterized by
bright colors, heavily outlined forms, lots
of line work that creates texture, and varying perspectives.
Bubba and Trixie by Lisa Campbell Ernst
Stella Louella's Runaway Book by Lisa Campbell Ernst
When Bluebell Sang by Lisa Campbell Ernst (Booklist Editor's Choice)
Duke the Dairy Delight Dog by Lisa Campbell Ernst
Ginger Jumps by Lisa Campbell Ernst
Tom Coffin was born in Lawrence, Kansas and attended the Institute of American Indian Arts in Santa Fe
and received a B.F.A. in painting and sculpture from the Kansas City Art Institute. He worked at the Shidoni
Fine Art Bronze Foundry in Santa Fe. He currently lives in Phoenix, Arizona, where he works as a sculptor,
painter, and architectural restorer. He grew up on the Prairie Band Potawatomi Reservation and Coyote in
Love With a Star, by Marty Kriepe De Montano, is drawn from a traditional story of that tribe. It is the only
children's book that Coffin has illustrated, but he enjoyed the process and hopes to do more. Coffin's illus-
trations consist of bold, brightly colored drawings with varying perspectives.
Lane Smith was born on August 25, 1959 in Tulsa, Oklahoma. He received a B.F.A. in illustration and his
work has appeared in newspapers, magazines, and on album covers. Smith has collaborated with Jon
Scieszka on a number of children's books. Their book, The Stinky Cheese Man and Other Fairly Stupid
Tales, was a Caldecott Honor Book winner. Smith has also illustrated books by Roald Dahl and Dr. Seuss.
His unique work is funny and energetic, attracting children and adults of all ages.
The Time Warp Trio series by Jon Scieszka
The Big Pets by Lane Smith
Math Curse by Jon Scieszka (1997 ALA Notable Book)
Janet Stevens was born in Dallas, Texas in 1953. She received her B.F.A. in 1975 from the University of
Colorado at Boulder. During college, Stevens spent summers designing fabric. Stevens received her first
book contract in 1978. Here work has been the subject of an exhibition at the National Center for Children's
Illustrated Literature. She works in a variety of media, including acrylic, watercolor, pencil, collage, and digi-
tal imagery. Her book, Tops and Bottoms, was a Caldecott Honor Book in 1996. From Pictures to Words
goes through the steps of creating a book from the conception of the initial idea to creating the finished prod-
uct as ideas are suggested to Stevens by three of her characters. Stevens renders herself and the rest of
the reality in black and white, while the fictional characters and Stevens' imagination are in vibrant color.
To Market, To Market by Anne Miranda (1998 ALA Notable Book)
And the Dish Ran Away With the Spoon by Susan Stevens Crummel

5 2
Crate 4Advanced Reader
Contents:Unit I - The Visual MessageUnit II - Bringing History AliveUnit III - Biographies and Portraiture
Books included in crate:Storm in the Night by Mary Stolz, illustrated by Pat CummingsThe Bravest of Us All by Marsha Diane Arnold, illustrated by Brad SneedMark Twain and the Ghosts of the Mississippi by Cheryl HarnessComing Home from the life of Langston Hughes by Floyd CooperWill Rogers by Frank Keating, illustrated Mike WimmerRemember the Ladies by Cheryl HarnessPicture This: How Pictures Work by Molly BangBeyond Oz Catalogue
Other items in crate :Mark Twain’s America (music CD)The Voice of Langston Hughes (voice/poetry CD)

5 3
Unit I The Visual Message
• Students will better understand how authors use descriptive words to create a visual image.
• Students will better understand how illustrators/artists use the elements of art to create a
visual message.
Storm in the Night by Mary Stolz, illustrated by Pat Cummings and The Bravest of Us All by Marsha Diane
Arnold, illustrated by Brad Sneed are both books about storms. After reading the two books, student can
compare the details: how are the storms alike, how are they different.
Tools are an important part of creating. Artists use physical tools such as pencils, paints and brushes, pas-
tels, paper and canvas, just as writers use pencils, pens, computers and paper. But both writers and illus-
trators have other important tools that they use. Writers use setting, characters and plot to create a story.
They may also create props such as costumes or important items that support the story and there may be
other things that occur such as humor, mood, or moral lessons. Janet Stevens book From Pictures to
Words does a good job of outlining the parts of a story. In addition, authors can use descriptive language to
create a visual picture in your mind.
The illustrators job is to bring the story to visual life. He or she can't change what the author has written, but
the illustrator can read between the lines and add details that make the words of the story come to life visu-
ally. Illustrators also have tools, such as the elements of art (line, shape, color, and texture) and composi-
tion (how the elements of art are put together including proportion, perspective, focal points, repetition and
rhythm, balance, etc.) A worksheet defining the Language of Art has been enclosed and your art teacher
can help you talk to your students about the tools artists use. The book Picture This: How Pictures Work, by
Molly Bang is an excellent resource.

5 4
Summary of Molly Bang's Visual Principles
1. Smooth, flat, horizontal shapes and lines give a sense a stability and calm.
2. Vertical shapes and lines are more exciting and active. Vertical shapes fight earth's gravity.
They imply energy and reaching to the sky.
3. Diagonal shapes or lines are dynamic - they seem to imply motion or tension.
4. The upper half of the picture is a place of freedom, happiness or triumph - it is also the
spiritual place in the picture. The bottom half is heavier, sadder or more constrained.
Objects on the bottom are grounded. Items place in the top half have more pictorial
weight. The center of the page is often the most effective focal point or center of attention.
The edges and corners are the edges of the picture world.
5. White or light backgrounds feel safer than dark backgrounds - like night and day time.
6. Pointed shapes are scarier than rounded or curved shapes.
7. Larger objects feel stronger
8. Color can impact mood - darker or less pure colors seem dark and sad. Vibrant colors seem
happy or excited. Colors can be warm or cool.
9. We notice contrasts between dark and light.

5 5
The Language of Art
I. Elements of Design
Line: Can be drawn or implied (e.g. between two colors). Lines help to define space and shapes, can be
expressive, and can form patterns and textures.
Shape/Form: A shape is the two-dimensional (height and width) representation on a flat surface, form is
three-dimensional (height, width and depth) as in sculpture. A shape or form takes up positive space and is
surrounded by negative space. Form can also apply to the total design of
an art work.
Color: 1. Hue - the name of a color. Primary colors - red, yellow, blue. Secondary colors - orange, green,
violet (purple). Colors are arranged according to the spectrum and are often displayed as
a color wheel (developed in the 19th century) in the following order: red, orange, yellow, green, blue, indi-
go/violet. Complementary colors are located across from each other on the wheel. When mixed they create
grey. When used next to each other they create a resonance. Analogous colors are located next to each
other on the wheel. 2. Value - how light or dark a color is. A tint is achieved by adding white, a shade by
adding black. 3. Intensity is how bright a color appears and is altered by adding grey or complementary
color until grey is reached. Monochrome - tones of a single color.
Simultaneous contrast - the effect achieved by placing one color next to another, especially its complement.
Texture: The surface quality of an object as we see it or feel it. Visual texture is simulated, although the
media may have a texture of its own. Tactile texture is three dimensional, and can be felt. Dull or matte tex-
tures absorb light, while shiny surfaces reflect light. Smooth surfaces reflect light evenly, while rough sur-
faces reflect light unevenly.
Drawing or drafting (the use of lines) is often one ofthe first things that an artist would learn.
Color is extremely expressive, and often is associated with cer-
tain ideas or emotions. Color symbolism may be very impor-
tant in a work of art!
Since we can't touch art in the museum, we have to discover tex-ture by sight and relating the work to things we can touch with simi-lar textures. We have to imagine how it would feel.

5 6
II. Composition
A painter chooses the above elements to express what he/she wants to communicate to the
viewer. An understanding of them helps us organize visual composition and provides criteria for appreciation
and evaluation (aesthetics).
Repetition: Repetition of elements can be used to create rhythm and movement.
Variety/Contrast: of elements (e.g. color) and between positive and negative space can be used
to achieve emphasis and focus (what your eye notices first).
Balance: The arrangement of the elements within a work to create equilibrium. Can be
symmetrical (same on both sides) asymmetrical (seems balanced) or radial ( focus on the center with work
radiating around).
Proportion: The size of one part of a work in relation to other parts; can be used to denote space/perspec-
tive. When we have something "in proportion" it means that we have achieved
a balanced relationship of the parts to the whole. Classical proportion is determined by using
the Golden Mean.
Rhythm - movement or action characterized by a
regularly recurring element. Following rhythm in an
artwork can help you visually move through a work
of art.
Contrast in color intensity or value is one way to create emphasis.
Chiaroscuro - the contrast between light and dark, is a common method
of focusing the viewer. We might also notice the break in
a rhythm pattern, or a unique shape. Movement in a work might
also lead us to the object the artist wants us to focus on.
ASSYMETRICAL BALANCE1. A large object can be balanced with a smaller object if the smaller object is
more complex - perhaps it has a heavier texture or more pieces. We call this balance by interest, because the more complex object attracts our attention.
2. Balance by weight - a heavier object can be balanced by a lighter object located at a greater distance from the center - like a seesaw
3. In general warm colors are heavier than cool colors, those of stronger intensity heavier than those of weaker intensity.
4. Perspective can also play a role - if we know an object is further back in the picture frame, but weighs the same as an object in front, it appears balanced.
Artists manipulate proportions to achieve desired effects. For example, the use of caricature or enlarging
of the natural environment to imply grandeur. The German Expressionist painters
elongated their figures to express emotion. Closer to home, Thomas Hart Benton used exagge-rated
proportions similar to those of El Greco. Rather than following the proportions of Leonardo Da Vinci's
"Universal Man" of height being equal to the length of 8 heads, he
has height equal to the length of 12 heads.

5 7
Perspective or the Illusion of Space: An artist can achieve the illusion of three-dimensionality on a two-dimensional surface by using one or more of the techniques listed below.
1. Baseline Perspective - The relationship of the object to the baseline of the work determines whether they are in the foreground or background - objects above the baseline are in the distance, below the baseline are in the foreground.
2. Overlapping Objects - Objects in front of other objects will appear to be in the foreground.3. Proportion - Objects closer to the viewer will appear large than objects far away from the
viewer. In this situation, a house in the background may be much smaller than the person in the foreground.
4. Linear Perspective - Often called train track perspective or scientific perspective, this is based on the fact that two parallel lines will converge on the horizon (in the background). This point on the horizon is called the vanishing point. Look for diagonal or the appearance of diagonal lines in the work.
5. Contrast of Color - Cool colors will recede and appear to be further back in the picture space.
6. Aerial Perspective or Atmospheric Perspective - Objects in the distance will be blurrier than objects in the foreground. In addition objects in the front will be a darker color than those in the background.
7. Foreshortening - This applies the rules of perspective to a single object in the work. The parts of the object which are further away from the viewer will be smaller, making the object appear to go back in the picture plain.
UNITY - THE RELATIONSHIP OF ALL THE ELEMENTS TO ACHIEVE WHOLENESS, COHERENCE AND CONSISTENCY.

5 8
Activity 1Details and Reading Between the Lines
Read the following passage from The Bravest of Us All written by Marsha Diane Arnold. Have the students
close their eyes and listen and then draw what they see.
"I stood up, held tight to Velma Jean's hand, and looked that tornado in the face. The wind sounded like Old
Engine 85 comin' down the railroad tracks. The funnel grew darker and wider, nearly touchin' the ground. It
was headin' straight toward us, howlin' like a coyote. I was howlin', too."
Activity 2
Use the two storm illustrations, one from Storm in the Night and one from The Bravest of Us All (You can
also use the images from the catalogue).
1. Make a visual inventory of each illustration - List colors, objects, types of lines, types of
shapes, motion, etc.
2. Summarize the emotional feeling of each in a couple of words.
3. Go back to the stories and find words and phrases used to define the two different storms.
4. Compare the two lists. How are they the same? How are they different?
5. Think about a storm you have experienced. Describe it using the most descriptive words
you can think of (colors, sounds, smells, feelings, movement). Then create a picture of the
storm, using the words you have written. A successful illustration will match your words,
but help you see the storm even better.
The Storm, written by Marc Harshman and illustrated by Wichita artist Mark Mohr in 1995 is
an additional resource that could be added to the unit.

5 9
Comparing the StormsWorksheet
Colors
Types of Lines
Types of Shapes
Motion
Objects
Feeling of the Illustration
Descriptive wordsand phrases from the book
Storm in the Night The Bravest of Us All

6 0
Unit II Bringing History Alive
• Students will learn about visual resources/primary documents.
• Students will think about visual accuracy in books.
• Students will consider the importance of illustrations in non-fiction books.
Cheryl Harness has written many books that help to bring history to life for children because of their
informative illustrations. When Harness comes to schools she talks to children about doing research in
the library and on the internet (she tells children that books are more accurate resources). In fact accu-
racy is incredibly important because many of Harness' books are published by The National Geographic
Society.
Harness says, "The Eula Belle never ruffled and drummed along any river. I made her up from a hand-
ful of old engravings and photos, populated her with the kind of folks who would know a boat like that,
then named her after grandma who since 1974 is as lost to the world as Cleopatra and Sam, Clemens
and the Gardens of Babylon. That's what words and pictures mean to me. They're our only way to link
the living and vanished past."
Note : A CD with music from the period has been included in the crate.

6 1
Activity 1
Discuss the illustration/diagram of the Eula Belle with the students. Have them find pictures of river boats.
Even though the Eula Belle did not exist, is this an accurate illustration of a paddle steamer?
Another interesting aspect of Harness' work is the introduction at the beginning of each book. Since these
books are short, she recognizes that she can't cover everything about a topic in a single book. In addition,
she is careful to acknowledge differing points of views and interpretation.
Cheryl Harness book list (note that some of these are biographies that could be used with the
next unit):
Three Young Pilgrims
*Young John Quincy
The Amazing Impossible Erie Canal
*Young Abe Lincoln
They're Off! The Story of the Pony Express
*Abe Lincoln Goes to Washington
*Ghosts in the White House
*Young Teddy Roosevelt
*Ghosts of the 20th Century
*George Washington
Ghosts of the Civil War
Due out in 2003----
*The Rabble Rousers
*The Revolutionary John Adams
*Denotes biographies
Activity 2
Mark Twain and the Queens of the Mississippi by Cheryl Harness
Give the children the following work sheet of questions to answer while reading the book.
To create a master worksheet white out the italics on the teacher's copy.
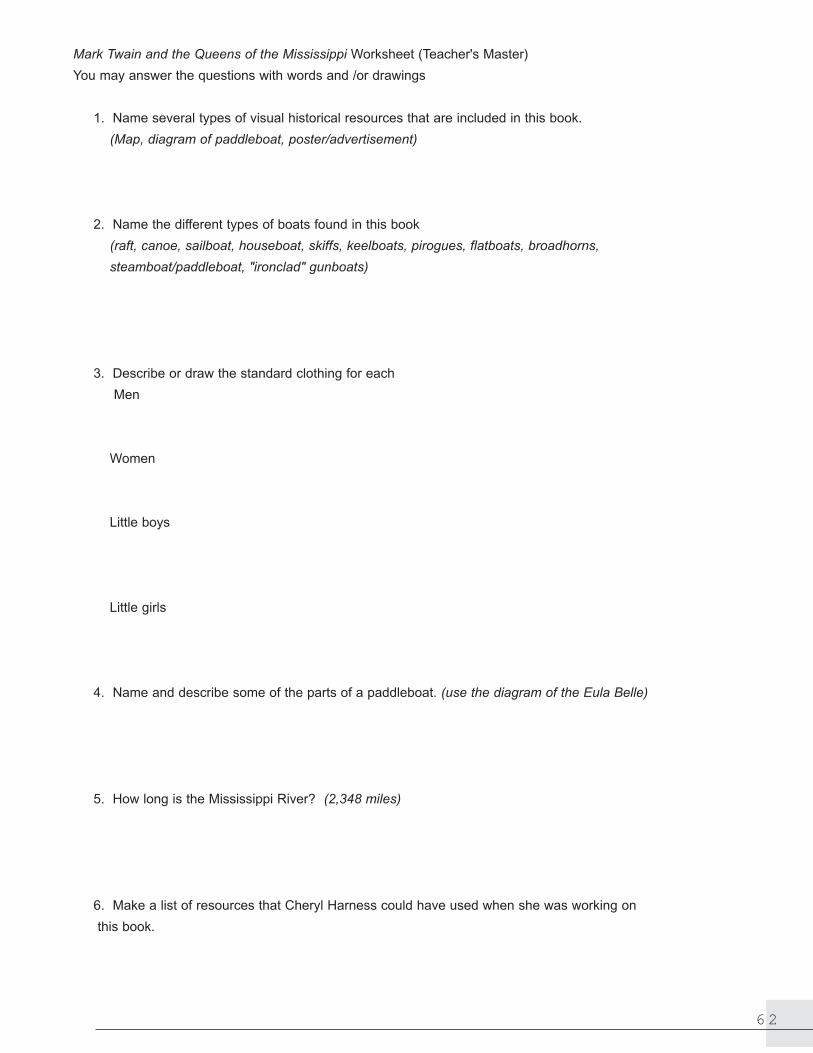
6 2
Mark Twain and the Queens of the Mississippi Worksheet (Teacher's Master)
You may answer the questions with words and /or drawings
1. Name several types of visual historical resources that are included in this book.
(Map, diagram of paddleboat, poster/advertisement)
2. Name the different types of boats found in this book
(raft, canoe, sailboat, houseboat, skiffs, keelboats, pirogues, flatboats, broadhorns,
steamboat/paddleboat, "ironclad" gunboats)
3. Describe or draw the standard clothing for each
Men
Women
Little boys
Little girls
4. Name and describe some of the parts of a paddleboat. (use the diagram of the Eula Belle)
5. How long is the Mississippi River? (2,348 miles)
6. Make a list of resources that Cheryl Harness could have used when she was working on
this book.

6 3
Activity 3
Project
Have students pick historic events that you are studying. Using books, internet, photographs, paintings etc.,
have students create an illustration for the event. If students are uncomfortable drawing certain objects or
figures, they can use very thin paper and outline figures or items and transfer them to their drawing with car-
bon paper. The focus should be on historical detail and using visual documentary resources, not artistic abil-
ity. Another option is to create a mural of
an event and assign different parts of the event to different students.
Or
Choose an object from the past, and do research on it, both visual and documentary. Create a technical
illustration similar to the diagram of the Eula Belle featured in Mark Twain and the Queens of the Mississippi.
Other illustrators featured in Beyond Oz have illustrated historical books. You might be interested in :
Bound for Americas: The Forced Migration of Africans to the New World by James Haskins
and Kathleen Benson, illustrated by Floyd Cooper
When Africa was Home by Karen Lynn Williams, illustrated by Floyd Cooper
One April Morning: Children Remember the Oklahoma City Bombing illustrated by Floyd Cooper
Orphan Journey Home, by Liza Ketchum illustrated by C. B. Mordan

6 4
Unit III Biographies
• Students will think about historical accuracy in creating a biography.• Students will investigate the use of words and pictures in portraying an historical
figure.• Student will learn about the proportions of the face, and use this information in
drawing a portrait.
The people that make history are always fascinating. Mike Wimmer has illustrated anumber of biographies. Floyd Cooper, who is best known as an illustrator, began towrite biographies. Cheryl Harness has done numerous biographies.
Discuss the role of a biographer with your students. What tools does a biographeruse? How important is accuracy? Is a biographer objective or subjective in their pointof view?
Note : A CD of Langston Hughes’ poetry is included in the crate

6 5
Activity 1
Read the biographies of Will Rogers and Langston Hughes. Using the character sheet fol-lowing, make a list of the characteristics of each person. Notice, that there is a space onthe sheet to list visual characteristics, which means that students will need to look carefullyat the illustrations.
Activity 2
Portrait BiographiesChoose portraits of famous and not so famous people - have the students fill in the biogra-phy forms BEFORE telling them who the portrait is of.

6 6
Character Sheets (Activity 1)
Choose a character _______________________.
Describe the physical appearance of the character (tall, blond, blue eyed)
From text From illustrations
List the personal characteristics of the character (e.g. brave, timid, thoughtful)
From text From illustrations
List the physical characteristic of the character (strong, weak, etc.)
From text From illustrations

6 7
Portrait Biography
(Activity 2)
Pretend you are the person in the portrait and using the clues the artist provided, answer the
following questions to write your "autobiography." Be prepared to back up your statements with visual infor-
mation in the portraits (e.g. clothing styles, documents or objects used in the
background, expression on face, etc.)
My name is ____________________________.
I am _________ years old.
I live in _________________________.
The date is ______________.
My job is _______________________________________________.
In my spare time I like to ________________________________.
My favorite thing is_____________________________________.
I have a lot/some/very little money. (circle one) How can we tell?___________
_________________________________________________________________.
People use the following words to describe me: ____________________________
___________________________________________________________________.
I am thinking about_____________________________________________________
______________________________________________________________________.
I like the way the artist painted/drew my ____________________________________.
I don't like the way the artist painted/drew my ________________________________.
The other people in the picture are (only if there are other people/animals
etc.)___________________________________________________________________________________
_______________________________________________________.
Other things I can say about myself based on the picture
_______________________________________________________________________________________
_______________________________________________________________________________________
__.

6 8
Activity 3
Project
This art project also integrates math (propotions).
Most children are familiar with Leonardo Da Vinci's "Universal Man" which shows the ideal
proportions for the human figure. The face also has idea proportions, although very few of us
are perfect!
Most children have a difficult time in placing the feature of the face in the correct place, unless the proper
proportions have been pointed out to them. The diagram below will help you instruct students on placing the
features on the face. Student may want to use tape measures on their own face or a partner's to check the
proportions.
Mike Wimmer and Cheryl Harness both demonstrated their skill in portraiture to students when they visited
Manhattan and Riley. Wimmer, especially pointed out that although we tend to see things as line drawings -
symbols of what they are - if we look carefully and draw what we really see, we get a more accurate repre-
sentation. For example, much of what we tend to draw as lines
is really shadows or changes in color or texture. Harness demonstrated how famous figures often identifying
characteristics - e.g. Abraham Lincoln's thin face and beard.
Have students work in pairs and draw portraits of each other. Have students be aware of what makes their
partner unique - shapes of eyebrows, hairline, glasses, freckles, etc. When we think of characters in history
- e. g. Abraham Lincoln - they have features which make them unique, too.
D i a g r a m
Nose = center 1/3 of head
6 9
Activity 4
Remember the Ladies by Cheryl HarnessCheryl Harness' book has biographies of 100 great American Women. Each woman has ashort write up and a portrait. Using this format, create a biography book for a time periodor part of the world that you are studying. Assign each student a person. Have them doboth documentary and visual research and create a biographical "sketch."
Other works to look at by the featured illustrators:Cheryl Harness' biographies (see book list in unit on Mark Twain and the Queens of the Mississippi)
Satchmo's Blues by Alan Schroeder, illustrated by Floyd CooperHappy Birthday Dr. King by Kathryn Jones, illustrated by Floyd CooperMartin Luther King Jr. and His Birthday by Jacqueline Woodson, illustrated by FloydCooperMandela, written and illustrated by Floyd CooperShake Rag: From the Life of Elvis Presley, written by Amy Littlesugar, illustrated by FloydCooperHome Run: The Story of Babe Ruth, by Robert Burleigh, illustrated by Mike WimmerFlight: The Journey of Charles Lindberg by Robert Burleigh, illustrated by Mike WimmerBully for You, Teddy Roosevelt by Jean Fritz, illustrated by Mike WimmerMoses by Margaret Hodges, illustrated by Mike WimmerTalking with Adventurers compiled and edited by Pat Cummings and Linda CummingsPhD.

7 0
Biographies:
Floyd Cooper was born in Tulsa, Oklahoma. He received a B.F.A. from the University of Oklahoma.
Cooper has worked as a Hallmark greeting card designer, a toy designer, and a
freelance illustrator. He has written biographies of Langston Hughes, Nelson Mandela, and Louis
Armstrong. Two books illustrated by Cooper, Meet Danitra Brown by Nikki Grimes and Brown Honey in
Broomwheat Tea by Joyce C. Thomas, received Coretta Scott King Honor Books for Illustration. His work
has also received Oklahoma Book Awards and awards from the Society of Illustrators. Cooper has illustrat-
ed over twenty-five books. His illustrations suggest a sense of place and emotion to their viewers.
I Have Heard of a Land by Joyce C. Thomas (1999 ALA Notable Book, Coretta Scott King Honor Book)
Miz Berlin Walks by Jane Yolen
Faraway Drums by Virginia Kroll
On Marti Gras Day by Fatima Shaik
The Girl Who Loved Caterpillars: A Twelfth-Century Tale from Japan by Jean Merrill (Society of Illustrators
Award)
Pat Cummings was born on November 5, 1950 in Chicago, Illinois. Cummings' family moved
frequently because her father was in the army. They spent time in Germany, Japan, Kansas, and several
other states. Cummings has been drawing since she was a little girl. In fifth grade, she
discovered that art could be profitable. Cummings sold her drawings of ballerinas to classmates
for nickels or candy. She continued this interest in art during her studies at the Pratt Institute. After gradua-
tion, Cummings worked as a graphic artist. Cummings is also the editor of the award
winning series of books for children, Talking With Artists. Cummings uses her friends and family as models
for her illustrations to make her drawings more personal. She says that her imagery is, "…a composite of
everything I've seen or experienced; my memories are visual ones." In "Grandfather's Story Begins" from
The Storm in the Night, Cummings' impressionistic style and cool palette create a sense of the storm and of
darkness.
My Mamma Needs Me by Mildred Pitts Walter (Coretta Scott King Award)
Just Us Women by Jeannette Caines (a Reading Rainbow Book)
Go Fish by Mary Stolz (ALA Notable Book 1991)
Petey Moroni's Camp Runamok Diary by Pat Cummings
Clean Your Room Harvey Moon! by Pat Cummings
Cheryl Harness was born on July 6, 1951 in California. Harness received her degree in art
education from Central Missouri State University in 1973. Before she began writing and
illustrating children's books, Harness worked as a teacher, a waitress, an art supply seller, and at Hallmark.
Harness's books deal with historical themes and she is an avid researcher. In addition to writing her own
books, she illustrates books written by others. Harness has been a guest on
the C-SPAN program Bookspan. In Mark Twain and the Queens of the Mississippi, Harness's
colorful, impressionistic drawings and use of perspective give a sense of grandness to her topic
and make history fun for children.

7 1
Ghosts of the White House by Cheryl Harness
Young Abe Lincoln: the Frontier Days, 1809-1837 by Cheryl Harness
Ghosts of the 20th Century by Cheryl Harness
Brad Sneed attended the University of Kansas and received his B.F.A. there in 1989. He grew up in
Newton, Kansas and his illustrations have been greatly influenced by his life there. Sneed uses Kansas
landscapes and experiences in his books and has been heavily influenced by America's regionalist painters
- John Steuart Curry, Thomas Hart Benton, and Grant Wood. Sneed's illustrations also appear in magazines.
His newest book, Picture a Letter, uses Bentonesque figures in the shapes of letters.
The Strange and Wonderful Tale of Robert McDoodle: The Boy Who Wanted to be a Dog by Steven Bauer
I Heard Said the Bird by Polly Berends
Higgens Bend Song and Dance by Jacqueline Briggs Martin
The Pumpkin Runner by Marsha Diane Arnold (Smithsonian Notable Books for Children)
Mike Wimmer was born in Muskogee, Oklahoma in 1961. He received his B.A. in 1984 from
the University of Oklahoma and spent two-and-a-half years studying at the SketchPad Studio.
In addition to working as a children's book illustrator, Wimmer worked as a commercial artist. Wimmer has
done over two hundred book cover illustrations and a number of interior book
illustrations as well. As an artist, he has been inspired by classic illustrator Howard Pyle and
N.C. Wyeth. Wimmer has received numerous awards for his illustrations. His work is included
in the Mazza Collection and in the National Center for Children's Illustrated Literature in Abilene, Texas.
All the Places to Love by Patricia MacLachlan
Home Run: The Story of Babe Ruth by Robert Burleigh
Flight: The Journey of Charles Lindbergh by Robert Burleigh
Staying Nine by Pam Conrad
Will Rogers by Frank Keating (due August 2002)

7 2
Appendix ASTATE OF KANSAS STANDARDS TIES
Reading and Writing:
2/3 grade
Standard 1 - Learners demonstrate skill in reading a variety of materials for a variety of purposes
Benchmark 1 - Comprehends whole pieces of narration
- Understands basic message
- Retells accurate sequence
Benchmark 2 - Decodes accurately and understand new words
- Uses context clues
Benchmark 3 - Reads fluently
- Understands how print is organized and read
- Recognizes title page
Benchmark 4 - Uses what he/she already knows about the topic and the type of text
to understand what is read
- Applies predictable patterns (rhyme, beginning, middle
and end of story, topic, details)
Benchmark 5 - Draws conclusion supported by text
- Retells the basic plot
Standard 3 - Learners demonstrate knowledge of literature from a variety of cultures, genres,
and time periods
Benchmark 2 - Identifies characteristics of a wide variety of literary genres in various
formats
- Identifies fiction, humor, fairy tale
5th grade
Standard 1 - Learners demonstrate skill in reading a variety of materials for a variety of purposes
Benchmark 1 - Comprehends whole pieces of narration - Indicators 1,2,3,5,7,11
Benchmark 2 - Decodes accurately and understand new words
- Uses context clues
Benchmark 4 - Uses what he/she already knows about the topic and the type of text
to understand what it read
- Uses pattern such as cause and effect, comparison and contrast
- Uses elements of story
Benchmark 5 - Draws conclusion supported by text
- Identifies common topics in different texts
- Draws conclusions from text

7 3
Standard 2 - Learners write effectively for a variety of audiences, purposes and contexts
This will depend on how well and extensively the teacher uses the suggested writing projects included, but
most benchmarks and indicators can be covered.
Standard 3 - Learners demonstrate knowledge of literature from a variety of cultures, genres, and time peri-
ods
Benchmark 2 - Identifies characteristics of a wide variety of literary genres in various
formats
- Biography, history, folklore/fairy tale, fiction, non-fiction
Standard 4 - Learners demonstrate skills needed to read and respond to literature
Benchmark 1 - Uses Literary concepts to interpret literature
- Identify elements of fiction - plot, setting, characters
Listening, Viewing and Speaking
Viewing
Benchmark 2 - Identifies cues in visual messages
Benchmark 3 - Understands the visual message
Benchmark 5 - Analyzes/evaluates visual messages
Music
1. Singing with others
2. Performing on instruments
8. Relationship between music and visual art
9. Understanding music in relation to history and culture
Social Studies
Civics and Government & U.S. History - Several of Cheryl Harness' books relate to early American history
and the founders of our country. The process involved in looking at the books will relate to Benchmark 3 of
U.S. History - Student engages in historical thinking skills.
Geography - Mississippi region of U.S.
Visual Arts
Various aspects of Discipline Based Arts Education, particularly aesthetics and visual literacy, and art pro-
duction.

7 4
Appendix BRESOURCE LIST
Many resources on literacy were used in the development of this curriculum. Where possible,
the materials respond to current trends in literacy education and to programs that are used by
organizations such as Head Start and American Reads:
--------------Emerging Literacy: Linking Social Competence to Learning, Training Guide for the Head Start
Learning Community, Head Start Publications Management Center, 1999. Additional material from the CIR-
CLE (Center for Improving the Readiness of Children for Learning and Education) program at the University
of Texas, Houston, and used by the Manhattan, KS Head Start Program.
---------------The Picturebook: Source and Resource for Art Education, Reston, VA: The National Art
Education Association, 1994.
--------------Reading Tips for Parents, Partnership for Family Involvement, U.S. Department of Education,
2001.
--------------Teaching Our Youngest: A Guide for Preschool Teachers and Child-Care and Family Providers,
Early Childhood-Headstart Taskforce, U.S. Department of Education, and U.S. Department of Health and
Human Services, 2002.
Armbruster, Bonnie, Fran Lehr and Jean Osborn, Putting Reading First: The Research Building Blocks for
Teaching Children to Read, Center for the Improvement of Early Reading Achievement/National Institute for
Literacy, 2001.
Collins, Raymond C., Reading Helpers: A Handbook for Training Tutors, from American Reads, a joint proj-
ect of the Corporation for National Service, the U.S. Department of Education and the U.S. Department of
Health and Human Services, 1999.
Cummings, Pat, Talking With Artists, New York: Simon and Schuster, 1992.
Cummings, Pat, Talking With Artists, Volume Two, New York: Simon and Schuster, 1995.
Cummings, Pat, Talking With Artists, Volume Three, New York: Clarion Books, 1999

7 5
Eubanks, Paula, "Understanding Picture Books as an Art Medium," Art Education, November 1999, p 38-44.
Frohardt, Darcie Clark, Teaching Art with Books Kids Love, Golden, CO: Fulcrum Resources, 1999.
Heil, Lillian H. "Teaching Visual Literacy," Northern Rocky Mountain Educational Research Association
Meeting, 1991.
McCann, Donna and Olga Richard, The Child's First Books: A Critical Study of Pictures and Texts, New
York: H. W. Wilson Company, 1973.
Nodelman, Perry, The Pleasures of Children's Literature, edition 2, White Plains, NY: Longmans, 1996.
Novelli, Joan, Using Caldecotts Across the Curriculum, New York: Scholastic, 1998.
Polette, Nancy Picture Books for Gifted Programs, New York: Scarecrow Press, 1981.
Richardson, Maurice V. and Margaret B. Miller Using Picture Books Kindergarten through High School,
University of South Dakota, 1997.
Stewig, John Warren "Book Illustration: Key to Visual and Verbal Literacy," International Reading
Association, 20th Conference Proceedings, 1975.
Sunday, Barbara, "Book Links: Picture Books in the Curriculum," BCATA Journal for Art Teachers, Volume
33, number 2, Summer 1993, p. 12-18.
Trelease, Jim, The Read-Aloud Handbook, New York: Penguin Books, 1982.

7 6
Appendix CREADING AN ILLUSTRATION
The ways illustrators use the elements of art (line, shape, color and texture) and composition, help children
and adults understand the story better.
Choose an illustration from one of the books in the trunk. What drew you to it?
What colors do you see? How do the colors help you understand the mood of the picture?
What types of lines do you see? What direction(s) do they go? How do they help you understand the mood
of the picture?
What types of geometric shapes do you see? Do certain shapes create a certain feeling (e.g. pointy might
be scary, round might be comforting, square might be solid)?
What do you see first (focal point) and why? What do you see next? Do these focal points help you move
through (read) the picture in a certain order?
Has the artist use any other "tricks" to help you understand the illustration? E.g. repetition,
contrast, perspective (this could be looking from above or below, how far the work goes back
in the picture, etc.), unusual proportions, etc. What types of hints do they give you?

7 7
Other things to think about:
How would you rate this work on a realism scale with 1 being photographic and 10 being totally unrealistic?
Why?
Is the illustration meant to be serious, scary, silly, happy, funny etc? How does that affect the artist's choices
of style? (e.g. The artists might choose a cartoon style for a funny book.)
What could you do to completely change the mood or the intent of the illustration? Think about colors,
shapes, lines, etc.
Do you think the artist did a good job helping you to understand the story better? Why or why not?

7 8
Appendix DMAKING PICTURE BOOKS
One of the most effective ways to combine literacy and visual literacy skills is for children to
create their own picture books. There are numerous ways to make books, ranging from basic bound books
with drawn illustration to complicated folded books with pop out pictures, to more complicated ways to bind
books. The instructions below are to make a very simple bound book.
If you wish to have a decorative cover try marbelizing paper (see supply ideas for marblethix) or use decora-
tive paper, fabric, etc.
Supplies
Unruled paper (size is up to you)
Thin cardboard or heavy paper - 2" wider and longer than your unruled paper
Material to decorate the cover - one cut 1" larger than the cardboard and one cut 1/8" smaller
Thread
1. Glue cover paper on, mitering the corners (see diagram 1)
2. Line the cover with paper or fabric to within 1/8" on the edge (see diagram 2)
3. Fold pages and the cover in half, open them and holding them flat punch a hole along the fold line in the
center. Punch two more holes above and two more holes below the center hole, evenly spaced.
4. Sew the book together, starting at the center, leaving several inches of thread to be tied later. Carry
thread through center hole out of the cover, in again through the next hole, and out the next. Sew in and out
up to the top hole, down to the bottom and back to the center. When the thread returns to the center, loop it
over the sewed portion and tie with a firm double knot. Keep the thread taut but do not pull tightly because
it will cut the paper. (see diagram 3)
Diagram 1 Diagram 2

7 9
5. Fold the book and put under weight to dry.
When illustrating a book, have students think about the graphic design. It is useful to spend some time look-
ing at picture books first.
Think about how the illustrations are laid out - Are they all on one side of the book? How much of the page
do they take up? Are the illustrations a full spread (taking up two pages)?
Where are the words - How has the artist left space for them?
Are they part of the drawing or separate?
Janet Steven's book From Picture to Words is a good starting point.
The following books by Paul Johnson will provide lots more ideas for creating pop up books, origami books,
unique bindings, etc.
A Book of One's Own: Developing literacy through making books, second edition, by Paul Johnson,
Portsmouth, NH: Heinemann, 1998.
Pictures & Words Together: Children Illustrating and Writing their Own Books, by Paul Johnson, Portsmouth,
NH: Heinemann, 1997
Literacy Through the Book Arts, by Paul Johnson, Portsmouth, NH: Heinemann, 1993.
Diagram 1 Diagram 2