before using this , rmh36 mixer
TRANSCRIPT
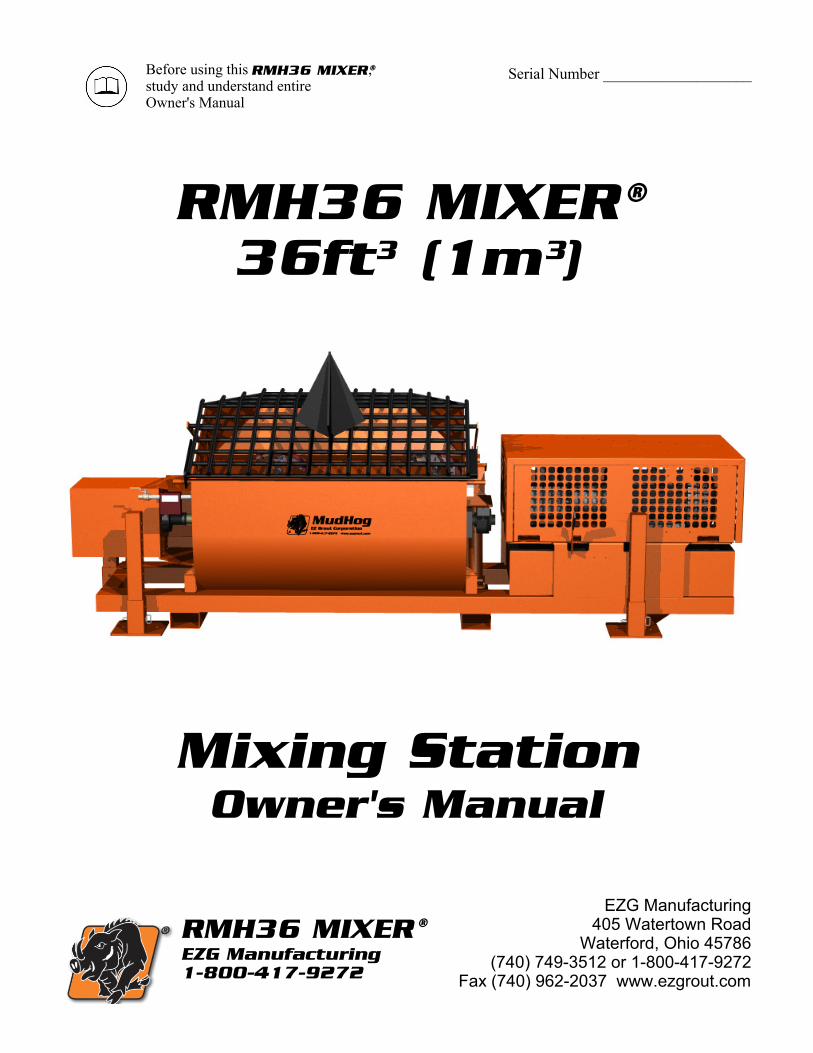
RMH36 MIXER
RMH36 MIXER
®
®
®
EZG Manufacturing1-800-417-9272
EZG Manufacturing405 Watertown Road
Waterford, Ohio 45786(740) 749-3512 or 1-800-417-9272
Fax (740) 962-2037 www.ezgrout.com
Serial Number ___________________Before using this ,study and understand entireOwner's Manual
33

Table of Contents
Introduction _________________________________________ 2
About this Manual ____________________________________ 2
General Information ____________________________________ 2
Safety Information ____________________________________ 2
Safety Precautions ____________________________________ 3
California Proposition 65 Warning __________________________ 4
Setup Instructions __________________________________________ 5
Operating Instructions _____________________________________ 5
Obtaining Spare Parts _____________________________________ 6
Daily Maintenance _____________________________________ 6
Cleanup _______________________________________________ 6
Service Records __________________________________________ 7
Warning Labels and Locations ________________________________ 8
Frame Assembly __________________________________________ 9
Hydraulic Service History __________________________________ 10
Shaft Assembly __________________________________________ 11
Grease Fitting Locations _____________________________________ 12
Notes _______________________________________________ 13
Warranty _______________________________________________ 14
Warranty Registration _____________________________________ 15

2
RHM36 Rev – 000
12/01/13 - Present ©Copyright 2013
Introduction
Congratulations on purchasing one of the finest pieces of masonry equipment on the market today! If this is
your first EZ Grout Manufacturing product then you will not be disappointed. If you have previously owned
an EZ Grout Manufacturing product then you will find the same high quality and dependability you have come
to expect from EZ Grout Manufacturing.
About this Manual
The purpose of this manual is to inform the owner, employer, and the operators of the unit, how to safely
operate this piece of equipment, and to make them aware of any hazards. It also contains important information
regarding assembly, setup, operation, and maintenance. It is the owner/employer’s responsibility to make sure
that anyone who operates this machine understands all of the safety warnings. If you do not understand any
items in this manual please contact the dealer where this product was purchased, or the manufacturer at the
number listed throughout this manual. If you have any suggestions about how to make this manual easier to
understand then please contact the manufacturer. Keep this manual available for reference wherever this piece
of equipment is being used, and make it available to any operators.
General Information
Illustrations in this manual may show details or components that may not be the same as your machine.
Continuing improvements to the design of this machine may have caused changes that are not reflected in this
manual. The information in this document is subject to change without notice.
Safety Information
The following safety symbols and signal words will be used throughout this manual an on the product. For
your safety, and the safety of others, please become familiar with their meanings and their warnings.
This symbol, either used alone or with a signal word, is used to call your attention to instructions involving your safety and/or the safety of others. Failure to follow these instructions could result in personal injury or death.
This signal word is used to identify a hazard that if not avoided could result in death or serious injury.
This signal word is used to identify a hazard that if not avoided could result in death or serious injury.
This signal word is used to identify a hazard that if not avoided could result in minor or moderate injury.
This signal word is used to identify a hazard that if not avoided could result in property or equipment damage. It also may be used for special instructions related to performance, maintenance, or general items.

3
RHM36 Rev – 000
12/01/13 - Present ©Copyright 2013
Safety Precautions
In this manual the RMH36 MIXER® is commonly referred to as unit, mixer, or mixing station.
Failure to obey the following safety instructions could result in DEATH or SERIOUS INJURY.
Read and understand the entire manual before operating any EZG Manufacturing product.
For your safety, and the safety of others, replace any missing or damaged warning decals by
contacting the manufacturer at 1-800-417-9272.
Make sure anyone operating the mixer is thoroughly familiar with its operation. Keep all
unauthorized and untrained personnel, especially children, away from the unit.
Never operate the unit with the safety grate, guards, or safety devices removed or open. Do not alter
any safety guards.
Stay clear of mixing paddles while the unit is running. Keep all body parts, clothing, jewelry, and
solid objects away from moving parts.
Never preform any work on the mixer while it is running. Before working on or cleaning the unit:
shut off the motor and service disconnect box.
Never operate the unit under the influence of alcohol, drugs, or medications
This unit has been designed and built as a material mixing station and should not be used for anything
other than its intended purpose.
Consult the forklift manufacturer’s specifications to insure load capacity is not exceeded.
Model Empty Weight Max Gross Weight
RHM36 5860 lbs. (2658 kg) 11,260 lbs. ( 5107.5 kg)
Do not exceed Maximum Gross Weight
Never stand under an elevated unit.
Stay clear of moving parts while the unit is in operation.
Never attempt to ride the unit.
Operate only in properly vented environments.

4
RHM36 Rev – 000
12/01/13 - Present ©Copyright 2013
Safety Precautions (continued)
Avoid breathing the dust that is produced while using the unit. Dust may contain crystalline silica and
may cause serious health problems.
Always know the locations of the nearest fire extinguishers, first aid kit, and emergency personnel
phone numbers in case of emergency.
Failure to obey the following safety instructions could result in MINOR or MODERATE INJURY.
Inspect all hoses, fasteners, bolts, and welds for nicks, cracks, cuts, damage, wear, or looseness
before each use. Repair as needed.
Always wear approved PPE, including: safety glasses, hearing protection, hard hats, and ventilation
mask when operating the mixing station.
Do not use the unit as a lifting device or with accessories or attachments not recommended by EZG
Manufacturing. Damage to equipment or operator might result.
Avoid contact with hot hydraulic fluid.
Allow system to cool before preforming any repairs or service such as adding fuel or oil.
Use only factory authorized parts.
Used lubricants, such as engine and hydraulic oil, and other hazardous waste must be taken to an
authorized disposal or recycling center.
California – Proposition 65 Warning
Engine exhaust, some of its constituents, and some dust created by: power sanding, sawing,
grinding, drilling, and other construction activities contains chemicals known to the State of
California to cause cancer, birth defects, and other reproductive harm. Some examples of these
chemicals are: Lead from lead based paints – Crystalline Silica from bricks – Cement and other
masonry products – Arsenic and Chromium from chemically treated lumber.
Your risk from these exposures varies depending on how often you do this type of work. To reduce
your exposure to these chemicals: ALWAYS work in a well-ventilated area and work with
approved safety equipment such as dust mask that are specially designed to filter out microscopic
particles.

5
RHM36 Rev – 000
12/01/13 - Present ©Copyright 2013
Setup Instructions
Before operating the mixing station it should be properly setup on the jobsite. The unit may be lifted by
using a forklift. The RMH36 MIXER® weighs 5860 lbs. (2658 kg) empty and 11,260 lbs. (5107.5 kg)
full. Check the forklift’s ratings before attempting to move the mixing station.
1. Raise the mixing station with a forklift.
2. Fully extend the outriggers by removing the hitch pins. Extend the outriggers and reinsert the
hitch pins. Each outrigger has a ¾” (19 mm) hitch-pin and a ¼” (6 mm) hair-pin as the
keeper. Make sure the hitch-pin is locked in position with the hair-pin.
Do not operate the mixing station without having the outriggers fully extended to provide a stable base. DEATH or SERIOUS INJURY can result.
3. While raised, set the mixing station to the desired height by adjusting the mixer feet. Each
mixer foot allows for 1” (25.4 mm) adjustments and has a 5/8” (15.8 mm) hitch-pin with a
hair-pin keeper. Make sure each pin is locked into position. In the full down position the unit
can dump into most mortar pans. Level the mixing station as close as possible.
4. Verify that all mixer feet are touching the ground and the unit is level and cannot rock in any
direction. If one of the mixer feet is not touching the ground and cannot be adjusted to do so
then place a shim under that foot with a board to create a solid footing.
If setting the unit in a permanent position then bolt the unit’s feet to the floor to prevent tipping. DEATH or SERIOUS INJURY can result.
5. Perform the daily maintenance as described in the Daily Maintenance section in this manual.
6. Check all hydraulic operations using both levers on the hydraulic control valve and the
auxiliary valve handles.
Operating Instructions
This equipment is to be operated by trained and qualified personnel over the age of 18. DEATH or SERIOUS INJURY can result.
1. After following the Setup Instructions connect the power source and start the unit.
2. Fill with material and add water.
3. Mix to your desired consistency.
4. Dump the mixed materials into your preferred transport.
In the unlikely event the mixing paddles plug or jamb then momentarily reverse the paddle direction.
NEVER put your hands inside the mixer drum while the equipment is running. DEATH or SERIOUS INJURY can result.

6
RHM36 Rev – 000
12/01/13 - Present ©Copyright 2013
Obtaining Spare Parts
Spare parts for your mixing station can be obtained by the following procedure:
1. Record the information from the Serial Number Tag located on the rear of the frame near the
hydraulic reservoir.
2. Using the Parts Reference Table in this manual record the part number.
3. Contact your local RMH36 MIXER® dealer, or EZG Manufacturing @ 1-888-344-7688
and provide the recorded information.
Daily Maintenance
Before performing any described maintenance items make sure the unit is turned off and the power source is disconnected. DEATH or SERIOUS INJURY can result.
1. Check and grease all fittings. Grease fitting locations can be found on the Grease Fitting
Location Drawing in this manual – see Table of Contents for its location.
2. Check the hydraulic oil level and add as needed. Change the hydraulic oil twice a year or if
contaminated. Change the hydraulic oil filters monthly. Use only recommended premium
grade ISO68 Heavy Duty Hydraulic Oil or equivalent premium grade oil. Do not use
contaminated fluid. Premium Grade ISO32 Oil may be used in cooler climates.
3. For maximum performance thoroughly clean inside and out at midday, or lunch break, and
again at the end of each day’s use. Do not allow a buildup of materials to form on the blades
and seals
4. Check all hydraulic hoses and equipment for leaks. Fix any leaks before operating the mixing
station.
5. Check all welds and bolts. If a cracked weld is found do not operate the unit until a repair is
made by qualified personnel. Tighten and loose bolts.
6. Check Paddle Shaft Seal for excessive wear. If any mortar or concrete is leaking past the seal
then change the seals immediately.
7. Check Paddle Rubbers for wear. Adjust or replace as needed.
Cleanup
1. Turn off the Motor, disconnect the power source, and Lockout.
2. For maximum performance thoroughly clean inside and out at midday and again at the end of
each day’s use. Do not allow a buildup of materials to form on the blades and seals.
3. Hose-out and brush-down the Mixing Drum. Spray and brush the Paddles until all excess
materials are removed.
4. Grease the fittings and brush the face of the Drum Seals until clean.

7
RHM36 Rev – 000
12/01/13 - Present ©Copyright 2013
Service Records
Service Performed Date Initials

RMH36 Rev-00012/01/13 - Present
©Copyright 2013
Item Part Number QTY Description Item Part Number QTY Description
1
2
3
4
5
6
7
8
9
10
11
12
13
14
15
16
16-129
16-131
16=159
16-121
16-106
16-125
16-157
16-165
16-161
16-163
16-150
16-162
16-177
16-112
16-193
2
5
1
2
1
2
2
2
1
1
1
1
1
1
1
Fully Extend Legs
Small Pinch Point
Never Open Grate
Stay Clear of Drum
US Flag
Grease Seals Daily
US Patents
Do Not Remove
Push for Forward / Pull for Reverse
Push to Dump / Pull to Lower
Push to Lower / Pull to Dump
Push for Reverse / Pull for Forward
Read Owner's Manual
Hot Surface
California's Proposition 65
8
U.S. Patents
#7,165,877
Grease seals daily.Use EPI rated orequivalent grease.
������
������
WARNINGBefore using this equipment,read and understand entireoperator’s manual.
Failure to follow operatinginstructions could resultin death or serious injury.
16-177
MANUFACTURED WITH PRIDE IN
MORGAN COUNTY, OHIO, USA
WARNING
Stay clear of moving partswhile machine is in operation
Failure to follow operatinginstructions could resultin death or serious injury.
16-131
PINCH HAZARD! WARNING
Stay clear of drum when inthe raised position.
Failure to follow operatinginstructions could result indeath or serious injury.
16-121
CRUSH HAZARD!
WARNING
Surface may be hot.Do not touch.
Severe burns may result.
16-112
BURN HAZARD!
!
����� ��� ���� ��� ��������������
WARNING
WARNING
Never open grate whilemixer is running.
Rotating paddles can cutand crush.
16-159
CRUSH HAZARD!
WARNING
Fully extend legs on® before dumping.
Mud
Hog
Dumping without properfooting could cause machineto tip over.
16-129
CRUSH HAZARD!
(both sides)
(both sides)
12 1
4 5
10
4
6
7
7
8
8
2
2
1112
6
3
13
14
15
9
Warning Labels and Locations
8

1
2
3
4
56
9
8
7
10
13
14
15
17
18
19
20
22
30
31
32
33
34
38
39
Item
Part N
umber
QTY
Description
12345678910
11
12
13
14
15
16
17
18
19
20
21
22
23
24
25
26
27
28
30
31
39
32
33
34
35
36
37
38
Standard Grating
1RMH36-A-3
RMH36 Rolled Drum Liner
11End Liner Kit (2
Sides)
Water M
eter
113/4" IP
Ball V
alve
1Gear Box
1Hydraulic Motor G
uard
1Hydraulic Motor H
ead
Grate Opener
21RMH36 Drum
02-701
2Hydraulic Cylinder (1
6")
Trunion Kit
1
Leg Kit (c
entered post)
11RMH36 Frame
RMH36-A-1
1Outrig
ger (e
nd/side)
1
Hitch Pin w/ Hair P
in
Outrig
ger (n
on motor side)
16
Leg Kit (c
orner post, n
on m)
Outrig
ger (m
otor side)
Hydraulic Oil S
ight G
lass
Hydraulic Tank Cleanout
Hydraulic Fluid Tank
1" IP
Cap
Hydraulic Breather
Emergency Stop Switch
Valve Handle Kit
Hydraulic Control Valve
Hydraulic Pump
Pump Adapter
Pump Half C
oupling
Motor H
alf C
oupling
Coupling Spider
Electric
Motor (2
30V - 4
60V)
Hydraulic Filter Body
Hydraulic Heat Exchanger
Engine Hood (hinged)
Engine Hood (fix
ed)
Leg Kit (c
orner post, m
otor)
35
RMH36-14
RMH36- 15
20-170
02-436
11111111111111111111111
Frame Assembly
RMH36-43
02-442
MH-86
RMH36-A-2
RMH36-A-8
MH-A-19
MH-A-19
09-404
MH-A-18
MH-A-19
MH-A-17
02-321
15-152
RMH36-A-7
01-722
02-528
03-538
MH-A-88
02-667
02-440
15-153
15-154
15-122
15-151
03-720
02-309
02-721
RMH36-A-5
RMH36-A-4
9
29
21
12
11
23
26
25
24
27
28
37
36
02-508
Gear Pump
29
RMH36 Rev-00012/01/13 - Present
Copyright 2013
02-175
MH-A-21

10
RHM36 Rev – 000
12/01/13 - Present ©Copyright 2013
Hydraulic Service History
_____________________________________________
_____________________________________________
_____________________________________________
_____________________________________________
_____________________________________________
_____________________________________________
_____________________________________________
_____________________________________________
_____________________________________________
_____________________________________________
_____________________________________________
_____________________________________________
_____________________________________________
_____________________________________________
_____________________________________________
_____________________________________________
_____________________________________________
_____________________________________________
_____________________________________________
_____________________________________________
_____________________________________________
_____________________________________________
_____________________________________________
_____________________________________________
_____________________________________________

1
2
3
4
6
7
89
78
10
8
7
8
10
16
17
4
5
5
7
8
12
3
7
15
8
13
78
11
7
8
11
810
7
14
7
11
6
Item Part Number QTY Description Item Part Number QTY Description
1
2
3
4
5
6
7
8
9
10
11
12
13
14
15
16
17
18
19
1 Hydraulic Motor Head
1 Hydraulic Motor
1 Shaft Seal Outter Plate -Hydraulic Motor End
3 Shaft Seal Rubber - Hydraulic Motor End
2 Shaft Seal Inner Plate - Hydraulic Motor End
1 Shaft Seal Kit
2 Paddle Cover Kit (No Rubbers or Bolts)
2 Paddle Rubber Kit w/ Bolts (No Covers)
1 Otter Paddle - Drive End
Otter Paddle - Bearing End
Center Paddle - Bearing End
Center Paddle - Drive End
3
1
3
2 Cleaner Paddle
8 Paddle Mounting Plate
1 RMH36 Paddle Shaft
1 Paddle Shaft Bearing
2 Shaft Bearing Shim
Shaft Assembly
02-442
2-436
RMH-18
RMH-19
RMH-16
RMH-A-2
RMH36-A-21
RMH36-A-20
RMH36-A-14
RMH36-A-17
RMH36-A-15
RMH36-A-16
RMH36-A-18
RMHC-1
RMH36-A-9
15-150
RMH36-44
RMH36-A-22
RMH36-A-6
1 Paddle Bolt Kit
Paddle Kit - Consist of all Paddles, Bolt Kit,and Cover Kit
NOTES:
11
RMH36 Rev-00012/01/13 - PresentRMH36 Rev-00012/01/13 - Present
©Copyright 2013

Grease Fittin
g Locations
Check ALL grease fittin
g locations
DAILY and grease as needed.
1
2
3
4
5
7
8
9
10
12
6
RMH36 Rev-00012/01/13 - Present
Copyright 2013

13
RHM36 Rev – 000
12/01/13 - Present ©Copyright 2013
Notes
_____________________________________________
_____________________________________________
_____________________________________________
_____________________________________________
_____________________________________________
_____________________________________________
_____________________________________________
_____________________________________________
_____________________________________________
_____________________________________________
_____________________________________________
_____________________________________________
_____________________________________________
_____________________________________________
_____________________________________________
_____________________________________________
_____________________________________________
_____________________________________________
_____________________________________________
_____________________________________________
_____________________________________________
_____________________________________________
_____________________________________________
_____________________________________________
_____________________________________________
_____________________________________________
_____________________________________________

14
RHM36 Rev – 000
12/01/13 - Present ©Copyright 2013
Warranty
Limited Warranty
The manufacturer warrants that products manufactured shall be free from defects in material and
workmanship that develop under normal use for a period of one year on all products from the date of
shipment. The foregoing shall be the exclusive remedy of the buyer and the exclusive liability of the
manufacturer. Our warranty excludes normal replaceable wear items, i.e. gaskets, wear parts, seals, O-rings,
belts, drive chains, clutches, etc. Any equipment, part or product which is furnished by the manufacturer but
manufactured by another, bears only the warranty given by such other manufacturer. (Manufacturer agrees to
furnish free of charge a written description of problem or cause.) Warranty is voided by product abuse,
alterations, use of equipment in applications for which it was not intended, use of non-manufacturer parts, or
failure to follow documented service instructions. The foregoing warranty is exclusive of all other warranties
whether written or oral, expressed or implied. No warranty of merchantability or fitness for a particular
purpose shall apply. The agents, dealers, and employees of Manufacturer are not authorized to make
modifications to this warranty, or additional warranties binding on the Manufacturer. Therefore, additional
statements, whether oral or written, do not constitute warranty and should not be relied upon.
The Manufacturer’s sole responsibility for any breach of the foregoing warranty provisions, with respect to
any product or part not conforming to the Warranty or the description herein contained, is at its option (a) to
repair, replace, or refund such product or parts upon the prepaid return thereof to location designated
specifically by the Manufacturer. Product returns not shipped prepaid will be refused (b) as an alternative to
the foregoing modes of settlement the Manufacturer’s dealer may repair defective units with reimbursement
for expenses. A written description of problem or cause must accompany all warranty claims.
Except as set forth here in above and without limitation of the above, there are no warranties or other
affirmation which extend beyond the description of the products on the fact here of, or as to operational
efficiency, product reliability, or maintainability or compatibility with products furnished by others. In no
event, whether as a result of breach of contract or warranty or alleged negligence, shall the Manufacturer, be
liable for special or consequential damages including but not limited to: Loss of profits or revenue, loss of
use of the product or any associated product, cost of capital, cost of substitute products, facilities or services
or claims of customers. Manufacturer does not assume responsibility for any accident due to equipment
modification.
No claim will be allowed for products lost or damaged in transit. Such claims should be filed with the carrier
within fifteen days.
Effective July 20, 2005

15
RHM36 Rev – 000
12/01/13 - Present ©Copyright 2013
Fax Warranty Registration Form to 740-962-2037; or, submit online at www.ezgrout.com by clicking on
“Products” then “Warranty Cards.
WARRANTY REGISTRATION
CONTACT: ___________________________________________________________________
COMPANY NAME: _____________________________________________________________
ADDRESS: ___________________________________________________________________
CITY: _____________________________ STATE: _______________ ZIP: __________
PHONE: _______________ FAX: ________________ EMAIL: ____________________
PURCHASED FROM: DIRECT DISTRIBUTOR __________________________________
PURCHASED DATE: _________________ SERIAL NO. ____________________________
PLEASE COMPLETETHIS WARRENTY CARD AND RETURN IT VIA MAIL, FAX, OR EMAIL, WITHIN 30 DAYS OF THE PURCHASE TO VALIDATE YOUR MANUFACTURER’S WARRENTY FOR ALL EZ GROUT
PRODUCTS. WARRENTY PROVISIONS OF THIS MACHINE ARE HANDLED DIRECTLY THROUGH THE MANUFACTURER.
EZG MANUFACTURING * 1833 NORTH RIVERVIEW ROAD * MALTA, OH 43758 FAX 740-962-2037 * [email protected]
Please take a minute to fill out the survey below so we can better serve our customers.
EZ Survey
WHERE DID YOU FIRST HEAR ABOUT EZG MANUFACTURING? (CHECK ONE)
Masonry Magazine Website Newsletter Referral Masonry Construction
Other _________________________________________________________________________
WHAT INFLUENCE YOU TO BUY? QUALITY PRICE EAST TO USE OTHER
WHO IS YOUR SALES REPRESENTATIVE? _________________________________________
ARE YOU SATISFIED WITH THE CUSTOMER SERVICE YOU RECEIVED? YES NO
EXPLAIN: _____________________________________________________________________
WHAT OTHER EZG MANUFACTURING PRODUCTS DO YOU OWN? _______________________________
WOULD YOU LIKE TO BE FEATURED IN OUR NEWSLETTER? _________________________
If yes, where can we reach you and what is the best time? ____________________________
Comments:________________________________________________________________________________________________________________________________________________________________________________________________________________________________