beach glass vessel
TRANSCRIPT

8/12/2019 Beach Glass Vessel
http://slidepdf.com/reader/full/beach-glass-vessel 1/6

8/12/2019 Beach Glass Vessel
http://slidepdf.com/reader/full/beach-glass-vessel 2/6
Like most artists I'm a beachcomber, collecting all the wonderful things that the sea gives up onsandy shores. So it was with relish that I immersed myself in my boxes of shells, driftwood and
bric-a-brac for this proect. !he starfish I found washed up on the sand in the "ahamas, theshells are from the reef off #alindi, a little $enyan town on the Indian %cean, and the sand
dollar is from &ancun. !he ammonites came from urope but I found them in a mineral shop inSedona. So this vessel is all about the dreamy remembrance of my travels to warm places.
I love (#&). *ith its low firing schedule you can fire it right onto your bead. !his enables me tomarry the frosted beach glass look with the gleam of fine polished silver, which before (#&)
could only be accomplished by casting. !his vessel looks like it could have been plucked freshfrom a tidal pool. noy+
Skill Level dvanced
What You Will Need:
• (#&) Slip, &lay, (#& sheet
• / (art silicone mold materiel 0I used "elicone1
• Soft Italian glass for the vessel
• Small shells etc. 2or molding
• Small detail brushes
• Spatula
• 3-!ips
• $iln
• 2iber blanket
• (olishing compound
• 2lex shaft
• Small (eridot cabs
Make the Bead
Step 1
#ake a bead in the shape of a vessel with a lip. #y bead measures /4 at the shoulder and 56/4
for the neck and the lip is about 5674 for a total of / )674. *hatever si8e you make your bead,you need to give yourself a long neck in order to have room to add elaborate handles.
Etch
Step 2

8/12/2019 Beach Glass Vessel
http://slidepdf.com/reader/full/beach-glass-vessel 3/6
I have chosen to etch this bead to achieve a beach glass encrusted look, but the (#&) will bond
with un-etched glass as well. If you choose to etch then dip your bead in the etching solution foronly / or ) minutes using fresh solution. 9emove but be careful not to spill on yourself+ I have a
set of plastic twee8ers I use for this ob. 9inse, dry and check to make sure there is an overalletch. If not, return and check again in a few minutes. *hen you are pleased with the results,
rinse again thoroughly, making sure to rinse out the bead hole too+ Set aside to dry thoroughly.
Make the Molds
Step 3
(repare to make the molds. I use a two part silicone 9!: 0room temperature vulcani8ing1
system. It's easy, fast, and the (#& doesn't stick to the surface. It's simple take two e;ual si8elumps of part 5 and part /, mix together thoroughly by kneading and folding for a minute in
your hand. %nce it has become a uniform color you have about / minutes working time. It willcure in about /< minutes at room temperature. =ou can use your gram scale to be ultra
accurate, but I have found the product so forgiving that it works every time if you ust eyeballit. If you are new to it, it has the consistency of set pudding, and it's very oily so keep a paper
towel handy.
Step 4

8/12/2019 Beach Glass Vessel
http://slidepdf.com/reader/full/beach-glass-vessel 4/6

8/12/2019 Beach Glass Vessel
http://slidepdf.com/reader/full/beach-glass-vessel 5/6
"reak off a small piece of clay, ust big enough to fit into the mold. (ress it in and clean off anyextra. I use a spatula across the top of the mold with the same motion that you use for
measuring flour level into a cup. ?ow is the time to press any pattern into what will be the backof the handle if it is going to show. I have pressed a piece of ammonite into the moist (#&) as
it lies in the mold so that when I take it out it will have a front and back pattern. #old the twohandles and set them aside to firm up but not dry out.
Step 6
2or stability since I have chosen large handles, I take a piece of clay sheet, which is perfect for
imitating silver flat wire, and cut a 56A4 strip. ttach the strip to ust under the lip of the vase bybrushing one side of the strip with slip and placing it on the glass. Bo around the neck once and
overlap slightly at the side where one of the handles will oin. &ut off any extra and press lightlyall around to make sure you have contact and there are no air bubbles.
Step 7
%nce the handles are dry or at least firm, try them in place on the bead so you will know where
they will touch the shoulder and the clay sheet under the lip. =ou can make a mark with a felttip on the bead since it will be covered up with silver. In order to have a decorative element to
rest the bottom of my handles on, I molded part of a shell. (ush a small piece of
clay into a shell or other small part mold and while it is still wet, paint the back with slip andattach it to each shoulder side of the bead where it is marked. (ress firmly but gently. "y doing
this wet, any shrinkage while drying will occur on the bead and it produces a better hold. Letdry.
Attachin the !ieces
Step "
?ow for 4gluing4 on the handles. (ut a small amount of slip onto the vessel over the marks, andonto the small pieces that you have ust added to the shoulder. Cse ust enough slip to hold the
handles on firmly. (ress one handle into the slip at both points, 0under the lip and the shoulder1and hold until firm. =ou can add more slip with a detail brush after it is set if you are worried
about the connection. !he bead is in its most delicate state now, so be very careful. Blue theother handle on. Let dry completely.
=ou will need to prop up the bead in the kiln. #ake sure the handles are supported or they couldfall off in the fire from their weight and the slight movement of the sintering silver. I use kiln
fiber blanket for this, especially old blanket that is coming apart 0never throw anything away+1.=ou don't have to worry the glass should not stick to the blanket, and the clay won't either.
#i$st #i$e
2ire at 555<' for one hour. &ool slowly. Inspect the places where the silver touches the bead. If
you have any doubts as to how well you have attached it, now is the time to add more slip, dryand fire again to insure firm handles+
Step %
%nce the handles are attached you can add the other decorations 0now you have cute littlehandles to hold the bead by1. I have made molds of small starfish, sand dollars and the tips ofsmall welk shells. "reak off small pieces of clay and press into the molds. !ake out immediately
8/12/2019 Beach Glass Vessel
http://slidepdf.com/reader/full/beach-glass-vessel 6/6
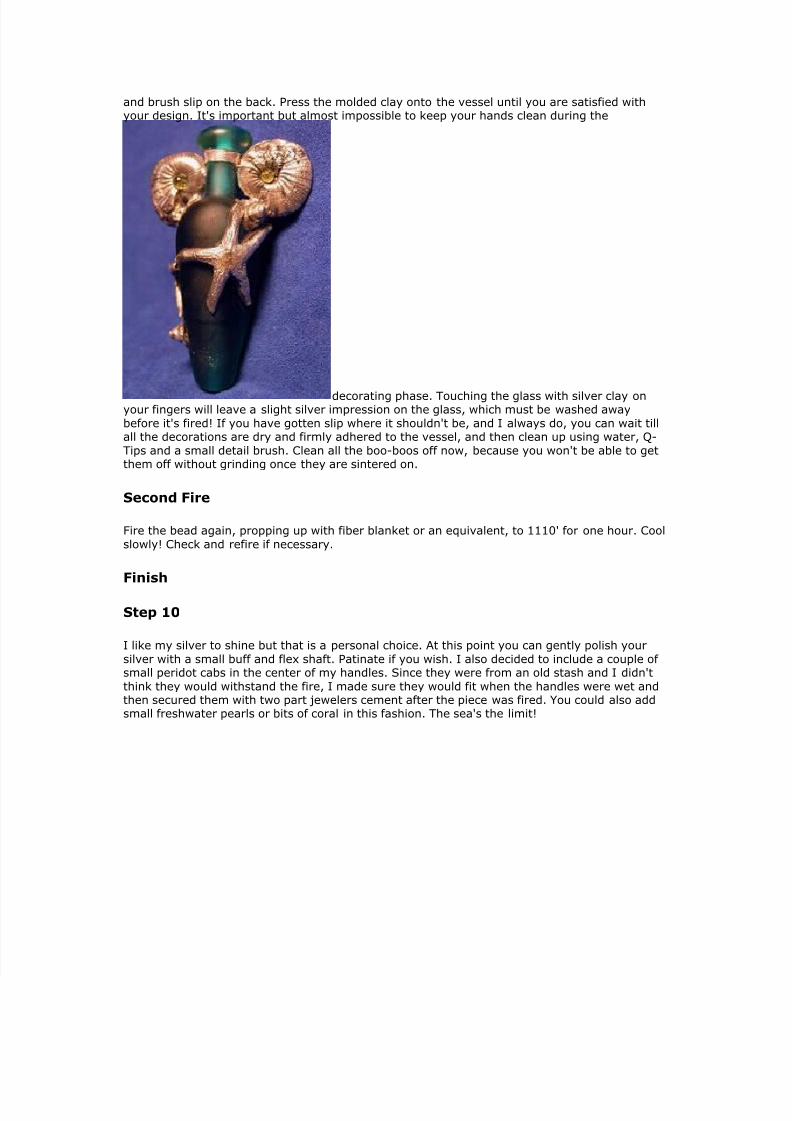
and brush slip on the back. (ress the molded clay onto the vessel until you are satisfied withyour design. It's important but almost impossible to keep your hands clean during the
decorating phase. !ouching the glass with silver clay onyour fingers will leave a slight silver impression on the glass, which must be washed away
before it's fired+ If you have gotten slip where it shouldn't be, and I always do, you can wait tillall the decorations are dry and firmly adhered to the vessel, and then clean up using water, 3-
!ips and a small detail brush. &lean all the boo-boos off now, because you won't be able to getthem off without grinding once they are sintered on.
Second #i$e
2ire the bead again, propping up with fiber blanket or an e;uivalent, to 555<' for one hour. &ool
slowly+ &heck and refire if necessary.
#inish
Step 1&
I like my silver to shine but that is a personal choice. t this point you can gently polish your
silver with a small buff and flex shaft. (atinate if you wish. I also decided to include a couple ofsmall peridot cabs in the center of my handles. Since they were from an old stash and I didn't
think they would withstand the fire, I made sure they would fit when the handles were wet andthen secured them with two part ewelers cement after the piece was fired. =ou could also addsmall freshwater pearls or bits of coral in this fashion. !he sea's the limit+