basic game framework: a matching game
TRANSCRIPT

3Basic Game Framework: A Matching Game
■ Placing Interactive Elements
■ Game Play
■ Encapsulating the Game
■ Adding Scoring and a Clock
■ Adding Game Effects
■ Modifying the Game
04_0789737027_ch03.qxd 8/2/07 2:00 PM Page 83

Chapter 3: Basic Game Framework: A Matching Game84
SOURCE FILES http://flashgameu.com
A3GPU03_MatchingGame.zip
To build our first game, I’ve chosen one of the most popular games you will find on theWeb and in interactive and educational software: a matching game.
Matching games are simple memory games played in the physical world using a simpledeck of cards with pictures on them. The idea is to place pairs of cards face down in arandom arrangement. Then, try to find matches by turning over two cards at a time.When the two cards match, they are removed. If they don’t match, they are turned facedown again.
A good player is one who remembers what cards he or she sees when a match is notmade, and can determine where pairs are located after several failed tries.
NOTESometimes educational matching games for children don’t have exact matches in apair of cards. For instance, one card can have a picture of a cat on it, whereas theother card has the word cat. Or, one card can have the number 7, whereas anotherhas 3+4.
Computer versions of matching games have advantages over physical versions: Youdon’t need to collect, shuffle, and place the cards to start each game. The computerdoes that for you. It is also easier and less expensive for the game developer to createdifferent pictures for the cards with virtual cards rather than physical ones.
To create a matching game, we first work on placing the cards on the screen. To dothis, we need to shuffle the deck to place the cards in a random order each time thegame is played.
Then, we take the player’s input and use that to reveal the pictures on a pair of cards.Then, we compare the cards and remove them if they match.
We also need to turn cards back to their face-down positions when a match is notfound. And then we need to check to see when all the pairs have been found so thatthe game can end.
Placing Interactive ElementsCreating a matching game first requires that you create a set of cards. Because thecards need to be in pairs, we need to figure out how many cards will be displayed onthe screen, and make half that many pictures.
04_0789737027_ch03.qxd 8/2/07 2:00 PM Page 84
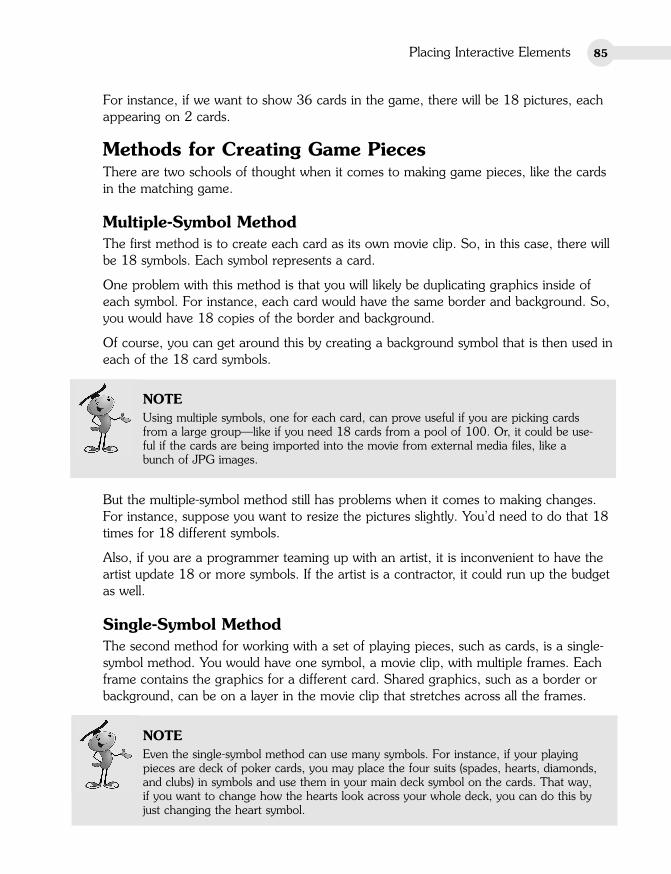
For instance, if we want to show 36 cards in the game, there will be 18 pictures, eachappearing on 2 cards.
Methods for Creating Game PiecesThere are two schools of thought when it comes to making game pieces, like the cardsin the matching game.
Multiple-Symbol MethodThe first method is to create each card as its own movie clip. So, in this case, there willbe 18 symbols. Each symbol represents a card.
One problem with this method is that you will likely be duplicating graphics inside ofeach symbol. For instance, each card would have the same border and background. So,you would have 18 copies of the border and background.
Of course, you can get around this by creating a background symbol that is then used ineach of the 18 card symbols.
NOTEUsing multiple symbols, one for each card, can prove useful if you are picking cardsfrom a large group—like if you need 18 cards from a pool of 100. Or, it could be use-ful if the cards are being imported into the movie from external media files, like abunch of JPG images.
But the multiple-symbol method still has problems when it comes to making changes.For instance, suppose you want to resize the pictures slightly. You’d need to do that 18times for 18 different symbols.
Also, if you are a programmer teaming up with an artist, it is inconvenient to have theartist update 18 or more symbols. If the artist is a contractor, it could run up the budgetas well.
Single-Symbol MethodThe second method for working with a set of playing pieces, such as cards, is a single-symbol method. You would have one symbol, a movie clip, with multiple frames. Eachframe contains the graphics for a different card. Shared graphics, such as a border orbackground, can be on a layer in the movie clip that stretches across all the frames.
NOTEEven the single-symbol method can use many symbols. For instance, if your playingpieces are deck of poker cards, you may place the four suits (spades, hearts, diamonds,and clubs) in symbols and use them in your main deck symbol on the cards. That way,if you want to change how the hearts look across your whole deck, you can do this byjust changing the heart symbol.
Placing Interactive Elements 85
04_0789737027_ch03.qxd 8/2/07 2:00 PM Page 85

This method has major advantages when it comes to updates and changes to the play-ing pieces. You can quickly and easily move between and edit all the frames in themovie clip. You can also easily grab an updated movie clip from an artist with whomyou are working.
Setting Up the Flash MovieUsing the single-symbol method, we need to have at least one movie clip in the library.This movie clip will contain all the cards, and even a frame that represents the back ofthe card that we must show when the card is face down.
Create a new movie that contains a single movie clip called Cards. To create a newmovie in Flash CS3, choose File, New, and then you will be presented with a list of filetypes. You must choose Flash File (ActionScript 3.0) to create a movie file that willwork with the ActionScript 3.0 class file we are about to create.
Put at least 19 frames in that movie clip, representing the card back and 18 card frontswith different pictures on them. You can open the MatchingGame1.fla file for thisexercise if you don’t have your own symbol file to use.
Chapter 3: Basic Game Framework: A Matching Game86
Figure 3.1The Card movie clipis a symbol with 37frames. Each framerepresents a differ-ent card.
Figure 3.1 shows a timeline for the Card movie clip we will be using in this game. Thefirst frame is “back” of the card. It is what the player will see when the card is supposedto be face down. Then, each of the other frames shows a different picture for the frontof a card.
After we have a symbol in the library, we need to set it up so that we can use it with ourActionScript code. To do this, we need to set its properties by selecting it in the libraryand bringing up the Symbol Properties dialog box (see Figure 3.2).
04_0789737027_ch03.qxd 8/2/07 2:00 PM Page 86

Set the symbol name to Card and its type to Movie Clip. For ActionScript to be able towork with the Cards movie clip, it needs to be assigned a class. By checking the Exportfor ActionScript box, we automatically get the class name Card assigned to the symbol.This will be fine for our needs here.
There is nothing else needed in the Flash movie at all. The main timeline is completelyempty. The library has only one movie clip in it, the Cards movie clip. All that we neednow is some ActionScript.
Creating the Basic ActionScript ClassTo create an ActionScript class file, choose File, New, and then select ActionScript Filefrom the list of file types; by doing so you create an untitled ActionScript document thatyou can type into.
We start off an ActionScript 3.0 file by defining it as a package. This is done in the firstline, as you can see in the following code sample: package {
import flash.display.*;
Right after the package declaration, we need to tell the Flash playback engine whatclasses we need to accomplish our tasks. In this case, we go ahead and tell it we’ll beneeding access to the entire flash.display class and all its immediate subclasses. Thiswill give us the ability to create and manipulate movie clips like the cards.
Placing Interactive Elements 87
Figure 3.2The SymbolProperties dialogbox shows the properties for thesymbol Card.
04_0789737027_ch03.qxd 8/2/07 2:00 PM Page 87

The class declaration is next. The name of the class must match the name of the fileexactly. In this case, we call it MatchingGame1. We also need to define what this class willaffect. In this case, it will affect the main Flash movie, which is a movie clip:public class MatchingGame1 extends MovieClip {
Next is the declaration of any variables that will be used throughout the class. However,our first task of creating the 36 cards on the screen is so simple that we don’t need touse any variables. At least not yet.
Therefore, we can move right on to the initialization function, also called the construc-tor function. This function runs as soon as the class is created when the movie isplayed. It must have exactly the same name as the class and the ActionScript file:public function MatchingGame1():void {
This function does not need to return any value, so we can put :void after it to tellFlash that nothing will ever be returned from this function. We can also leave the :voidoff, and it will be assumed by the Flash compiler.
Inside the constructor function we can perform the task of creating the 36 cards on thescreen. We’ll make it a grid of 6 cards across by 6 cards down.
To do this, we use two nested for loops. The first moves the variable x from 0 to 5.The x will represent the column in our 6x6 grid. Then, the second loop will move yfrom 0 to 5, which will represent the row:
for(var x:uint=0;x<6;x++) {
for(var y:uint=0;y<6;y++) {
Each of these two variables is declared as a uint, an unsigned integer, right inside thefor statement. Each will start with the value 0, and then continue while the value is lessthan 6. And, they will increase by one each time through the loop.
NOTEThere are three types of numbers: uint, int, and Number. The uint type is for wholenumbers 0 or higher. The int type is for whole numbers that can be positive or nega-tive. The Number type can be positive or negative numbers, whole or floating point,such as 3.5 or –173.98. In for loops, we usually use either uint or int types becausewe only move in whole steps.
So, this is basically a quick way to loop and get the chance to create 36 different Cardmovie clips. Creating the movie clips is just a matter of using new, plus addChild. Wealso want to make sure that as each new movie clip is created it is stopped on its firstframe and is positioned on the screen correctly:
Chapter 3: Basic Game Framework: A Matching Game88
04_0789737027_ch03.qxd 8/2/07 2:00 PM Page 88

var thisCard:Card = new Card();
thisCard.stop();
thisCard.x = x*52+120;
thisCard.y = y*52+45;
addChild(thisCard);
}
}
}
}
}
NOTEAdding a symbol in ActionScript 3.0 takes only two commands: new, which allows youto create a new instance of the symbol; and addChild, which adds the instance to thedisplay list for the stage. In between these two commands, you want to do things suchas set the x and y position of the new symbol.
The positioning is based on the width and height of the cards we created. In the exam-ple movie MatchingGame1.fla, the cards are 50 by 50 with 2 pixels in between. So,by multiplying the x and y values by 52, we space the cards with a little extra spacebetween each one. We also add 120 horizontally and 45 vertically, which happens toplace the card about in the center of a 550x400 standard Flash movie.
Before we can test this code, we need to link the Flash movie to the ActionScript file.The ActionScript file should be saved as MatchingGame1.as, and located in the samedirectory as the MatchingGame1.fla movie.
Placing Interactive Elements 89
Figure 3.3You need to set theDocument class of aFlash movie to thename of the AS filethat contains yourmain script.
However, that is not all you need to do to link the two. You also need to set the Flashmovie’s Document class property in the Property Inspector. Just select the Propertiestab of the Property Inspector while the Flash movie MatchingGame1.fla is the currentdocument. Figure 3.3 shows the Property Inspector, and you can see the Documentclass field at the bottom right.
04_0789737027_ch03.qxd 8/2/07 2:00 PM Page 89

NOTEYou can test a movie when either the Flash movie itself is the current document or anActionScript file is the current document. When an ActionScript file is the current doc-ument, look in the upper-right part of the document window for a Target indicator.This tells you what Flash movie will be compiled and run when you test. If the wrongfile is shown as the Target, you can use the drop-down menu to change it.
Figure 3.4 shows the screen after we have tested the movie. The easiest way to test isto go to the menu and choose Control, Test Movie.
Chapter 3: Basic Game Framework: A Matching Game90
Figure 3.4The screen shows36 cards, spacedand in the center ofthe stage.
Using Constants for Better CodingBefore we go any further with developing this game, let’s look at how we can makewhat we have better. We’ll copy the existing movie to MatchingGame2.fla and thecode to MatchingGame2.as. Remember to change the document class ofMatchingGame2.fla to MatchingGame2 and the class declaration and constructorfunction to MatchingGame2.
Suppose you don’t want a 6x6 grid of cards. Maybe you want a simpler 4x4 grid. Oreven a rectangular 6x5 grid. To do that, you just need to find the for loops in the previ-ous code and change the loops so that they loop with different amounts.
A better way to do it is to remove the specific numbers from the code all together.Instead, have them at the top of your code, and clearly labeled, so that you can easilyfind and change them later on.
04_0789737027_ch03.qxd 8/2/07 2:00 PM Page 90

NOTEPutting specific numbers in your code, such as the 6s for the row and column lengths,is called hard coding. It is considered to be a bad practice for programmers because itmakes it harder to adjust your program later, and especially hard for others to inherityour code and find out where they can adjust it.
We’ve got several other hard-coded values in our programs. Let’s make a list.
Horizontal Rows = 6Vertical Rows = 6Horizontal Spacing = 52Vertical Spacing = 52Horizontal Screen Offset = 120Vertical Screen Offset = 45
Instead of placing these values in the code, let’s put them in some constant variables upin our class, to make them easy to find and modify:public class MatchingGame2 extends MovieClip {
// game constants
private static const boardWidth:uint = 6;
private static const boardHeight:uint = 6;
private static const cardHorizontalSpacing:Number = 52;
private static const cardVerticalSpacing:Number = 52;
private static const boardOffsetX:Number = 120;
private static const boardOffsetY:Number = 45;
NOTENotice that I chose private static const when defining each constant. The privatemeans that these variables can only be accessed inside this class. The static meansthat they will have the same values in all instances of the class. And, the const meansthat the values can never change. If you were to use public var instead, it would giveyou the opposite declaration: can be accessed outside of the class, and will hold differ-ent values for each instance. Because this is the one and only instance of the class, andthere are no outside scripts, it really makes no difference, except for neatness.
Now that we have constants, we can replace the code in the constructor function to usethem rather than the hard-coded numbers:public function MatchingGame2():void {
for(var x:uint=0;x<boardWidth;x++) {
for(var y:uint=0;y<boardHeight;y++) {
var thisCard:Card = new Card();
thisCard.stop();
thisCard.x = x*cardHorizontalSpacing+boardOffsetX;
Placing Interactive Elements 91
04_0789737027_ch03.qxd 8/2/07 2:00 PM Page 91

thisCard.y = y*cardVerticalSpacing+boardOffsetY;
addChild(thisCard);
}
}
}
You can see that I also changed the name of the class and function to MatchingGame2.You can find these in the sample files MatchingGame2.fla and MatchingGame2.as.
NOTEAs we move through this chapter, we’ll be changing the filenames of both theActionScript file and the movie. If you are following along by creating your ownmovies from scratch, also remember to change the document class in the PropertyInspector so each movie points to the right ActionScript file. For instance, theMatchingGame2.fla movie needs to use the MatchingGame2.as file, so its docu-ment class should be set to MatchingGame2.
In fact, open those two files. Test them one time. Then, test them again after youchange some of the constants. Make the boardHeight only five cards, for instance.Scoot the cards down by 20 pixels by changing boardOffsetY. The fact that you canmake these changes quickly and painlessly drives home the point of using constants.
Shuffling and Assigning CardsNow that we can add cards to the screen, we want to assign the pictures randomly toeach card. So, if there are 36 cards in the screen, there should be 18 pairs of picturesin random positions.
Chapter 2, “ActionScript Game Elements,” discussed how to use random numbers.However, we can’t just pick a random picture for each card. We need to make surethere are exactly two of each type of card on the screen. No more, no less; otherwise,there will not be matching pairs.
NOTEThis process is kind of the opposite from shuffling a deck of cards. Instead of mixingthe cards and then picking new cards from the top of the deck, we’ll be using anordered list of cards and picking new cards from random spots in the deck.
To do this, we need to create an array that lists each card, and then pick a random cardfrom this array. The array will be 36 items in length, containing 2 of each of the 18cards. Then, as we create the 6x6 board, we’ll be removing cards from the array andplacing them on the board. When we have finished, the array will be empty, and all 18pairs of cards will be accounted for on the game board.
Chapter 3: Basic Game Framework: A Matching Game92
04_0789737027_ch03.qxd 8/2/07 2:00 PM Page 92

Here is the code to do this. A variable i is declared in the for statement. It will go fromzero to the number of cards needed. This is simply the board width times the boardheight, divided by two (because there are two of each card). So, for a 6x6 board, therewill be 36 cards. We must loop 18 times to add 18 pairs of cards:// make a list of card numbers
var cardlist:Array = new Array();
for(var i:uint=0;i<boardWidth*boardHeight/2;i++) {
cardlist.push(i);
cardlist.push(i);
}
The push command is used to place a number in the array, twice. Here is what thearray will look like:0,0,1,1,2,2,3,3,4,4,5,5,6,6,7,7,8,8,9,9,10,10,11,11,12,12,13,13,14,14,15,15,16,16,17,17
Now as we loop to create the 36 movie clips, we’ll pull a random number from this listto determine which picture will display on each card:for(var x:uint=0;x<boardWidth;x++) { // horizontal
for(var y:uint=0;y<boardHeight;y++) { // vertical
var c:Card = new Card(); // copy the movie clip
c.stop(); // stop on first frame
c.x = x*cardHorizontalSpacing+boardOffsetX; // set position
c.y = y*cardVerticalSpacing+boardOffsetY;
var r:uint = Math.floor(Math.random()*cardlist.length); // get a random face
c.cardface = cardlist[r]; // assign face to card
cardlist.splice(r,1); // remove face from list
c.gotoAndStop(c.cardface+2);
addChild(c); // show the card
}
}
The new lines are in the middle of the code. First, we use this line to get a randomnumber between zero and the number of items remaining in the list:var r:uint = Math.floor(Math.random()*cardlist.length);
The Math.random() function will return a number from 0.0 up to just before 1.0.Multiply this by cardlist.length to get a random number from 0.0 up to 35.9999.Then use Math.floor() to round that number down so that it is a whole number from 0 to 35—that is, of course, when there are 36 items in the cardlist array at the startof the loops.
Then, the number at the location in cardlist is assigned to a property of u namedcardface. Then, we use the splice command to remove that number from the array sothat it won’t be used again.
Placing Interactive Elements 93
04_0789737027_ch03.qxd 8/2/07 2:00 PM Page 93

NOTEAlthough we usually need to declare and define variables, we can also add dynamicproperties such as cardface to an object. This can only be done if the object isdynamic, which the Card object is by default because we did not define it otherwise.The cardface property will assume the type of the value it is assigned (such as aNumber, in this case).
This is not the best programming practice. Better would be to define a class for theCard, complete with an ActionScript file declaring a package, class, properties, andconstructor function. However, this is quite a lot of extra work when only one littleproperty is needed, so the benefits of convenience outweigh the benefits of sticking tostrict programming practices.
In addition, the MatchingGame3.as script includes this line to test that everything isworking so far:c.gotoAndStop(c.cardface+2);
This syntax makes the Card movie clip show its picture. So, all 36 cards will be face uprather than face down. It takes the value of the property cardface, which is a numberfrom 0 to 17, and then adds 2 to get a number from 2 to 19. This corresponds to theframes in the Card movie clip, where frame 1 is the back of the card, and frames 2 andso on are the picture faces of the cards.
Obviously, we don’t want to have this line of code in our final game, but it is useful atthis point to illustrate what we have accomplished. Figure 3.5 shows what the screenmight look like after we run the program with this testing line in place.
Chapter 3: Basic Game Framework: A Matching Game94
Figure 3.5The third version ofour programincludes code thatreveals each of thecards. This is usefulto get visual confir-mation that yourcode is working sofar.
04_0789737027_ch03.qxd 8/2/07 2:00 PM Page 94

Game PlayNow that the game board is set up, we need to let the user click cards to try to findmatches. We also need to keep track of play state, which in this case means whetherthe player is clicking the first card or second card, and whether all the cards have beenfound.
Adding Keyboard ListenersThe first step is to get each of the cards we create to respond to mouse clicks. We cando this by adding a listener to each of these objects. The addEventListener function willdo this, and it takes two parameters: which event to listen for, and what function to callwhen the event occurs. Here is the line of code:c.addEventListener(MouseEvent.CLICK,clickCard);
You also need to add another import statement at the start of the class to tell Flash youwant to use events: import flash.events.*;
The syntax for the event in this case is MouseEvent.CLICK, which is just a simple click onthe card. When this happens, it should call the function clickCard, which we have yetto create. We need to create it before testing the movie again because Flash won’t com-pile our movie with a loose end.
Here is a simple start to the clickCard function:public function clickCard(event:MouseEvent) {
var thisCard:Card = (event.currentTarget as Card); // what card?
trace(thisCard.cardface);
}
NOTEUsing a trace statement call to check your code is a great way to program in smallsteps to avoid headaches. For instance, if you add 27 lines of code at once and thenthe program doesn’t work as expected, you must locate the problem in 27 new lines ofcode. If you add only five new lines of code, however, and then use a trace statementto display the values of key variables, you can solve any problems with those five linesof code before moving on.
Any time you have a function that responds to an event, it must take at least one para-meter, the event itself. In this case, it is a value of type MouseEvent, which we will assignto the variable event.
Game Play 95
04_0789737027_ch03.qxd 8/2/07 2:00 PM Page 95

NOTEYou need to accept the event parameter on an event listener function whether youcare about its value or not. For instance, if you create a single button and know thatthe function will only run when that button is pressed, you still need to accept theevent as a parameter and then just not use it for anything.
In this case, the event parameter is key because we need to know which of the 36cards the player clicked. The event parameter value is actually an object with all sorts ofproperties, but the only property we need to know about is which Card object wasclicked. This would be the target, or more precisely, the currentTarget of the event.
However, the currentTarget is a vague object to the ActionScript engine at this point.Sure, it is a Card object. However, it is also a movie clip, which is a display object, too.We want to get its value as a Card object, so we define a variable as a Card, and thenuse a Card to specify that we want the value of event.currentTarget to be returned as aCard.
Now that we have a Card object in the variable thisCard, we can access its cardfaceproperty. We’ll use trace to put it in the Output window and run a quick test ofMatchingGame4.fla to make sure it is working.
Setting Up Game LogicWhen a player clicks a card, we need to determine what steps to take based on theirchoice and the state of the game. There are three main states we need to deal with:
• State 1. No cards have been chosen, player selects first card in a potentialmatch.
• State 2. One card has been chosen, player selects a second card. A comparisonmust be made and action taken based on whether there is a match.
• State 3. Two cards have been chosen, but no match was found. Leave thosecards face up until a new card is chosen, and then turn them both over andreveal the new card.
Figures 3.6 through 3.8 show the three game states.
Chapter 3: Basic Game Framework: A Matching Game96
04_0789737027_ch03.qxd 8/2/07 2:00 PM Page 96

Figure 3.8State 3, where apair of cards wasselected, but nomatch found. Nowthe user mustchoose anothercard to start a second pair.
Game Play 97
Figure 3.6State 1, where theuser is about tochoose his or herfirst card.
Figure 3.7State 2, where theuser is about tochoose his or hersecond card.
04_0789737027_ch03.qxd 8/2/07 2:01 PM Page 97

Then, there are some other considerations. What if the player clicks a card, and thenclicks the same card again. This means the player probably wants to take back the firstchoice, so we should turn that card over and return to the first state.
We can predict that we will need to keep track of which cards are chosen when theplayer is going for a match. So, we need to create our first class variables. We’ll callthem firstCard and secondCard. They will both be of type Card:private var firstCard:Card;
private var secondCard:Card;
Because we haven’t set any values for these variables, they will both start off with thedefault object value of null. In fact, we’ll use the null values of these two variables todetermine the state.
NOTENot all types of variables can be set to null. For instance, an int variable will be set tozero when it is first created, unless you specify otherwise. You can’t set it to null evenif you want to.
If both firstCard and secondCard are null, we must be at the first state. The player isabout to choose his first card.
If firstCard is not null, and secondCard is null, we are at the second state. The playerwill soon choose the card that he hopes matches the first.
If both firstCard and secondCard are not null, we are in the third state. We’ll use thevalues of firstCard and secondCard to know which two cards to turn face down whenthe user chooses the next firstCard.
Let’s have a look at the code:public function clickCard(event:MouseEvent) {
var thisCard:Card = (event.target as Card); // what card?
if (firstCard == null) { // first card in a pair
firstCard = thisCard; // note it
firstCard.gotoAndStop(thisCard.cardface+2); // turn it over
So far, we can see what happens when the player clicks the first card. Notice that thegotoAndStop command is similar to the one we used to test the card shuffle earlier inthe chapter. It must add 2 to the frame number so that the card values of 0 to 17match up with the frame numbers of 2 to 19 that contain the 18 card faces.
Now that we have the value of firstCard set, we can expect the second click. This ishandled by the next two parts of the if statement. This part handles the case of whenthe player clicks the first card again, and will turn it back over and set the value offirstCard back to null:
Chapter 3: Basic Game Framework: A Matching Game98
04_0789737027_ch03.qxd 8/2/07 2:01 PM Page 98

} else if (firstCard == thisCard) { // clicked first card again
firstCard.gotoAndStop(1); // turn back over
firstCard = null;
If the player clicks a different card for the second card, a comparison must be madebetween the two cards. We’re not comparing the cards themselves, but the cardfaceproperty of the cards. If the faces are the same, a match has been found:
} else if (secondCard == null) { // second card in a pair
secondCard = thisCard; // note it
secondCard.gotoAndStop(thisCard.cardface+2); // turn it over
// compare two cards
if (firstCard.cardface == secondCard.cardface) {
If a match has been found, we want to remove the cards and reset the firstCard andsecondCard variables: This is done by using the removeChild command, which is theopposite of addChild. It will take the object out of the display list and remove it fromview. But they are still stored in variables in this case, so we must set those to null sothe objects are disposed by the Flash player.
// remove a match
removeChild(firstCard);
removeChild(secondCard);
// reset selection
firstCard = null;
secondCard = null;
}
The next case is what happens if the player has selected a firstCard, but then selects asecond card that doesn’t match. And now goes on to click yet another card. This shouldturn over the first two cards back to their face-down position, which is frame 1 of theCard movie clip.
Immediately following that, it should set the firstCard to the new card, and show itspicture:
} else { // starting to pick another pair
// reset previous pair
firstCard.gotoAndStop(1);
secondCard.gotoAndStop(1);
secondCard = null;
// select first card in next pair
firstCard = thisCard;
firstCard.gotoAndStop(thisCard.cardface+2);
}
}
Game Play 99
04_0789737027_ch03.qxd 8/2/07 2:01 PM Page 99

That’s actually it for the basic game. You can test out MatchingGame5.fla andMatchingGame5.as to play it. You can select pairs of cards and see matches removedfrom the board.
You can consider this a complete game. You could easily stick a picture behind thecards in the main movie timeline and have the reward for winning simply be the revela-tion of the full picture. As an extra add-on to a website, it will work fine. However, wecan go much further and add more features.
Checking for Game OverIt is likely that you will want to check for a game over state so that you can reward play-ers with a screen telling them that they have completed the game. The game over statewill be achieved when all the cards have been removed.
NOTEIn the examples in this chapter we just take the player to a screen that displays thewords Game Over. However, you could show them an animation, or take them to anew web page, too. But we’ll stick to the game programming here.
There are many ways to do this. For instance, you could have a new variable where youkeep track of the number of pairs found. Every time you find a pair, increase this valueby one, and then check to see when it is equal to the total number of pairs.
Another method would be to check the numChildren property of the MatchingGameobject. When you add 36 cards to it, numChildren will be 36. As pairs get removed,numChildren goes to zero. When it gets to zero, the game is over.
The problem with that method is that if you place more items on the stage, such as abackground or title bar, they will also be counted in numChildren.
In this case, I like a variation on the first idea. Instead of counting the number of cardsremoved, count the number of cards shown. So, create a new class variable namedcardsLeft:private var cardsLeft:uint;
Then, set it to zero just before the for loops that create the cards. And, add one to thisvariable for every card created:cardsLeft = 0;
for(var x:uint=0;x<boardWidth;x++) { // horizontal
for(var y:uint=0;y<boardHeight;y++) { // vertical
var c:Card = new Card(); // copy the movie clip
c.stop(); // stop on first frame
c.x = x*cardHorizontalSpacing+boardOffsetX; // set position
c.y = y*cardVerticalSpacing+boardOffsetY;
var r:uint = Math.floor(Math.random()*cardlist.length); // get a random face
Chapter 3: Basic Game Framework: A Matching Game100
04_0789737027_ch03.qxd 8/2/07 2:01 PM Page 100

c.cardface = cardlist[r]; // assign face to card
cardlist.splice(r,1); // remove face from list
c.addEventListener(MouseEvent.CLICK,clickCard); // have it listen for clicks
addChild(c); // show the card
cardsLeft++;
}
}
Then, in the clickCard function, we need to add new code when the user makes amatch and the cards are removed from the screen: This goes in the clickCard function.cardsLeft -= 2;
if (cardsLeft == 0) {
gotoAndStop(“gameover”);
}
NOTEYou can use ++ to add one to a variable, — to subtract one. For instance, cardsLeft++is the same as writing cardsLeft = cardsLeft + 1.
You can also use += to add a number to a variable, and -= to subtract a number. Forinstance, cardsLeft -= 2 is the same as writing cardsLeft = cardsLeft - 2.
That is all we needed for coding. Now, the game tracks the number of cards on thescreen using the cardsLeft variable, and it will take an action when that number hitszero.
Game Play 101
Figure 3.9The simplestgameover screenever.
The action it takes is to jump to a new frame, like the one shown in Figure 3.9. If youlook at the movie MatchingGame6.fla, you can see that I added a second frame. I alsoadded stop(); commands to the first frame. This makes the movie stop on the first
04_0789737027_ch03.qxd 8/2/07 2:01 PM Page 101

frame so that the user can play the game, instead of continuing on to the second frame.The second frame is labeled gameover and will be used when the cardsLeft property is zero.
At this point, we want to remove any game elements created by the code. However,because the game only creates the 36 cards, and then all 36 are removed when theplayer finds all the matches, there are no extra items on the screen to remove. We canjump to the gameover frame without any items on the screen at all.
The gameover screen shows the words Game Over in the sample movie. You can addadditional graphics or even animation here, too. Later in this chapter, we look at howto add a Play Again button to this frame.
Encapsulating the GameAt this point, we have a game that runs as a whole Flash movie. The movie isMatchingGameX.fla, and the ActionScript class is MatchingGameX.as. When themovie runs, the game initializes and starts. The movie is the game, and the game is themovie.
This works well in simple situations. In the real world, however, you want to have intro-duction screens, gameover screens, loading screens, and so on. You might even want tohave different screens with different versions of the game, or different games com-pletely.
Flash is great at encapsulation. A Flash movie is a movie clip. You can have movie clipsinside of movie clips. So, a game can be the movie, or a game can be a movie clipinside the movie.
Why would you want to do this? Well, for one thing, it makes it easy to add otherscreens to your game. So, we can make frame 1 an introduction screen, frame 2 thegame, and frame 3 the gameover screen. Frame 2 would actually contain a movie clipcalled MatchingGameObject7 that uses the class MatchingGameObject7.as.
Figure 3.10 shows a diagram of the three frames we plan to have in our updatedmovie, and what each one contains.
Chapter 3: Basic Game Framework: A Matching Game102
Intro Screen
Frame 1
Play Button
Game Play Screen
Frame 2
GameMovie Clip
Game Over Screen
Frame 3
Play Again Button
Figure 3.10The second frameof the movie con-tains a movie clip,which is the actualgame. The otherframes contain sup-porting material.
04_0789737027_ch03.qxd 8/2/07 2:01 PM Page 102

Creating the Game Movie ClipIn MatchingGameObject7.fla, there are three frames. Let’s skip right to the secondframe. There, we can see a single movie clip. You might not even notice it at firstbecause it is a completely empty movie clip and so appears as a small circle at theupper-left corner of the screen.
In the library, this movie clip is named MatchingGameObject7; and as shown in Figure3.11, it is assigned the class MatchingGameObject7.
Encapsulating the Game 103
Figure 3.11This movie clip willuse the MatchingGameObject7.asfile as its class.
So, essentially, this movie clip takes over the entire game, and the main movie timelineis now a larger movie clip wrapped around it.
When the movie gets to frame 2, the MatchingGameObject7 movie clip springs into exis-tence, runs the class constructor function in its MatchingGameObject7.as class, andthe game plays inside this movie clip.
When the movie goes on to frame 3, the whole game will disappear because the movieclip only exists on frame 2.
This enables us to put frames before and after the game (and thus leave the game codealone to just worry about the game).
04_0789737027_ch03.qxd 8/2/07 2:01 PM Page 103

Adding an Introduction ScreenMost games would have an introduction screen. After all, we don’t want to throw play-ers right into the game. They may need an introduction or instructions.
The intro screen will contain some scripting on the main timeline, in frame 1. First, itmust stop the movie so that it doesn’t continue past frame 1. Then, it should set up abutton to allow users to start the game.
NOTEIf you want to keep all code off of the main timeline, you could set up a new AS classfile to be the document class for the whole movie. It would run on frame 1, and youcould do the same sorts of things in this class file as you could on the timeline.However, it is irresistibly easy to just add this little bit of code to the main timeline andavoid creating more files than necessary.
The frame script first needs to assign a listener to a button we will create on the firstframe. We’ll assign the name playButton to that button.
The event listener will call the function startGame, which simply issues a gotoAndStopcommand to the main timeline, telling it to go to the frame called playgame, which isframe 2.
We will also put a stop command on the frame so that when the movie runs, it will stopon frame 1 and wait for the user to click this button:playButton.addEventListener(MouseEvent.CLICK,startGame);
function startGame(event:MouseEvent) {
gotoAndStop(“playgame”);
}
stop();
On the second frame, the empty movie clip MatchingGameObject7 will sit. Then, weneed to rename the document class AS file to MatchingGameObject7.as so that itwill be used by this movie clip and not the main movie.
NOTETo create an empty movie clip, just go to the library and choose New Symbol for itstop menu. Name the symbol, set its type to Movie Clip, and set its properties. Then,drag the movie clip from the library to the stage. Place it at the very upper-left cornerso that its 0,0 location is the same as the stage’s 0,0 location.
We need to make one change in the code. There is a reference to the main timelinewhen the game is over. The gotoAndStop command will no longer work properly
Chapter 3: Basic Game Framework: A Matching Game104
04_0789737027_ch03.qxd 8/2/07 2:01 PM Page 104

because the game is taking place in the movie clip and the gameover frame is on themain timeline. We just need to change this as follows:MovieClip(root).gotoAndStop(“gameover”);
NOTEYou would think that you could simply program root.gotoAndStop(“gameover”). Afterall, root is indeed the main timeline and the parent of the movie clip. However, thestrict ActionScript compiler will not allow it. The gotoAndStop command can be issuedonly to movie clips, and technically, root can be other things, such as a single-framemovie clip called a sprite. So to ensure the compiler that root is a movie clip, we typeit using the MovieClip() function.
The gameover frame of the movie is the same, for the time being, as inMatchingGame6.fla. It is just a frame with the words Game Over on it.
The MatchingGame7.fla movie is a little different from the preceding six versions in that it doesn’t have a document class assigned to it. In fact, there is noMatchingGame7.as file at all. Take a close look at how this movie is put together,along with Figure 3.10, to understand how the game fits into the larger main movie.
Adding a Play Again ButtonOn the last frame, we want to add another button that enables players to play again.
This is as simple as duplicating the original play button from frame 1. Don’t just copyand paste. Instead, create a duplicate of the button in the library. Then, change the texton the button from Play to Play Again.
Your gameover frame should now look like Figure 3.12.
Encapsulating the Game 105
Figure 3.12The gameoverscreen now has aPlay Again buttonon it.
04_0789737027_ch03.qxd 8/2/07 2:01 PM Page 105

After you have added this button to the third frame, name it playAgainButton using theProperty Inspector so that you can assign a listener to it. The frame script should looklike this:playAgainButton.addEventListener(MouseEvent.CLICK,playAgain);
function playAgain(event:MouseEvent) {
gotoAndStop(“playgame”);
}
Test out MatchingGame7.fla and see these buttons in action. You’ve got a very versa-tile game framework now, where you can substitute content in the intro and gameoverpages, and restart the game without fear of leftover screen elements or variable values.This was quite a problem in ActionScript 1 and 2, but isn’t an issue with this sort offramework in ActionScript 3.
Adding Scoring and a ClockThe goal of this chapter is to develop a complete game framework around the basicmatching game. Two elements commonly seen in casual games are scoring and timers.Even though the matching game concept doesn’t really need them, let’s go ahead andadd them to the game anyway to make it as full-featured as we can.
Adding ScoringThe first problem is deciding how scoring should work for a game like this. There isn’tan obvious answer. However, there should be a positive reward for getting a match, andperhaps a negative response for missing. Because it is almost always the case that aplayer will miss more than he or she finds matches, a match should be worth far morethan a miss. A good starting point is 100 points for a match and –5 points for a miss.
Instead of hard coding these amounts in the game, let’s add them to the list of con-stants at the start of the class:private static const pointsForMatch:int = 100;
private static const pointsForMiss:int = -5;
Now, to display the score, we need a text field. Creating a text field is pretty straightfor-ward, as you saw in Chapter 2. We first need to declare a new TextField object in thelist of class variables:private var gameScoreField:TextField;
Then, we need to create that text field and add it as a child:gameScoreField = new TextField();
addChild(gameScoreField);
Chapter 3: Basic Game Framework: A Matching Game106
04_0789737027_ch03.qxd 8/2/07 2:01 PM Page 106

We could also format it and create a nicer-looking text field, as we did in Chapter 2, butwe’ll leave that part out for now.
The score itself will be a simple integer variable named gameScore. We’ll declare it at thestart of the class:private var gameScore:int;
And then we’ll set it to zero in the constructor function:gameScore = 0;
In addition, it would be a good idea to immediately show the score in the text field:gameScoreField.text = “Score: “+String(gameScore);
However, we realize at this point that there are at least several places in the code wherewe will set the text of gameScoreField. The first is in the constructor function. The sec-ond will be after the score changes during game play. Instead of copying and pastingthe previous line of code in two places, let’s move it to a function of its own. Then, wecan call the same function from each of the places in the code where we need toupdate the score:public function showGameScore() {
gameScoreField.text = “Score: “+String(gameScore);
}
We need to change the score in two places in the code. The first is right after we find amatch, just before we check to see whether the game is over:gameScore += pointsForMatch;
Then, we add an else clause to the if statement that checks for a match, and subtractpoints if the match is not found:gameScore += pointsForMiss;
Here is the entire section of code so that you can see where these two lines fit in:// compare two cards
if (firstCard.cardface == secondCard.cardface) {
// remove a match
removeChild(firstCard);
removeChild(secondCard);
// reset selection
firstCard = null;
secondCard = null;
// add points
gameScore += pointsForMatch;
showGameScore();
// check for game over
cardsLeft -= 2; // 2 less cards
if (cardsLeft == 0) {
Adding Scoring and a Clock 107
04_0789737027_ch03.qxd 8/2/07 2:01 PM Page 107

MovieClip(root).gotoAndStop(“gameover”);
}
} else {
gameScore += pointsForMiss;
showGameScore();
}
Notice that we are adding points using the += operation, even if there is a miss. This isbecause the pointsForMiss variable is set to –5. So adding –5 is the same as subtracting5 points.
We also put in the showGameScore() function call after each change to the score. Thiswill make sure the player sees an up-to-date score, as shown in Figure 3.13.
Chapter 3: Basic Game Framework: A Matching Game108
Figure 3.13The score nowappears in theupper left, usingthe default font andstyle.
NOTEIn moving from MatchingGame8.fla to MatchingGame9.fla, you need to do morethan just change the filenames. In the movie, you need to change both the name andthe class of the MatchingGameObject7 movie clip to MatchingGameObject8. It would bean easy mistake to only change the name of the movie clip but leave the class pointingto MatchingGameObject7.
Then, of course, you need to change the name of the ActionScript file toMatchingGame8.as, and change the class name and constructor function name, too.
This is true of future versions of the matching game in the rest of this chapter, too.
MatchingGame8.fla and MatchingGame8.as include this scoring code. Take a lookto see it in action.
04_0789737027_ch03.qxd 8/2/07 2:01 PM Page 108

Adding a ClockAdding a clock timer is a little harder than adding a score. For one thing, a clock needsto be updated constantly, as opposed to the score, which only needs to be updatedwhen the user tries a match.
To have a clock, we need to use the getTimer() function. This will return the time sincethe Flash movie started, in milliseconds. This is a special function that requires a specialFlash class that we need to import at the start of our program:import flash.utils.getTimer;
NOTEThe getTimer function measures the number of milliseconds since the Flash moviestarted. However, it is never useful as a raw time measurement because the playerwon’t ever be starting a game the instant the movie appears on his or her screen.Instead, getTimer is useful when you take two measurements and subtract the laterone from the earlier one. That is what we will do here, get the time the user pressedPlay, and then subtract this from the current time to get the amount of time the gamehas been played.
Now we will need some new variables. We need one to record the time the gamestarted. Then, we can simply subtract the current time from the start time to get theamount of time the player has been playing the game. We’ll also use a variable to storethe game time:private var gameStartTime:uint;
private var gameTime:uint;
We also need to define a new text field to display the time to the player:private var gameTimeField:TextField;
In the constructor function, we add a new text field to display the time. We also moveto the right side of the screen so that it won’t be on top of the score display:gameTimeField = new TextField();
gameTimeField.x = 450;
addChild(gameTimeField);
Before the constructor function is done, we’ll want to set the gameStartTime variable.We can also set the gameTime to zero:gameStartTime = getTimer();
gameTime = 0;
Now we need to figure out a way for the game time to update. It will be changing con-stantly, so we don’t want to wait for user action to display the time.
Adding Scoring and a Clock 109
04_0789737027_ch03.qxd 8/2/07 2:01 PM Page 109
One way to do it is to create a Timer object, as in Chapter 2. However, it isn’t criticalthat the clock be updated at regular intervals, only that the clock be updated oftenenough so that players get an accurate sense of how long they have been playing.
Instead of using a Timer, we can just have the ENTER_FRAME event trigger a function thatupdates the clock. In a default Flash movie, this will happen 12 times a second, whichis certainly enough:addEventListener(Event.ENTER_FRAME,showTime);
All that is left is to make the showTime function. It will calculate the current time basedon the current value of getTimer() and the value of gameStartTime. Then, it will put itin the text field for display:public function showTime(event:Event) {
gameTime = getTimer()-gameStartTime;
gameTimeField.text = “Time: “+gameTime;
}
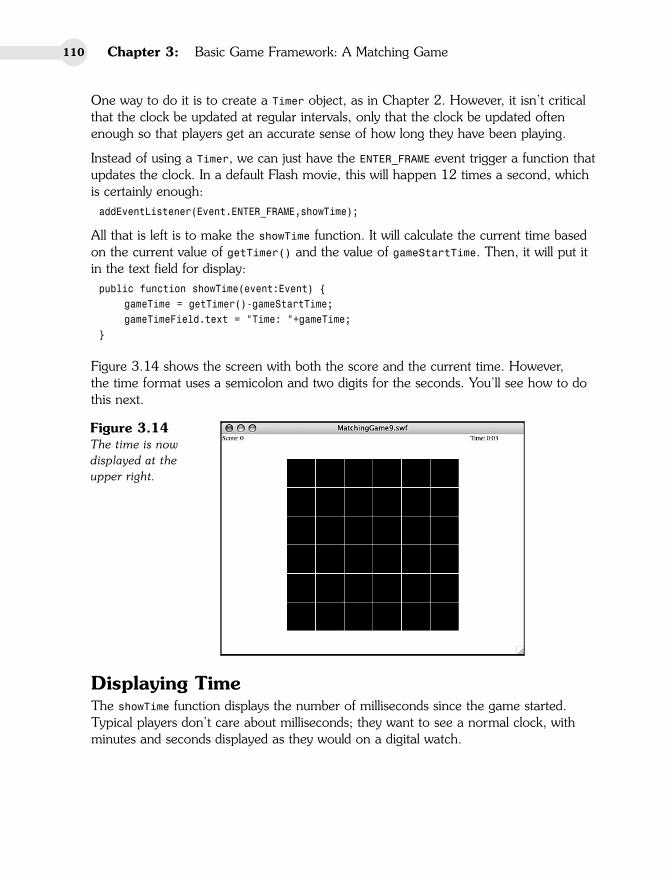
Figure 3.14 shows the screen with both the score and the current time. However, the time format uses a semicolon and two digits for the seconds. You’ll see how to dothis next.
Chapter 3: Basic Game Framework: A Matching Game110
Figure 3.14The time is nowdisplayed at theupper right.
Displaying TimeThe showTime function displays the number of milliseconds since the game started.Typical players don’t care about milliseconds; they want to see a normal clock, withminutes and seconds displayed as they would on a digital watch.
04_0789737027_ch03.qxd 8/2/07 2:01 PM Page 110

Let’s break this out in another function. Instead of just including the raw gameTime in the text field as in the preceding code example, we can call a function to return a niceroutput:gameTimeField.text = “Time: “+clockTime(gameTime);
The idea is that the old code would show this:Time: 123726
The new code will show:Time: 2:03
The clockTime function will take the time in raw milliseconds and convert it to minutesand whole seconds. In addition, it will format it to use a colon (:) and make sure that azero is placed correctly when the number of seconds is fewer than ten.
The function will start off by simply dividing the number of milliseconds by 1,000 to getthe number of seconds. It will then divide that by 60 to get the number of minutes.
Next, it must subtract the minutes from the seconds. For instance, if there are 123 sec-onds, that means there are 2 minutes. So, subtract 2*60 from 123 to get 3 seconds leftover. 123 is 2 minutes and 3 seconds:public function clockTime(ms:int) {
var seconds:int = Math.floor(ms/1000);
var minutes:int = Math.floor(seconds/60);
seconds -= minutes*60;
Now that we have the number of minutes and seconds, we want to make sure that weinsert a colon between them, and make sure that the seconds are always two digits.
I use a trick to do this. The substr function enables you to grab a set number of charac-ters from a string. So, the number of seconds will be between 0 and 59. Add 100 tothat, and you have a number between 100 and 159. Grab the second and third charac-ters from that as a string, and you have a range of 00 to 59. The following line is howit looks in ActionScript:var timeString:String = minutes+”:”+String(seconds+100).substr(1,2);
Now just return the value.return timeString;
}
The time will now display at the top of the screen in a familiar digital watch format,rather than just as a number of milliseconds.
Adding Scoring and a Clock 111
04_0789737027_ch03.qxd 8/2/07 2:01 PM Page 111

Displaying Score and Time after the Game Is OverBefore we finish with MatchingGame9.fla, let’s take the new score and time displaysand carry them over to the gameover screen.
This is a little tricky because the gameover screen exists on the main timeline, outside ofthe game movie clip. To have the main timeline even know what the score and timeare, this data needs to be sent from the game to the root level.
Just before we call the gotoAndStop command that will advance the movie to thegameover screen, we pass these two values up to root:MovieClip(root).gameScore = gameScore;
MovieClip(root).gameTime = clockTime(gameTime);
Notice that we pass the score up as a raw value, but we run the time through the handyclockTime function so that it is a string with a colon and a two-digit second.
At the root level, we need to define those new variables, which use the same names asthe game variables: gameTime and gameScore. I’ve added this code to the first frame:var gameScore:int;
var gameTime:String;
Then, on the gameover frame, we use these variables to place values in new text fields:showScore.text = “Score: “+String(gameScore);
showTime.text = “Time: “+gameTime;
NOTETo simplify things here, we’re including the “Score: “ and “Time: “ strings in withthe Score and Time fields. But, a more professional way to do it would be to have thewords Score and Time as static text or graphics on the screen, and only the actualscore and time in the fields. In that case, encasing the gameScore variable inside theString function is definitely necessary (because the .text property of a text field mustbe a string). Setting it to just gameScore would be trying to set a string to an integerand would cause an error message.
We don’t need to use code to create the showScore and showTime dynamic text fields;we can simply do that on the stage with the Flash editing tools. Figure 3.15 shows whatthe gameover screen now looks like, when a game is complete.
This completes MatchingGame9.fla and MatchingGameObject9.fla. We now have a game with an intro and gameover screen. It keeps track of score and time, anddisplays them when the game is over. It also allows the player to play again.
Next we finish off the game by adding a variety of special effects, such as card flips, limited card-viewing time, and sound effects.
Chapter 3: Basic Game Framework: A Matching Game112
04_0789737027_ch03.qxd 8/2/07 2:01 PM Page 112

Adding Game EffectsGone are the early days of games on the Web, when just the idea of a game in a webpage was cool enough to get you attention. Now, you have to work to add quality toyour games—little touches such as animation and sound.
Let’s spruce up this simple matching game with some special effects. Although theywon’t change the basic game play, they will make the game seem a lot more interestingto players.
Animated Card FlipsBecause we are flipping virtual cards over and back, it makes sense to want to see thisflip as an animation. You can do this with a series of frames inside a movie clip, butbecause you’re learning ActionScript here, let’s do it with ActionScript.
NOTEUsing a timeline animation rather than an ActionScript one is difficult here because ofthe nature of the cards. You do not want to animate 18 different cards, just 1. So, youwould probably put the card faces inside another movie clip and change the frame ofthat nested movie clip rather than the main Card movie clip. Then the Card movie clipcan have frames 2 and on, which would be an animated sequence showing a card flip.It is not easy to envision unless you do a lot of Flash animating.
Because this animation affects the cards, and only the cards, it makes sense to put itinside the Card class. However, we don’t have a Card class. We opted way back at thestart of this chapter to not use a Card class and just allow Flash to assign a default classto it.
Adding Game Effects 113
Figure 3.15The gameoverscreen, completewith final score andtime.
04_0789737027_ch03.qxd 8/2/07 2:01 PM Page 113

Now it is time to create Card class. If we make a Card.as file, however, it will be usedby any Card object that is in the folder. We’ve already got MatchingGame1.flathrough MatchingGame9.fla with Card objects in it. So, to make it clear that we onlywant MatchingGame10.fla to use this Card class, we’ll change the name of the sym-bol, and the class it references, to Card10. Then, we’ll create a Card10.as ActionScriptclass file.
This class will enable an animated flip of the card, rather than just changing the cardinstantly. It will replace all the gotoAndStop functions in the main class. Instead, it willtell the card to startFlip. It also passes in the frame which the card should show whenthe flip is over. The Card10 class will then set up some variables, set up an event lis-tener, and proceed to animate the card over the next ten frames:package {
import flash.display.*;
import flash.events.*;
public dynamic class Card10 extends MovieClip {
private var flipStep:uint;
private var isFlipping:Boolean = false;
private var flipToFrame:uint;
// begin the flip, remember which frame to jump to
public function startFlip(flipToWhichFrame:uint) {
isFlipping = true;
flipStep = 10;
flipToFrame = flipToWhichFrame;
this.addEventListener(Event.ENTER_FRAME, flip);
}
// take 10 steps to flip
public function flip(event:Event) {
flipStep--; // next step
if (flipStep > 5) { // first half of flip
this.scaleX = .2*(flipStep-6);
} else { // second half of flip
this.scaleX = .2*(5-flipStep);
}
// when it is the middle of the flip, go to new frame
if (flipStep == 5) {
gotoAndStop(flipToFrame);
}
// at the end of the flip, stop the animation
if (flipStep == 0) {
this.removeEventListener(Event.ENTER_FRAME, flip);
Chapter 3: Basic Game Framework: A Matching Game114
04_0789737027_ch03.qxd 8/2/07 2:01 PM Page 114

}
}
}
}
So, the flipStep variable starts at 10 when the startFlip function is called. It then isreduced by one each frame thereafter.
NOTEThe scaleX property shrinks or expands the width of a movie clip. A value of 1.0 isthe default. A value of 2.0 stretches it to twice its width, and a value of .5 makes it halfits width.
If flipStep is between 6 and 10, the scaleX property of the card is set to.2*(flipStep-6), which would be .8, .6, .4, .2, and 0. So, it gets thinner with eachstep.
Then, when flipStep is between 5 and 0, the new formula of .2*(5-flipStep) is used.So, it would be 0, .2, .4, .6, .8, and then 1.0; and so, it returns to normal size.
At the fifth step, the card jumps to the new frame. It appears to shrink, goes to noth-ing, jumps to the new frame, and then grows again.
To accomplish this effect, I had to make one change to how the graphics on the Cardmovie clip were arranged. In all previous versions of the game, the cards had theirupper-left corner at the center of the movie clip. For the change to scaleX to make itappear that the card was flipping around its center, however, I had to center the cardgraphics on each frame over the center of the movie clip. Compare the Card movieclips in MachingGame9.fla and MatchingGame10.fla to see the difference. SeeFigure 3.16 to see how this looks when editing the movie clips.
Adding Game Effects 115
Figure 3.16The left side showsthe registrationpoint of the movieclip at the upperleft, as it is in thefirst nine examplemovies of this chap-ter. The right sideshows the movieclip centered as it is for the finalexample.
04_0789737027_ch03.qxd 8/2/07 2:01 PM Page 115

At the last step, the event listener is removed completely.
The great thing about this class is that it works just as well when the card is beingturned back face down, going to frame 1.
Look at MatchingGameObject10.as and see where all the gotoAndStop calls havebeen replaced with startFlip. By doing this, we are not only creating a flip animation,but we are also giving the Card class more control over itself. Ideally, you might want togive cards complete control over themselves by having the Card10.as class more func-tions, such as those that set the location of the cards at the start of the game.
Limited Card-Viewing TimeAnother nice touch to this game is to automatically turn over pairs of mismatched cardsafter the player has had enough time to look at them. For instance, the player choosestwo cards. They don’t match, so they remain face up for the player to inspect. Aftertwo seconds, however, the cards turn over, even if the player hasn’t begun to selectanother pair.
To accomplish this, we’ll use a Timer. A Timer will make adding this feature relativelyeasy. To start, we’ll need to import the Timer class into our main class:import flash.utils.Timer;
Next, we create a timer variable at the start of the class:private var flipBackTimer:Timer;
Later on in the clickCard function, we add some code right after the player has chosenthe second card, not made a match, and his or her score has been decreased. ThisTimer code will set up the new timer, which will simply call a function when two sec-onds have gone by:flipBackTimer = new Timer(2000,1);
flipBackTimer.addEventListener(TimerEvent.TIMER_COMPLETE,returnCards);
flipBackTimer.start();
The TimerEvent.TIMER_COMPLETE event is triggered when a timer is done. Typically, aTimer runs a certain number of times, triggering a TimerEvent.TIMER each time. Then,on the last event, it also triggers the TimerEvent.TIMER_COMPLETE. Because we only wantto trigger a single event at some point in the future, we just set the number of Timerevents to one, and then look for TimerEvent.TIMER_COMPLETE.
When two seconds go by, the returnCards function is called. This is a new function thatworks just like the later part of the old clickCard function. It flips both the first and sec-ond selections back to the face-down state, and then sets the firstCard and secondCardvalues to null. It also removed the listener:
Chapter 3: Basic Game Framework: A Matching Game116
04_0789737027_ch03.qxd 8/2/07 2:01 PM Page 116

public function returnCards(event:TimerEvent) {
firstCard.startFlip(1);
secondCard.startFlip(1);
firstCard = null;
secondCard = null;
flipBackTimer.removeEventListener(TimerEvent.TIMER_COMPLETE,returnCards);
}
The returnCards function duplicates code that was in clickCard before, so inMatchingGameObject10.as I’ve replaced this duplicate code in clickCard with asimple call to returnCards. This way, we only have one spot in our code that returns apair of cards to the face-down state.
Because returnCards demands a single event parameter, we need to pass that parame-ter into returnCards whether we have something to pass or not. So, the call insideclickCard simply passes a null:returnCards(null);
Now if you run the movie and flip two cards, then wait, the cards will flip back on their own.
Because we have a removeEventListener command in the returnCards function, the lis-tener is removed even if the returnCards function is triggered by the player turning overanother card. Otherwise, the player would turn over a new card, the first two cardswould turn back, and then the event would be triggered after two seconds regardless ofthe fact that the original two cards are already face down.
Sound EffectsNo game is truly complete without sound. ActionScript 3.0 makes adding sound rela-tively easy, although there are quite a few steps involved.
The first step is to import your sounds. I’ve created three sounds and want to bringthem each into the library:
FirstCardSound.aiffMissSound.aiffMatchSound.aiff
After we have imported them, they need to have properties changed. Name them allafter their filenames, but minus the .aiff. Also, check the Export for ActionScript optionand give them the same class name as symbol name. Figure 3.17 shows one of thesound’s Properties dialog box.
Adding Game Effects 117
04_0789737027_ch03.qxd 8/2/07 2:01 PM Page 117
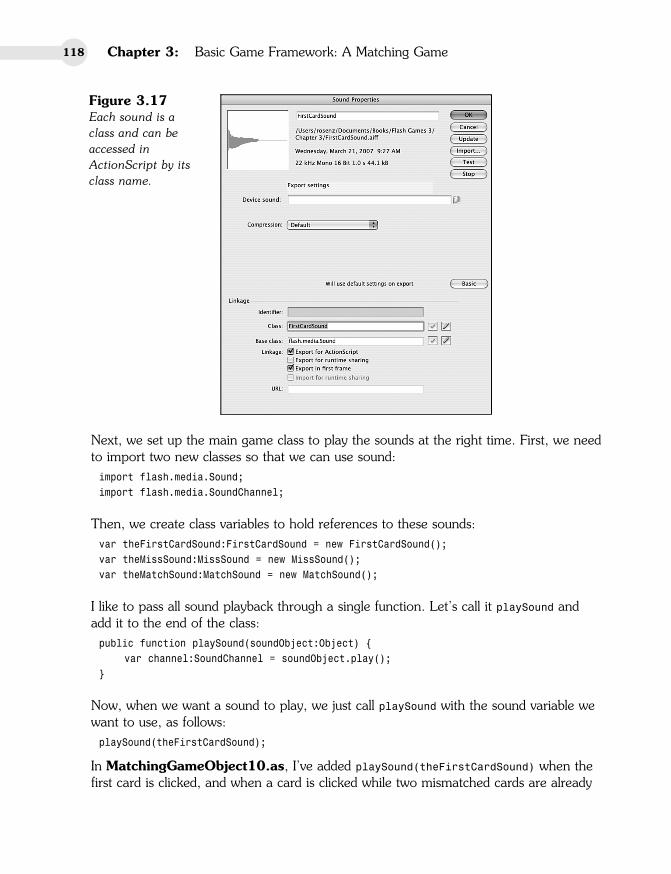
Next, we set up the main game class to play the sounds at the right time. First, we needto import two new classes so that we can use sound:import flash.media.Sound;
import flash.media.SoundChannel;
Then, we create class variables to hold references to these sounds:var theFirstCardSound:FirstCardSound = new FirstCardSound();
var theMissSound:MissSound = new MissSound();
var theMatchSound:MatchSound = new MatchSound();
I like to pass all sound playback through a single function. Let’s call it playSound andadd it to the end of the class:public function playSound(soundObject:Object) {
var channel:SoundChannel = soundObject.play();
}
Now, when we want a sound to play, we just call playSound with the sound variable wewant to use, as follows:playSound(theFirstCardSound);
In MatchingGameObject10.as, I’ve added playSound(theFirstCardSound) when thefirst card is clicked, and when a card is clicked while two mismatched cards are already
Chapter 3: Basic Game Framework: A Matching Game118
Figure 3.17Each sound is aclass and can beaccessed inActionScript by itsclass name.
04_0789737027_ch03.qxd 8/2/07 2:01 PM Page 118

showing. I’ve added playSound(theMissSound) when the second card is turned over andthere is no match. I’ve added playSound(theMatchSound) when the second card isturned over and a match is found.
This is all that it takes to add sound effects to the game.
NOTEYou might at this point want to review your publish settings to choose your soundcompression settings. Alternatively, you could set the sound compression for eachsound individually in its symbol properties. Either way, you probably want to use some-thing pretty low, such as 16Mbps MP3, because these are just simple sound effects.
Modifying the GameA few more tiny changes before we are done with the game.
First, when we recentered all the cards, it threw off the horizontal and vertical offsetsfor the card placement. So, that needs to be readjusted:private static const boardOffsetX:Number = 145;
private static const boardOffsetY:Number = 70;
How did I come up with those numbers? Well, if you really want to know:
• The stage is 550 pixels across. There are 6 cards, each spaced 52 pixels apart.That’s 550–6*52 for the total space remaining on the left and the right. Divideby 2 to get the space to the right. However, the cards are centered at 0,0, so Ineed to subtract half of the width of a card, or 26. So, (550-6*52)/2-26=145;
• Same for the vertical offset. (400-6*52)/2-26=70;
Another loose end to consider is the cursor. When users go to click a card, they don’tget a special “I can click this” cursor. That is pretty easily changed by just setting thebuttonMode property of each card as it is created:c.buttonMode = true;
Now we have a finger cursor when the user rolls over the cards. This is already the casefor the Play and Play Again buttons because those are Button symbols.
One last change I made was to increase the frame rate of the movie from the default12 frames per second to 60. You can do this by choosing Modify, Document to changethe main movie document properties.
At 60 frames per second, the flips are much smoother. And with the super-fastActionScript 3.0 engine, even slow machines can run this game at this high frame rate.
Modifying the Game 119
04_0789737027_ch03.qxd 8/2/07 2:01 PM Page 119

That wraps up the matching game, leaving us with the final version files:
MatchingGame10.flaMatchingGameObject10.asCard10.as
Chapter 3: Basic Game Framework: A Matching Game120
04_0789737027_ch03.qxd 8/2/07 2:01 PM Page 120