balloon rockets
TRANSCRIPT

Balloon RocketsAugust 10, 2012
Kids love balloons. Balloons are fun and frugal entertainment. There is certainly no denying that.
I always keep a stash of balloons around to pull out on days when my boys are in need of some unexpected fun. They love to play the classic “don’t let the balloon touch the floor” game.
Balloons can also be a great science tool. We used balloons to make ourMarshmallow Shooters and for our Balloon Blow Up activity.
Recently, we’ve experimented with building our own model rockets and we’ve launched water rockets at our local science museum. Rockets are fascinating and a great way to teach the concept of action and reaction.
Fortunately, they can also be as simple or as complicated as you’d like. Today, simplicity was the route we took. By using a few items we had around the house, we made balloon rockets.
What you need:
Piece of yarn (cut to about 6 feet)
Balloon
2 Chairs
Drinking straw
Tape
Scissors
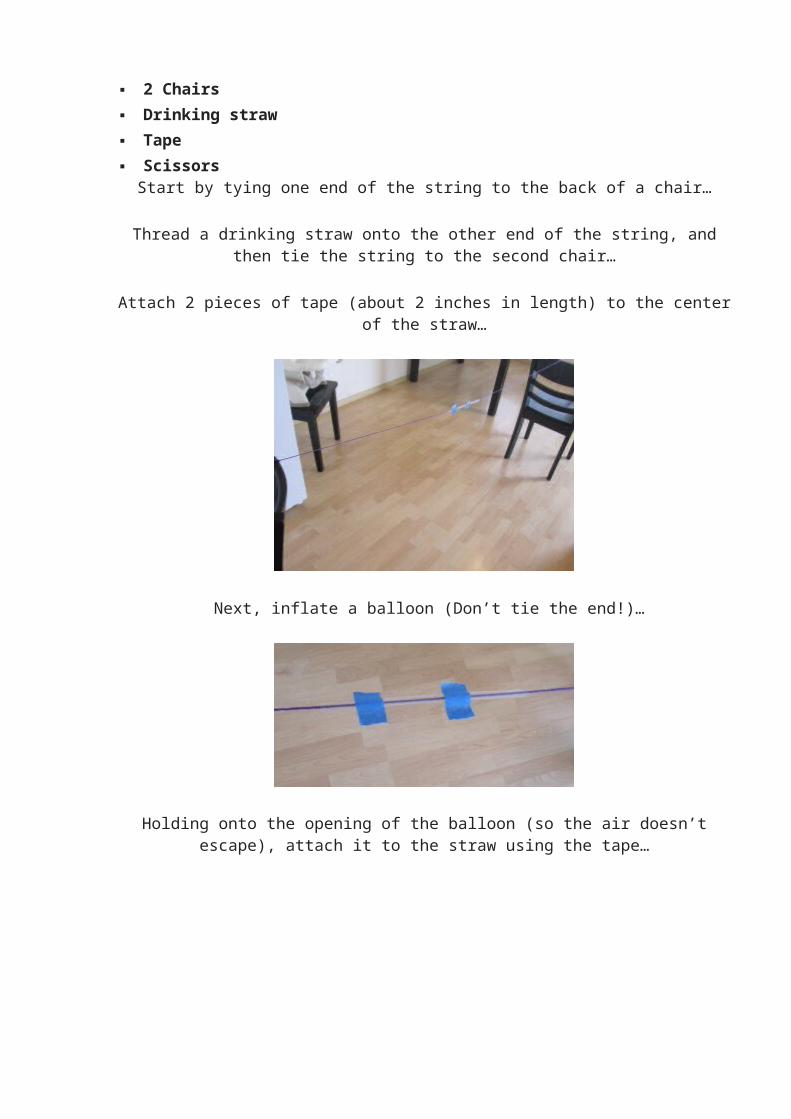
Start by tying one end of the string to the back of a chair…
Thread a drinking straw onto the other end of the string, and then tie the string to the second chair…
Attach 2 pieces of tape (about 2 inches in length) to the center of the straw…
Next, inflate a balloon (Don’t tie the end!)…
Holding onto the opening of the balloon (so the air doesn’t escape), attach it to the straw using the tape…

Pull the balloon to one end of the string (so that the opening of the balloon is touching one of the chairs), and let go…
Observe what happens.
The balloon should start to move as soon as you let go of it.
Action and reaction is a fairly simple concept – To make an object move one way, a force has to work in the opposite direction.
In this case, the balloon is full of air. When you let go of the balloon, causing the air to rush out of the opening, it creates a pushing force in the opposite direction. This makes the balloon move.
Real rockets work in a similar way. A rocket engine works by exploding fuel inside a chamber that is open at the bottom. The force of the explosion creates an opposite force that pushes the rocket up and into space.
Make Your Own Marshmallow ShooterJanuary 18, 2012
Need a fun gross motor activity for the kids that incorporates science, and can be done either inside or out ? Here it is !
Making a marshmallow shooter is so easy, and will provide the kids with a hands-on lesson in movement, force, and friction.
Here is what you need:
Disposable cups (medium-sized work best)
Balloons
Marshmallows (pom-poms work too, although not as well)
Scissors

Tape (we used duct tape)- Start by cutting the bottom off of the cup.
- Next, cut the tip off of a balloon, and stretch it over the bottom portion of the cup. Tie a knot in the other end of the balloon.
- To make your marshmallow shooter more durable, put tape around the edges of the balloon that is stretched over the cup. This will prevent the balloon from snapping off while the children are experimenting with the shooter.
That’s it ! Grab some marshmallows (or pom-poms) and start shooting !
I didn’t demonstrate how the marshmallow shooter works. Instead, I just handed it over to see if they could figure it out. It didn’t take long…
Finally, an activity that even big brother (age 12) wanted to participate in…
So much fun…
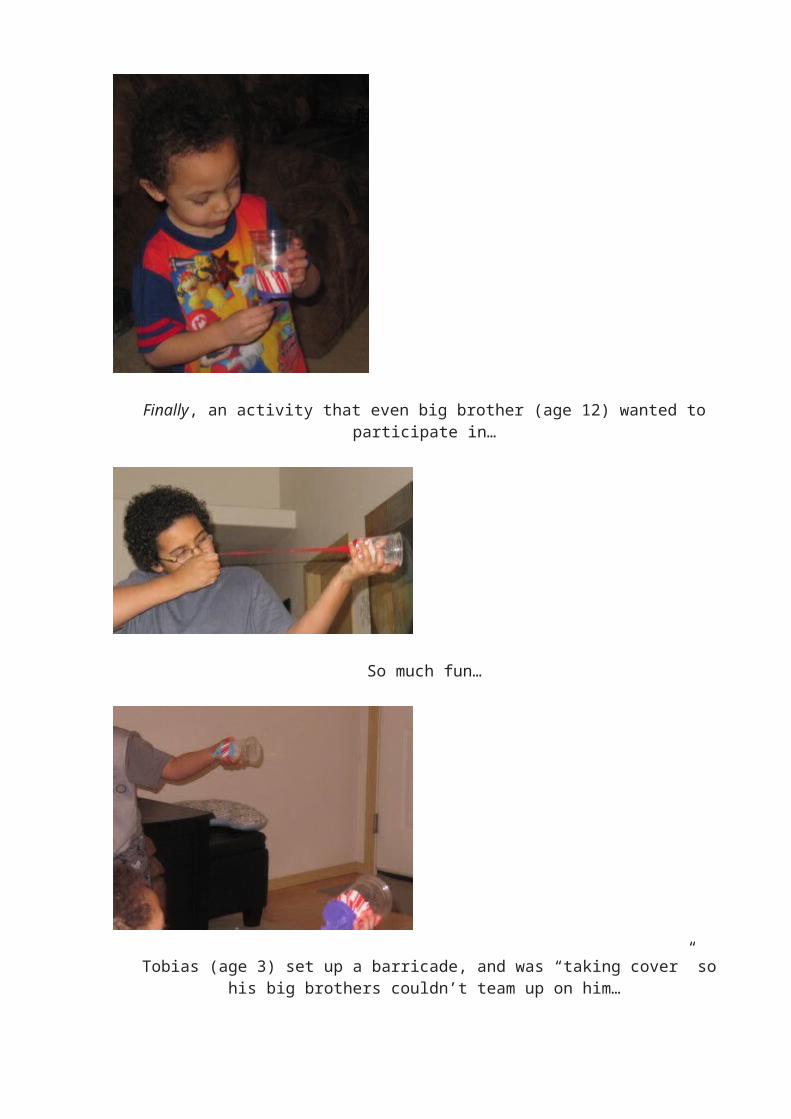
Tobias (age 3) set up a barricade, and was “taking cover” so his big brothers couldn’t team up on him…
We had so much fun with this project. We experimented with different forces – pulling the balloon back just a little bit creates a small amount of force, but pulling the balloon back a lot, creates a bigger force, which results in the marshmallows going much further and faster.
We learned about measurement and estimation. The boys tried to guess how far they could shoot, and then measured the distance. They compared their results, and discussed the differences and similarities.
We learned that weight has a major impact on how far an object will travel. When we used the shooters with pom-poms, we discovered that because they are so light, they don’t travel very far. The marshmallows, on the other hand, were heavier and traveled much further (and faster).
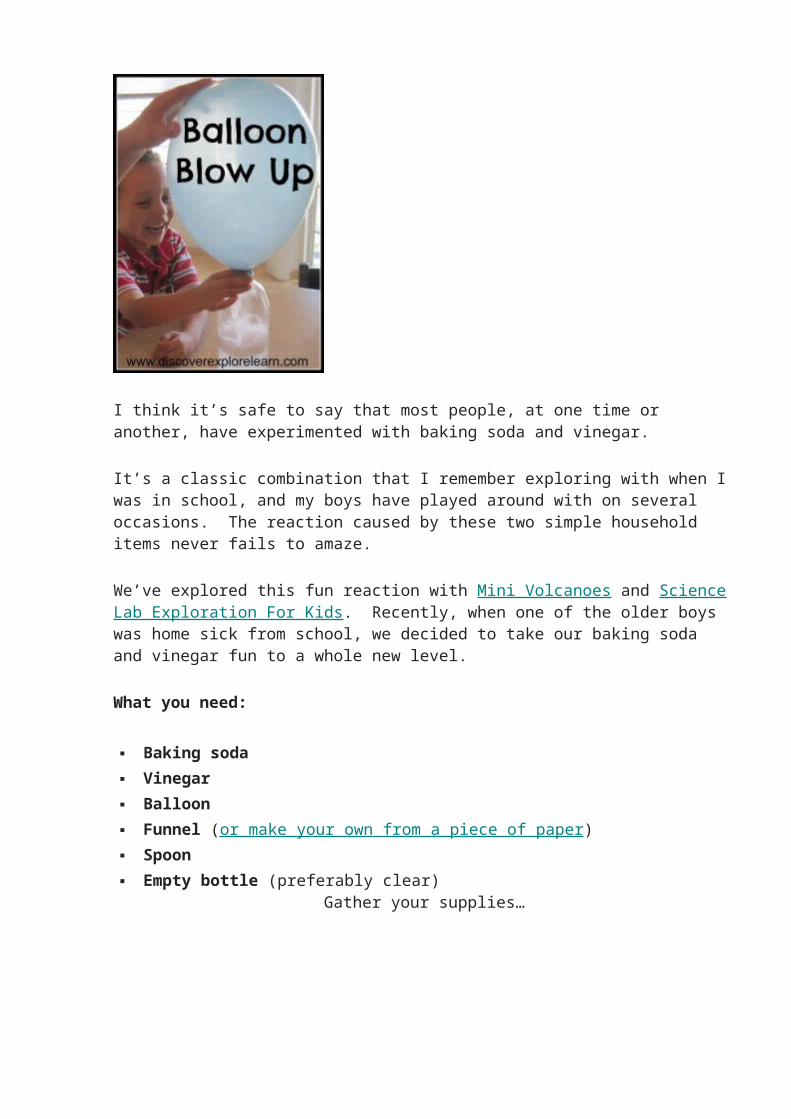
Balloon Blow Up
September 23, 2012
I think it’s safe to say that most people, at one time or another, have experimented with baking soda and vinegar.
It’s a classic combination that I remember exploring with when I was in school, and my boys have played around with on several occasions. The reaction caused by these two simple household items never fails to amaze.
We’ve explored this fun reaction with Mini Volcanoes and Science Lab Exploration For Kids. Recently, when one of the older boys was home sick from school, we decided to take our baking soda and vinegar fun to a whole new level.
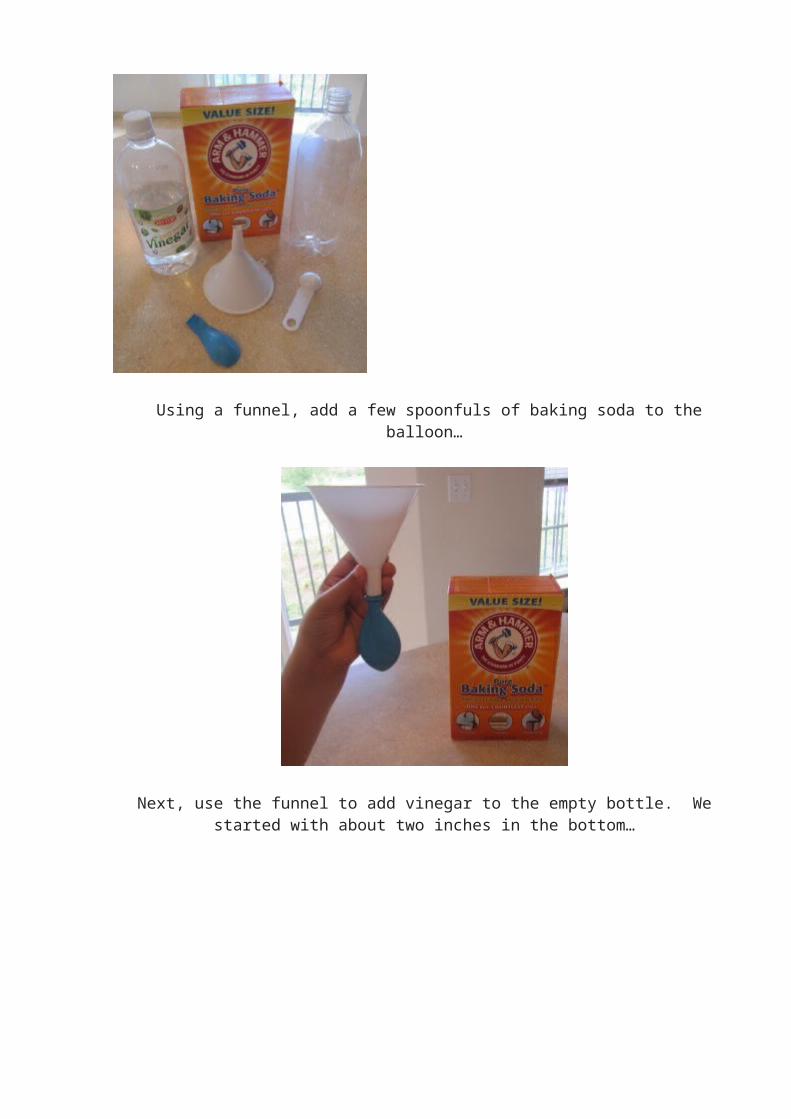
What you need:
Baking soda
Vinegar
Balloon
Funnel (or make your own from a piece of paper )
Spoon
Empty bottle (preferably clear)Gather your supplies…
Using a funnel, add a few spoonfuls of baking soda to the balloon…
Next, use the funnel to add vinegar to the empty bottle. We started with about two inches in the bottom…
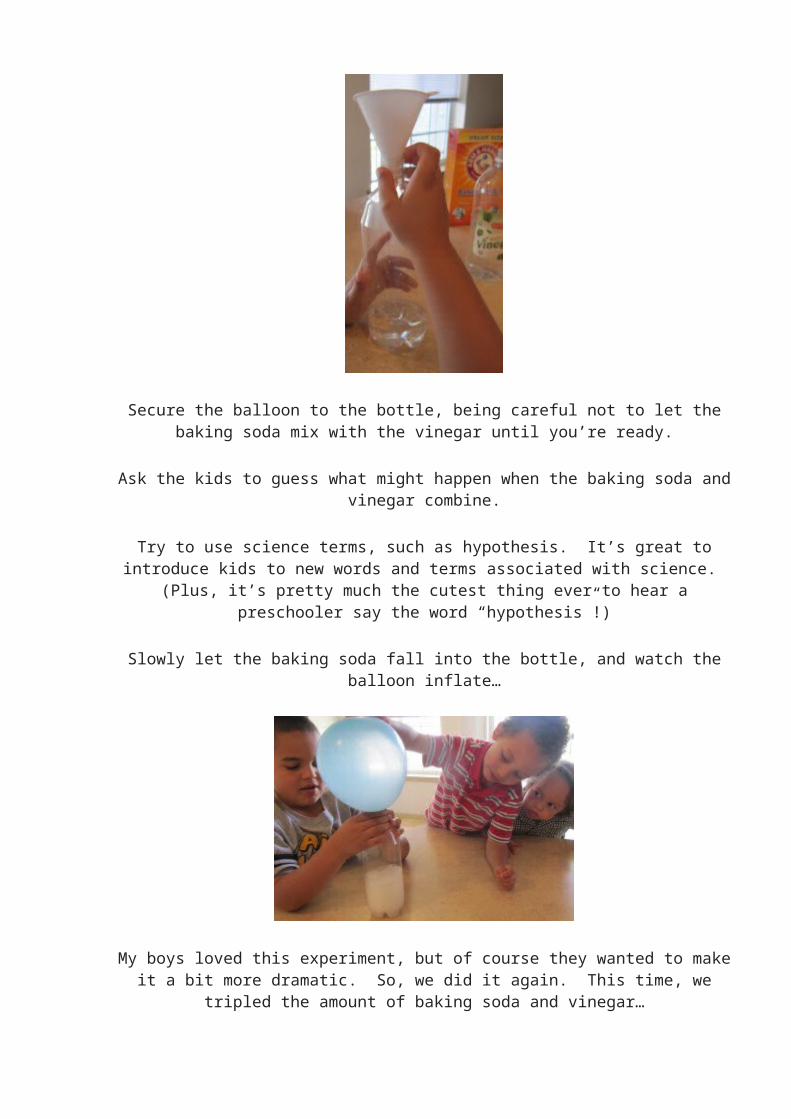
Secure the balloon to the bottle, being careful not to let the baking soda mix with the vinegar until you’re ready.
Ask the kids to guess what might happen when the baking soda and vinegar combine.
Try to use science terms, such as hypothesis. It’s great to introduce kids to new words and terms associated with science. (Plus, it’s pretty much the
cutest thing ever to hear a preschooler say the word “hypothesis”!)
Slowly let the baking soda fall into the bottle, and watch the balloon inflate…
My boys loved this experiment, but of course they wanted to make it a bit more dramatic. So, we did it again. This time, we tripled the amount of
baking soda and vinegar…
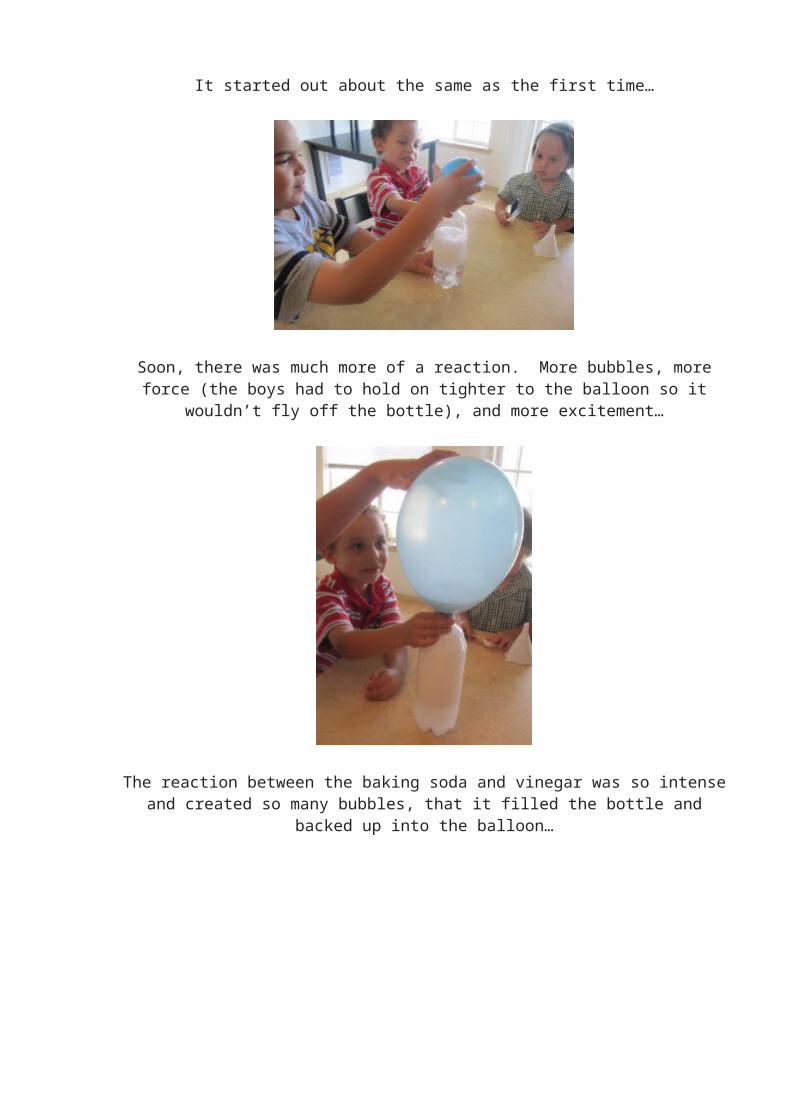
It started out about the same as the first time…
Soon, there was much more of a reaction. More bubbles, more force (the boys had to hold on tighter to the balloon so it wouldn’t fly off the bottle),
and more excitement…
The reaction between the baking soda and vinegar was so intense and created so many bubbles, that it filled the bottle and backed up into the
balloon…
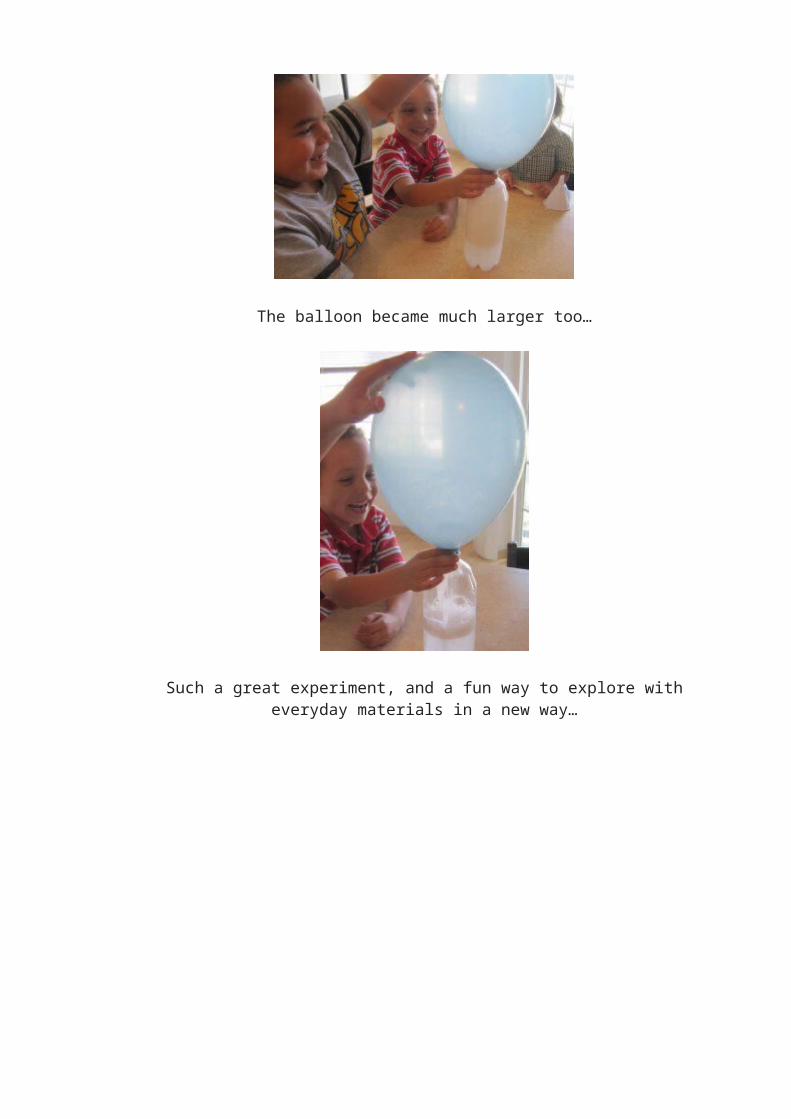
The balloon became much larger too…
Such a great experiment, and a fun way to explore with everyday materials in a new way…
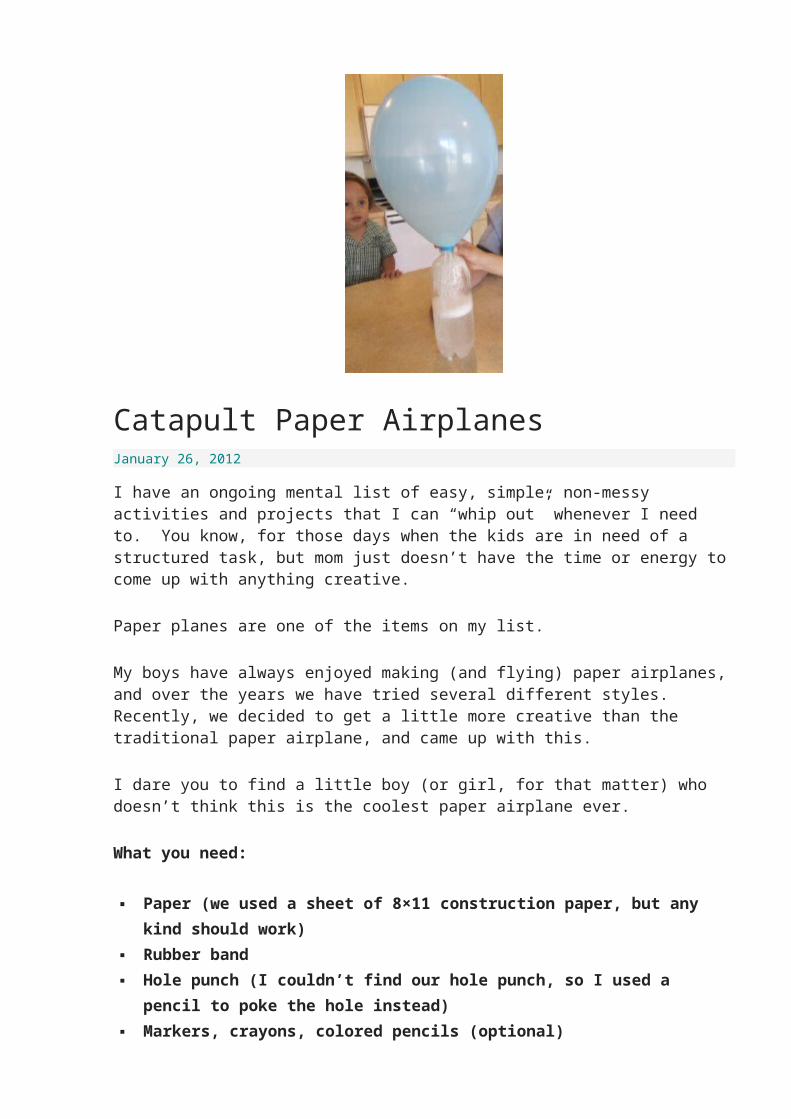
Catapult Paper AirplanesJanuary 26, 2012
I have an ongoing mental list of easy, simple, non-messy activities and projects that I can “whip out” whenever I need to. You know, for those days when the kids are in need of a structured task, but mom just doesn’t have the time or energy to come up with anything creative.
Paper planes are one of the items on my list.
My boys have always enjoyed making (and flying) paper airplanes, and over the years we have tried several different styles. Recently, we decided to get a little more creative than the traditional paper airplane, and came up with this.
I dare you to find a little boy (or girl, for that matter) who doesn’t think this is the coolest paper airplane ever.
What you need:
Paper (we used a sheet of 8×11 construction paper, but any kind
should work)
Rubber band
Hole punch (I couldn’t find our hole punch, so I used a pencil to
poke the hole instead)
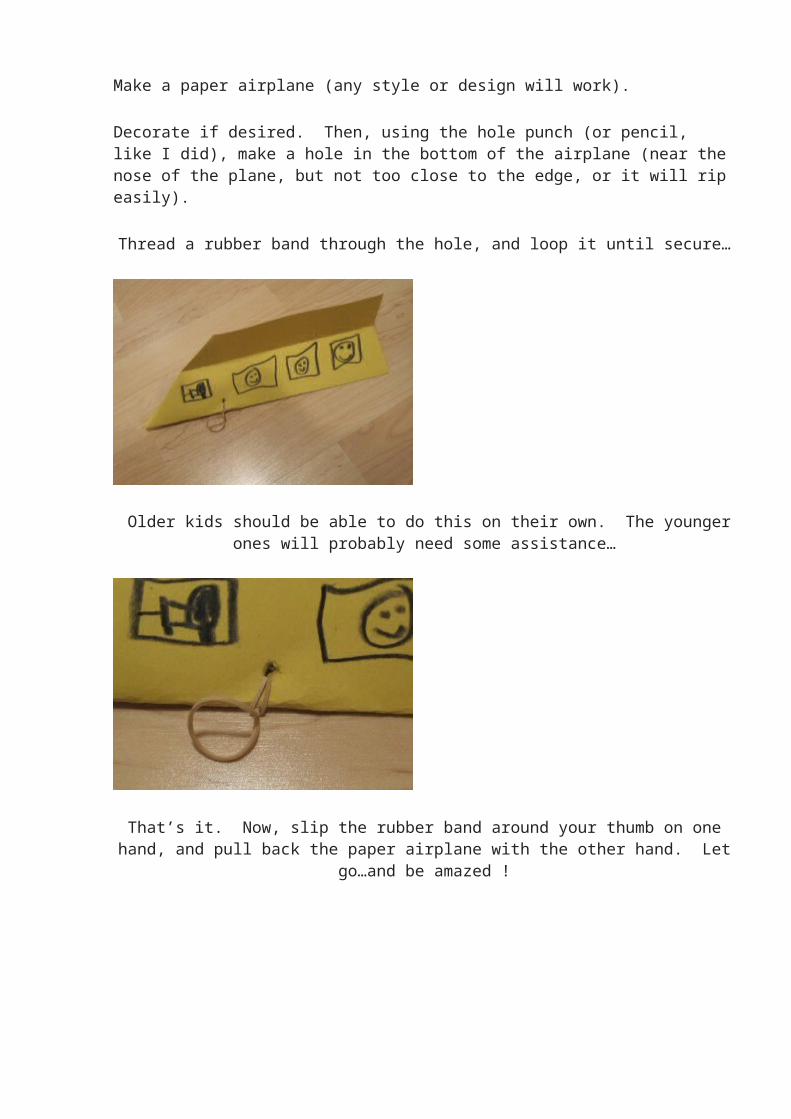
Markers, crayons, colored pencils (optional)Make a paper airplane (any style or design will work).
Decorate if desired. Then, using the hole punch (or pencil, like I did), make a hole in the bottom of the airplane (near the nose of the plane, but not too close to the edge, or it will rip easily).
Thread a rubber band through the hole, and loop it until secure…
Older kids should be able to do this on their own. The younger ones will probably need some assistance…
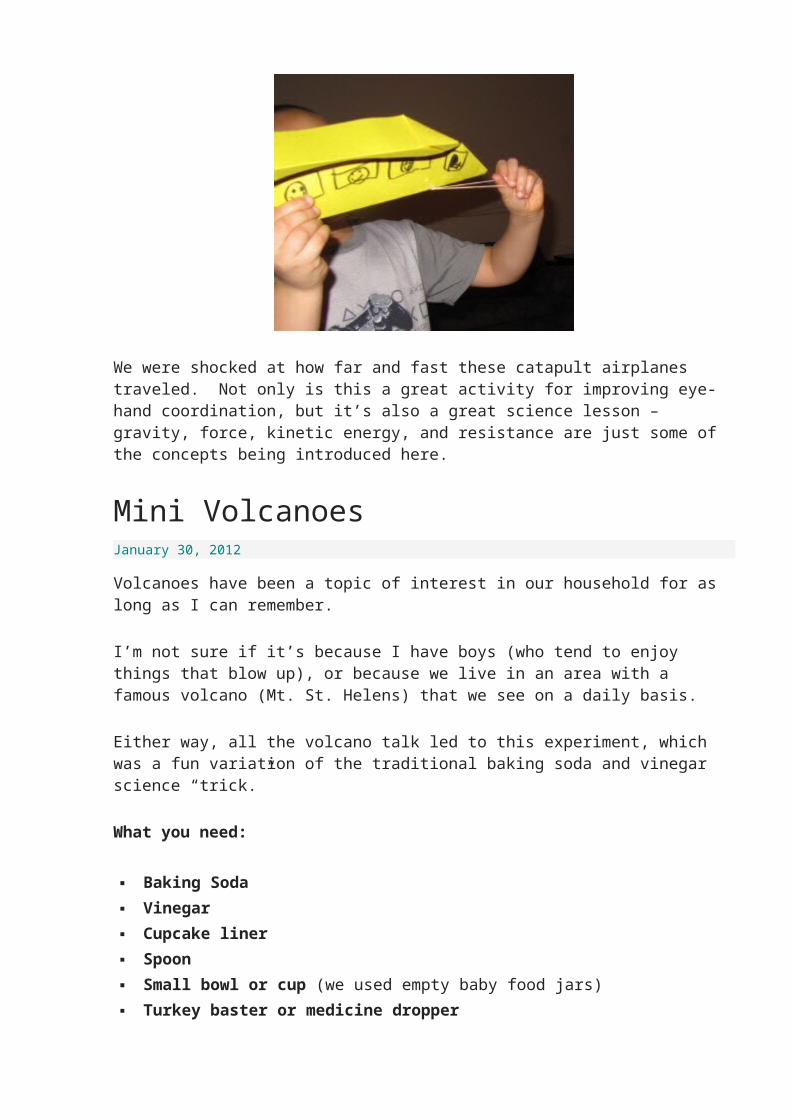
That’s it. Now, slip the rubber band around your thumb on one hand, and pull back the paper airplane with the other hand. Let go…and be amazed !
We were shocked at how far and fast these catapult airplanes traveled. Not only is this a great activity for improving eye-hand coordination, but it’s also a great science lesson – gravity, force, kinetic energy, and resistance are just some of the concepts being introduced here.
Mini VolcanoesJanuary 30, 2012
Volcanoes have been a topic of interest in our household for as long as I can remember.
I’m not sure if it’s because I have boys (who tend to enjoy things that blow up), or because we live in an area with a famous volcano (Mt. St. Helens) that we see on a daily basis.
Either way, all the volcano talk led to this experiment, which was a fun variation of the traditional baking soda and vinegar science “trick.”
What you need:
Baking Soda
Vinegar
Cupcake liner
Spoon
Small bowl or cup (we used empty baby food jars)
Turkey baster or medicine dropper
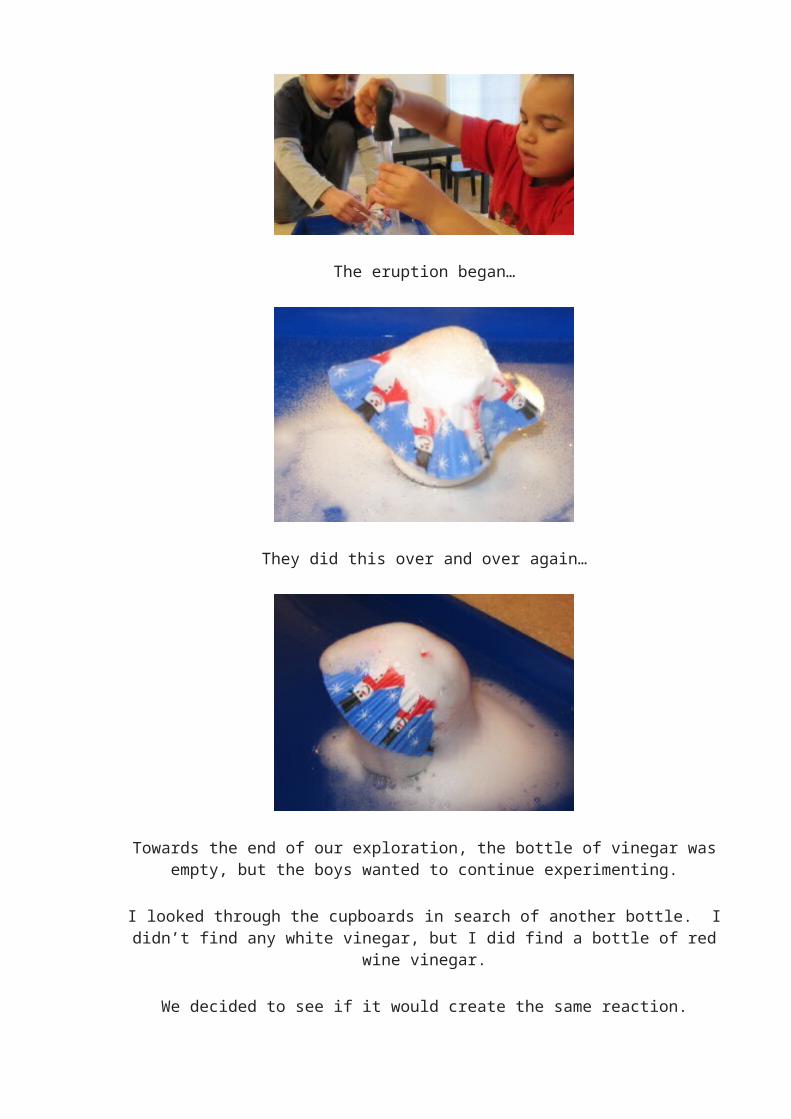
Tray or bin to help contain the chemical reaction (optional)We gathered our supplies…
The boys added a few spoonfuls of baking soda to each jar.
Then, they poked a hole in the top of a cupcake liner and placed it on top of the jar. (Can you tell our liners were left over from the holidays?)…
Next, they used the turkey baster to add vinegar to their “volcano”…
The eruption began…
They did this over and over again…

Towards the end of our exploration, the bottle of vinegar was empty, but the boys wanted to continue experimenting.
I looked through the cupboards in search of another bottle. I didn’t find any white vinegar, but I did find a bottle of red wine vinegar.
We decided to see if it would create the same reaction.
The result: White vinegar mixed with baking soda made more fizzing sounds as it erupted. Red wine vinegar mixed with baking soda created more bubbles, and gave it a cool red tint. This, of course, became “lava” from the “volcano.”
When they were done experimenting, we discussed why the baking soda and vinegar react the way that they do.
We learned that acetic acid (in vinegar) reacts with sodium bicarbonate (in baking soda) to form carbonic acid.
Carbonic acid is unstable, and immediately falls apart into carbon dioxide and water. The bubbles that occur, come from the carbon dioxide escaping the solution.
Carbon dioxide is heavier than air, so it flows almost like water (or in our case, “lava”) when it spills over the container.
Dancing RaisinsFebruary 16, 2012
What’s that? You want to make raisins dance? No problem.
What you need:
Clear soda (Sprite, 7Up, Sierra Mist)
Raisins
Clear glass (or bowl)Pour soda into a glass. Notice the bubbles? That’s carbon dioxide gas being
released from the liquid.
Drop some raisins into the glass, and observe what happens…

The raisins are denser than the liquid in the soda, so initially they sink to the bottom of the glass.
As the soda releases carbon dioxide bubbles, they stick to the bumpy surface of the raisins, which are then lifted because of the increased buoyancy.
Watch as the raisins reach the top of the glass. What happens?
When the raisins reach the surface, the bubbles pop, and the carbon dioxide gas escapes into the air. This causes the raisins to lose buoyancy and sink again.
The raisins will continue to rise and sink (or dance, as we like to call it) until most of the carbon dioxide has escaped and the soda becomes flat.
(At that point, the raisins are generally soggy from absorbing the liquid, and are too heavy to float anyway).
A fun way to expand on this, would be to find other objects around the house to experiment with. Many other items will “dance” as well, they just need to have a density that is slightly greater than water, and a rough surface for the gas bubbles to attach to.
As you experiment, introduce science terms (such as theory, hypothesis, conclusion, etc). This is a great opportunity to increase vocabulary and comprehension for children.
Remember to discover, explore, and learn together with your kids. You will not only be teaching them important science concepts, you’ll also be creating great memories.

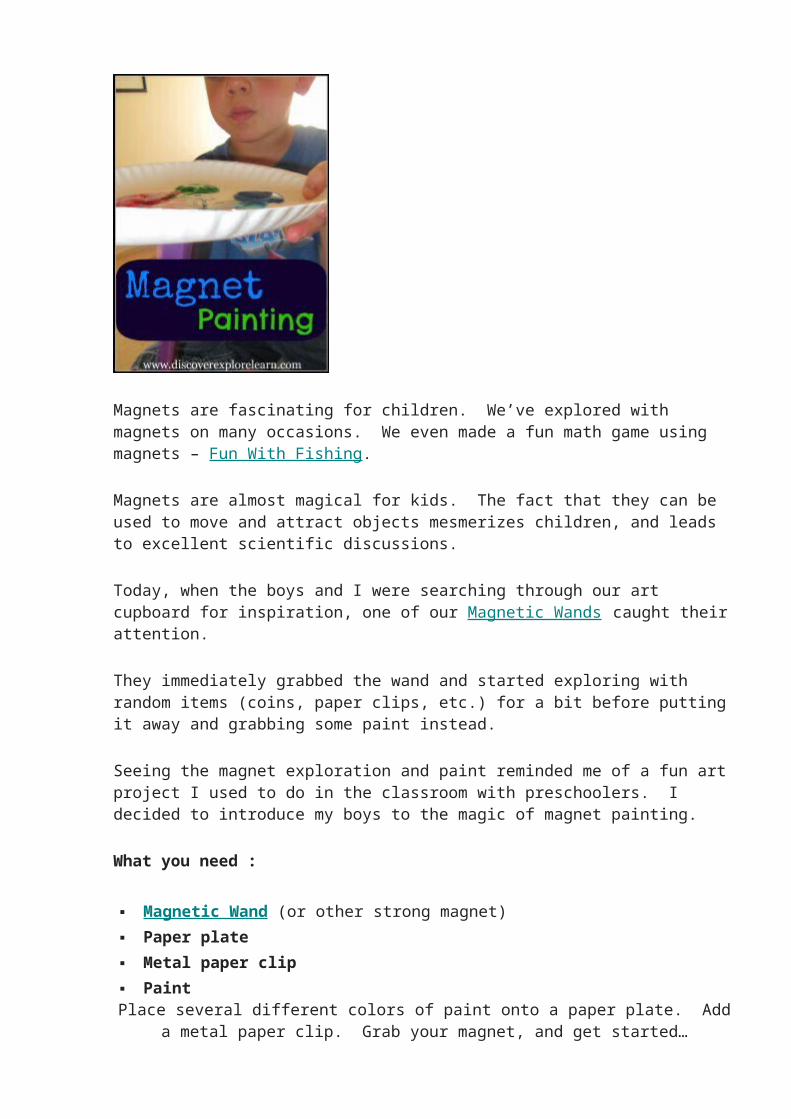
Magnet PaintingMay 14, 2012
Magnets are fascinating for children. We’ve explored with magnets on many occasions. We even made a fun math game using magnets – Fun With Fishing.
Magnets are almost magical for kids. The fact that they can be used to move and attract objects mesmerizes children, and leads to excellent scientific discussions.
Today, when the boys and I were searching through our art cupboard for inspiration, one of our Magnetic Wands caught their attention.
They immediately grabbed the wand and started exploring with random items (coins, paper clips, etc.) for a bit before putting it away and grabbing some paint instead.
Seeing the magnet exploration and paint reminded me of a fun art project I used to do in the classroom with preschoolers. I decided to introduce my boys to the magic of magnet painting.
What you need :
Magnetic Wand (or other strong magnet)
Paper plate
Metal paper clip
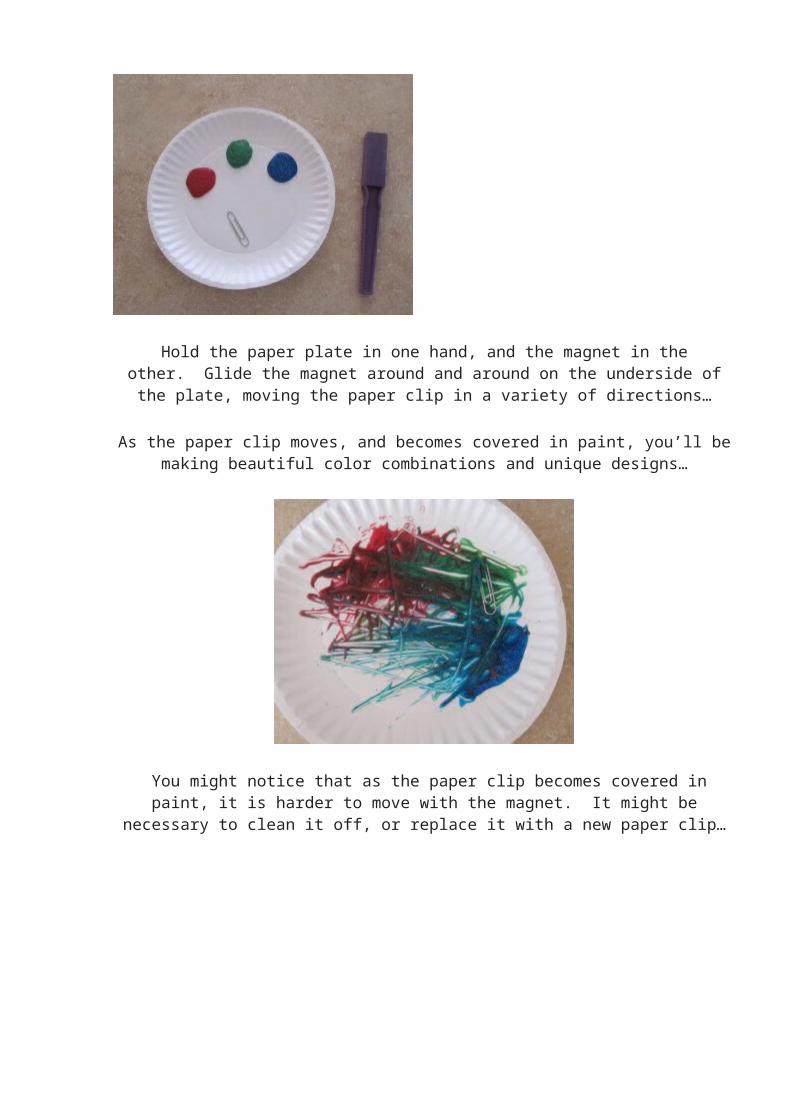
PaintPlace several different colors of paint onto a paper plate. Add a metal paper
clip. Grab your magnet, and get started…

Hold the paper plate in one hand, and the magnet in the other. Glide the magnet around and around on the underside of the plate, moving the paper
clip in a variety of directions…
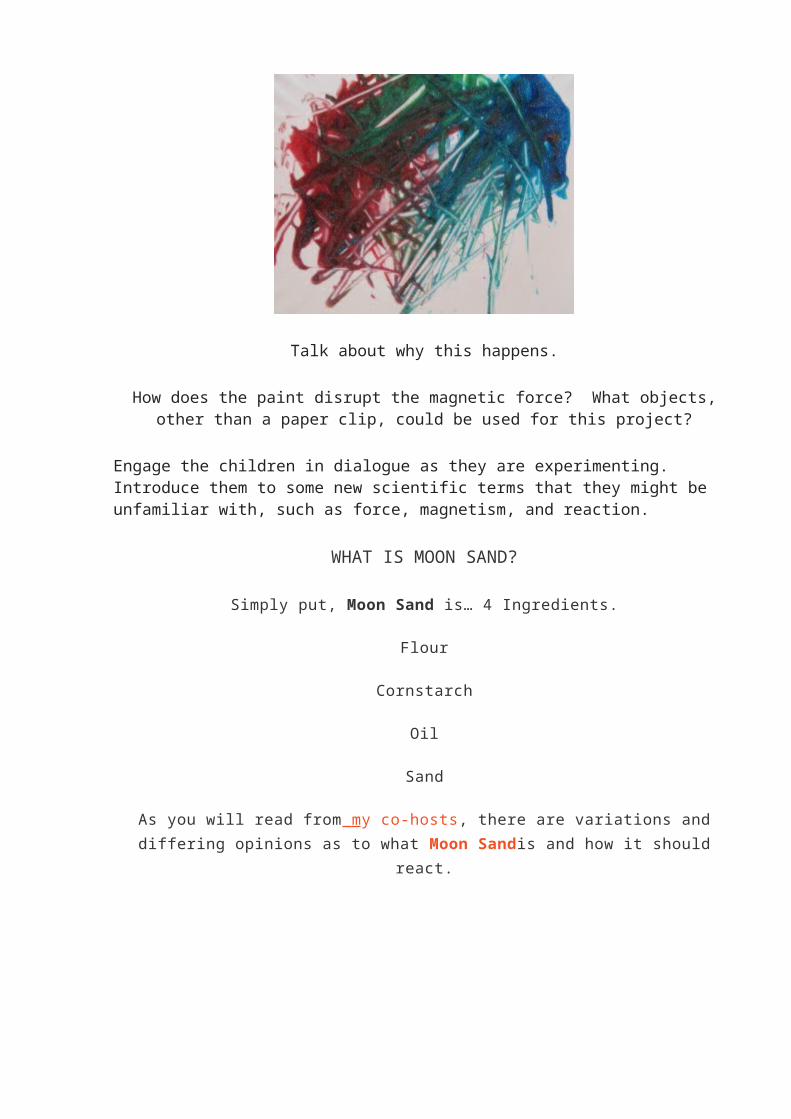
As the paper clip moves, and becomes covered in paint, you’ll be making beautiful color combinations and unique designs…
You might notice that as the paper clip becomes covered in paint, it is harder to move with the magnet. It might be necessary to clean it off, or
replace it with a new paper clip…
Talk about why this happens.
How does the paint disrupt the magnetic force? What objects, other than a paper clip, could be used for this project?
Engage the children in dialogue as they are experimenting. Introduce them to some new scientific terms that they might be unfamiliar with, such as force, magnetism, and reaction.
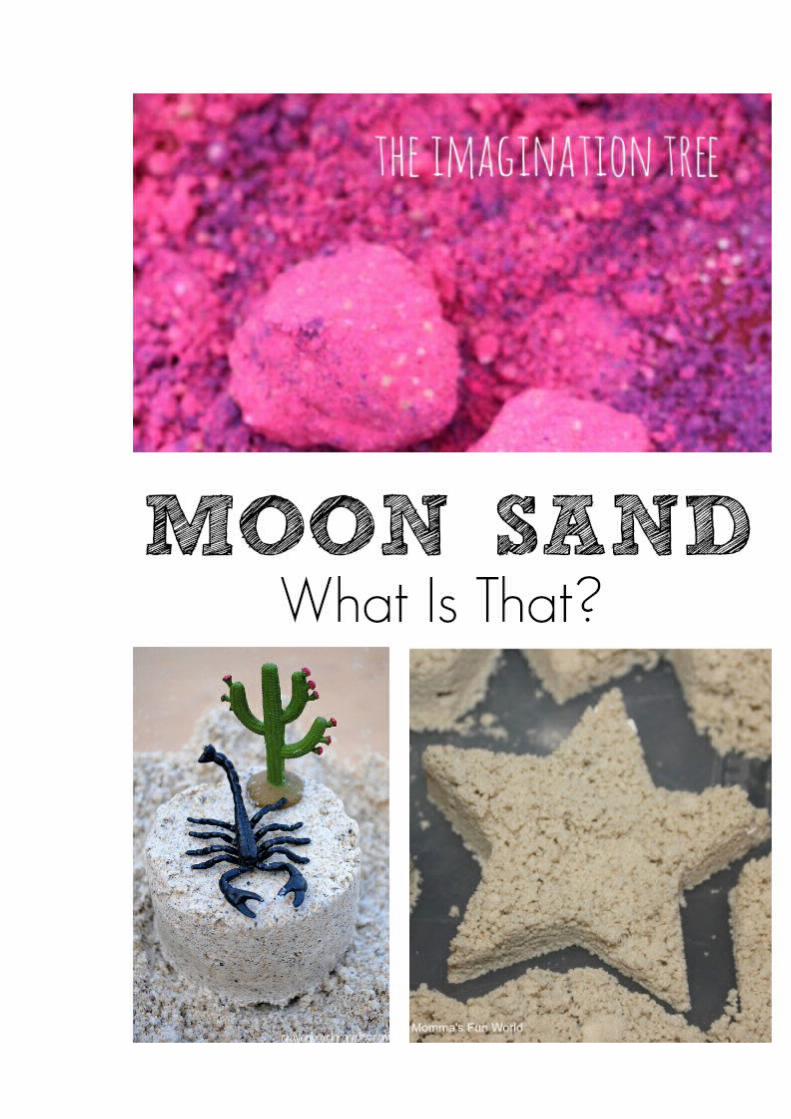
WHAT IS MOON SAND?
Simply put, Moon Sand is… 4 Ingredients.
Flour
Cornstarch
Oil
Sand
As you will read from my co-hosts, there are variations and differing opinions as to
what Moon Sandis and how it should react.
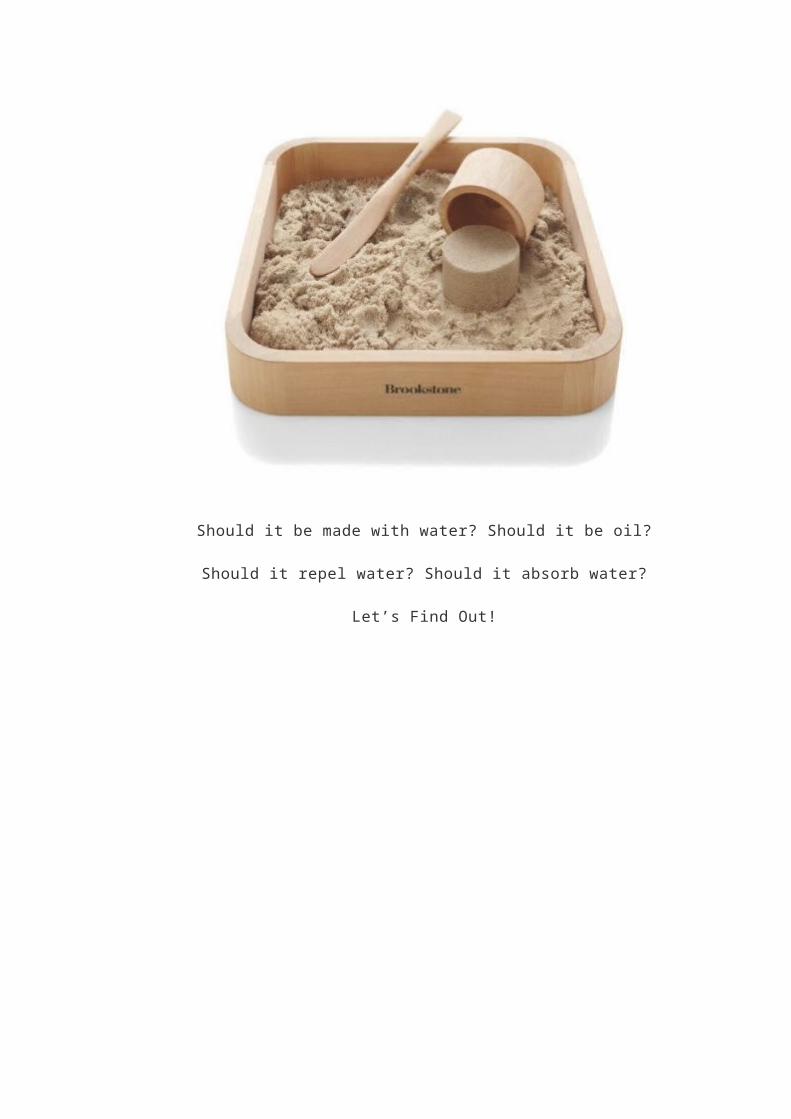
Should it be made with water? Should it be oil?
Should it repel water? Should it absorb water?
Let’s Find Out!
WHAT SHOULD MOON SAND LOOK LIKE?

According to my good friends at The Imagination Tree , Crayon Box
Chronicles and Mommas Fun World, you might describe Moon Sand as:
Moldable
Squooshable
and Never Drying
If you click through to their recipes you will see that they both differ slightly and even
they don’t all agree on the liquid ingredients. So we set out to figure out the
best Moon Sand Recipe!
WHAT EXPERIMENT DID WE DO WITH MOON SAND?
When we started our explorations with Moon Sand, we had every intention to
compare store bought Moon Sand to our very own Homemade recipe. However, we
love science so much that we wanted to test the properties of the main ingredient
(Sand) before making our own.
We researched moon sand science and were amazed to learn that there are so many
cool and fun experiments that can be done with Moon Sand.
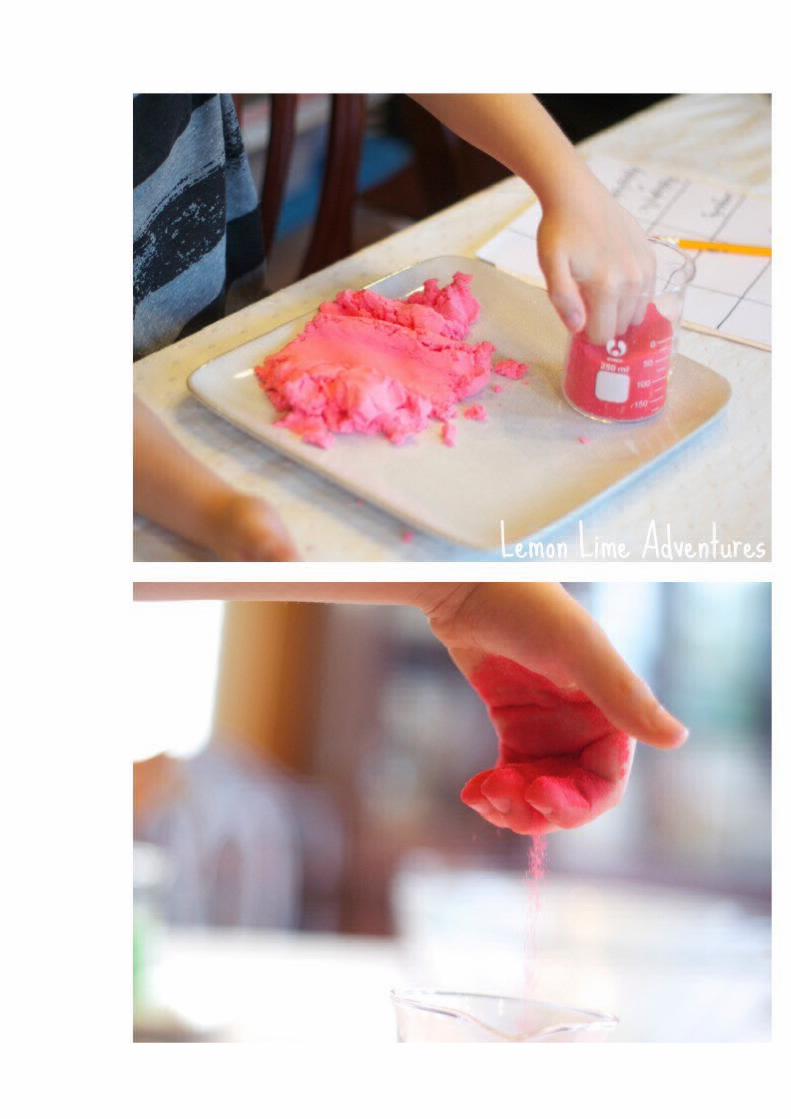
We started by comparing the properties of Play Sand vs. Store Bought Moon Sand.
Each boy was given the same amount of each material and they were left to feel,
smell, manipulate and describe the properties.

Both boys wrote down their observations as they squeezed, poured, and attempted to
mold each material.
They immediately noticed the differences. While we wrote our observations on
recycled paper, I have made a Comparing Properties Printable for you to use.
After learning about what it means for a material to be hydrophyllic or hydrophobic, it
was time to test our sands.
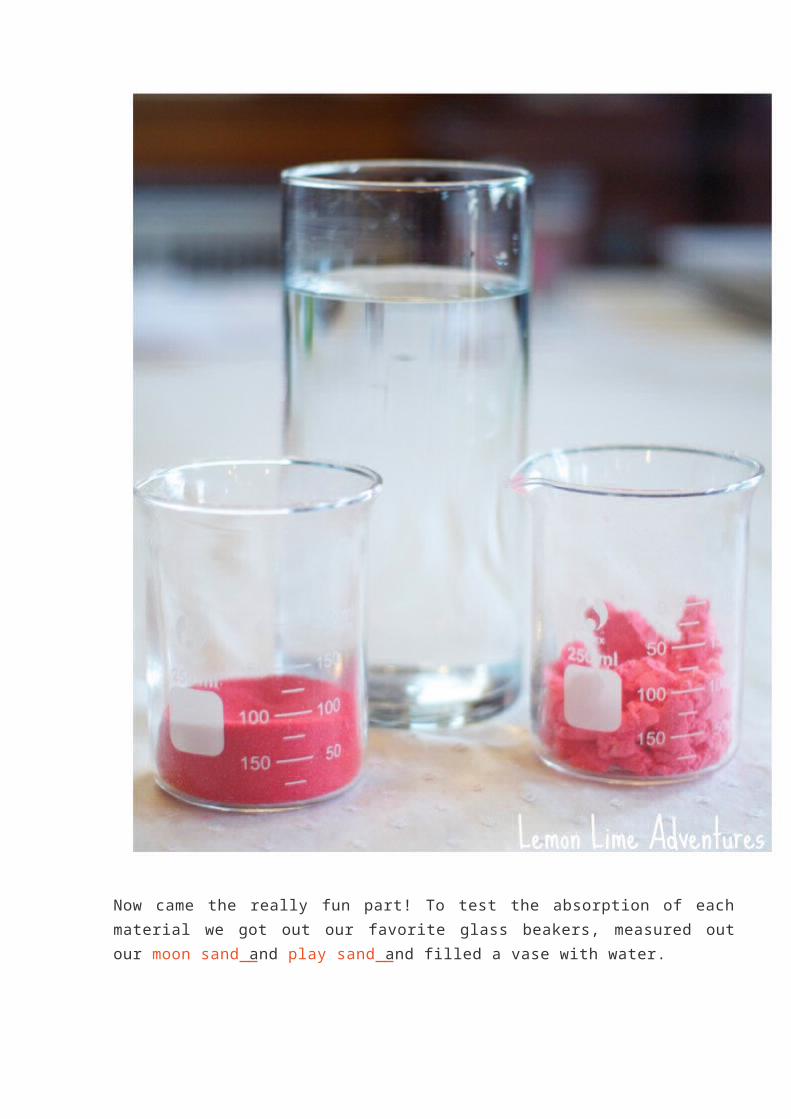
Now came the really fun part! To test the absorption of each material we got out our
favorite glass beakers, measured out our moon sand and play sand and filled a vase
with water.

Before we began, the boys made predictions for each material and recorded their
thoughts. I have made a Simple Prediction and Observation Printable for you to use,
if you want.

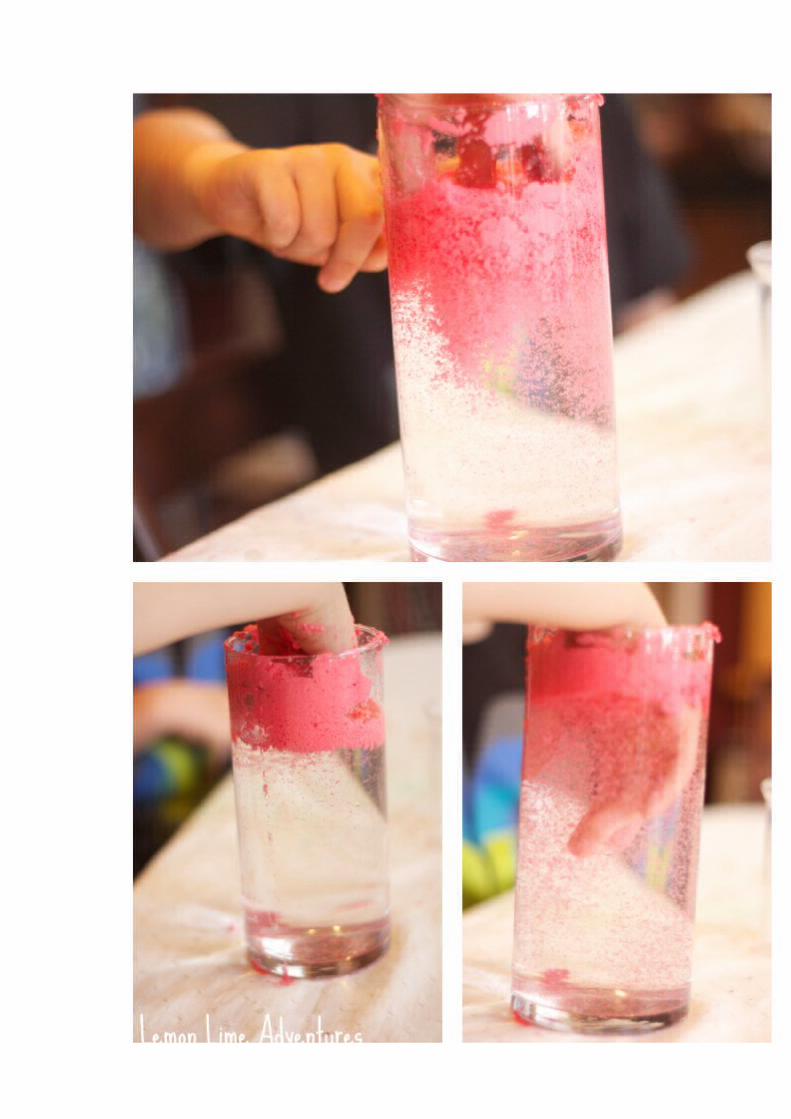
We started by adding the Moon Sand into the water. Immediately the boys noticed
that it didn’t mix with the water. They were determined to get it to mix and sink.
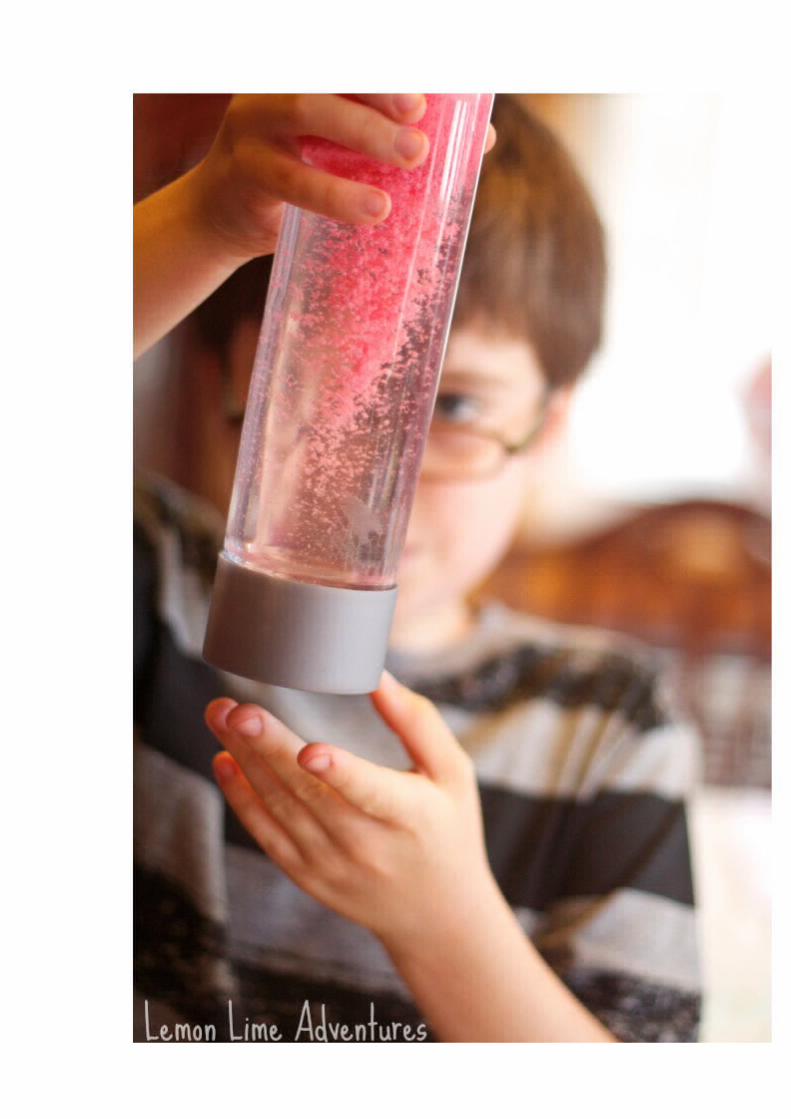
So we put it in one of our favorite bottles we use for sensory bottles, and WOAH!
AMAZEMENT!
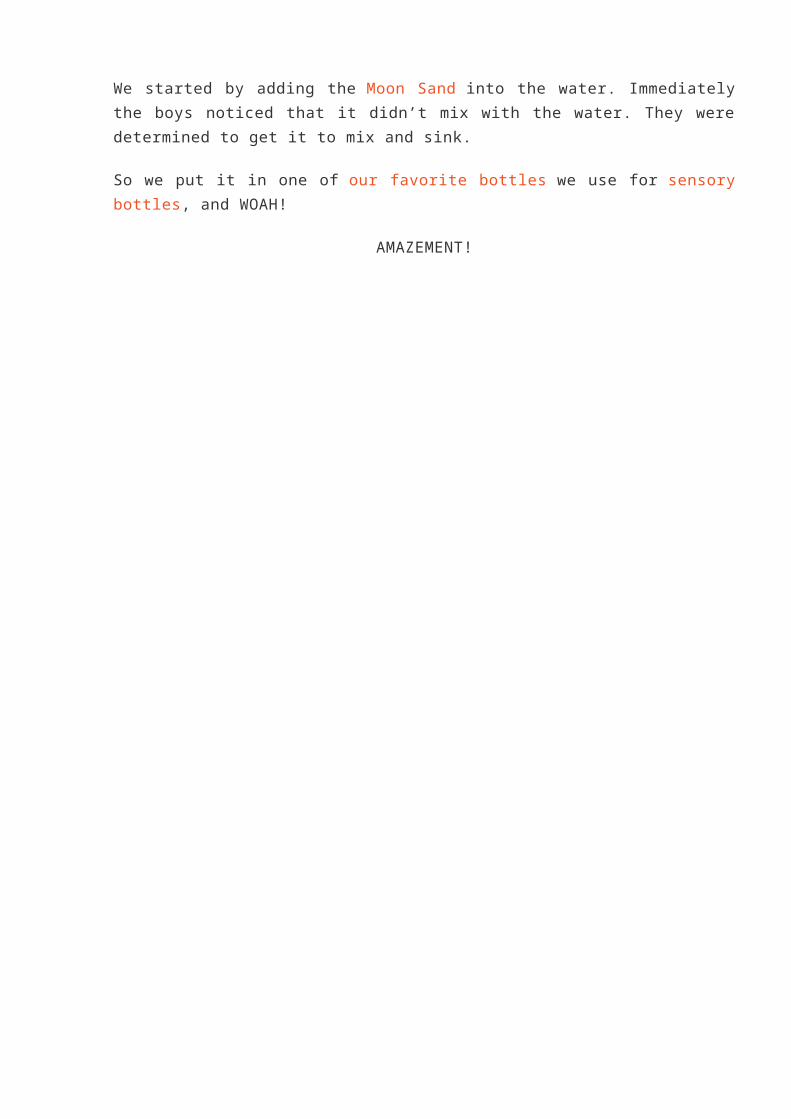
( We will leave the sensory bottles for another post and attempt to stay on track, but
you can see why we got so distracted)
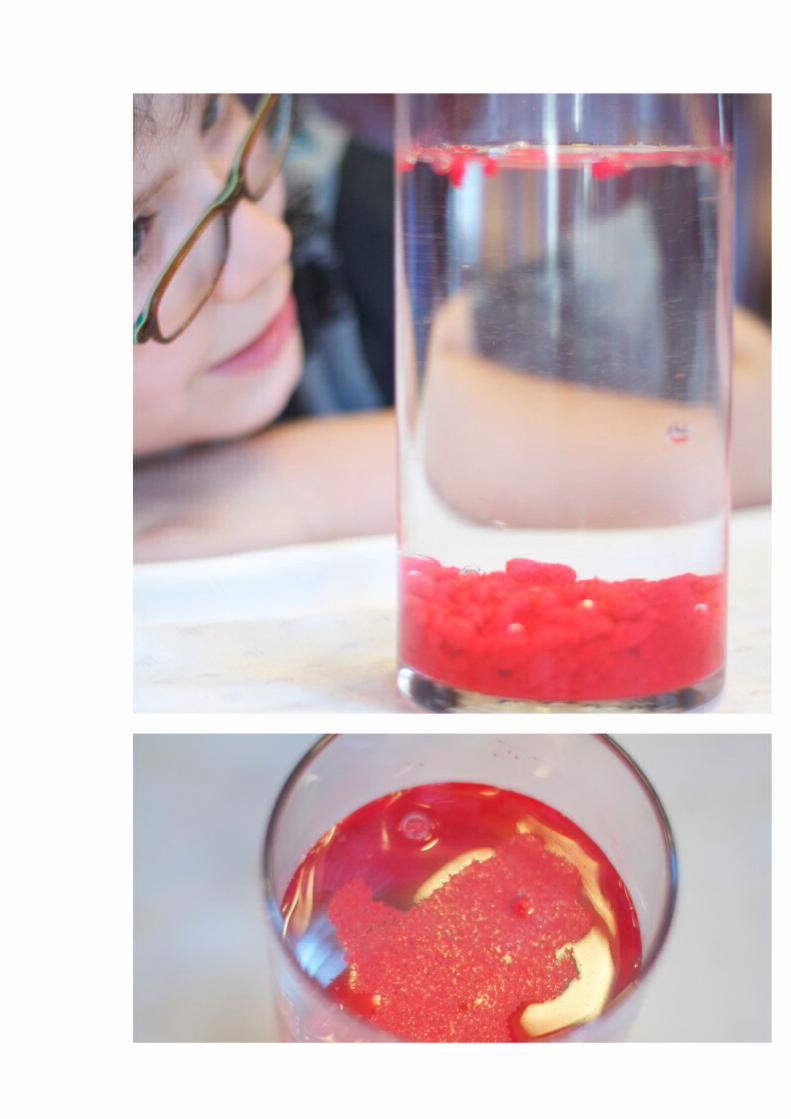
Next, it was time for the play sand. We poured it in and watched for the reaction. The
boys sat in awe as it repelled the water and formed the COOLEST formation in the
bottom of the vase.

I think they watch the bubbles rise and fall for at least 20 minutes before finally
transferring the sand to a bottle to compare it to the moon sand sensory bottle.
WERE WE SUCCESSFUL AT MAKING MOON SAND?
Ha. As you can see, we didn’t even get to making the Moon Sand. We spent well
over an hour doing this experiment alone.
Not to mention the time we spent exploring and comparing the density of moon sand
vs. play sand.
Next on our lesson plans, Make Homemade Moon Sand! You better believe we will
be comparing it in a sensory jar as well!
Until then, You have to check out all of my friends that are trying out Moon Sand, too