baby mocassin boots - whistleandivy.com · work 3 sc in 2nd ch from hook, sc in next 4 ch, hdc in...
TRANSCRIPT
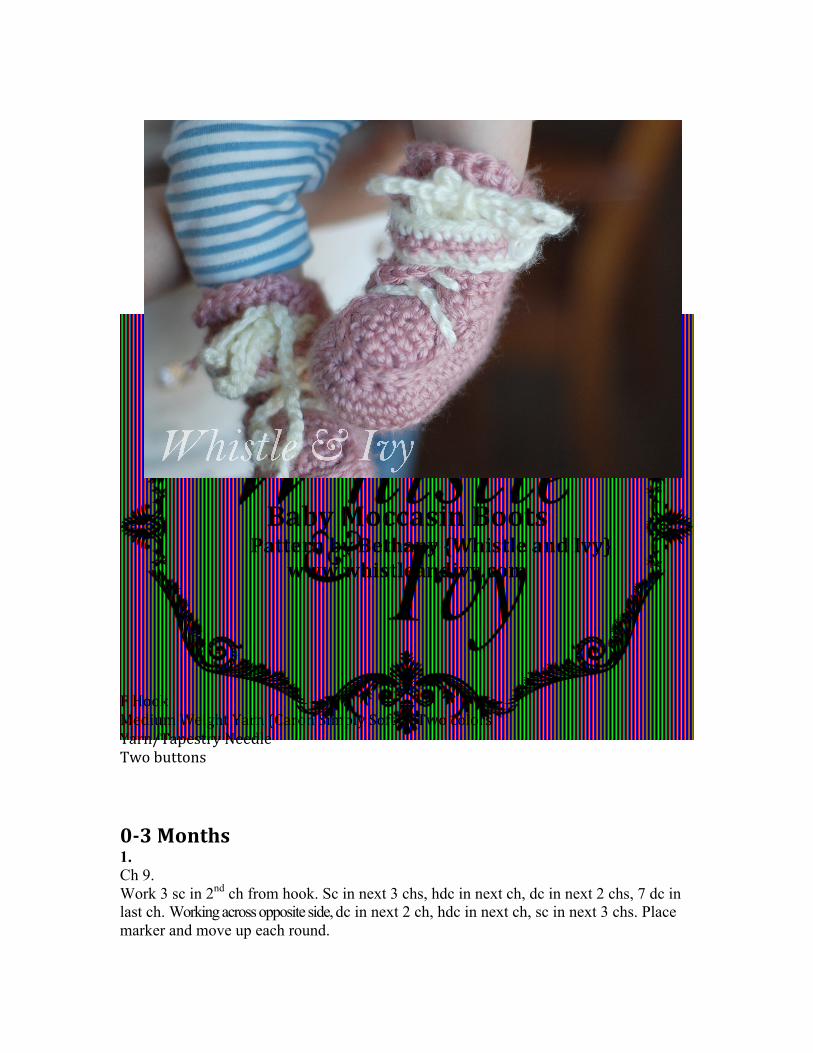
Baby Moccasin Boots Pattern by Bethany {Whistle and Ivy}
www.whistleandivy.com
F Hook Medium Weight Yarn (Caron Simply Soft) – Two colors Yarn/Tapestry Needle Two buttons 0-‐3 Months 1. Ch 9. Work 3 sc in 2nd ch from hook. Sc in next 3 chs, hdc in next ch, dc in next 2 chs, 7 dc in last ch. Working across opposite side, dc in next 2 ch, hdc in next ch, sc in next 3 chs. Place marker and move up each round.
2. Beginning in the top of the first sc of previous round, 2 sc in the next 3 st. Sc 7. 2 sc in next 5 sts. Sc 7. 3. (Sc 1, 2 sc in next st) 3 times. Sc 7. (Sc 1, 2 sc in next st) 5 times. Sc 7. 4. Work this round through back loops only: Sc 38. 5. Sc 38. 6. Sc 17. Sc2tog 7 times. Sc 7. 7. Starting the heel (where you left off at the end of the last round). You will be going back and forth, turning after each row to build the tall heel, and no longer around the whole shoe. Sc 15. Turn. 8. Ch 1. Sc2tog. Sc 16. Sc2tog. Turn. 9. Ch 1. Sc in same st. Sc 17. Turn. 10. Ch 1 . Sc2tog. Sc 14. Sc2tog. Turn. 11. – 18. Ch 1. Sc in same st. Sc 15. Turn Don’t tie off. 19. Sc in same st, down the side of the heel, SL ST across the toe ,and SC up the other side of the boot. Tie off. Toe Flap*
ch 3. 1. Work 2 sc in 2nd ch from hook. Sc 2 in last st. Turn 2. Ch 1. Sc 2 in same st. sc 2. Sc 2 in last st. 3. -‐8. Ch 1. Sc in same st. sc 5. 9. Ch 1. Sc 2 in same st. sc 4. Sc 2 in last st. Turn 10. – 19. Ch 1. Sc in same st. sc 7. Tie off. Using a yarn needle, begin sewing your tongue in place where the flap gets wider, to where the shoe begins to slope up into the heel. Sew it little low on the side, so the side can hang over the flap a little bit. See Photo 1. Make sure to sew down from the top, to the top of the flap, instead of end to end. See Photo 2. Straps: (Make 2, one for each shoe) 1. Ch 12. Sc into 4th st from hook. Sc 8. Turn. Tie off, leave your tail long. 2. Start second color with a sl st. Ch1. Sc in same st. Sc 8. Sc 4 in same 4 ch loop. Sc 8. Attach the strap by pulling through your 4 tails, and tying to together in a firm knot. See photos 3 and 4. Laces: (Make 2, one for each shoe) Make a ch about 23” long. Pull through the sides with your hook and lace up.d 3-6 Months 1.
Ch 11. Work 3 sc in 2nd ch from hook, sc in next 4 ch, hdc in next ch, dcin next 3 ch, 7 dc in last ch. Working across opposite side ,dc in next 3 ch, hdc in next ch, sc in next 4 ch . 2. Beginning in the top of the first sc of previous round, 2 sc in next 3 st sc in next 9 sts, 2 sc in next 5 sts, sc in next 9 sts. 3. {Sc in next st, 2 sc in next st} 3 times, sc in next 9 sts, {sc in nextst, 2 sc in next st} 5 times, sc in next 9 sts. 4. Work this round through back loops only: Sc 42. 5. Sc 42. 6. Sc 19. Sc2tog 7 times. Sc 9. 7. Continue where you left off at the end of the last round). You will be going back and forth, turning after each row to build the tall heel, and no longer around the whole shoe. Sc 15. Turn. 8. Ch 1. Sc2tog. Sc 16. Sc2tog. Turn. 9. Ch 1. Sc in same st. Sc 17. Turn. 10. Ch 1 . sc2tog. Sc 14 . Sc2tog. Turn. 11.-‐19. Ch 1. Sc in same st. sc 15. Turn Don’t tie off. 20. Sc down the side of the heel, SL ST across the toe ,and SC up the other side of the boot. Tie off.

Toe Flap* Ch 3. 1. Work 2 sc in 2nd ch from hook. Sc 2 in last st. Turn 2. Ch 1. Sc 2 in same st. sc 2. Sc 2 in last st. 3. -‐11. Ch 1. Sc in same st. sc 5. 12. Ch 1. Sc 2 in same st. sc 4. Sc 2 in last st. Turn 13. – 22. Ch 1. Sc in same st. sc 7. Tie off. Using a yarn needle, begin sewing your tongue in place where the flap gets wider on the flap, to where the shoe begins to slope up into the heel. Sew it little low on the side, so the side can hang over the flap a little bit. See Photo 1. Make sure to sew down from the top, to the top of the flap, instead of end to end. See Photo 2. Straps: (Make 2, one for each shoe) 1. Ch 13. Sc into 4th st from hook. Sc 9. Turn. 2. Ch1. Sc in same st. Sc 9. Sc 4 in the 4 ch loop. Sc 9. Attach the strap by pulling through your 4 tails, and tying to together in a firm knot. See photos 3 and 4. Laces: (Make 2, one for each shoe) Make a chain about 25” long. Pull through the sides with your hook and lace up. 6-9 months
1. Ch 13. Work 3 sc in 2nd ch from hook, sc in next 5 chs, hdc in next ch, dc in next 4 chs, 7 dc in last ch. Working across opposite side , dc in next 4 chs, hdc in next ch, sc in next 5 chs . Place marker, and move up each round. 2. Beginning in the top of the first sc of previous round, 2 sc in next 3 sts. Sc 11. 2 sc in next 5 sts. Sc 11. 3. (1 Sc in next st, 2 sc in next st) 3 times. Sc 11. (1 sc in next st, 2 sc in next st) 5 times. Sc 11. 4. Work this round through back loops only: Sc 46. 5. Sc 46. 6. Sc 21. Sc2tog 7 times. Sc 11. 7. Continue where you left off at the end of the last round) . You will be going back and forth, turning after each row to build the tall heel, and no longer around the whole shoe. Sc 16. Turn. 8. Ch 1. Sc2tog. Sc 18. Sc2tog. Turn. 9. Ch 1. Sc in same st. Sc 19. Turn. 10. Ch 1 . Sc2tog. Sc 16 . Sc2tog. Turn. 11.-‐20. Ch 1. Sc in same st. Sc 17. Turn Don’t tie off.
21. Sc down the side of the heel, SL ST across the toe ,and SC up the other side of the boot. Tie off. Toe Flap* Ch 3. 1. Work 2 sc in 2nd ch from hook. Sc 2 in last st. Turn 2. Ch 1. Sc 2 in same st. sc 2. Sc 2 in last st. 3. -‐11. Ch 1. Sc in same st. sc 5. 12. Ch 1. Sc 2 in same st. sc 4. Sc 2 in last st. Turn 13. – 23. Ch 1. Sc in same st. sc 7. Tie off. Using a yarn needle, begin sewing your tongue in place where the flap gets wider on the flap, to where the shoe begins to slope up into the heel. Sew it little low on the side, so the side can hang over the flap a little bit. See Photo 1. Make sure to sew down from the top, to the top of the flap, instead of end to end. See Photo 2. Straps: (Make 2, one for each shoe) 1. Ch 14. Sc into 4th st from hook. Sc 10. Turn. 2. Ch1. Sc in same st. Sc 10. Sc 4 in the 4 ch loop. Sc 10. Attach the strap by pulling through your 4 tails, and tying to together in a firm knot. See photos 3 and 4. Laces: (Make 2, one for each shoe) Make a ch about 27” long. Pull through the sides with your hook and lace up.
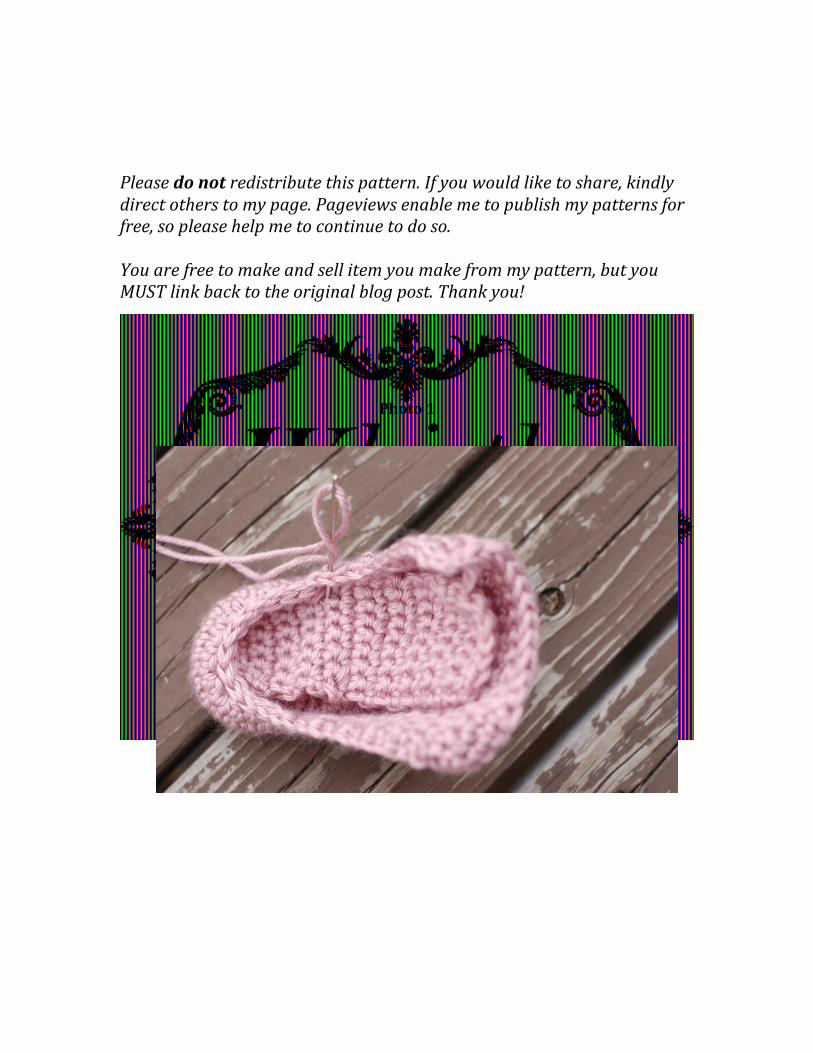
Please do not redistribute this pattern. If you would like to share, kindly direct others to my page. Pageviews enable me to publish my patterns for free, so please help me to continue to do so. You are free to make and sell item you make from my pattern, but you MUST link back to the original blog post. Thank you!
Photo 1
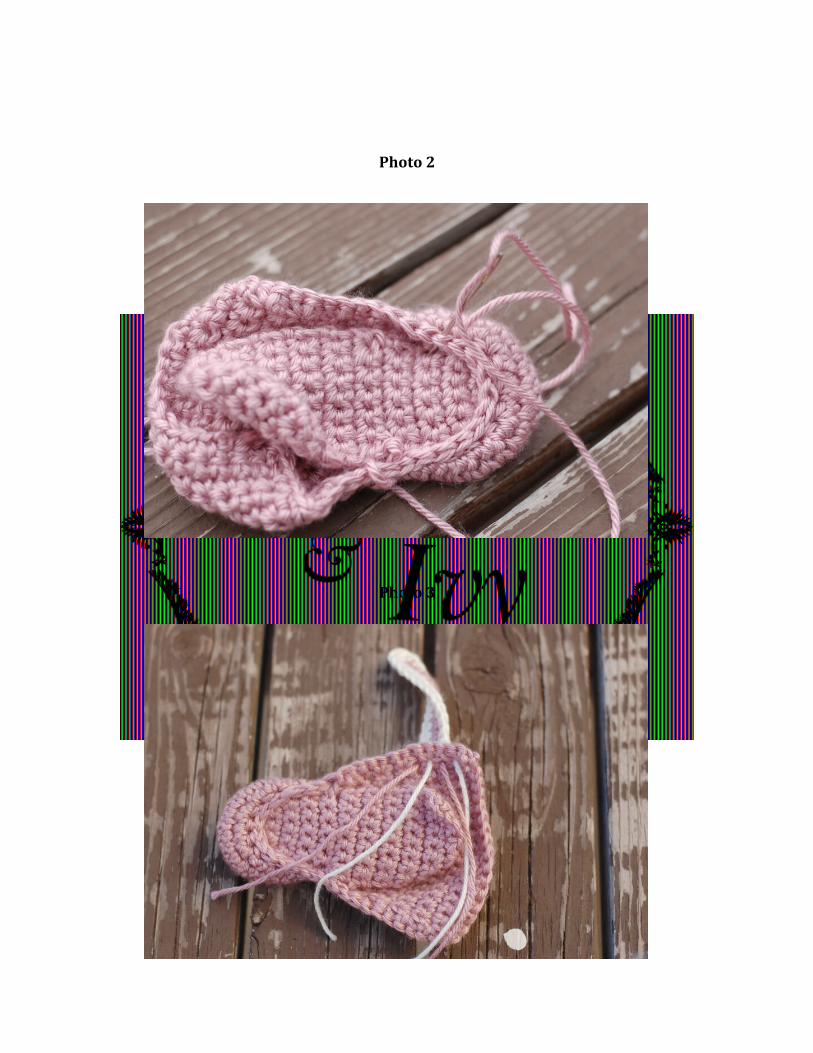
Photo 2
Photo 3

Photo 4