avepoint online services user...
TRANSCRIPT

AvePoint Online Services 2
User Guide
Service Pack 10
Issued October 2017

2
AvePoint Online Services
Table of Contents
What is New in this Release .......................................................................................................................... 6
About AvePoint Online Services ................................................................................................................... 9
AvePoint Online Services Versions: Commercial and U.S. Government Public Sector ............................. 9
Submitting Documentation Feedback to AvePoint .................................................................................... 10
Browser Support Information ..................................................................................................................... 11
30-Day Free Trial ......................................................................................................................................... 12
Selecting Services .................................................................................................................................... 12
Signing Up for AvePoint Online Services ................................................................................................. 12
Signing into AvePoint Online Services ........................................................................................................ 14
Signing in with an Office 365 Account .................................................................................................... 14
Signing in with a Salesforce Account ...................................................................................................... 15
Signing in with an AvePoint Online Services Local Account ................................................................... 15
Resetting Your AvePoint Online Services Password ............................................................................... 15
Required Permissions ................................................................................................................................. 17
Permissions for App Authorization ......................................................................................................... 17
Permissions for Dynamic Object Registration......................................................................................... 18
Getting Started ............................................................................................................................................ 20
Starting Up AvePoint Online Services ......................................................................................................... 24
Obtaining a Full License .......................................................................................................................... 24
Starting the Trial on the Home Page ....................................................................................................... 24
AvePoint Cloud Backup Trial ............................................................................................................... 25
AvePoint Cloud Management Trial ..................................................................................................... 25
AvePoint Cloud Archiving Trial ............................................................................................................ 25
Governance Automation Online Trial ................................................................................................. 25
File Share Navigator Online Trial......................................................................................................... 26
AvePoint Cloud Backup for Salesforce® Trial ...................................................................................... 26
AvePoint Cloud Insights Trial .............................................................................................................. 26
AvePoint Cloud Records Trial .............................................................................................................. 27
Obtaining a License for Classic DocAve Backup ...................................................................................... 27

3
AvePoint Online Services
AvePoint Online Services User Roles .......................................................................................................... 28
Managing App Profiles ................................................................................................................................ 30
Creating App Profiles .............................................................................................................................. 31
Creating Applications in Azure Government ...................................................................................... 31
Creating an App Profile for Office 365 ................................................................................................ 34
Creating an App Profile for Yammer ................................................................................................... 35
Creating an App Profile for Microsoft Azure AD ................................................................................. 35
Creating an App Profile for Salesforce ................................................................................................ 36
Creating an App Profile for Salesforce Sandbox ................................................................................. 37
Searching for Existing App Profiles ......................................................................................................... 37
Re-authorizing AvePoint Online Services Administration App ............................................................... 38
Re-authorizing the App for Office 365 ................................................................................................ 38
Re-authorizing the App for Salesforce ................................................................................................ 39
Re-authorizing App for Salesforce Sandbox ........................................................................................ 39
Re-authorizing the AOS Administration App .......................................................................................... 40
Re-authorizing the AvePoint Online Services Administration for Azure App ......................................... 40
Editing Admin Center URL in an App Profile for Office 365 .................................................................... 41
Deleting App Profiles .............................................................................................................................. 41
Managing AvePoint Online Services Users ................................................................................................. 42
Adding Users ........................................................................................................................................... 43
Creating the Office 365 Account Sign-in Authorization Application in Azure Government ............... 46
Searching for Existing Users .................................................................................................................... 47
Editing a User’s Permissions ................................................................................................................... 47
Editing Multiple Users’ Permissions ........................................................................................................ 47
Deactivating User Accounts .................................................................................................................... 48
Activating User Accounts ........................................................................................................................ 48
Unlocking User Accounts ........................................................................................................................ 48
Deleting Users ......................................................................................................................................... 49
Managing Office 365 Service Account Profiles ........................................................................................... 50
Creating a Service Account Profile .......................................................................................................... 50
Searching for Existing Service Account Profiles ...................................................................................... 51
Editing a Service Account Profile ............................................................................................................ 51

4
AvePoint Online Services
Deleting Service Account Profiles ........................................................................................................... 51
Managing Account Pool .............................................................................................................................. 52
Managing Encryption Profiles ..................................................................................................................... 53
Preparations ............................................................................................................................................ 53
Creating an Encryption Profile ................................................................................................................ 54
Applying an Encryption Profile ................................................................................................................ 54
Searching for Existing Encryption Profiles .............................................................................................. 54
Editing an Encryption Profile .................................................................................................................. 54
Deleting Encryption Profiles ................................................................................................................... 55
Managing Dynamic Object Registration ..................................................................................................... 56
Creating a Dynamic Object Registration Profile...................................................................................... 57
Advanced Mode .................................................................................................................................. 59
Editing a Dynamic Object Registration Profile ........................................................................................ 60
Deleting Dynamic Object Registration Profiles ....................................................................................... 61
Viewing Scan History ............................................................................................................................... 61
Viewing Dynamic Object Registration Settings ....................................................................................... 61
Managing Rules ....................................................................................................................................... 62
Managing Containers .............................................................................................................................. 62
Importing Objects in Batch ................................................................................................................. 63
Viewing License Information....................................................................................................................... 65
Managing Promotional Codes ..................................................................................................................... 66
Applying a Promotional Code ................................................................................................................. 66
Searching for Existing Promotional Codes .............................................................................................. 66
Viewing Transaction History ....................................................................................................................... 67
Managing Subscriptions .............................................................................................................................. 68
Cancelling a Subscription ........................................................................................................................ 68
Viewing Invoices ..................................................................................................................................... 69
Viewing and Editing Credit Card Information ......................................................................................... 69
Viewing and Editing Billing Address ........................................................................................................ 69
Enabling Report Data Collection ................................................................................................................. 70
Exporting the User Activity Report ............................................................................................................. 72
Configuring Advanced Settings ................................................................................................................... 73

5
AvePoint Online Services
Enabling Integration with SCOM ............................................................................................................. 73
Enabling Trusted IP Address Settings ...................................................................................................... 73
Viewing Notifications .................................................................................................................................. 75
Submitting Feedback .................................................................................................................................. 77
Managing Your Profile Information ............................................................................................................ 78
Appendix A: Supported Criteria in Dynamic Object Registration Rules...................................................... 79
Exchange Online Mailbox ........................................................................................................................ 79
OneDrive for Business ............................................................................................................................. 81
SharePoint Online Site Collection ........................................................................................................... 83
Office 365 Group ..................................................................................................................................... 84
Project Online Site Collection ................................................................................................................. 86
Exchange Online Public Folder ................................................................................................................ 87
Appendix B: Objects Supported by Dynamic Object Registration .............................................................. 88
Appendix C: Creating a Key Vault in Azure ................................................................................................. 91
Appendix D: Password Limitations and Requirements of Office 365 Accounts ......................................... 93
Notices and Copyright Information ............................................................................................................ 94

6
AvePoint Online Services
What is New in this Release • Dynamic Object Registration now supports scanning Exchange Online public folders if
your tenant has a license for AvePoint Cloud Backup – Exchange Online Public Folder.
Figure 1: Support for Exchange Online public folder.
• Dynamic Object Registration advanced mode now supports scanning all objects of the same type and placing them in one custom container without any dynamic rules.
Figure 2: Scanning all objects and placing them in one container.

7 AvePoint Online Services
• Support for trusted IP addresses or IP address range.
Figure 3: Support for trusted IP addresses or ranges
• Dynamic rules now support the Job Title criterion for scanning Exchange Onlinemailboxes and OneDrive for Business.
• Dynamic rules now support the Created from criterion for scanning Office 365 groupsthat are created from Microsoft Teams.
This criterion is only available when a service account profile is selected as theauthentication method in the dynamic object registration profile.
• The Manage Containers functionality now supports viewing details of each customcontainer.
• You can add Office 365 users as AvePoint Online Services users as long as you have anOffice 365 service account profile configured. The app profile is not required for addingOffice 365 users any more.
• Renamed the DocAve Backup for Salesforce® service to AvePoint Cloud Backup forSalesforce®.
For more information, refer to the Release Notes.
The following updates have been made to this user guide for this release:
• Updated the Getting Started section.
• Updated the Managing Dynamic Object Registration section.
• Updated the Managing Containers section.
• Updated the Adding Users section.
• Added the Enabling Trusted IP Address Settings section.
8
AvePoint Online Services
• In Appendix A: Supported Criteria in Dynamic Object Registration Rules:
o Added the Exchange Online Public Folder section.
o Updated the Exchange Online Mailbox, OneDrive for Business, and Office 365 Group sections
• Updated Appendix B: Objects Supported by Dynamic Object Registration.
• Added Appendix D: Password Limitations and Requirements of Office 365 Accounts.

9
AvePoint Online Services
About AvePoint Online Services AvePoint Online Services is a central hub for the following AvePoint online services:
• AvePoint Cloud Backup
• AvePoint Cloud Management
• AvePoint Cloud Archiving
• Governance Automation Online
• File Share Navigator Online
• AvePoint Cloud Backup for Salesforce®
• AvePoint Cloud Insights
• AvePoint Cloud Records
• App: AvePoint Permissions Manager (Preview)
User management for each online service and licensing for each online service (excluding apps) are accessible from the same AvePoint Online Services account.
AvePoint Online Services supports the following languages: English, Japanese, and French.
AvePoint Online Services Versions: Commercial and U.S. Government Public Sector There are two versions of AvePoint Online Services: a version for Commercial use, and a version available on Microsoft’s Cloud Platform for U.S. Government. The U.S. Government Public Sector version of AvePoint Online Services offers most of the same functionality as the Commercial version. Both versions are covered in this guide. Compared to the Commercial version, the U.S. Government Public Sector version:
• Sign-in page URL is: https://usgov.avepointonlineservices.com.
• Does not support the Transaction History function.
• Does not support the Subscription Management function.
• Requires the manual application creation for Office 365 and Microsoft Azure AD app profiles if your tenant uses the Active Directory in Microsoft Azure Government.
• Requires the manual creation for Office 365 account sign-in authorization application if your tenant uses the Active Directory in Microsoft Azure Government.
There are feature differences between the U.S. Government Public Sector version and the Commercial version of the online services. The feature differences are covered in each online product’s user guide.

10
AvePoint Online Services
Submitting Documentation Feedback to AvePoint AvePoint encourages customers to provide feedback regarding our product documentation. You can Submit Your Feedback on our website.

11
AvePoint Online Services
Browser Support Information The following table provides the required browser versions.
Browser Version Internet Explorer IE 11 Google Chrome The latest version Mozilla Firefox The latest version Safari The latest version Microsoft Edge The latest version

12
AvePoint Online Services
30-Day Free Trial AvePoint Online Services provides new users with a 30-day trial license for each online service.
Refer to the sections below to start the trial.
Selecting Services Choose one of the following methods to select services:
• On AvePoint Online Services landing page, click Try Free for 30 Days.
On the Services page, the following services are displayed under the Office 365 Services tab:
o AvePoint Cloud Backup
o AvePoint Cloud Management
o AvePoint Cloud Archiving
o Governance Automation Online
o File Share Navigator Online
o AvePoint Cloud Insights
o AvePoint Cloud Records
AvePoint Cloud Backup for Salesforce® is displayed under the Salesforce Services tabs.
Select the Add Free Trial to Cart checkboxes for your desired services. Then, click Start Trial. The Sign Up to Get Started page appears.
• On the AvePoint Online Services landing page, you can click Learn More under each online service’s introduction paragraph to view more detailed product introduction in a pop-up window. When viewing the service introduction, click Start Free Trial Now to start the trial of this service. The Sign Up to Get Started page appears.
Then, refer to Signing Up for AvePoint Online Services to proceed.
Signing Up for AvePoint Online Services On the Sign Up to Get Started page, complete the following fields in the form:
• First Name
• Last Name
• Corporate E-mail Address
• Password
13
AvePoint Online Services
• Confirm Password
• Organization Name
• Industry
• Title
• Country Code
• State or Province
*Note: This field only appears when your country code is United States (+1).
• Work Phone Number
• Data Center
*Note: Select the closest data center to your location. All of the data centers displayed are Microsoft-owned and operated Azure data centers. After the signup is finished, you cannot change the data center.
• Security Verification – Enter the displayed verification code in the text box. Click Refresh to refresh the verification code if there is no image.
Then, click Sign Up Now. Upon signing up, a confirmation e-mail is sent to your corporate e-mail address. Once you receive the e-mail, click the supplied link to activate your account.

14
AvePoint Online Services
Signing into AvePoint Online Services AvePoint provides the following entries to sign into AvePoint Online Services:
• Sign into AvePoint Online Services through https://www.avepointonlineservices.com.
• Visit the AvePoint Online Services, DocAve Online, DocAve Governance Automation Online, File Share Navigator Online, AvePoint Cloud Backup for Salesforce®, AvePoint Cloud Insights, or AvePoint Cloud Records page on the AvePoint website.
• To sign into AvePoint Online Services for U.S. Government Public Sector, access the following URL: https://usgov.avepointonlineservices.com.
If you are on the AvePoint website, click Sign In to go to the AvePoint Online Services sign-in page.
On the AvePoint Online Services landing page, click Sign In on the upper-right corner. Then choose one of the following sign-in methods:
• Signing in with an Office 365 Account
• Signing in with a Salesforce Account
• Signing in with an AvePoint Online Services Local Account
Signing in with an Office 365 Account To sign in with an Office 365 account, complete the following steps:
On the sign-in page, click Sign In with Office 365.
*Note: If you are using the Office 365 account to sign into another app on the same browser, you will be automatically signed into AvePoint Online Services.
On the Office 365 authentication page, enter an existing Office 365 account and the password.
Click Sign In.
If it is the first time that this Office 365 account is signing into AvePoint Online Services, the permissions required for AvePoint Online Services are displayed. Review the permissions and click Accept. The AvePoint Online Services app is generated in My apps on Office 365. Click the app to access AvePoint Online Services within Office 365. The app will remember your credentials when you sign in through it.
The AvePoint Online Services homepage appears.
*Note: If your Office 365 account does not exist but your tenant exists in AvePoint Online Services, the Join AvePoint Online Services page will appear. If you would like to request to join the existing tenant, you can contact Service Administrator to invite you to AvePoint Online Services.
15
AvePoint Online Services
Signing in with a Salesforce Account To sign in with a Salesforce account, complete the following steps:
On the sign-in page, click Sign In with Salesforce.
*Note: If you are using the Salesforce account to sign into another app on the same browser, you will be automatically signed into AvePoint Online Services.
On the Salesforce login page, enter an existing Salesforce account and the password.
Click Sign In.
If it is the first time that this Salesforce account is signing into AvePoint Online Services, the permissions required for AvePoint Online Services are displayed. Review the permissions and click Allow. The AvePoint Online Services app is generated in Connected Apps on Salesforce. The app will remember your credentials when you login through it.
The AvePoint Online Services homepage appears.
*Note: If your Salesforce account does not exist but your tenant exists in AvePoint Online Services, the Join AvePoint Online Services page will appear. If you would like to request to add the existing tenant, you can contact your Service Administrator to invite you to AvePoint Online Services.
Signing in with an AvePoint Online Services Local Account To sign in with an AvePoint Online Services local account, complete the following steps:
On the sign-in page, enter your login information:
a. Login ID – Enter the e-mail address used as your AvePoint Online Services local account.
b. Password – Enter your password.
*Note: If the password is entered incorrectly three consecutive times, your account will be locked. After an hour, it will automatically unlock. You can also refer to the instructions in Resetting Your AvePoint Online Services Password to retrieve and reset your password.
Click Sign In to access AvePoint Online Services homepage.
Resetting Your AvePoint Online Services Password You can reset your AvePoint Online Services password by completing the following steps:
*Note: You can only reset passwords for local users. For more information about user types, refer to Adding Users.
Navigate to the AvePoint Online Services sign-in page.

16
AvePoint Online Services
Click the Forgot Password link above the Sign In button.
Enter the following information on the Forget Password page:
a. User ID – Enter the e-mail address used as your AvePoint Online Services user ID.
b. Verification Code – Enter the verification code. Click Refresh to refresh the verification graphic if no image is displayed.
Click Submit to set a new password. After submitting, a verification e-mail is sent to the e-mail you specified. Retrieve the e-mail message and click the supplied link to set a new password. After clicking the link, you will be redirected to the Reset Your Password page. Enter the following information on this page:
a. New Password – Enter a new password that you want to use.
b. Confirm Password – Enter the new password again for confirmation.
c. Verification Code – Enter the verification code. Click Refresh to refresh the verification graphic if no image is displayed.
After setting up the new password, click Submit to save your new password, and then click OK in the pop-up window. You are redirected to the login page. Log into AvePoint Online Services with the new password.

17
AvePoint Online Services
Required Permissions Refer to the sections below for the required permissions for using AvePoint Online Services properly.
Permissions for App Authorization When you create an app profile for Office 365 or Microsoft Azure AD, the AvePoint Online Services Administration app or the AvePoint Online Services Administration for Azure app is automatically created. Note that the Office 365 account used to consent the app must have the Global Administrator role, which is a requirement from Microsoft. For details about this role, refer to the Microsoft Article About Office 365 admin roles.
The table below lists the permissions that should be accepted when you authorize the AvePoint Online Services Administration app.
Permission Permission Type Why we need it? Read user profiles All Permissions Retrieve the username and tenant ID of
the account that consents the app. Have full control of all site collections
All Permissions Retrieve information of SharePoint Online site collections that are scanned by Dynamic Object Registration.
SharePoint Online Permissions
Read user profiles All Permissions Retrieve information of Office 365 user profiles related to OneDrive for Business that are scanned by Dynamic Object Registration.
SharePoint Online Permissions
Read directory data All Permissions Support adding Office 365 users and groups as AvePoint Online Services users. Validate whether an app profile is expired.
SharePoint Online Permissions Exchange Online Permissions
Use Exchange Web Services with full access to all mailboxes
All Permissions Retrieve information of Exchange Online mailboxes and Office 365 group team sites that are scanned by Dynamic Object Registration.
Exchange Online Permissions
Read activity data for your organization
All Permissions Retrieve activity data in your organization to generate reports in AvePoint Cloud Insights.
Sign in and read user profile All Permissions Support signing into AvePoint Online Services with Office 365 accounts. SharePoint Online
Permissions Exchange Online Permissions
Access the directory as the signed-in user
All Permissions Retrieve information of a signed-in user.
Read all groups All Permissions

18
AvePoint Online Services
Permission Permission Type Why we need it? SharePoint Online Permissions
Scan Office 365 groups via Dynamic Object Registration.
Exchange Online Permissions
The table below lists the permissions that should be accepted when you authorize the AvePoint Online Services Administration for Azure app.
Permission Why we need it? Sign-in and read user profile Identity Manager uses it to retrieve tenant
display name, and display the name on the interface.
Read all users' basic profiles Identity Manager uses it to search for users and display them on the interface. Read all users' full profiles
Read all groups Identity Manager uses it to search for groups and display them on the interface. Read and write all groups
Read and write directory data Identity Manager uses it to manage license, users, roles, groups, and applications that can be accessed by users. Governance Automation Online uses it to manage Office 365 users and groups.
Access directory as the signed-in user Identity Manager uses it to manage license, users, roles, groups, and applications that can be accessed by users.
Read directory data Identity Manager uses it to search for license, users, roles, groups, and applications.
Read and write devices Identity Manager uses it to retrieve user information.
Read and write files in all site collections (preview)
Governance Automation Online uses it to retrieve the URLs of Office 365 group team sites.
Permissions for Dynamic Object Registration To register objects via the Dynamic Object Registration functionality, the following permissions are required:
• To scan the following types of objects, the account configured in the Office 365 service account profile must have the SharePoint Administrator role. For details about this role, refer to the Microsoft article About the SharePoint Online admin role.
o SharePoint Online site collections
o OneDrive for Business
19
AvePoint Online Services
• To scan the following types of objects, the account configured in the Office 365 app profile or Office 365 service account profile must have the Exchange Administrator role. For details about this role, refer to the Microsoft article About the Exchange Online admin role.
o Exchange Online mailboxes
o Office 365 groups (group mailboxes only)
• To scan the following type of objects, the account configured in the Office 365 service account profile must have both the Exchange Administrator role and the SharePoint Administrator role. For details about these roles, refer to the Microsoft article About Office 365 admin roles.
o Office 365 groups (both group mailboxes and group team sites)

20
AvePoint Online Services
Getting Started After you sign into AvePoint Online Services, the Register Your Office 365 Objects wizard appears.
*Note: If your organization uses multi-factor authentication (MFA) in Office 365, close the registration wizard, and navigate to Dynamic Object Registration to create a registration profile. For more information about how to create a profile, refer to Creating a Dynamic Object Registration Profile.
With the completion of this wizard, Dynamic Object Registration can automatically register the following objects in your Office 365 environment:
• SharePoint Online site collections
• OneDrive for Business
• Exchange Online mailboxes
• Office 365 groups (including group team sites and group mailboxes)
• Project Online site collections
• Exchange Online public folders
Note the following:
• If your tenant wants to back up Exchange Online public folders via AvePoint Cloud Backup, contact AvePoint Sales to purchase the license for AvePoint Cloud Backup – Exchange Online Public Folder. Then, Dynamic Object Registration can scan Exchange Online public folders.
• If your tenant only purchased the enterprise licenses of several AvePoint Cloud Backup modules, Dynamic Object Registration scans objects according to the licenses you purchased. For example, if only the Exchange Online module license is purchased, only mailboxes will be scanned.
• If your tenant purchased the enterprise licenses of several AvePoint Cloud Backup modules, and also has the licenses of one or more other AvePoint services for Office 365, all object types will be available to you. However, if you do not have the Project Online module license for AvePoint Cloud Backup, do not customize containers for Project Online site collections. With the exception of AvePoint Cloud Backup, all AvePoint services for Office 365 regard Project Online site collections as normal SharePoint Online site collections, and Dynamic Object Registration will scan Project Online site collections as normal SharePoint Online site collections.
The detected objects will be grouped to default or custom containers, and will appear in the environment of the services you are using. AvePoint Online Services will automatically monitor for object updates, creation, and deletion.
Complete the following steps to configure the registration wizard:

21
AvePoint Online Services
In the Register Your Office 365 Objects window, enter the username and password of an Office 365 Global Administrator account. The credentials of this account will be used to scan Office 365 objects. AvePoint does not recommend that the Global Administrator be assigned to a personal active user account once you are using AvePoint Online Services. We recommend you use a separate service account to handle all administration.
*Note: The password is validated via Office 365 API. Due to an Office 365 API limitation, you may encounter the following issue: the password is checked as invalid here, but you can use this password to log into Office 365 successfully. To resolve the issue, you must change your password in Office 365, and then enter the new password here. For details about the password limitations and requirements, refer to Appendix D: Password Limitations and Requirements of Office 365 Accounts.
Click Next.
In the Manage Office 365 Objects window, choose to use one of the following modes:
*Note: You can click Learn More to view the process of registering Office 365 objects in either mode.
• Express Mode – For organizations with less than 300 users or for the purposes of testing, you can use this mode to register all Office 365 objects to default containers all at once.
• Advanced Mode – For organizations with over 300 users, AvePoint recommends that you use this mode to register your Office 365 objects dynamically to custom containers according to business rules.
Click Start in either mode to start the registration.
• If you start the express mode registration, the Successfully created the profile page appears. The Default Express Profile is created for the express mode registration, and you can click Go Back to the Dynamic Object Registration Homepage to view the profile details.
• If you start the advanced mode registration, the Dynamic Object Registration page appears. Proceed to step 5.
Complete the following steps on the Dynamic Object Registration page.
Choose one of the following methods to scan objects: Scan all objects and place them in one container or Scan objects according to dynamic rules.
• If you choose the Scan all objects and place them in one container option, enter a container name in the text box. You can also click the select container ( ) button and select an existing container in the pop-up window.
• If you choose the Scan objects according to dynamic rules option, define containers for desired Office 365 object types. Click the title for an object type, click New Container, and then configure the following settings:
Container Name – Enter a name for this object container.

22
AvePoint Online Services
Rule Name – Enter a name for the rule that will be used to filter objects.
Configure rule settings by selecting a criterion, selecting a condition, and selecting or entering a value. For more information about supported criteria, refer to Appendix A: Supported Criteria in Dynamic Object Registration Rules.
*Note: When you select the Matches or Does Not Match condition, you can enter a value that contains regular expressions.
You can click the add ( ) button to add another criterion. With multiple criteria, you must select the logic option And or Or.
And – The objects that meet all criteria will be filtered to be included.
Or – The objects that meet any one of the criteria will be filtered to be included.
Click Save to save this container. The container settings are collapsed. You can click the blank area next to the container name to edit the container settings or click Remove to remove this container.
You can click New Container and repeat the steps above to create another container.
If you define multiple containers, set the Priority.
If there is any object that does not meet the criteria in your rules, the object will not be registered to the containers you defined. Select a resolution for the object:
o Do not add them to any containers
o Add them to the system default container
o Add them to a custom container
If you choose this option, enter either an existing container name or a non-existing container name. You can also click the select ( ) button to select an existing container. If you enter a non-existing container name, AvePoint Online Services will automatically create the container.
d. Click Finish. The Successfully created the profile page appears. The Default Express Profile is created for the advanced mode registration, and you can click Go Back to the Dynamic Object Registration Homepage to view the profile details.
*Note: The schedule of the registration is Daily; 00:00, which follows the time zone of your local computer. When the schedule reaches, AvePoint Online Services will start the scan and registration process. The whole process will be divided into multiple partial scans, so that you can manage and monitor the registered objects flexibly, rather than waiting for the whole process to complete. When a partial scan is finished, the detected objects will appear in the environment of the services you are using. You can also find them in the Scan History.
23
AvePoint Online Services
*Note: After you complete the registration wizard, you can also navigate to Dynamic Object Registration to manage dynamic object registration. For example, you can modify the update schedule of the default registration profile, create a new registration profile to connect to another Office 365 tenant, manage rules and containers, etc. For more information, refer to Managing Dynamic Object Registration.
24
AvePoint Online Services
Starting Up AvePoint Online Services The Home page provides the following views:
• My Favorite Apps – This view displays the services you selected as favorites. Click a service name to access that service.
You can click the heart ( ) button to remove a service from your favorites.
• All Apps – This view displays all services that your tenant has purchased or for which it has started the trial. Click a service name to access that service.
You can click the heart ( ) button to add a service to the My Favorite Apps view.
• Store – This view displays all AvePoint online services within the AvePoint Online Service platform. You can start trial for services that were not selected when using the 30-Day Free Trial. For more information, refer to Starting the Trial on the Home Page.
AvePoint Online Services can be used in two ways, either by obtaining a full license or with a free trial.
*Note: The license for each online service is calculated in Greenwich Mean Time (GMT 0:00). Even if the available license duration is less than 24 hours, it is calculated as one day.
If your tenant’s license type or license agreement of a service has changed, the new license agreement will be displayed to the Tenant Owner when the Tenant Owner is trying to access the service. The Tenant Owner must accept the new license agreement.
Obtaining a Full License To obtain a full license for any of the AvePoint online services, contact AvePoint Sales.
AvePoint services for Office 365 charge licenses of several Office 365 subscriptions. For more information, refer to Licensing Information.
Starting the Trial on the Home Page If your tenant wants to start a trial for services that were not selected when using the 30-Day Free Trial from the AvePoint Online Services landing page, refer to the sections below to obtain the trial licenses of services.
*Note: Only the Tenant Owner can start the trial.
25
AvePoint Online Services
AvePoint Cloud Backup Trial On the Store tab, navigate to AvePoint Cloud Backup and click START TRIAL to get a 30-day trial license. A pop-up window appears with the license agreement of the trial license displayed. Read the terms in the agreement, and then you must click Accept to start the trial.
Then, you can click AvePoint Cloud Backup to access it. For detailed instructions on using AvePoint Cloud Backup, refer to the AvePoint Cloud Backup User Guide.
AvePoint Cloud Management Trial On the Store tab, navigate to AvePoint Cloud Management and click START TRIAL to get a 30-day trial license. A pop-up window appears with the license agreement of the trial license displayed. Read the terms in the agreement, and then you must click Accept to start the trial.
Then, you can click AvePoint Cloud Management to access it. You are brought to the DocAve Online interface. The AvePoint Cloud Management service includes the following modules in DocAve Online:
• Administrator
• Content Manager
• Replicator
• Deployment Manager
• Report Center
• Identity Manager
For detailed instructions on using these modules, refer to the DocAve Online User Guide.
AvePoint Cloud Archiving Trial On the Store tab, navigate to AvePoint Cloud Archiving and click START TRIAL to get a 30-day trial license. A pop-up window appears with the license agreement of the trial license displayed. Read the terms in the agreement, and then you must click Accept to start the trial.
Then, you can click AvePoint Cloud Archiving to access it. You are brought to the DocAve Online interface. The AvePoint Cloud Archiving service is the Archiver module in DocAve Online. For detailed instructions on using Archiver, refer to the DocAve Online User Guide.
Governance Automation Online Trial On the Store tab, navigate to Governance Automation Online and click START TRIAL to get a 30-day trial license. A pop-up window appears with the license agreement of the trial license displayed. Read the terms in the agreement, and then you must click Accept to start the trial.
26
AvePoint Online Services
Governance Automation Online integrates with AvePoint Cloud Management. To use Governance Automation Online, you must also have an available AvePoint Cloud Management license. If you click START TRIAL in Governance Automation Online when the trial license for AvePoint Cloud Management has not started yet, the AvePoint Cloud Management 30-day trial license will start immediately.
Then, you can click Governance Automation Online to access it. For detailed instructions on using Governance Automation Online, refer to the DocAve Governance Automation Online Administrator’s Guide or the DocAve Governance Automation Online Business User’s Guide.
File Share Navigator Online Trial On the Store tab, navigate to File Share Navigator Online and click START TRIAL to get a 30-day trial license. A pop-up window appears with the license agreement of the trial license displayed. Read the terms in the agreement, and then you must click Accept to start the trial.
Then, you can click File Share Navigator Online to access it. For detailed instructions on using File Share Navigator Online, refer to the File Share Navigator Online User Guide.
AvePoint Cloud Backup for Salesforce® Trial On the Store tab, navigate to AvePoint Cloud Backup for Salesforce® and click START TRIAL to get a 30-day trial license. A pop-up window appears with the license agreement of the trial license displayed. Read the terms in the agreement, and then you must click Accept to start the trial.
Then, you can click AvePoint Cloud Backup for Salesforce® to access it. For detailed instructions on using AvePoint Cloud Backup for Salesforce®, refer to the AvePoint Cloud Backup for Salesforce User
Guide that can be accessed by clicking the help ( ) button within AvePoint Cloud Backup for Salesforce®.
AvePoint Cloud Insights Trial On the Store tab, navigate to AvePoint Cloud Insights and click START TRIAL to get a 30-day trial license. A pop-up window appears with the license agreement of the trial license displayed. Read the terms in the agreement, and then you must click Accept to start the trial.
To use AvePoint Cloud Insights, you must enable the report data collection. For more information, refer to Enabling Report Data Collection.
Then, you can click AvePoint Cloud Insights to access it. For detailed instructions on using AvePoint Cloud Insights, refer to the AvePoint Cloud Insights User Guide.

27
AvePoint Online Services
AvePoint Cloud Records Trial On the Store tab, navigate to AvePoint Cloud Records and click START TRIAL to get a 30-day trial license. A pop-up window appears with the license agreement of the trial license displayed. Read the terms in the agreement, and then you must click Accept to start the trial.
AvePoint Cloud Records integrates with AvePoint Cloud Archiving. To use AvePoint Cloud Records, you must also have the license for AvePoint Cloud Archiving. If you click START TRIAL in AvePoint Cloud Records when the trial license for AvePoint Cloud Archiving has not started yet, the 30-day trial license for AvePoint Cloud Archiving will start immediately.
Then, you can click AvePoint Cloud Records to access it. For detailed instructions on using AvePoint Cloud Records, refer to the AvePoint Cloud Records User Guide.
Obtaining a License for Classic DocAve Backup If your tenant signed up for AvePoint Online Services on or after June 18th, 2017, the Granular Backup & Restore and Exchange Online Backup & Restore modules in DocAve Online are not available to you. If you need to use these modules, contact AvePoint Sales to obtain a trial or full license. After the license is assigned to you, you can see the Classic DocAve Backup service in AvePoint Online Services homepage. For detailed instructions on using these modules, refer to the DocAve Online User Guide.
28
AvePoint Online Services
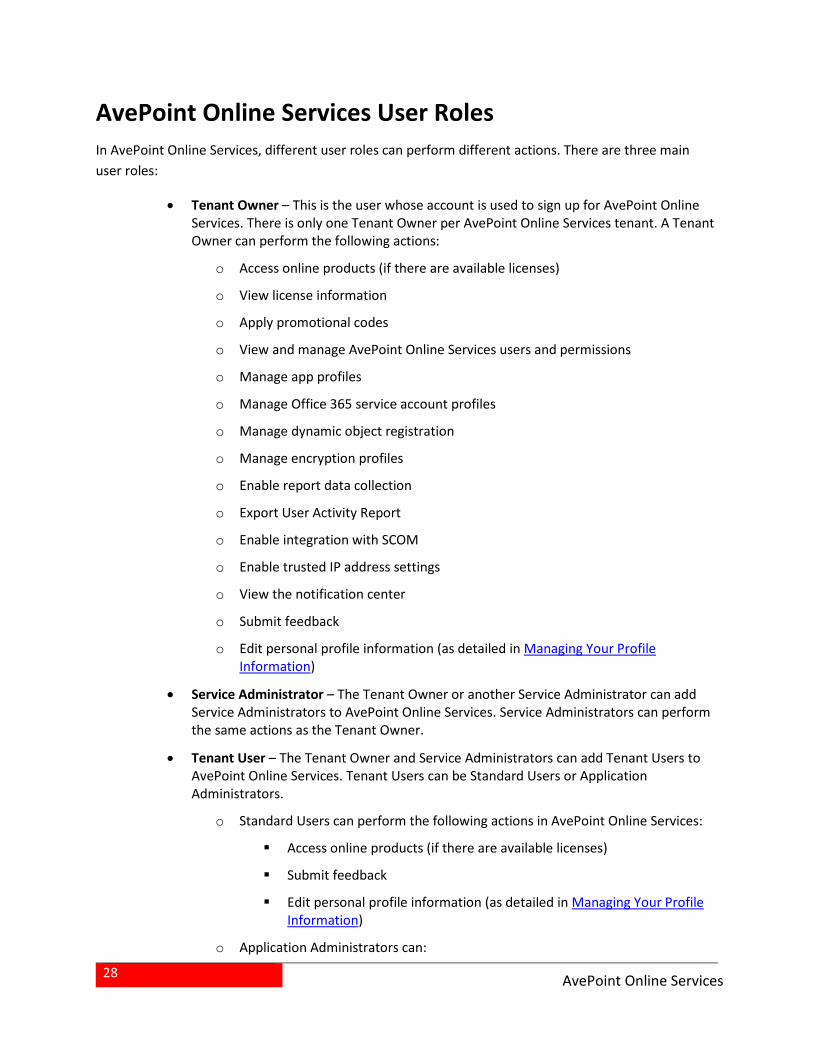
AvePoint Online Services User Roles In AvePoint Online Services, different user roles can perform different actions. There are three main user roles:
• Tenant Owner – This is the user whose account is used to sign up for AvePoint Online Services. There is only one Tenant Owner per AvePoint Online Services tenant. A Tenant Owner can perform the following actions:
o Access online products (if there are available licenses)
o View license information
o Apply promotional codes
o View and manage AvePoint Online Services users and permissions
o Manage app profiles
o Manage Office 365 service account profiles
o Manage dynamic object registration
o Manage encryption profiles
o Enable report data collection
o Export User Activity Report
o Enable integration with SCOM
o Enable trusted IP address settings
o View the notification center
o Submit feedback
o Edit personal profile information (as detailed in Managing Your Profile Information)
• Service Administrator – The Tenant Owner or another Service Administrator can add Service Administrators to AvePoint Online Services. Service Administrators can perform the same actions as the Tenant Owner.
• Tenant User – The Tenant Owner and Service Administrators can add Tenant Users to AvePoint Online Services. Tenant Users can be Standard Users or Application Administrators.
o Standard Users can perform the following actions in AvePoint Online Services:
Access online products (if there are available licenses)
Submit feedback
Edit personal profile information (as detailed in Managing Your Profile Information)
o Application Administrators can:

29
AvePoint Online Services
Access online products (if there are available licenses)
Add Tenant Users and assign products to them. They can only assign the products for which they are Application Administrators.
Edit Tenant Users to change available products for them. They can only select the products for which they are Application Administrators.
Submit feedback
Edit personal profile information (as detailed in Managing Your Profile Information)
The role permissions for specific products vary by product, to learn more go to Adding Users for information that is specific to your product.
30
AvePoint Online Services
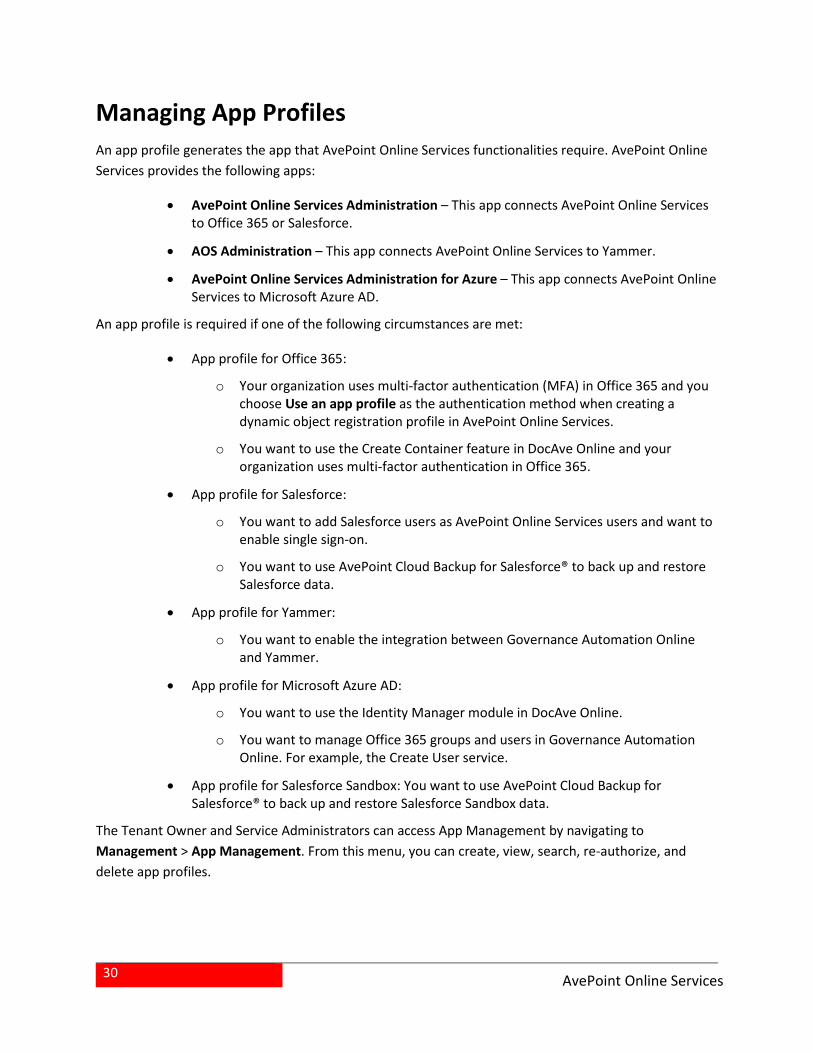
Managing App Profiles An app profile generates the app that AvePoint Online Services functionalities require. AvePoint Online Services provides the following apps:
• AvePoint Online Services Administration – This app connects AvePoint Online Services to Office 365 or Salesforce.
• AOS Administration – This app connects AvePoint Online Services to Yammer.
• AvePoint Online Services Administration for Azure – This app connects AvePoint Online Services to Microsoft Azure AD.
An app profile is required if one of the following circumstances are met:
• App profile for Office 365:
o Your organization uses multi-factor authentication (MFA) in Office 365 and you choose Use an app profile as the authentication method when creating a dynamic object registration profile in AvePoint Online Services.
o You want to use the Create Container feature in DocAve Online and your organization uses multi-factor authentication in Office 365.
• App profile for Salesforce:
o You want to add Salesforce users as AvePoint Online Services users and want to enable single sign-on.
o You want to use AvePoint Cloud Backup for Salesforce® to back up and restore Salesforce data.
• App profile for Yammer:
o You want to enable the integration between Governance Automation Online and Yammer.
• App profile for Microsoft Azure AD:
o You want to use the Identity Manager module in DocAve Online.
o You want to manage Office 365 groups and users in Governance Automation Online. For example, the Create User service.
• App profile for Salesforce Sandbox: You want to use AvePoint Cloud Backup for Salesforce® to back up and restore Salesforce Sandbox data.
The Tenant Owner and Service Administrators can access App Management by navigating to Management > App Management. From this menu, you can create, view, search, re-authorize, and delete app profiles.
31
AvePoint Online Services
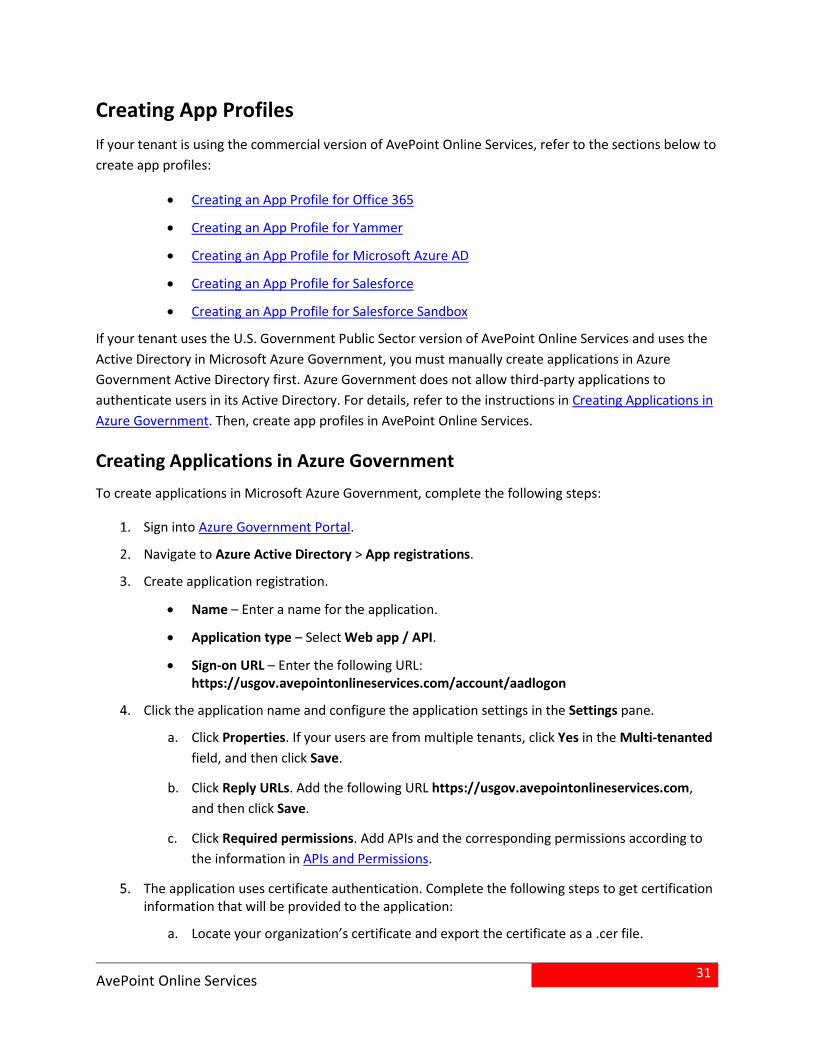
Creating App Profiles If your tenant is using the commercial version of AvePoint Online Services, refer to the sections below to create app profiles:
• Creating an App Profile for Office 365
• Creating an App Profile for Yammer
• Creating an App Profile for Microsoft Azure AD
• Creating an App Profile for Salesforce
• Creating an App Profile for Salesforce Sandbox
If your tenant uses the U.S. Government Public Sector version of AvePoint Online Services and uses the Active Directory in Microsoft Azure Government, you must manually create applications in Azure Government Active Directory first. Azure Government does not allow third-party applications to authenticate users in its Active Directory. For details, refer to the instructions in Creating Applications in Azure Government. Then, create app profiles in AvePoint Online Services.
Creating Applications in Azure Government To create applications in Microsoft Azure Government, complete the following steps:
Sign into Azure Government Portal.
Navigate to Azure Active Directory > App registrations.
Create application registration.
• Name – Enter a name for the application.
• Application type – Select Web app / API.
• Sign-on URL – Enter the following URL: https://usgov.avepointonlineservices.com/account/aadlogon
Click the application name and configure the application settings in the Settings pane.
a. Click Properties. If your users are from multiple tenants, click Yes in the Multi-tenanted field, and then click Save.
b. Click Reply URLs. Add the following URL https://usgov.avepointonlineservices.com, and then click Save.
c. Click Required permissions. Add APIs and the corresponding permissions according to the information in APIs and Permissions.
The application uses certificate authentication. Complete the following steps to get certification information that will be provided to the application:
a. Locate your organization’s certificate and export the certificate as a .cer file.

32
AvePoint Online Services
b. Navigate to Windows PowerShell.
c. Enter and execute the following commands:
$certPath = Read-Host "[.cer File Path]"
$cert = New-Object System.Security.Cryptography.X509Certificates.X509Certificate2
$cert.Import($certPath)
$rawCert = $cert.GetRawCertData()
$base64Cert = [System.Convert]::ToBase64String($rawCert)
$rawCertHash = $cert.GetCertHash()
$base64CertHash = [System.Convert]::ToBase64String($rawCertHash)
$KeyId = [System.Guid]::NewGuid().ToString()
Write-Host $base64Cert
Write-Host $base64CertHash
Write-Host $KeyId
*Note: Replace [.cer File Path] with the file path of the exported .cer file.
The commands output the values of $base64Cert, $base64CertHash, and $KeyId. The values are required in the step below.
Click Manifest next to Settings. In the Edit manifest pane, find the keyCredentials node, and enter the value in the following format: {
"customKeyIdentifier": "[$base64CertHash Value]",
"keyId": "[$KeyId Value]",
"type": "AsymmetricX509Cert",
"usage": "Verify",
"value": "[$base64Cert Value]"
}
*Note: Replace [$base64CertHash Value], [$KeyId Value], and [$base64Cert Value] with the corresponding values output from Windows PowerShell.
Click Save to save changes to the manifest.
33
AvePoint Online Services
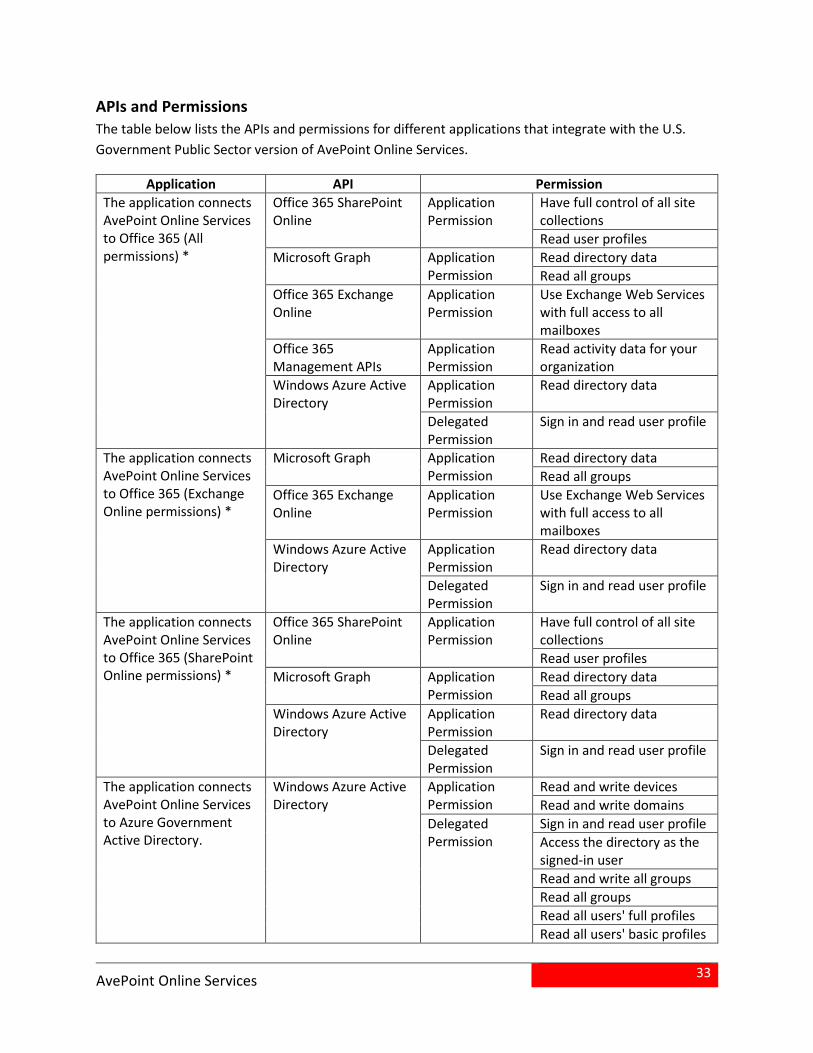
APIs and Permissions The table below lists the APIs and permissions for different applications that integrate with the U.S. Government Public Sector version of AvePoint Online Services.
Application API Permission The application connects AvePoint Online Services to Office 365 (All permissions) *
Office 365 SharePoint Online
Application Permission
Have full control of all site collections Read user profiles
Microsoft Graph Application Permission
Read directory data Read all groups
Office 365 Exchange Online
Application Permission
Use Exchange Web Services with full access to all mailboxes
Office 365 Management APIs
Application Permission
Read activity data for your organization
Windows Azure Active Directory
Application Permission
Read directory data
Delegated Permission
Sign in and read user profile
The application connects AvePoint Online Services to Office 365 (Exchange Online permissions) *
Microsoft Graph Application Permission
Read directory data Read all groups
Office 365 Exchange Online
Application Permission
Use Exchange Web Services with full access to all mailboxes
Windows Azure Active Directory
Application Permission
Read directory data
Delegated Permission
Sign in and read user profile
The application connects AvePoint Online Services to Office 365 (SharePoint Online permissions) *
Office 365 SharePoint Online
Application Permission
Have full control of all site collections Read user profiles
Microsoft Graph Application Permission
Read directory data Read all groups
Windows Azure Active Directory
Application Permission
Read directory data
Delegated Permission
Sign in and read user profile
The application connects AvePoint Online Services to Azure Government Active Directory.
Windows Azure Active Directory
Application Permission
Read and write devices Read and write domains
Delegated Permission
Sign in and read user profile Access the directory as the signed-in user Read and write all groups Read all groups Read all users' full profiles Read all users' basic profiles
34
AvePoint Online Services
Application API Permission Microsoft Graph Application
Permission Read directory data Read and write files in all site collections (preview)
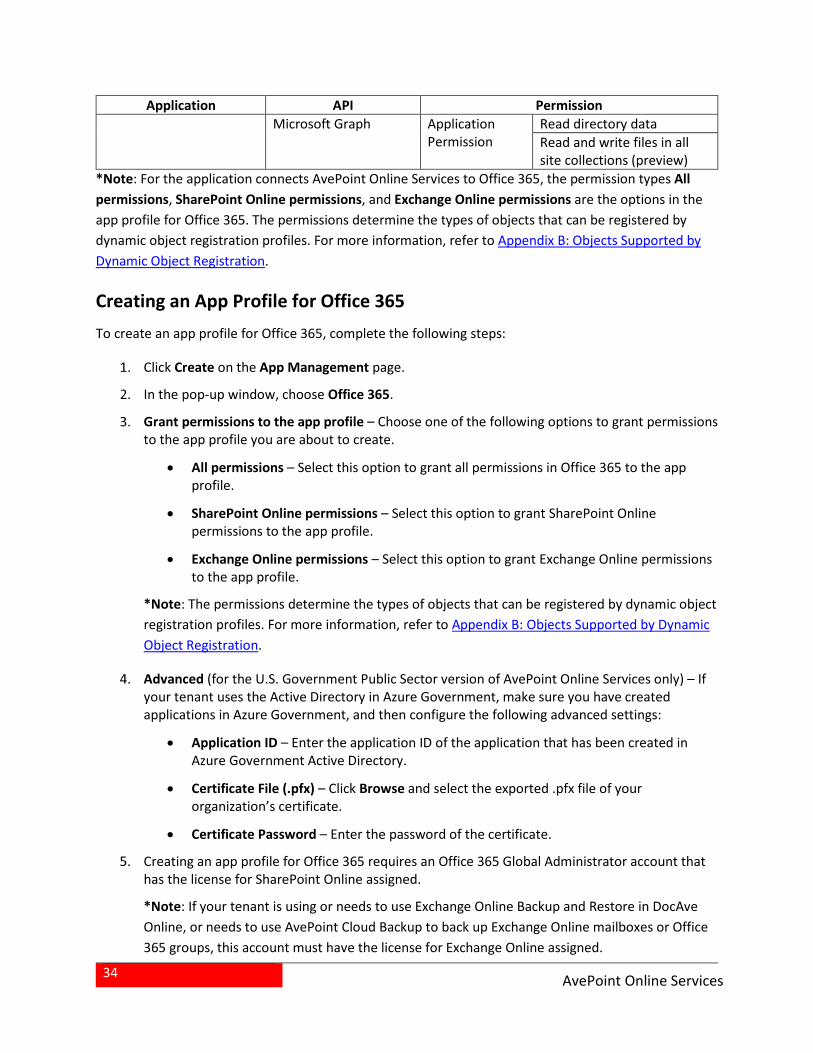
*Note: For the application connects AvePoint Online Services to Office 365, the permission types All permissions, SharePoint Online permissions, and Exchange Online permissions are the options in the app profile for Office 365. The permissions determine the types of objects that can be registered by dynamic object registration profiles. For more information, refer to Appendix B: Objects Supported by Dynamic Object Registration.
Creating an App Profile for Office 365 To create an app profile for Office 365, complete the following steps:
Click Create on the App Management page.
In the pop-up window, choose Office 365.
Grant permissions to the app profile – Choose one of the following options to grant permissions to the app profile you are about to create.
• All permissions – Select this option to grant all permissions in Office 365 to the app profile.
• SharePoint Online permissions – Select this option to grant SharePoint Online permissions to the app profile.
• Exchange Online permissions – Select this option to grant Exchange Online permissions to the app profile.
*Note: The permissions determine the types of objects that can be registered by dynamic object registration profiles. For more information, refer to Appendix B: Objects Supported by Dynamic Object Registration.
Advanced (for the U.S. Government Public Sector version of AvePoint Online Services only) – If your tenant uses the Active Directory in Azure Government, make sure you have created applications in Azure Government, and then configure the following advanced settings:
• Application ID – Enter the application ID of the application that has been created in Azure Government Active Directory.
• Certificate File (.pfx) – Click Browse and select the exported .pfx file of your organization’s certificate.
• Certificate Password – Enter the password of the certificate.
Creating an app profile for Office 365 requires an Office 365 Global Administrator account that has the license for SharePoint Online assigned.
*Note: If your tenant is using or needs to use Exchange Online Backup and Restore in DocAve Online, or needs to use AvePoint Cloud Backup to back up Exchange Online mailboxes or Office 365 groups, this account must have the license for Exchange Online assigned.
35
AvePoint Online Services
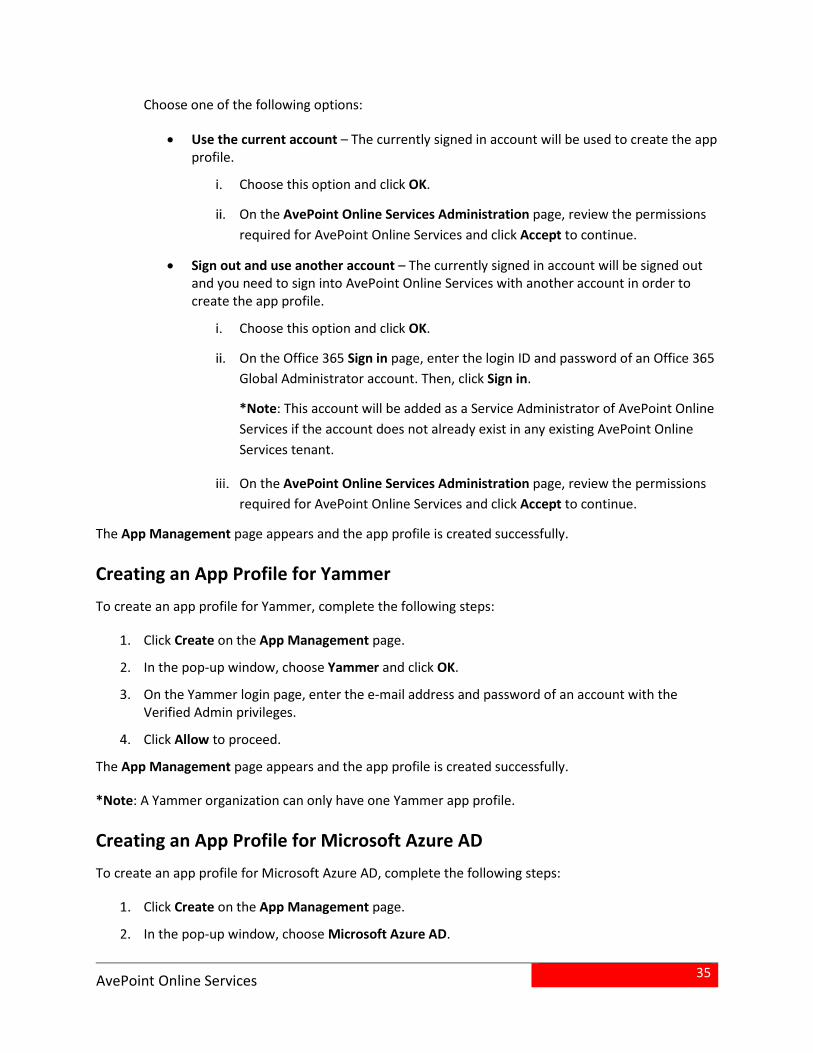
Choose one of the following options:
• Use the current account – The currently signed in account will be used to create the app profile.
Choose this option and click OK.
On the AvePoint Online Services Administration page, review the permissions required for AvePoint Online Services and click Accept to continue.
• Sign out and use another account – The currently signed in account will be signed out and you need to sign into AvePoint Online Services with another account in order to create the app profile.
Choose this option and click OK.
On the Office 365 Sign in page, enter the login ID and password of an Office 365 Global Administrator account. Then, click Sign in.
*Note: This account will be added as a Service Administrator of AvePoint Online Services if the account does not already exist in any existing AvePoint Online Services tenant.
On the AvePoint Online Services Administration page, review the permissions required for AvePoint Online Services and click Accept to continue.
The App Management page appears and the app profile is created successfully.
Creating an App Profile for Yammer To create an app profile for Yammer, complete the following steps:
Click Create on the App Management page.
In the pop-up window, choose Yammer and click OK.
On the Yammer login page, enter the e-mail address and password of an account with the Verified Admin privileges.
Click Allow to proceed.
The App Management page appears and the app profile is created successfully.
*Note: A Yammer organization can only have one Yammer app profile.
Creating an App Profile for Microsoft Azure AD To create an app profile for Microsoft Azure AD, complete the following steps:
Click Create on the App Management page.
In the pop-up window, choose Microsoft Azure AD.

36
AvePoint Online Services
Advanced (for the U.S. Government Public Sector version of AvePoint Online Services only) – If your tenant uses the Active Directory in Azure Government, make sure you have created applications in Azure Government, and then configure the following advanced settings:
• Application ID – Enter the application ID of the application that has been created in Azure Government Active Directory.
• Certificate File (.pfx) – Click Browse and select the exported .pfx file of your organization’s certificate.
• Certificate Password – Enter the password of the certificate.
Creating an app profile for Microsoft Azure AD requires an Office 365 Global Administrator account.
*Note: There is no license requirement for this account.
Choose one of the following options:
• Use the current account – The currently signed in account will be used to create the app profile.
Choose this option and click OK.
On the AvePoint Online Services Administration for Azure page, review the permissions required for AvePoint Online Services and click Accept to continue.
• Sign out and use another account – The currently signed in account will be signed out and you need to sign into AvePoint Online Services with another account in order to create the app profile.
Choose this option and click OK.
On the Office 365 Sign in page, enter the login ID and password of an Office 365 Global Administrator account. Then, click Sign in.
On the AvePoint Online Services Administration for Azure page, review the permissions required for AvePoint Online Services and click Accept to continue.
The App Management page appears and the app profile is created successfully.
Creating an App Profile for Salesforce To create an app profile for Salesforce, complete the following steps:
Click Create on the App Management page.
In the pop-up window, choose Salesforce.
Creating an app profile for Salesforce requires a Salesforce account with the System Administrator profile or another profile that has the same permissions as those of the System Administrator profile. Choose one of the following options:
37
AvePoint Online Services
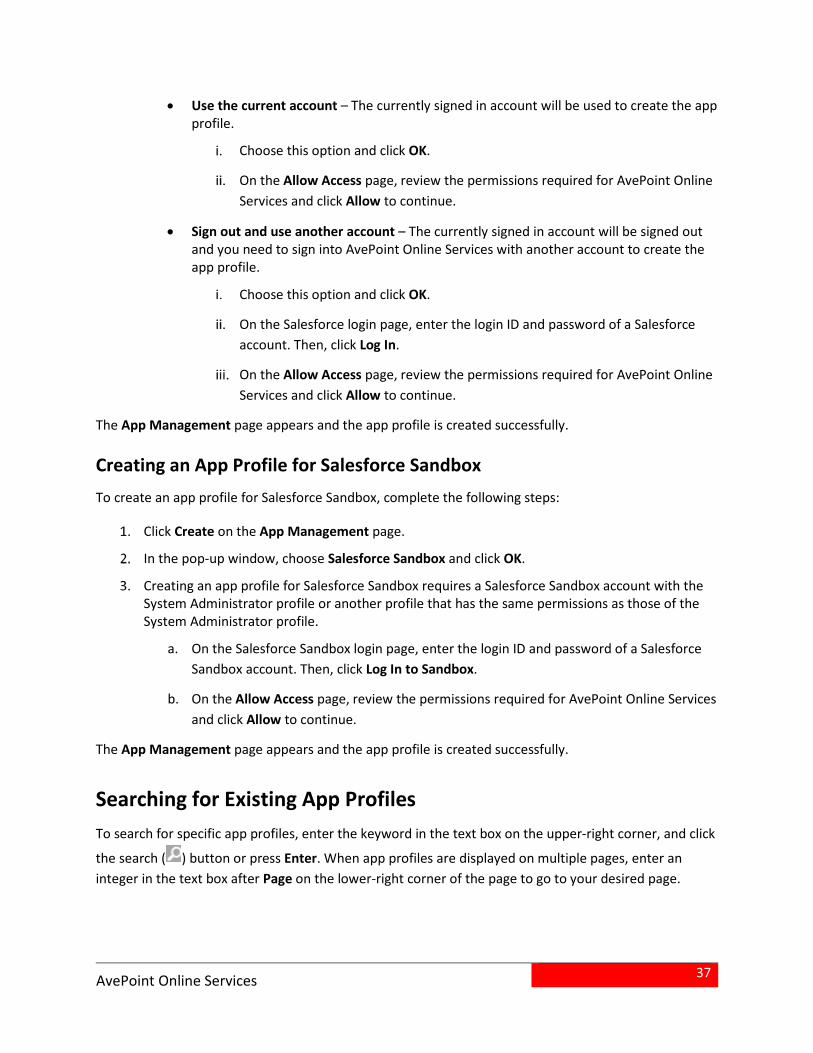
• Use the current account – The currently signed in account will be used to create the app profile.
Choose this option and click OK.
On the Allow Access page, review the permissions required for AvePoint Online Services and click Allow to continue.
• Sign out and use another account – The currently signed in account will be signed out and you need to sign into AvePoint Online Services with another account to create the app profile.
Choose this option and click OK.
On the Salesforce login page, enter the login ID and password of a Salesforce account. Then, click Log In.
On the Allow Access page, review the permissions required for AvePoint Online Services and click Allow to continue.
The App Management page appears and the app profile is created successfully.
Creating an App Profile for Salesforce Sandbox To create an app profile for Salesforce Sandbox, complete the following steps:
Click Create on the App Management page.
In the pop-up window, choose Salesforce Sandbox and click OK.
Creating an app profile for Salesforce Sandbox requires a Salesforce Sandbox account with the System Administrator profile or another profile that has the same permissions as those of the System Administrator profile.
a. On the Salesforce Sandbox login page, enter the login ID and password of a Salesforce Sandbox account. Then, click Log In to Sandbox.
b. On the Allow Access page, review the permissions required for AvePoint Online Services and click Allow to continue.
The App Management page appears and the app profile is created successfully.
Searching for Existing App Profiles To search for specific app profiles, enter the keyword in the text box on the upper-right corner, and click
the search ( ) button or press Enter. When app profiles are displayed on multiple pages, enter an integer in the text box after Page on the lower-right corner of the page to go to your desired page.
38
AvePoint Online Services
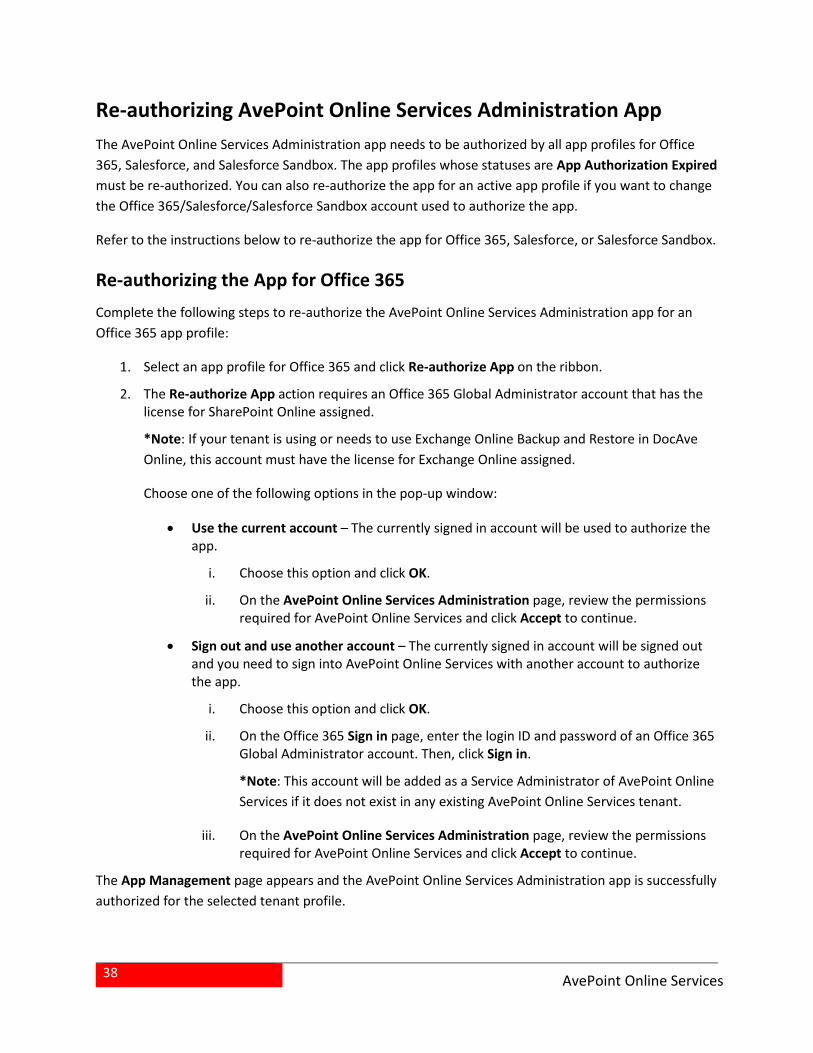
Re-authorizing AvePoint Online Services Administration App The AvePoint Online Services Administration app needs to be authorized by all app profiles for Office 365, Salesforce, and Salesforce Sandbox. The app profiles whose statuses are App Authorization Expired must be re-authorized. You can also re-authorize the app for an active app profile if you want to change the Office 365/Salesforce/Salesforce Sandbox account used to authorize the app.
Refer to the instructions below to re-authorize the app for Office 365, Salesforce, or Salesforce Sandbox.
Re-authorizing the App for Office 365 Complete the following steps to re-authorize the AvePoint Online Services Administration app for an Office 365 app profile:
Select an app profile for Office 365 and click Re-authorize App on the ribbon.
The Re-authorize App action requires an Office 365 Global Administrator account that has the license for SharePoint Online assigned.
*Note: If your tenant is using or needs to use Exchange Online Backup and Restore in DocAve Online, this account must have the license for Exchange Online assigned.
Choose one of the following options in the pop-up window:
• Use the current account – The currently signed in account will be used to authorize the app.
i. Choose this option and click OK.
ii. On the AvePoint Online Services Administration page, review the permissions required for AvePoint Online Services and click Accept to continue.
• Sign out and use another account – The currently signed in account will be signed out and you need to sign into AvePoint Online Services with another account to authorize the app.
i. Choose this option and click OK.
ii. On the Office 365 Sign in page, enter the login ID and password of an Office 365 Global Administrator account. Then, click Sign in.
*Note: This account will be added as a Service Administrator of AvePoint Online Services if it does not exist in any existing AvePoint Online Services tenant.
iii. On the AvePoint Online Services Administration page, review the permissions required for AvePoint Online Services and click Accept to continue.
The App Management page appears and the AvePoint Online Services Administration app is successfully authorized for the selected tenant profile.

39
AvePoint Online Services
Re-authorizing the App for Salesforce Complete the following steps to re-authorize the AvePoint Online Services Administration app for a Salesforce app profile:
Select an app profile for Salesforce and click Re-authorize App on the ribbon.
The Re-authorize App action requires a Salesforce account with the System Administrator profile or another profile that has the same permissions as the System Administrator profile. Choose one of the following options in the pop-up window:
• Use the current account – The currently signed in account will be used to authorize the app.
Choose this option and click OK.
On the Allow Access page, review the permissions required for AvePoint Online Services and click Allow to continue.
• Sign out and use another account – You will be logged out of the current account and you need to sign into AvePoint Online Services with another account to authorize the app.
Choose this option and click OK.
On the Salesforce login page, enter the login ID and password of a Salesforce account. Then, click Log In.
On the Allow Access page, review the permissions required for AvePoint Online Services and click Allow to continue.
The App Management page appears and the AvePoint Online Services Administration app is successfully authorized for the selected tenant profile.
Re-authorizing App for Salesforce Sandbox Complete the following steps to re-authorize the AvePoint Online Services Administration app for a Salesforce Sandbox app profile:
Select an app profile for Salesforce Sandbox and click Re-authorize App on the ribbon.
The Re-authorize App action requires a Salesforce Sandbox account with the System Administrator profile or another profile that has the same permissions as the System Administrator profile.
a. On the Salesforce Sandbox login page, enter the login ID and password of a Salesforce Sandbox account. Then, click Log In to Sandbox.
b. On the Allow Access page, review the permissions required for AvePoint Online Services and click Allow to continue.

40
AvePoint Online Services
The App Management page appears and the AvePoint Online Services Administration app is successfully authorized for the selected tenant profile.
Re-authorizing the AOS Administration App The AOS Administration app needs to be authorized by the app profile for Yammer. App profiles with the App Authorization Expired status must be re-authorized. You can also re-authorize the app for an active app profile if you want to change the Yammer account used to authorize the app.
Complete the following steps to re-authorize the app:
Select the app profile for Yammer and click Re-authorize App on the ribbon.
The Re-authorize App action requires a Yammer account with the Verified Admin privileges. On the Yammer login page, enter the e-mail address and password.
Click Log In.
The App Management page appears and the app registered for AvePoint Online Services is successfully authorized for the selected tenant profile.
Re-authorizing the AvePoint Online Services Administration for Azure App The AvePoint Online Services Administration for Azure app needs to be authorized by the app profile for Microsoft Azure AD. The app profile whose status is App Authorization Expired must be re-authorized. You can also re-authorize the app for an active app profile if you want to change the Office 365 account used to authorize the app.
Complete the following steps to re-authorize the app:
Select an app profile for Microsoft Azure AD and click Re-authorize App on the ribbon.
The Re-authorize App action requires an Office 365 Global Administrator account.
*Note: There is no license requirement for this account.
Choose one of the following options in the pop-up window:
• Use the current account – The currently signed in account will be used to authorize the app.
Choose this option and click OK.
On the AvePoint Online Services Administration for Azure page, review the permissions required for AvePoint Online Services and click Accept to continue.

41
AvePoint Online Services
• Sign out and use another account – You will be logged out of the current account and you need to sign into AvePoint Online Services with another account to authorize the app.
Choose this option and click OK.
On the Office 365 Sign in page, enter the login ID and password of an Office 365 Global Administrator account. Then, click Sign in.
On the AvePoint Online Services Administration for Azure page, review the permissions required for AvePoint Online Services and click Accept to continue.
The App Management page appears and the AvePoint Online Services Administration for Azure app is successfully authorized for the selected tenant profile.
Editing Admin Center URL in an App Profile for Office 365 In an app profile for Office 365, your tenant’s SharePoint Online admin center URL is retrieved and stored. If your tenant’s admin center URL is changed, you can edit the admin center URL in the app profile.
Complete the following steps to edit the admin center URL:
Click the profile name of the app profile.
Click Edit next to the current admin center URL.
Change the domain name in the text box.
Click Save to save your change.
Deleting App Profiles To delete one or more app profiles, select the checkboxes next to the profile names and click Delete on the ribbon.
If an app profile is applied in the User Management to add Office 365 users/groups or Salesforce users, and users of the same tenant exist in AvePoint Online Services, the profile cannot be deleted.

42
AvePoint Online Services
Managing AvePoint Online Services Users To manage AvePoint Online Services users, navigate to Management > User Management. On the User Management page, the Tenant Owner, Service Administrators, and Application Administrators can use the following two views to manage AvePoint Online Services users and permissions:
• User-based View – This view displays all AvePoint Online Services users based on the user ID. The viewer will see the user ID, sign-in method, the user ID’s role, available product, user type, and status.
• Product-based View – This view displays all AvePoint Online Services users based on the product name, together with the user ID’s status.
*Note: In the Product-based View, only Tenant Users and the products that they can access are visible.
Click either User-based View or Product-based View to display that view type. Tenant Owner and Service Administrators can perform the following actions:
• Adding Users
• Searching for Existing Users
• Editing a User’s Permissions
• Editing Multiple Users’ Permissions
• Deactivating User Accounts
• Activating User Accounts
• Unlocking User Accounts
• Deleting Users
*Note: Logged-in users (the Tenant Owner or Service Administrators) cannot edit, deactivate, or delete their own accounts.
Application Administrators can perform the following actions:
• Adding Users
*Note: Application Administrators can only add Tenant Users and assign the products for which they are Application Administrators.
• Searching for Existing Users
• Editing a User’s Permissions/Editing Multiple Users’ Permissions
*Note: Application Administrators can only change available products for Tenant Users, and they can only select the products for which they are Application Administrators.
*Note: Logged-in users (the Application Administrators) cannot edit their own accounts.
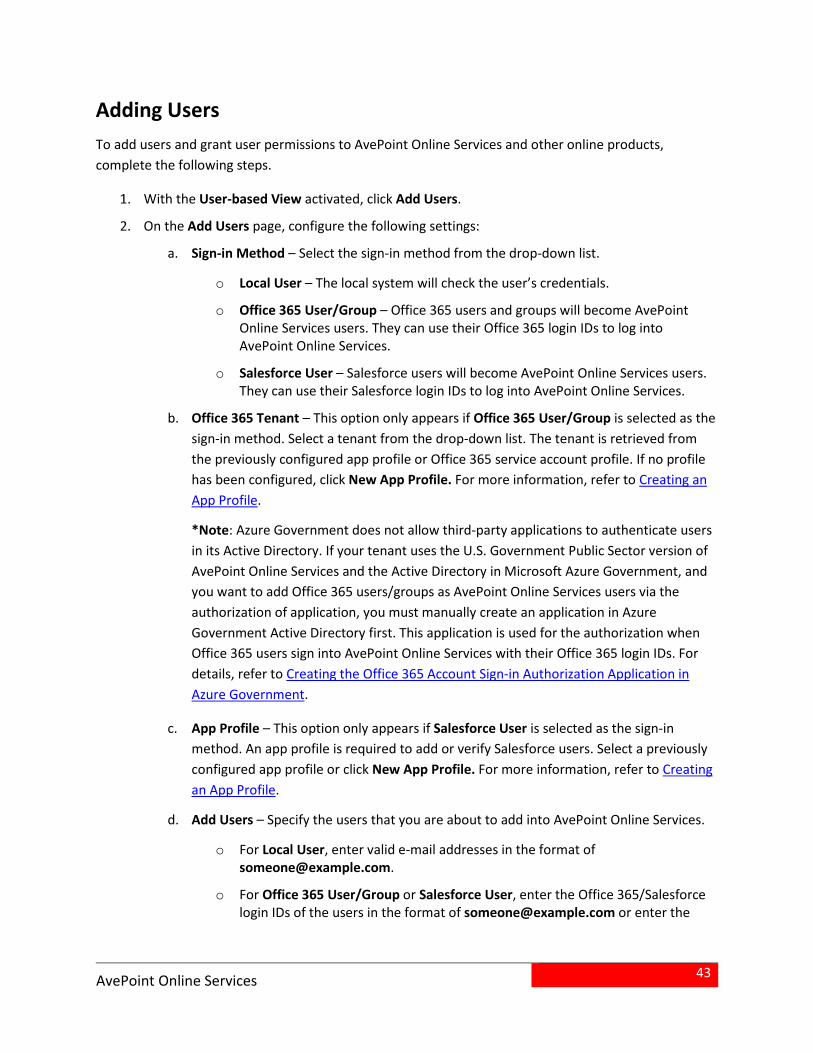
43
AvePoint Online Services
Adding Users To add users and grant user permissions to AvePoint Online Services and other online products, complete the following steps.
With the User-based View activated, click Add Users.
On the Add Users page, configure the following settings:
a. Sign-in Method – Select the sign-in method from the drop-down list.
o Local User – The local system will check the user’s credentials.
o Office 365 User/Group – Office 365 users and groups will become AvePoint Online Services users. They can use their Office 365 login IDs to log into AvePoint Online Services.
o Salesforce User – Salesforce users will become AvePoint Online Services users. They can use their Salesforce login IDs to log into AvePoint Online Services.
b. Office 365 Tenant – This option only appears if Office 365 User/Group is selected as the sign-in method. Select a tenant from the drop-down list. The tenant is retrieved from the previously configured app profile or Office 365 service account profile. If no profile has been configured, click New App Profile. For more information, refer to Creating an App Profile.
*Note: Azure Government does not allow third-party applications to authenticate users in its Active Directory. If your tenant uses the U.S. Government Public Sector version of AvePoint Online Services and the Active Directory in Microsoft Azure Government, and you want to add Office 365 users/groups as AvePoint Online Services users via the authorization of application, you must manually create an application in Azure Government Active Directory first. This application is used for the authorization when Office 365 users sign into AvePoint Online Services with their Office 365 login IDs. For details, refer to Creating the Office 365 Account Sign-in Authorization Application in Azure Government.
c. App Profile – This option only appears if Salesforce User is selected as the sign-in method. An app profile is required to add or verify Salesforce users. Select a previously configured app profile or click New App Profile. For more information, refer to Creating an App Profile.
d. Add Users – Specify the users that you are about to add into AvePoint Online Services.
o For Local User, enter valid e-mail addresses in the format of [email protected].
o For Office 365 User/Group or Salesforce User, enter the Office 365/Salesforce login IDs of the users in the format of [email protected] or enter the

44
AvePoint Online Services
names of Office 365 groups, then click the check ( ) button to check whether the users or groups are valid.
You can also click the browse ( ) button to view the users or groups within the selected profile, and then select your desired users or groups.
To search a specific user, enter the keywords of the user’s Office 365/Salesforce login ID, first name, or last name.
To search a specific Office 365 group, enter the keywords of the group’s display name.
Then, click the search ( ) button.
Note the following:
When an Office 365 group is added, the users in that group will become AvePoint Online Services users. If the Office 365 group has nested groups, AvePoint Online Services will only add users to the first five layers.
If you select Office 365 User/Group as the sign-in method, you can enter or select Everyone. Everyone refers to all available users (excluding external users) in your Office 365 tenant’s Azure AD. If you add Everyone as AvePoint Online Services users, all available users can sign into AvePoint Online Services and perform the corresponding actions according to the assigned role and available products.
If you select Office 365 User/Group as the sign-in method, you can add external users. You need to add external users and assign Governance Automation Online to them if the following circumstance are met:
Your SharePoint Online site collections or sites are shared to external users.
The shared site collections or sites contain Governance Automation Online app part.
*Note: After you add external users here, they can view the app part when accessing the shared site collections or sites, but they cannot log into AvePoint Online Services.
e. Role – Select the user role. If you select Tenant User, proceed to the next step. If you select Service Administrator, go directly to step 4.
f. Available Product – Select the products that the user should be able to access and then select the permissions for the users. The products available for selection depend on your license. If your license for a specific product has expired, the product is unavailable for selection.

45
AvePoint Online Services
Product User Type DocAve Online (Includes the AvePoint Cloud Management, AvePoint Cloud Archiving, and Classic DocAve Backup services)
Standard User A standard user can be delegated access to SharePoint Online site collections and DocAve Online management tools. Application Administrator The application administrator fulfills the role of a Power User. Power Users have full control of DocAve Online management tools as well as profile and plan settings.
Governance Automation Online Standard User A standard user fulfills the role of a Business User. Business users can make and track service requests, approve or reject assigned tasks, and manage site collections they own. Application Administrator The application administrator fulfills the role of the IT Administrator. The IT Administrator can create or modify service request definitions and manage Governance Automation Online settings.
AvePoint Cloud Backup
Application Administrator In addition to the abilities of a Standard User, Application Administrators can add Tenant Users and assign AvePoint Cloud Backup to them.
File Share Navigator Online Application Administrator The application administrator can manage the File Share Navigator Online Administration Service connections and configure the scheduled job account.
AvePoint Cloud Backup for Salesforce® Standard User A standard user must be added into a user group in AvePoint Cloud Backup for Salesforce® by Administrators for using the specific features according to the permissions granted to the user group. Application Administrator The application administrator fulfills the role of an Administrator. The Administrator can perform backup/restore jobs, export backup data to CSV, download reports, and manage AvePoint Cloud Backup for Salesforce® settings.

46
AvePoint Online Services
Product User Type AvePoint Cloud Insights Application Administrator
The application administrator can view statistics about all site collections in your SharePoint Online environment. Standard User A standard user can only view statistics about the site collections for which they have the role of primary administrator or site owner.
AvePoint Permissions Manager
Standard User A standard user can only view or edit the objects in the scope that they have permissions to. Application Administrator The application administrators can manage licenses, users, and permissions of the selected scopes, configure customized settings, and generate reports.
AvePoint Cloud Records Application Administrator The application administrator can manage their Office 365 electronic content and physical records using functions such as classification, retention, and disposal.
If you select AvePoint Cloud Insights in the Available Product field, the Available Report field appears. Select one or more reports that will be available to the users.
Click Save to save your configurations, or click Cancel to cancel your configurations.
Users with the user type of Local User will receive invitation e-mails. They must activate the user IDs first by clicking the link provided in the e-mail, and then use the user ID and password in the invitation e-mails to log into AvePoint Online Services.
Creating the Office 365 Account Sign-in Authorization Application in Azure Government Complete the following steps to create the application, which provides authorization when Office 365 users sign into AvePoint Online Services with their Office 365 login IDs.
Sign into Azure Government Portal.
Navigate to Azure Active Directory > App registrations.
Create application registration.
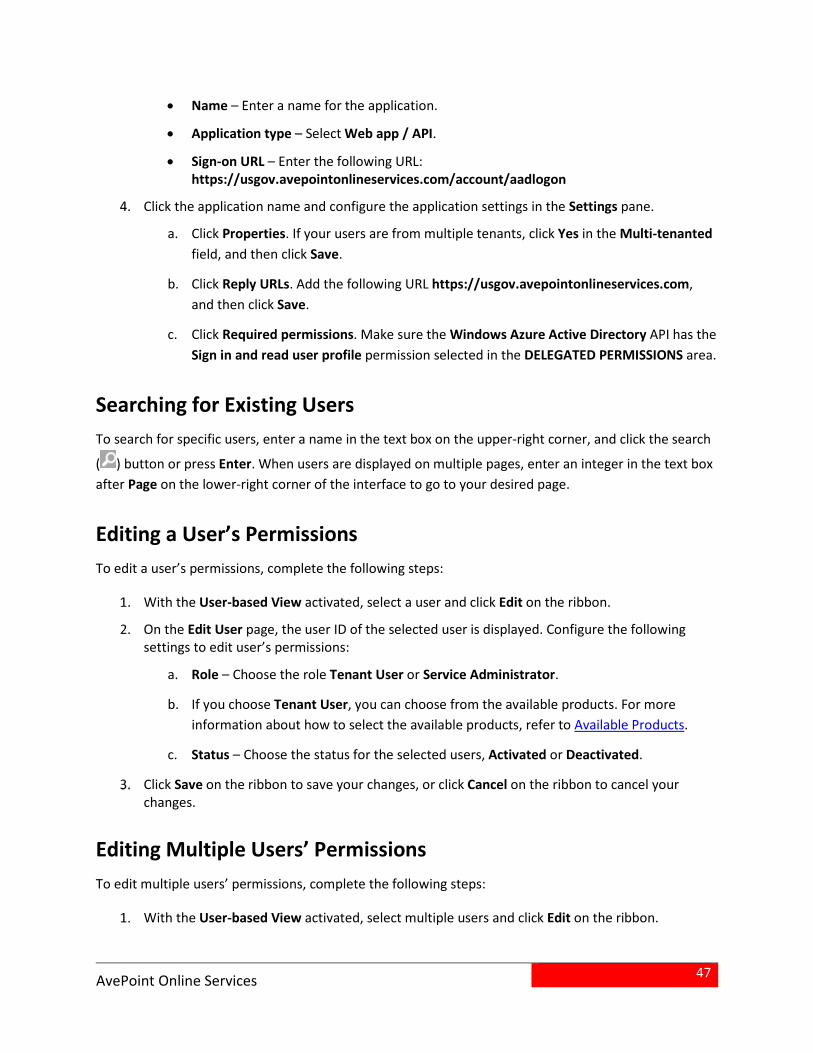
47
AvePoint Online Services
• Name – Enter a name for the application.
• Application type – Select Web app / API.
• Sign-on URL – Enter the following URL: https://usgov.avepointonlineservices.com/account/aadlogon
Click the application name and configure the application settings in the Settings pane.
a. Click Properties. If your users are from multiple tenants, click Yes in the Multi-tenanted field, and then click Save.
b. Click Reply URLs. Add the following URL https://usgov.avepointonlineservices.com, and then click Save.
c. Click Required permissions. Make sure the Windows Azure Active Directory API has the Sign in and read user profile permission selected in the DELEGATED PERMISSIONS area.
Searching for Existing Users To search for specific users, enter a name in the text box on the upper-right corner, and click the search
( ) button or press Enter. When users are displayed on multiple pages, enter an integer in the text box after Page on the lower-right corner of the interface to go to your desired page.
Editing a User’s Permissions To edit a user’s permissions, complete the following steps:
With the User-based View activated, select a user and click Edit on the ribbon.
On the Edit User page, the user ID of the selected user is displayed. Configure the following settings to edit user’s permissions:
a. Role – Choose the role Tenant User or Service Administrator.
b. If you choose Tenant User, you can choose from the available products. For more information about how to select the available products, refer to Available Products.
c. Status – Choose the status for the selected users, Activated or Deactivated.
Click Save on the ribbon to save your changes, or click Cancel on the ribbon to cancel your changes.
Editing Multiple Users’ Permissions To edit multiple users’ permissions, complete the following steps:
With the User-based View activated, select multiple users and click Edit on the ribbon.

48
AvePoint Online Services
On the Edit User page, the user IDs of the selected users are displayed. Configure the following settings to edit users’ permissions:
a. Role – Choose the role Tenant User or Service Administrator.
b. If you choose Tenant User, you can further configure the following settings:
o Available Product – Choose the available products for these users. For more information about how to select the available products, refer to Available Products.
o License Change Logic – Choose the logic to change the license for the available products.
Merge – The newly selected available products for the selected users will be merged to the existing ones. Any products the users previously had access to will remain.
Replace – The newly selected available products for the selected users will replace the existing ones. Any products not selected here but previously assigned to the users will be removed.
c. Status – Choose the status for the selected users, Activated or Deactivated.
Click Save on the ribbon to save your changes, or click Cancel on the ribbon to cancel your changes.
Deactivating User Accounts To deactivate a user, navigate to User Management > User-based View. Select the users to deactivate and then click Deactivate on the ribbon. Deactivated users are not removed from the system, but are restricted from accessing the system.
*Note: If the user who registered with AvePoint Online Services is deactivated, the Tenant Owner role will be granted to the Service Administrator who deactivated the Tenant Owner. If the old Tenant Owner’s account is reactivated, the user will be assigned to the Service Administrator role.
Activating User Accounts To activate users, navigate to User Management > User-based View. Select the users to activate and click Activate on the ribbon.
Unlocking User Accounts If a user enters an incorrect password more than three times, the user account will be locked. A Service Administrator can unlock a locked out user.

49
AvePoint Online Services
To unlock a locked user account, navigate to User Management > User-based View. Select the user with a locked status, and click Unlock on the ribbon.
*Note: If Service Administrator does not unlock a locked user account, after an hour, the locked account will automatically unlock and the user can try to log in again.
Deleting Users To delete users, navigate to User Management > User-based View. Select the users that you will delete and then click Delete on the ribbon. All of the users’ profiles and system information will be deleted.

50
AvePoint Online Services
Managing Office 365 Service Account Profiles An Office 365 service account profile contains an Office 365 Global Administrator, SharePoint Online Administrator, or Exchange Online Administrator account. With the credentials of this account, you can invite Office 365 users or groups as AvePoint Online Services users. Dynamic Object Registration also uses the credentials to scan Office 365 objects.
The Tenant Owner and Service Administrators can manage Office 365 service account profiles by navigating to Management > Office 365 Service Account. From this menu, you can perform the following actions:
• Creating a Service Account Profile
• Searching for Existing Service Account Profiles
• Editing a Service Account Profile
• Deleting Service Account Profiles
Creating a Service Account Profile To create a service account profile, click Create on the ribbon, and configure the following settings on the Create Service Account Profile page.
Profile Name – Enter a name for the service account profile.
Description – Enter an optional description.
Enable MFA – If your organization uses multi-factor authentication in Office 365, select the Our organization uses multi-factor authentication checkbox.
Username – Enter the login ID of an Office 365 Global Administrator account, SharePoint Online Administrator account, or Exchange Online Administrator account.
*Note: AvePoint does not recommend that a personal active user account be used as the service account. We recommend you use a separate service account to handle all administration.
Password – If your Office 365 tenant does not have MFA enabled, enter the login password of the account above. If MFA is enabled, enter the app password of the account above. For more information about app password, refer to the Microsoft technical article https://azure.microsoft.com/en-us/documentation/articles/multi-factor-authentication-end-user-app-passwords/.
Click Validation Test to validate the information above. The user role will be automatically displayed in the User Role field.
*Note: The password is validated via Office 365 API. Due to an Office 365 API limitation, you may encounter the following issue: the password is checked as invalid here, but you can use this password to log into Office 365 successfully. To resolve the issue, you must change your password in Office 365, and then enter the new password here. For details about the password

51
AvePoint Online Services
limitations and requirements, refer to Appendix D: Password Limitations and Requirements of Office 365 Accounts.
SharePoint Online Admin Center URL – If your organization uses the default SharePoint Online admin center URL in Office 365, select the Our organization uses the default SharePoint Online admin center URL option, and the admin center URL will be displayed; if your organization uses a custom SharePoint Online admin center URL in Office 365, select the Our organization uses a custom SharePoint Online admin center URL option, and enter the admin center URL in the text box.
*Note: If the Our organization uses multi-factor authentication checkbox is selected, you must manually enter the SharePoint Online admin center URL in the text box.
Enable E-mail Notification – Choose whether to Send e-mail notification to Service Administrators when the account fails to connect to Office 365. The failed connection occurs when the configured account is deleted from Office 365, or when the account’s password is changed. The e-mail notification will be sent every day if the connection continues to fail.
Click Save to save your configurations, or click Cancel to go back to the Office 365 Service Account page without saving any configurations.
Searching for Existing Service Account Profiles To search for specific service account profiles, enter keywords of the profile name in the text box on the
upper-right corner, and click the search ( ) button or press Enter.
Editing a Service Account Profile To edit a service account profile, select the profile and click Edit on the ribbon.
You can edit the following fields: Description, Enable MFA, Username, and Password.
Deleting Service Account Profiles To delete one or more service account profiles, select the profiles and click Delete on the ribbon. A pop-up window appears asking for your confirmation. Click OK to confirm your deletion.

52
AvePoint Online Services
Managing Account Pool An account pool contains multiple Office 365 accounts. When AvePoint Online Services registers SharePoint Online site collections and OneDrive for Business, AvePoint Online Services grants the site collection administrator permission to these Office 365 accounts. With the credentials of these accounts, AvePoint Cloud Backup can manage a large amount of data simultaneously, and Governance Automation Online can process multiple requests simultaneously.
To build an account pool in AvePoint Online Services, create a group in Office 365 first. The group type can be Office 365 group, mail-enabled security group, or security group. This group should contain a certain number of users, and these users can be unlicensed in Office 365.
Then, navigate to the Office 365 Service Account page and click Manage Account Pool on the ribbon. On the Manage Account Pool page, configure the following settings:
Select a Tenant – Select a tenant from the drop-down list. The tenant is retrieved from the previously configured app profile or Office 365 service account profile.
*Note: If you want to add more tenants, click the Office 365 Service Account or App Management link to go to the corresponding page and create new profiles. Then, the tenants can be retrieved here.
Group – Enter the name of the group you prepared. Group members will be displayed in the Group Users field.
Note the following:
• If the account of a user exists in a service account profile, the password will be automatically filled in the text box. Otherwise, you must enter the password manually.
• If the account of a user has multi-factor authentication enabled in Office 365, click the turn on ( ) button to enable MFA, and then enter the app password of this account.
Custom SharePoint Online Admin Center URL – If you enable MFA for one or more accounts, you must enter your SharePoint Online admin center URL in the text box.
Enable E-mail Notification – Choose whether to Send e-mail notification to Service Administrators when any group users are deleted or their passwords are changed.
Click Save to save your configurations, or click Cancel to go back to the Office 365 Service Account page without saving any configurations. You can also click Reset to clear the account pool of the selected tenant.
*Note: After an account pool for a tenant is saved, the account pool will take effect on the next dynamic object registration scan job.

53
AvePoint Online Services
Managing Encryption Profiles
Encryption profiles allow you to use Azure Key Vault to encrypt backup data and tenant sensitive information (Office 365 usernames, passwords, etc.).
The Tenant Owner and Service Administrators can manage encryption profiles by navigating to Management > Encryption Management. From this menu, you can perform the following actions:
• Creating an Encryption Profile
• Applying an Encryption Profile
• Searching for Existing Encryption Profiles
• Editing an Encryption Profile
• Deleting Encryption Profiles
*Note: AvePoint provides a default encryption profile. If your tenant signed up to AvePoint Online Services after October 16th 2016, the default encryption profile is automatically applied. You can also create a custom encryption profile and apply it. If your tenant signed up to AvePoint Online Services before October 16th 2016, the default encryption profile is not automatically applied. You can choose to apply the default encryption profile, or create a custom encryption profile and apply it.
Preparations The encryption profile requires some properties of a key vault. Before creating an encryption profile, make sure you have a key vault in Azure. If you do not have any key vaults, refer to the instructions in Appendix C: Creating a Key Vault in Azure to create a key vault.
Then, perform the following pre-check on the key vault:
Log into Azure Portal.
Click All resources on the left pane.
Click a key vault and click Access policies on the middle pane.
Click a resource group and click Key permissions.
On the Key permissions pane, make sure that at least the following operations are selected: Get, Encrypt, and Decrypt.
Navigate to the pane for key vault settings, and click Keys.
Click a key, and click a version of the key.
In the Permitted operations section, make sure that at least Encrypt and Decrypt are selected.
Copy the key identifier that resides in the Properties section. When you create an encryption profile in AvePoint Online Services, you will need to provide this key identifier.

54
AvePoint Online Services
Apart from the pre-checking above, AvePoint Online Services recommends that you back up the key in case that the key is deleted accidentally. If a key has been applied to AvePoint Online Services encryption profile to encrypt data, and the key is deleted with no backup, the encrypted data will be damaged and AvePoint Online Services cannot work for you smoothly.
Creating an Encryption Profile To create an encryption profile, click Create on the ribbon, and configure the following settings on the Create Encryption Profile page.
Profile Name – Enter a name for the encryption profile.
Description – Enter an optional description.
Key Identifier – Enter the key identifier of your key vault.
Client ID – Enter the application ID of the application you prepared for the key vault.
Client Secret – Enter the application key of the application above.
Click Validation Test to validate your key vault information.
Click Save to save your configurations, or click Cancel to go back to the Encryption Management page without saving any configurations.
Applying an Encryption Profile To apply the key vault of an encryption profile to encrypt backup data and tenant sensitive information, select the encryption profile and click Apply on the ribbon. A pop-up window appears asking for your confirmation. Click OK to apply the encryption profile. The Being Used label is displayed next to the profile name.
Searching for Existing Encryption Profiles To search for specific encryption profiles, enter keywords of the profile name in the text box on the
upper-right corner, and click the search ( ) button or press Enter.
Editing an Encryption Profile To edit an encryption profile, select a profile and click Edit on the ribbon. On the Edit Profile page, you can edit Profile Name and Description.
*Note: The Default Encryption Profile and the encryption profile that is being used cannot be edited.

55
AvePoint Online Services
Deleting Encryption Profiles To delete one or more encryption profiles, select the profiles and click Delete on the ribbon. A pop-up window appears asking for your confirmation. Click OK to confirm your deletion.

56
AvePoint Online Services
Managing Dynamic Object Registration The Dynamic Object Registration feature automatically registers the following objects in your Office 365 environment:
• SharePoint Online site collections
• OneDrive for Business
• Exchange Online mailboxes
• Office 365 groups (including group team sites and group mailboxes)
• Project Online site collections
• Exchange Online public folders
Note the following:
• If your tenant wants to back up Exchange Online public folders via AvePoint Cloud Backup, contact AvePoint Sales to purchase the license for AvePoint Cloud Backup – Exchange Online Public Folder. Then, Dynamic Object Registration can scan Exchange Online public folders.
• If your tenant only purchased the enterprise licenses of several AvePoint Cloud Backup modules, Dynamic Object Registration scans objects according to the licenses you purchased. For example, only if the Exchange Online module license is purchased, then only mailboxes will be scanned.
• If your tenant purchased the enterprise licenses of several AvePoint Cloud Backup modules, and also has the licenses of one or more other AvePoint services for Office 365, all object types will be available to you. However, if you do not have the Project Online module license for AvePoint Cloud Backup, do not customize containers for Project Online site collections. With the exception of AvePoint Cloud Backup, all AvePoint services for Office 365 regard Project Online site collections as normal SharePoint Online site collections, and Dynamic Object Registration will scan Project Online site collections as normal SharePoint Online site collections.
The detected objects will appear in your DocAve Online, Governance Automation Online, and AvePoint Cloud Backup environment. AvePoint Online Services will automatically monitor for updates, creation, and deletion of these objects. For conflicted containers and deleted objects, the result depends on the Dynamic Object Registration Settings configured in DocAve Online.
The Tenant Owner and Service Administrators can use Dynamic Object Registration by clicking Dynamic Object Registration on the left pane.
If your tenant has enabled dynamic object registration via the registration wizard, you can perform the following actions on the Dynamic Object Registration page.
*Note: If this is the first time that your tenant is using dynamic object registration, you must first create a registration profile. For more information, refer to Creating a Dynamic Object Registration Profile.

57
AvePoint Online Services
• Editing a Dynamic Object Registration Profile
• Deleting Dynamic Object Registration Profile
• Viewing Scan History
• Viewing Dynamic Object Registration Settings
• Managing Rules
Creating a Dynamic Object Registration Profile To create a dynamic object registration profile, click Create on the ribbon, and then configure the following settings:
Registration Profile Name – Enter a name for the profile.
Description – Enter an optional description for the profile.
Authentication Method – Choose an authentication method according to the scenarios below:
• If you only want to register Exchange Online mailboxes and/or Office 365 group mailboxes and back up them in DocAve Online, choose either Use a service account profile or Use an app profile. AvePoint recommends that you choose the Use an app profile method. App only permissions utilize modern authentication in place of a service account.
• If your organization does not have multi-factor authentication enabled in Office 365, choose the Use a service account profile method and select a service account profile.
• If your organization is using multi-factor authentication in Office 365, choose the Use an app profile method. Then, select an app profile for Office 365 and select a service account profile with MFA enabled.
For detailed information about objects that can be registered by dynamic object registration profiles with different authentication methods, refer to Appendix B: Objects Supported by Dynamic Object Registration.
*Note: If the Use an app profile method is selected, due to the limitation of Microsoft Graph API, AvePoint Online Services cannot scan Exchange Online in-place archived mailboxes.
*Note: When AvePoint Online Services scans SharePoint Online site collections and OneDrive for Business, AOS will check if the Office 365 Global Administrator account specified in the related service account profile already has the site collection administrator permission to site collections and OneDrive for Business. If the Global Administrator does not have this permission, AOS will assign the site collection administrator permission to this Global Administrator, so that AOS can retrieve required properties that will be used by Dynamic Object Registration and DocAve Online jobs. When the scan and filter process is finished, the Global Administrator account’s site collection administrator permission on the object will be removed if the object is not added into any dynamic containers.

58
AvePoint Online Services
To get the latest profiles in the drop-down lists when you configure the authentication method, click the refresh ( ) button next to the corresponding drop-down list.
Registration Mode – Choose a registration mode, Express Mode or Advanced Mode.
• The advanced mode provides rules, which allow you to define how Office 365 objects are detected and grouped in online products. This can make management of those objects a lot easier.
• If you do not have a lot of Office 365 objects, you can use the express mode where all objects are clustered within their default containers.
Update Schedule – Choose to run scheduled registration or one-time registration by selecting one of the following options:
• Set up a registration schedule – Select this option to set the daily update schedule, and then select the time for AvePoint Online Services to scan and update your Office 365 objects.
• Start a one-time registration now – Select this option to make AvePoint Online Services run a one-time scan for your Office 365 objects immediately. If you select this option, the scan will not run again.
*Note: The selected time follows the time zone of your local computer.
Choose whether or not to Enable this profile to automatically remove objects that no longer match registration rules by selecting Yes or No.
• No – If you select No, objects that no longer match registration rules will not be automatically removed from dynamic containers.
• Yes – If you select Yes, objects that no longer match registration rules will be automatically removed from dynamic containers, and you can choose whether to Send e-mail notification to me when the objects are removed. If you enable this option, enter an e-mail address in the text box. When any objects are automatically removed from dynamic containers, an e-mail notification will be sent to the configured e-mail address
*Note: By default, the conflict resolution in DocAve Online Dynamic Object Registration Settings is Merge, and this remove action will be synchronized to DocAve Online. The DocAve Online plans that contain the related objects will be affected, and you must to reconfigure those plans after the registration process is complete.
Choose whether or not to Enable this profile to automatically remove objects that were deleted in Office 365 by selecting Yes or No.
*Note: If you select Yes, objects that were deleted in Office 365 will be automatically removed from dynamic containers. If you also want these objects to be removed from the containers in DocAve Online, navigate to DocAve Online Control Panel > Dynamic Object Registration Settings and select Replace as the conflict resolution.

59
AvePoint Online Services
If you choose Express Mode, click Finish. The profile is created successfully. When the schedule reaches, AvePoint Online Services will start the scan and registration process. The whole process will be divided into multiple partial scans, so that you can manage and monitor the registered objects flexibly, rather than waiting for the whole process to complete. When a partial scan is finished, the detected objects will appear in your DocAve Online and Governance Automation Online environment. You can also find them in the Scan History.
If you choose Advanced Mode, Click Next, and then configure the Advanced Mode settings.
Advanced Mode For organizations with over 300 users, AvePoint recommends that you use this mode to register your Office 365 objects dynamically to custom containers according to business rules.
If you choose this mode, complete the following steps:
Choose one of the following methods to scan objects: Scan all objects and place them in one container or Scan objects according to dynamic rules.
• If you choose the Scan all objects and place them in one container option, enter a container name in the text box. You can also click the select container ( ) button and select an existing container in the pop-up window.
• If you choose the Scan objects according to dynamic rules option, define containers for desired Office 365 object types. Click the title for an object type, click New Container, and then configure the following settings:
Container Name – Enter a name for this object container.
Rule Name – Enter a name for the rule that will be used to filter objects.
Configure rule settings by selecting a criterion, selecting a condition, and selecting or entering a value. For more information about supported criteria, refer to Appendix A: Supported Criteria in Dynamic Object Registration Rules.
*Note: You can click Copy from Existing Rules to reuse rule settings. In the pop-up window, all rules are displayed. Click Copy Criteria or Copy Criteria and Values.
You can click the add ( ) button to add another criterion. With multiple criteria, you must select the logic option And or Or.
And – The objects that meet all criteria will be filtered to be included.
Or – The objects that meet any one of the criteria will be filtered to be included.
Click Save to save this container. The container settings are collapsed. You can click the blank area next to the container name to edit the container settings or click Remove to remove the container from the profile.

60
AvePoint Online Services
You can click New Container and repeat the steps above to create another group.
If you define multiple containers, set a container’s priority by selecting a number from the Priority drop-down list.
If there is any object that does not meet the criteria in your rules, the object will not be registered to the containers you defined. Select a resolution for the object:
o Do not add them to any containers
o Add them to system default containers
o Add them to a custom container
If you choose this option, enter either an existing container name or a non-existing container name. You can also click the select ( ) button to select an existing container. You can enter either an existing container name or a non-existing container name. If you enter a non-existing container name, AvePoint Online Services will automatically create the container.
Click Finish. The profile is created successfully. When the schedule reaches, AvePoint Online Services will start the scan and registration process. The whole process will be divided into multiple partial scans, so that you can manage and monitor the registered objects flexibly, rather than waiting for the whole process to complete. When a partial scan is finished, the detected objects will appear in your DocAve Online, Governance Automation Online, or AvePoint Cloud Backup environment. You can also find them in the Scan History.
Editing a Dynamic Object Registration Profile To edit a dynamic object registration profile, select the profile and click Edit on the ribbon. Then, edit the profile settings. For more information about the profile settings, refer to Creating a Dynamic Object Registration Profile.
*Note: When you are editing a container and click Remove in the right pane, the container is just removed from the current profile and it is not deleted. If you want to delete the container or remove objects from the container, navigate to the Dynamic Object Registration page and click Manage Containers. For detailed instructions, refer to Managing Containers.
*Note: When you are editing a previously created dynamic object registration profile that has defined containers for Office 365 group team sites and Office 365 group mailboxes, you can view and edit the rules of the containers. However, if you create any containers for an Office 365 Group and save the dynamic object registration profile, the new registration process will scan Office 365 group objects according to the rules of the custom Office 365 group containers. After the new registration process completes, the objects previously registered to the Office 365 group team site and Office 365 group mailbox containers will be removed, and the objects will be placed in the corresponding new containers

61
AvePoint Online Services
if they match the rules. The DocAve Online plans that contain the previously registered objects will be affected. You need to reconfigure those plans after the registration process is finished.
Deleting Dynamic Object Registration Profiles To delete one or more dynamic object registration profiles, select the profiles and click Delete on the ribbon. A pop-up window appears providing the following options from which you can choose a resolution for the containers that are related to the selected profiles:
• Delete the containers along with the profile. They will be removed from AvePoint Online Services products.
• Keep these containers registered in the system. They will continue to appear in your AvePoint Online Services products. No new objects will be added.
Choose one of the options above and click Delete to confirm your deletion.
*Note: If you choose to keep the containers and you do not manually remove the objects from the containers via Dynamic Object Registration > Manage Containers, once use the same Office 365 credentials to create a new registration profile, the scan result of these objects will be Need to Remove. For the deleted containers and removed objects, DocAve Online handle them according to your configurations in Control Panel > Dynamic Object Registration Settings.
Viewing Scan History To view the scan history of a dynamic object registration profile, select the profile and click Scan History on the ribbon. The View Scan History page appears.
On the View Scan History page, the basic profile information is displayed on the top. Select a scan job from the drop-down list; the basic job information and detailed scan results are displayed. You can filter the scan history by scan results.
You can click Export Scan History to export a report about the detailed scan results. You can also click Delete Scan History to delete the selected scan job, including the basic job information and detailed scan results.
Viewing Dynamic Object Registration Settings To view detailed registration settings of a dynamic object registration profile, click View Registration Settings under the Action column of a profile. The View Dynamic Object Registration Settings page appears. The following information is displayed:
• The basic profile settings, including profile name, profile description, authentication method, service account profile name or app profile name, registration mode, and update schedule.

62
AvePoint Online Services
• The container details, including the containers for each object type and the objects that have been added to the containers.
On the View Dynamic Object Registration Settings page, you can also click Edit to edit the profile or click View Scan History to view the scan history of this profile.
*Note: If the following message is displayed, it indicates that some objects need to be removed:
Due to changes in this registration profile, some objects no longer meet the container’s criteria. View and manage these objects?
Click the View and manage these objects link, and a pop-up window appears displaying the objects that need to be removed. You can select one or more objects and click Remove on the ribbon. You can also click Remove All to remove all of these objects from the corresponding containers.
Managing Rules After rules are created in dynamic object registration profiles, you can manage these rules.
Click Mange Rules on the ribbon; the Manage Rules page appears. You can edit or delete rules.
• Edit – To edit the settings of a rule, select the rule and click Edit on the ribbon.
*Note: The "Office 365 Group Team Site" and "Office 365 Group Mailbox" object types have been integrated into "Office 365 Group". The rules of previously created custom containers for Office 365 group team sites and Office 365 group mailboxes cannot be edited.
• Delete – To delete one or more rules, select the rules and click Delete on the ribbon. A pop-up window appears asking for your confirmation. Click OK to confirm your deletion.
Managing Containers After containers are created in dynamic object registration profiles, you can manage these containers and the objects within the containers.
Click Mange Containers on the ribbon; the Manage Containers page appears. You can perform the following actions:
• View Details – You can view details of dynamic object registration profiles and rules that are applied to custom containers. Click View Details next to a custom container name. A pop-up window appears displaying the registration profile name and rule details.
• Batch Import – To batch import objects into a container, complete the following steps:
Click the title of an Office 365 object type to import objects into the containers for this type of objects.

63
AvePoint Online Services
Select the container where the objects will be imported.
Click Batch Import on the ribbon, and a pop-up window appears. Then, refer to the instructions in Importing Objects in Batch.
Click Import to import the objects into the selected container in batch, or click Cancel to close the pop-up window without importing any objects.
• Delete Container – To delete one or more custom containers, select the containers and click Delete on the ribbon. A pop-up window appears asking for your confirmation. Click OK to confirm your deletion. When the containers are deleted, the objects within the containers are removed from the groups.
• Remove Objects – To remove one or more objects from their containers, expand the container name, select the objects, and click Delete on the ribbon. A pop-up window appears asking for your confirmation. Click OK to confirm your action.
• Remove Objects Only – To only remove the objects from one or more containers, select the containers and click Remove Objects Only on the ribbon. A pop-up window appears asking for your confirmation. Click OK to confirm your action.
After you delete containers and remove objects in AvePoint Online Services, DocAve Online will handle them according to your configurations in DocAve Online Control Panel > Dynamic Object Registration Settings.
Importing Objects in Batch In the pop-up window for importing objects in batch, configure the following settings:
Download an object list template by clicking the Download the Object List Template link, and enter the information about the objects you are about to import in the downloaded Excel file.
Click Browse to upload the configured object list.
*Note: You can only upload one object list at a time. The previously uploaded object list will be replaced by the newly uploaded one.
Provide an Office 365 account to connect to your Office 365 environment in the Office 365 Account Information field. Select one of the following methods:
*Note: The method determines the types of objects that can be imported. For more information, refer to Appendix B: Objects Supported by Dynamic Object Registration.
• Retrieve from a service account profile – Select this option to retrieve an Office 365 account information from a service account profile. Select a service account profile from the drop-down list. If you have not created any service account profiles, you can select the New Service Account Profile option from the drop-down list, and the Create Service Account Profile page will appear in a new tab. For details of creating a service account profile, refer to the Creating a Service Account Profile. After creating a new service account profile, go back to the Manage Containers page, and click the refresh ( ) button next to the corresponding drop-down list to get the latest profile.

64
AvePoint Online Services
• Retrieve from an app profile – Select this option to retrieve an Office 365 account information from an app profile. Select an app profile from the drop-down list. If you have not created any app profiles, you can select the New App Profile option from the drop-down list, and the App Management page will appear in a new tab. For details of creating an app profile, refer to the Creating App Profiles. After creating a new app profile, go back to the Manage Containers page, and click the refresh ( ) button next to the corresponding drop-down list to get the latest profile.
• Specify an Office 365 account manually – Select this option to specify an Office 365 account manually.
If the account you want to use has multi-factor authentication (MFA) enabled, select the Our organization uses multi-factor authentication checkbox.
Enter the username and password in the corresponding test boxes.
Click Validation Test to validate the entered information.
*Note: The password is validated via Office 365 API. Due to an Office 365 API limitation, you may encounter the following issue: the password is checked as invalid here, but you can use this password to log into Office 365 successfully. To resolve the issue, you must change your password in Office 365, and then enter the new password here. For details about the password limitations and requirements, refer to refer to Appendix D: Password Limitations and Requirements of Office 365 Accounts.
If you enable MFA, the Custom SharePoint Online Admin Center URL field appears. Enter your SharePoint Online admin center URL in the text box.
*Note: If you want to import Office 365 groups or Exchange Online mailboxes, the specified account must be an Office 365 Global Administrator or Exchange Online Administrator; if you want to import OneDrive for Business, the specified account must be the administrator for all OneDrive for Business in the object list; if you want to import SharePoint Online site collections, the specified account must be the administrator of all site collections in the object list.
Click Import to import the objects into the selected container in batch, or click Cancel to close the pop-up window without importing any objects.

65
AvePoint Online Services
Viewing License Information On the Home page, the Tenant Owner and Service Administrators can view the license expiration date of each available online product. The license expiration date is displayed below the product name.
If your product has the User Count Exceeded Purchased Limit label displayed on the Home page,
• the number of your licenses in Office 365 has exceeded the licensed user seats for AvePoint Online product for Office 365, and the number of exceeded Office 365 licenses is larger than 10% of your purchased user seats.
or
• the number of your active users in Salesforce has exceeded the licensed user seats for AvePoint Cloud Backup for Salesforce®, and the number of exceeded Salesforce active users is larger than 10% of your purchased user seats.
To ensure you can use the online products without any interruption, you must contact AvePoint Sales to purchase more user seats.
*Note: AvePoint services for Office 365 charge licenses of several Office 365 subscriptions. For more information, refer to Licensing Information.
To view the detailed information of the license for each available online product, navigate to License > License Information on the left pane.
On the License Information page, the license type, license status, and expiration date for each online product are displayed. Click the product name to view more details about your license for this product, including license type, the number of purchased user seats, license expiration date, license status, and license agreement.
To obtain a full product license for any of the AvePoint Online Services products, contact AvePoint Sales.

66
AvePoint Online Services
Managing Promotional Codes Promotional codes allow you to obtain free enterprise licenses of AvePoint online products. You can contact AvePoint Technical Support to obtain promotional codes.
Note the following:
• If the number of your Office 365 licenses has exceeded 100, you cannot apply any promotional codes.
• You can apply at most 10 promotional codes.
The Tenant Owner and Service Administrators can manage promotional codes by navigating to License > Promotional Code Management. From this menu, you can perform the following actions:
• Applying a Promotional Code
• Searching for Existing Promotional Codes
Applying a Promotional Code To apply a promotional code to obtain free enterprise licenses of AvePoint online products, enter the promotional code in the text box on the upper-left corner, and click Apply next to the text box. You can view details of each applied promotional code by clicking the View Details in the corresponding row.
Searching for Existing Promotional Codes To search for specific promotional codes, enter keywords of the promotional code in the text box on the
upper-right corner, and click the search ( ) button or press Enter.

67
AvePoint Online Services
Viewing Transaction History If your tenant has obtained the full product license for DocAve Online through online payment, or your tenant started a trial with a monthly or annually billed subscription on or after March 27th 2016 and before February 19th 2017, the Tenant Owner and Service Administrators can view your transaction history by navigating to License > Transaction History on the left pane.
On the Transaction History page, the following information is displayed: order number, invoice number, payment amount, product, registered account holder e-mail, date and time of payment. Click an order number to view more details of the transaction.

68
AvePoint Online Services
Managing Subscriptions If your tenant signed up to AvePoint Online Services on or after March 27th 2016 and before February 19th 2017, the Tenant Owner and Service Administrators can use Subscription Management.
Navigate to License > Subscription Management on the left pane. The Subscription Management page provides Subscription Details and Payment Information. Click either of these tabs to access it.
• The Subscription Details tab displays the following information of monthly or yearly subscriptions: service, subscription, next payment amount, next payment date, subscription start date, subscription end date, license status, and invoice number.
You can also perform the following actions on a monthly or yearly subscription:
o Cancelling a Subscription
o Viewing Invoices
• The Payment Information tab allows you to perform the following actions:
o Viewing and Editing Credit Card Information
o Viewing and Editing Billing Address
*Note: If you want to edit your mailing address, click the current login ID in the upper-right corner, select My Profile, and then edit the address in the contact information.
Cancelling a Subscription To cancel a subscribed subscription, complete the following steps:
In the Subscription Details tab, locate to the subscription you are about to cancel.
In the Action column, click Cancel.
In the pop-up window, choose a reason for your cancellation or choose Others and enter your reason in the text box.
Enter Additional comments or suggestions in the text box.
Choose one of the following options:
• Click Keep My Subscription to close the window without cancelling your subscription.
• Click Cancel My Subscription to confirm your cancellation.
*Note: If the Governance Automation Online (Includes DocAve Online and AvePoint Cloud Insights) service was chosen for your tenant when signing up to AvePoint Online Services, three subscriptions are generated in Subscription Details. One subscription is for DocAve Online, one subscription is for AvePoint Cloud Insights, and another one is for Governance Automation Online. If you cancel the subscription for Governance Automation Online here, the subscriptions for DocAve Online and AvePoint Cloud Insights will remain.
69
AvePoint Online Services
*Note: If the DocAve Online (Includes AvePoint Cloud Insights) service was chosen for your tenant when signing up to AvePoint Online Services, two subscriptions are generated in Subscription Details, one subscription is for DocAve Online and the other is for AvePoint Cloud Insights. If you cancel the subscription for DocAve Online here, the subscriptions for AvePoint Cloud Insights will remain.
Viewing Invoices To view the invoice of a subscription, click the invoice number of the subscription in the Subscription Details tab. A pop-up window appears and displays the detailed information of the invoice.
Viewing and Editing Credit Card Information To view and edit your credit card information, complete the following steps:
In the Payment Information tab, go to the Credit Card field.
Click the here link.
The credit card information you previously provided is displayed, and you can modify it.
Click Submit.
Viewing and Editing Billing Address To view and edit your billing address, complete the following steps:
In the Payment Information tab, go to the Billing Address field. The current billing address is displayed.
To edit your billing address, click the here link in the Credit Card field. The billing address information you previously provided is displayed, and you can modify it.
Click Submit.

70
AvePoint Online Services
Enabling Report Data Collection To view reports provided by AvePoint Cloud Insights, Tenant Owners or Service Administrators must first enable the report data collection.
Complete the following steps to enable the report data collection:
Click Report Data Collection on the left pane.
On the Report Data Collection page, select the Enable data collection checkbox.
*Note: Only the Office 365 data which is created after the report data collection is enabled can be retrieved and included in AvePoint Cloud Insights reports.
Select the data source of report:
• Office 365 API
o SharePoint Online – Select this if you want to view the Content Reports and User Reports in AvePoint Cloud Insights.
o Exchange Online – This data source will be used in the later release.
o Azure AD – This data source will be used in the later release.
• Storage – Select this if you want to view the Storage Reports in AvePoint Cloud Insights.
• Page Views – Select this if you want to view the Site Analysis in AvePoint Cloud Insights.
You can set Account Filter, which will exclude specific accounts from AvePoint Cloud Insights report collectors. This can be useful for filtering out service accounts to improve the quality and accuracy of reports. Enter one or more accounts in the following format: [email protected].
Filter out DocAve Online system operator activity – AvePoint recommends you select this option to filter out actions of DocAve Online system operators who register objects into DocAve Online, since the action records caused by DocAve Online jobs may affect the collected data and the analysis results.
Tenant Scope – Set the scope for the tenants whose data will be displayed on reports. Select All tenants or Specific tenants. If you select Specific tenants, select at least one tenant from the drop-down list.
Storage Configuration – Configure the storage for storing Cloud Insights data.
• Select a storage type:
o Default storage – Select this if you want to continue to use the default Azure storage provided by AvePoint.
o Custom storage – Select this if you want to create a custom storage (only Azure BLOB Storage is supported), and finish the configurations below.
Account name – Enter an account name of Azure BLOB Storage.
71
AvePoint Online Services
Account password – Enter the password of the account above.
Container name – Enter a container name of the storage. If the container is removed from the storage, AvePoint Online Services will create a new container using the same name when collecting storage for the next time.
*Note: If you want to use a custom storage, note the followings:
Once the configuration is saved, old data in the default storage will be cleared up and moved to the new custom storage, and you cannot switch to the default storage anymore.
If you want to change to another custom storage, manually move the data from the old custom storage to the new one. AvePoint Online Services does not have the permission to clear up Cloud Insights data from the old custom storage.
• Enable e-mail notification about failed connection (for Custom storage only) – Select this if you want to send an e-mail notification to all active Service Administrators when the custom storage connection fails. The e-mail notification will be sent at 00:00 UTC every day if the connection continues to fail.
Click Save to save your selections, or click Cancel to go back to the homepage without saving any selections.

72
AvePoint Online Services
Exporting the User Activity Report The User Activity Report allows Tenant Owners and Service Administrators to view their tenant’s user activities in AvePoint Online Services.
Complete the following steps to export the User Activity Report:
Click User Activity Report on the left pane.
Click the calendar ( ) button and respectively select the Start Time and End Time.
Click Export and select a location to save the CSV report. The report contains the information about user activities within the selected time range. The information includes the summary of actions, the login ID of the users who performed the actions, and the operation time.

73
AvePoint Online Services
Configuring Advanced Settings In Advanced Settings, the Tenant Owner and Service Administrators can configure integration with SCOM and trusted IP address settings. Refer to the instructions in the sections below.
Enabling Integration with SCOM You can enable the integration between AvePoint Online Services and System Center Operations Manager. With the integration enabled, you can monitor AvePoint Online Services activities in System Center Operations Manager.
*Note: The integration supports System Center Operations Manager 2012 R2 and System Center Operations Manager 2016.
Complete the following steps to enable the integration:
Navigate to Advanced Settings > Integration with SCOM on the left pane. The Integration with SCOM page appears.
Select the Enable integration with System Center Operations Manager checkbox.
Configure the following settings:
• SCOM Server – Enter the IP address of the server where System Center Operations Manager is installed.
• Domain – Enter the name of the domain where the SCOM server resides.
• Username – Enter the username of an account that has the Operations Manager Administrators user role in SCOM.
• Password – Enter the password of the account above.
Click Validation Test to validate the information above.
Click Save to save your configurations, or click Cancel to go back to the homepage without saving any configurations.
Enabling Trusted IP Address Settings You can enable trusted IP address settings to only allow users to access AvePoint Online Services from certain IP addresses or IP address ranges.
*Note: Only IPv4 addresses are supported.
Complete the following steps to enable trusted IP address settings:
Navigate to Advanced Settings > Trusted IP Address Settings on the left pane,
Select the Enable trusted IP address settings checkbox.

74
AvePoint Online Services
• If you want to set specific IP addresses as trusted, enter the IP address in the Trusted IP Address text box. You can enter multiple IP addresses by separating them with commas (,).
• If you want to set IP address range as trusted, click New IP Address Range in the Trusted IP Address Range field. Then, enter the IP address range and click the save ( ) button. You can set multiple IP address range.
Click Save to save your configurations, or click Cancel to go back to the homepage without saving any configurations.
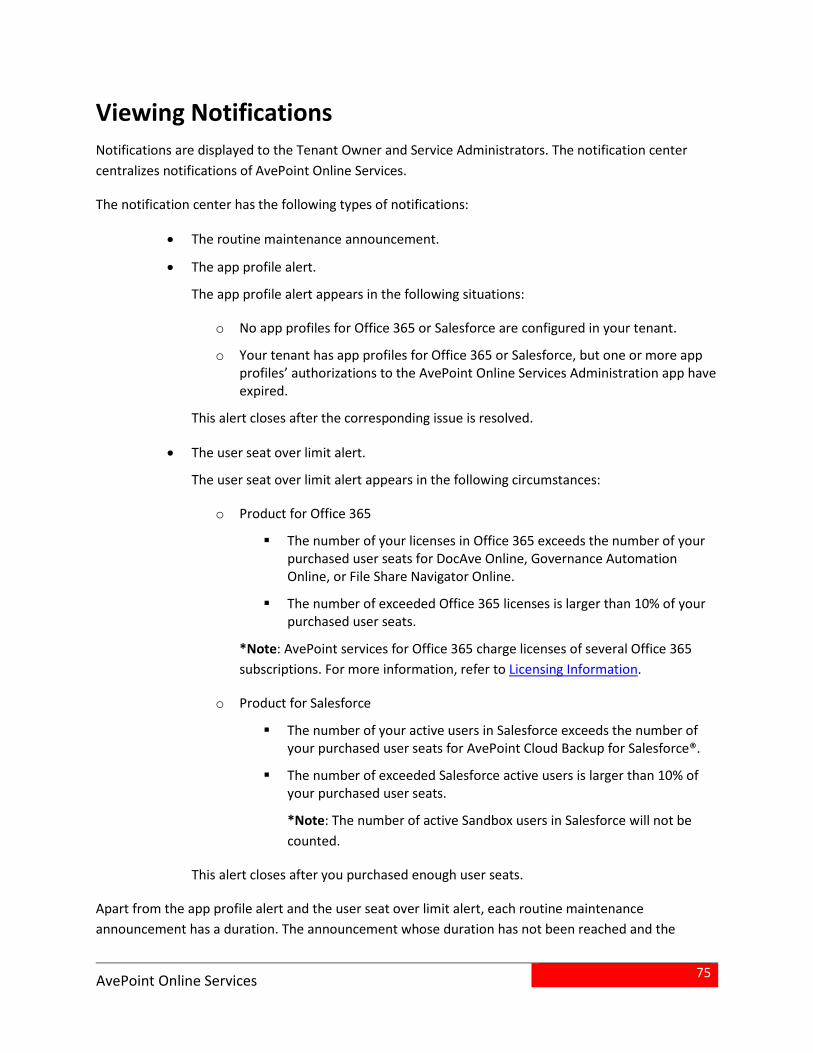
75
AvePoint Online Services
Viewing Notifications Notifications are displayed to the Tenant Owner and Service Administrators. The notification center centralizes notifications of AvePoint Online Services.
The notification center has the following types of notifications:
• The routine maintenance announcement.
• The app profile alert.
The app profile alert appears in the following situations:
o No app profiles for Office 365 or Salesforce are configured in your tenant.
o Your tenant has app profiles for Office 365 or Salesforce, but one or more app profiles’ authorizations to the AvePoint Online Services Administration app have expired.
This alert closes after the corresponding issue is resolved.
• The user seat over limit alert.
The user seat over limit alert appears in the following circumstances:
o Product for Office 365
The number of your licenses in Office 365 exceeds the number of your purchased user seats for DocAve Online, Governance Automation Online, or File Share Navigator Online.
The number of exceeded Office 365 licenses is larger than 10% of your purchased user seats.
*Note: AvePoint services for Office 365 charge licenses of several Office 365 subscriptions. For more information, refer to Licensing Information.
o Product for Salesforce
The number of your active users in Salesforce exceeds the number of your purchased user seats for AvePoint Cloud Backup for Salesforce®.
The number of exceeded Salesforce active users is larger than 10% of your purchased user seats.
*Note: The number of active Sandbox users in Salesforce will not be counted.
This alert closes after you purchased enough user seats.
Apart from the app profile alert and the user seat over limit alert, each routine maintenance announcement has a duration. The announcement whose duration has not been reached and the

76
AvePoint Online Services
unresolved app profile alert or user seat over limit alert are ongoing notifications. Each time you sign into AvePoint Online Services, the NOTIFICATION CENTER window appears on the upper-right corner with the ongoing notification displayed.
*Note: If you do not purchase user seats after the user seats have exceeded the limit for 30 days, the user seat over limit alert appears each time you refresh the current page or go to another page within AvePoint Online Services.
In the NOTIFICATION CENTER window, click View More Details to go to the Notification Center page.
You can also click the notification center ( ) button on the upper-right corner and click View More Details to go to the Notification Center page.
The Notification Center page displays ongoing notifications and announcement history. You can click Hide History to hide the announcement history. Show History allows you to display the hidden announcement history.
77
AvePoint Online Services
Submitting Feedback AvePoint provides a platform to collect feedback where you can provide suggestions for product features from your AvePoint Online Services experience. Refer to the following steps to submit feedback:
Click the submit feedback ( ) button on the upper-right corner.
On the Submit Feedback page, configure the following settings:
a. Rate Your AvePoint Online Services Experience – Click the stars to evaluate your AvePoint Online Services experience
b. Your Suggestion – Enter your suggestions about AvePoint Online Services features.
Click Submit to submit your feedback, or click Cancel to return to the AvePoint Online Services homepage without submitting your feedback.

78
AvePoint Online Services
Managing Your Profile Information To view and change your account information and reset your AvePoint Online Services password, click the current login ID in the top-right corner, and then select My Profile from the drop-down list.
*Note: My Profile is only available to Local Authentication users and Office 365/Salesforce Service Administrators.
In My Profile, you can edit the following information:
• Contact Information – This tab displays the user ID and the contact information of the current user. Edit the information in any of the available fields. Click Save to save your changes, or click Cancel.
• Reset Password – This tab allows you to reset a new password for your AvePoint Online Services account when you’re logged in. Enter the Old Password, New Password, and Confirm Password in the corresponding text boxes. Click Save to save your changes, or click Cancel.
*Note: The Reset Password tab is only available to Local Authentication users.
After you reset your password, a password change confirmation e-mail will be sent to your e-mail inbox to confirm the change.
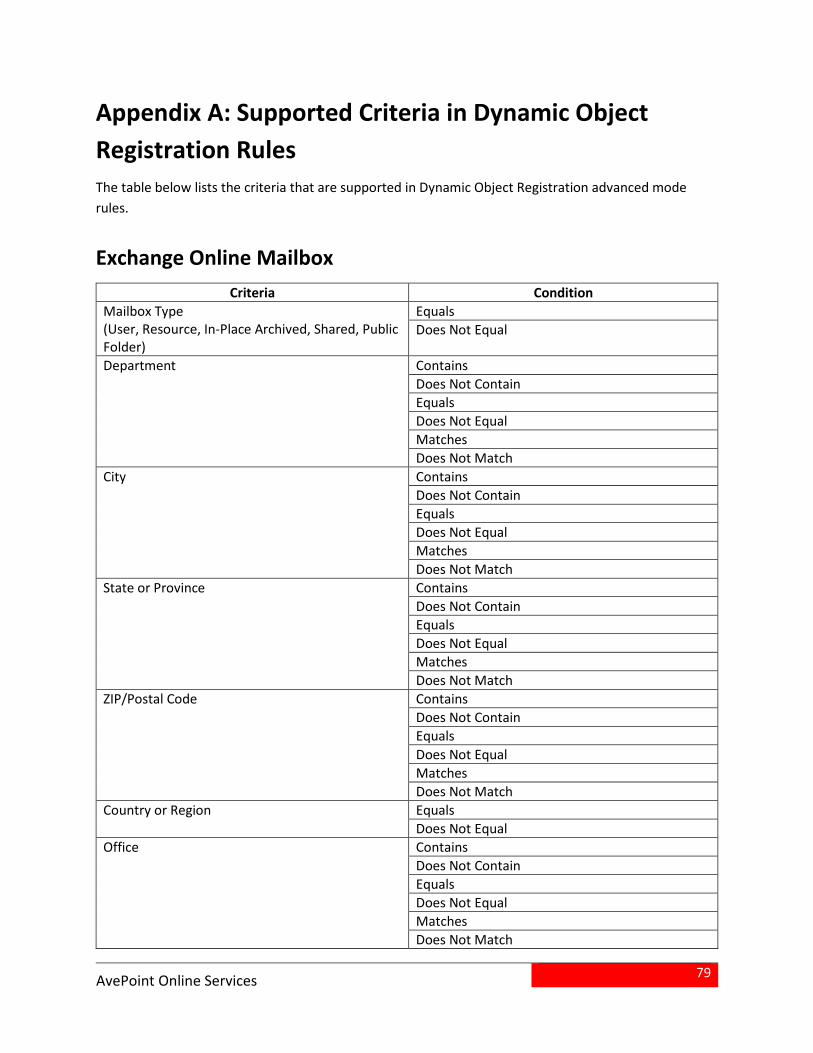
79
AvePoint Online Services
Appendix A: Supported Criteria in Dynamic Object Registration Rules The table below lists the criteria that are supported in Dynamic Object Registration advanced mode rules.
Exchange Online Mailbox Criteria Condition
Mailbox Type (User, Resource, In-Place Archived, Shared, Public Folder)
Equals Does Not Equal
Department Contains Does Not Contain Equals Does Not Equal Matches Does Not Match
City Contains Does Not Contain Equals Does Not Equal Matches Does Not Match
State or Province Contains Does Not Contain Equals Does Not Equal Matches Does Not Match
ZIP/Postal Code Contains Does Not Contain Equals Does Not Equal Matches Does Not Match
Country or Region Equals Does Not Equal
Office Contains Does Not Contain Equals Does Not Equal Matches Does Not Match

80
AvePoint Online Services
Criteria Condition User ID Contains
Does Not Contain Equals Does Not Equal Matches Does Not Match
Display Name Contains Does Not Contain Equals Does Not Equal Matches Does Not Match
Company Contains Does Not Contain Equals Does Not Equal Matches Does Not Match
Office 365 Subscription Name Contains Does Not Contain Equals Does Not Equal
Group Membership Contains Does Not Contain Equals Does Not Equal
Custom Attribute*
Contains Does Not Contain Equals Does Not Equal Matches Does Not Match
Job Title Contains Does Not Contain Equals Does Not Equal Matches Does Not Match
*Note: The Custom Attribute criterion is only available when a service account profile is selected as the authentication method in the dynamic object registration profile. After selecting Custom Attribute, select an attribute number, which is retrieved from Exchange Online.

81
AvePoint Online Services
OneDrive for Business Criteria Condition
Site Collection Property
URL Contains Does Not Contain Equals Does Not Equal Matches Does Not Match
Size >= <=
Created Time Before After On Within Older Than
Primary Administrator Contains Equals
Custom Property: Text Contains Does Not Contain Equals Does Not Equal Matches Does Not Match
Custom Property: Number >= <= =
Custom Property: Yes/No Equals Does Not Equal
Custom Property: Date and Time Before After On Within Older Than
Basic User Information
City Contains Does Not Contain Equals Does Not Equal Matches Does Not Match
Country or Region Contains Does Not Contain Equals Does Not Equal Matches Does Not Match

82
AvePoint Online Services
Criteria Condition Company Contains
Does Not Contain Equals Does Not Equal Matches Does Not Match
Office Contains Does Not Contain Equals Does Not Equal Matches Does Not Match
Department Contains Does Not Contain Equals Does Not Equal Matches Does Not Match
Office 365 Subscription Name Contains Does Not Contain Equals Does Not Equal
Group Membership Contains Does Not Contain Equals Does Not Equal
Job Title Contains Does Not Contain Equals Does Not Equal Matches Does Not Match
User Profile Property
Boolean Equals Does Not Equal
Date Before After On Within Older Than
Date Time Before After On Within Older Than
E-mail Contains
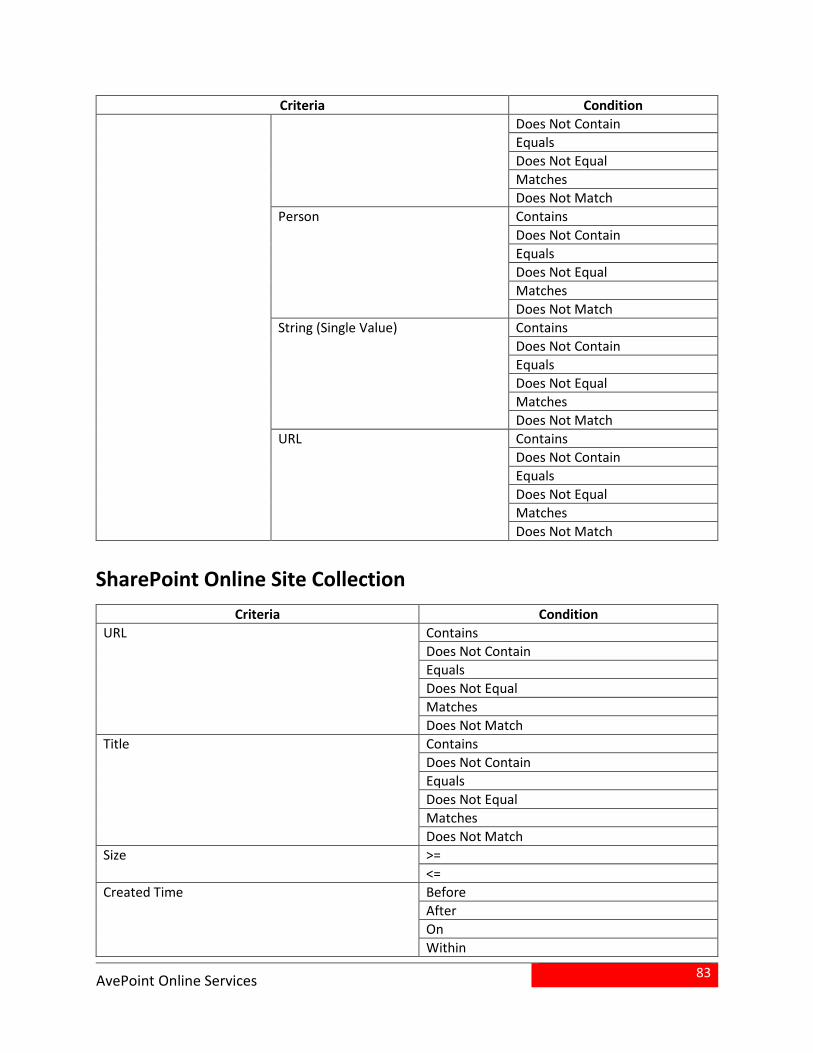
83
AvePoint Online Services
Criteria Condition Does Not Contain Equals Does Not Equal Matches Does Not Match
Person Contains Does Not Contain Equals Does Not Equal Matches Does Not Match
String (Single Value) Contains Does Not Contain Equals Does Not Equal Matches Does Not Match
URL Contains Does Not Contain Equals Does Not Equal Matches Does Not Match
SharePoint Online Site Collection Criteria Condition
URL Contains Does Not Contain Equals Does Not Equal Matches Does Not Match
Title Contains Does Not Contain Equals Does Not Equal Matches Does Not Match
Size
>= <=
Created Time Before After On Within

84
AvePoint Online Services
Criteria Condition Older Than
Primary Administrator Contains Equals
Template Name Contains Does Not Contain Equals Does Not Equal Matches Does Not Match
Template Title Contains Equals
Custom Property: Text Contains Does Not Contain Equals Does Not Equal Matches Does Not Match
Custom Property: Number >= <= =
Custom Property: Yes/No Equals Does Not Equal
Custom Property: Date and Time Before After On Within Older Than
Office 365 Group Criteria Condition
Group Property Created from* Equals Does Not Equal
Display Name Contains Does Not Contain Equals Does Not Equal Matches Does Not Match
Group Classification Contains Does Not Contain Equals Does Not Equal

85
AvePoint Online Services
Criteria Condition Matches Does Not Match
Group ID Contains Does Not Contain Equals Does Not Equal Matches Does Not Match
Group Owner Name Contains Does Not Contain Equals Does Not Equal Matches Does Not Match
Privacy Equals Does Not Equal
Group Team Site Property
Created Time Before After On Within Older Than
Custom Property: Date and Time Before After On Within Older Than
Custom Property: Number
>= <= =
Custom Property: Text Contains Does Not Contain Equals Does Not Equal Matches Does Not Match
Custom Property: Yes/No Equals Does Not Equal
Title Contains Does Not Contain Equals Does Not Equal Matches Does Not Match
URL Contains Does Not Contain

86
AvePoint Online Services
Criteria Condition Equals Does Not Equal Matches Does Not Match
Size >= <=
*Note: The Created from criterion is only available when a service account profile is selected as the authentication method in the dynamic object registration profile.
Project Online Site Collection Criteria Condition
URL Contains Does Not Contain Equals Does Not Equal Matches Does Not Match
Title Contains Does Not Contain Equals Does Not Equal Matches Does Not Match
Size
>= <=
Created Time Before After On Within Older Than
Primary Administrator Contains Equals
Template Name Contains Does Not Contain Equals Does Not Equal Matches Does Not Match
Template Title Contains Equals
Custom Property: Text Contains Does Not Contain Equals

87
AvePoint Online Services
Criteria Condition Does Not Equal Matches Does Not Match
Custom Property: Number >= <= =
Custom Property: Yes/No Equals Does Not Equal
Custom Property: Date and Time Before After On Within Older Than
Exchange Online Public Folder Criteria Condition
Display Name Contains Does Not Contain Equals Does Not Equal Matches Does Not Match
Path Is Under Is Not Under
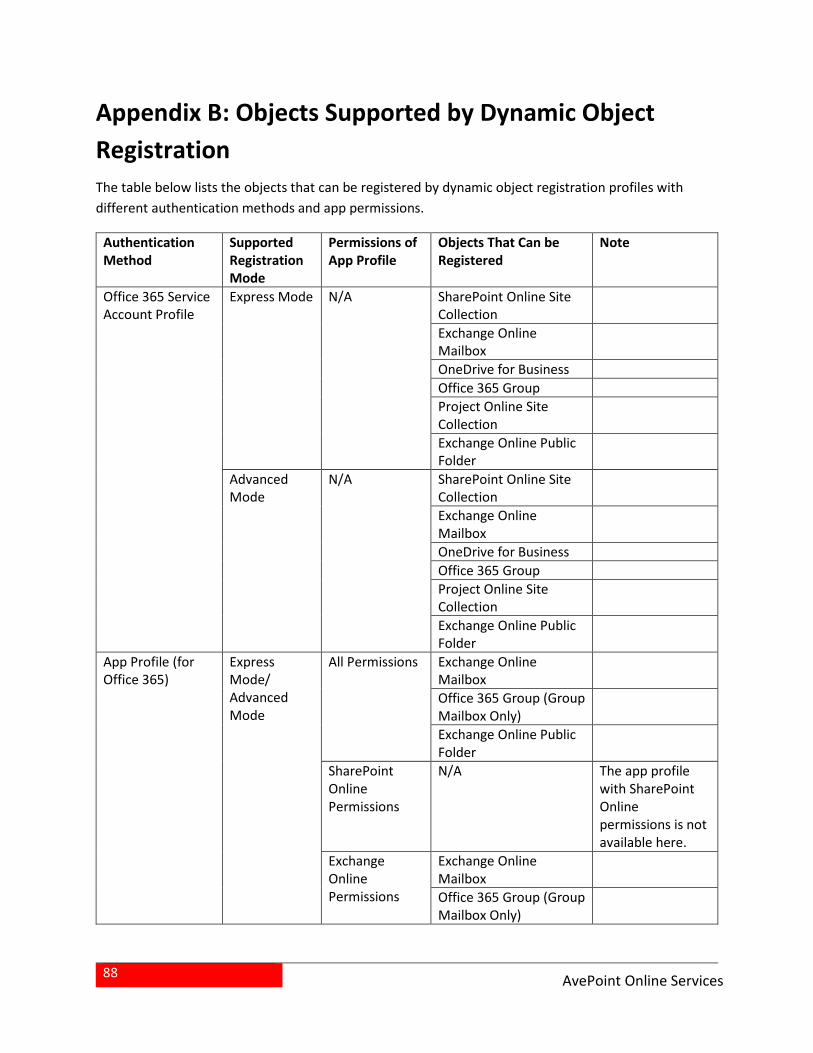
88
AvePoint Online Services
Appendix B: Objects Supported by Dynamic Object Registration The table below lists the objects that can be registered by dynamic object registration profiles with different authentication methods and app permissions.
Authentication Method
Supported Registration Mode
Permissions of App Profile
Objects That Can be Registered
Note
Office 365 Service Account Profile
Express Mode
N/A
SharePoint Online Site Collection
Exchange Online Mailbox
OneDrive for Business Office 365 Group Project Online Site Collection
Exchange Online Public Folder
Advanced Mode
N/A
SharePoint Online Site Collection
Exchange Online Mailbox
OneDrive for Business Office 365 Group Project Online Site Collection
Exchange Online Public Folder
App Profile (for Office 365)
Express Mode/ Advanced Mode
All Permissions
Exchange Online Mailbox
Office 365 Group (Group Mailbox Only)
Exchange Online Public Folder
SharePoint Online Permissions
N/A The app profile with SharePoint Online permissions is not available here.
Exchange Online Permissions
Exchange Online Mailbox
Office 365 Group (Group Mailbox Only)

89
AvePoint Online Services
Authentication Method
Supported Registration Mode
Permissions of App Profile
Objects That Can be Registered
Note
Exchange Online Public Folder
Office 365 Service Account Profile (with MFA Enabled) + App Profile (for Office 365)
Express Mode/ Advanced Mode
All Permissions
SharePoint Online Site Collection
Exchange Online Mailbox
OneDrive for Business Office 365 Group Project Online Site Collection
Exchange Online Public Folder
SharePoint Online Permissions
SharePoint Online Site Collection
OneDrive for Business Project Online Site Collection
Exchange Online Permissions
N/A When the selected Office 365 service account profile has MFA enabled, the app profile with Exchange Online permissions is not available here.

The table below lists the objects that can be and cannot be registered via Batch Import.
Retrieve Credentials from SharePoint Online Site Collection
Exchange Online Mailbox
OneDrive for Business
Office 365 Group
Project Online Site Collection
Exchange Online Public Folder
Office 365 Service Account Profile
Without MFA Enabled
Global Administrator
Supported Supported Supported Supported Supported Unsupported
SharePoint Online Administrator
Supported Supported Supported Unsupported Supported Unsupported
Exchange Online Administrator
Unsupported Supported Supported Supported Unsupported Unsupported
With MFA Enabled
Global Administrator
Supported Unsupported Unsupported Unsupported Supported Unsupported
SharePoint Online Administrator
Supported Unsupported Unsupported Unsupported Supported Unsupported
Exchange Online Administrator
Unsupported Unsupported Unsupported Unsupported Unsupported Unsupported
App Profile (for Office 365)
All Permissions Unsupported Supported Unsupported Supported Unsupported Unsupported SharePoint Online Permissions
Unsupported Supported Unsupported Supported Unsupported Unsupported
Exchange Online Permissions
Unsupported Supported Unsupported Supported Unsupported Unsupported
Manually Specified Office 365 Account Supported Supported Supported Supported Supported Unsupported

Appendix C: Creating a Key Vault in Azure Make sure you have an Azure subscription that contains Azure Key Vault. Then, follow the instructions below:
Create an application. This application is only used for Azure Key Vault. AvePoint Online Services encryption profile will access key vault via the application.
a. In Azure Portal, navigate to Azure Active Directory > App registration.
b. Click New application registration on the ribbon.
c. Configure the application settings. The application type must be Web app / API, and the sign-on URL can be any URL.
d. After the application is created successfully, copy the application ID. The application ID is the client ID that will be used in the encryption profile.
Create a key for the application. The key is the client secret that will be used in the AvePoint Online Services encryption profile.
a. In the Settings pane of the newly created application, click Keys.
b. Enter a description for the key and select a duration for the key.
c. Click Save. The value of the key is automatically generated and displayed.
d. Copy the key value. You will need to provide the key value when configuring the encryption profile.
*Note: The value will be hidden after you leave or refresh the page.
Create a key vault.
a. In Azure Portal, enter Key vaults in the search box on the top, and then select the first result to access the Key vaults page.
b. Click Add.
c. In the Create key vault pane, click Access policies.
d. In the Access policies pane, click Add new.
e. In the Add access policy pane, click Select principal, and then enter the application name or application ID in the search box.
f. Select the application, and click Select in the bottom.
g. In the Add access policy pane, navigate to the Key permissions field.
o In Key Management Operations, select Get.

92
AvePoint Online Services
o In Cryptographic Operations, select Decrypt and Encrypt.
h. Save the access policy and the key vault.
i. On the Key vaults page, click the newly created key vault.
j. Click Keys in SETTINGS. In the Keys pane, click Add on the ribbon to create a key. Then, select the current version. The key Identifier is displayed on the right pane.
k. Copy the key identifier. You will need to provide the key identifier when configuring the encryption profile.

93
AvePoint Online Services
Appendix D: Password Limitations and Requirements of Office 365 Accounts The table below details the password limitations and requirements of Office 365 accounts. Note that the password limitations and requirements are from Office 365.
Property Requirements Characters Allowed • A-Z
• a-z
• 0-9
• @ # $ % ^ & * - _ ! + = [] {} | \ : ’ , . ? / ` ~ ” () ;
Characters Not Allowed • Unicode characters
• Spaces
• Strong passwords only: Cannot contain a dot character (.) immediately preceding the @ symbol.
Password Restrictions • Eight (8) characters to the minimum and sixteen (16) characters to the maximum
• Strong passwords only: Three of the following is required:
o Lowercase characters
o Uppercase characters
o Numbers (0-9)
o Symbols (see the symbols listed in Characters Allowed above)
Password Expiry By default, password expiry is enabled. If you want to disable it, navigate to Office 365 > Admin center > Settings > Security & privacy > Password policy, click Edit, and then click the Off ( ) button.
Password Expiry Duration By default, a password will expire in 90 days. If you want to change the duration, navigate to Office 365 > Admin center > Settings > Security & privacy > Password policy, click Edit, and then modify the number in the Days before passwords expire field.
Password Expiry Notification
By default, password expiry notification will be sent to users 14 days before the passwords expires. If you want to change the notification time, navigate to Office 365 > Admin center > Settings > Security & privacy > Password policy, click Edit, and then modify the number in the Days before a user is notified about expiration field.

94
AvePoint Online Services
Notices and Copyright Information Notice The materials contained in this publication are owned or provided by AvePoint, Inc. and are the property of AvePoint or its licensors, and are protected by copyright, trademark and other intellectual property laws. No trademark or copyright notice in this publication may be removed or altered in any way.
Copyright Copyright © 2014-2017 AvePoint, Inc. All rights reserved. All materials contained in this publication are protected by United States and international copyright laws and no part of this publication may be reproduced, modified, displayed, stored in a retrieval system, or transmitted in any form or by any means, electronic, mechanical, photocopying, recording or otherwise, without the prior written consent of AvePoint, 525 Washington Blvd, Suite 1400, Jersey City, NJ 07310, USA or, in the case of materials in this publication owned by third parties, without such third party’s consent. Notwithstanding the foregoing, to the extent any AvePoint material in this publication is reproduced or modified in any way (including derivative works and transformative works), by you or on your behalf, then such reproduced or modified materials shall be automatically assigned to AvePoint without any further act and you agree on behalf of yourself and your successors, assigns, heirs, beneficiaries, and executors, to promptly do all things and sign all documents to confirm the transfer of such reproduced or modified materials to AvePoint.
Trademarks AvePoint®, DocAve®, the AvePoint logo, and the AvePoint Pyramid logo are registered trademarks of AvePoint, Inc. with the United States Patent and Trademark Office. These registered trademarks, along with all other trademarks of AvePoint used in this publication are the exclusive property of AvePoint and may not be used without prior written consent.
Microsoft, MS-DOS, Internet Explorer, Office, Office 365, SharePoint, Windows PowerShell, SQL Server, Outlook, Windows Server, Active Directory, and Dynamics CRM 2013 are either registered trademarks or trademarks of Microsoft Corporation in the United States and/or other countries.
Adobe Acrobat and Acrobat Reader are trademarks of Adobe Systems, Inc.
All other trademarks contained in this publication are the property of their respective owners and may not be used without such party’s consent.
Changes The material in this publication is for information purposes only and is subject to change without notice. While reasonable efforts have been made in the preparation of this publication to ensure its accuracy, AvePoint makes no representation or warranty, expressed or implied, as to its completeness, accuracy, or suitability, and assumes no liability resulting from errors or omissions in this publication or from the use of the information contained herein. AvePoint reserves the right to make changes in the Graphical User Interface of the AvePoint software without reservation and without notification to its users.
AvePoint, Inc. 525 Washington Blvd Suite 1400 Jersey City, NJ 07310 USA