autocad® secrets exposed!aucache.autodesk.com/au2012/sessionsfiles/2247/3530/handout_2247...share...
TRANSCRIPT

1
AutoCAD® Secrets Exposed! Jeanne Aarhus – Aarhus Associates, LLC
AC2247
This class is filled with time-saving tips and tricks that can be used to increase your productivity
immediately. If you have attended previous offerings of this class, you know there is always
something you didn’t know you could do, so don’t miss it this year. We have new tips to expose,
including tips from the new and exciting AutoCAD 2012 and AutoCAD 2013 software. Some of
the best and most production-enhancing tools have been introduced in recent upgrades. To
take advantage of them, attend this class and discover what might take you years to discover on
our own. Leave this class with the knowledge to dazzle your coworkers back home—a great
way to ensure yourself a ticket to attend next year!
Learning Objectives At the end of this class, you will be able to:
Use hidden tips and tricks from other AutoCAD users.
Share tips that apply to many versions of AutoCAD ranging from 2009-2012.
Use the newer tools for greater productivity.
Use hidden tips that you may not find on your own.
About the Speaker
Jeanne is known for keeping her training sessions fast moving and fun. She is a nationally
known speaker and expert in CAD, and presents seminars and workshops on CAD productivity
for managers and users in both corporate and college settings. She has over 25 years
experience involving production drafting, user support, standards coordination, programming,
and training in various CAD applications. Jeanne is an independent consultant offering training
and implementation services and is certified in several Autodesk® and Bentley® products. She
continues to be actively involved in international, national, and local CAD user groups and has
been a popular speaker at AU for several years. [email protected]

AutoCAD® Secrets Exposed!
2
AutoCAD® Secrets Exposed! The topics I selected for this presentation were collected from friends, co-workers, other user
groups; and of course the newsgroups.
If you have an idea or a great tip to pass along, I invite you to share your ideas with oth er
users. This only works when we ALL share ideas and concepts and keep the information
flowing. Many thanks to all those who have sent me their tips over the past year to help with
this collection of secrets.
About this document:
Secret available in AutoCAD 2009
Secret available in AutoCAD 2010
Secret available in AutoCAD 2011
Secret available in AutoCAD 2012
Secret available in AutoCAD 2013

AutoCAD® Secrets Exposed!
3
1 Smarter Viewports OLDIE but GOODIE…
Use the VPCLIP command to modify the shape of a viewport; for example, change a rectangular
viewport to a non-rectangular viewport. This command is located on the ribbon
tab LAYOUT LAYOUT VIEWPORTS CLIP.
2 Readable Text OLDIE but GOODIE…
Use the TORIENT command to make un-readable text, more readable.

AutoCAD® Secrets Exposed!
4
3 Justify Text OLDIE but GOODIE…
Use the TJUST command to set the justification of any selected DTEXT or MTEXT without moving
the text object. This command only moves the basepoint.
Have you ever changed your text justification only to get this result? Use this command instead
and get the CORRECT results.
4 Enclose Text OLDIE but GOODIE…
Use the TCIRCLE command to enclose text with a
circle, a slot, or a rectangle automatically.

AutoCAD® Secrets Exposed!
5
5 Missing Aerial View?
OLDIE but GOODIE…
Use the command .DSVIEWER to run the old AERIAL VIEW
command.
6 Trim and Extend Dimensions OLDIE but GOODIE…
I learned of this one a long time ago, but I keep passing it on. It is such a handy feature and it
seems that most users don’t even know they can do this.
Use either the TRIM or
EXTEND command to modify
dimensions as well as lines,
arcs, etc.
7 Trim Your Hatches OLDIE but GOODIE…
The new hatch capabilities allow you to TRIM your hatches just like you would other objects.

AutoCAD® Secrets Exposed!
6
8 Hatch Defaults OLDIE but GOODIE…
Do you always have to change the default hatch pattern because ANSI31 is not the most common
hatch for your work? Me too! I would prefer to have SOLID my default hatch.
Here is how you can modify your “default” hatch pattern for future hatching commands.
Use the system variable HPNAME and set it to the pattern of your choice
HPNAME = SOLID
Sorry, but this setting isn’t saved anywhere; so when you close AutoCAD it reverts back to ANSI31.
So how can you save this change permanently? Try using the ACADDOC.LSP file. You can create
and place the ACADDOC.LSP in any support path directory and it will be loaded automatically each
time a drawing is accessed.
Use the file ACADDOC.LSP to save these “favorite settings” every time you run AutoCAD.
(setvar “HPNAME” “SOLID”)
Use the . character to reset the pattern back to the default hatch.
9 No More LTSCALE? Tired of setting LTSCALE yet? Me too; especially when moving between modelspace and
paperspace right? Here is an enhancement in 2008 and 2009 that I never thought we would see!
At last, no more LTSCALE “switching”.
A new system variable MSLTSCALE scales linetypes in modelspace using the new annotative
scale settings.
MSLTSCALE
Scales linetypes displayed on the model tab by the annotation scale.
0 Linetypes displayed on the Model tab are not scaled by the annotation scale
1 (default) Linetypes displayed on the Model tab are scaled by the annotation scale
Using this new variable you can set your LTSCALE to your company standard; usually .5 or .375.
After that, MSLTSCALE will manage the line scales automatically and YOU NEVER HAVE TO SET
IT AGAIN!

AutoCAD® Secrets Exposed!
7
10 Auto-Increment Text Use the TCOUNT command to increment existing text.
11 Pline Continue? Use the new GRIP > ADD VERTEX to continue a polyline with additional vertex.
12 Quick Block Fix Just in case someone in your office refuses to use the BYLAYER setting for color, linetype, or
lineweight; use the new SETBYLAYER command to fix layer errors in blocks without having to edit
them individually.

AutoCAD® Secrets Exposed!
8
13 Compare DWFs Use Design Review to compare two drawing .DWFs.
GREEN represents the modified objects.
PURPLE represents the deleted objects.

AutoCAD® Secrets Exposed!
9
14 The NEW Measure There are some great enhancements to the MEASURE commands. Check them out!
Measure Area The MEASURE AREA tool is much more visual now which is a significant help. I know there were
times that I had to actually used a hatch object to determine the area I wanted since it was more
visual. Now you can do this, (ALMOST) with the AREA tool.
I said (ALMOST) because if the objects overlap, the command does not take that
into consideration.
My solution for this is to use a hatch object for your area calculations and get the
area from the hatch properties.

AutoCAD® Secrets Exposed!
10
15 Angle > 180 Do you need to create an angular dimensions with angles larger than 180 degrees. If you just select
two lines you are not able to get the larger angles to display. Just use the command differently.
Use the <select vertex> command option:
16 Shifty Fillet = 0 Use the SHIFT key to override the fillet and chamfer radius to 0.

AutoCAD® Secrets Exposed!
11
17 Dimension Priority Another command that is new to many users is the ability to define extension line priorities for those
“overlapping” extension lines without exploding the dimension; or using wipeouts.
Use the new DIMENSION BREAK command to select the extension line you wish to “break” at the
overlapping location. Don’t worry, it doesn’t really break the dimension; just fakes it out!
STEP 1: Open the DIMENSION toolbar and select the DIMENSION BREAK command.
STEP 2: Select the extension line you want to “break”
18 Generate Boundaries Using AutoCAD 2011 you can re-generate boundaries for hatch patterns and fills.

AutoCAD® Secrets Exposed!
12
19 Convert Dimensions You can convert associated dimensions to constrained dimensions using the new DCCONVERT
command. This is a great way to “smarten” up those dimensions in legacy drawings.
STEP 1: Select the PARAMETRIC TAB on the ribbon, and locate the CONVERT tool on the DIMENSIONAL PANEL.
STEP 2: Select all dimensions to be converted to parametric dimensions.
SECRET: You can modify the parametric dimensions to display like “normal” dimensions using the following property settings. Constrain Form: Annotational
20 DIM What? Everyone one of us has seen badly spaced baseline dimensions right? Now you can fix this
problem using this new 2009 command to adjust the spacing on existing dimensions.
STEP 1: Key in the command DIMSPACE to re-align the baseline dimensions automatically.

AutoCAD® Secrets Exposed!
13
21 Generate 3D from 2D You can also generate a 3D solid from the existing flat linework .
STEP 1: Generate flat polylines that define the “shape” for TOP, FRONT and SIDE views of the 3D
solid.
STEP 2: Use the EXTRUDE command to extrude the flat polylines through all other parts as needed.
STEP 3: Use the INTERSECT command to keep only the intersecting portion of the 3 extrusions created.

AutoCAD® Secrets Exposed!
14
22 PDF Collate Your Way I had to add this secret since everyone seems to be asking me how to do this lately. How can you
control whether your PDF output is in a single file or multiple files? Use the system variable
PUBLISHCOLLATE to control your PDF output.
PUBLISHCOLLATE
Publishing sheets as a single job requires a plot driver that supports the multi-sheet plotting or printing
0
A published sheet set is processed one sheet at a time. Separate PLT files
are created for each sheet. If the sheet set is published, the sheets might be
interleaved with other plot jobs.
1 (default)
A published sheet set is processed as a single job. A multi-sheet PLT file is
created. If the sheet set is published, it is never interleaved with other plot
jobs.
23 Print Layer List How many times have you wanted to print the layer list in a drawing file? Use this little known tip!
STEP 1: Open the LAYER MANAGER dialog and use the <Right-Click> menu to access the SELECT ALL layers command.
STEP 2: Issue a <CTRL>+C> to copy all layers to the windows clipboard.
STEP 3: Open an Excel spreadsheet and PASTE the layers into the spreadsheet.
So Cool!

AutoCAD® Secrets Exposed!
15
24 TEXTTOFRONT A new command TEXTTOFRONT brings all your text and dimension text to the top of the
draworder stack.
25 Smarter Command Line
Smarter Command Options Using AutoCAD 2013, you have more obvious command options available when using the “implied”
selection tools. With no command active, if a selection method is initiated, the command line
displays the command options for Fence, WindowPolygon, and CrossingPolygon.
26 Smarter ViewCube New for me when using the ViewCube is the fact that if you have objects selected the ViewCube
will limit the viewing commands to the selected objects. This is very handy when working in
complex 3D models.

AutoCAD® Secrets Exposed!
16
27 Custom Stamps
Reference List Stamp Use the remote text (RTEXT) express tool to automate a list of your attached references for your
titleblocks.
Add a reference file, and it automatically updates!
Smarter Plot Stamp I am not going to cover the obvious Plot Stamp utility found on the Plot dialog box. You have
probably already discovered that one. I find it a little limiting in placement options….so here is an
alternative. This method will work in any version of AutoCAD that has the Express Tools installed.
You can put this text anywhere in your file, modelspace or paperspace and get easy plot stamp
capabilities.

AutoCAD® Secrets Exposed!
17
28 Disable Attributes? Need to place blocks but don’t have time to enter attributes right now? Use this system variable to
disable the attribute value entry.
ATTREQ
Controls whether INSERT uses default attribute settings during insertion of blocks.
Saved in: Registry
0 Assumes the defaults for the values of all attributes
1 (default) Turns on prompts or a dialog box for attribute values, as specified by ATTDIA
29 Smarter SELECTION Picks Use the new option for the PICKDRAG variable to allow for either the <Pick-n-Drag> selection
method; or the <Pick-n-Pick> method.
PICKDRAG
Controls the method of drawing a selection window.
0 Specifies a selection window using two points. Click once to begin a selection
window, click again to complete the selection.
1 Specifies a selection window by clicking and dragging. Release the mouse
button to complete the selection.
2 (default) Specifies a selection window using either of the methods above.
30 Annotation Background The Annotation Background setting has been improved to remember your last setting. You no
longer have to live with the constant RED background! It’s the simple things that matter right?

AutoCAD® Secrets Exposed!
18
31 Annotation Monitor Use the new ANNOTATION MONITOR feature to analyze associated dimensions and easily update
or remove extraneous or incorrect associations. This feature automatically marks each non -
associated dimension with an “information” icon that displays the available commands to correct the
problem.
For example, you can REASSOCIATE or DELETE the identified dimension.
Note the icon located in the status bar that also identifies that there are association problems.
ANNOMONITOR
Turns the annotation monitor on or off. When the annotation monitor is on, it flags all non-associative annotations by placing a badge on them.
2 (default) Annotation monitor is ON
1 Annotation monitor is ON
0 Annotation monitor is OFF
-1 Annotation monitor is OFF
-2 Annotation monitor off. However, it automatically turns ON or sets
ANNOMONITOR to 2, when a model documentation edit or update event
occurs.

AutoCAD® Secrets Exposed!
19
32 Smarter Model Documentation If you liked the model documentation that was introduced in AutoCAD 2012; you are going to love
the enhancements added in AutoCAD 2013. It’s like they read my mind!
You can directly IMPORT or LINK Inventor models into AutoCAD 2013. Way Cool!
Projected Views Using AutoCAD 2012 or 2013 you can create the standard projected views of the part.

AutoCAD® Secrets Exposed!
20
Section Views Using AutoCAD 2013 you can now create SECTION views of the part.
Detail Views Using AutoCAD 2013 you can now create DETAIL views of the part. Use a CIRCULAR or
RECTANGULAR detail view with options for

AutoCAD® Secrets Exposed!
21
33 New Frames You can now view hidden frames when selecting references, point clouds, or even wipeouts. This
makes simple frame changes easy to make on-the-fly.
FRAMESELECTION
Controls whether the hidden frame of an image, underlay, clipped xref, clipped point cloud, or
wipeout can be selected.
0 Hidden frames cannot be selected.
1 (default) Hidden frames can be selected.

AutoCAD® Secrets Exposed!
22
34 Had Enough Layers Reconciled? Many users complain about the notification of new layers that have been added to active or
reference files.
Change the following settings if you want to stop this notification!
LAYEREVAL
The setting is stored in an integer using one of the following values:
0 (default) Off
1 Detects when new xref layers have been added in the drawing
2 Detects when new layers have been added in the drawing and xrefs
LAYEREVALCTL
This system variable also affects whether the new layer notification is displayed or not.
0 Disables the evaluation and notification of new layers
1 (default) Enables the evaluation of new layers on the LAYEREVAL settings.

AutoCAD® Secrets Exposed!
23
35 On-the-Fly Basepoints You can modify the block insertion base point using the BASEPOINT option during insertion.
STEP 1: Run the INSERT command.
STEP 2: Key in B to define a new BASEPOINT on the block.
STEP 3: Snap to the new basepoint and place the block.
36 Cycle Basepoints You can provide alternate block insertion points for use with the INSERT command using point
parameter objects in a dynamic block definition.
STEP 1: Select the block you want to have alternate insertion points
STEP 2: <Right-Click> and select the BLOCK EDITOR command
STEP 3: Place POINT parameter at the alternate insertion point locations.
STEP 4: For once, you can ignore those “exclamation points” that normally indicate you haven’t completed the parameter definition.,
STEP 5: Close the Block Editor and SAVE the changes to the block.
STEP 6: Insert the block again and use the CTRL key to toggle between the new “alternate” insertion points.

AutoCAD® Secrets Exposed!
24
37 F1 - YOUR Way Tired of hitting that F1 – HELP by mistake? Use this procedure to alter the F1 key execution
command.
STEP 1: Key in CUI to access the Customize User Interface dialog.
STEP 2: Expand the Customizations in All CUI Files section of the dialog.
STEP 3: Expand the Commands List section of the dialog.
STEP 4: Change All Commands to Custom Commands and pick the NEW button
STEP 5: Change the name of the new command to F1 CANCEL. The command macro is already defined as ^C^C which will perform a CANCEL command.
STEP 6: Expand Keyboard Shortcuts in the Customizations in All CUI Files section.
STEP 7: Drag-n-Drop the previously made custom command F1 CANCEL on top of the Shortcut Keys.
STEP 8: Expand the Shortcut Keys to verify that the F1 CANCEL command has been copied.
STEP 9: Select the new F1 CANCEL command in the Shortcut Keys section.
STEP 10: Access the Properties section of the dialog and modify the Access Keys definition to use the F1 shortcut key.
STEP 11: Pick the Browse button and select the F1 key on your keyboard. Pick OK to save the definition.
STEP 12: Pick APPLY and OK to save your changes.
Try out your new F1 key. No more accidental help.
You can still access Online Help using the Help pulldown menu only on purpose from now on!

AutoCAD® Secrets Exposed!
25
38 PEDITACCEPT Use the system variable PEDITACCEPT to simplify your polyline editing. After all, have you ever
answered NO to the PEDIT question stating that the object you selected is not a polyline – would
you like to convert it to one? Me neither…what a silly question! To NEVER see this question again
change this system variable.
PEDITACCEPT
Automatically converts selected objects into polylines without a prompt when using PEDIT.
0 (default) the prompt is displayed
1 the prompt is suppressed
39 Take the Edge Out
Using the system variable EDGEMODE can simplify your trim and extend functionality. Did you
know that you can TRIM and EXTEND to non-existent edges?
EDGEMODE
Controls how the TRIM and EXTEND commands determine cutting and boundary edges
Saved in: Registry
0 (default) Uses the selected edge without an extension
1 Extends or trims the selected object to an imaginary extension of the cutting
or boundary edge
AutoCAD® Secrets Exposed!
26
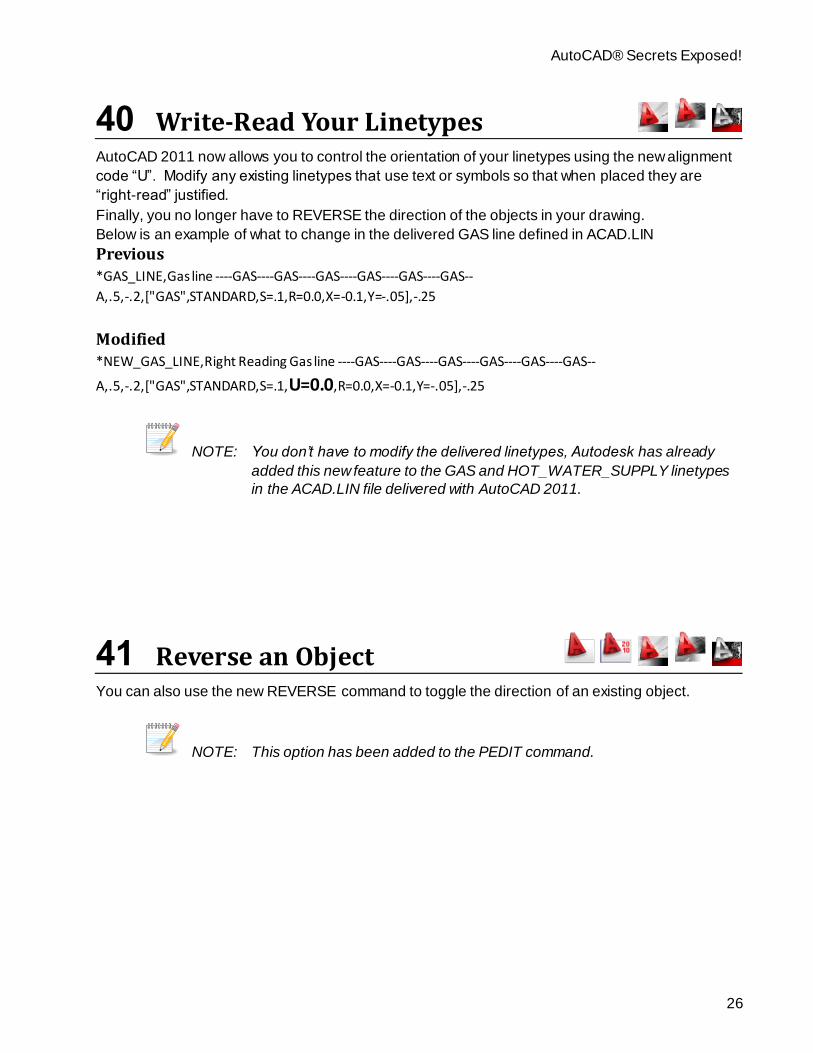
40 Write-Read Your Linetypes
AutoCAD 2011 now allows you to control the orientation of your linetypes using the new alignment
code “U”. Modify any existing linetypes that use text or symbols so that when placed they are
“right-read” justified.
Finally, you no longer have to REVERSE the direction of the objects in your drawing.
Below is an example of what to change in the delivered GAS line defined in ACAD.LIN
Previous *GAS_LINE,Gas line ----GAS----GAS----GAS----GAS----GAS----GAS--
A,.5,-.2,["GAS",STANDARD,S=.1,R=0.0,X=-0.1,Y=-.05],-.25
Modified *NEW_GAS_LINE,Right Reading Gas line ----GAS----GAS----GAS----GAS----GAS----GAS--
A,.5,-.2,["GAS",STANDARD,S=.1,U=0.0,R=0.0,X=-0.1,Y=-.05],-.25
NOTE: You don’t have to modify the delivered linetypes, Autodesk has already
added this new feature to the GAS and HOT_WATER_SUPPLY linetypes
in the ACAD.LIN file delivered with AutoCAD 2011.
41 Reverse an Object
You can also use the new REVERSE command to toggle the direction of an existing object.
NOTE: This option has been added to the PEDIT command.

AutoCAD® Secrets Exposed!
27
42 Object Isolation When working in large drawings the objects just using layers to “filter” your view display may not be
enough. Use this tool to “filter” just what you need and minimize your view extents and your
frustration. Working with a minimum number of objects displayed not only speeds up AutoCAD but
speeds up the tasks you need to perform.
Isolate Objects: Filter the display ON for SELECTED objects and turn off all objects not in the current selection set.
STEP 1: Select the objects you need to work with and select the ISOLATE OBJECTS button.
Un-Isolate Objects: Restore all drawing objects displayed in the current drawing.
STEP 1: Select UNISOLATE OBJECTS END OBJECT ISOLATION to restore the entire model.
Hide Objects Filter the display OFF for all of SELECTED objects in the current selection set.

AutoCAD® Secrets Exposed!
28
43 Select Similar This command has been available in other Autodesk products for years, and as one of my favorites
there, I am more than ecstatic to see it arrive in AutoCAD!
The SELECTSIMILAR command allows you to select objects in a drawing that are similar to a
selected object or objects.
STEP 1: Select one or more objects, then <Right-Click> to access the SELECT SIMILAR command.
All similar objects are selected and added to the current selection set.
STEP 2: Use any command to manipulate the selection set.
NOTE: Use the Settings option to control which object properties AutoCAD uses to
compare the selected objects with others in the drawing.
44 Add Selected Use the new ADDSELECTED command to re-create existing objects in a drawing. This is a much
better way to duplicate objects than matching after the fact, or copying and making changes after
the fact.
STEP 1: Select an existing object, then <Right-Click> to access the ADD SELECTED command.
STEP 2: Place the new object in the drawing.

AutoCAD® Secrets Exposed!
29
45 Automatic Coordinate Labels
Many users ask me how to label a drawing coordinate automatically in AutoCAD. Have you figured
it out yet?
You can use an ordinate dimension but there is a better way if you
make a “smarter” dynamic block to label points in your drawing.
Use a simple dynamic block using FIELDS that display the
INSERTION POINT of the block.
46 Tables and Tool Palettes How can you place a TABLE object on a tool palette? Have you ever tried? If so, then you have
also discovered that you can’t just use <Drag-n-Drop> to get it there!
Try this one out; use the <RIGHT MOUSE BUTTON> to drag instead of the <LEFT MOUSE
BUTTON>. Weird, I know, but it works!!!

AutoCAD® Secrets Exposed!
30
47 Using Double-Click Actions Mohamed Haris
One of the coolest things you can do in the new CUI interface is to customize the <Double-Click-
Actions>. Many of you probably use this new feature when editing objects such as blocks, hatches,
text, and many others. But have you ever <Double-Clicked> on an object only to get the Properties
dialog, which isn’t terribly useful? How about when you <Double-Click> on a line object? It runs the
Properties command, what good is that?
Let’s try to improve on this just a little. I want to <Double-Click> on a line have it convert it to a
polyline automatically.
Lines Assign the following macro to the <Double-Click> action for LINE.
^C^C_PEDIT;Y;;
Dimension Assign the following macro to the <Double-Click> action for a DIMENSION. This macro will
automatically restore the dimension text to the “true length” value.
^C^C_dimedit;home;cmddia;0;_dimedit;new;<>;previous;;
Dimension Arrow Assign the following macro to the <Double-Click> action for a DIMENSION ARROW. This macro
will automatically “flip” the arrow on the dimension.
^C^C_^C^C_aidimfliparrow
Arc or Circle Assign the following macro to the <Double-Click> action for a POLYLINE. This macro will
automatically convert a closed ARC to a POLYLINE.
^C^C$M=$(if,$(=,$(getvar,peditaccept),1),_pedit;close;,_pedit;;close;)
NOTE: <Double-Click> actions cannot be created for OLE and VIEWPORT
objects.
SECRET: Try out any of these commands on custom <Right-Click> menus too!

AutoCAD® Secrets Exposed!
31
48 Automatic Areas Using Fields For this demonstration let’s use a polyline to demonstrate a new feature in AutoCAD that can
automatic my design process.
If you need to label areas on your drawings you can use
FIELD objects along with polylines to “automatically” keep
them up to date.
STEP 1: Place text using the Mtext Editor
and key-in AREA =
STEP 2: <Right-Click> to access the INSERT FIELD command
STEP 3: In the FIELD CATEGORY select OBJECT
STEP 4: Use the Pick Object button and select the closed polyline
STEP 5: In the PROPERTY list select AREA
STEP 6: In the FORMAT list select ARCHITECTURAL and pick OK to close the dialog.
STEP 7: Pick OK to place the text in your drawing.
You can modify the GRAY SHADE and the UPDATE FIELD SETTINGS in the user preferences to
control when the fields are updated.
49 Forgotten Dimension Command Have you ever had problems dimensioning objects that are staggered? Using the DIMALIGNED
command doesn’t dimension exactly the way you want to, so what do you do? Use the old
DIMROTATED command to get exactly the dimension you want.

AutoCAD® Secrets Exposed!
32
50 Buried in the Express Offset There is a couple of very handy options buried in the new OFFSET commands. The first option
allows you offset objects to the CURRENT LAYER instead of the same layer as the original object;
and the second allows you to perform a multiple offset so you don’t have to continuously pick that
first object.
OFFSET to CURRENT Layers STEP 1: Key-in OFFSET to start the command
STEP 2: Key-in L for LAYER
STEP 3: Key-in C for CURRENT and hit ENTER one more time.
STEP 4: Key-in the offset distance
STEP 5: Select the object to offset and the direction
You can put this on a button and make it a lot easier to use!
^C^C_offset;l;c;;
OFFSET MULTIPLE times STEP 1: Key-in OFFSET to start the command
STEP 2: Key-in offset distance
STEP 3: Select the object to offset
STEP 4: Key-in M for MULTIPLE
STEP 5: Select the direction for the offset
You can put this on a button and make it a lot easier to use!
^C^C_offset;\\m;

AutoCAD® Secrets Exposed!
33
That's probably more than I have time for….but hopefully
not more that you wanted to know!
Thank you for your time Hope you enjoyed the session!
Looking for customized Training and Standards consulting
using your company standards and procedures?
Call for affordable and flexible rates and schedules.
Contact: AARHUS ASSOCIATES, LLC
12005 Quail Drive
Bellevue, NE 68123-1175
www.aarhusassociates.com
Jeanne Aarhus
(402) 408-9696
Copyright © 2012 Aarhus Associates, LLC. Aarhus Associates and the Aarhus Associates Logo are registered trademarks of Aarhus Associates.
All other product names are trademarks of their respective owners. Aarhus Associates believes the information in this document is accurate as
of its publication date. Such information is subject to change without notice and is subject to applicable technical product descriptions. Aarhus
Associates is not responsible for inadvertent errors.
ASSOCIATES
aarhus