auto discovery in em12c - wordpress.com ·...
TRANSCRIPT

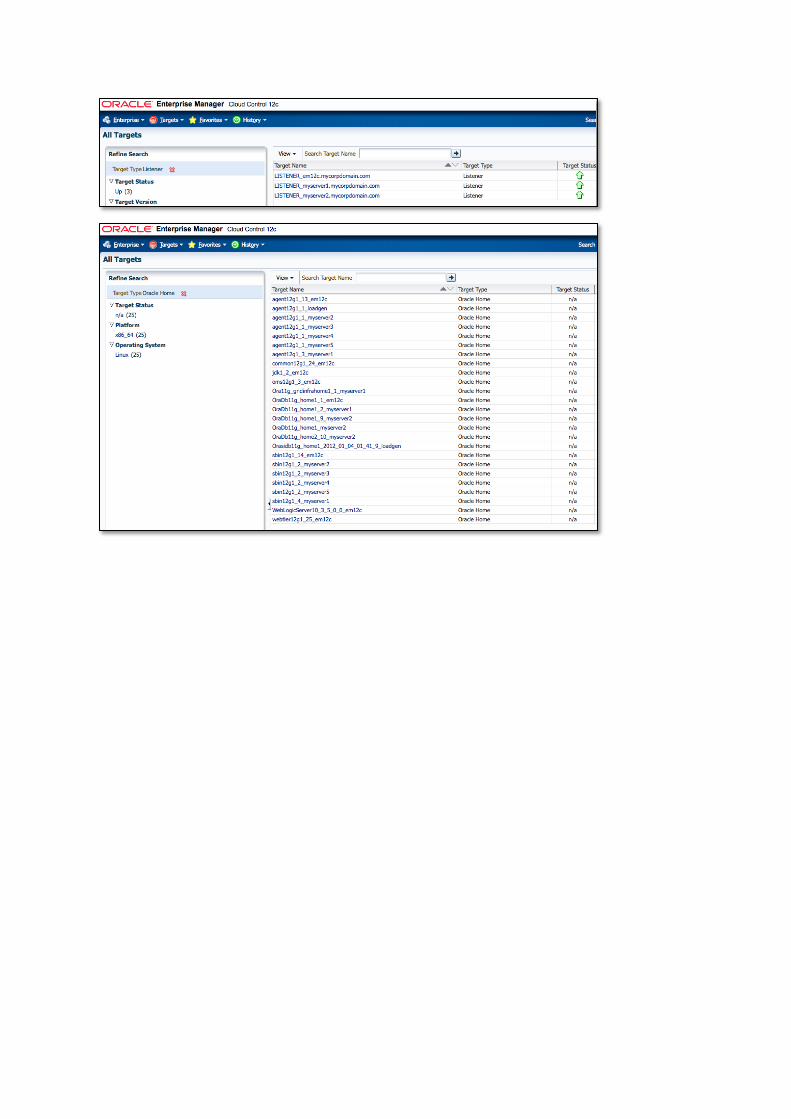
Auto Discovery in EM12c Date: 19/01/2012 Author: Rob Zoeteweij http://oemgc.wordpress.com Using Enterprise Manager 11 and earlier, you needed to install an Agent any time a new Server was introduced in your datacentre. Then after you would have created a new Database or any other Target Type, you would need to perform a discovery using the Agent that was monitoring the specific server. Starting with Enterprise Manager 12c your Targets can get discovered automatically even if no Agent has been installed yet. In order to use this feature we need to do some basic configuration.
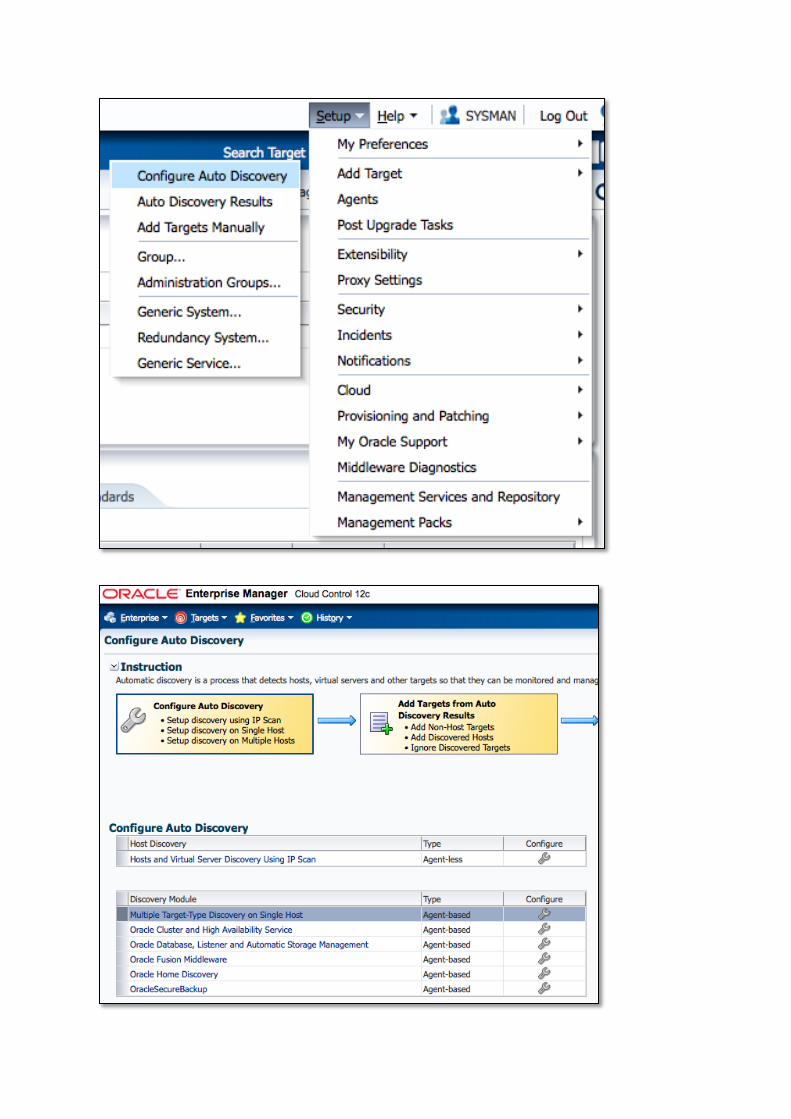
From the Setup Menu select Add Target à Configure Auto Discovery

This page allows us to configure Automatic Discovery for several Target Types.
Host and Virtual Server Discovery In this example we will start configuring the Discovery of Hosts and Virtual Servers using an IP scan: Press the configure Icon for the “Hosts and Virtual Server Discovery Using IP Scan”
Press the [Create] Icon to create a Host Discovery Specification
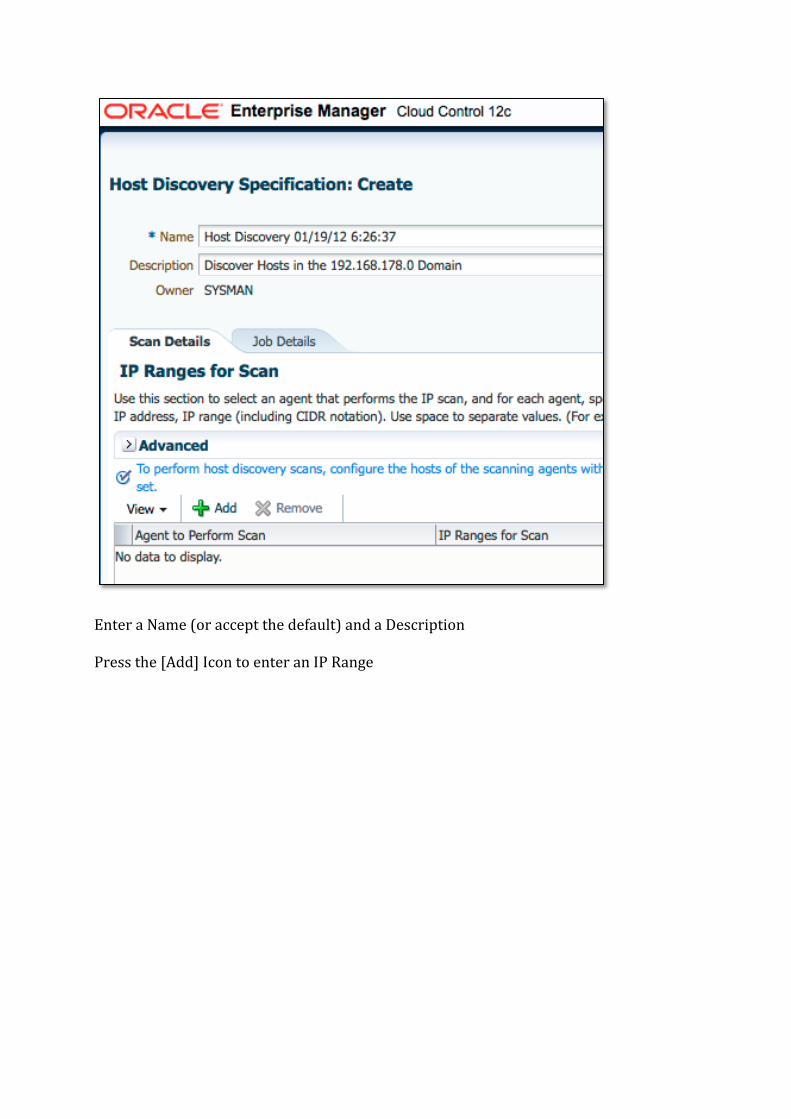
Enter a Name (or accept the default) and a Description Press the [Add] Icon to enter an IP Range
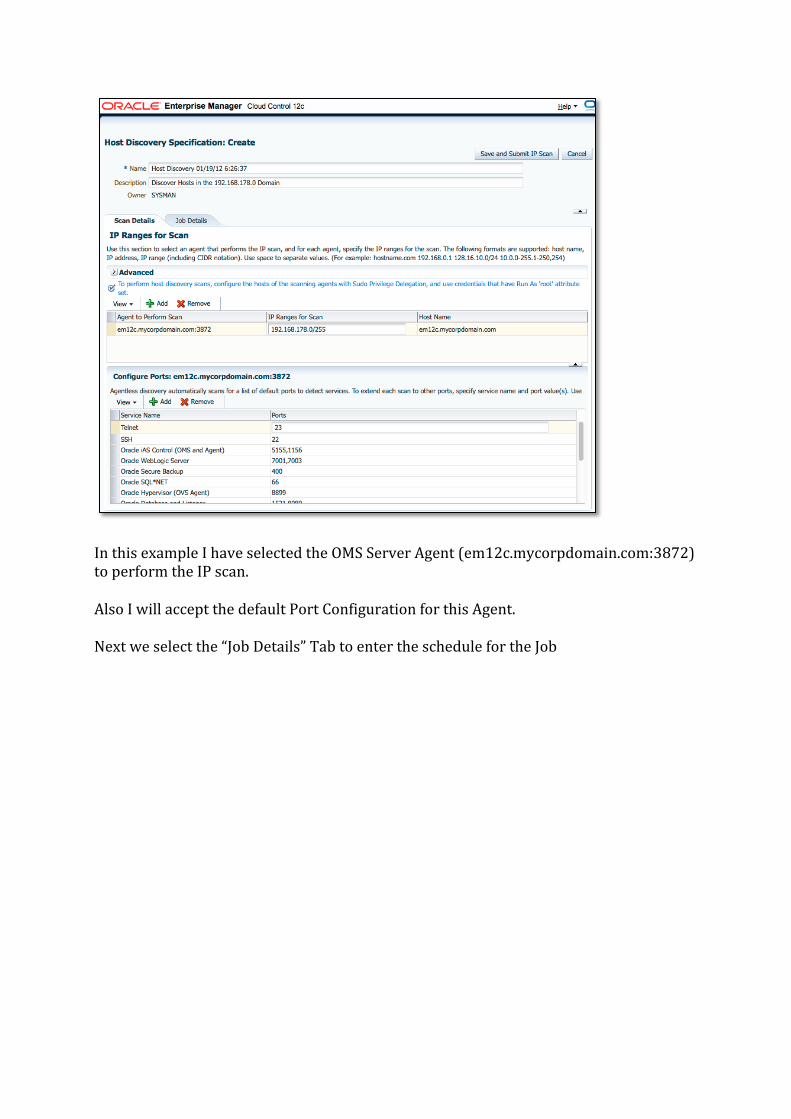
In this example I have selected the OMS Server Agent (em12c.mycorpdomain.com:3872) to perform the IP scan. Also I will accept the default Port Configuration for this Agent. Next we select the “Job Details” Tab to enter the schedule for the Job
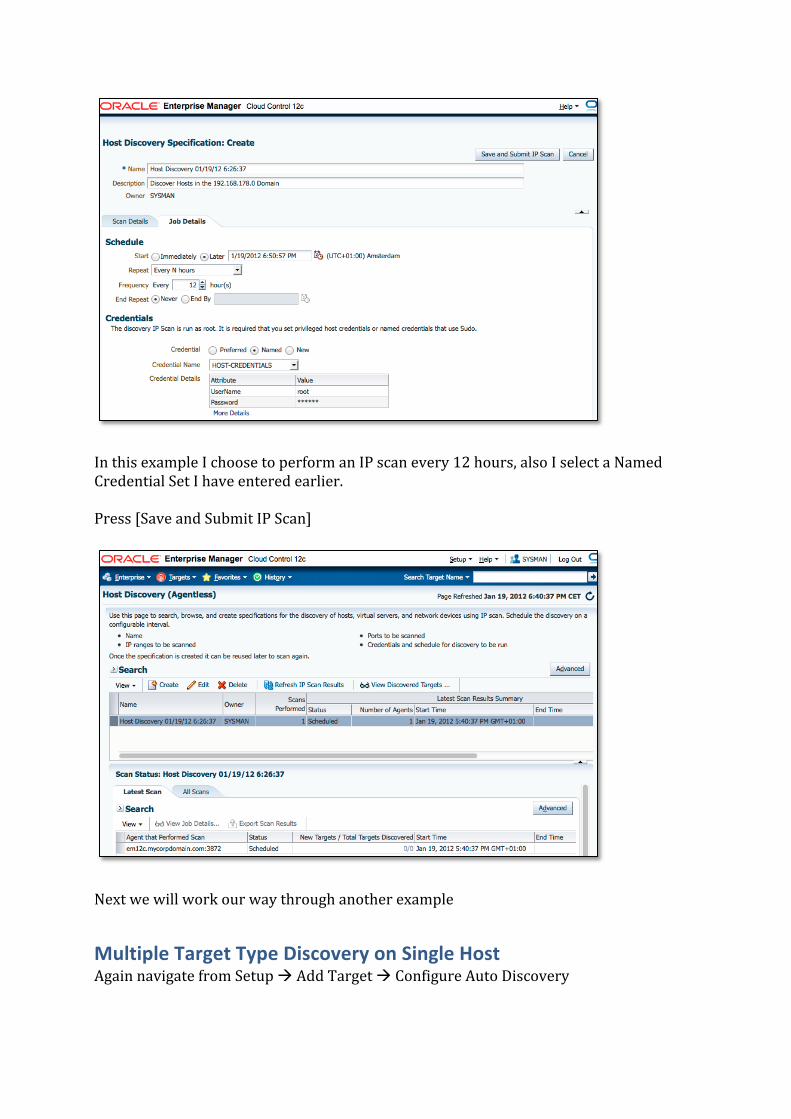
In this example I choose to perform an IP scan every 12 hours, also I select a Named Credential Set I have entered earlier. Press [Save and Submit IP Scan]
Next we will work our way through another example
Multiple Target Type Discovery on Single Host Again navigate from Setup à Add Target à Configure Auto Discovery

From here we will select the Configure Icon next to the Discovery Module “Multiple Target Type Discovery on Single Host”
As you can see this page shows all installed Agents We will now press the [Configure] Icon
For this example we did not enable the discovery of Oracle Fusion Middleware As we can see, the Discovery Module “Oracle Database, Listener and Automatic Storage Manager” needs a value for the Clusterware Home. We will press the [Edit Parameters] Icon after selecting the Discovery Module

Here we enter the location of our Grid Infrastructure and press [OK]
Next to prompt “Frequency Every” we can change the discovery frequency. For this example we will leave it to “1”, meaning once every day the Discovery Modules will be activated. Press [OK] to finalize this configuration step.
Pressing the [Run Discovery Now] Icon we would be able to activate the Discovery Modules immediately.
Auto Discovery Results As we have configured “Auto Discovery” once a day, we like to check what results came out of this. For this we will navigate Setup à Add Targets à Auto Discovery Results
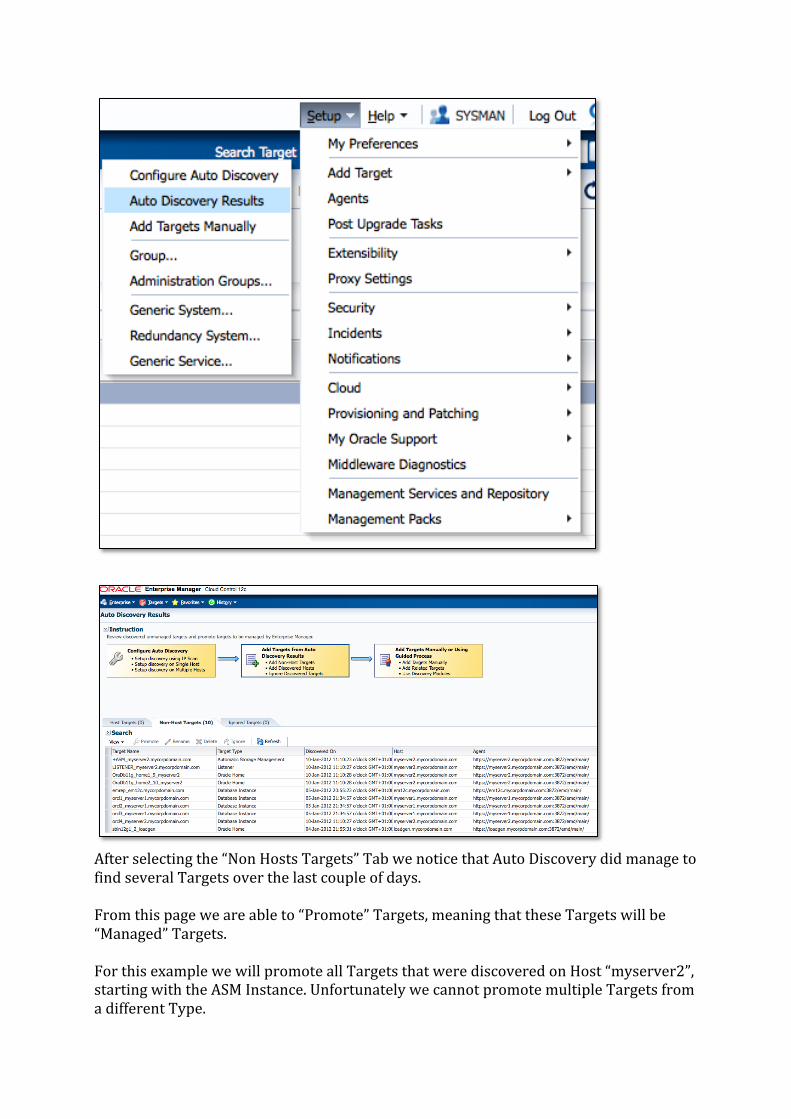
After selecting the “Non Hosts Targets” Tab we notice that Auto Discovery did manage to find several Targets over the last couple of days. From this page we are able to “Promote” Targets, meaning that these Targets will be “Managed” Targets. For this example we will promote all Targets that were discovered on Host “myserver2”, starting with the ASM Instance. Unfortunately we cannot promote multiple Targets from a different Type.
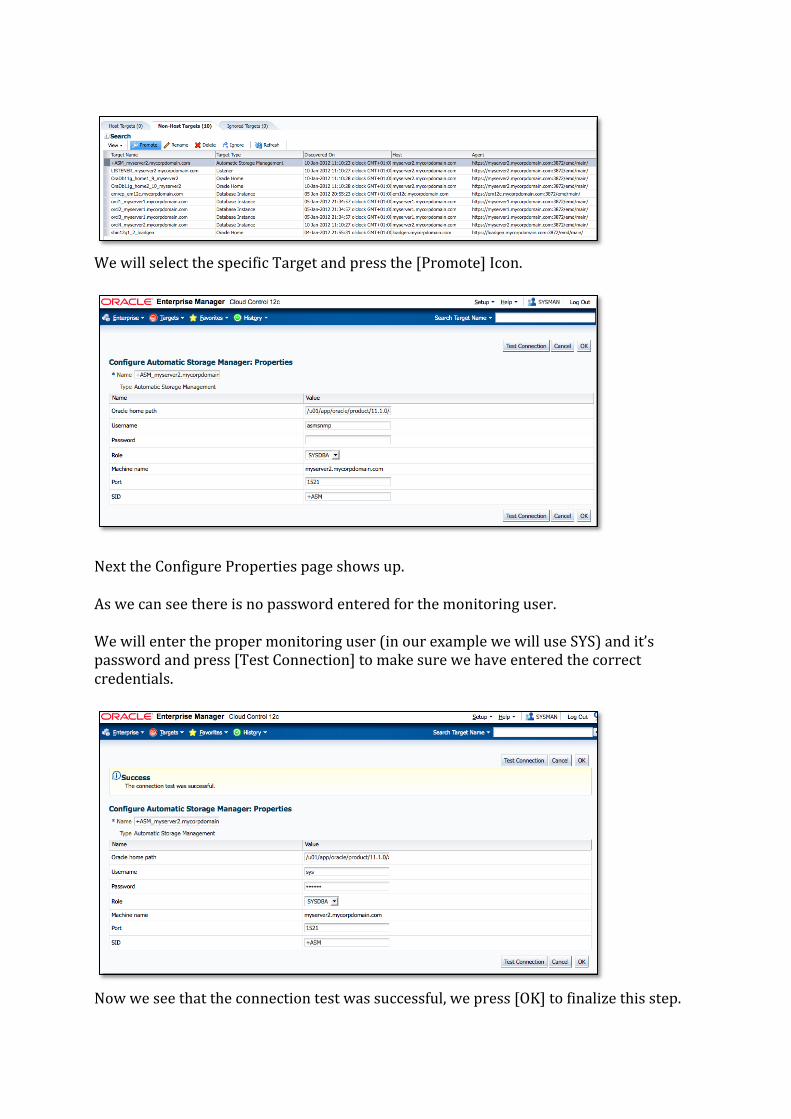
We will select the specific Target and press the [Promote] Icon.
Next the Configure Properties page shows up. As we can see there is no password entered for the monitoring user. We will enter the proper monitoring user (in our example we will use SYS) and it’s password and press [Test Connection] to make sure we have entered the correct credentials.
Now we see that the connection test was successful, we press [OK] to finalize this step.
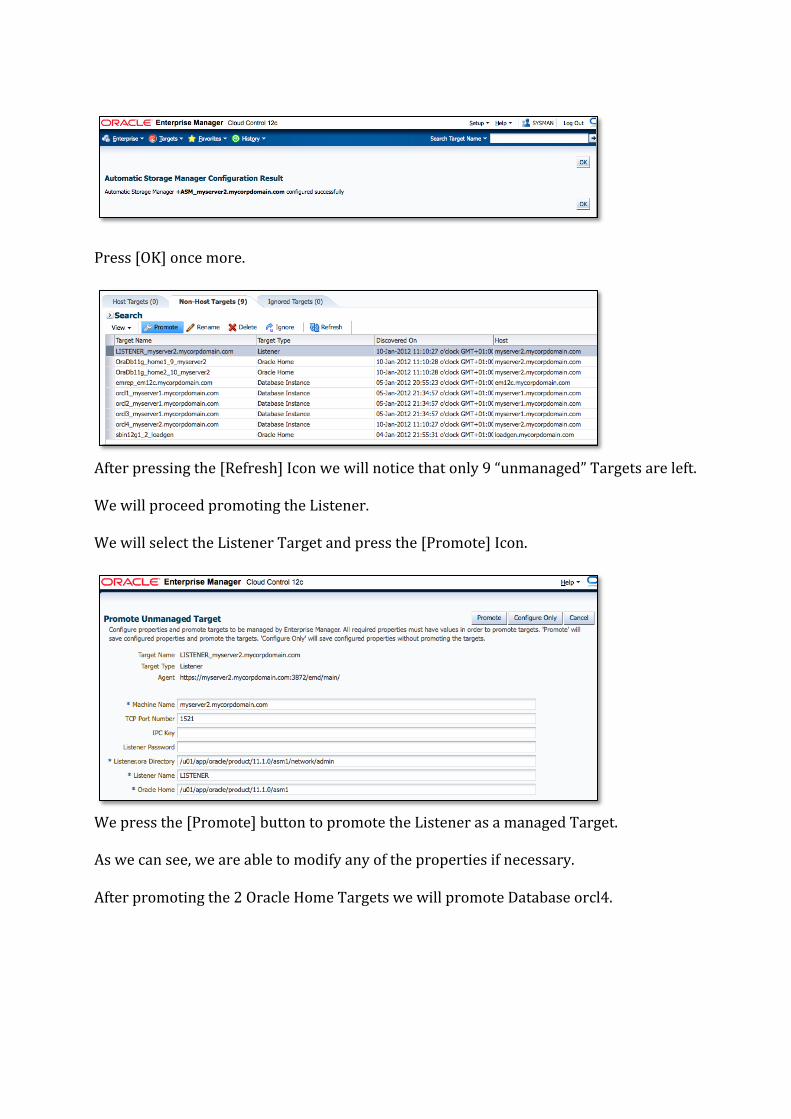
Press [OK] once more.
After pressing the [Refresh] Icon we will notice that only 9 “unmanaged” Targets are left. We will proceed promoting the Listener. We will select the Listener Target and press the [Promote] Icon.
We press the [Promote] button to promote the Listener as a managed Target. As we can see, we are able to modify any of the properties if necessary. After promoting the 2 Oracle Home Targets we will promote Database orcl4.
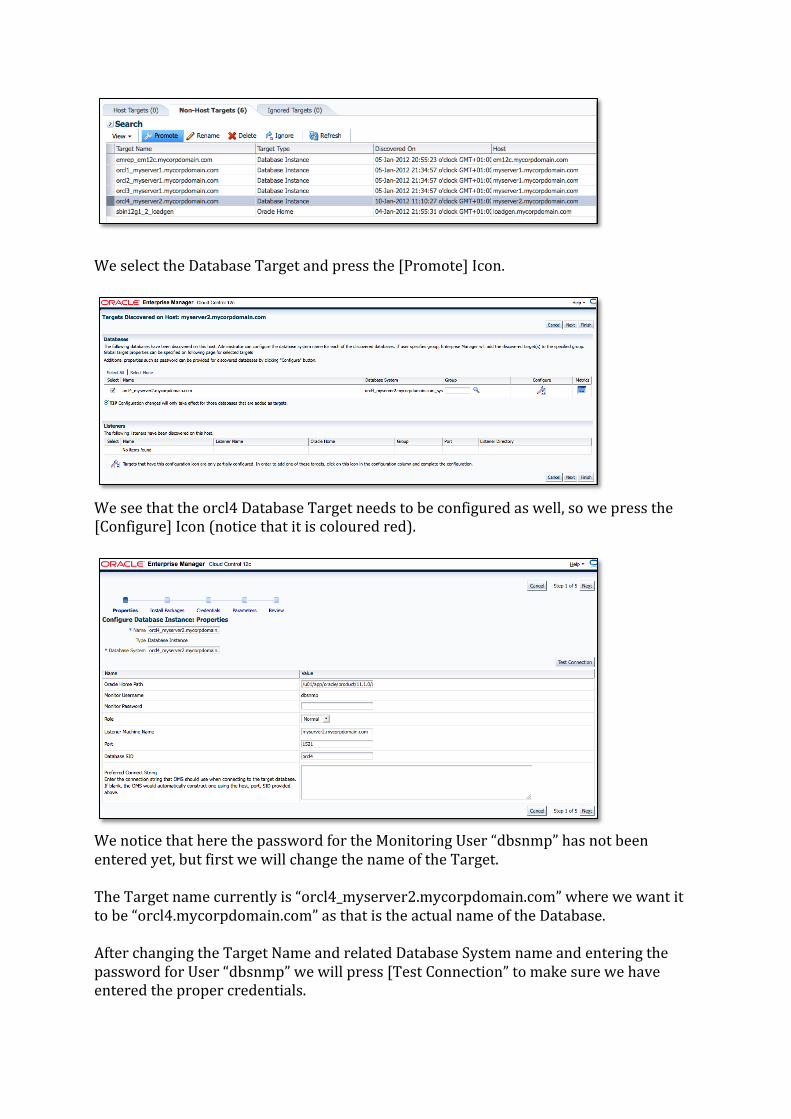
We select the Database Target and press the [Promote] Icon.
We see that the orcl4 Database Target needs to be configured as well, so we press the [Configure] Icon (notice that it is coloured red).
We notice that here the password for the Monitoring User “dbsnmp” has not been entered yet, but first we will change the name of the Target. The Target name currently is “orcl4_myserver2.mycorpdomain.com” where we want it to be “orcl4.mycorpdomain.com” as that is the actual name of the Database. After changing the Target Name and related Database System name and entering the password for User “dbsnmp” we will press [Test Connection” to make sure we have entered the proper credentials.
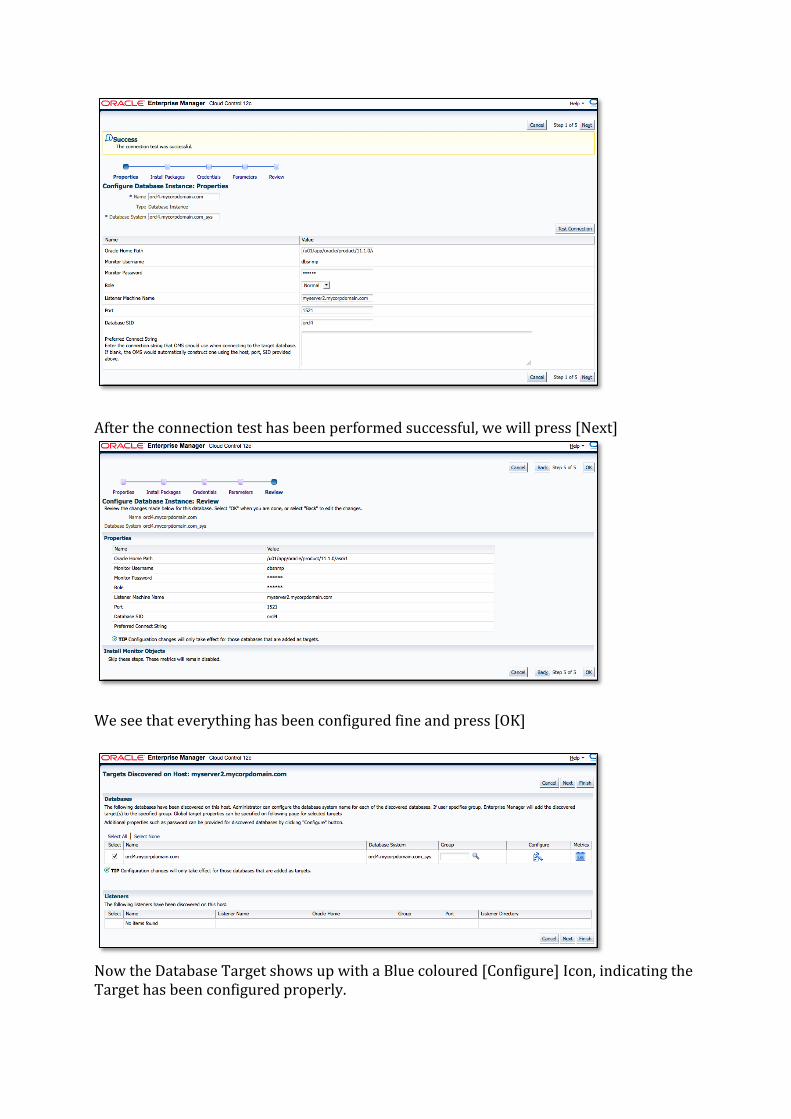
After the connection test has been performed successful, we will press [Next]
We see that everything has been configured fine and press [OK]
Now the Database Target shows up with a Blue coloured [Configure] Icon, indicating the Target has been configured properly.

We can now finalize by pressing [Finish]
The summary Page that shows up, let us see that Database System “orcl4.mycorpdomain.com_sys” and Database “orcl4.mycorpdomain.com” are ready to be promoted. Press the [Promote] button to do so.
Press [OK] once again We will now find all of our promoted Targets as “managed” Targets