articulate word output - web viewriver site owner v2. 1. river site owner. 1.1 welcome. 1.2 learning...
TRANSCRIPT

RIVER Site Owner V2
1. RIVER Site Owner
1.1 Welcome
1.2 Learning Objectives
Notes:
Congratulations you are on your way to becoming a RIVER site owner. At the conclusion of the course you will have an overview of the following:
Published by Articulate® Storyline www.articulate.com

You are required to read all of the content of this module and obtain a score of 80% or higher in the assessment
This course should take no longer than 60 minutes to complete
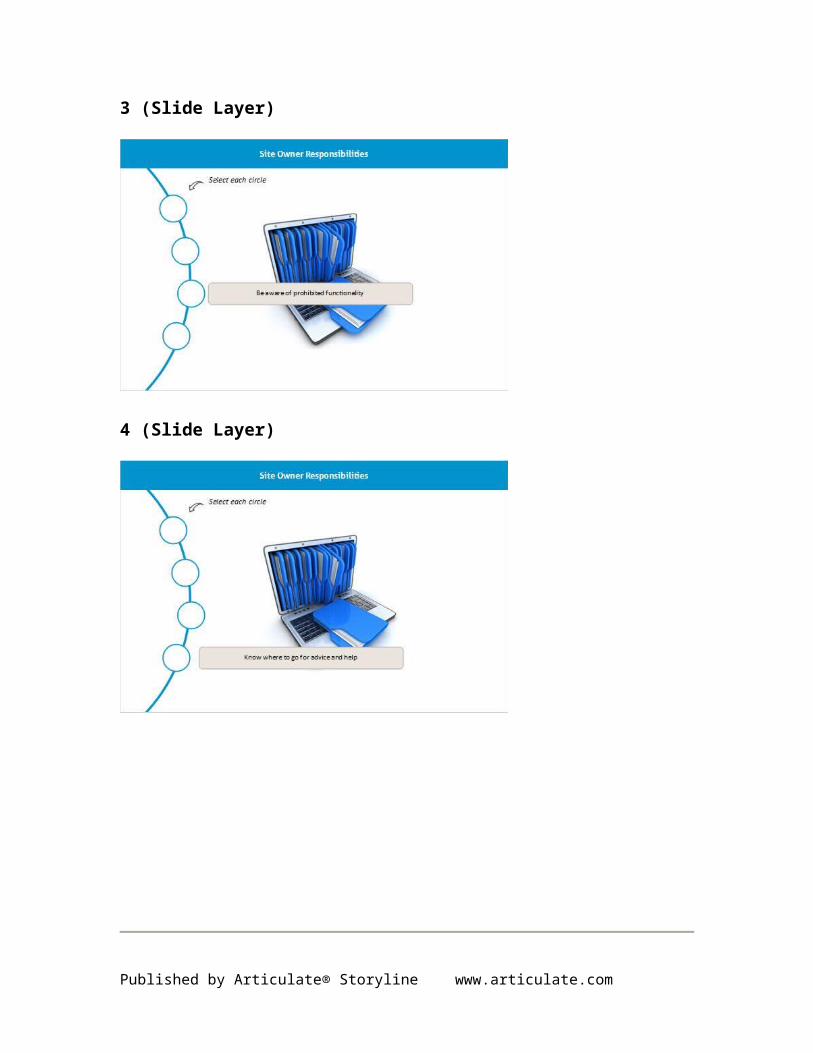
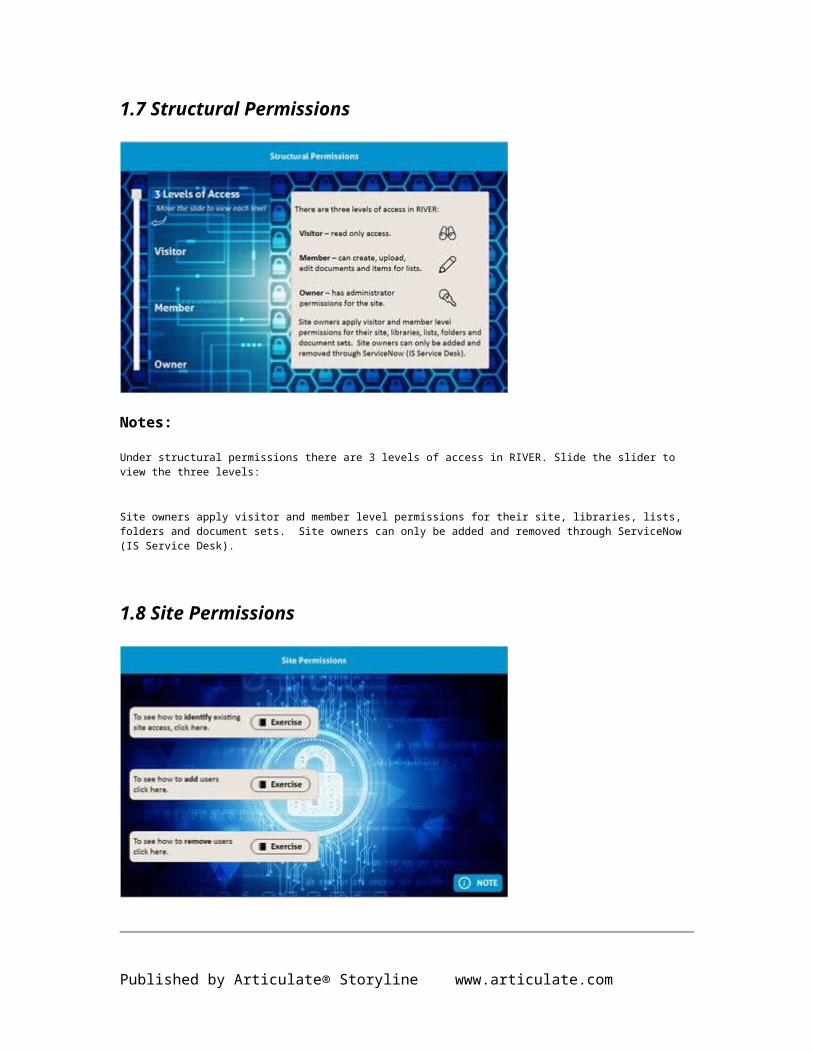
1.3 Site Owner Responsibilities
Notes:
Click each of the circles to review the capabilities you are expected to develop as a site owner.
1 (Slide Layer)
Published by Articulate® Storyline www.articulate.com

2 (Slide Layer)
3 (Slide Layer)
Published by Articulate® Storyline www.articulate.com
4 (Slide Layer)
1.4 Site Administrator Role
Notes:
Your primary responsibility as a site owner is to act as the site administrator. This means there are a number of things you are expected to do on behalf of RIVER site members. You will develop these skills over time. Some things may only be done occasionally, so there are detailed work instructions with screen shots located on the RIVER Help site to assist you. They include the following:
Published by Articulate® Storyline www.articulate.com

1.5 Minimum Site Owner Competencies
Notes:
The role of the site owner varies depending on the needs of your site members and the structure of your site. However as a minimum all site owners need to be able to do the following:
1.6 Permissions
Notes:
RIVER has two types of permissions, please click each tab to view more information
Published by Articulate® Storyline www.articulate.com

Structural (Slide Layer)
Titan (Slide Layer)
Published by Articulate® Storyline www.articulate.com

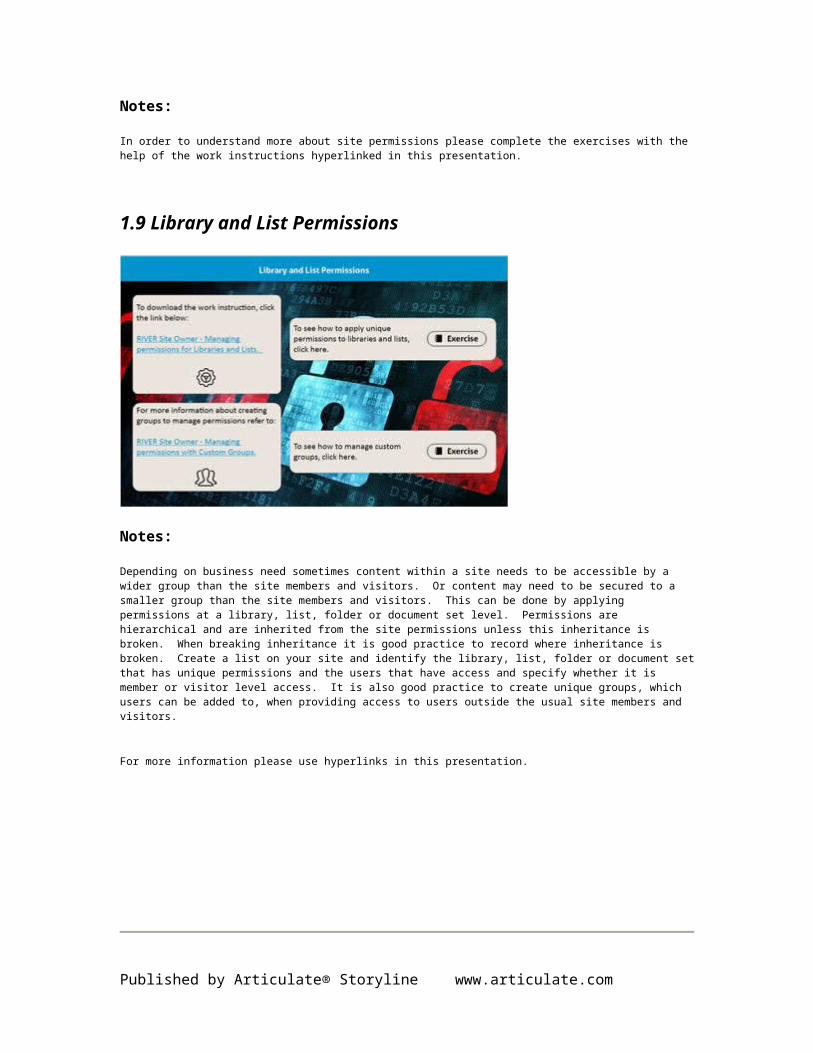
1.7 Structural Permissions
Notes:
Under structural permissions there are 3 levels of access in RIVER. Slide the slider to view the three levels:
Site owners apply visitor and member level permissions for their site, libraries, lists, folders and document sets. Site owners can only be added and removed through ServiceNow (IS Service Desk).
1.8 Site Permissions
Notes:
In order to understand more about site permissions please complete the exercises with the help of the work instructions hyperlinked in this presentation.
Published by Articulate® Storyline www.articulate.com
1.9 Library and List Permissions
Notes:
Depending on business need sometimes content within a site needs to be accessible by a wider group than the site members and visitors. Or content may need to be secured to a smaller group than the site members and visitors. This can be done by applying permissions at a library, list, folder or document set level. Permissions are hierarchical and are inherited from the site permissions unless this inheritance is broken. When breaking inheritance it is good practice to record where inheritance is broken. Create a list on your site and identify the library, list, folder or document set that has unique permissions and the users that have access and specify whether it is member or visitor level access. It is also good practice to create unique groups, which users can be added to, when providing access to users outside the usual site members and visitors.
For more information please use hyperlinks in this presentation.
Published by Articulate® Storyline www.articulate.com
1.10 Folder and Document Permissions
Notes:
Like libraries and lists, unique permissions can be applied to folders and document sets. If you have a business need to apply permissions to an individual document and it does not meet the requirements of Titus Security, move the document into a folder and secure the folder.
1.11 Libraries and Lists
Notes:
In RIVER, libraries are used for storing corporate records and business information. Lists are used as business tools. Lists are dynamic and can be used to create registers and indexes particularly when they are updated frequently. Lists that are considered corporate records should be exported as an Excel spreadsheet and stored in a library when they are reported e.g. monthly, quarterly, annually. This allows the corporate record to be captured. Site owners create lists and libraries on behalf of site
Published by Articulate® Storyline www.articulate.com
members.
1.12 Overriding Checked-Out Documents
Notes:
Sometimes site members either check-out documents and forget to check them in or do not upload them properly so they are never checked in. When a document has been checked-out, the changes are made on a local copy on the PC being used. Those changes are not updated in RIVER until the document is checked-in. Site members can only see the last checked-in version of the document in the site. No-one else can make changes to the document unless it is checked-in. Site members should get into the habit of checking in their documents regularly. However if they leave the organisation or take extended leave and the document needs to be amended site owners can override (discard) the check-out. Any changes made to the document whilst it is checked-out will be lost.
1.13 Moving Content within a Site
Published by Articulate® Storyline www.articulate.com

Notes:
Sometimes site members either check-out documents and forget to check them in or do not upload them properly so they are never checked in. When a document has been checked-out, the changes are made on a local copy on the PC being used. Those changes are not updated in RIVER until the document is checked-in. Site members can only see the last checked-in version of the document in the site. No-one else can make changes to the document unless it is checked-in. Site members should get into the habit of checking in their documents regularly. However if they leave the organisation or take extended leave and the document needs to be amended site owners can override (discard) the check-out. Any changes made to the document whilst it is checked-out will be lost.
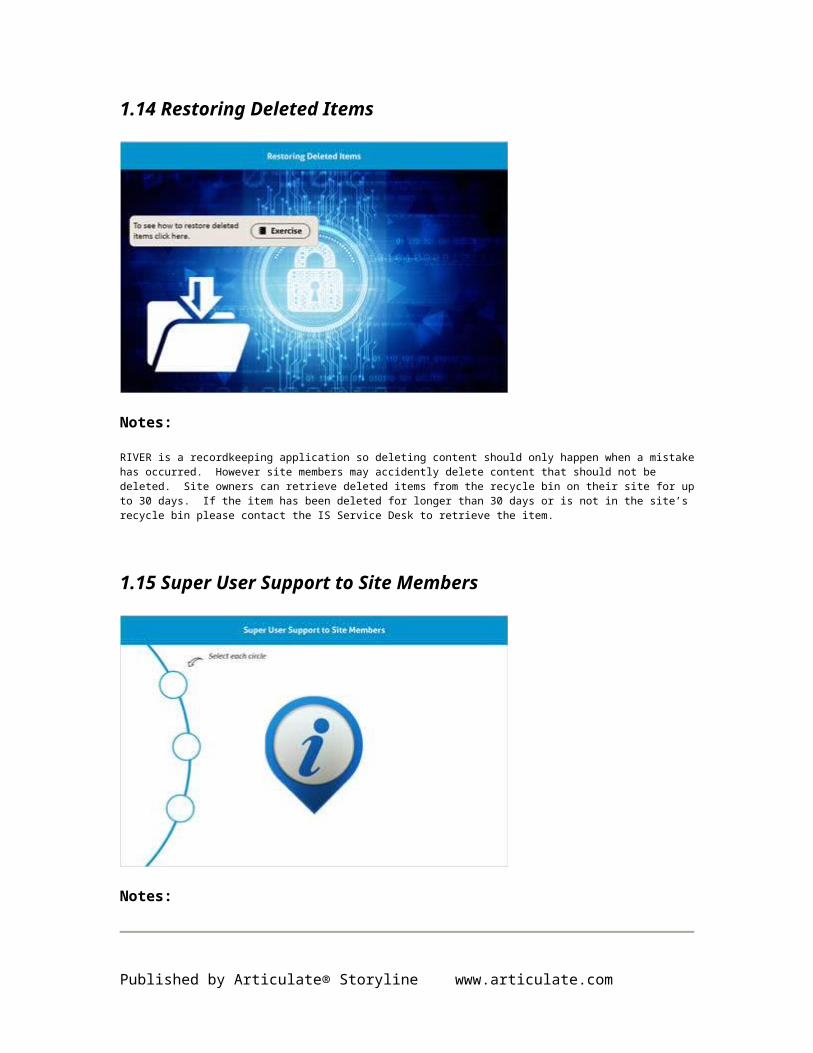
1.14 Restoring Deleted Items
Notes:
RIVER is a recordkeeping application so deleting content should only happen when a mistake has occurred. However site members may accidently delete content that should not be deleted. Site owners can retrieve deleted items from the recycle bin on their site for up to 30 days. If the item has been deleted for longer than 30 days or is not in the site’s recycle bin please contact the IS Service Desk to retrieve the item.
Published by Articulate® Storyline www.articulate.com

1.15 Super User Support to Site Members
Notes:
Click each of the circles to review the capabilities you are expected to develop as a site owner.
1 (Slide Layer)
Published by Articulate® Storyline www.articulate.com
2 (Slide Layer)
3 (Slide Layer)
Published by Articulate® Storyline www.articulate.com

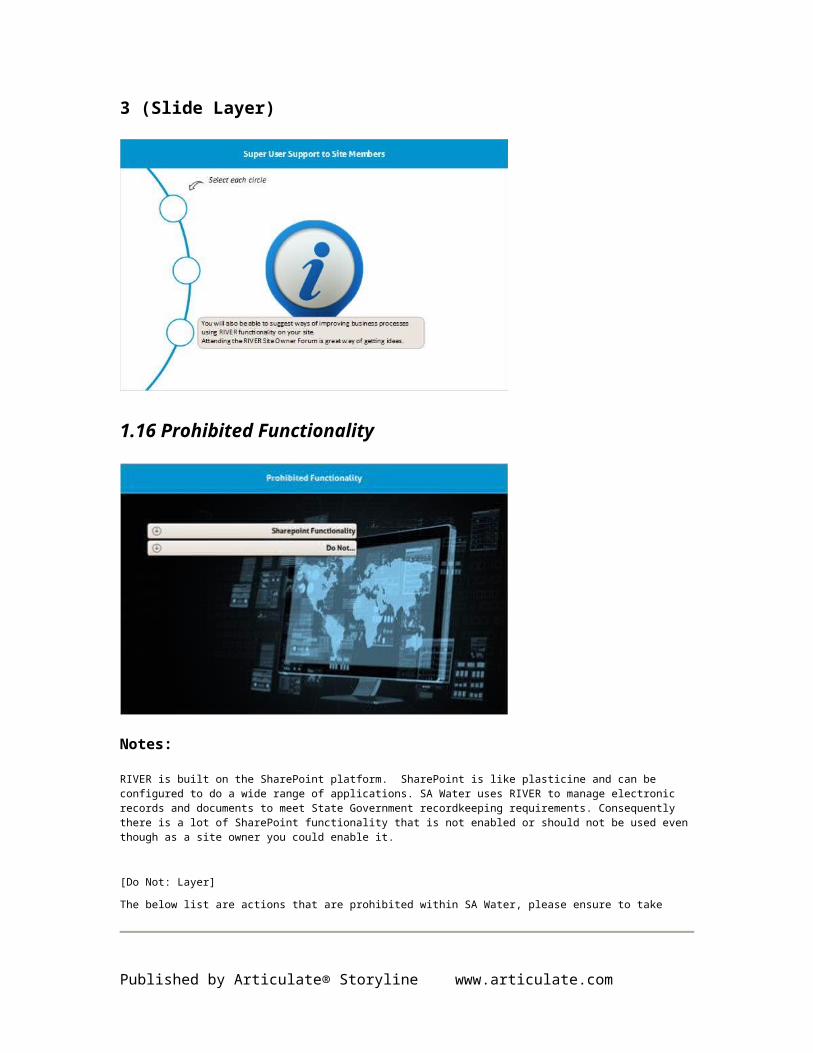
1.16 Prohibited Functionality
Notes:
RIVER is built on the SharePoint platform. SharePoint is like plasticine and can be configured to do a wide range of applications. SA Water uses RIVER to manage electronic records and documents to meet State Government recordkeeping requirements. Consequently there is a lot of SharePoint functionality that is not enabled or should not be used even though as a site owner you could enable it.
[Do Not: Layer]
The below list are actions that are prohibited within SA Water, please ensure to take careful note.
SPoint Func (Slide Layer)
Published by Articulate® Storyline www.articulate.com
Do not (Slide Layer)
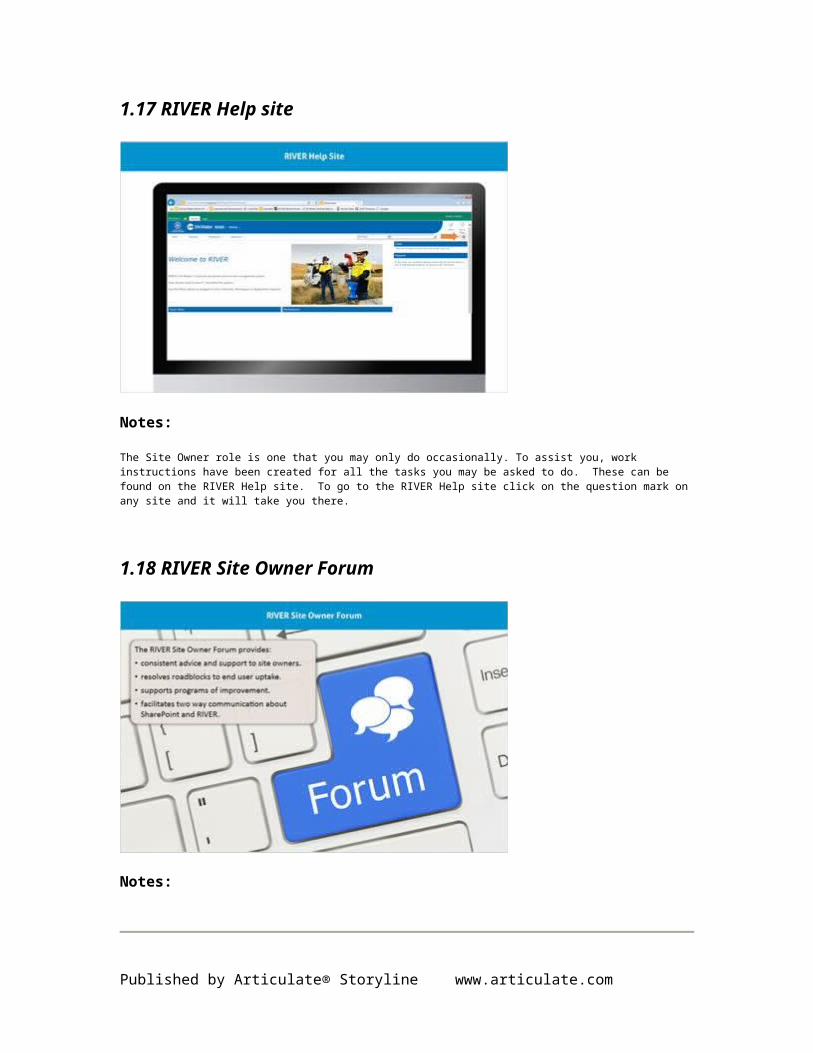
1.17 RIVER Help site
Notes:
The Site Owner role is one that you may only do occasionally. To assist you, work instructions have been created for all the tasks you may be asked to do. These can be found on the RIVER Help site. To go to the RIVER Help site click on the question mark on any site and it will take you there.
Published by Articulate® Storyline www.articulate.com

1.18 RIVER Site Owner Forum
Notes:
The RIVER Site Owner Forum is run periodically (at least quarterly) and invitations are issued to all RIVER Site Owners. It is designed to ensure ongoing and continual improvement of RIVER usage across SA Water within the parameters of the RIVER governance framework.
It is highly recommended that site owners attend the RIVER Site Owner Forum.
1.19 Service Desk and Records Management
Notes:
The IS Service Desk and the Records Management team provide support for RIVER.
Published by Articulate® Storyline www.articulate.com
Click each of the information bars to review who the best contact is for certain situations regarding RIVER.
IS Service Desk (Slide Layer)
Rec management team (Slide Layer)
Published by Articulate® Storyline www.articulate.com

1.20 Knowledge Check
1.21 Site Owners are expected to:
(Multiple Choice, 10 points, 3 attempts permitted)
Correct Choice
Act as site administrator
Be a super user for the team
Be aware of prohibited functionality
Published by Articulate® Storyline www.articulate.com

X All of the above
Correct (Slide Layer)
Incorrect (Slide Layer)
Published by Articulate® Storyline www.articulate.com

Try Again (Slide Layer)
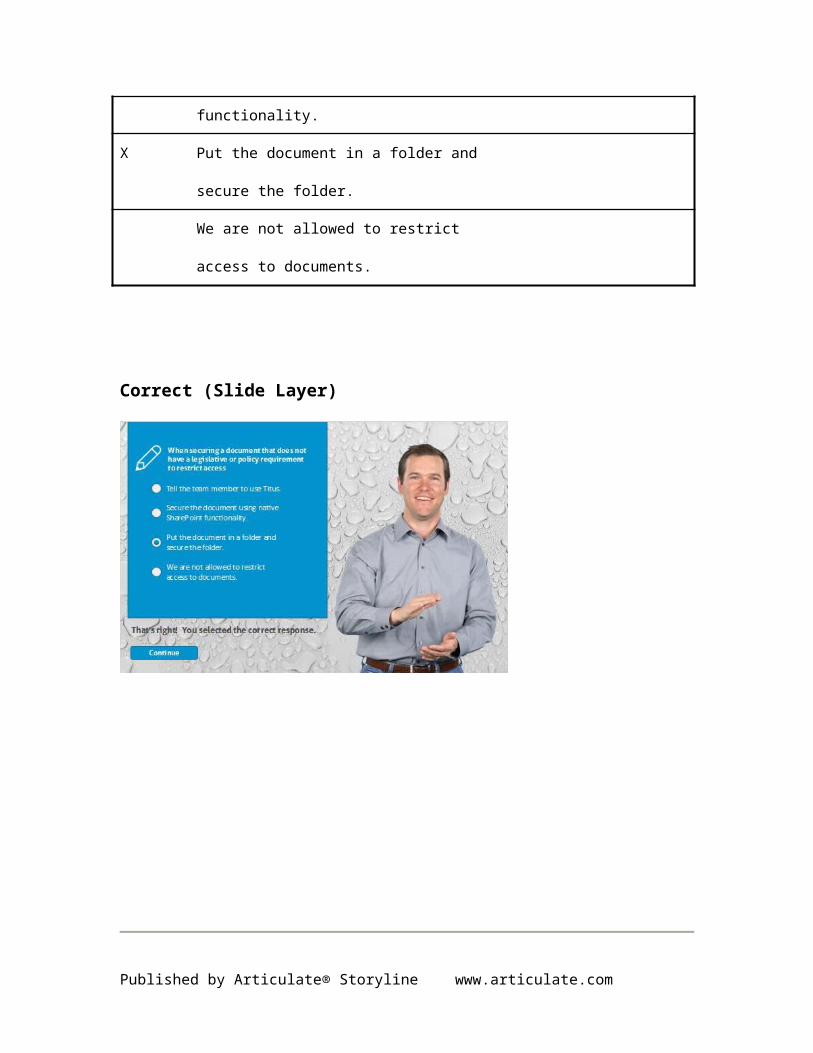
1.22 When securing a document that does not have a legislative or policy
requirement to restrict access
(Multiple Choice, 10 points, 3 attempts permitted)
Correct Choice
Tell the team member to use Titus.
Secure the document using native SharePoint functionality.
Published by Articulate® Storyline www.articulate.com

X Put the document in a folder and
secure the folder.
We are not allowed to restrict
access to documents.
Correct (Slide Layer)
Published by Articulate® Storyline www.articulate.com

Incorrect (Slide Layer)
Try Again (Slide Layer)
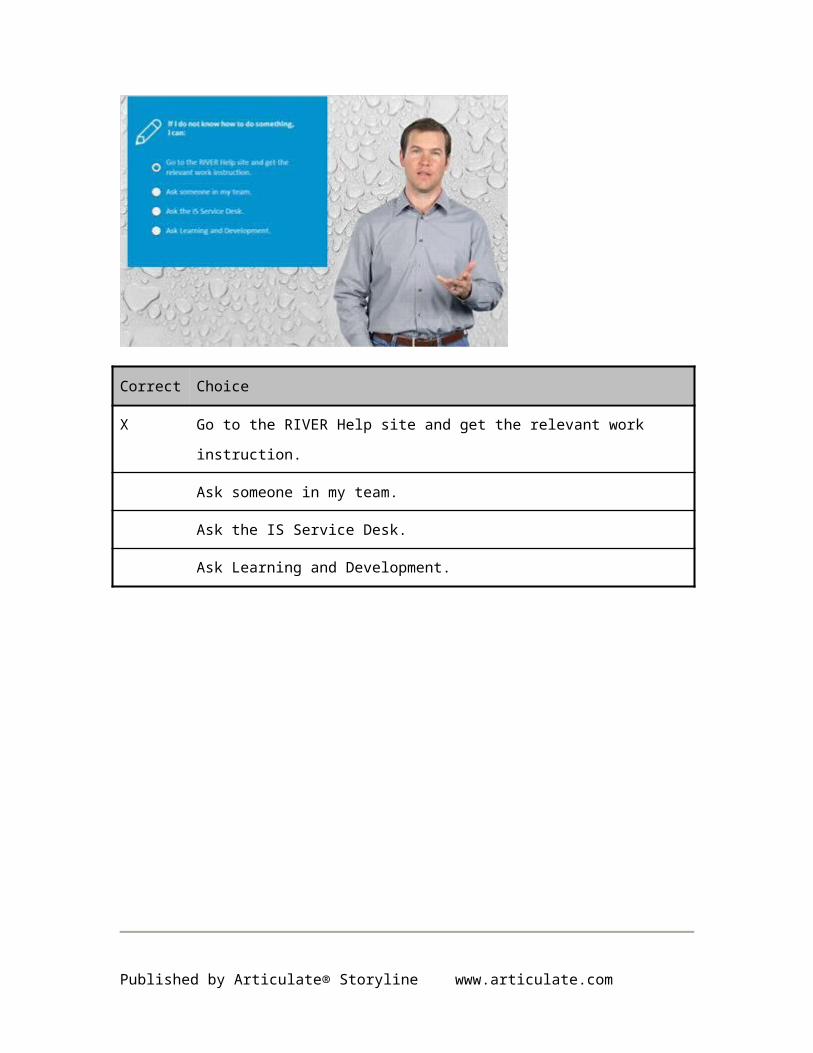
1.23 If I do not know how to do something,
I can:
(Multiple Choice, 10 points, 3 attempts permitted)
Published by Articulate® Storyline www.articulate.com
Correct Choice
X Go to the RIVER Help site and get the relevant work instruction.
Ask someone in my team.
Ask the IS Service Desk.
Ask Learning and Development.
Correct (Slide Layer)
Published by Articulate® Storyline www.articulate.com

Incorrect (Slide Layer)
Try Again (Slide Layer)
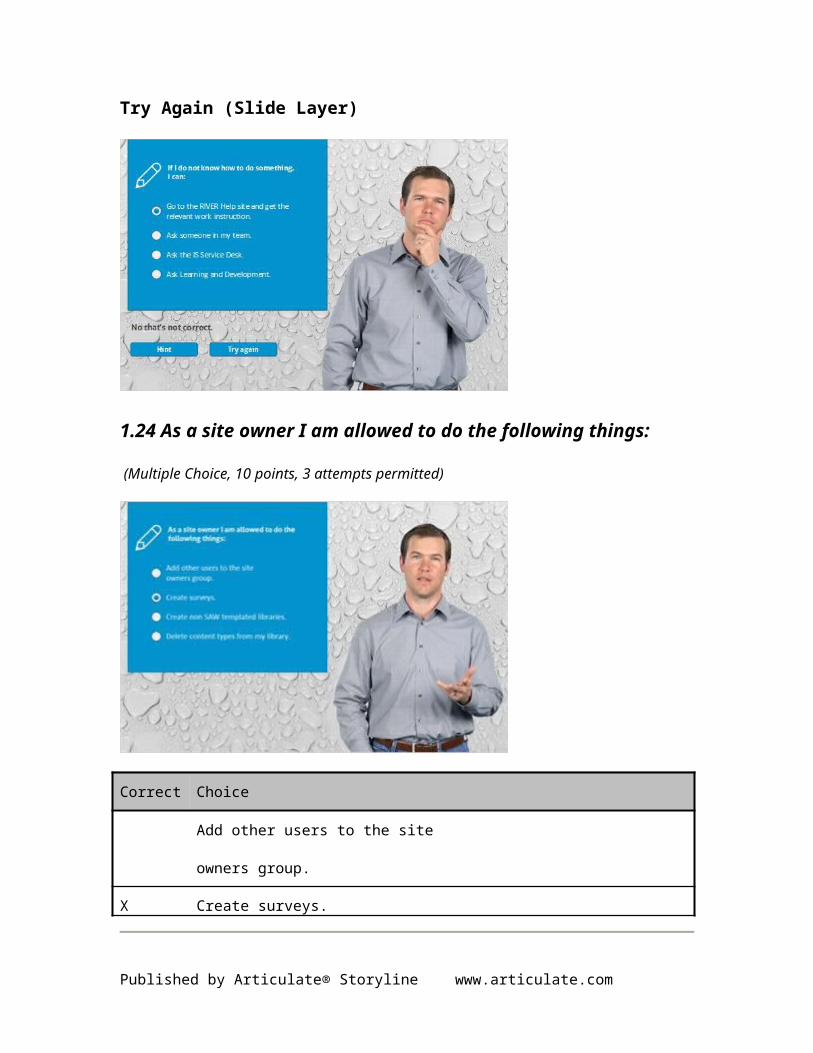
1.24 As a site owner I am allowed to do the following things:
(Multiple Choice, 10 points, 3 attempts permitted)
Published by Articulate® Storyline www.articulate.com
Correct Choice
Add other users to the site
owners group.
X Create surveys.
Create non SAW templated libraries.
Delete content types from my library.
Published by Articulate® Storyline www.articulate.com

Correct (Slide Layer)
Incorrect (Slide Layer)
Published by Articulate® Storyline www.articulate.com
Try Again (Slide Layer)
1.25 I should always over-ride a checked out document when
(Multiple Choice, 10 points, 3 attempts permitted)
Correct Choice
I want to edit a document that someone else has checked out
I never override checked out documents
X The user who has it checked out has left
Published by Articulate® Storyline www.articulate.com
the organisation
Someone asked me to because they want to edit a document that is checked out
Correct (Slide Layer)
Incorrect (Slide Layer)
Published by Articulate® Storyline www.articulate.com

Try Again (Slide Layer)
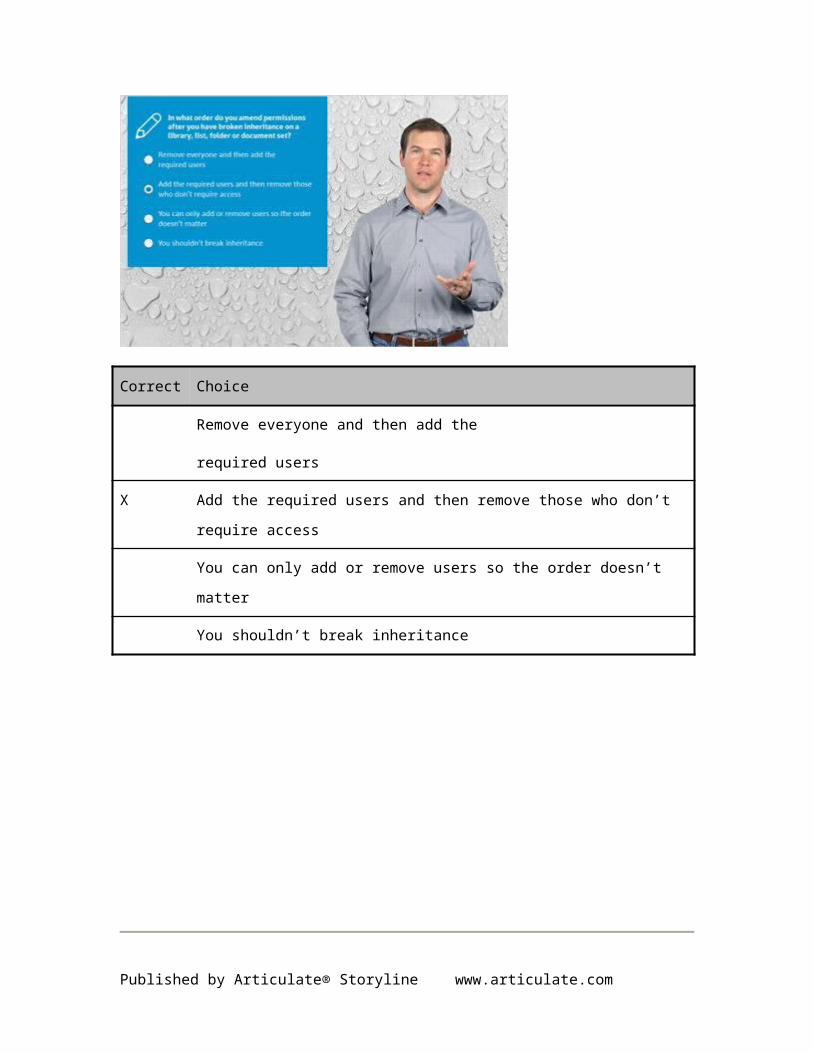
1.26 In what order do you amend permissions after you have broken
inheritance on a library, list, folder or document set?
(Multiple Choice, 10 points, 3 attempts permitted)
Correct Choice
Remove everyone and then add the
required users
Published by Articulate® Storyline www.articulate.com

X Add the required users and then remove those who don’t require access
You can only add or remove users so the order doesn’t matter
You shouldn’t break inheritance
Correct (Slide Layer)
Incorrect (Slide Layer)
Published by Articulate® Storyline www.articulate.com

Try Again (Slide Layer)
1.27 Deleted items can be restored from the site recycle bin by site
owners,
(Multiple Choice, 10 points, 3 attempts permitted)
Correct Choice
Anytime
Up to 120 days after they are deleted
Published by Articulate® Storyline www.articulate.com
Never
X Up to 30 days after they are deleted
Correct (Slide Layer)
Incorrect (Slide Layer)
Published by Articulate® Storyline www.articulate.com

Try Again (Slide Layer)
1.28 When creating libraries and lists, the name should be abbreviated
initially so,
(Multiple Choice, 10 points, 3 attempts permitted)
Correct Choice
X The URL is not over 255 characters
To make it easier to find the libraries and lists
Published by Articulate® Storyline www.articulate.com

So you don’t have to data entry as
much information
All of the above
Correct (Slide Layer)
Incorrect (Slide Layer)
Published by Articulate® Storyline www.articulate.com

Try Again (Slide Layer)
1.29 Results Slide
(Results Slide, 0 points, 1 attempt permitted)
Results for
1.21 Site Owners are expected to:
Published by Articulate® Storyline www.articulate.com

1.22 When securing a document that does not have a legislative or policy requirement to
restrict access
1.23 If I do not know how to do something,
I can:
1.24 As a site owner I am allowed to do the following things:
1.25 I should always over-ride a checked out document when
1.26 In what order do you amend permissions after you have broken inheritance on a library,
list, folder or document set?
1.27 Deleted items can be restored from the site recycle bin by site owners,
1.28 When creating libraries and lists, the name should be abbreviated initially so,
Result slide properties
Passing Score 80%
Published by Articulate® Storyline www.articulate.com

Success (Slide Layer)
Failure (Slide Layer)
Published by Articulate® Storyline www.articulate.com

1.30 Finish
Notes:
Published by Articulate® Storyline www.articulate.com

2. Existing Site Access
2.1 Click the To navigate through the Ribbon, use standard browser
navigation keys. To skip between groups, use Ctrl+LEFT or Ctrl+RIGHT. To
jump to the first Ribbon tab use Ctrl+[. To jump to the last selected
command use Ctrl+]. To activate a command, use Enter.Site Actions This
page location is: RiverTrainingHomeBrowse
Tab 1 of 2.Page
Tab 2 of 2.Ulvestad, Anethea toolbar
Published by Articulate® Storyline www.articulate.com

2.2 Click the Site Settings
Access all settings for this site. link
2.3 Click the Specify users and user groups who have access to this site
and any subsite which inherits permissions. link
Published by Articulate® Storyline www.articulate.com

2.4 Click the Training Owners link
2.5 Click the Training Visitors link
Published by Articulate® Storyline www.articulate.com

3. Add new site member
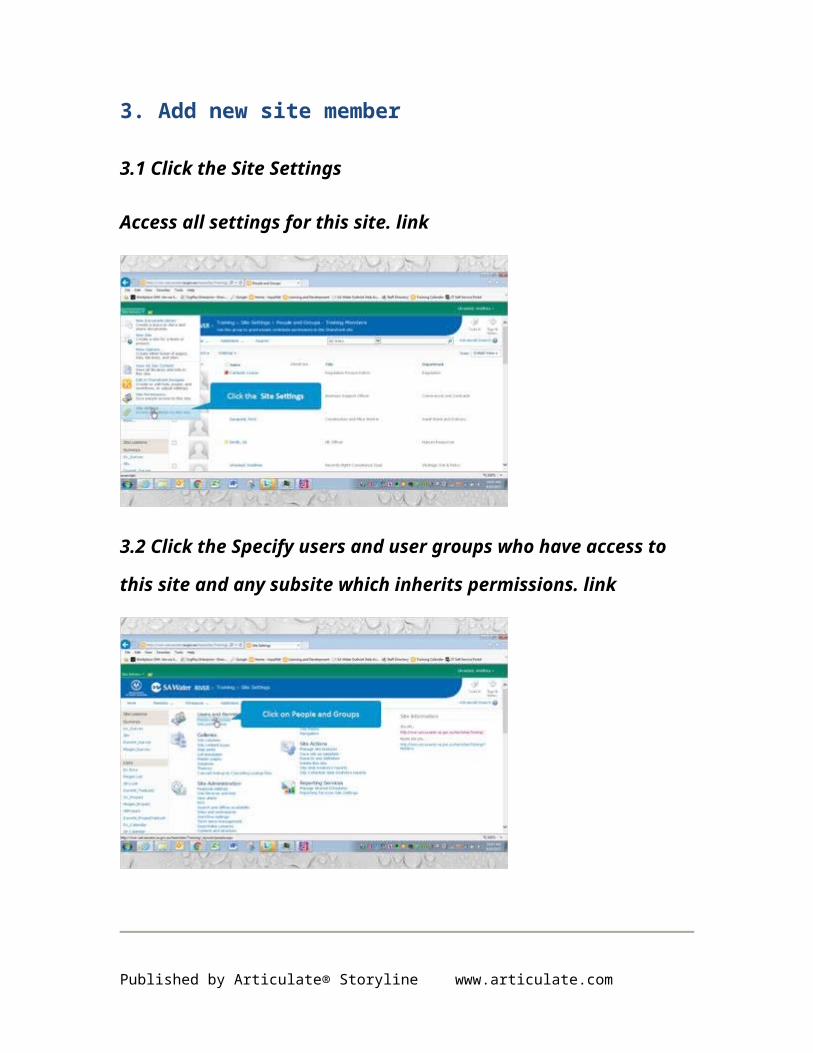
3.1 Click the Site Settings
Access all settings for this site. link
3.2 Click the Specify users and user groups who have access to this site
and any subsite which inherits permissions. link
Published by Articulate® Storyline www.articulate.com

3.3 Click the Open Menu image
3.4 Click the Add Users
Add users to this group. link
Published by Articulate® Storyline www.articulate.com

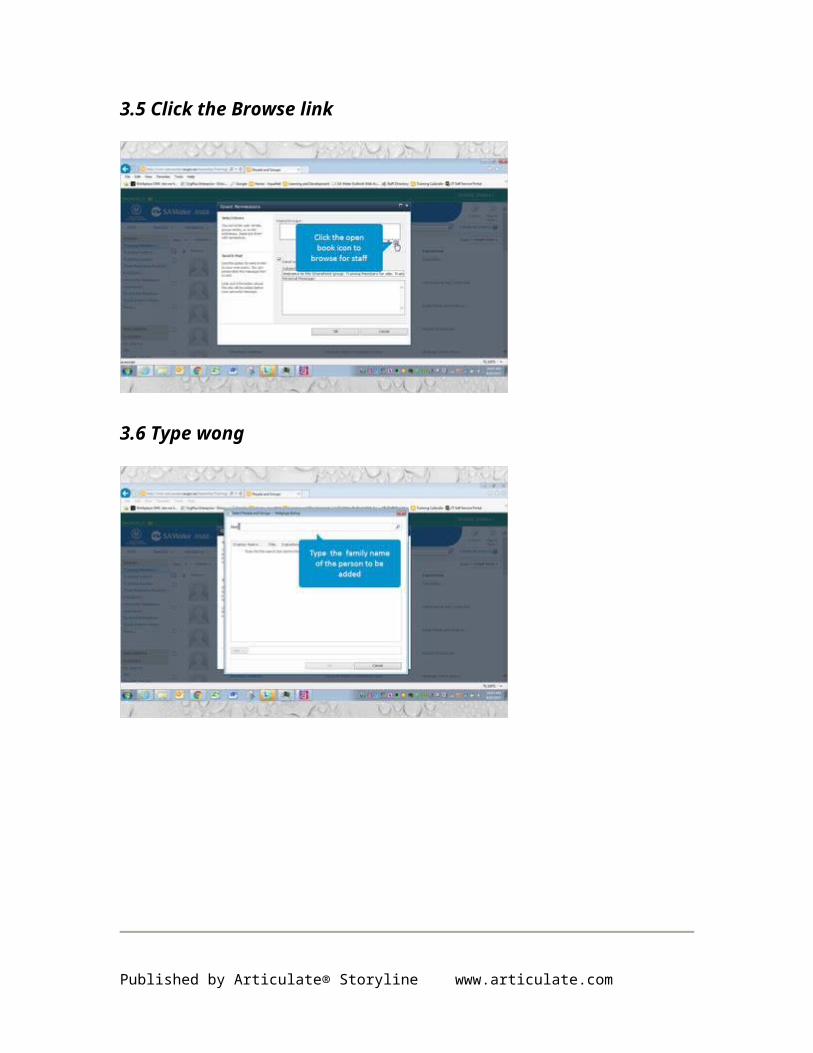
3.5 Click the Browse link
3.6 Type wong
Published by Articulate® Storyline www.articulate.com
3.7 Click the Search button
3.8 Click the text box
Published by Articulate® Storyline www.articulate.com

3.9 Click the Add -> button
3.10 Click the OK button
Published by Articulate® Storyline www.articulate.com
3.11 Click the Send welcome e-mail to the new users check box
3.12 Click the OK button
Published by Articulate® Storyline www.articulate.com

3.13 Click and drag
4. Delete site member
4.1 Click the Open Menu image
Published by Articulate® Storyline www.articulate.com

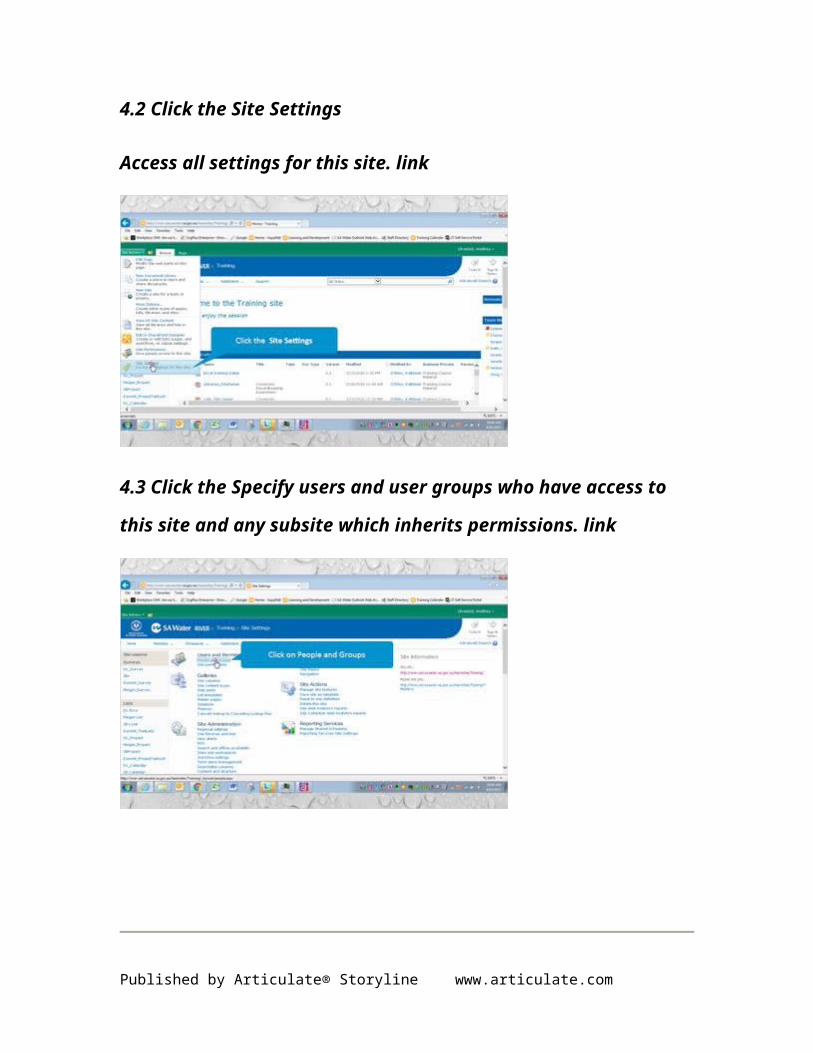
4.2 Click the Site Settings
Access all settings for this site. link
4.3 Click the Specify users and user groups who have access to this site
and any subsite which inherits permissions. link
Published by Articulate® Storyline www.articulate.com

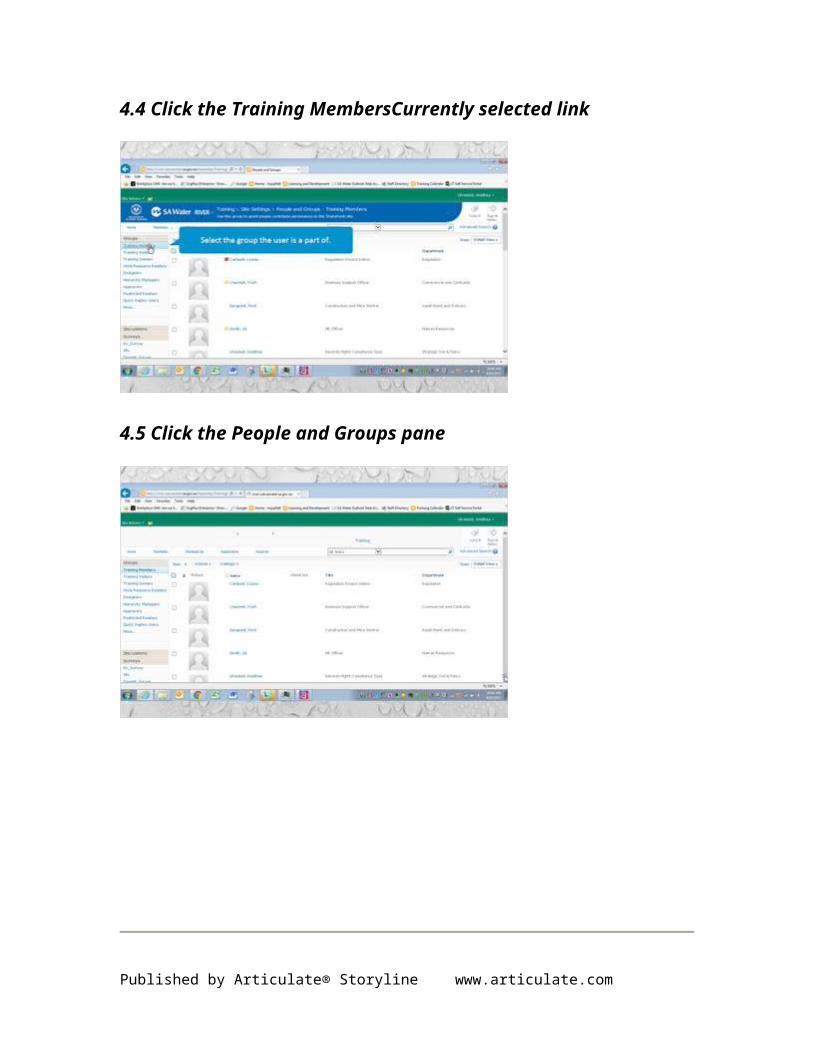
4.4 Click the Training MembersCurrently selected link
4.5 Click the People and Groups pane
Published by Articulate® Storyline www.articulate.com

4.6 Click the People and Groups pane
4.7 Click the Wong, Robin check box
Published by Articulate® Storyline www.articulate.com
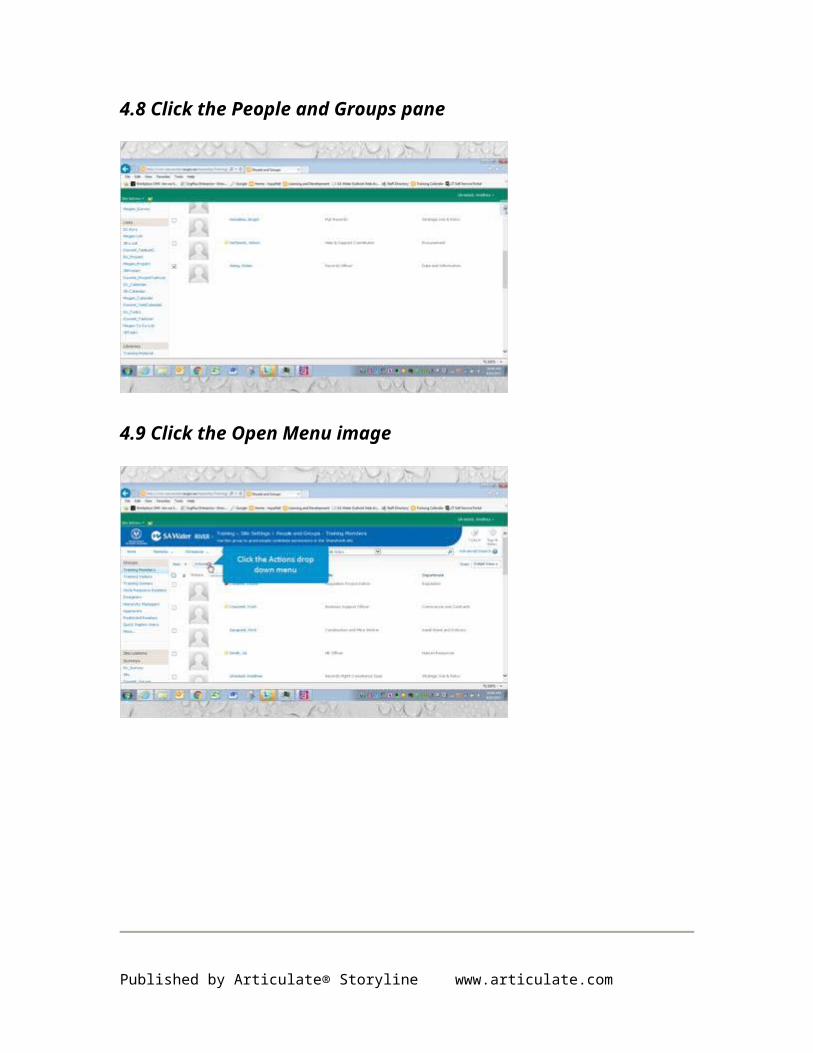
4.8 Click the People and Groups pane
4.9 Click the Open Menu image
Published by Articulate® Storyline www.articulate.com
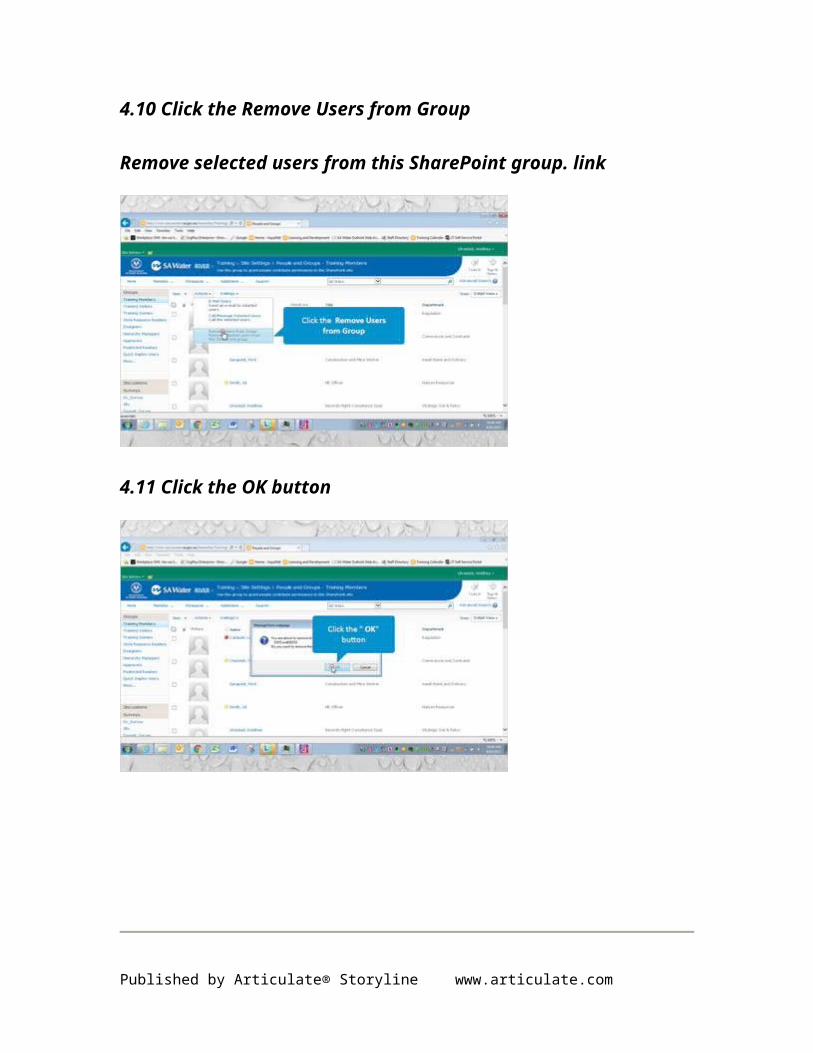
4.10 Click the Remove Users from Group
Remove selected users from this SharePoint group. link
4.11 Click the OK button
Published by Articulate® Storyline www.articulate.com

4.12 Click and drag
5. Custom Groups
5.1 Click the People and Groups pane
Published by Articulate® Storyline www.articulate.com
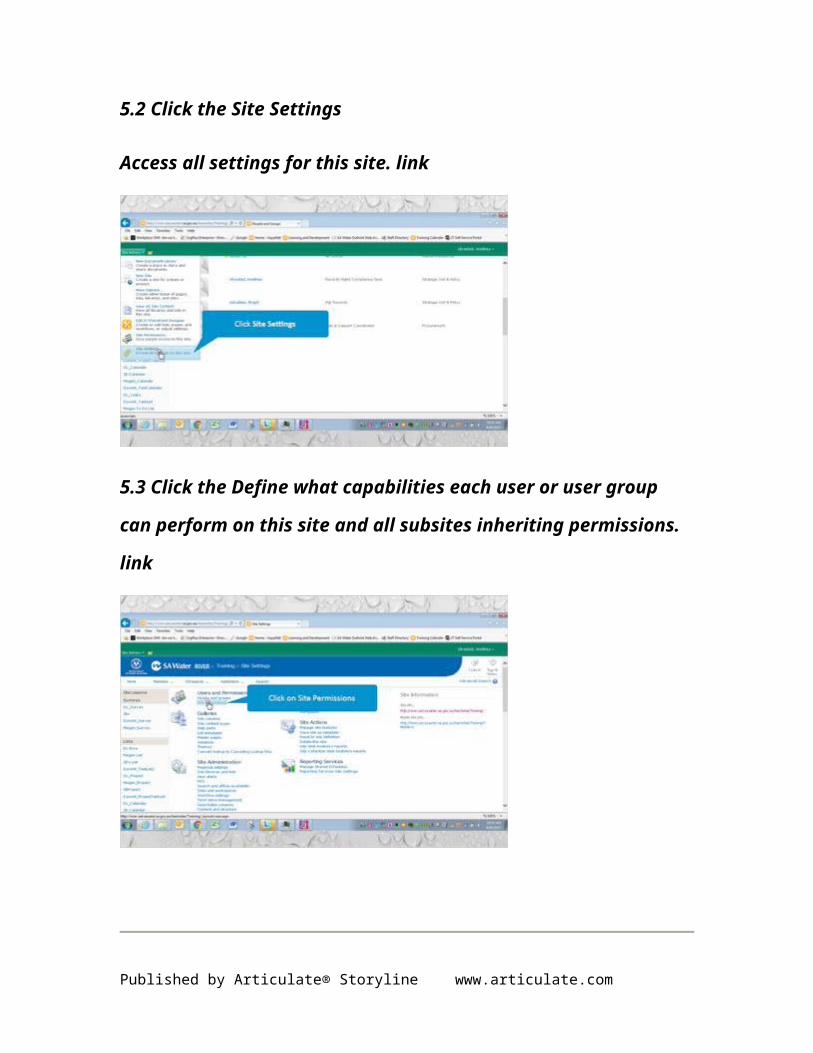
5.2 Click the Site Settings
Access all settings for this site. link
5.3 Click the Define what capabilities each user or user group can perform
on this site and all subsites inheriting permissions. link
Published by Articulate® Storyline www.articulate.com
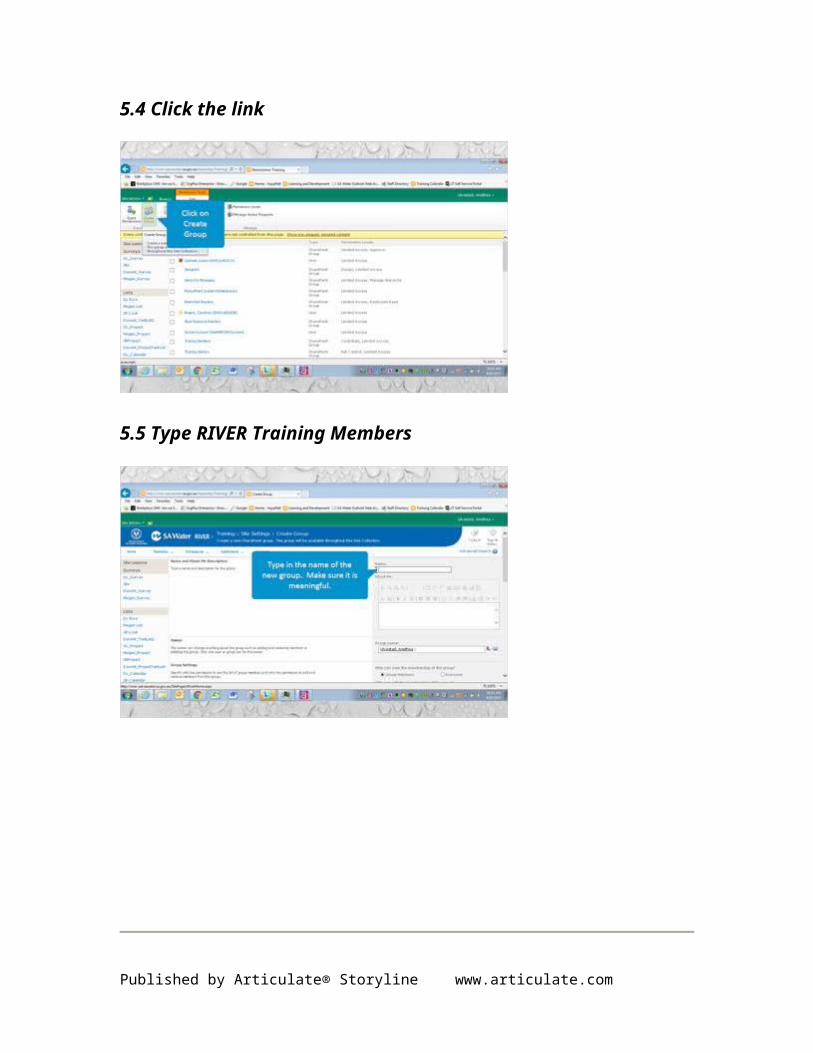
5.4 Click the link
5.5 Type RIVER Training Members
Published by Articulate® Storyline www.articulate.com

5.6 Click the Create Group pane
5.7 Click the Create Group pane
Published by Articulate® Storyline www.articulate.com
5.8 Click the Create Group pane
5.9 Double-Click the Create Group pane
Published by Articulate® Storyline www.articulate.com
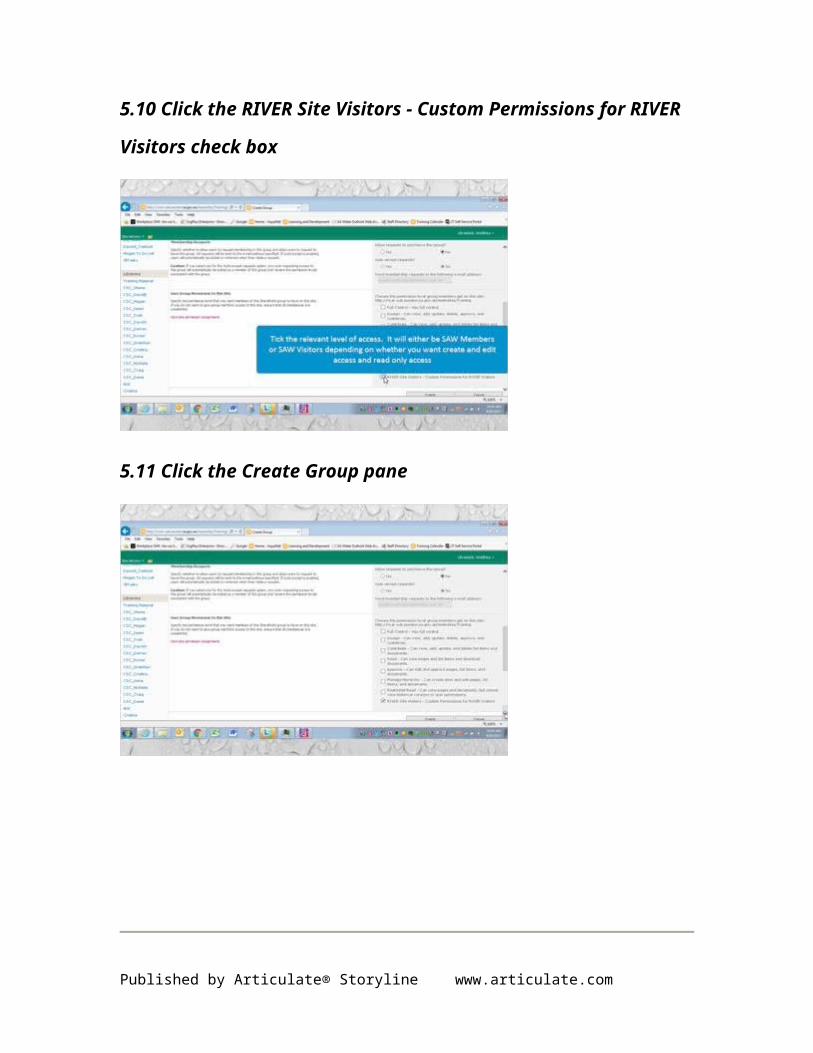
5.10 Click the RIVER Site Visitors - Custom Permissions for RIVER Visitors
check box
5.11 Click the Create Group pane
Published by Articulate® Storyline www.articulate.com

5.12 Click the Create button
6. Permissions libraries and lists
6.1 Click the Home - Training pane
Published by Articulate® Storyline www.articulate.com

6.2 Click the Training Material link
6.3 Click the Library link
Published by Articulate® Storyline www.articulate.com
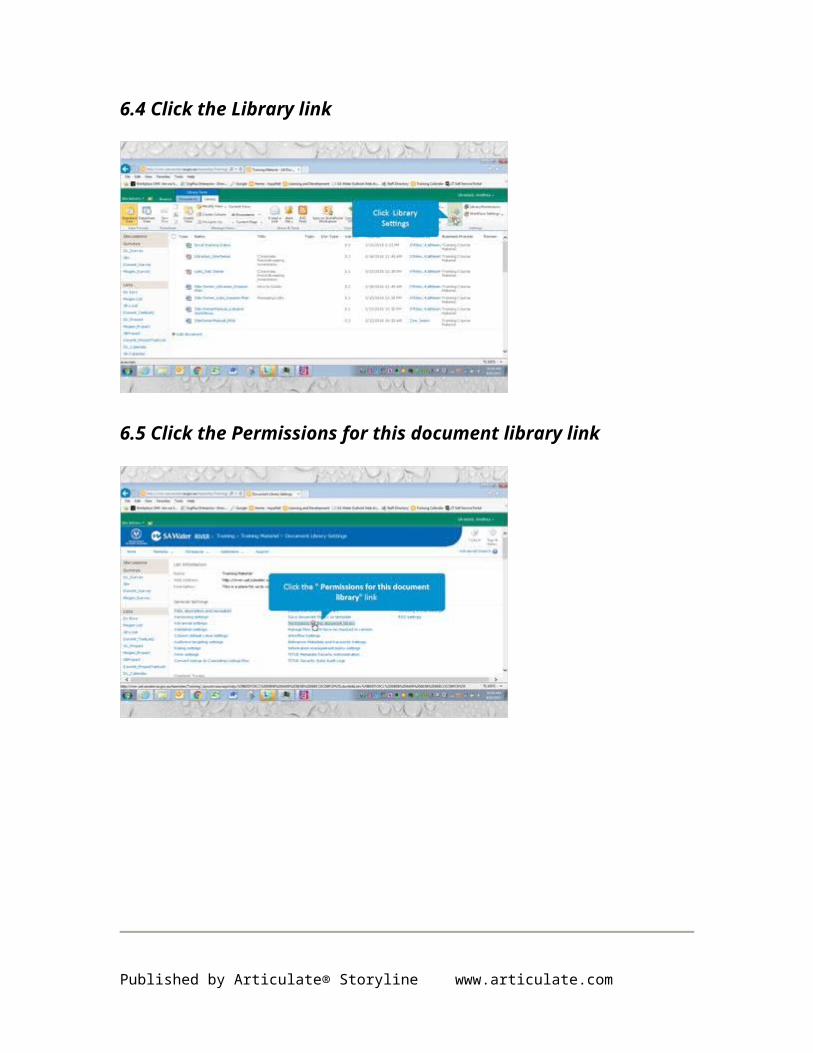
6.4 Click the Library link
6.5 Click the Permissions for this document library link
Published by Articulate® Storyline www.articulate.com

6.6 Click the link
6.7 Click the OK button
Published by Articulate® Storyline www.articulate.com

6.8 Click the link
6.9 Click the Browse link
Published by Articulate® Storyline www.articulate.com
6.10 Type wong
6.11 Click the Search button
Published by Articulate® Storyline www.articulate.com

6.12 Click the text box
6.13 Click the Add -> button
Published by Articulate® Storyline www.articulate.com

6.14 Click the OK button
6.15 Click the Add users to a SharePoint group (recommended) radio
button
Published by Articulate® Storyline www.articulate.com

6.16 Click the Close button
6.17 Click the RIVER Training Members [RIVER Site Visitors] list item
Published by Articulate® Storyline www.articulate.com

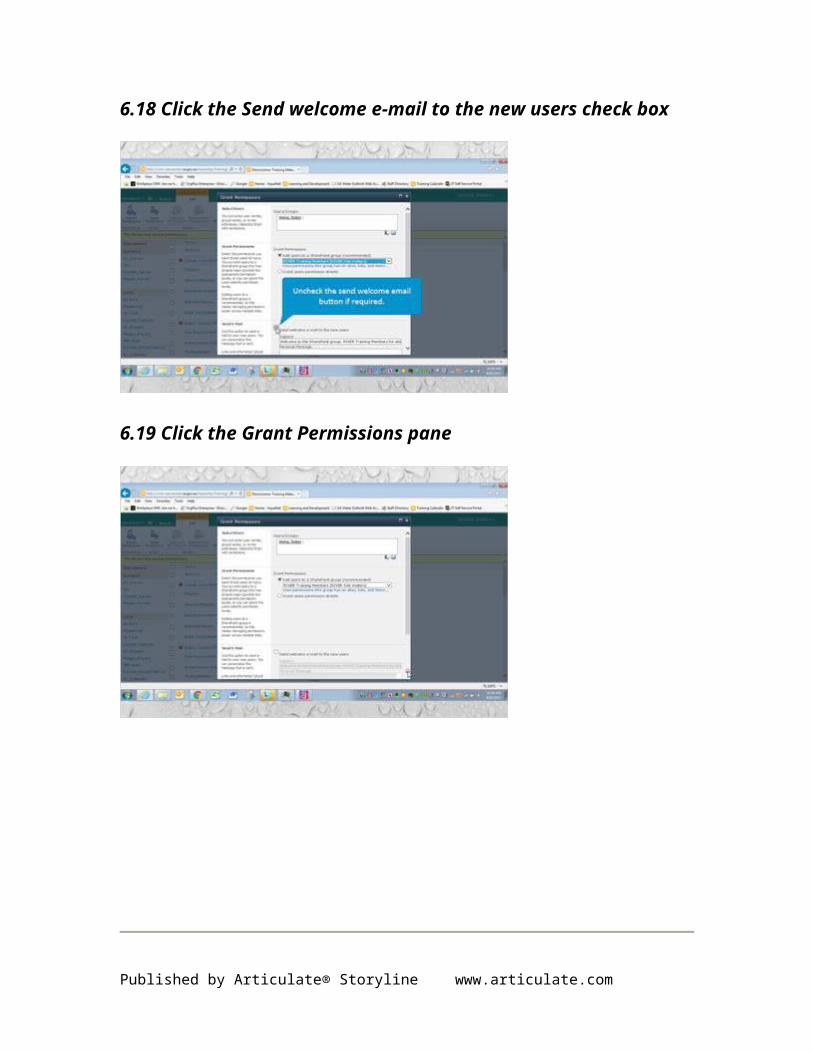
6.18 Click the Send welcome e-mail to the new users check box
6.19 Click the Grant Permissions pane
Published by Articulate® Storyline www.articulate.com

6.20 Click the OK button
6.21 Click the Designers check box
Published by Articulate® Storyline www.articulate.com

6.22 Click the Hierarchy Managers check box
6.23 Click the Remove User
Permissions link
Published by Articulate® Storyline www.articulate.com
6.24 Click the OK button
7. Permissions foldersand doc sets
7.1 Click the Home - Training pane
Published by Articulate® Storyline www.articulate.com

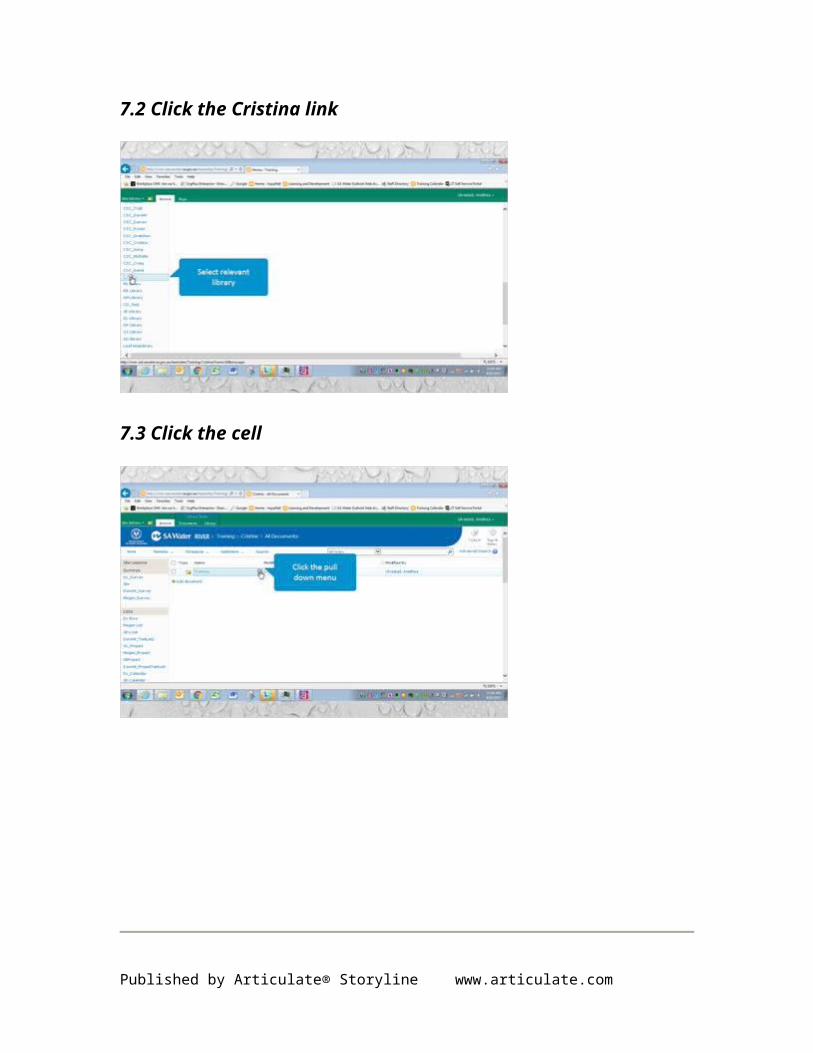
7.2 Click the Cristina link
7.3 Click the cell
Published by Articulate® Storyline www.articulate.com

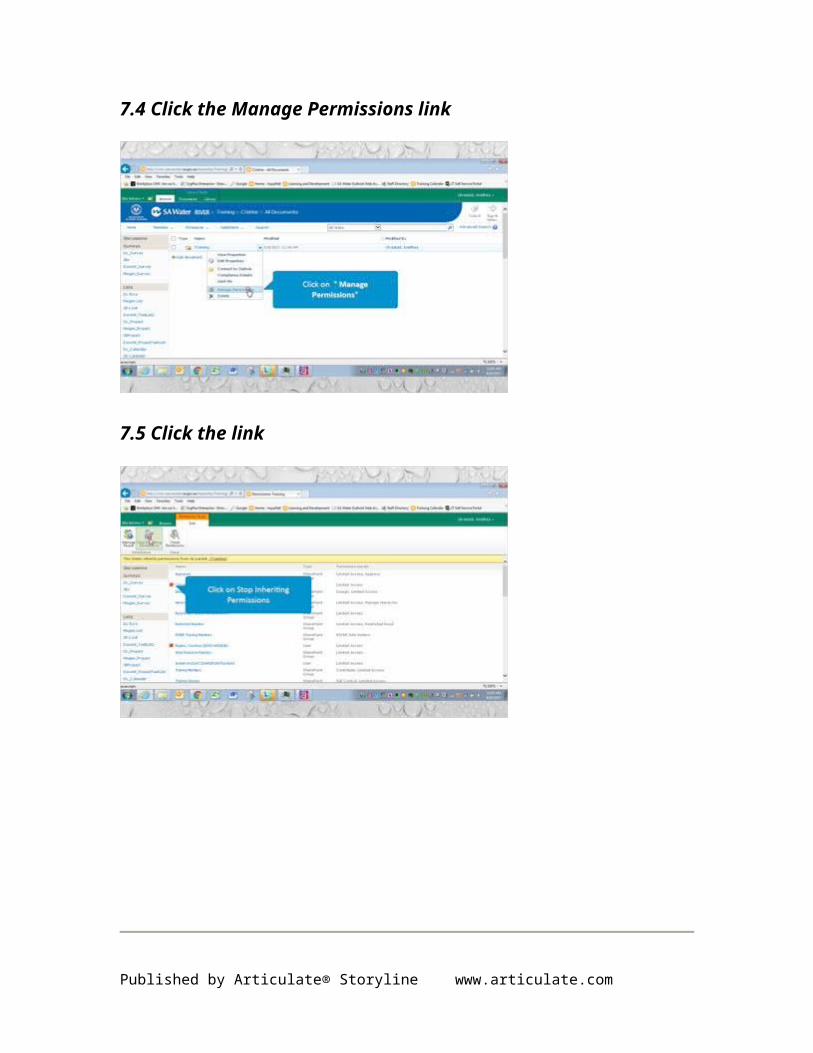
7.4 Click the Manage Permissions link
7.5 Click the link
Published by Articulate® Storyline www.articulate.com

7.6 Click the OK button
7.7 Click the Select All check box
Published by Articulate® Storyline www.articulate.com
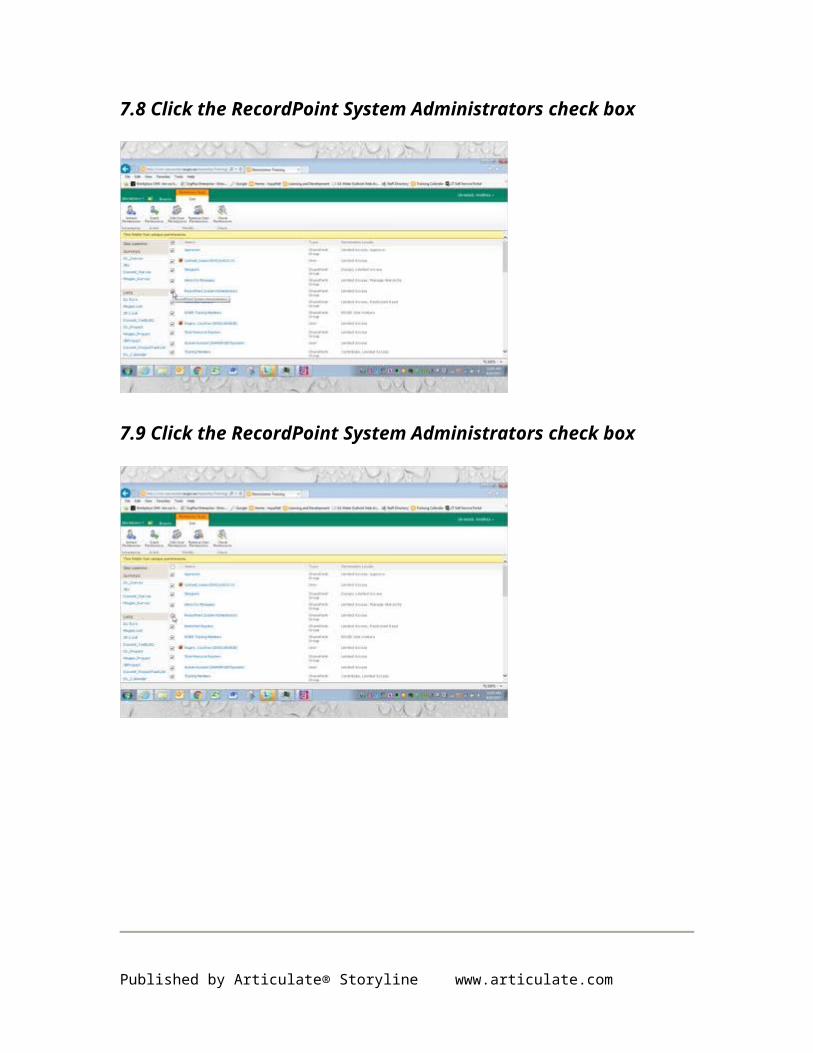
7.8 Click the RecordPoint System Administrators check box
7.9 Click the RecordPoint System Administrators check box
Published by Articulate® Storyline www.articulate.com
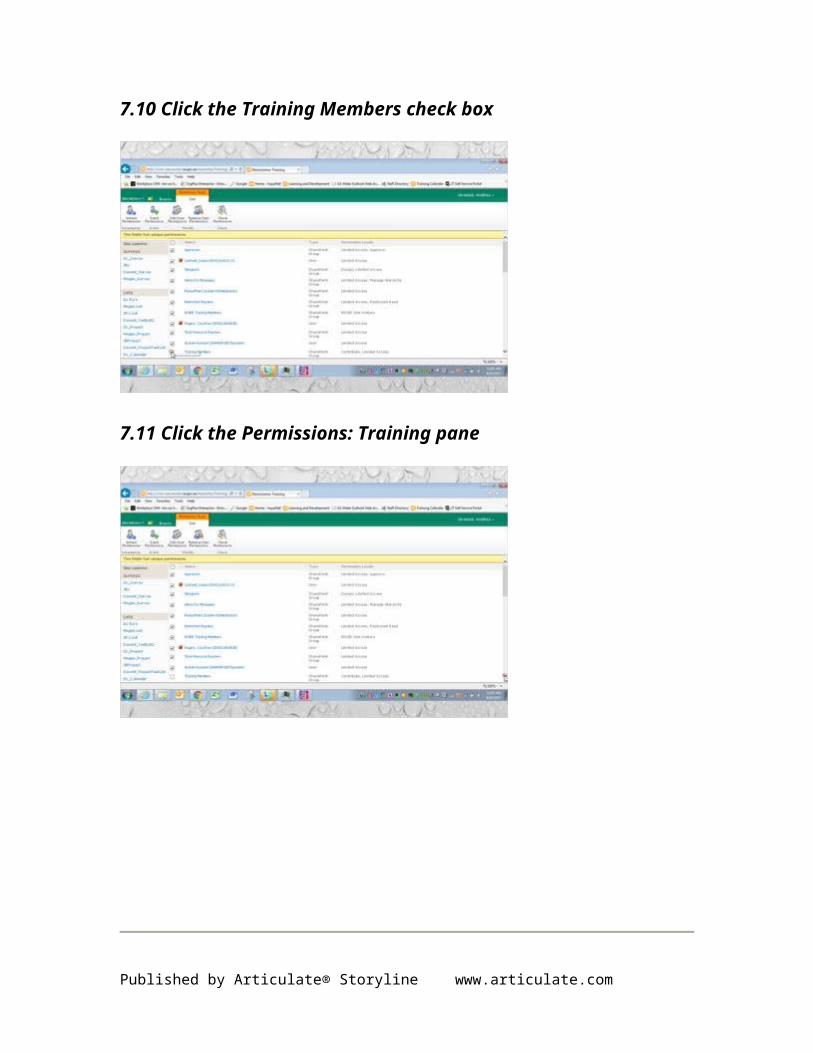
7.10 Click the Training Members check box
7.11 Click the Permissions: Training pane
Published by Articulate® Storyline www.articulate.com

7.12 Click the Training Owners check box
7.13 Click the Training Visitors check box
Published by Articulate® Storyline www.articulate.com
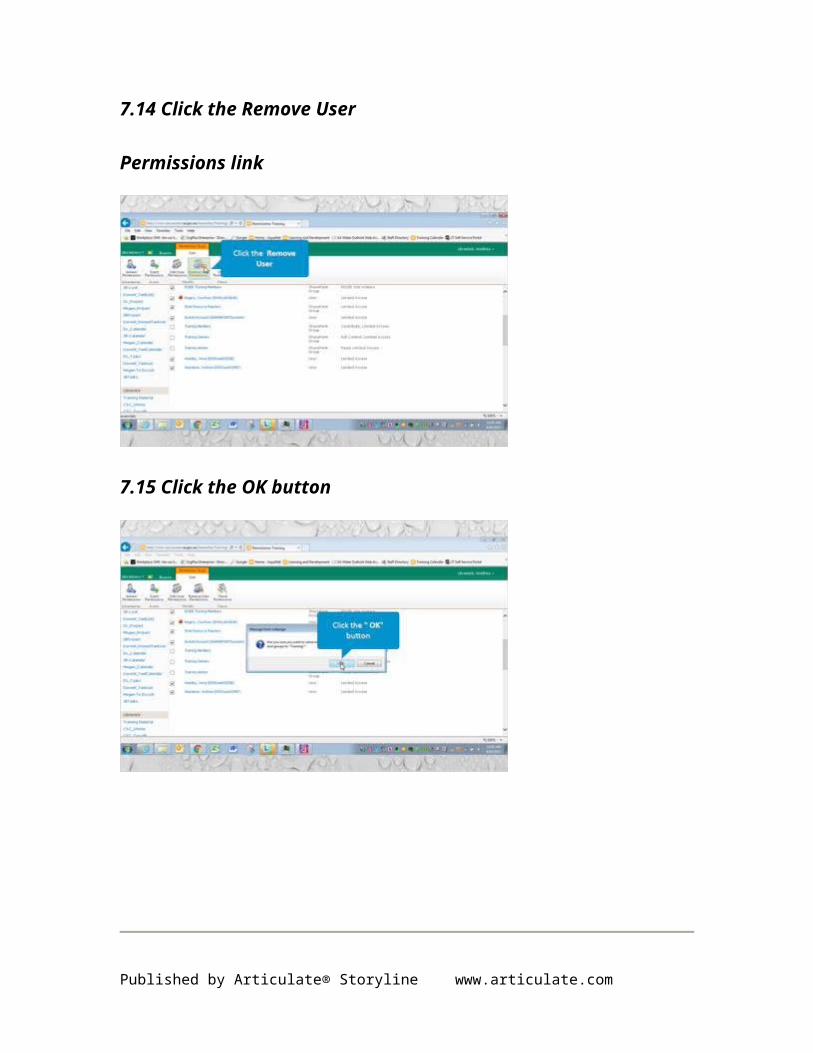
7.14 Click the Remove User
Permissions link
7.15 Click the OK button
Published by Articulate® Storyline www.articulate.com
8. New library
8.1 Click the Libraries link
8.2 Click the Create link
Published by Articulate® Storyline www.articulate.com

8.3 Click the button
8.4 Click the image
Published by Articulate® Storyline www.articulate.com
8.5 Click the text box
8.6 Type ttl
Published by Articulate® Storyline www.articulate.com

8.7 Click the Create button
8.8 Click the Settings link
Published by Articulate® Storyline www.articulate.com

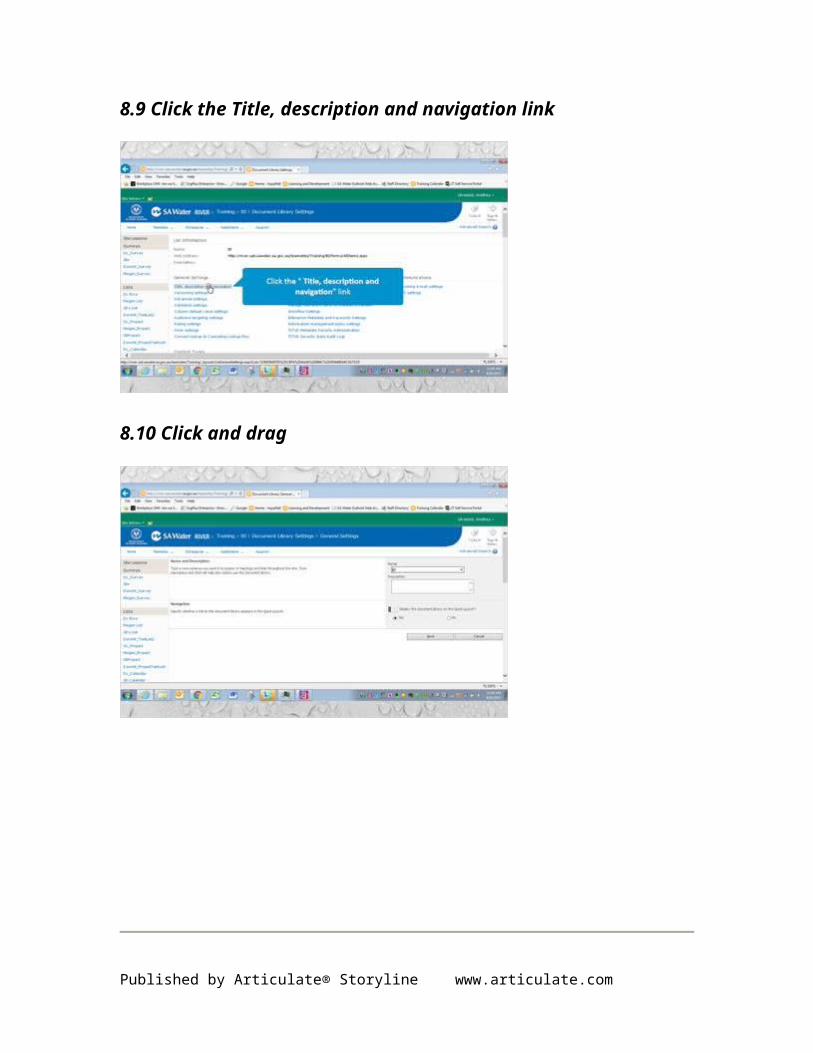
8.9 Click the Title, description and navigation link
8.10 Click and drag
Published by Articulate® Storyline www.articulate.com

8.11 Type Test Training
8.12 Click the Save button
Published by Articulate® Storyline www.articulate.com

8.13 Click the Training link
8.14 Click and drag
Published by Articulate® Storyline www.articulate.com
9. Discard Check-out
9.1 Click the cell
9.2 Click the Discard Check Out link
Published by Articulate® Storyline www.articulate.com

9.3 Click the OK button
10. Restore deletions
10.1 Click and drag
Published by Articulate® Storyline www.articulate.com

10.2 Click the Recycle Bin link
10.3 Click the Awareness Booklet.docx check box
Published by Articulate® Storyline www.articulate.com

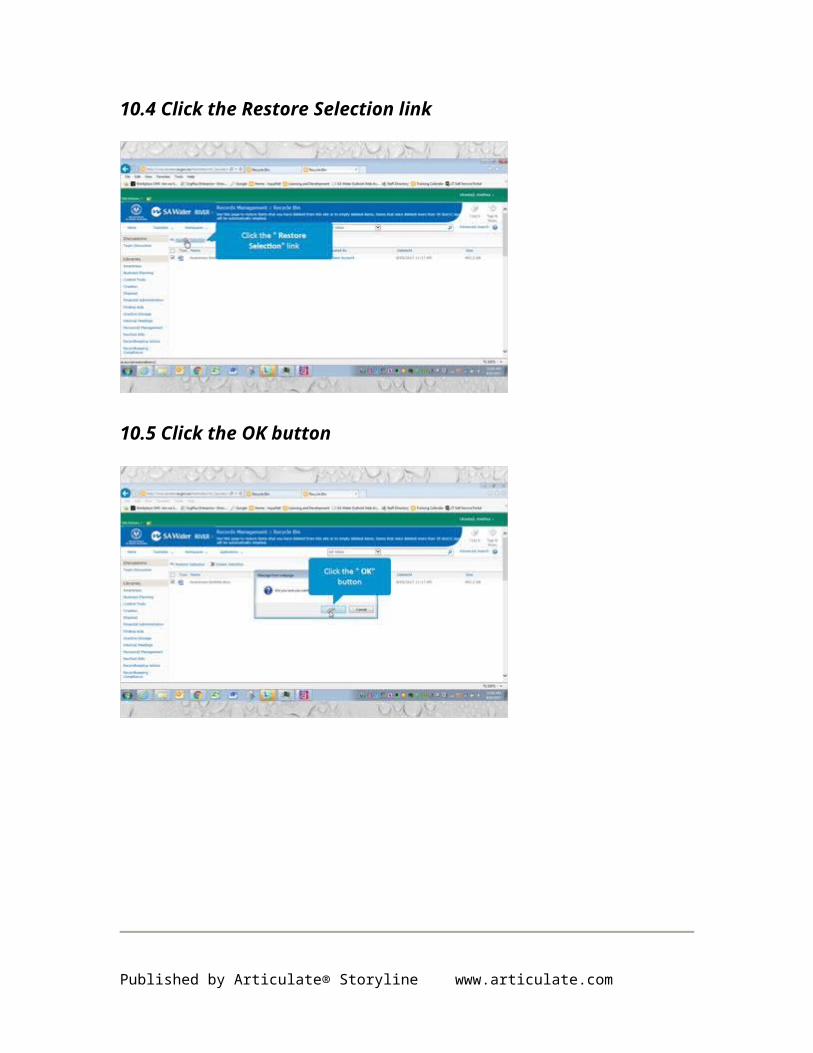
10.4 Click the Restore Selection link
10.5 Click the OK button
Published by Articulate® Storyline www.articulate.com

11. Moving items
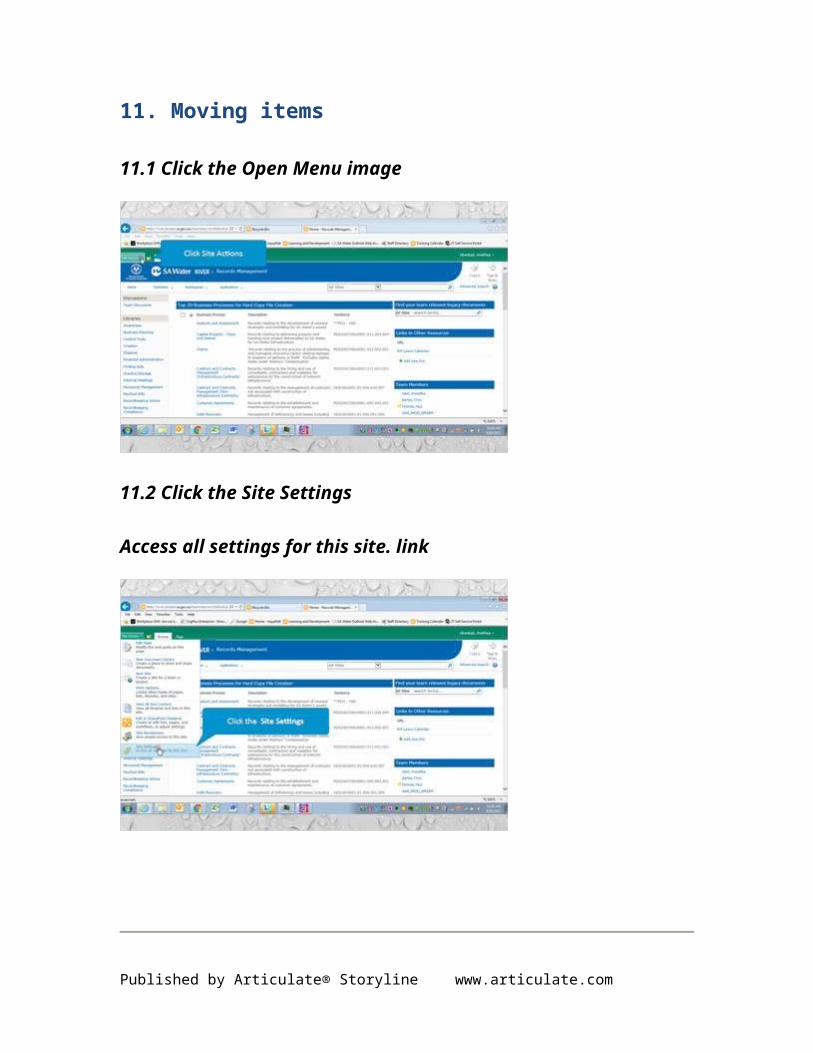
11.1 Click the Open Menu image
11.2 Click the Site Settings
Access all settings for this site. link
Published by Articulate® Storyline www.articulate.com

11.3 Click the Use the content and structure application to rearrange the
physical layout of all your sites, lists, and libraries. link
11.4 Click the Expand Awareness link
Published by Articulate® Storyline www.articulate.com
11.5 Click the Awareness link
11.6 Click the Select/Unselect Corporate Records Disposal Program.pptx
check box
Published by Articulate® Storyline www.articulate.com
11.7 Click the Select/Unselect GovernanceOHSWPresentation.pptx check
box
11.8 Click the Select/Unselect Hard Copy Super Users Meeting.pptx check
box
Published by Articulate® Storyline www.articulate.com

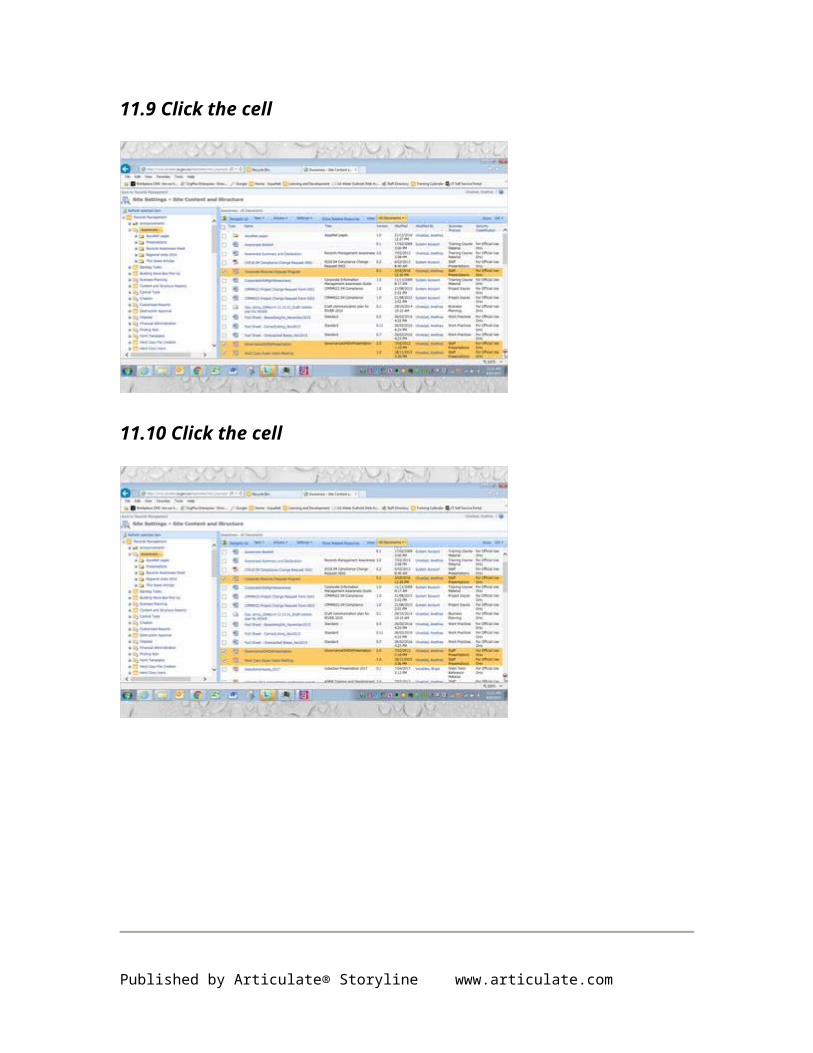
11.9 Click the cell
11.10 Click the cell
Published by Articulate® Storyline www.articulate.com

11.11 Click the cell
11.12 Click the Select/Unselect inForum 2011 presentation_conference
report presentation.pptx check box
Published by Articulate® Storyline www.articulate.com

11.13 Click the Select/Unselect
Invitation_HardCopySuperUsers_2015.docx check box
11.14 Click the Select/Unselect
Invitation_HardCopySuperUsers_2015.docx check box
Published by Articulate® Storyline www.articulate.com
11.15 Click the Open Menu image
11.16 Click the Move... label
Published by Articulate® Storyline www.articulate.com

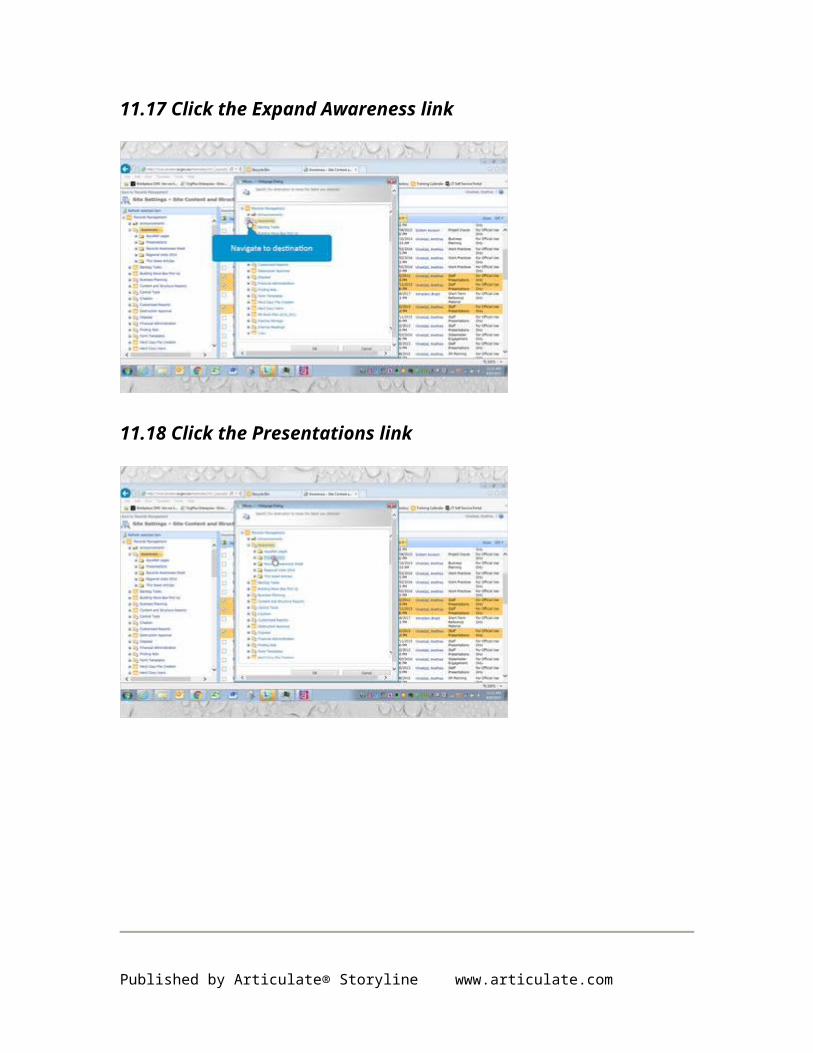
11.17 Click the Expand Awareness link
11.18 Click the Presentations link
Published by Articulate® Storyline www.articulate.com

11.19 Click the OK button
12. Custome List
12.1 Click the Lists link
Published by Articulate® Storyline www.articulate.com

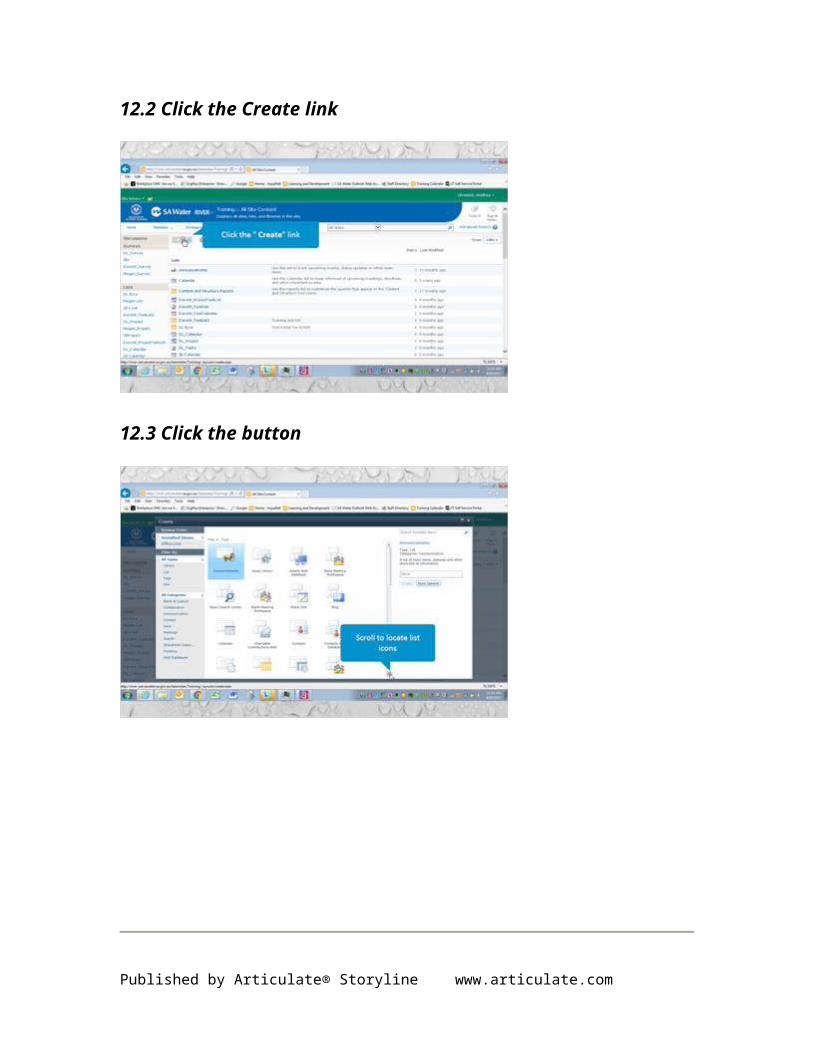
12.2 Click the Create link
12.3 Click the button
Published by Articulate® Storyline www.articulate.com
12.4 Click the button
12.5 Click the button
Published by Articulate® Storyline www.articulate.com

12.6 Double-Click the button
12.7 Click the image
Published by Articulate® Storyline www.articulate.com
12.8 Click the text box
12.9 Type cl
Published by Articulate® Storyline www.articulate.com

12.10 Click the Create button
12.11 Click the List link
Published by Articulate® Storyline www.articulate.com

12.12 Click the Title, description and navigation link
12.13 Click and drag
Published by Articulate® Storyline www.articulate.com

12.14 Type Custome list
12.15 Click the Save button
Published by Articulate® Storyline www.articulate.com

12.16 Click the List Settings pane
12.17 Click the Custome list link
Published by Articulate® Storyline www.articulate.com

12.18 Click the List link
12.19 Click the Create Column link
Published by Articulate® Storyline www.articulate.com

12.20 Type Received Date
12.21 Click the Date and Time radio button
Published by Articulate® Storyline www.articulate.com

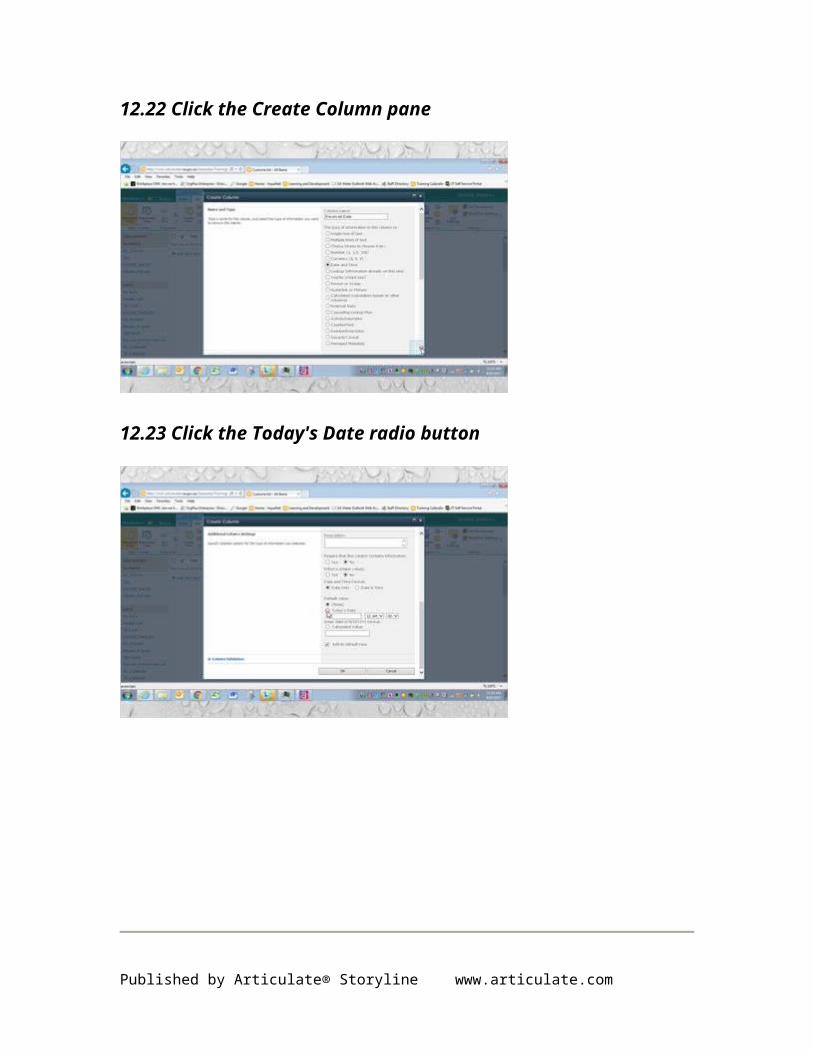
12.22 Click the Create Column pane
12.23 Click the Today's Date radio button
Published by Articulate® Storyline www.articulate.com

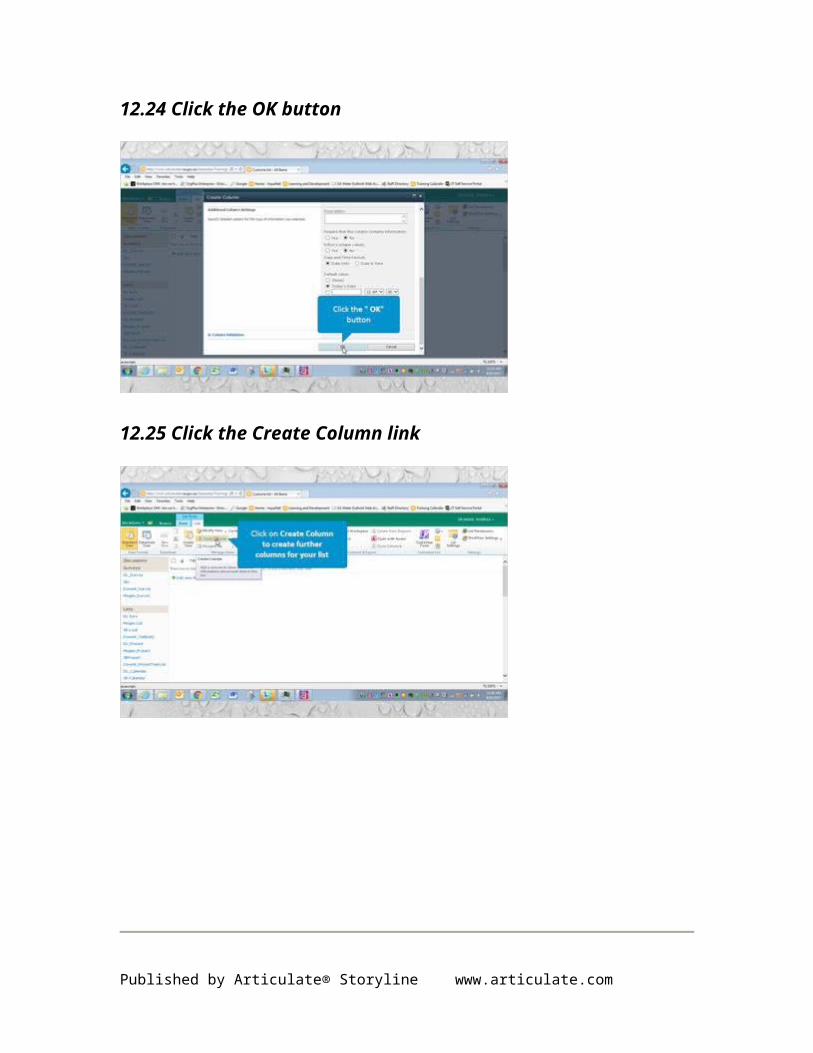
12.24 Click the OK button
12.25 Click the Create Column link
Published by Articulate® Storyline www.articulate.com

12.26 Type Name
12.27 Click the Person or Group radio button
Published by Articulate® Storyline www.articulate.com
12.28 Click the Create Column pane
12.29 Click the Create Column pane
Published by Articulate® Storyline www.articulate.com
12.30 Click the Yes radio button
12.31 Click the OK button
Published by Articulate® Storyline www.articulate.com