art140 photoshop portrait wrinkles
DESCRIPTION
art 140TRANSCRIPT
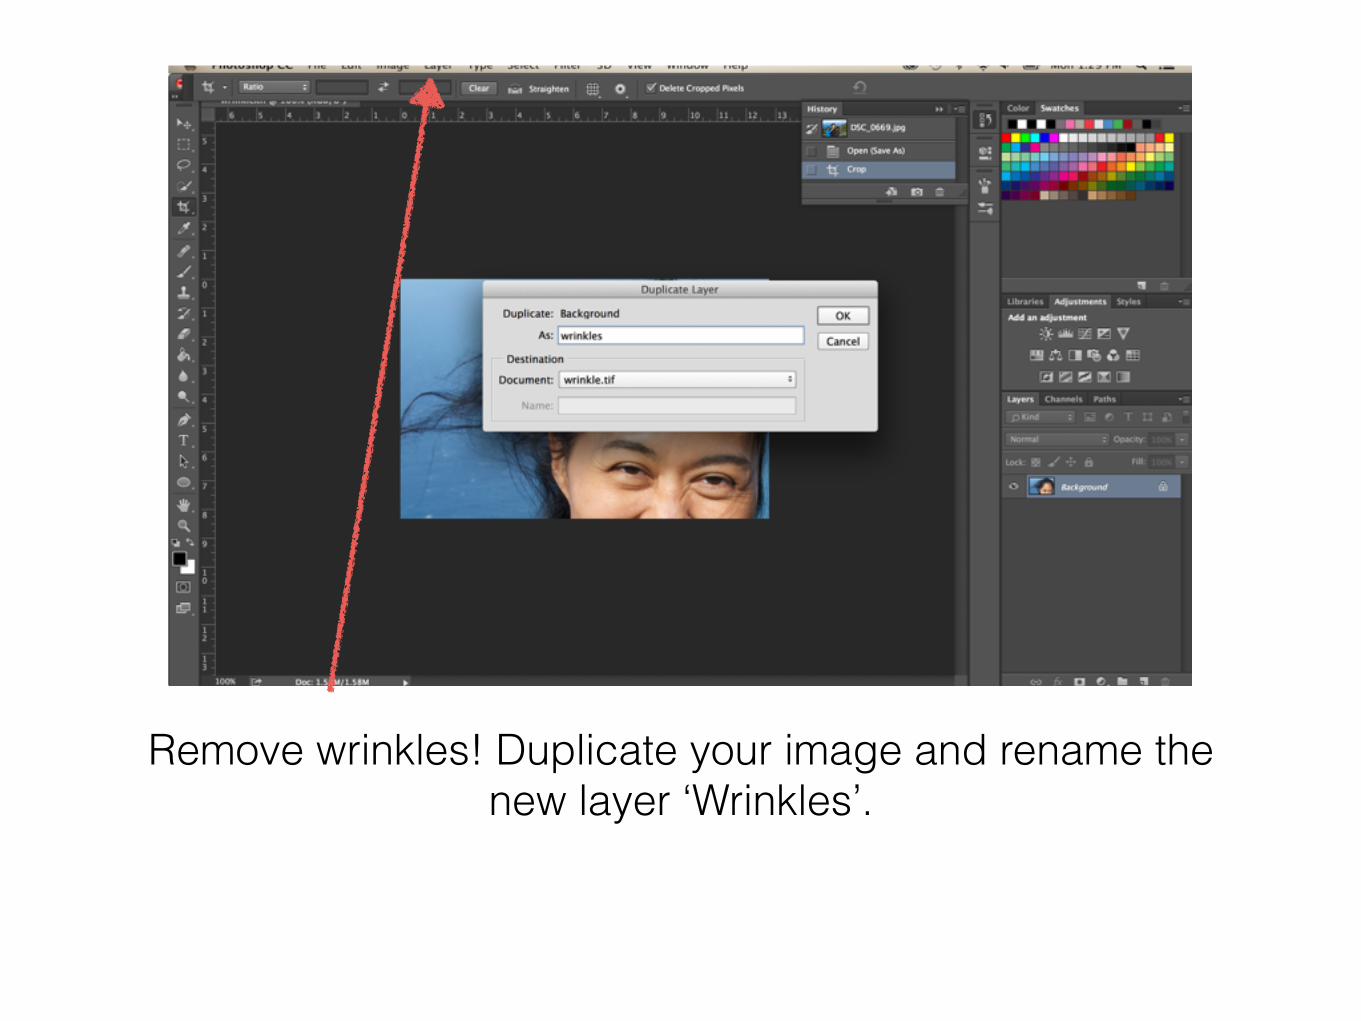
Remove wrinkles! Duplicate your image and rename the new layer ‘Wrinkles’.
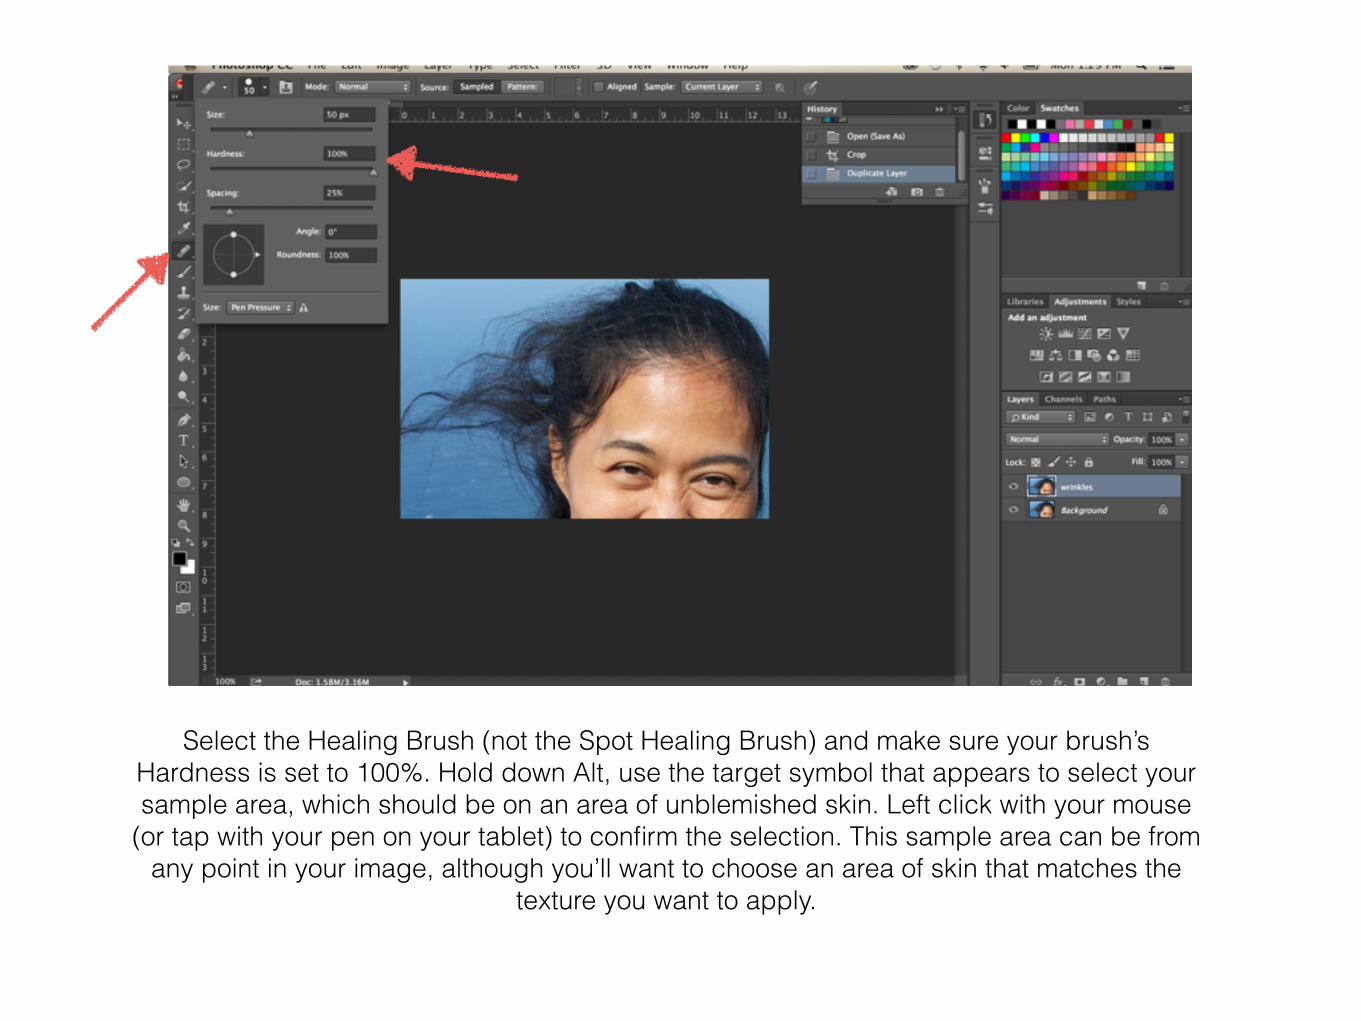
Select the Healing Brush (not the Spot Healing Brush) and make sure your brush’s Hardness is set to 100%. Hold down Alt, use the target symbol that appears to select your sample area, which should be on an area of unblemished skin. Left click with your mouse
(or tap with your pen on your tablet) to confirm the selection. This sample area can be from any point in your image, although you’ll want to choose an area of skin that matches the
texture you want to apply.

With your sample area now selected, brush over all of the wrinkles, lines and marks so that they disappear. Don’t worry at this point if there are any visible defects in your editing – they won’t be visible later.
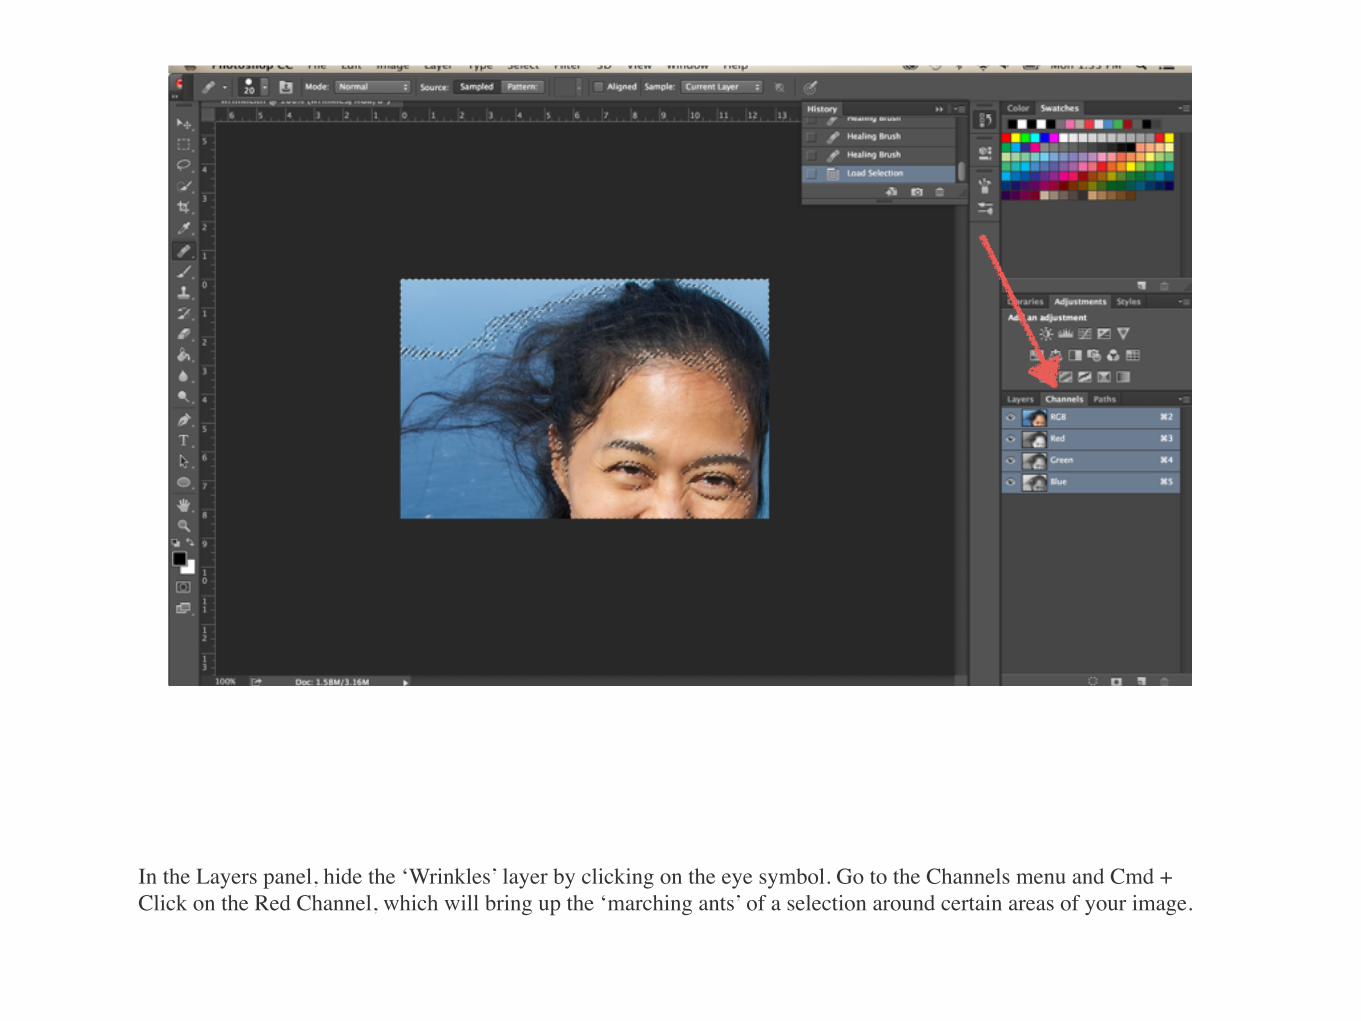
In the Layers panel, hide the ‘Wrinkles’ layer by clicking on the eye symbol. Go to the Channels menu and Cmd + Click on the Red Channel, which will bring up the ‘marching ants’ of a selection around certain areas of your image.

Back in the Layers panel, make your ‘Wrinkles’ layer visible again and click on the Add Layer Mask button to apply this selection to your layer. You should notice that sections of your editing layer will now have disappeared, and you’ll be left with a much smoother looking image. Depending on your image, lower the opacity of your editing layer for a more natural effect. I lowered the opacity to 91%.
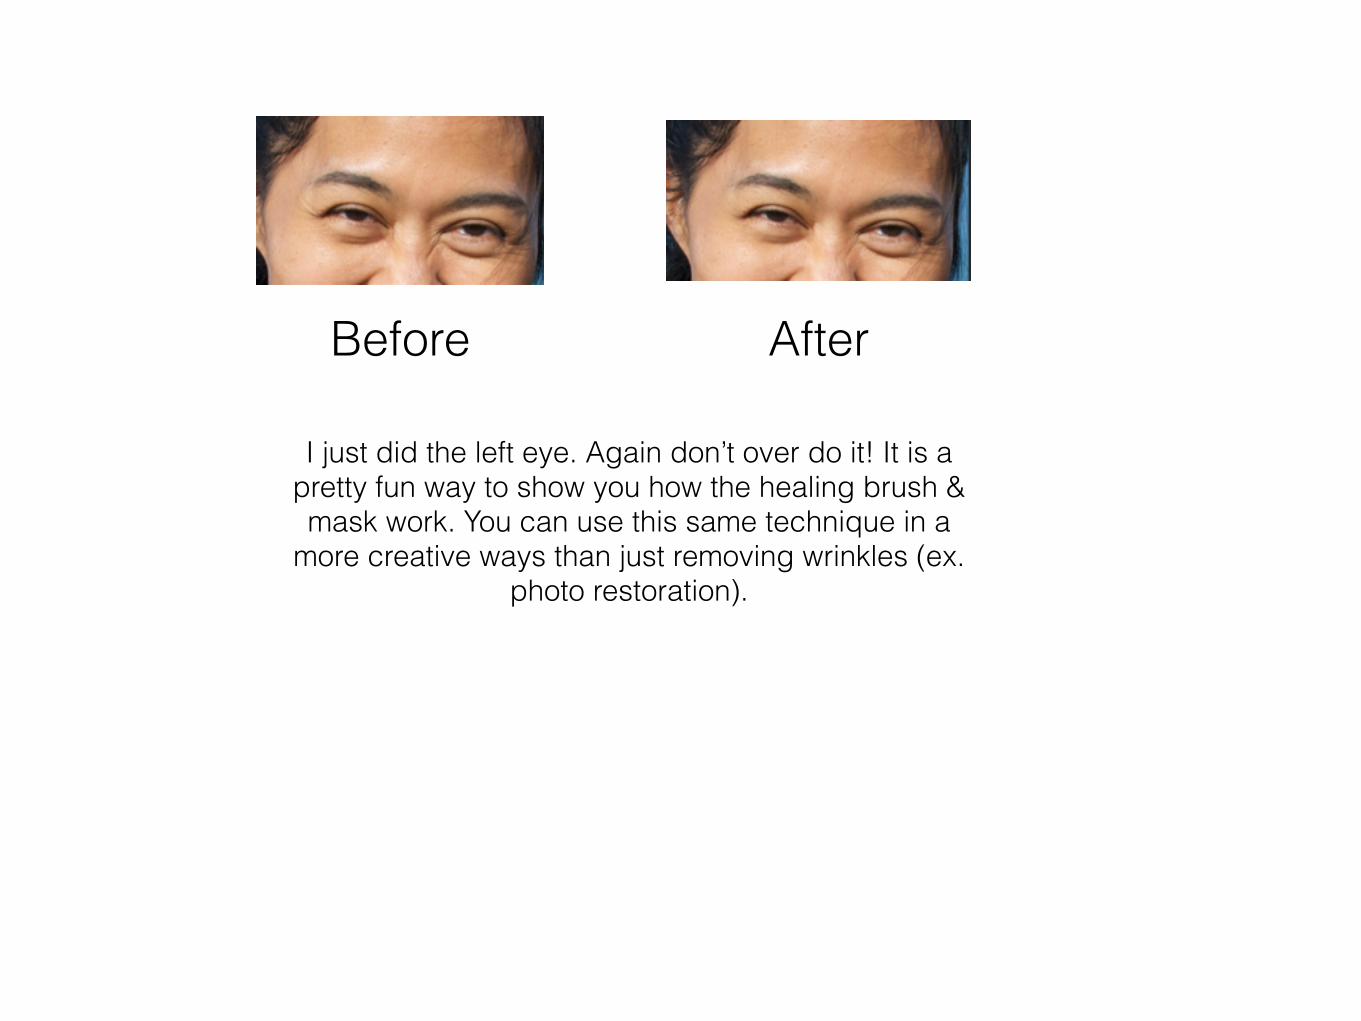
I just did the left eye. Again don’t over do it! It is a pretty fun way to show you how the healing brush & mask work. You can use this same technique in a
more creative ways than just removing wrinkles (ex. photo restoration).
Before After