aria os tracefinder walkthrough - wordpress.com
TRANSCRIPT
1 The world leader in serving science
2 July 12 James Byrd
Aria OS & TraceFinder Walkthrough

2
How to use this walkthrough
• The steps in this walkthrough will show you one way to use Aria OS and TraceFinder to acquire and process data
• Software components: • Aria OS 1.6.3f1– used for submitting samples for analysis • Xcalibur 2.2 sp1– runs the Mass Spec in the background • TraceFinder CT 2.0sp1– used for processing, after the run is complete
• The steps in this guide may be altered to suit your lab’s needs
3
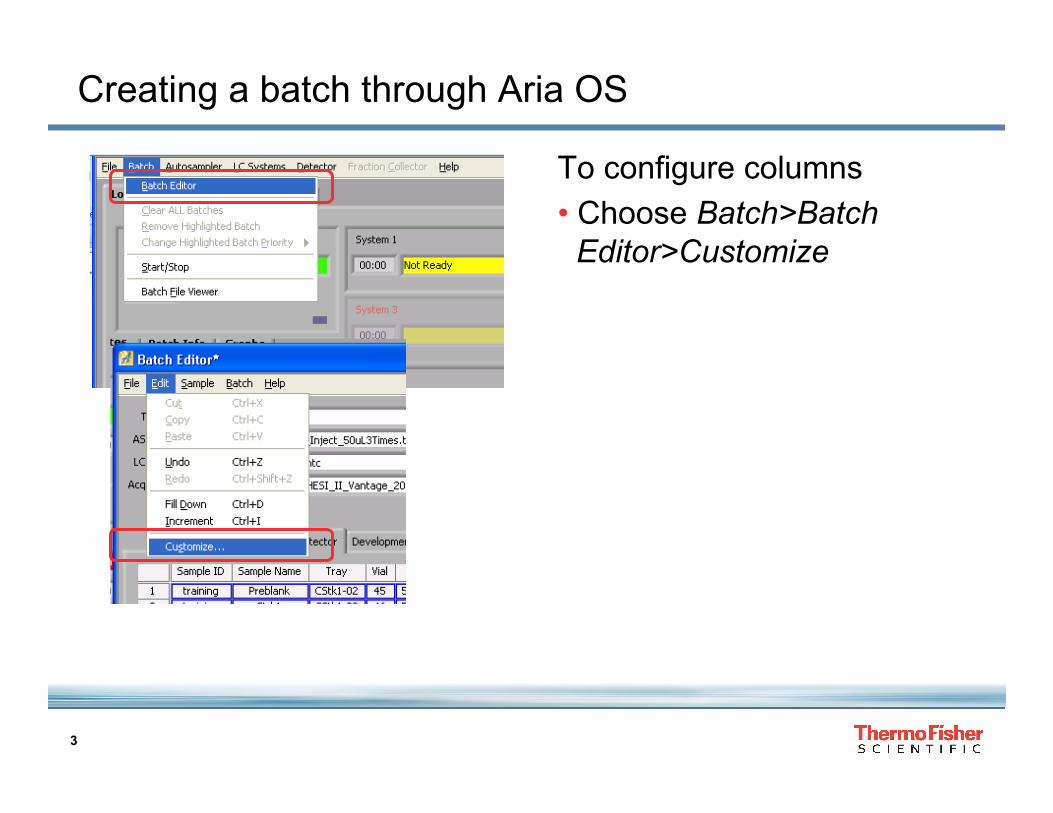
Creating a batch through Aria OS
To configure columns • Choose Batch>Batch
Editor>Customize
4
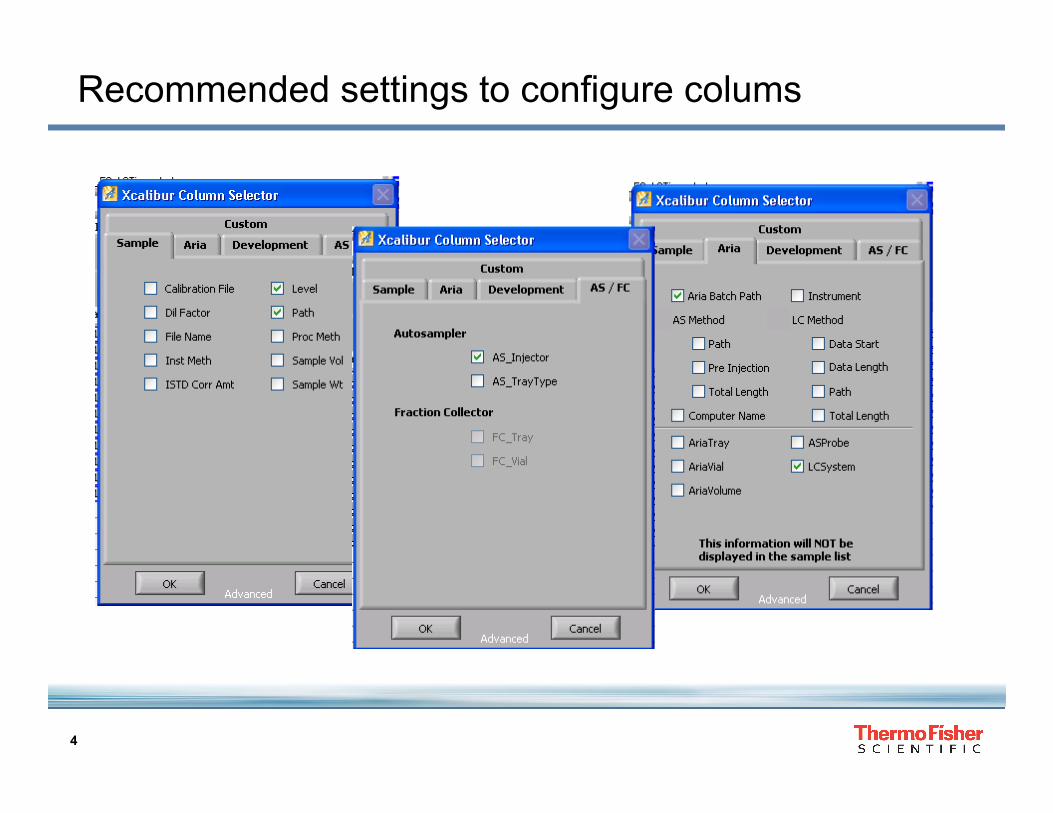
Recommended settings to configure colums

5
Create and submit a sample list
1. Type or import (File>Import>Text File) sample info
2. Choose the channels you want to use
3. Click Submit

6
Browse button to place & save the batch file
7
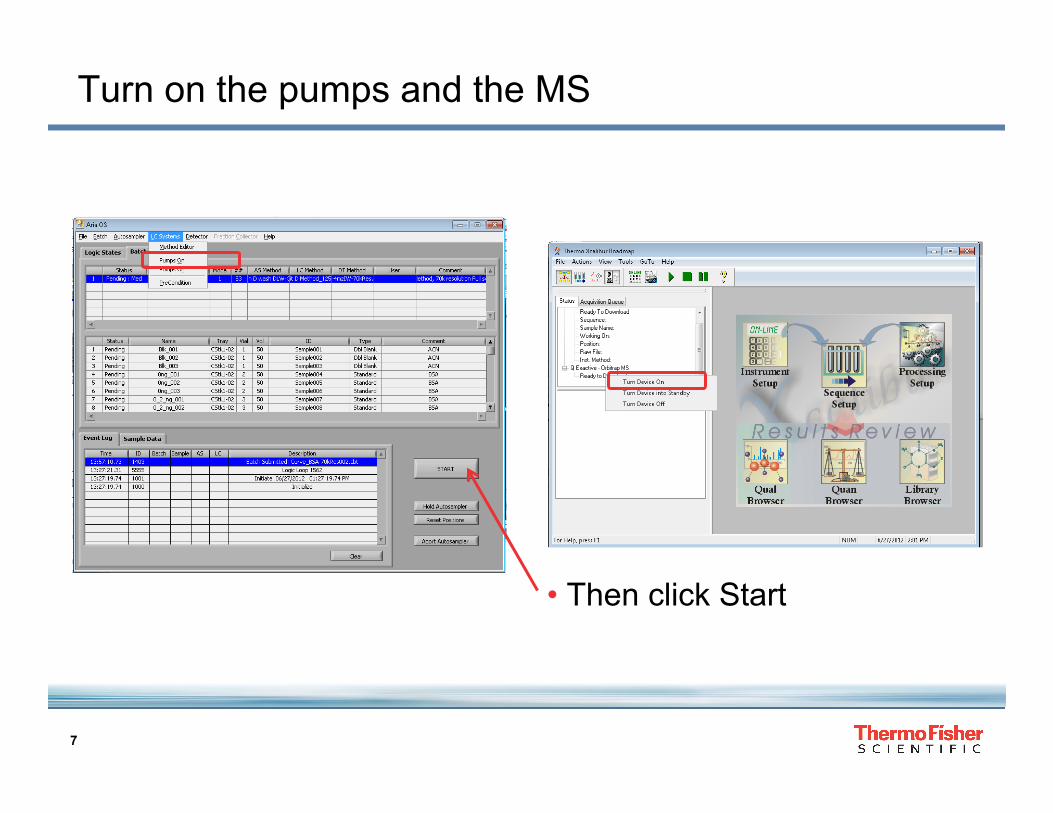
Turn on the pumps and the MS
• Then click Start
8
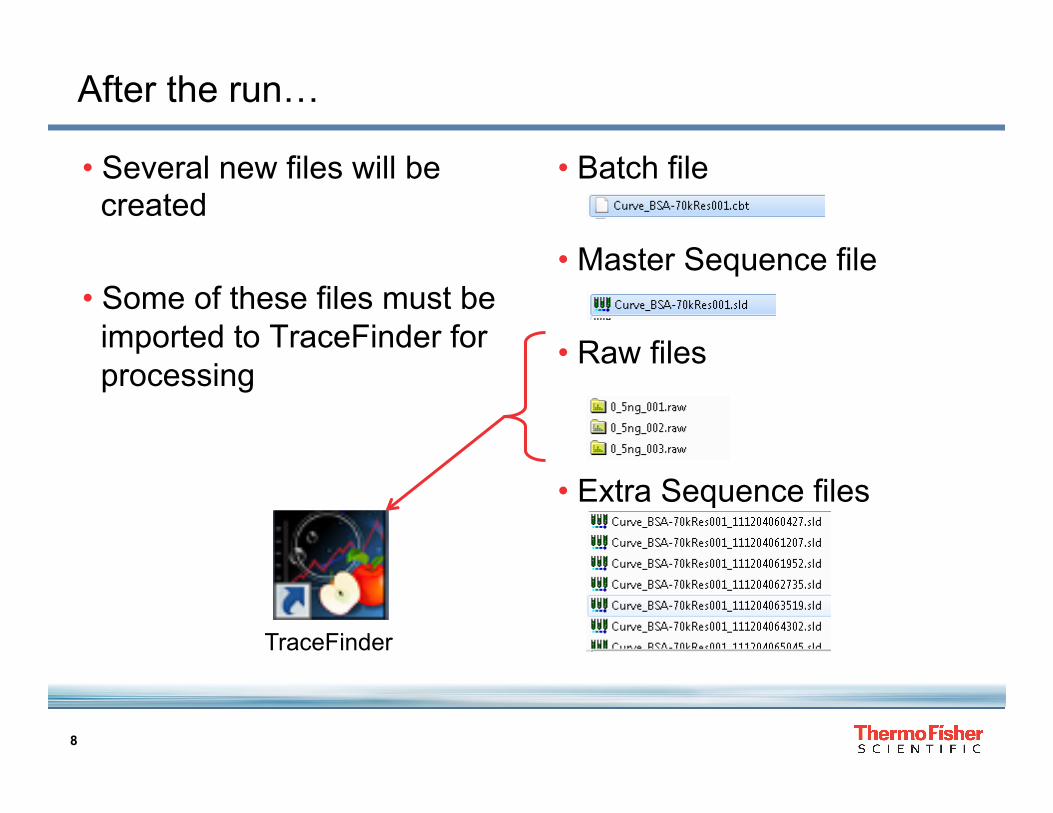
After the run…
• Batch file
• Master Sequence file
• Raw files
• Extra Sequence files
• Several new files will be created
• Some of these files must be imported to TraceFinder for processing
TraceFinder

9
Importing to TraceFinder
• Open “TraceFinder for Clinical Research”
• Click Analysis
10
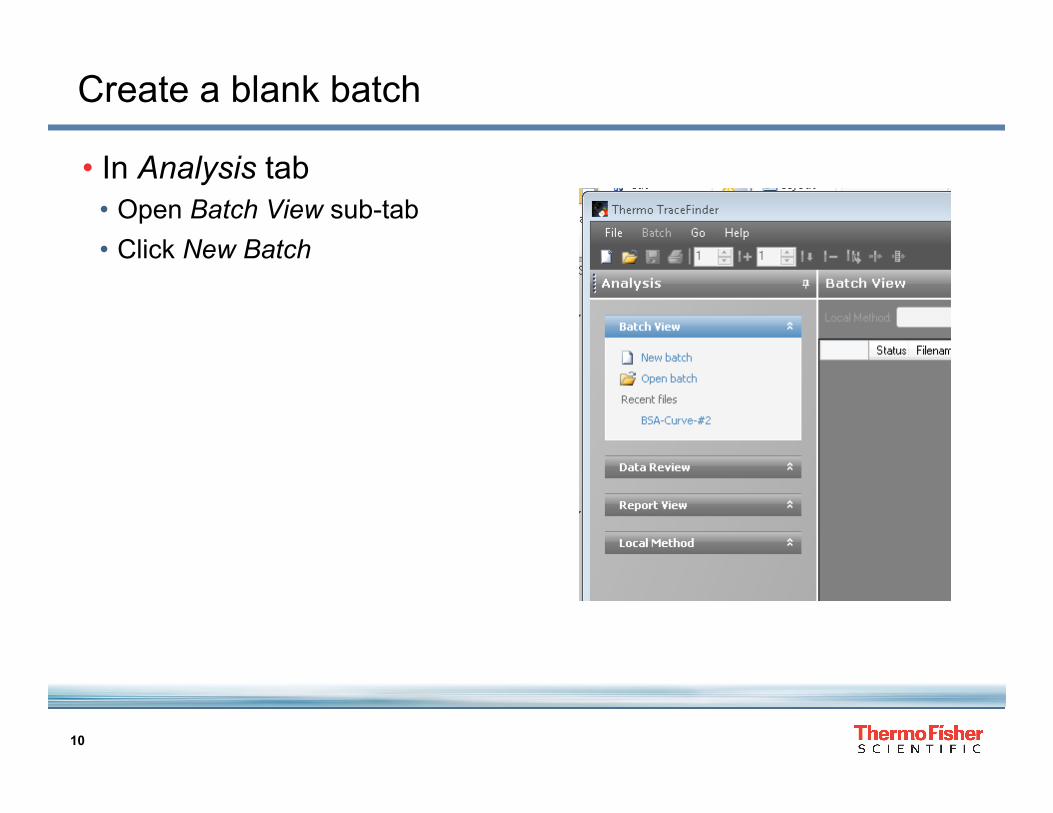
Create a blank batch
• In Analysis tab • Open Batch View sub-tab • Click New Batch

11
• Select a Master Method • (See TraceFinder help for
assistance creating a master method)
• Select a location and name for the batch

12
A blank batch is created

13
“Browse in” the raw files
• Right click and select Browse in raw file… • This “Browse in” tool will copy
the raw files into TraceFinder for processing

14
Select all the raw files
• Use shift-click to select all raw files • Click open
15
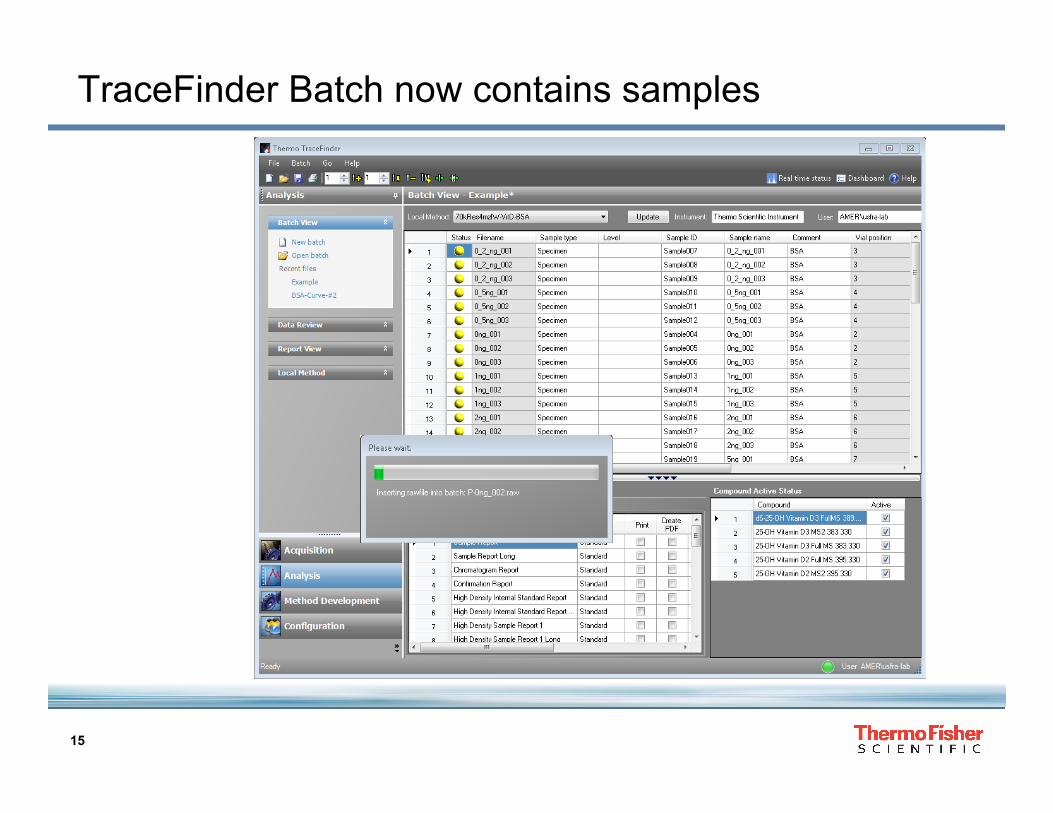
TraceFinder Batch now contains samples

16
If needed, update the sample types and levels
• Click on the drop-down menus
17
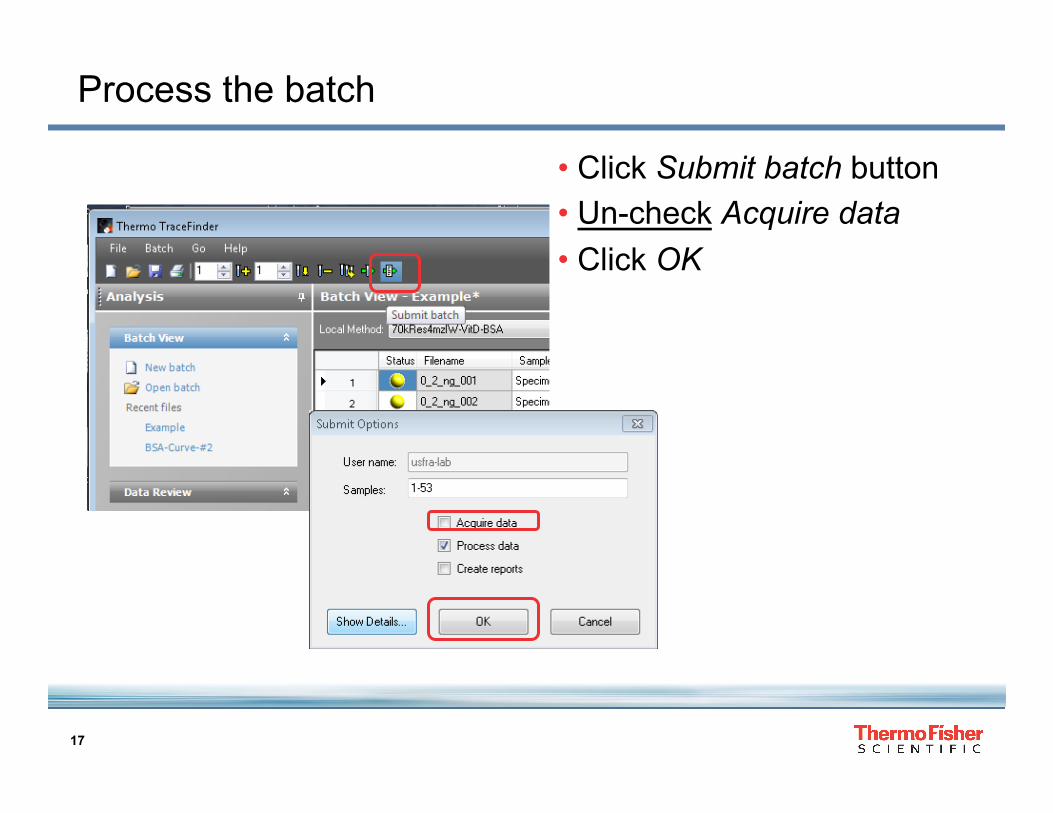
Process the batch
• Click Submit batch button • Un-check Acquire data • Click OK
18
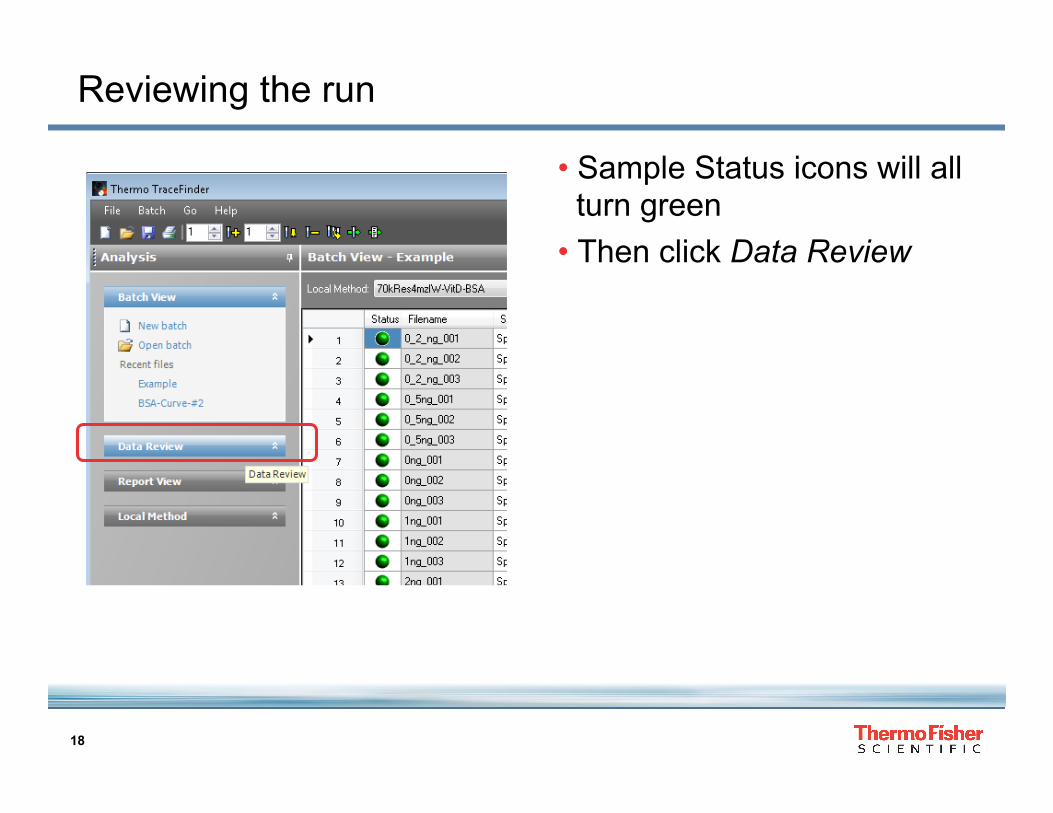
Reviewing the run
• Sample Status icons will all turn green
• Then click Data Review
19
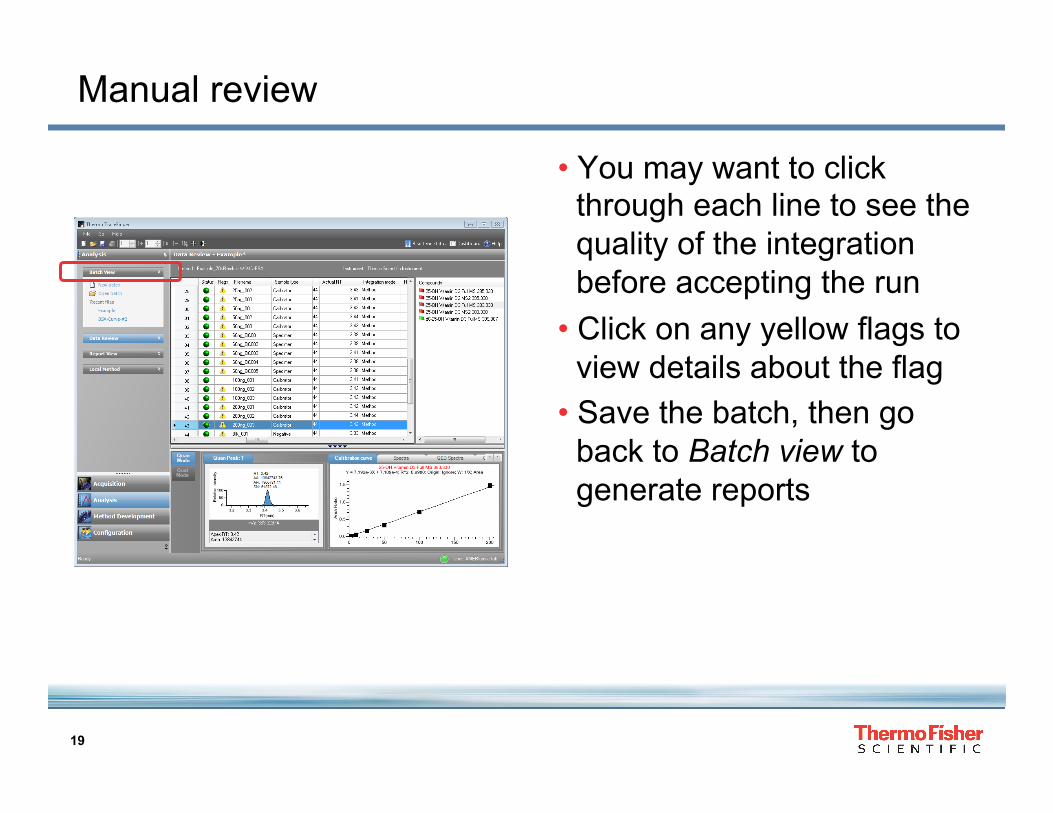
Manual review
• You may want to click through each line to see the quality of the integration before accepting the run
• Click on any yellow flags to view details about the flag
• Save the batch, then go back to Batch view to generate reports
20
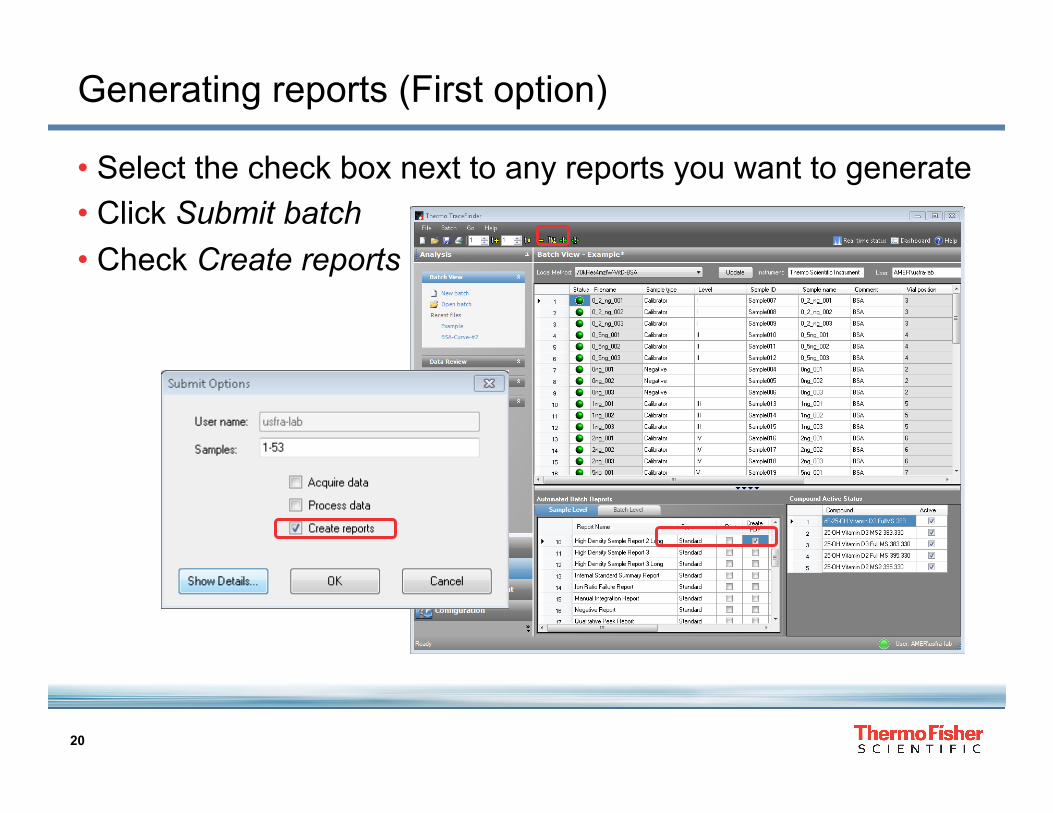
Generating reports (First option)
• Select the check box next to any reports you want to generate • Click Submit batch • Check Create reports

21
Report location
• Reports will be generated within the reports folder of the TraceFinder batch
• E.g. C:\Thermo\TraceFinder\2.0\ClinTox\Projects\Vitamin D TLX\TLX\Example\Reports
22
Generating reports (second option)
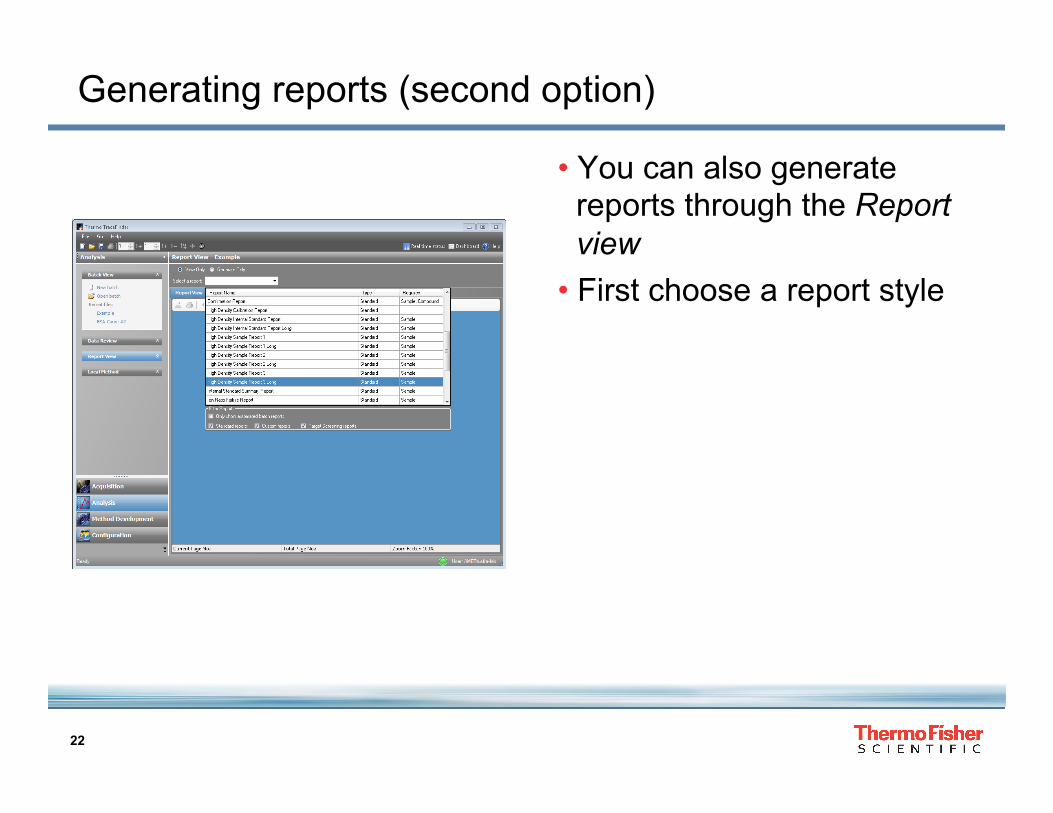
• You can also generate reports through the Report view
• First choose a report style
23
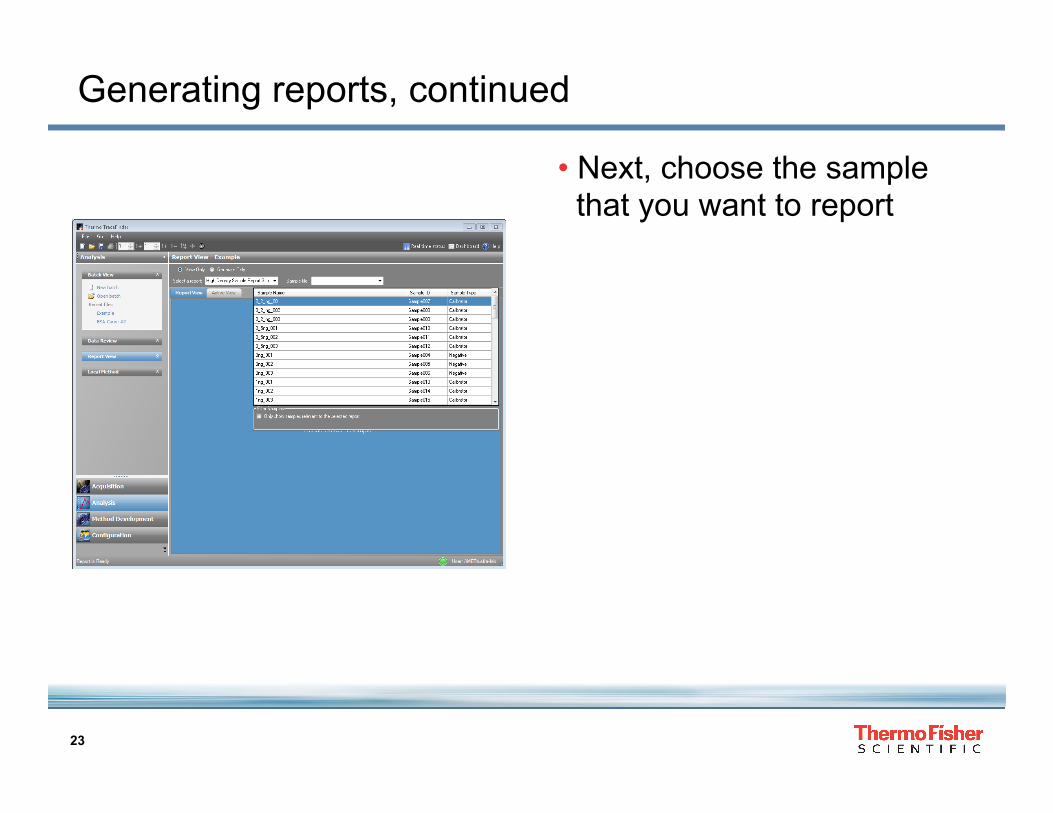
Generating reports, continued
• Next, choose the sample that you want to report

24
Generating reports, continued
• Click Export or print • Then choose a name and
location for the report

25
Final product
• Report is generated as a pdf or hard copy
26
Addendum
• For more tips and tricks, • Check out our blog,
MyTraceFinder.com