aqd portal configuration 7.2
DESCRIPTION
AQD Portal Configuration Guide v7.2TRANSCRIPT
For further information Email: [email protected] Website: www.superstructuregroup.com
Head Office Superstructure Group Limited Ash House, Fairfield Avenue Staines, Middlesex TW18 4AB United Kingdom Ph +44 870 803 2579 Fax +44 1784 224 245
Regional Office Superstructure Group (AP) Limited Level 1, 19 Tory Street P O Box 19127, Courtenay Place Wellington, New Zealand Ph +64 4 385 0001 Fax +64 4 381 3934
Safety & Risk Management
AQD PORTAL V7.2
Configuration Guide
Release: 1.6
October 2010

AQD Portal Configuration Guide
Release: 1.6 October 2010 AQD Portal Configuration Guide v7.2
Copyright 2010 Superstructure Group Limited
All rights reserved No part of this publication may be reproduced, stored in a retrieval system, or transmitted in any form or by any means, electronic, mechanical, photocopying, recording or otherwise without the prior written permission of Superstructure Group Limited, the copyright holder. This document is the property of Superstructure Group Limited and may not be disclosed to any third party or copied without consent.
AQD Portal Configuration Guide
Release: 1.6 October 2010 CONFIDENTIAL Contents i AQD Portal Configuration Guide v7.2
Table of Contents
Introduction .......................................................................................................................................... 1
Web configuration file settings ....................................................................................................... 1
Database Connection ......................................................................................................................... 2
SQL Server Connection ................................................................................................................... 2
Oracle Connection ............................................................................................................................ 2
Application Settings ............................................................................................................................ 3
Compression On ............................................................................................................................... 3
eReport Format ................................................................................................................................. 3
Authentication ...................................................................................................................................... 4
Introduction ........................................................................................................................................ 4
Windows Authentication .................................................................................................................. 5
Database Authentication ................................................................................................................. 6
LDAP Authentication ........................................................................................................................ 7
Reverse Proxy Authentication ........................................................................................................ 8
RSA SecurId Forms Authentication (32-bit only) ......................................................................... 8
Custom Authentication Page ........................................................................................................ 10
Authorisation ...................................................................................................................................... 13
Introduction ...................................................................................................................................... 13
Supplied Providers ......................................................................................................................... 14
Use of other Providers ................................................................................................................... 14
Security-Enabled ............................................................................................................................ 15
Database-Authorisation-Provider ................................................................................................. 15
Windows Authorisation Provider .................................................................................................. 15
LDAP Authorisation Provider ........................................................................................................ 16
Directory User .................................................................................................................................... 17
Introduction ...................................................................................................................................... 17
Windows Directory User Provider ................................................................................................ 18
LDAP Directory User Provider ...................................................................................................... 18
Property to Field Mapping ............................................................................................................. 19
Department Resolution .................................................................................................................. 19
Logging ............................................................................................................................................... 20
Introduction ...................................................................................................................................... 20
Email Appender .............................................................................................................................. 21
Licensing ............................................................................................................................................ 22
Custom Content ................................................................................................................................ 23
Introduction ...................................................................................................................................... 23
Custom Content Location .............................................................................................................. 23
Custom Logo ................................................................................................................................... 23
Custom Text .................................................................................................................................... 24

AQD Portal Configuration Guide
Release: 1.6 October 2010 AQD Portal Configuration Guide v7.2.doc Page
ii

AQD Portal Configuration Guide
Release: 1.6 October 2010 CONFIDENTIAL Page 1
AQD Portal Configuration Guide v7.2
Introduction
The configuration settings for the AQD Portal are held in the ‘web.config’ file. Care
must be taken when editing this file and it should also be understood that when this file is saved (updated) it will cause the ASP.NET worker process to restart which can be disruptive to users. It is recommended that if the site is live then changes are done in a scheduled maintenance period. Please use an appropriate editor for XML files (eg Scite, Notepad++), otherwise the result may be unpredictable. The sections of the web configuration file that will need configuration are:
Database Connection,
Application Settings,
Authentication method,
Authorisation Providers,
Directory User Providers, and
Logging This guide does include basic descriptions of the element being configured to assist in the understanding of the function being configured.
Web configuration file settings
Database Connection This section deals with configuring the database connection to point to SQL Server 2005 onwards. Application Settings Miscellaneous settings like:
Enabling Compression
Switching between tabs and sections for eReport forms. Authentication Method Authentication section configures how the AQD Portal authenticates a user and establishes the user’s identity. Authorisation Providers The authorisation providers section configures a collection of providers that union together to determine the authorisations (roles, occurrence type security and departmental security) held by the identity (user). Directory User Providers This provider section configures which provider, if any, is to be used to add and synchronise externally managed users into the AQD Staff Members table. Logging The primary error and trace logging in the AQD Portal is implemented using log4net.
AQD Portal Configuration Guide
Release: 1.6 October 2010 CONFIDENTIAL Page 2
AQD Portal Configuration Guide v7.2
Database Connection
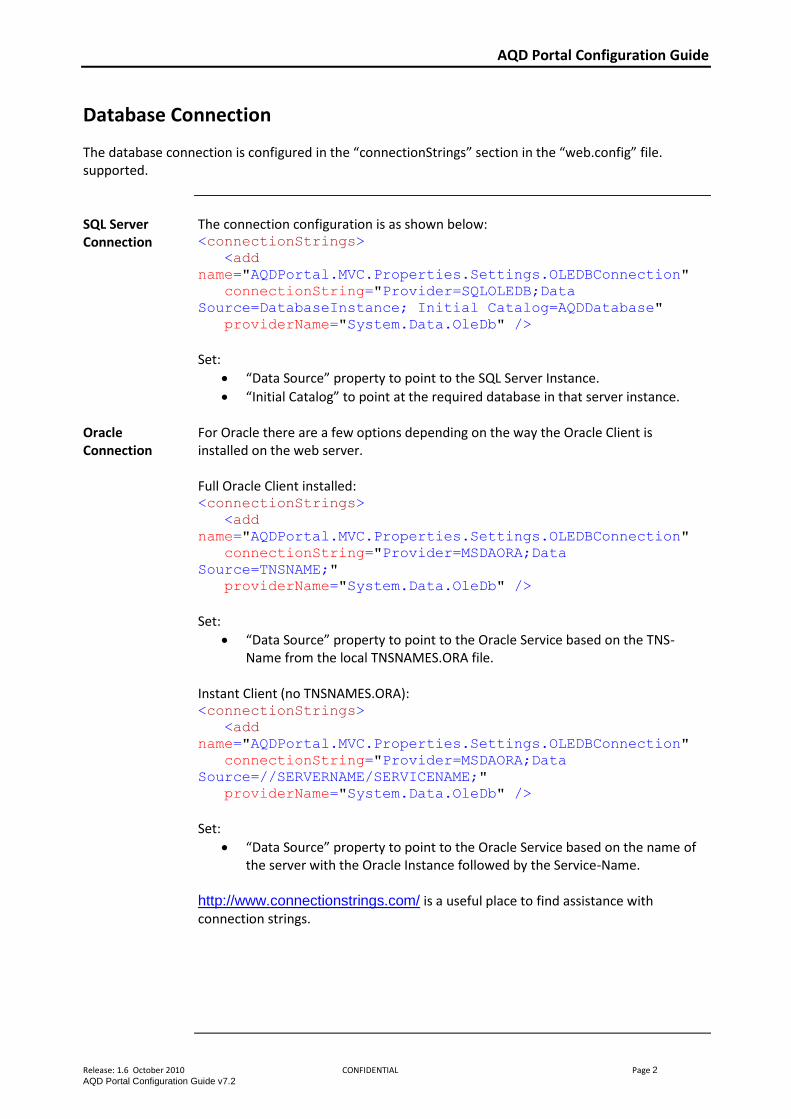
The database connection is configured in the “connectionStrings” section in the “web.config” file. supported.
SQL Server Connection
The connection configuration is as shown below: <connectionStrings>
<add
name="AQDPortal.MVC.Properties.Settings.OLEDBConnection"
connectionString="Provider=SQLOLEDB;Data
Source=DatabaseInstance; Initial Catalog=AQDDatabase"
providerName="System.Data.OleDb" />
Set:
“Data Source” property to point to the SQL Server Instance.
“Initial Catalog” to point at the required database in that server instance. Oracle Connection
For Oracle there are a few options depending on the way the Oracle Client is installed on the web server. Full Oracle Client installed: <connectionStrings>
<add
name="AQDPortal.MVC.Properties.Settings.OLEDBConnection"
connectionString="Provider=MSDAORA;Data
Source=TNSNAME;"
providerName="System.Data.OleDb" /> Set:
“Data Source” property to point to the Oracle Service based on the TNS-Name from the local TNSNAMES.ORA file.
Instant Client (no TNSNAMES.ORA): <connectionStrings>
<add
name="AQDPortal.MVC.Properties.Settings.OLEDBConnection"
connectionString="Provider=MSDAORA;Data
Source=//SERVERNAME/SERVICENAME;"
providerName="System.Data.OleDb" /> Set:
“Data Source” property to point to the Oracle Service based on the name of the server with the Oracle Instance followed by the Service-Name.
http://www.connectionstrings.com/ is a useful place to find assistance with connection strings.

AQD Portal Configuration Guide
Release: 1.6 October 2010 CONFIDENTIAL Page 3
AQD Portal Configuration Guide v7.2
Application Settings
Compression On Turns on output compression. If on (true) then responses are compressed; if off
(false) then the responses are not compressed. It is recommended that compression is used to assist performance. <appSettings>
<add key="CompressionOn" value="true"/>
<!-- eReport_format can be PANELS or TABS-->
<add key="eReport_format" value="Tabs"/>
</appSettings>
eReport Format Determines whether the eReports entry forms are formatted with the panels as a
tab control or a series of collapsible sections. Values are:
Tabs
Panels <appSettings>
<add key="CompressionOn" value="true"/>
<!-- eReport_format can be PANELS or TABS-->
<add key="eReport_format" value="Tabs"/>
</appSettings>
AQD Portal Configuration Guide
Release: 1.6 October 2010 CONFIDENTIAL Page 4
AQD Portal Configuration Guide v7.2
Authentication
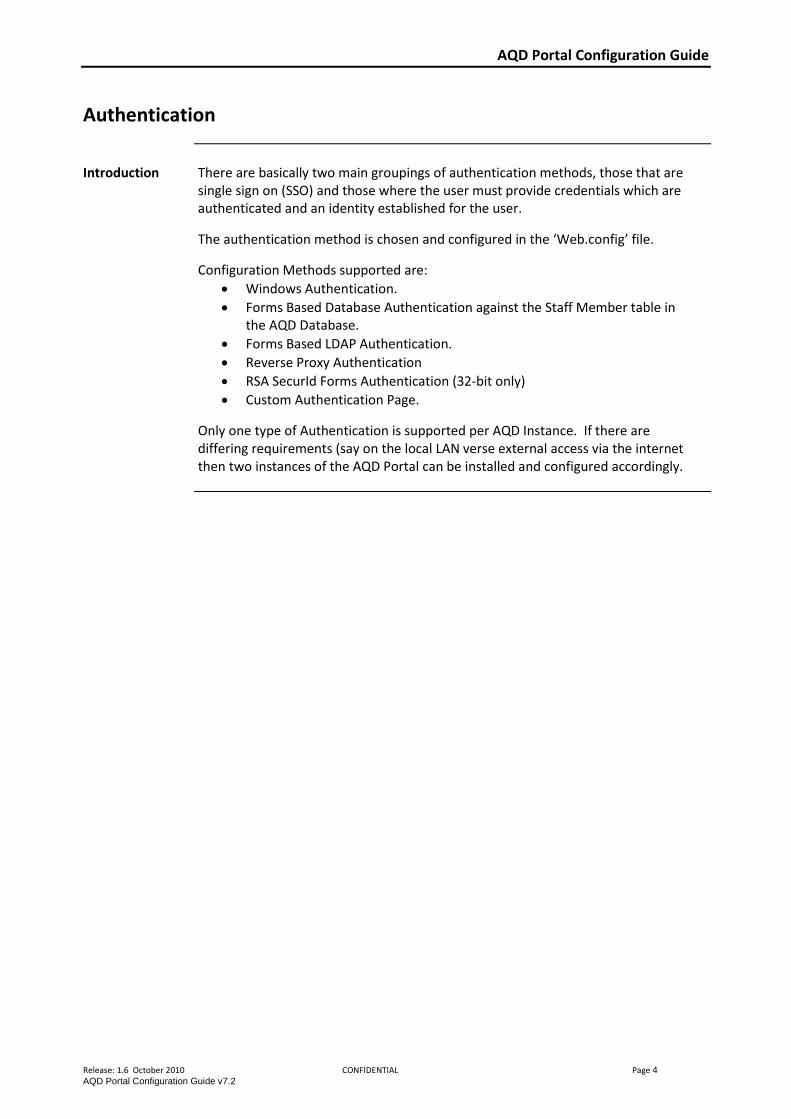
Introduction There are basically two main groupings of authentication methods, those that are
single sign on (SSO) and those where the user must provide credentials which are authenticated and an identity established for the user.
The authentication method is chosen and configured in the ‘Web.config’ file.
Configuration Methods supported are:
Windows Authentication.
Forms Based Database Authentication against the Staff Member table in the AQD Database.
Forms Based LDAP Authentication.
Reverse Proxy Authentication
RSA SecurId Forms Authentication (32-bit only)
Custom Authentication Page.
Only one type of Authentication is supported per AQD Instance. If there are differing requirements (say on the local LAN verse external access via the internet then two instances of the AQD Portal can be installed and configured accordingly.

AQD Portal Configuration Guide
Release: 1.6 October 2010 CONFIDENTIAL Page 5
AQD Portal Configuration Guide v7.2
Windows Authentication
<authentication mode="Windows"></authentication>
Ensure that Anonymous Authentication for the Web Application is disabled. In IIS7 this is done in the system.WebServer section of the “web.config” file thus:
<security>
<authentication>
<anonymousAuthentication enabled="false" />
</authentication>
</security>
Pre IIS7 this will have to be set in Internet Information Services Manager on the Authentication Methods dialog accessed from the Web Application Properties -> Directory Security Tab.
AQD Portal Configuration Guide
Release: 1.6 October 2010 CONFIDENTIAL Page 6
AQD Portal Configuration Guide v7.2
Database Authentication
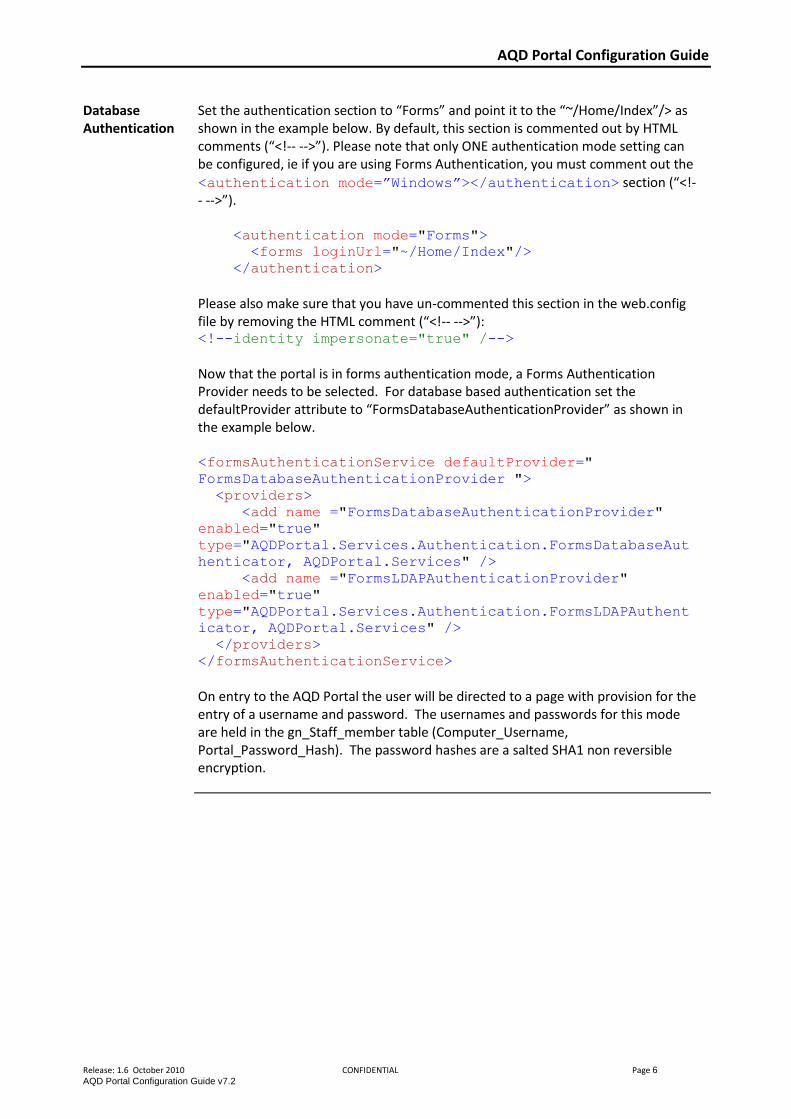
Set the authentication section to “Forms” and point it to the “~/Home/Index”/> as shown in the example below. By default, this section is commented out by HTML comments (“<!-- -->”). Please note that only ONE authentication mode setting can be configured, ie if you are using Forms Authentication, you must comment out the <authentication mode=”Windows”></authentication> section (“<!-- -->”). <authentication mode="Forms">
<forms loginUrl="~/Home/Index"/>
</authentication>
Please also make sure that you have un-commented this section in the web.config file by removing the HTML comment (“<!-- -->”): <!--identity impersonate="true" /-->
Now that the portal is in forms authentication mode, a Forms Authentication Provider needs to be selected. For database based authentication set the defaultProvider attribute to “FormsDatabaseAuthenticationProvider” as shown in the example below. <formsAuthenticationService defaultProvider="
FormsDatabaseAuthenticationProvider ">
<providers>
<add name ="FormsDatabaseAuthenticationProvider"
enabled="true"
type="AQDPortal.Services.Authentication.FormsDatabaseAut
henticator, AQDPortal.Services" />
<add name ="FormsLDAPAuthenticationProvider"
enabled="true"
type="AQDPortal.Services.Authentication.FormsLDAPAuthent
icator, AQDPortal.Services" />
</providers>
</formsAuthenticationService>
On entry to the AQD Portal the user will be directed to a page with provision for the entry of a username and password. The usernames and passwords for this mode are held in the gn_Staff_member table (Computer_Username, Portal_Password_Hash). The password hashes are a salted SHA1 non reversible encryption.
AQD Portal Configuration Guide
Release: 1.6 October 2010 CONFIDENTIAL Page 7
AQD Portal Configuration Guide v7.2
LDAP Authentication
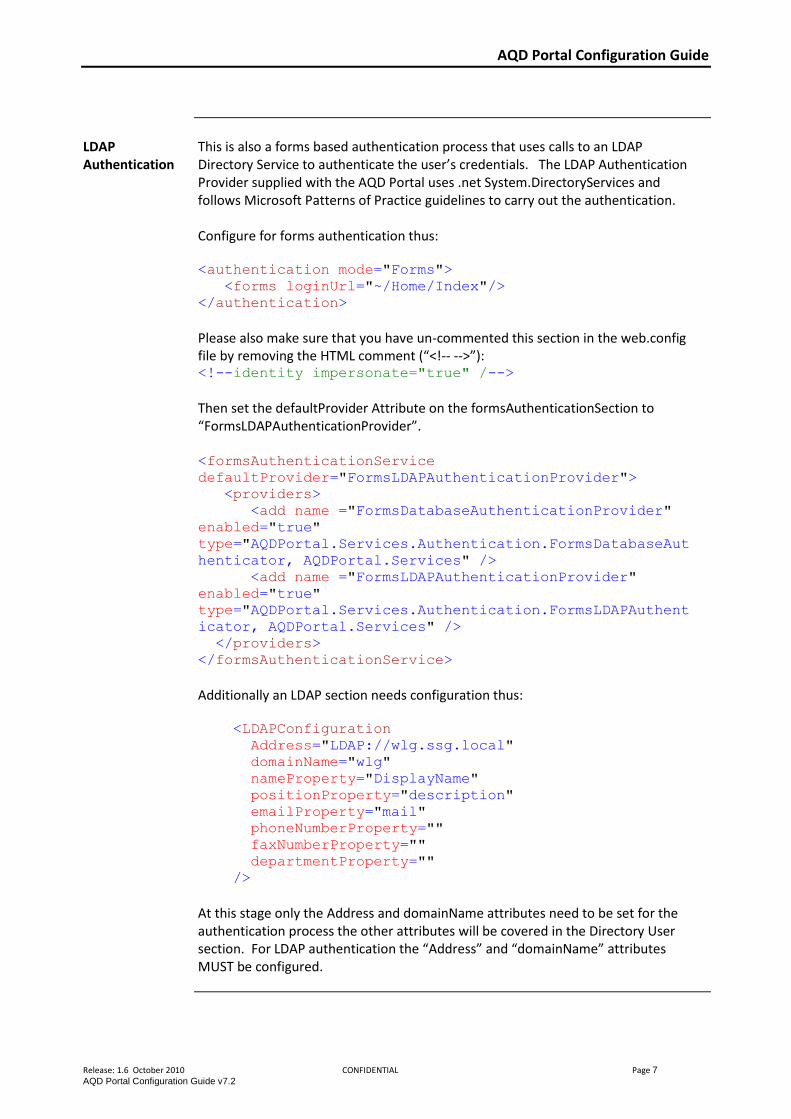
This is also a forms based authentication process that uses calls to an LDAP Directory Service to authenticate the user’s credentials. The LDAP Authentication Provider supplied with the AQD Portal uses .net System.DirectoryServices and follows Microsoft Patterns of Practice guidelines to carry out the authentication. Configure for forms authentication thus:
<authentication mode="Forms">
<forms loginUrl="~/Home/Index"/>
</authentication>
Please also make sure that you have un-commented this section in the web.config file by removing the HTML comment (“<!-- -->”): <!--identity impersonate="true" /-->
Then set the defaultProvider Attribute on the formsAuthenticationSection to “FormsLDAPAuthenticationProvider”. <formsAuthenticationService
defaultProvider="FormsLDAPAuthenticationProvider">
<providers>
<add name ="FormsDatabaseAuthenticationProvider"
enabled="true"
type="AQDPortal.Services.Authentication.FormsDatabaseAut
henticator, AQDPortal.Services" />
<add name ="FormsLDAPAuthenticationProvider"
enabled="true"
type="AQDPortal.Services.Authentication.FormsLDAPAuthent
icator, AQDPortal.Services" />
</providers>
</formsAuthenticationService>
Additionally an LDAP section needs configuration thus:
<LDAPConfiguration
Address="LDAP://wlg.ssg.local"
domainName="wlg"
nameProperty="DisplayName"
positionProperty="description"
emailProperty="mail"
phoneNumberProperty=""
faxNumberProperty=""
departmentProperty=""
/>
At this stage only the Address and domainName attributes need to be set for the authentication process the other attributes will be covered in the Directory User section. For LDAP authentication the “Address” and “domainName” attributes MUST be configured.
AQD Portal Configuration Guide
Release: 1.6 October 2010 CONFIDENTIAL Page 8
AQD Portal Configuration Guide v7.2
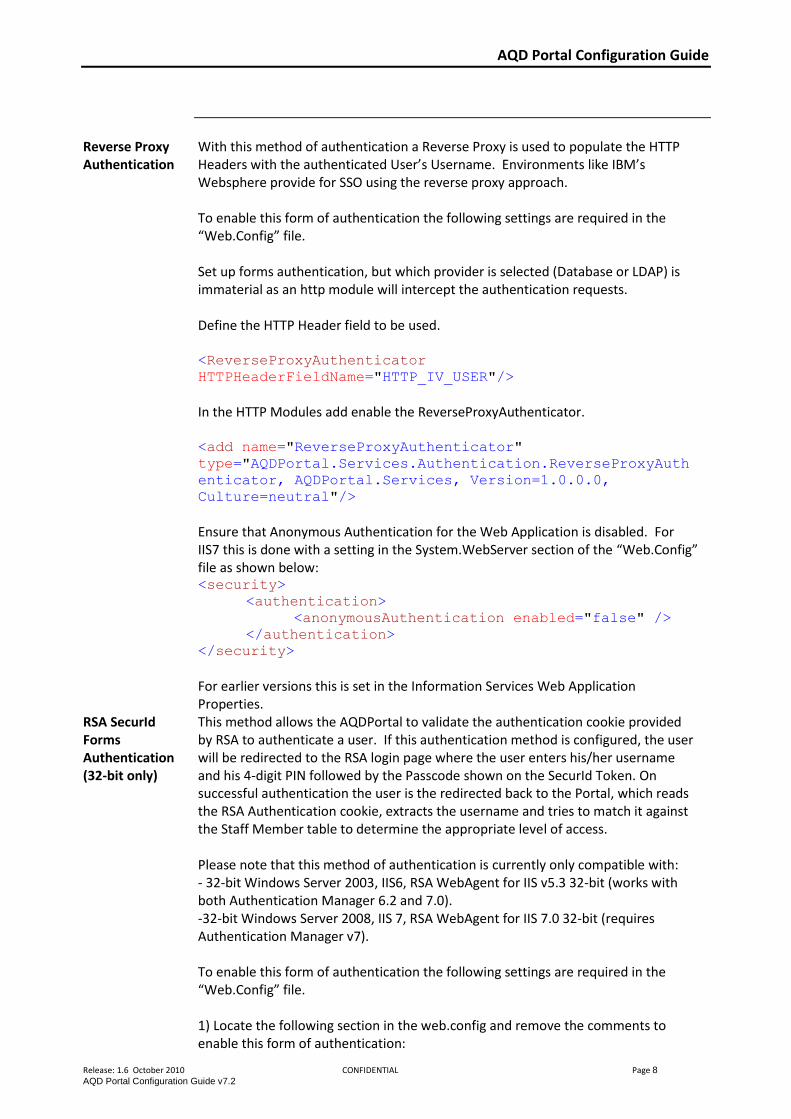
Reverse Proxy Authentication
With this method of authentication a Reverse Proxy is used to populate the HTTP Headers with the authenticated User’s Username. Environments like IBM’s Websphere provide for SSO using the reverse proxy approach. To enable this form of authentication the following settings are required in the “Web.Config” file. Set up forms authentication, but which provider is selected (Database or LDAP) is immaterial as an http module will intercept the authentication requests. Define the HTTP Header field to be used. <ReverseProxyAuthenticator
HTTPHeaderFieldName="HTTP_IV_USER"/>
In the HTTP Modules add enable the ReverseProxyAuthenticator. <add name="ReverseProxyAuthenticator"
type="AQDPortal.Services.Authentication.ReverseProxyAuth
enticator, AQDPortal.Services, Version=1.0.0.0,
Culture=neutral"/>
Ensure that Anonymous Authentication for the Web Application is disabled. For IIS7 this is done with a setting in the System.WebServer section of the “Web.Config” file as shown below: <security>
<authentication>
<anonymousAuthentication enabled="false" />
</authentication>
</security>
For earlier versions this is set in the Information Services Web Application Properties.
RSA SecurId Forms Authentication (32-bit only)
This method allows the AQDPortal to validate the authentication cookie provided by RSA to authenticate a user. If this authentication method is configured, the user will be redirected to the RSA login page where the user enters his/her username and his 4-digit PIN followed by the Passcode shown on the SecurId Token. On successful authentication the user is the redirected back to the Portal, which reads the RSA Authentication cookie, extracts the username and tries to match it against the Staff Member table to determine the appropriate level of access. Please note that this method of authentication is currently only compatible with: - 32-bit Windows Server 2003, IIS6, RSA WebAgent for IIS v5.3 32-bit (works with both Authentication Manager 6.2 and 7.0). -32-bit Windows Server 2008, IIS 7, RSA WebAgent for IIS 7.0 32-bit (requires Authentication Manager v7). To enable this form of authentication the following settings are required in the “Web.Config” file. 1) Locate the following section in the web.config and remove the comments to enable this form of authentication:

AQD Portal Configuration Guide
Release: 1.6 October 2010 CONFIDENTIAL Page 9
AQD Portal Configuration Guide v7.2
<!-- RSA Forms Authentication --> <authentication mode="Forms"> <forms loginUrl="~/Home.aspx/RSA"/> </authentication>
Make sure that all other authentication methods are commented out properly. 2) Locate the impersonation section in the web.config and make sure it is explicitly set to “false”: <identity impersonate="false" /> 3) Locate the following section in the web.config and remove the comments around the <location> tags: <!-- RSA Forms Authentication only please refer to the configuration guide--> <location path="Default.aspx"> <system.web> <authorization> <deny users="?" /> </authorization> </system.web> </location> <!-- RSA Forms Authentication End-->
4) Change the Authentication Methods Setting on the Directory Security tab in IIS, make sure no other authentication methods apart from ‘Anonymous’ are enabled: Example for IIS6:
AQD Portal Configuration Guide
Release: 1.6 October 2010 CONFIDENTIAL Page 10
AQD Portal Configuration Guide v7.2
Custom Authentication Page
Changes from Web Interface
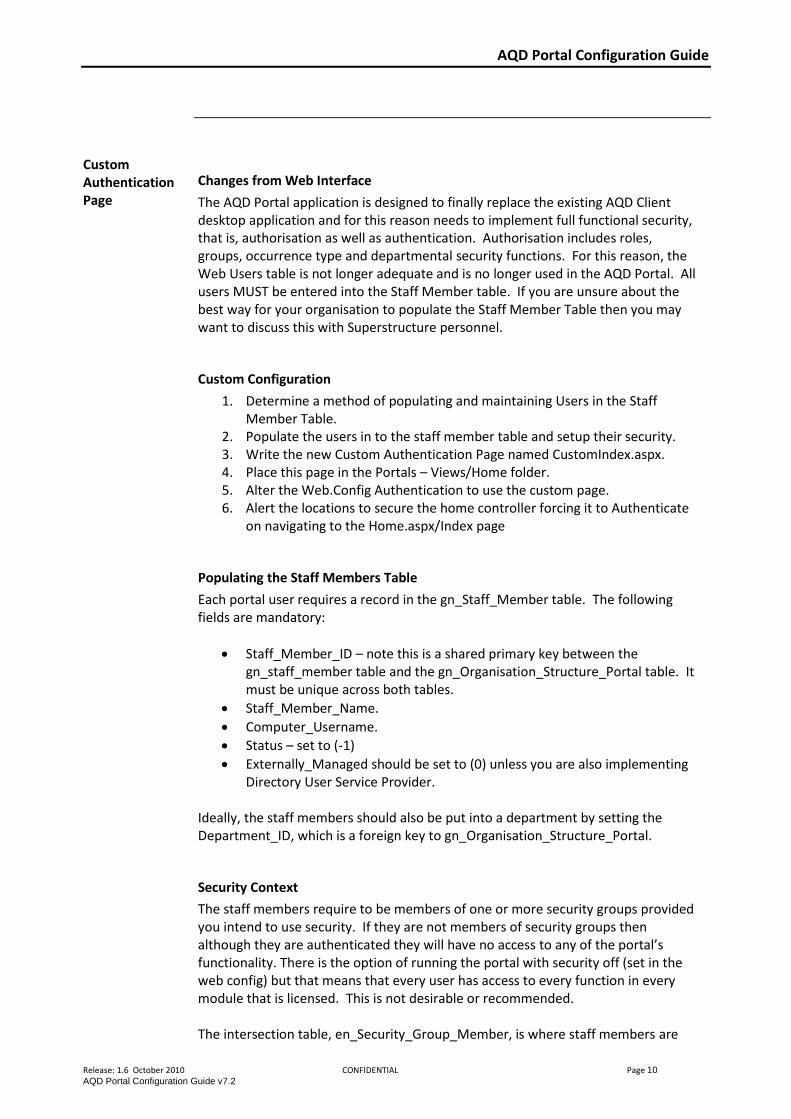
The AQD Portal application is designed to finally replace the existing AQD Client desktop application and for this reason needs to implement full functional security, that is, authorisation as well as authentication. Authorisation includes roles, groups, occurrence type and departmental security functions. For this reason, the Web Users table is not longer adequate and is no longer used in the AQD Portal. All users MUST be entered into the Staff Member table. If you are unsure about the best way for your organisation to populate the Staff Member Table then you may want to discuss this with Superstructure personnel.
Custom Configuration
1. Determine a method of populating and maintaining Users in the Staff Member Table.
2. Populate the users in to the staff member table and setup their security. 3. Write the new Custom Authentication Page named CustomIndex.aspx. 4. Place this page in the Portals – Views/Home folder. 5. Alter the Web.Config Authentication to use the custom page. 6. Alert the locations to secure the home controller forcing it to Authenticate
on navigating to the Home.aspx/Index page
Populating the Staff Members Table
Each portal user requires a record in the gn_Staff_Member table. The following fields are mandatory:
Staff_Member_ID – note this is a shared primary key between the gn_staff_member table and the gn_Organisation_Structure_Portal table. It must be unique across both tables.
Staff_Member_Name.
Computer_Username.
Status – set to (-1)
Externally_Managed should be set to (0) unless you are also implementing Directory User Service Provider.
Ideally, the staff members should also be put into a department by setting the Department_ID, which is a foreign key to gn_Organisation_Structure_Portal.
Security Context
The staff members require to be members of one or more security groups provided you intend to use security. If they are not members of security groups then although they are authenticated they will have no access to any of the portal’s functionality. There is the option of running the portal with security off (set in the web config) but that means that every user has access to every function in every module that is licensed. This is not desirable or recommended. The intersection table, en_Security_Group_Member, is where staff members are
AQD Portal Configuration Guide
Release: 1.6 October 2010 CONFIDENTIAL Page 11
AQD Portal Configuration Guide v7.2
associated with groups.
Custom Authentication Page
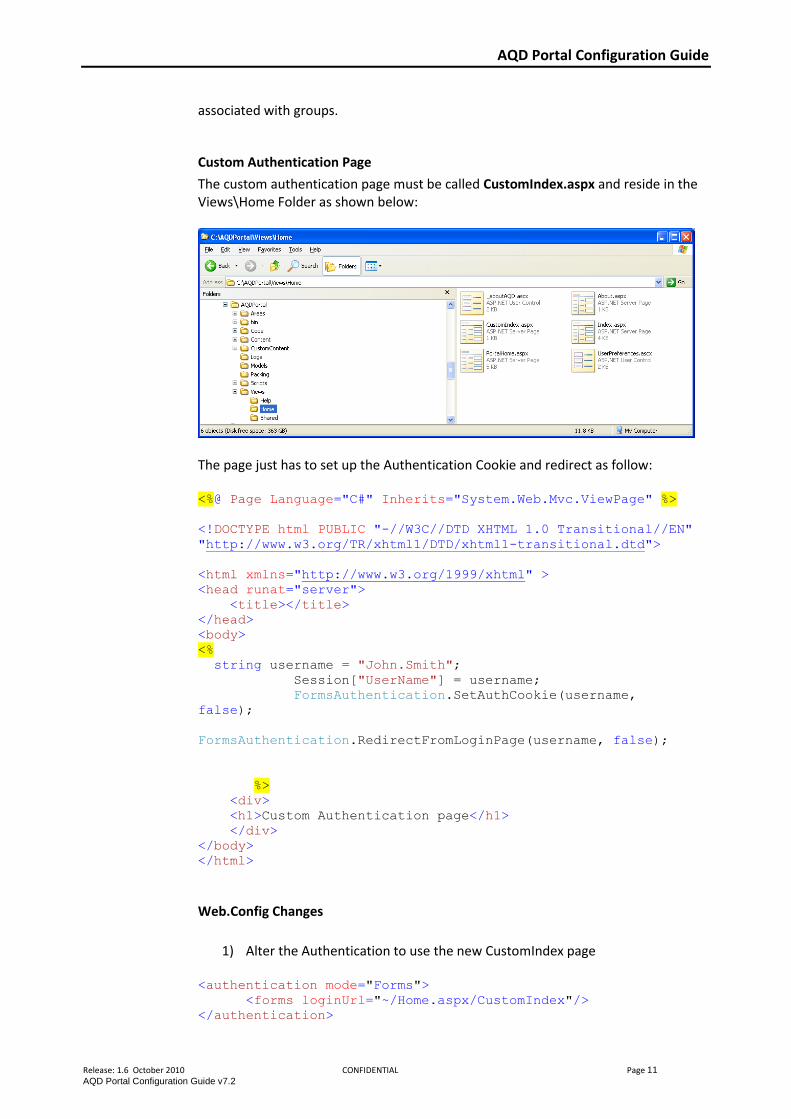
The custom authentication page must be called CustomIndex.aspx and reside in the Views\Home Folder as shown below:
The page just has to set up the Authentication Cookie and redirect as follow: <%@ Page Language="C#" Inherits="System.Web.Mvc.ViewPage" %>
<!DOCTYPE html PUBLIC "-//W3C//DTD XHTML 1.0 Transitional//EN"
"http://www.w3.org/TR/xhtml1/DTD/xhtml1-transitional.dtd">
<html xmlns="http://www.w3.org/1999/xhtml" >
<head runat="server">
<title></title>
</head>
<body>
<%
string username = "John.Smith";
Session["UserName"] = username;
FormsAuthentication.SetAuthCookie(username,
false);
FormsAuthentication.RedirectFromLoginPage(username, false);
%>
<div>
<h1>Custom Authentication page</h1>
</div>
</body>
</html>
Web.Config Changes
1) Alter the Authentication to use the new CustomIndex page <authentication mode="Forms">
<forms loginUrl="~/Home.aspx/CustomIndex"/>
</authentication>
AQD Portal Configuration Guide
Release: 1.6 October 2010 CONFIDENTIAL Page 12
AQD Portal Configuration Guide v7.2
The Portal is an ASP.MVC application, so url resolution and navigation is different than in a classic ASP.NET webforms application.
2) Now we need to force it to use this authentication page – normally the Index.aspx does not require authentication and this is where the portal goes to by default. Add the following code to the web.config:
<location path="Home.aspx">
<system.web>
<authorization>
<deny users="?" />
</authorization>
</system.web>
</location>
This forces the authentication process and the redirection to the CustomIndex.aspx takes place.
AQD Portal Configuration Guide
Release: 1.6 October 2010 CONFIDENTIAL Page 13
AQD Portal Configuration Guide v7.2
Authorisation
Introduction Authorisation is the process of determining whether the authenticated user
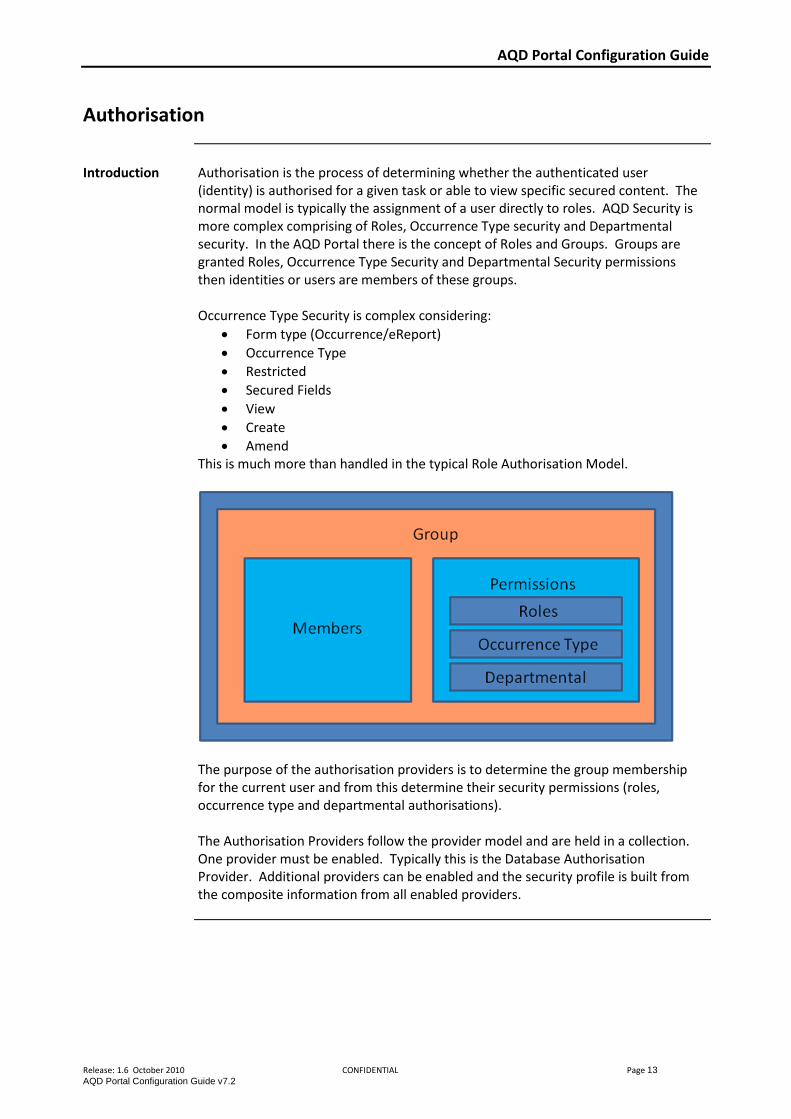
(identity) is authorised for a given task or able to view specific secured content. The normal model is typically the assignment of a user directly to roles. AQD Security is more complex comprising of Roles, Occurrence Type security and Departmental security. In the AQD Portal there is the concept of Roles and Groups. Groups are granted Roles, Occurrence Type Security and Departmental Security permissions then identities or users are members of these groups. Occurrence Type Security is complex considering:
Form type (Occurrence/eReport)
Occurrence Type
Restricted
Secured Fields
View
Create
Amend This is much more than handled in the typical Role Authorisation Model.
The purpose of the authorisation providers is to determine the group membership for the current user and from this determine their security permissions (roles, occurrence type and departmental authorisations). The Authorisation Providers follow the provider model and are held in a collection. One provider must be enabled. Typically this is the Database Authorisation Provider. Additional providers can be enabled and the security profile is built from the composite information from all enabled providers.
AQD Portal Configuration Guide
Release: 1.6 October 2010 CONFIDENTIAL Page 14
AQD Portal Configuration Guide v7.2
Supplied Providers
The supplied providers are:
DatabaseAuthorisationProvider
LDAPAuthorisationProvider
WindowsAuthorisationProvider The “<portalAuthorisationService>” section in the Web.config is as follows: <portalAuthorisationService
defaultProvider="DatabaseAuthorisationProvider"
securityEnabled="true">
<providers>
<add name="DatabaseAuthorisationProvider"
enabled="true"
type="AQDPortal.Services.Authorisation.PortalDatabaseAut
horisationProvider, AQDPortal.Services"/>
<add name="LDAPAuthorisationProvider"
enabled="false"
type="AQDPortal.Services.Authorisation.PortalLDAPAuthori
sationProvider, AQDPortal.Services"/>
<add name="WindowsAuthorisationProvider"
enabled="false"
type="AQDPortal.Services.Authorisation.PortalWindowsAuth
orisationProvider, AQDPortal.Services"/>
</providers>
</portalAuthorisationService>
Use of other Providers
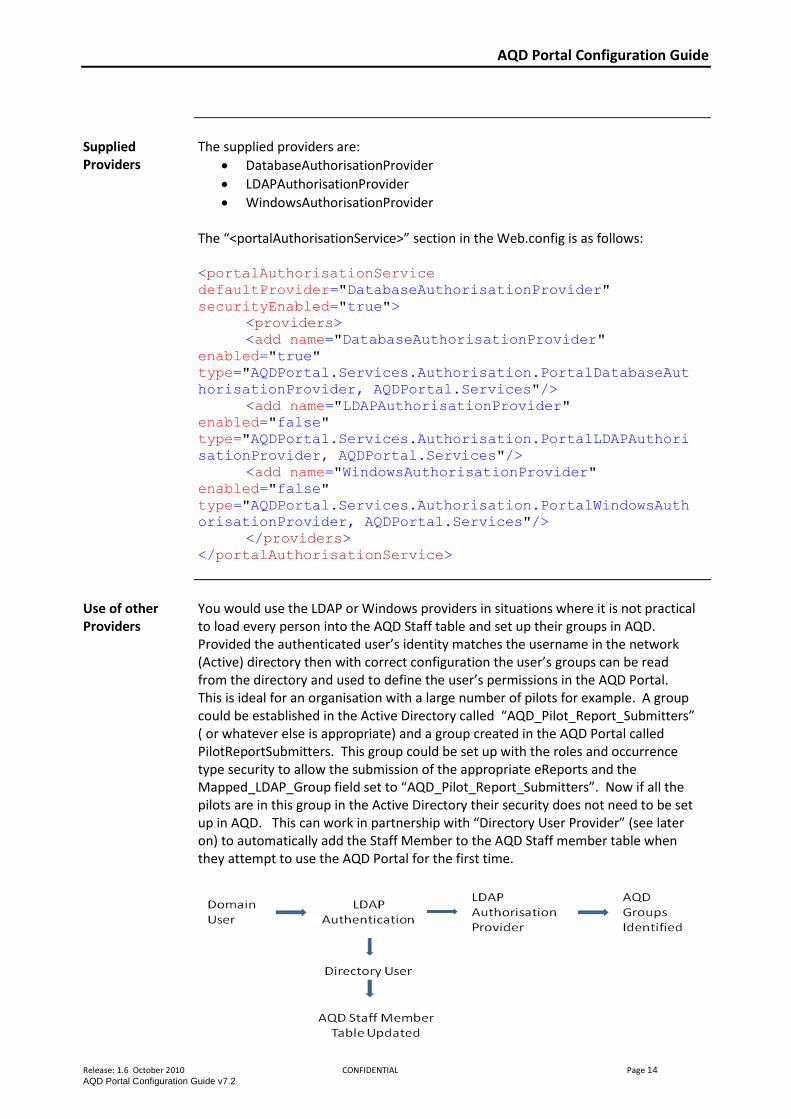
You would use the LDAP or Windows providers in situations where it is not practical to load every person into the AQD Staff table and set up their groups in AQD. Provided the authenticated user’s identity matches the username in the network (Active) directory then with correct configuration the user’s groups can be read from the directory and used to define the user’s permissions in the AQD Portal. This is ideal for an organisation with a large number of pilots for example. A group could be established in the Active Directory called “AQD_Pilot_Report_Submitters” ( or whatever else is appropriate) and a group created in the AQD Portal called PilotReportSubmitters. This group could be set up with the roles and occurrence type security to allow the submission of the appropriate eReports and the Mapped_LDAP_Group field set to “AQD_Pilot_Report_Submitters”. Now if all the pilots are in this group in the Active Directory their security does not need to be set up in AQD. This can work in partnership with “Directory User Provider” (see later on) to automatically add the Staff Member to the AQD Staff member table when they attempt to use the AQD Portal for the first time.
AQD Portal Configuration Guide
Release: 1.6 October 2010 CONFIDENTIAL Page 15
AQD Portal Configuration Guide v7.2
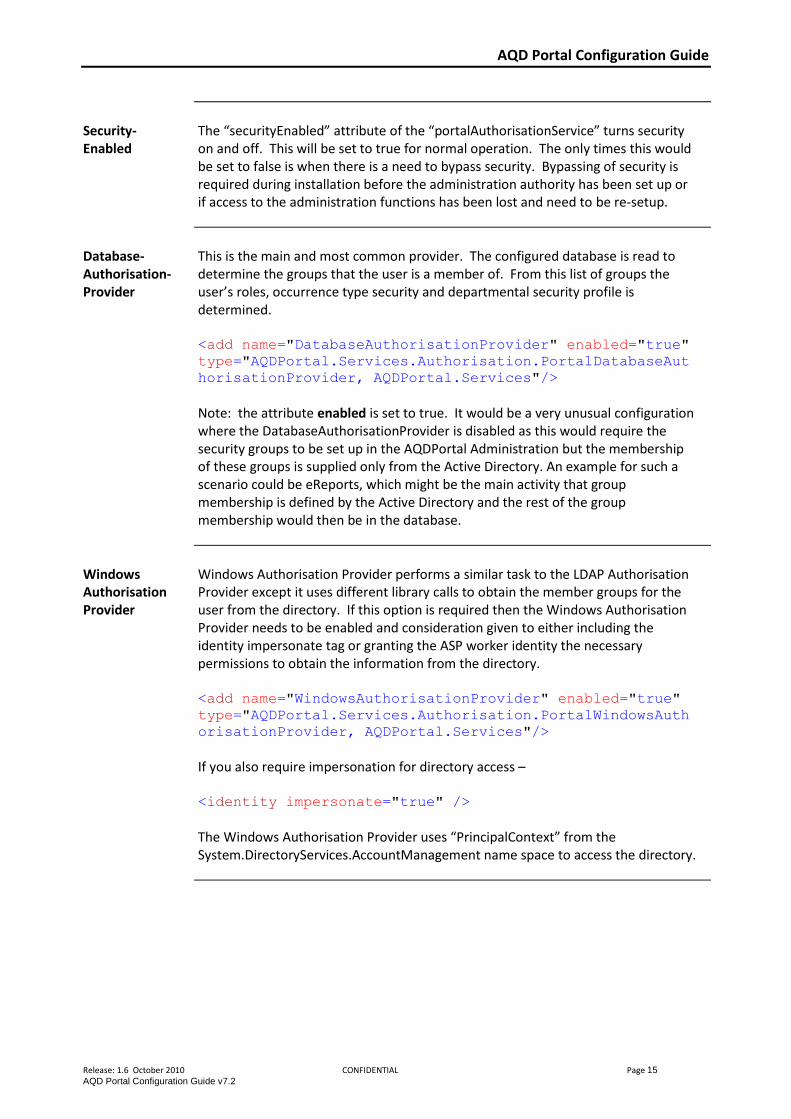
Security-Enabled
The “securityEnabled” attribute of the “portalAuthorisationService” turns security on and off. This will be set to true for normal operation. The only times this would be set to false is when there is a need to bypass security. Bypassing of security is required during installation before the administration authority has been set up or if access to the administration functions has been lost and need to be re-setup.
Database-Authorisation-Provider
This is the main and most common provider. The configured database is read to determine the groups that the user is a member of. From this list of groups the user’s roles, occurrence type security and departmental security profile is determined. <add name="DatabaseAuthorisationProvider" enabled="true"
type="AQDPortal.Services.Authorisation.PortalDatabaseAut
horisationProvider, AQDPortal.Services"/>
Note: the attribute enabled is set to true. It would be a very unusual configuration where the DatabaseAuthorisationProvider is disabled as this would require the security groups to be set up in the AQDPortal Administration but the membership of these groups is supplied only from the Active Directory. An example for such a scenario could be eReports, which might be the main activity that group membership is defined by the Active Directory and the rest of the group membership would then be in the database.
Windows Authorisation Provider
Windows Authorisation Provider performs a similar task to the LDAP Authorisation Provider except it uses different library calls to obtain the member groups for the user from the directory. If this option is required then the Windows Authorisation Provider needs to be enabled and consideration given to either including the identity impersonate tag or granting the ASP worker identity the necessary permissions to obtain the information from the directory. <add name="WindowsAuthorisationProvider" enabled="true"
type="AQDPortal.Services.Authorisation.PortalWindowsAuth
orisationProvider, AQDPortal.Services"/>
If you also require impersonation for directory access – <identity impersonate="true" /> The Windows Authorisation Provider uses “PrincipalContext” from the System.DirectoryServices.AccountManagement name space to access the directory.
AQD Portal Configuration Guide
Release: 1.6 October 2010 CONFIDENTIAL Page 16
AQD Portal Configuration Guide v7.2
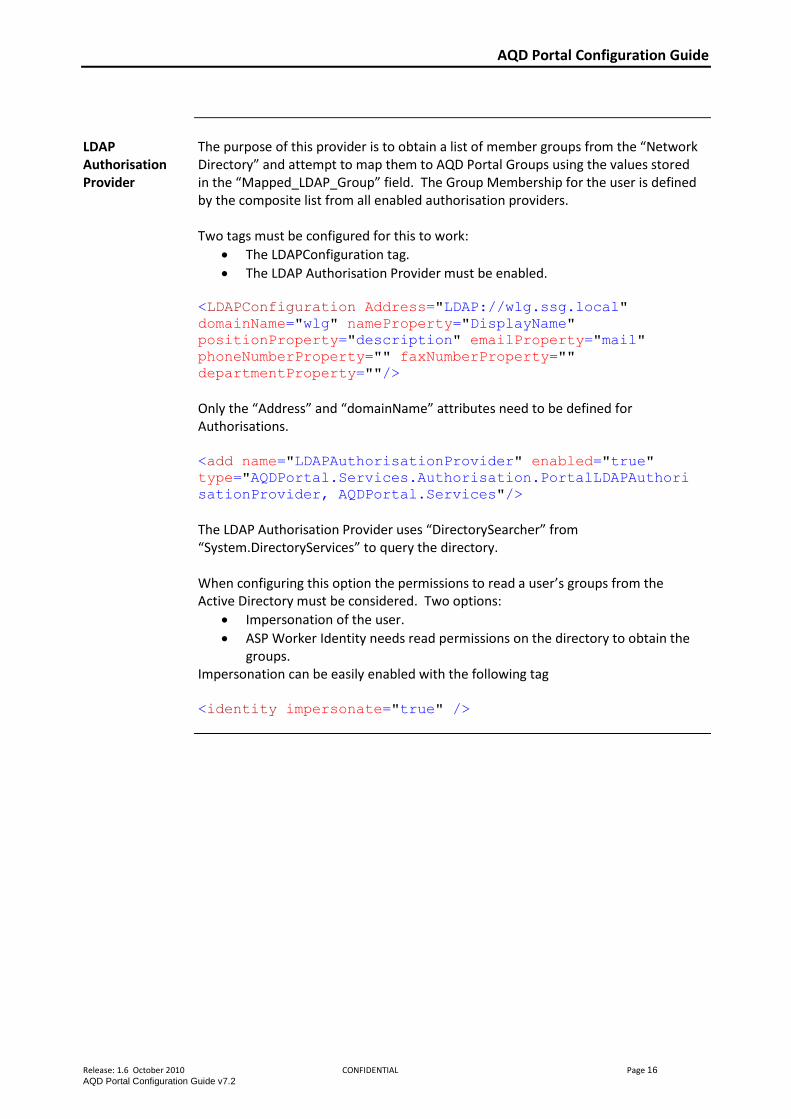
LDAP Authorisation Provider
The purpose of this provider is to obtain a list of member groups from the “Network Directory” and attempt to map them to AQD Portal Groups using the values stored in the “Mapped_LDAP_Group” field. The Group Membership for the user is defined by the composite list from all enabled authorisation providers. Two tags must be configured for this to work:
The LDAPConfiguration tag.
The LDAP Authorisation Provider must be enabled.
<LDAPConfiguration Address="LDAP://wlg.ssg.local"
domainName="wlg" nameProperty="DisplayName"
positionProperty="description" emailProperty="mail"
phoneNumberProperty="" faxNumberProperty=""
departmentProperty=""/>
Only the “Address” and “domainName” attributes need to be defined for Authorisations. <add name="LDAPAuthorisationProvider" enabled="true"
type="AQDPortal.Services.Authorisation.PortalLDAPAuthori
sationProvider, AQDPortal.Services"/> The LDAP Authorisation Provider uses “DirectorySearcher” from “System.DirectoryServices” to query the directory. When configuring this option the permissions to read a user’s groups from the Active Directory must be considered. Two options:
Impersonation of the user.
ASP Worker Identity needs read permissions on the directory to obtain the groups.
Impersonation can be easily enabled with the following tag <identity impersonate="true" />
AQD Portal Configuration Guide
Release: 1.6 October 2010 CONFIDENTIAL Page 17
AQD Portal Configuration Guide v7.2
Directory User
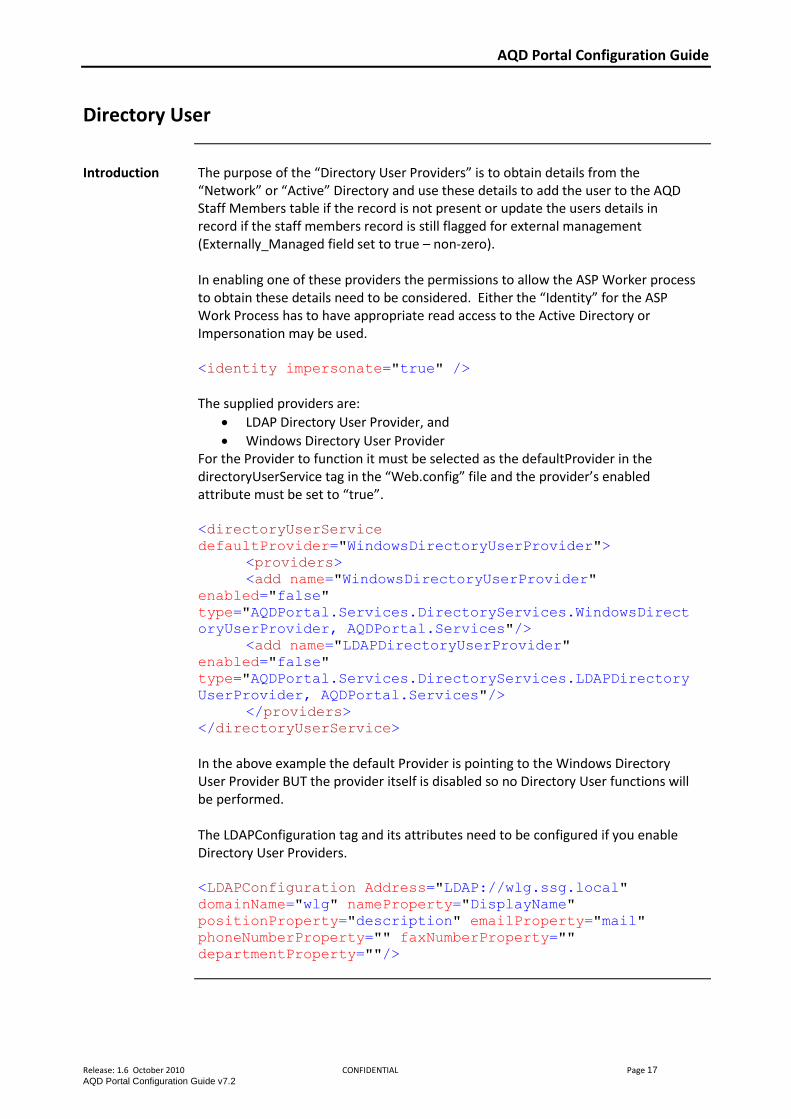
Introduction The purpose of the “Directory User Providers” is to obtain details from the
“Network” or “Active” Directory and use these details to add the user to the AQD Staff Members table if the record is not present or update the users details in record if the staff members record is still flagged for external management (Externally_Managed field set to true – non-zero). In enabling one of these providers the permissions to allow the ASP Worker process to obtain these details need to be considered. Either the “Identity” for the ASP Work Process has to have appropriate read access to the Active Directory or Impersonation may be used. <identity impersonate="true" /> The supplied providers are:
LDAP Directory User Provider, and
Windows Directory User Provider For the Provider to function it must be selected as the defaultProvider in the directoryUserService tag in the “Web.config” file and the provider’s enabled attribute must be set to “true”. <directoryUserService
defaultProvider="WindowsDirectoryUserProvider">
<providers>
<add name="WindowsDirectoryUserProvider"
enabled="false"
type="AQDPortal.Services.DirectoryServices.WindowsDirect
oryUserProvider, AQDPortal.Services"/>
<add name="LDAPDirectoryUserProvider"
enabled="false"
type="AQDPortal.Services.DirectoryServices.LDAPDirectory
UserProvider, AQDPortal.Services"/>
</providers>
</directoryUserService>
In the above example the default Provider is pointing to the Windows Directory User Provider BUT the provider itself is disabled so no Directory User functions will be performed. The LDAPConfiguration tag and its attributes need to be configured if you enable Directory User Providers. <LDAPConfiguration Address="LDAP://wlg.ssg.local"
domainName="wlg" nameProperty="DisplayName"
positionProperty="description" emailProperty="mail"
phoneNumberProperty="" faxNumberProperty=""
departmentProperty=""/>
AQD Portal Configuration Guide
Release: 1.6 October 2010 CONFIDENTIAL Page 18
AQD Portal Configuration Guide v7.2
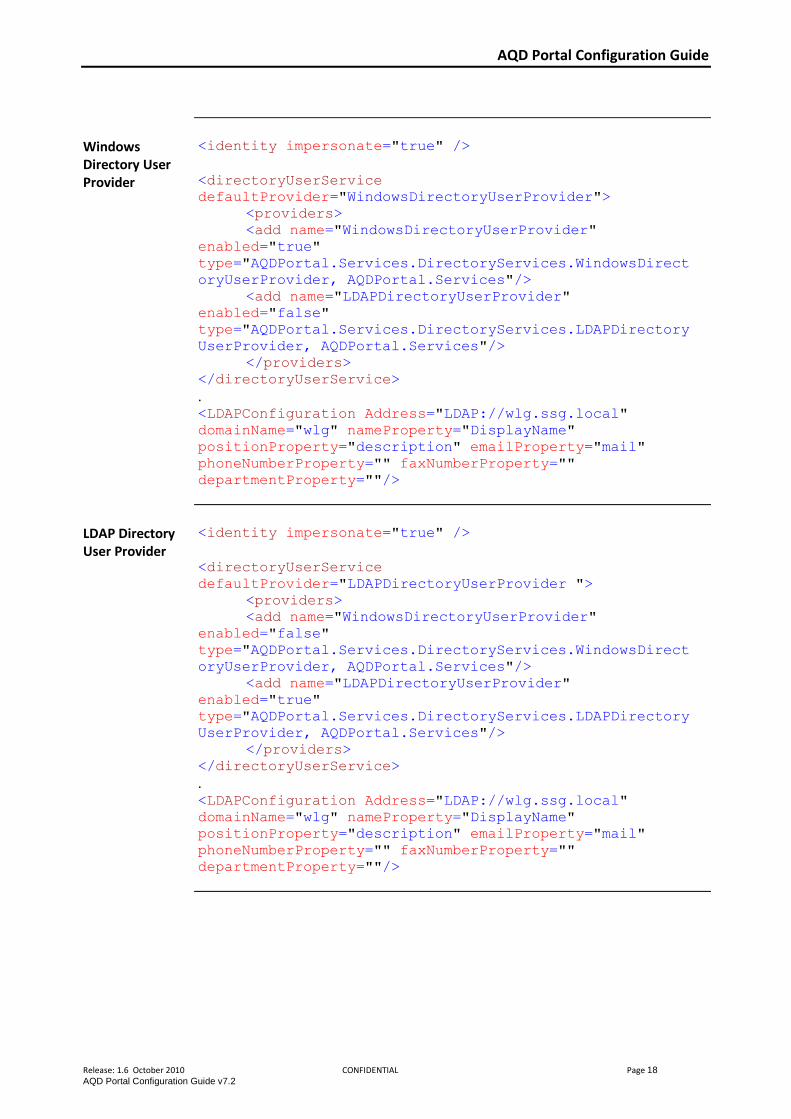
Windows Directory User Provider
<identity impersonate="true" /> <directoryUserService
defaultProvider="WindowsDirectoryUserProvider">
<providers>
<add name="WindowsDirectoryUserProvider"
enabled="true"
type="AQDPortal.Services.DirectoryServices.WindowsDirect
oryUserProvider, AQDPortal.Services"/>
<add name="LDAPDirectoryUserProvider"
enabled="false"
type="AQDPortal.Services.DirectoryServices.LDAPDirectory
UserProvider, AQDPortal.Services"/>
</providers>
</directoryUserService>
. <LDAPConfiguration Address="LDAP://wlg.ssg.local"
domainName="wlg" nameProperty="DisplayName"
positionProperty="description" emailProperty="mail"
phoneNumberProperty="" faxNumberProperty=""
departmentProperty=""/>
LDAP Directory User Provider
<identity impersonate="true" /> <directoryUserService
defaultProvider="LDAPDirectoryUserProvider ">
<providers>
<add name="WindowsDirectoryUserProvider"
enabled="false"
type="AQDPortal.Services.DirectoryServices.WindowsDirect
oryUserProvider, AQDPortal.Services"/>
<add name="LDAPDirectoryUserProvider"
enabled="true"
type="AQDPortal.Services.DirectoryServices.LDAPDirectory
UserProvider, AQDPortal.Services"/>
</providers>
</directoryUserService>
. <LDAPConfiguration Address="LDAP://wlg.ssg.local"
domainName="wlg" nameProperty="DisplayName"
positionProperty="description" emailProperty="mail"
phoneNumberProperty="" faxNumberProperty=""
departmentProperty=""/>
AQD Portal Configuration Guide
Release: 1.6 October 2010 CONFIDENTIAL Page 19
AQD Portal Configuration Guide v7.2
Property to Field Mapping
The LDAP Configuration tag allows the mapping of directory properties to AQD Staff Member fields. For example nameProperty="DisplayName" attribute will cause the provider to extract the “DisplayName” property from the user in the Active Directory and use this value to populate the “Staff_Member_Name” in the AQD Staff Member table. If the Attribute is an empty string, e.g. faxNumberProperty="", then the field in the database (Fax_Number) is not populated by this function. The Field Mappings supported are:
nameProperty == Staff_Member_Name
positionProperty == Position
emailProperty == Email_Address
phoneNumberProperty == Phone_Number
faxNumberProperty == Fax_Number
departmentProperty is a special case – see Department Resolution below
Department Resolution
In the AQD Portal and AQD Client Staff Members belong to departments and this relationship is important as without it departmental security cannot be applied. When Staff Members are added manually the staff member’s department can be selected as part of this process. If the staff member is added or maintained by the Directory User Provider the mapping of the staff member to the correct department is more problematic. Two mechanisms are provided to address this issue:
Checking for staff members without a department and fixing them in the Admin Client.
Setting the departmentProperty to Map and Active Directory Property to read for the Department name.
The use of the departmentProperty requires a text match between the contents of the mapped Active Directory field and the Department Names in the AQD Organisation Structure. A match will result in the Department_ID on the Staff Member Record being set to the located Org_Item_ID.
AQD Portal Configuration Guide
Release: 1.6 October 2010 CONFIDENTIAL Page 20
AQD Portal Configuration Guide v7.2
Logging
Introduction Error and trace logging is performed by log4net. Complete documentation for this can be found at http://logging.apache.org/log4net/index.html . The provided configuration will suffice for most circumstances.
Out of the box the configuration logs Exceptions to a text file in the Log folder in the application directory. To assist with the diagnosis of a problem Superstructure support staff may request changes to the logging configuration.
<log4net>
<appender name="LogFileAppender"
type="log4net.Appender.FileAppender">
<param name="File" value="Logs\\Log4Net.log"/>
<layout type="log4net.Layout.PatternLayout">
<param name="ConversionPattern" value="%d [%t] %-5p %c
%m%n"/>
</layout>
</appender>
<appender name="OutputDebugStringAppender"
type="log4net.Appender.OutputDebugStringAppender">
</appender>
<logger name="Exceptions">
<level value="Error"/>
</logger>
<root>
<level value="Warn"/>
<appender-ref ref="LogFileAppender"/>
</root>
</log4net>
AQD Portal Configuration Guide
Release: 1.6 October 2010 CONFIDENTIAL Page 21
AQD Portal Configuration Guide v7.2
Email Appender The addition of an email appender may be useful to notify of serious errors. An email appender would follow this form:
<appender name="SmtpAppender"
type="log4net.Appender.SmtpAppender">
<authentication value="basic"/>
<to value="to emailaddress" />
<from value="From email address" />
<subject value="AQD Portal Logging" />
<password value="Password" />
<username value="email user name"/>
<smtpHost value="host" />
<bufferSize value="1" />
<lossy value="false" />
<evaluator type="log4net.Core.LevelEvaluator">
<threshold value="WARN"/>
</evaluator>
<layout type="log4net.Layout.PatternLayout">
<conversionPattern value="%newline%date [%thread] %-
5level %logger [%property] -
%message%newline%newline%newline" />
</layout>
</appender>
<appender name="EmailAppender"
type="log4net.Appender.ForwardingAppender" >
<threshold value="Error"/>
<appender-ref ref="SmtpAppender" />
</appender>
AQD Portal Configuration Guide
Release: 1.6 October 2010 CONFIDENTIAL Page 22
AQD Portal Configuration Guide v7.2
Licensing
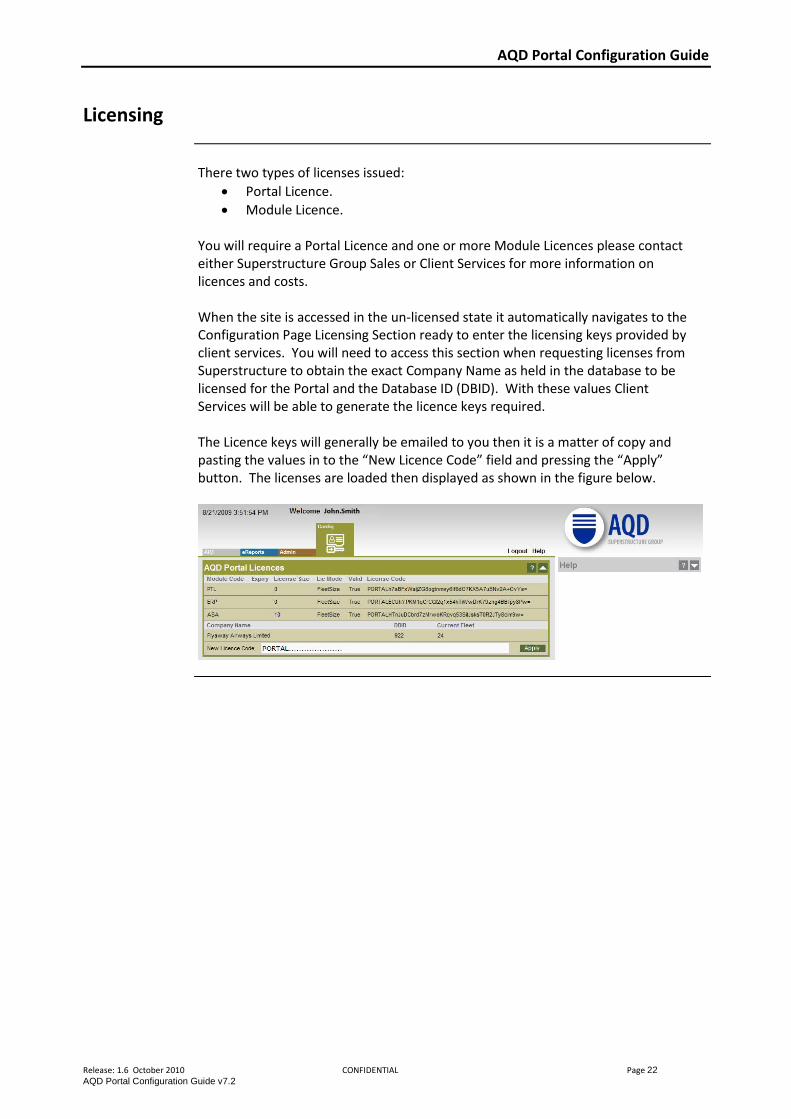
There two types of licenses issued:
Portal Licence.
Module Licence. You will require a Portal Licence and one or more Module Licences please contact either Superstructure Group Sales or Client Services for more information on licences and costs. When the site is accessed in the un-licensed state it automatically navigates to the Configuration Page Licensing Section ready to enter the licensing keys provided by client services. You will need to access this section when requesting licenses from Superstructure to obtain the exact Company Name as held in the database to be licensed for the Portal and the Database ID (DBID). With these values Client Services will be able to generate the licence keys required. The Licence keys will generally be emailed to you then it is a matter of copy and pasting the values in to the “New Licence Code” field and pressing the “Apply” button. The licenses are loaded then displayed as shown in the figure below.
AQD Portal Configuration Guide
Release: 1.6 October 2010 CONFIDENTIAL Page 23
AQD Portal Configuration Guide v7.2
Custom Content
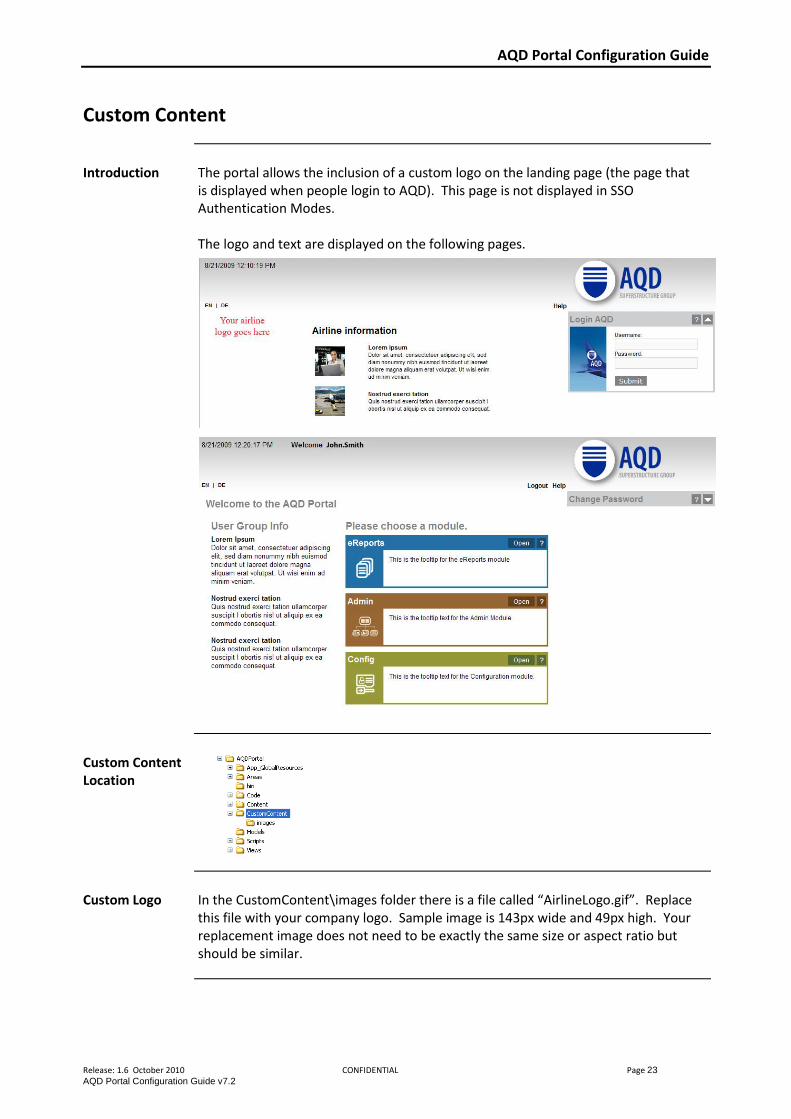
Introduction The portal allows the inclusion of a custom logo on the landing page (the page that
is displayed when people login to AQD). This page is not displayed in SSO Authentication Modes. The logo and text are displayed on the following pages.
Custom Content Location
Custom Logo In the CustomContent\images folder there is a file called “AirlineLogo.gif”. Replace
this file with your company logo. Sample image is 143px wide and 49px high. Your replacement image does not need to be exactly the same size or aspect ratio but should be similar.
AQD Portal Configuration Guide
Release: 1.6 October 2010 CONFIDENTIAL Page 24
AQD Portal Configuration Guide v7.2
Custom Text There are two htm files located in the CustomContent folder:
Index_CustomContent.htm
PortalHome_CustomContent.htm The contents of these files are injected into the Default.aspx (landing Page) and the Portal Home pages. It is recommended that you keep backup copies of these files and that caution is taken when editing them as they are injected into a page at runtime.