appendices - national highway traffic safety administration
TRANSCRIPT

Appendices
Cycling Skills Clinic Guide

Appendix AAppendix A
Explanation of TermsThe following terms are provided for your information. Some terms are referenced in the guide, others are included because they are terms used in bicycling and may be referred to during the cycling skills clinic.

Cycling Skills Clinic
Explanation of Terms
Bicycle DriverIn most States bicycles are considered vehicles; bicycles are for many their first vehicles. Bicyclists “drive” their vehicles much like drivers of motorized vehicles. Both bicyclists and motorists have the same rights and the same responsibilities to follow the same rules-of-the road when in traffic. To emphasize this concept, some teachers of bicycle safety will refer to this as “acting like a bicycle driver” or “driving your bicycle.”
Bike RodeoBike or bicycle rodeo is the original name of the cycling skills clinic, an interactive activity designed to introduce bicycle safety principles and an opportunity to practice the skills in a closed-off environment under supervision.
Emergency StopIn an attempt to stop quickly, the bicyclist applies both brakes while moving back and low on the bike. This position lowers the rider’s center of gravity and puts more weight on the rear wheel, both of which help keep the rider from flying over the handlebars. Note: This is considered a more advanced skill and is not taught in a cycling skills clinic. It is a very important skill to learn however for those who will ride their bicycles as part of traffic.
Hand Signals Bicyclists are expected to indicate their intent to turn by using hand signals. A left-turn signal is made by extending the left arm. A right turn is indicated by extending the right arm. (Point in the direction you want to go!)
Progress Card/Hang Tag A tag used in a skills clinic to track the stations completed and level of achievement. The purpose is to make the participant feel success but also to indicate to the participant and parent, areas that need practice. Samples are provided in Appendix H.
Lane Position Driving a bicycle is like driving a car. Bicyclists must properly position themselves on the roadway to increase their visibility and alert other motorists of their intended action.
• Width of the roadway: Most State laws indicate “a bicyclist must ride asfartotheright of the lane as is practicable.” Practicable means that the bicyclist makes a decision based on comfort level on a particular roadway. If the bicyclist feels the lane is wide enough for a motorist to pass him, the bicyclist may ride to the far right of the lane. If however, the bicyclist feels a lane is narrow, the bicyclist may opt to “take the lane” or ride in the middle of the lane just like a motorized vehicle to discourage a motorist from driving side by side. Bicyclists often choose to take the lane on narrow two-lane and curvy mountainous roadways.
• Bicyclist’s intent: If the bicyclist is at an intersection, the bicyclist’s position in a lane depends on the intended behavior, such as being to the right if going straight or right, or to the left of the lane if making a left turn.
Reflective GearReflective materials are worn or placed on items to make a person or item easier to see. The reflective materials are seen by a motorist typically when their car headlights shine on the material. Reflective materials include tape or stickers that can be applied to the bicyclists outwear, backpack, helmet or bicycle, shoe laces, etc.
Ride As Far To The Right As PracticableSee discussion above under laneposition, first bullet.
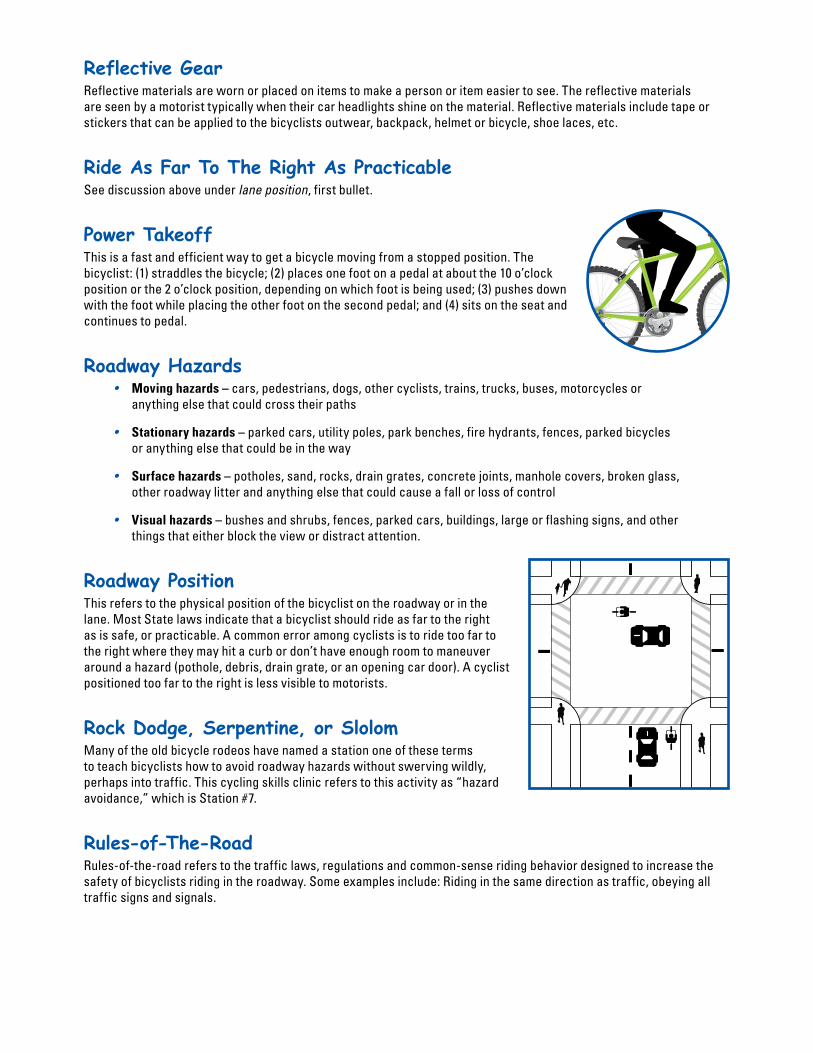
Power Takeoff This is a fast and efficient way to get a bicycle moving from a stopped position. The bicyclist: (1) straddles the bicycle; (2) places one foot on a pedal at about the 10 o’clock position or the 2 o’clock position, depending on which foot is being used; (3) pushes down with the foot while placing the other foot on the second pedal; and (4) sits on the seat and continues to pedal.
Roadway Hazards• Moving hazards – cars, pedestrians, dogs, other cyclists, trains, trucks, buses, motorcycles or
anything else that could cross their paths
• Stationary hazards – parked cars, utility poles, park benches, fire hydrants, fences, parked bicycles or anything else that could be in the way
• Surface hazards – potholes, sand, rocks, drain grates, concrete joints, manhole covers, broken glass, other roadway litter and anything else that could cause a fall or loss of control
• Visual hazards – bushes and shrubs, fences, parked cars, buildings, large or flashing signs, and other things that either block the view or distract attention.
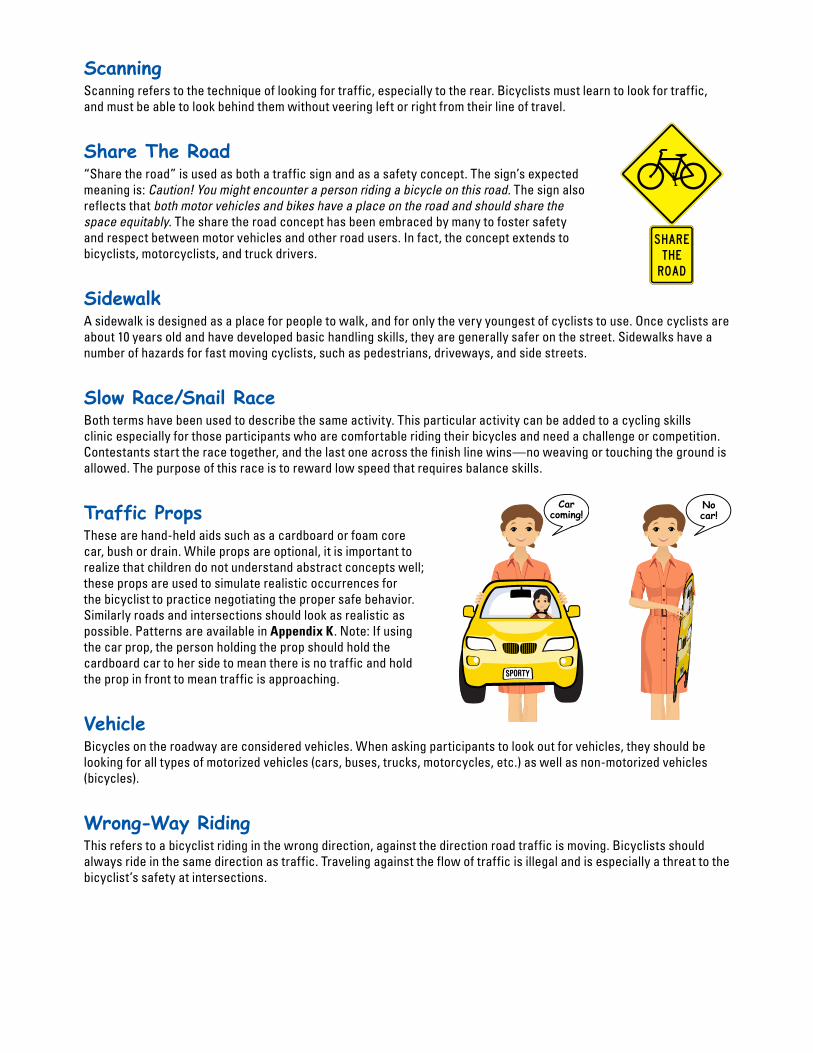
Roadway PositionThis refers to the physical position of the bicyclist on the roadway or in the lane. Most State laws indicate that a bicyclist should ride as far to the right as is safe, or practicable. A common error among cyclists is to ride too far to the right where they may hit a curb or don’t have enough room to maneuver around a hazard (pothole, debris, drain grate, or an opening car door). A cyclist positioned too far to the right is less visible to motorists.
Rock Dodge, Serpentine, or SlolomMany of the old bicycle rodeos have named a station one of these terms to teach bicyclists how to avoid roadway hazards without swerving wildly, perhaps into traffic. This cycling skills clinic refers to this activity as “hazard avoidance,” which is Station #7.
Rules-of-The-RoadRules-of-the-road refers to the traffic laws, regulations and common-sense riding behavior designed to increase the safety of bicyclists riding in the roadway. Some examples include: Riding in the same direction as traffic, obeying all traffic signs and signals.
Scanning Scanning refers to the technique of looking for traffic, especially to the rear. Bicyclists must learn to look for traffic, and must be able to look behind them without veering left or right from their line of travel.
Share The Road “Share the road” is used as both a traffic sign and as a safety concept. The sign’s expected meaning is: Caution!Youmightencounterapersonridingabicycleonthisroad. The sign also reflects that bothmotorvehiclesandbikeshaveaplaceontheroadandshouldsharethespaceequitably. The share the road concept has been embraced by many to foster safety and respect between motor vehicles and other road users. In fact, the concept extends to bicyclists, motorcyclists, and truck drivers.
Sidewalk A sidewalk is designed as a place for people to walk, and for only the very youngest of cyclists to use. Once cyclists are about 10 years old and have developed basic handling skills, they are generally safer on the street. Sidewalks have a number of hazards for fast moving cyclists, such as pedestrians, driveways, and side streets.
Slow Race/Snail RaceBoth terms have been used to describe the same activity. This particular activity can be added to a cycling skills clinic especially for those participants who are comfortable riding their bicycles and need a challenge or competition. Contestants start the race together, and the last one across the finish line wins—no weaving or touching the ground is allowed. The purpose of this race is to reward low speed that requires balance skills.
Traffic Props These are hand-held aids such as a cardboard or foam core car, bush or drain. While props are optional, it is important to realize that children do not understand abstract concepts well; these props are used to simulate realistic occurrences for the bicyclist to practice negotiating the proper safe behavior. Similarly roads and intersections should look as realistic as possible. Patterns are available in Appendix K. Note: If using the car prop, the person holding the prop should hold the cardboard car to her side to mean there is no traffic and hold the prop in front to mean traffic is approaching.
VehicleBicycles on the roadway are considered vehicles. When asking participants to look out for vehicles, they should be looking for all types of motorized vehicles (cars, buses, trucks, motorcycles, etc.) as well as non-motorized vehicles (bicycles).
Wrong-Way Riding This refers to a bicyclist riding in the wrong direction, against the direction road traffic is moving. Bicyclists should always ride in the same direction as traffic. Traveling against the flow of traffic is illegal and is especially a threat to the bicyclist’s safety at intersections.
Sign images from the Manual of Traffic Signs <http://www.trafficsign.us/>These sign images copyright Richard C. Moeur. All rights reserved.
Share the Road with Bicyclists assembly
ROADT H E
S HAR E
W11-1 / W16-1
Carcoming!
Nocar!

Sample ChecklistsOrganizers often find it helpful to use checklists to ensure every detail is complete. Sample checklists are provided to assist you in organizing your event planning.
Appendix B

Volunteer AssignmentsCoordinator: __________________________________ Phone: _____________________________
E-mail: _______________________________________
Event Site: ____________________________________ Date of Event: ________________________
Number of Volunteers Needed/Used: ______________
Name Phone E-mail
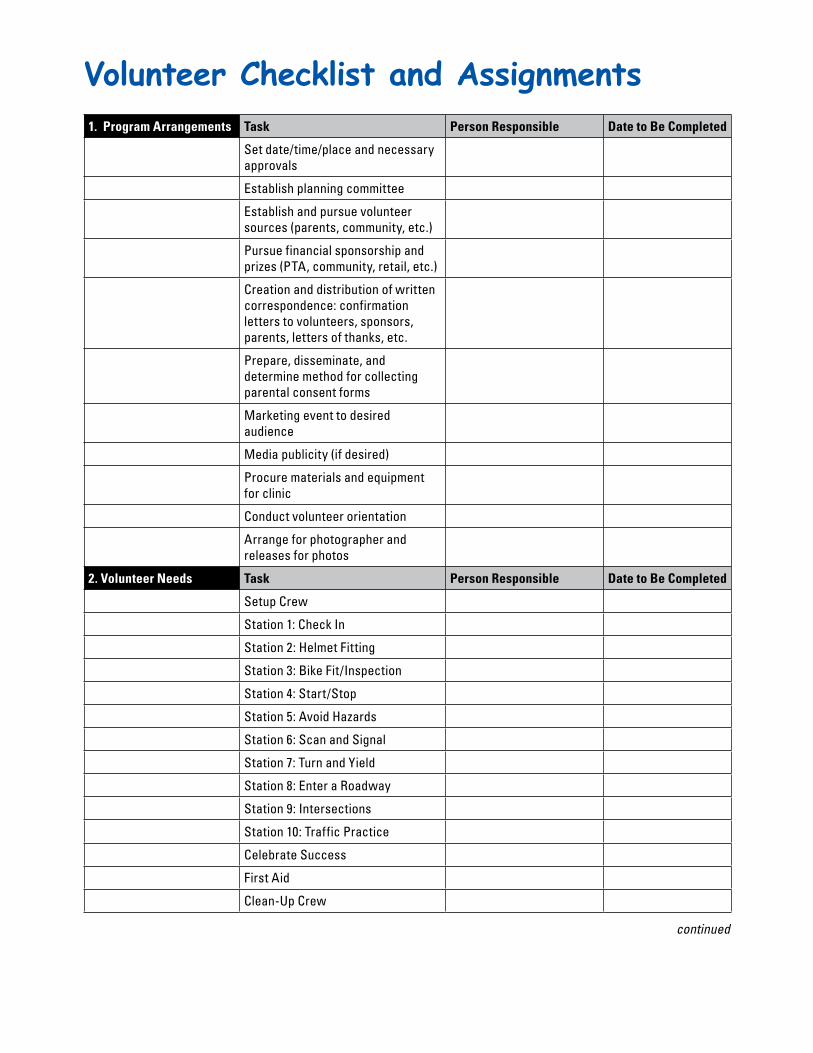
Volunteer Checklist and Assignments1. Program Arrangements Task Person Responsible Date to Be Completed
Set date/time/place and necessary approvals
Establish planning committee
Establish and pursue volunteer sources (parents, community, etc.)
Pursue financial sponsorship and prizes (PTA, community, retail, etc.)
Creation and distribution of written correspondence: confirmation letters to volunteers, sponsors, parents, letters of thanks, etc.
Prepare, disseminate, and determine method for collecting parental consent forms
Marketing event to desired audience
Media publicity (if desired)
Procure materials and equipment for clinic
Conduct volunteer orientation
Arrange for photographer and releases for photos
2. Volunteer Needs Task Person Responsible Date to Be Completed
Setup Crew
Station 1: Check In
Station 2: Helmet Fitting
Station 3: Bike Fit/Inspection
Station 4: Start/Stop
Station 5: Avoid Hazards
Station 6: Scan and Signal
Station 7: Turn and Yield
Station 8: Enter a Roadway
Station 9: Intersections
Station 10: Traffic Practice
Celebrate Success
First Aid
Clean-Up Crew
continued

3. Equipment/Supplies Task Person Responsible Date to Be Completed
Bicycle helmets
Bicycles
Education material
Station signs
Traffic signs
Container to hold consent forms and other forms
Materials for lane markings based on preference: traffic cones, bean bags, sponges, ½ tennis balls, chalk, plastic ribbon, thick marking tape
Registration table(s)
Chairs for volunteers
Table and water and/or refreshments for volunteers
Water and refreshments for participants
Progress cards pre-punched with elastic bands attached
Name tags for volunteers and participants
Markers, pens, and pencils
Clipboards
Scissors
Optional area (registration/engraving of bikes, videos, etc.)
Extension cords
Optional prizes/certificates
Surgical caps for loaned helmets
4. Post-Event Task Person Responsible Date to Be Completed
Notes of thanks
Return equipment

Sample Letters and News ReleasesCommunication is a critical component to a successful cycling skills clinic. Even if phone calls are made, written requests, reminders, and thanks are appreciated. Samples of letters and news releases are provided to assist you in planning.
Appendix C
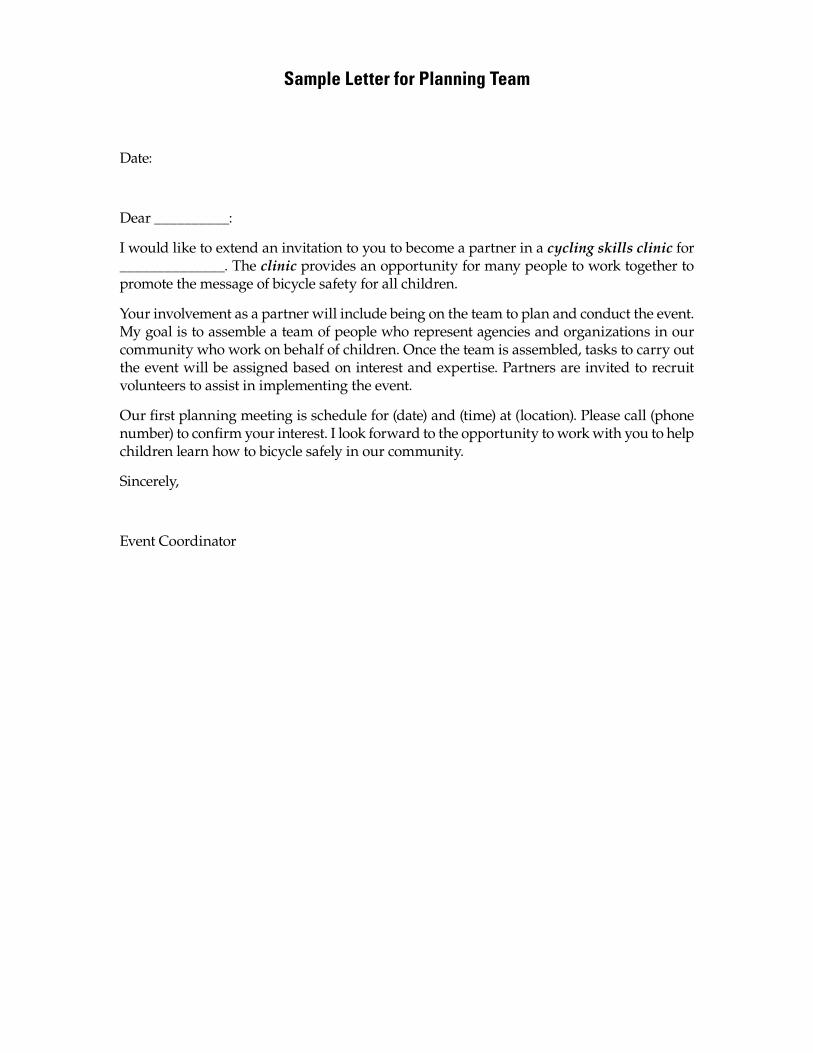
Sample Letter for Planning Team
Date:
Dear __________:
I would like to extend an invitation to you to become a partner in a cycling skills clinic for ______________. The clinic provides an opportunity for many people to work together to promote the message of bicycle safety for all children.
Your involvement as a partner will include being on the team to plan and conduct the event. My goal is to assemble a team of people who represent agencies and organizations in our community who work on behalf of children. Once the team is assembled, tasks to carry out the event will be assigned based on interest and expertise. Partners are invited to recruit volunteers to assist in implementing the event.
Our first planning meeting is schedule for (date) and (time) at (location). Please call (phone number) to confirm your interest. I look forward to the opportunity to work with you to help children learn how to bicycle safely in our community.
Sincerely,
Event Coordinator

Sample Letter of Invitation to Planning Team Members
Date
Dear (Insert Partner Name):
Do the children you know understand how to ride a bike safely? Do they wear bicycle hel-mets every time they ride? How many bicyclists do you see obeying all traffic signs and signals?
Children in our community are injured or killed oftentimes because they simply lack the information and education they need to make safety smart decisions in traffic. Let’s give our children a place where they can go to learn, practice, and improve the skills needed to ride bicycles safely, rather than get together to talk about what we could have done after a child is injured or killed.
Let’s provide our children with messages to reinforce to their parents and caregivers so adults know how to properly reinforce the correct safety information. Our children can lead the way to safe bicycling behavior for all bicyclists, including adults.
I need your help and support to plan and conduct a cycling skills clinic in our community. This invitation is being extended to many partners from a wide variety of organizations and businesses that are invested in keeping children and families safe while bicycling.
You are invited to be a member of the project team who will be planning and presenting a cycling skills clinic. At our first meeting, which is schedule for (date) at (time) at (location), (1) tasks will be identified and assigned to project team members based on interest, exper-tise, and availability; (2) help will be requested to recruit volunteers to assist at this event; and (3) a timetable for organizing the clinic will be presented.
Please call (phone number) to confirm your attendance at this first meeting. I look forward to having you contribute to this effort to help our community’s children become safe bicyclists.
Sincerely,
Event Coordinator
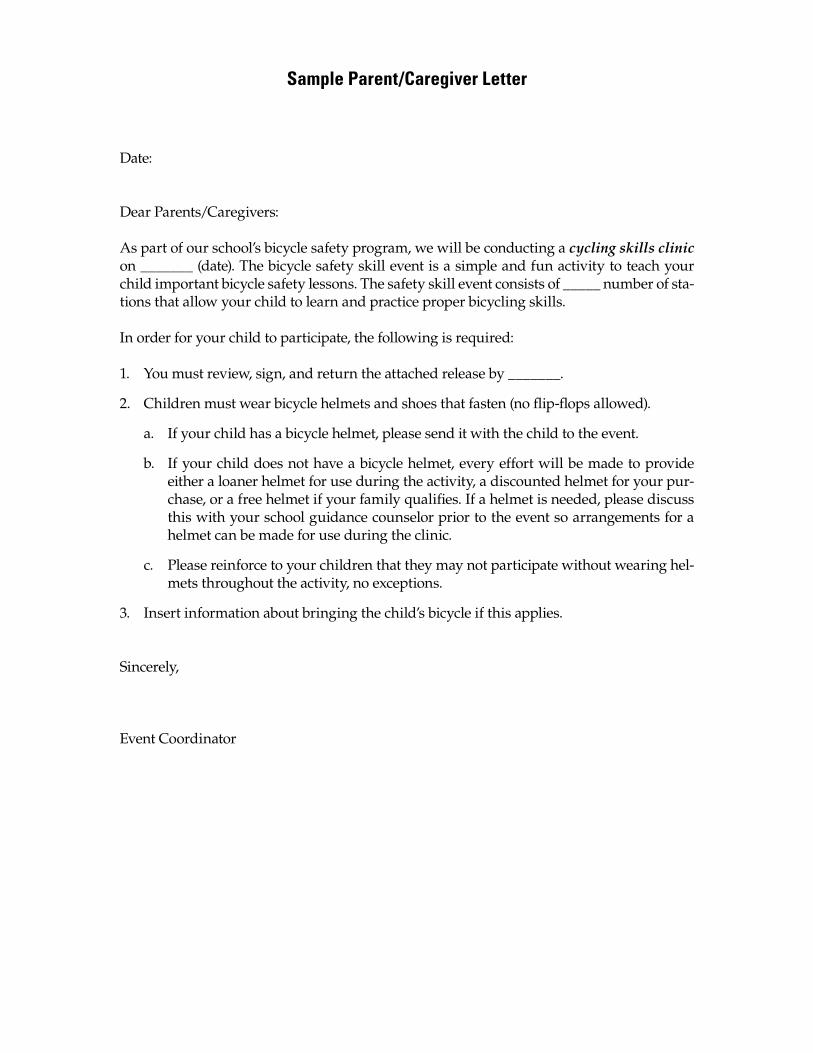
Sample Parent/Caregiver Letter
Date:
Dear Parents/Caregivers:
As part of our school’s bicycle safety program, we will be conducting a cycling skills clinic on _______ (date). The bicycle safety skill event is a simple and fun activity to teach your child important bicycle safety lessons. The safety skill event consists of _____ number of sta-tions that allow your child to learn and practice proper bicycling skills.
In order for your child to participate, the following is required:
1. You must review, sign, and return the attached release by _______.
2. Children must wear bicycle helmets and shoes that fasten (no flip-flops allowed).
a. If your child has a bicycle helmet, please send it with the child to the event.
b. If your child does not have a bicycle helmet, every effort will be made to provide either a loaner helmet for use during the activity, a discounted helmet for your pur-chase, or a free helmet if your family qualifies. If a helmet is needed, please discuss this with your school guidance counselor prior to the event so arrangements for a helmet can be made for use during the clinic.
c. Please reinforce to your children that they may not participate without wearing hel-mets throughout the activity, no exceptions.
3. Insert information about bringing the child’s bicycle if this applies.
Sincerely,
Event Coordinator
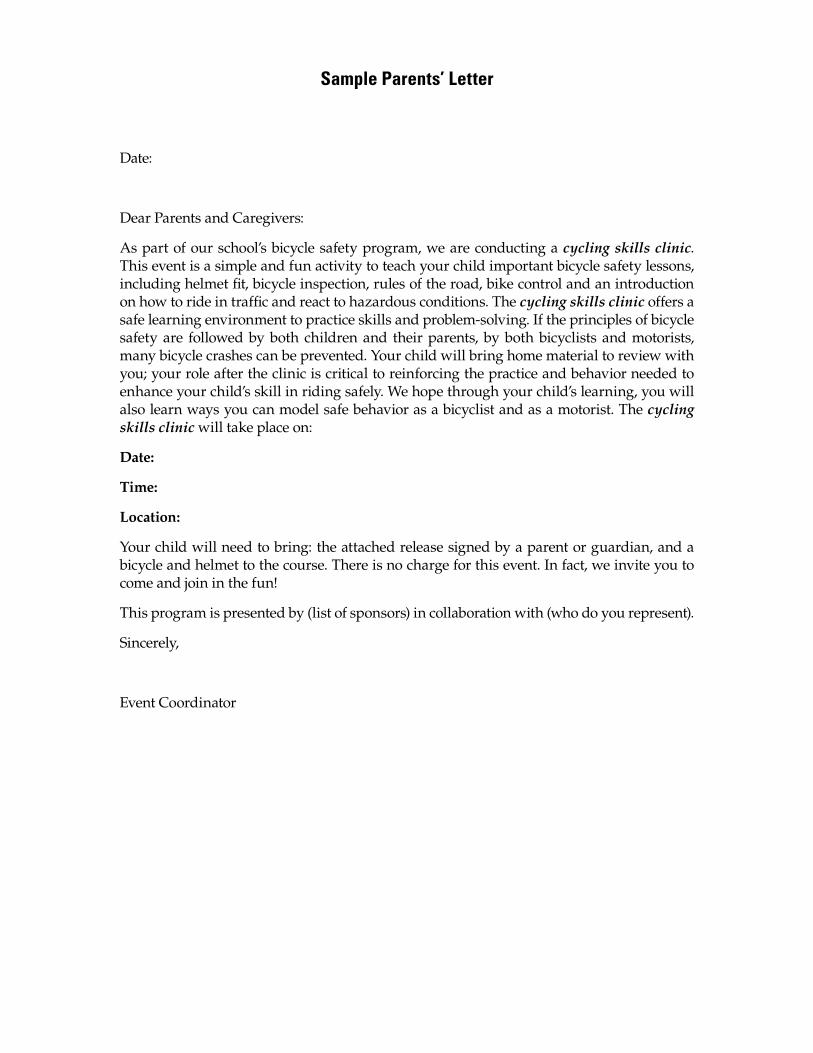
Sample Parents’ Letter
Date:
Dear Parents and Caregivers:
As part of our school’s bicycle safety program, we are conducting a cycling skills clinic. This event is a simple and fun activity to teach your child important bicycle safety lessons, including helmet fit, bicycle inspection, rules of the road, bike control and an introduction on how to ride in traffic and react to hazardous conditions. The cycling skills clinic offers a safe learning environment to practice skills and problem-solving. If the principles of bicycle safety are followed by both children and their parents, by both bicyclists and motorists, many bicycle crashes can be prevented. Your child will bring home material to review with you; your role after the clinic is critical to reinforcing the practice and behavior needed to enhance your child’s skill in riding safely. We hope through your child’s learning, you will also learn ways you can model safe behavior as a bicyclist and as a motorist. The cycling skills clinic will take place on:
Date:
Time:
Location:
Your child will need to bring: the attached release signed by a parent or guardian, and a bicycle and helmet to the course. There is no charge for this event. In fact, we invite you to come and join in the fun!
This program is presented by (list of sponsors) in collaboration with (who do you represent).
Sincerely,
Event Coordinator

After Event Sample Take Home Letter/Education
Date
Dear Parent,
Today your child learned basic bicycling skills and safety rules. The instruction presented was based on bicycle crash research, and to be truly effective, it needs to be reinforced by you. Ensure your child does the following to keep him/her safe:
• Wears a bicycle helmet every ride. Properly fitted and buckled helmets save lives. Seventy-five percent of all serious bicycle injuries involve a head injury that might have been prevented, if the bicyclist was wearing a helmet. Many States or jurisdictions have bicycle helmet laws for children. It is highly recommended that bicyclists of all ages wear a helmet designed for bicycling that meets the safety standards set forth by the Consumer Product Safety Commission (CPSC). Parents and other adults who wear hel-mets protect themselves from potential head injuries and al so set a proper example for others.
• Rides with traffic. The law requires all bicyclists to ride on the right-hand side of the road in the same direction as traffic. Riding against traffic has been shown to be a con-tributing factor in one out of every five bike/car crashes. This is because riding against traffic puts bicyclists where motorists least expect them. Motorists turning right nor-mally only look for traffic coming from the left, not from the right.
• Stops and looks before entering a street. Explain and practice stopping and looking for traffic at the end of a driveway, parking lot, or alley. Practice by looking left, then right, then left again for traffic; proceed when clear. Riding into the street from a driveway without stopping is the cause of half the bike fatalities to kids 8 and under. It accounts for about one-third of serious crashes involving children 8 to 12.
• Obeys signs and signals. Reinforce that bicyclists must stop at stop signs and red lights and what it means to yield to traffic and pedestrians. Failure to obey signs and signals is another major cause of bicycle/car collisions involving children. Stopping for traffic control devices should be stressed so it becomes a habit.
• Makes safe decisions. Your child must stop, look, and decide for him- or herself if the road is clear before exiting a driveway, crossing a street or making a turn. It is not safe to just follow a friend.
• Scans for traffic. Emphasize looking behind (over his/her shoulder) for traffic before turning or changing positions on the roadway. If there are lots of cars behind, the rider should get off the bike and walk across the intersection using the crosswalks, if available.
Thank you for allowing your children to take on this exhilarating sport and helping them learn how to do it safely. If bicycling is not already a family activity, give it a try! For further information contact:
Sincerely,
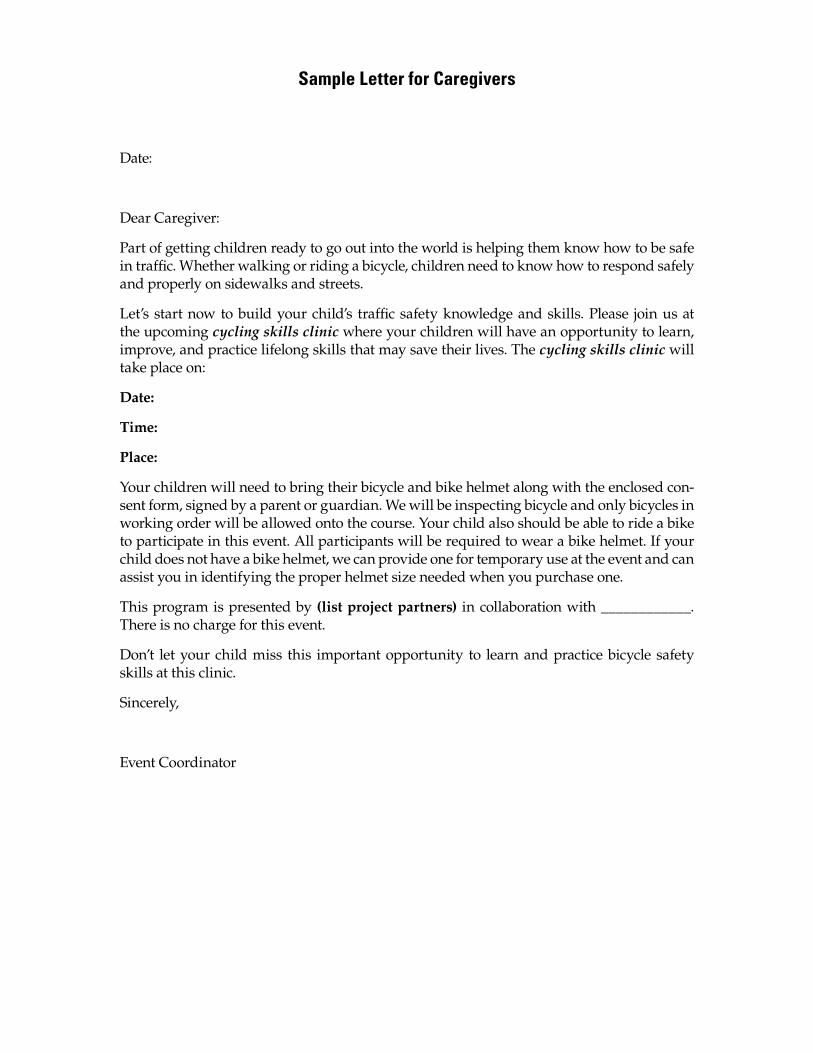
Sample Letter for Caregivers
Date:
Dear Caregiver:
Part of getting children ready to go out into the world is helping them know how to be safe in traffic. Whether walking or riding a bicycle, children need to know how to respond safely and properly on sidewalks and streets.
Let’s start now to build your child’s traffic safety knowledge and skills. Please join us at the upcoming cycling skills clinic where your children will have an opportunity to learn, improve, and practice lifelong skills that may save their lives. The cycling skills clinic will take place on:
Date:
Time:
Place:
Your children will need to bring their bicycle and bike helmet along with the enclosed con-sent form, signed by a parent or guardian. We will be inspecting bicycle and only bicycles in working order will be allowed onto the course. Your child also should be able to ride a bike to participate in this event. All participants will be required to wear a bike helmet. If your child does not have a bike helmet, we can provide one for temporary use at the event and can assist you in identifying the proper helmet size needed when you purchase one.
This program is presented by (list project partners) in collaboration with ____________. There is no charge for this event.
Don’t let your child miss this important opportunity to learn and practice bicycle safety skills at this clinic.
Sincerely,
Event Coordinator

Sample Thank You Letter
Date:
Dear __________:
The success of the recent cycling skills clinic held on (date) at (location) depended on the effort and support of many people who care about moving kids safely in our community on our streets and neighborhoods. Kids riding bicycles is a common event everywhere we go. The cycling skills clinic allowed children to learn and practice the skills they need to make every bike ride a safe one.
Thanks to your efforts, our event helped reach many children who needed that support and education—CONGRATULATIONS!
At our event, our (number of volunteers) volunteers representing (names of participat-ing agencies/organizations) worked with (number of children participating in the course) children. Thank you for helping make this event possible!
I look forward to future opportunities where we might join together again to give children and families in our community on-going opportunities to apply their knowledge and skills towards traffic safety.
Sincerely,
Event Coordinator

Sample News Releases
Date Contact:
Phone:
CYCLING SKILLS CLINIC OFFERED
A bicycle safety clinic that allows participants to learn and practice bicycle skills will be held on (date, time and place).
The clinic will provide children ages ________ with an introduction to bicycle safety, includ-ing rules of the road, bike fit and maintenance, bike helmet fit, and bicycle skills.
“We’re excited to be able to present the cycling skills clinic for children in our community,” says (planning team coordinator). “Through this clinic, children in our community will be able to learn and practice skills essential to keep them safe and cycling for life.”
The cycling skills clinic is being presented by (list sponsors and planning team members).
For more information about the cycling skills clinic or other bicycle safety resources, contact (your organization and contact information).
____________________________________________________________________________
Date Contact:
Phone:
Cycling Skills Clinic to be Held
Remember the feeling of first learning to ride a bicycle on your own—without training wheels and without a parent’s balancing hand? Remember the sudden rush of freedom?
(YOUR ORGANIZATION) is sponsoring a cycling skills clinic designed to teach bicyclists the skills needed to be a safe cyclists. Bicyclists will be taught skills and defensive riding techniques to help them become safe riders to enhance their enjoyment of bicycling.
The cycling skills clinic will be held (day, time, location). Bicyclists ages ________ are invited to attend. This event is made up of a series of exercises stations that teach important aspect of safe cycling. Participants will have their bicycles inspected, and learn and practice bicycle-handling skills. Parents are invited to participate too.
For more information, contact (your contact information).
____________________________________________________________________________
(continued)

Sample News Releases (continued)
Date Contact:
Phone:
Police Cyclists to Visit Cycling Skills Clinic
A cycling skills clinic will be held (day, date, time, location). Bicyclists ages _________ and their parents are invited to attend. This event is made up of a series of exercises to teach important aspects of safe cycling. Participants will practice the safe way to exit a driveway, how to look for traffic, negotiate an intersection, and avoid common road hazards.
Police cyclists from (name of department) will be at the cycling skills clinic. They will demonstrate some basic handling skills and address the importance of all cyclists following the rules of the road.
For more information, contact the (your organization).

Sample Parental Consent WaiversBy virtue of this type of event and the risk that a child might be hurt while engaging in physical activity, a parental or guardian signed release form should be a standard requirement. The following are some examples.
Despite the presence of signed waivers, clinic organizers and volunteers should pay close attention to participants at all times and minimize safety risks. All bicyclists should be required to wear a properly fitted bicycle helmet and use a bicycle considered to be safe for the activity. Helmet and bicycle assessments are standard stations at a cycling skills clinic.
Appendix D
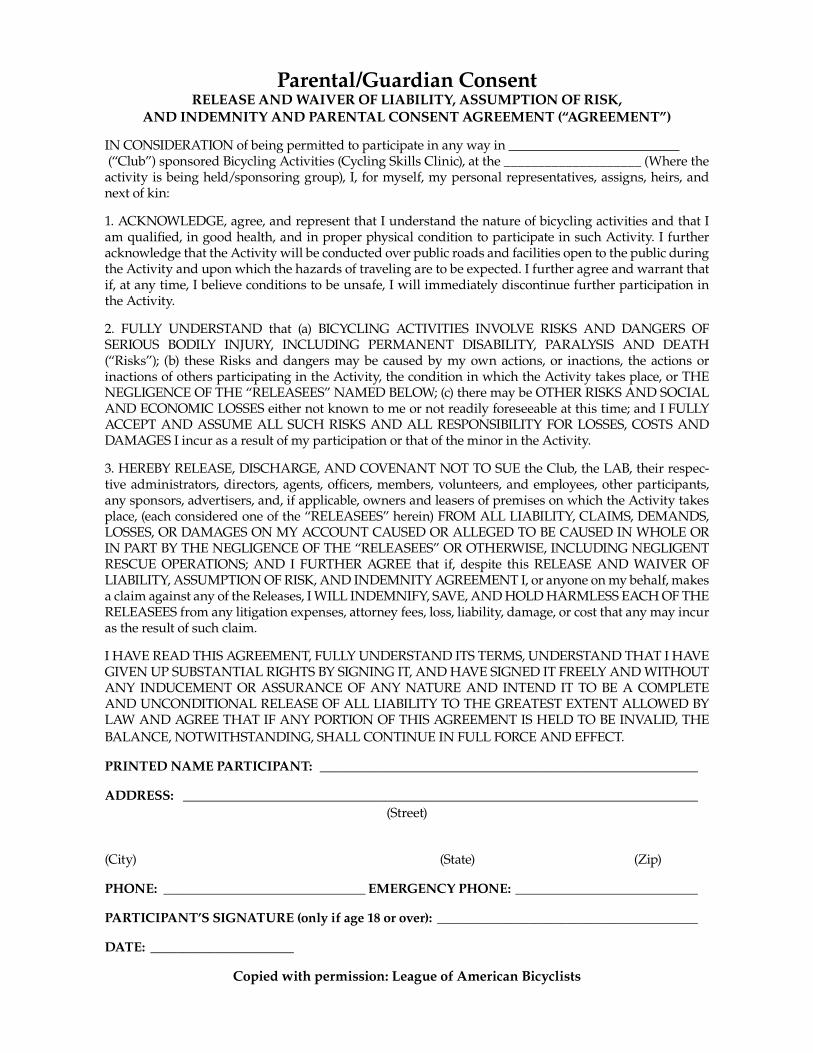
Parental/Guardian ConsentRELEASE AND WAIVER OF LIABILITY, ASSUMPTION OF RISK,
AND INDEMNITY AND PARENTAL CONSENT AGREEMENT (“AGREEMENT”)
IN CONSIDERATION of being permitted to participate in any way in (“Club”) sponsored Bicycling Activities (Cycling Skills Clinic), at the ____________________ (Where the activity is being held/sponsoring group), I, for myself, my personal representatives, assigns, heirs, and next of kin:
1. ACKNOWLEDGE, agree, and represent that I understand the nature of bicycling activities and that I am qualified, in good health, and in proper physical condition to participate in such Activity. I further acknowledge that the Activity will be conducted over public roads and facilities open to the public during the Activity and upon which the hazards of traveling are to be expected. I further agree and warrant that if, at any time, I believe conditions to be unsafe, I will immediately discontinue further participation in the Activity.
2. FULLY UNDERSTAND that (a) BICYCLING ACTIVITIES INVOLVE RISKS AND DANGERS OF SERIOUS BODILY INJURY, INCLUDING PERMANENT DISABILITY, PARALYSIS AND DEATH (“Risks”); (b) these Risks and dangers may be caused by my own actions, or inactions, the actions or inactions of others participating in the Activity, the condition in which the Activity takes place, or THE NEGLIGENCE OF THE “RELEASEES” NAMED BELOW; (c) there may be OTHER RISKS AND SOCIAL AND ECONOMIC LOSSES either not known to me or not readily foreseeable at this time; and I FULLY ACCEPT AND ASSUME ALL SUCH RISKS AND ALL RESPONSIBILITY FOR LOSSES, COSTS AND DAMAGES I incur as a result of my participation or that of the minor in the Activity.
3. HEREBY RELEASE, DISCHARGE, AND COVENANT NOT TO SUE the Club, the LAB, their respec-tive administrators, directors, agents, officers, members, volunteers, and employees, other participants, any sponsors, advertisers, and, if applicable, owners and leasers of premises on which the Activity takes place, (each considered one of the “RELEASEES” herein) FROM ALL LIABILITY, CLAIMS, DEMANDS, LOSSES, OR DAMAGES ON MY ACCOUNT CAUSED OR ALLEGED TO BE CAUSED IN WHOLE OR IN PART BY THE NEGLIGENCE OF THE “RELEASEES” OR OTHERWISE, INCLUDING NEGLIGENT RESCUE OPERATIONS; AND I FURTHER AGREE that if, despite this RELEASE AND WAIVER OF LIABILITY, ASSUMPTION OF RISK, AND INDEMNITY AGREEMENT I, or anyone on my behalf, makes a claim against any of the Releases, I WILL INDEMNIFY, SAVE, AND HOLD HARMLESS EACH OF THE RELEASEES from any litigation expenses, attorney fees, loss, liability, damage, or cost that any may incur as the result of such claim.
I HAVE READ THIS AGREEMENT, FULLY UNDERSTAND ITS TERMS, UNDERSTAND THAT I HAVE GIVEN UP SUBSTANTIAL RIGHTS BY SIGNING IT, AND HAVE SIGNED IT FREELY AND WITHOUT ANY INDUCEMENT OR ASSURANCE OF ANY NATURE AND INTEND IT TO BE A COMPLETE AND UNCONDITIONAL RELEASE OF ALL LIABILITY TO THE GREATEST EXTENT ALLOWED BY LAW AND AGREE THAT IF ANY PORTION OF THIS AGREEMENT IS HELD TO BE INVALID, THE BALANCE, NOTWITHSTANDING, SHALL CONTINUE IN FULL FORCE AND EFFECT.
PRINTED NAME PARTICIPANT: __________________________________________________________
ADDRESS: _______________________________________________________________________________(Street)
(City) (State) (Zip)
PHONE: _______________________________ EMERGENCY PHONE: ____________________________
PARTICIPANT’S SIGNATURE (only if age 18 or over): ________________________________________
DATE: ______________________
Copied with permission: League of American Bicyclists

RELEASE AND WAIVER OF LIABILITY, ASSUMPTION OF RISK, AND INDEMNITY AND
Parental/Guardian Release
MINOR RELEASE
The minor’s parent and/or legal guardian understand the nature of bicycling activities and the minor’s experience and capabilities and believe the minor to be qualified, in good health, and in proper physical condition to participate in such activity. I hereby release, discharge, covenant not to sue, and agree to indemnify and save and hold harmless each of the releases from all liability, claims, demands, losses, or damages on the minor’s account caused or alleged to be caused in whole or in part by the negligence of the “releasees” or otherwise, including negligent rescue operations and further agree that if, despite this release, i, the minor, or anyone on the minor’s behalf makes a claim against any of the releasees named above, i will indemnify, save, and hold harmless each of the releasees from any litigation expenses, attorney fees, loss liability, damage, or cost any may incur as the result of any such claim.
PRINTED NAME OF CHILD: ___________________________________________________________
PARENT/GUARDIAN: _____________________________ DAYTIME PHONE: _________________
ADDRESS: ____________________________________________________________________________(Street)
________________________________________________________________________________________(City) (State) (Zip)
DAYTIME PHONE: ________________________________
EMERGENCY POINT OF CONTACT: ______________________ PHONE: ____________________
PARTICIPANT’S SIGNATURE (if participant is under the age of 18): ________________________
DATE: ______________________
Copied with permission: League of American Bicyclists

RELEASE AND WAIVER OF LIABILITY, ASSUMPTION OF RISK, AND INDEMNITY AND
Parental/Guardian Release
WAIVER AND RELEASE
I recognize that the activity for which I am registering my child (participant) involves a risk of injury as does any athletic activity. I waive and release any and all rights and claims for injury or damages resulting from this event and agree to hold harmless the sponsors of this event for any and all injuries suffered by me or my child while participating in this activity unless such injury is caused by gross negligence of the sponsoring agencies.
PARENT/GUARDIAN SIGNATURE: _____________________________________________________
PRINTED NAME: ______________________________________________________________________
DATE: ______________________
PARTICIPANT’S NAME (ONE PER FORM): ______________________________________________
DATE OF BIRTH: ________________________ BOY / GIRL (circle one)
PHONE: ________________________________
This stub is retained at the registration booth.

Sample Bicycle Safety ChecksSample checklists are provided for use by volunteers at the bicycle safety check station. Typically this station is staffed by qualified volunteers from bicycle shops or those trained at some level in bicycle mechanics. Handouts for children and their families to use to perform a bicycle safety check are also included.
Appendix E
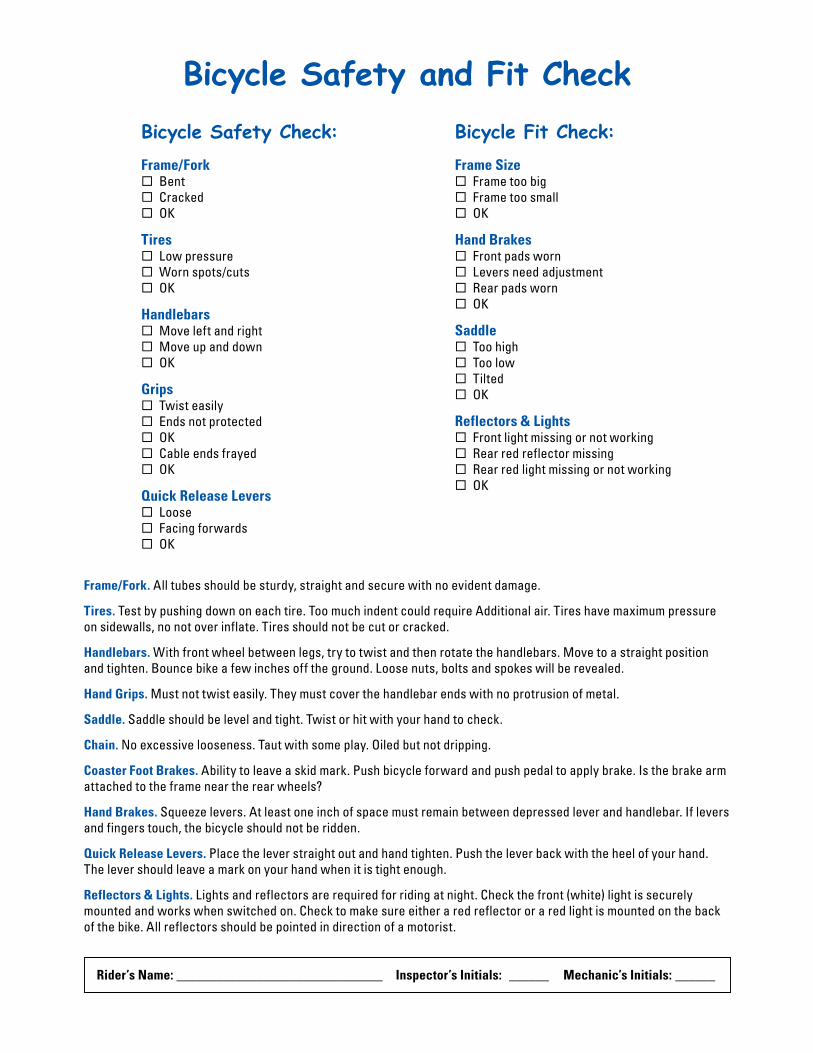
Bicycle Safety and Fit CheckBicycle Safety Check: Frame/Fork
� Bent � Cracked � OK
Tires � Low pressure � Worn spots/cuts � OK
Handlebars � Move left and right � Move up and down � OK
Grips � Twist easily � Ends not protected � OK � Cable ends frayed � OK
Quick Release Levers � Loose � Facing forwards � OK
Bicycle Fit Check: Frame Size
� Frame too big � Frame too small � OK
Hand Brakes � Front pads worn � Levers need adjustment � Rear pads worn � OK
Saddle � Too high � Too low � Tilted � OK
Reflectors & Lights � Front light missing or not working � Rear red reflector missing � Rear red light missing or not working � OK
Frame/Fork. All tubes should be sturdy, straight and secure with no evident damage.
Tires. Test by pushing down on each tire. Too much indent could require Additional air. Tires have maximum pressure on sidewalls, no not over inflate. Tires should not be cut or cracked.
Handlebars. With front wheel between legs, try to twist and then rotate the handlebars. Move to a straight position and tighten. Bounce bike a few inches off the ground. Loose nuts, bolts and spokes will be revealed.
Hand Grips. Must not twist easily. They must cover the handlebar ends with no protrusion of metal.
Saddle. Saddle should be level and tight. Twist or hit with your hand to check.
Chain. No excessive looseness. Taut with some play. Oiled but not dripping.
Coaster Foot Brakes. Ability to leave a skid mark. Push bicycle forward and push pedal to apply brake. Is the brake arm attached to the frame near the rear wheels?
Hand Brakes. Squeeze levers. At least one inch of space must remain between depressed lever and handlebar. If levers and fingers touch, the bicycle should not be ridden.
Quick Release Levers. Place the lever straight out and hand tighten. Push the lever back with the heel of your hand. The lever should leave a mark on your hand when it is tight enough.
Reflectors & Lights. Lights and reflectors are required for riding at night. Check the front (white) light is securely mounted and works when switched on. Check to make sure either a red reflector or a red light is mounted on the back of the bike. All reflectors should be pointed in direction of a motorist.
Rider’s Name: _______________________________ Inspector’s Initials: ______ Mechanic’s Initials: ______

Bicycle Safety CheckBicycle Part Questions to Ask Yes No Comments
Wheels Do the wheels spin without touching the brakes?
Are they centered and secure in the frame?
When you spin the wheel, is the rim of the wheel round?
Tires Are the tires free of bulges, cuts, worn spots?
Are the tires inflated to recommended air pressure?
Is the tread acceptable (not worn thin)?
Brakes Do the brakes have at least one finger’s width between the lever and handlebar when engaged?
Do coaster brakes effectively stop the rear wheel?
Do the brakes stop the wheels from turning?
Spokes Are all the spokes in place?
Chain Is the chain tight, in good working order?
Is the chain clean and lubricated?
Does the chain have the proper tension? It should fit snugly, with no more than one half inch play.
Pedals Are the pedals secure? Try to shake them back and forth.
Saddle Is the seat secure? Can you move it by banging on it?
Quick Releases Are the front and rear releases tight and in the closed position?
Rider’s Name: _______________________________ Inspector’s Initials: ______ Mechanic’s Initials: ______

The A B C Spin Check
A is for air: 99Inspect9and9squeeze9your9tires-9they9should9feel9hard.
99Soft9tires9can9cause9flat9tires,9ruin9your9rims,9make9your9bike9hard9to9ride.9
B is for brakes: 99Squeeze9the9brake9levers9or,9on9some9bikes,9pedal9backwards,9to9make9sure9you9can9stop9your9bike.9
C is for chain: 99Check9the9chain9to9make9sure9it9is9slightly9oily,9not9rusty,9and9makes9a9straight9line9across9the9bottom.9
Spin is for... You Got it... Spin 99Spin9your9wheels9to9make9sure9they9don’t9wobble9or9rub9on9the9brake9pads9or9the9frame.9
Used with permission: Washington Area Bicycle Association (WABA)
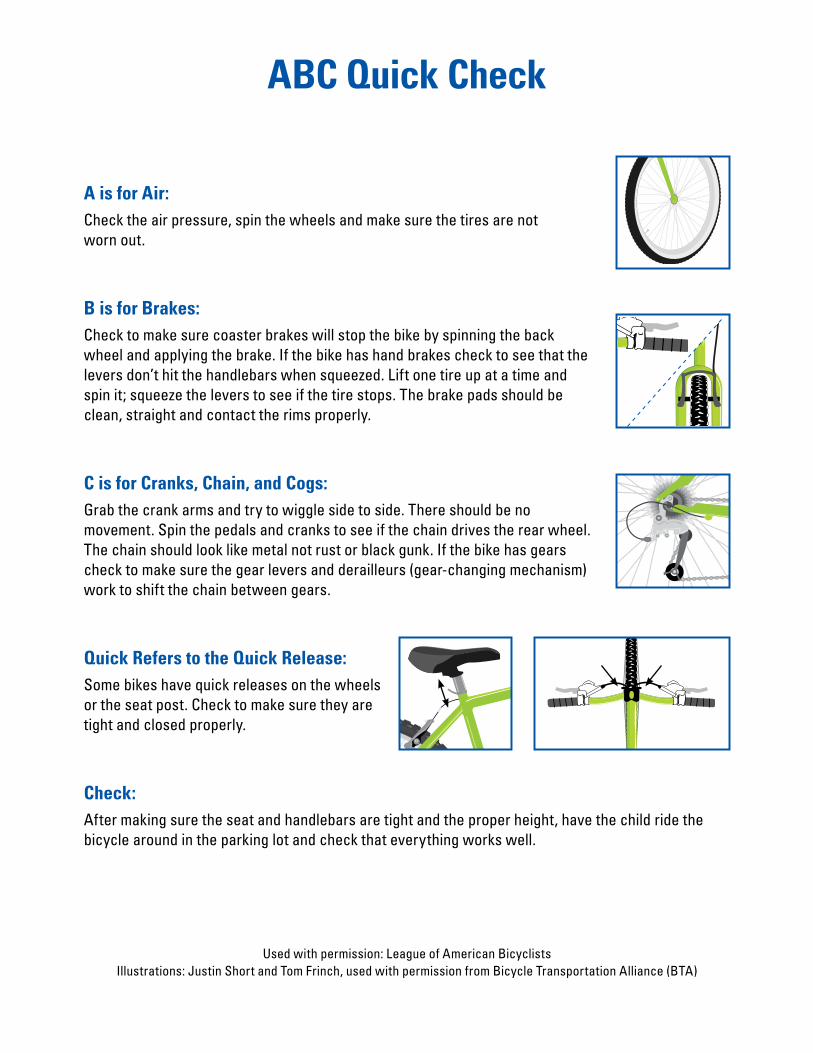
ABC Quick Check
A is for Air: Check the air pressure, spin the wheels and make sure the tires are not worn out.
B is for Brakes: Check to make sure coaster brakes will stop the bike by spinning the back wheel and applying the brake. If the bike has hand brakes check to see that the levers don’t hit the handlebars when squeezed. Lift one tire up at a time and spin it; squeeze the levers to see if the tire stops. The brake pads should be clean, straight and contact the rims properly.
C is for Cranks, Chain, and Cogs: Grab the crank arms and try to wiggle side to side. There should be no movement. Spin the pedals and cranks to see if the chain drives the rear wheel. The chain should look like metal not rust or black gunk. If the bike has gears check to make sure the gear levers and derailleurs (gear-changing mechanism) work to shift the chain between gears.
Quick Refers to the Quick Release: Some bikes have quick releases on the wheels or the seat post. Check to make sure they are tight and closed properly.
Check: After making sure the seat and handlebars are tight and the proper height, have the child ride the bicycle around in the parking lot and check that everything works well.
Used with permission: League of American BicyclistsIllustrations: Justin Short and Tom Frinch, used with permission from Bicycle Transportation Alliance (BTA)

Sample Bicycle Safety QuizzesSometimes there is a backup of participants, especially at the first three stations. To keep participants engaged, the following quizzes can be used. They are fun and keep the focus on safety.
Appendix F

Bike Riding DangersPretend you are the person riding the bicycle at the bottom of the picture. Can you see all the things that could affect your safety when bicycling? There are 13 bike-riding dangers in all.
Reprinted with permission: John Williams

Bike Riding Dangers Answer Key
Reprinted with permission: John Williams

Find the Hazards WorksheetAnswers and Explanations1. Male bicyclist is riding his bicycle against the flow of traffic. The law requires bicyclists to ride with the flow of
traffic. This is safer for several reasons:
a. Motorists look for and expect all traffic to move in one direction and may not see bicyclists riding the wrong way.
b. Traffic signs and lights face traffic flowing in one direction only. Bicyclists going against traffic will be unable to read and adhere to traffic signs and signals.
c. The reaction time of motorists is greatly reduced when bicyclists ride toward vehicles.
2. Male bicyclist is not wearing a helmet. Research shows that up to 90 percent of fatal bicycle crashes are the result of head trauma. A properly worn and certified bicycle helmet cushions and protects the head from injurious impacts with hard surfaces such as asphalt and concrete.
3. Male bicyclist is driving with only one hand on the handle bar. Riding a bicycle with one hand limits the reaction time to hazards and dangerous traffic situations. Bicyclists should always keep both hands on the handle bars. Books, packages and other items should be carried in a backpack or basket.
4. Car backing out of driveway. Bicyclists should stop or slow down at every intersection (including driveways) and watch for traffic. Parked vehicles can begin to move at any time. Look and listen to detect any movement from nearby vehicles. Do not cross in front of or behind an occupied vehicle without communicating your intentions through the use of hand signals and eye contact with the driver.
5. Oncoming train. Stop, look, and listen for oncoming trains and let them pass before crossing the tracks. Use auditory and visual senses to detect the status of nearby trains. A nearby train will typically send a warning whistle and crossing areas will be marked clearly with flashing red lights and signs.
6. Railroad tracks. When crossing train tracks, either walk or ride your bicycle across with your wheels perpendicular to the tracks to avoid getting tires caught.
7. Pedestrian is crossing street with packages. Bicyclists should always be observant of pedestrians. Pedestrians are often unpredictable, as in this example, and sometimes neglect to search for traffic before entering the street.
8. Opened door of parked car. Bicyclists should always scan parked vehicles for passengers who might open doors. When passing parked cars, allow enough room between the bicycle and vehicles to avoid opening doors. Always scan behind for on-coming traffic before swerving into another lane.\
9. Loose dog. If a dog approaches while cycling, yell loudly “No!” or “Go home!” and keep control of your bicycle. If the dog threatens to bite or attack, get off your bicycle, put it between you and the dog, and back away slowly. Do not try to outrun or hit the animal.
10, 11, and 12. Sewer grate, pot hole, and leaves/debris. Bicyclists need to dodge surface hazards without swerving into the path of on-coming traffic. Bicyclists constantly need to search ahead for obstacles and hazards, steering around or dodging them when necessary.
13. Car crossing the path of the girl bicyclist. Motorists sometimes cross in front of bicyclists and then either stop or slow down to turn. This often occurs when the motorist does not see the bicyclist or misjudges the bicyclist’s speed. Bicyclists must always BE VISIBLE, BE SEEN. Wear bright colored clothing, helmet, reflectors and lights, especially at night. In high traffic areas, bicyclists should ride slowly to improve their ability to react to the actions of motorists. Cycle defensively and be prepared to use your brake at all times.

What Do The Traffic Signs Mean? Young bicyclists as well as pedestrians need to know what laws pertain to them. They also need to know what traffic control devices mean and how they should act and react when they encounter one. Signs, signals, and painted markings on the pavement all have special traffic meanings for roadway users.
Directions: Match the signs with their description.
A B
CONE WAY
D
E F
G
R RH
YIELD
1. H; 2. B; 3. F; 4. D; 5. A; 6. G; 7. E; 8. CAnswers:
____ 1. Let the other traffic go first
____ 2. Bicycles not allowed
____ 3. All traffic in the right-hand lane must turn right
____ 4. Traffic facing the sign must stop
____ 5. Three colored lights – green means go, yellow and red mean stop
____ 6. Railroad tracks ahead
____ 7. No left turn
____ 8. Traffic flows in direction of arrow
Promise Card Helmet PledgeTo reinforce the importance of wearing a bicycle helmet, have the child and parent/guardian sign a pledge that they will obey the rules of the road and wear a helmet every ride. Sample pledge cards are provided for your use.
Appendix G

Promise CardMake a Promise That May Save Your Child’s Life
My Promise to My Child: I want to protect my children from serious head injury. I promise to buy bicycle helmets for my children and require they wear them every time they ride bicycles. Further, I promise to set a safe example by wearing a bicycle helmet every time I ride.
_________________________________________________________ ________________________________
Parent/Guardian’s Signature Date
Child’s Promise Reminder: I promise to wear my bicycle helmet every time I ride a bicycle.
_________________________________________________________ ________________________________Child’s Signature Date
Making Your Bicycle Helmet Promise Work • Fill out the bicycle promise reminder. When you get home, put it where it will be a
constant reminder, such as on the refrigerator door.
• Let your child choose her or his own helmet and make sure it fits properly.
• Set an example for your child by wearing a helmet every time you ride a bicycle.
• Make it a family pact to wear helmets whenever riding bicycles. Encourage friends to purchase and wear helmets to help keep their families safe.
• Make a rule and enforce it with all who are in your care: No helmet... No bicycling.
• Reward your child until he/she gets into the habit of always wearing a bicycle helmet.

Bicycle Helmet Pledge
I pledge to wear my helmet every time I ride my bicycle.
Name
Date
Bicycle Helmet Pledge
I pledge to wear my helmet every time I ride my bicycle.
Name
Date
Bicycle Helmet Pledge
I pledge to wear my helmet every time I ride my bicycle.
Name
Date
Bicycle Helmet Pledge
I pledge to wear my helmet every time I ride my bicycle.
Name
Date
#
#

Certificates and Progress Forms Children enjoy having something with their names on it to show they have successfully completed an activity. Certificates should be awarded to all cycling skills clinic participants to recognize the accomplishment of completing the cycling skills clinic. The checklist sheet or progress cards, whichever is preferred by the organizers, have the same intent but vary in design and size. Their purpose is to record the level of accomplishment by each child at the stations visited, and at times to emphasize the need for additional practice. On occasion a station may be skipped if the child is not comfortable performing the skill or the volunteers deem it is unsafe for the child, based on skill level.
Parents and guardians, as well as the participants, appreciate a summary of what has been learned and areas for improvement or additional practice needs. Riding a bicycle may seem easy, but learning to ride a bicycle with skill to enhance a bicyclist’s safety, takes practice. In addition to a “report card” format that indicates a simple “great job” or “needs practice,” you may choose to put some of the main safety tips taught during the event on the back. Sample progress and achievement forms are provided along with a certificate of completion.
Appendix H

Cycling Skills Clinic
Checklist of Achievement This certifies that __________________________ (participant’s name) has successfully completed
the Cycling Skills Clinic conducted by _______________________________ (Coordinating Group).
See your progress and areas to work on:
Signed: __________________________________________________ Date: ___________________________
Scale: 0 = Not done 1 = Working on + = Proficient
Helmet Fit: _____ Understands importance of wearing helmet
each ride
_____ Shows where on forehead helmet needs to fit
_____ Able to snap buckle with assistance
_____ Own helmet fitted
_____ Given a helmet and fitted
Bike Fit and Inspection: _____ Understands ABC’s (Air, Brakes, Chains/Cranks)
_____ Shows 1-2” of room between self and bar of bike
_____ Feet flat on ground (for new rider)
_____ Feet touch ground (experienced rider)
Start and Stop: _____ Pedal up to start
_____ Brakes with foot pedal
_____ Brakes with hand brakes
Avoid Hazards: _____ Able to state what roadway obstacles to avoid
(grates, stones, wet leaves, opening of car doors, objects in roadway)
_____ Able to control bicycle through planned obstacles
Scan and Signal: _____ Able to demonstrate turn signals
_____ Maintains straight line while pedaling
_____ Able to look over shoulder for objects while pedaling
_____ Able to maintain a straight line while pedaling and looking over shoulder
Turn and Yield: _____ Able to change direction and lean to turn in a
short distance
_____ Understands and executes proper yield to the traffic on the right
Enter a Roadway: _____ Understands what is meant by scanning before
leaving a driveway
_____ Able to demonstrate ride, stop, scan, then start out of a driveway
_____ States what looking for before proceeding (people, bicyclists, cars)
Intersections: _____ Understands and demonstrates looking left-
right-left for traffic before entering
_____ Demonstrates proper way to cross the street as a cyclist
Remember always wear your bicycle helmet every ride and RIDE SAFELY!!
Traffic Practice (optional): ______ Practiced all the skills as a final review (advanced only)

Cycling Skills Clinic
Progress Sheet Your child participated in an event today that included learning and practicing skills related to safe bicycling. Please review and practice these skills with them. To get in the habit of following the safety principles they learned, they will need you to reinforce and practice the skills with them. Adults are responsible for assuring their children’s safety when bicycling by:
• Supervising their children while they are bicycling, • Reinforcing safe behaviors, and • Modeling safe behaviors, including wearing a bicycle helmet every ride
Scale: 0 = Not done 1 = Working on + = Proficient
___ Station 2: Helmet FitComments:
___ Station 3: Bike Fit and InspectionComments:
___ Station 4: Start and StopComments:
___ Station 5: Avoid HazardsComments:
___ Station 6: Scan and SignalComments:
___ Station 7: Turn and YieldComments:
___ Station 8: Enter a RoadwayComments:
___ Station 9: IntersectionsComments:
___ Station 10: Traffic Practice is optional; it allows participants to practice all the skills learned in Stations 4-9.
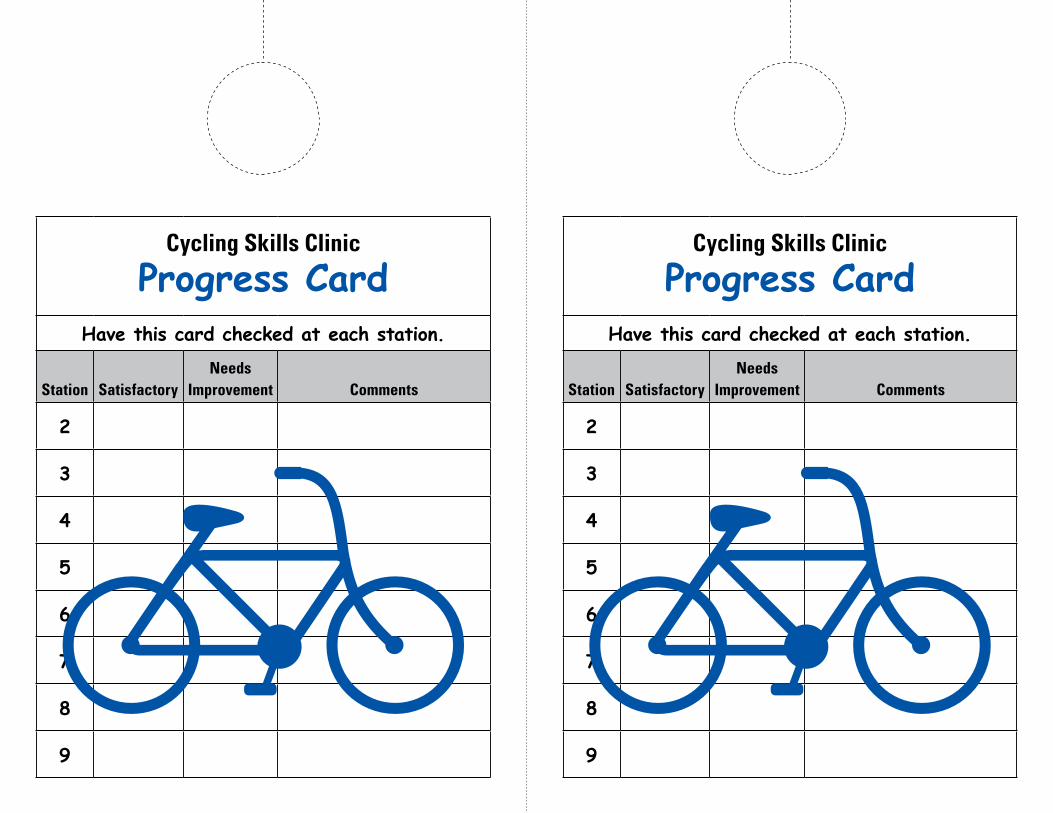
Cycling Skills Clinic
Progress CardHave this card checked at each station.
Station SatisfactoryNeeds
Improvement Comments
2
3
4
5
6
7
8
9
Cycling Skills Clinic
Progress CardHave this card checked at each station.
Station SatisfactoryNeeds
Improvement Comments
2
3
4
5
6
7
8
9

Certificate of Completion This hereby certifies that
has participated in and completed the
Cycling Skills Clinic
Certificate of Completion
This hereby certifies that
has participated in and completed the
Cycling Skills Clinic

Certificate of Completion
This hereby certifies that
has participated in and completed the
Cycling Skills Clinic

Take-Home Tip Sheets for Bicycle and Pedestrian SafetyIt is good practice to provide continued reinforcement of the lessons learned during the event. The following are flyers that can be sent home to inform parents what their children learned.
Feel free to add your organization’s name, logo, and any other marketing information.
Pedestrian safety tips have been included as a resource. Some groups teaching bicycle education incorporate safe pedestrian crossing into their exercise
Appendix I

• Properly fitting a bicycle helmet;
• Inspecting bicycles to make sure they fit properly and are safe to ride;
• Practicing starting and stopping while riding;
• Practicing riding in a straight line and staying straight while looking over their shoulders;
• Scanning (looking) for traffic when coming out of a driveway or riding on a roadway;
• Practicing riding and dodging objects on the roadway; and
• Putting all the skills together.
Cycling Skills Clinic
Review and Tips for Parents
Today’s program is only part of learning to ride a bicycle safely. Children need reinforcement and supervision from responsible adults as they continue to develop the motor skills needed to maintain control of a bicycle and the cognitive skills of negotiating traffic. Children still need the supervision of a responsible adult to help keep them safe when bicycling. Here is why.
Today your child participated in a cycling skills clinic that provided your child “hands-on”experience learning skills to increase their safety when riding a bicycle. The activities included:
Young children have a physical disadvantage in traffic: their peripheral vision is two-thirds that of an adult.
1. Children have difficulty determining where a sound is coming from. Traffic noises and sirens may confuse them.
2. Most children lack a sense of danger. They do not understand that an automobile may seriously hurt or kill them if they collide.
3. Children are often restless and impulsive. They have trouble waiting for things like traffic lights or cars heading in their direction.
4. Most children are unable to understand a complex chain of events or abstract thinking.
5. Children believe that all grownups will look out for them. They think that if they can see an adult driving a car toward them, the driver must be able to see them.
6. Younger children often mix fantasy with reality. They may give themselves superhuman powers and do not understand that moving vehicles can hurt them. Older children think they are more capable they actually are when it comes to judgment related to traffic safety. Regardless of all that your child learned today, please remember that an adult is still responsible for a child in and around traffic.
7. Children have difficulty judging the speed and distance of oncoming vehicles.
8. Children are easily distracted and tend to focus on the things that interest them at the moment.
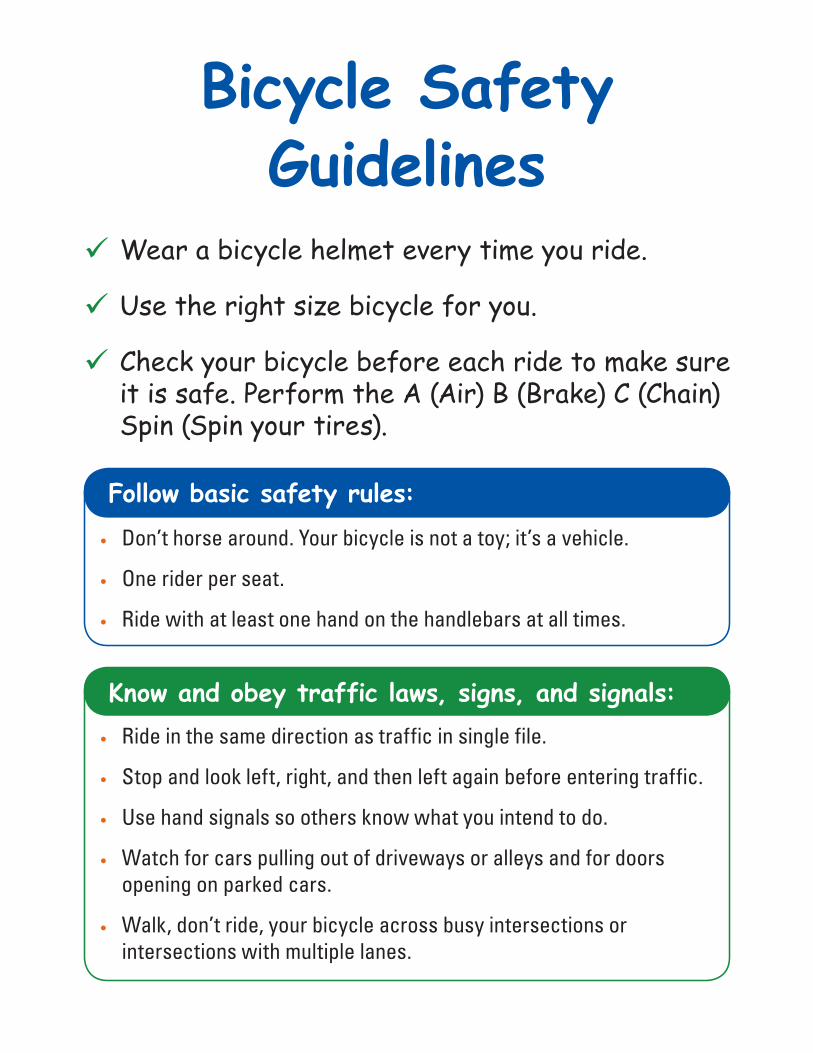
Bicycle Safety Guidelines
9 Wear a bicycle helmet every time you ride.
9 Use the right size bicycle for you.
9 Check your bicycle before each ride to make sure it is safe. Perform the A (Air) B (Brake) C (Chain) Spin (Spin your tires).
• Ride in the same direction as traffic in single file.
• Stop and look left, right, and then left again before entering traffic.
• Use hand signals so others know what you intend to do.
• Watch for cars pulling out of driveways or alleys and for doors opening on parked cars.
• Walk, don’t ride, your bicycle across busy intersections or intersections with multiple lanes.
Know and obey traffic laws, signs, and signals:
• Don’t horse around. Your bicycle is not a toy; it’s a vehicle.
• One rider per seat.
• Ride with at least one hand on the handlebars at all times.
Follow basic safety rules:
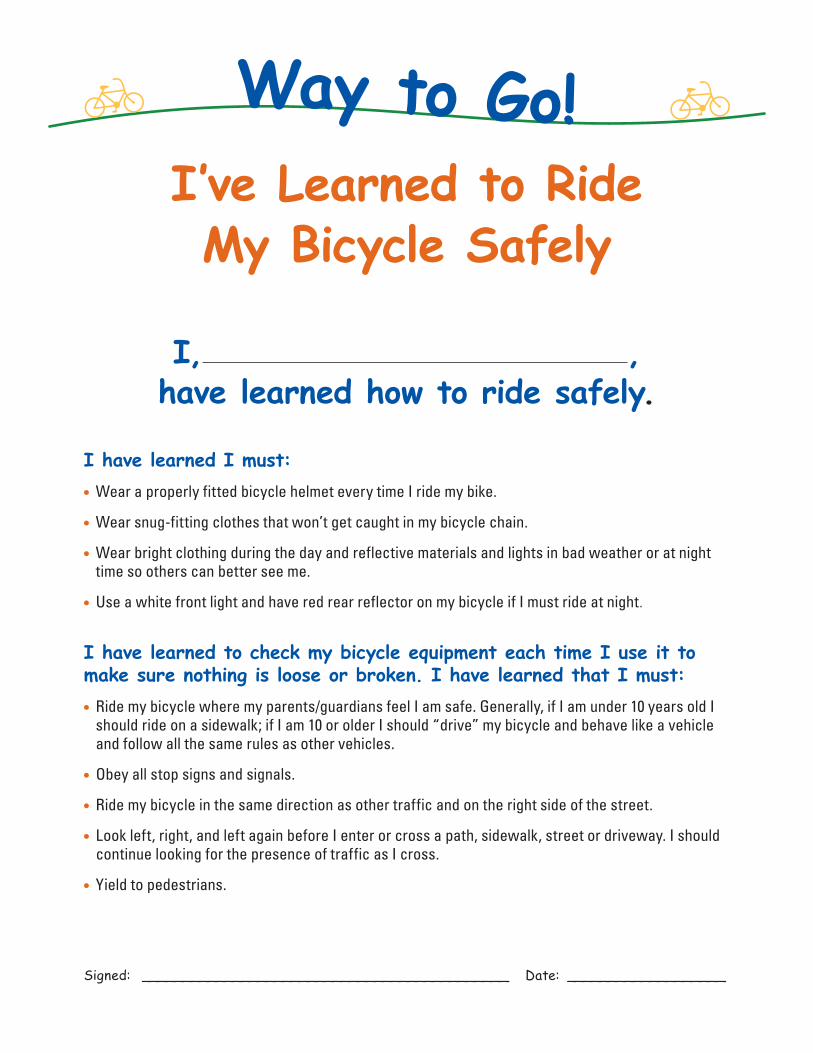
I’ve Learned to Ride My Bicycle Safely
I, , have learned how to ride safely.
I have learned I must:• Wear a properly fitted bicycle helmet every time I ride my bike.
• Wear snug-fitting clothes that won’t get caught in my bicycle chain.
• Wear bright clothing during the day and reflective materials and lights in bad weather or at night time so others can better see me.
• Use a white front light and have red rear reflector on my bicycle if I must ride at night.
I have learned to check my bicycle equipment each time I use it to make sure nothing is loose or broken. I have learned that I must: • Ride my bicycle where my parents/guardians feel I am safe. Generally, if I am under 10 years old I
should ride on a sidewalk; if I am 10 or older I should “drive” my bicycle and behave like a vehicle and follow all the same rules as other vehicles.
• Obey all stop signs and signals.
• Ride my bicycle in the same direction as other traffic and on the right side of the street.
• Look left, right, and left again before I enter or cross a path, sidewalk, street or driveway. I should continue looking for the presence of traffic as I cross.
• Yield to pedestrians.
Signed: ____________________________________________ Date: ___________________
Way to Go!

Parent Tip Sheet
Bicyclists and Motorists Improve the Safety of All Road Users. Bicycling and walking safety are a shared responsibility for all road users, including drivers, pedestrians, and bicyclists. Being alert, cautious, and responsible as road users will create a safer and more comfortable environment for everyone and will provide a positive example for others.
Safety Tips for BicyclistsAlways ride to the right with traffic, and follow the rules of the road:
• Ride in the same direction as traffic making you more visible and predictable to motorists, especially at intersections and driveways.
• Ride as far to the right as is practicable and safe.
• Ride in a straight line, not in and out of cars.
• Use hand signals when turning and stopping to let others know your intentions.
• Obey traffic signs, signals, and lane markings and yield to traffic when appropriate, including pedestrians.
• If riding in the dark, use white headlights, red taillights, and reflectors, and wear reflective materials so you are better seen by others.
Don’t ride on the sidewalk. Only children under the age of 10 should ride on the sidewalk because they lack the experience and capacity to negotiate traffic. Those over 10 should be taught how to safely ride in traffic and encouraged to use the roadway. Riding on the roadway is often safer because it is where motorists expect to see faster moving traffic.
• Motorists are not looking for bicyclists on the sidewalk, especially those riding against traffic.
• At every driveway and intersection, a bicyclist riding on a sidewalk is at greater risk of being hit by a motorist than if riding on the road where traffic is expected.
• When riding in the road, bicyclists must follow the same rules as motorists; when riding on the sidewalk, bicyclists are expected to follow the same rules as pedestrians. A bicyclist on the sidewalk must yield to traffic when crossing at a crosswalk or intersection.
Ride on a trail, bike lane, or bike route
• Riding on trails or lanes is encouraged; however, it is not required by law.
• Bike routes are often created to guide bicyclists to roads that may have lower volumes of traffic. Again, use of bike routes is not required by law.
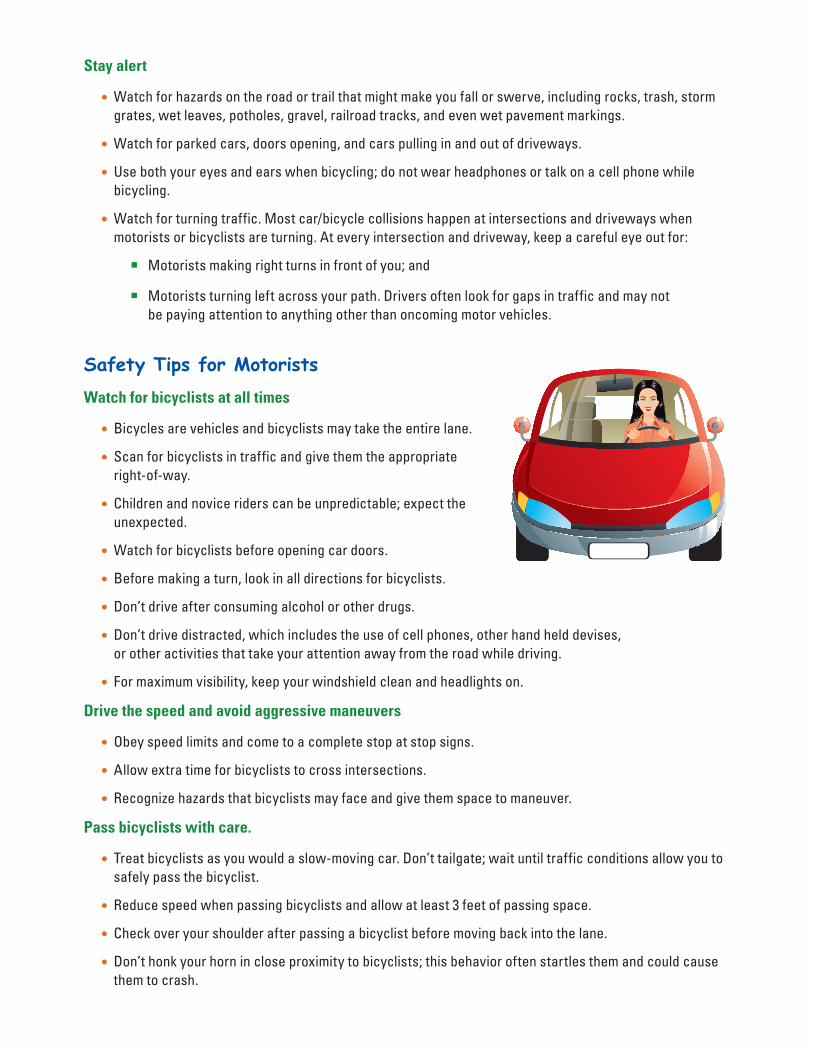
Stay alert
• Watch for hazards on the road or trail that might make you fall or swerve, including rocks, trash, storm grates, wet leaves, potholes, gravel, railroad tracks, and even wet pavement markings.
• Watch for parked cars, doors opening, and cars pulling in and out of driveways.
• Use both your eyes and ears when bicycling; do not wear headphones or talk on a cell phone while bicycling.
• Watch for turning traffic. Most car/bicycle collisions happen at intersections and driveways when motorists or bicyclists are turning. At every intersection and driveway, keep a careful eye out for:
� Motorists making right turns in front of you; and
� Motorists turning left across your path. Drivers often look for gaps in traffic and may not be paying attention to anything other than oncoming motor vehicles.
Safety Tips for MotoristsWatch for bicyclists at all times
• Bicycles are vehicles and bicyclists may take the entire lane.
• Scan for bicyclists in traffic and give them the appropriate right-of-way.
• Children and novice riders can be unpredictable; expect the unexpected.
• Watch for bicyclists before opening car doors.
• Before making a turn, look in all directions for bicyclists.
• Don’t drive after consuming alcohol or other drugs.
• Don’t drive distracted, which includes the use of cell phones, other hand held devises, or other activities that take your attention away from the road while driving.
• For maximum visibility, keep your windshield clean and headlights on.
Drive the speed and avoid aggressive maneuvers
• Obey speed limits and come to a complete stop at stop signs.
• Allow extra time for bicyclists to cross intersections.
• Recognize hazards that bicyclists may face and give them space to maneuver.
Pass bicyclists with care.
• Treat bicyclists as you would a slow-moving car. Don’t tailgate; wait until traffic conditions allow you to safely pass the bicyclist.
• Reduce speed when passing bicyclists and allow at least 3 feet of passing space.
• Check over your shoulder after passing a bicyclist before moving back into the lane.
• Don’t honk your horn in close proximity to bicyclists; this behavior often startles them and could cause them to crash.
Parent Tip Sheet
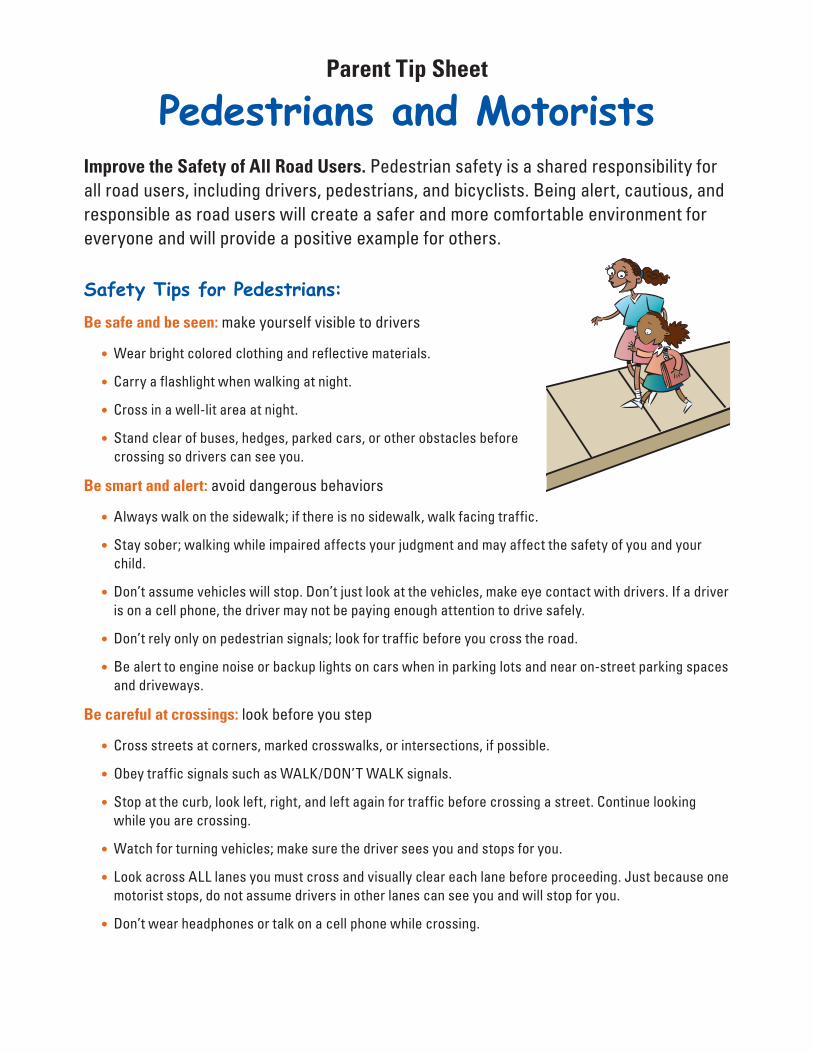
Pedestrians and Motorists Improve the Safety of All Road Users. Pedestrian safety is a shared responsibility for all road users, including drivers, pedestrians, and bicyclists. Being alert, cautious, and responsible as road users will create a safer and more comfortable environment for everyone and will provide a positive example for others.
Safety Tips for Pedestrians:Be safe and be seen: make yourself visible to drivers
• Wear bright colored clothing and reflective materials.
• Carry a flashlight when walking at night.
• Cross in a well-lit area at night.
• Stand clear of buses, hedges, parked cars, or other obstacles before crossing so drivers can see you.
Be smart and alert: avoid dangerous behaviors
• Always walk on the sidewalk; if there is no sidewalk, walk facing traffic.
• Stay sober; walking while impaired affects your judgment and may affect the safety of you and your child.
• Don’t assume vehicles will stop. Don’t just look at the vehicles, make eye contact with drivers. If a driver is on a cell phone, the driver may not be paying enough attention to drive safely.
• Don’t rely only on pedestrian signals; look for traffic before you cross the road.
• Be alert to engine noise or backup lights on cars when in parking lots and near on-street parking spaces and driveways.
Be careful at crossings: look before you step
• Cross streets at corners, marked crosswalks, or intersections, if possible.
• Obey traffic signals such as WALK/DON’T WALK signals.
• Stop at the curb, look left, right, and left again for traffic before crossing a street. Continue looking while you are crossing.
• Watch for turning vehicles; make sure the driver sees you and stops for you.
• Look across ALL lanes you must cross and visually clear each lane before proceeding. Just because one motorist stops, do not assume drivers in other lanes can see you and will stop for you.
• Don’t wear headphones or talk on a cell phone while crossing.

Safety Tips for Motorists:Be alert: watch for pedestrians at all times
• Scan the road and the sides of the road ahead for pedestrians.
• Before making a turn, look in all directions for pedestrians crossing.
• Don’t drive distracted or after consuming alcohol or other drugs.
• Do not use your cell phone while driving.
• Look carefully behind your vehicle for approaching pedestrians before backing up; especially look for small children.
• For maximum visibility, keep your windshield clean and headlights on.
Be responsible: yield to pedestrians at crossings
• Yield to pedestrians in crosswalks, whether marked or unmarked.
• Yield to pedestrians when making right or left turns at intersections.
• Do not block or park in crosswalks.
Be patient: drive the speed limit and avoid aggressive maneuvers
• Never pass or overtake a school bus that has the stop-arm out and flashing lights on. Children may be crossing and not yet visible.
• Never pass or overtake a vehicle that is stopped for pedestrians.
• Obey speed limits and come to a complete stop at STOP signs.
• Use extra caution when driving near children playing along the street or near older pedestrians who may not see or hear you.
• Always be prepared to stop for pedestrians.

Station SignsIt is important to clearly mark your stations with large signs that include a number and the name. This makes your cycling skills clinic visually appealing and adds organization. Displaying the signs prominently will aid volunteers, family members, and riders. This is also helpful for large crowds and participants with limited English language comprehension.
The following signs can be downloaded and printed on brightly colored paper or pasted onto colored poster board for display.
Appendix J
Station
1Check-In
Station
2Helmet Fit
Station
3Bike Fit and Inspection

Station
4Start
and Stop

Station
5Avoid
Hazards

Station
6Scan and Signal

Station
7Turn and
Yield
Station
8Enter a Roadway

Station
9Intersections

Station
10Traffic Practice

CelebrateSuccess!

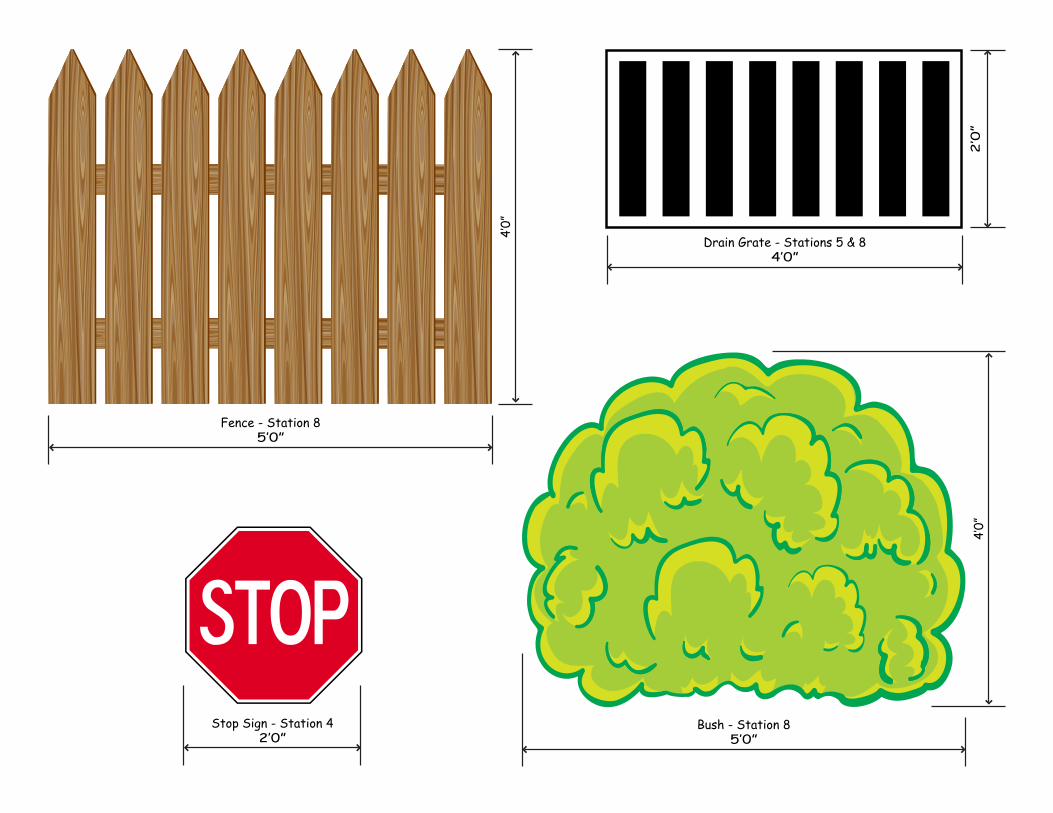
Sample Props Children’s learning is enhanced during the cycling skills clinic with visual aids to remind them to always look for traffic (cars, trucks, other bicyclists, etc), hazards (drain grates), obstacles (bushes and fences) and traffic signs (stop). The following props can be enlarged and cut out with poster board, then held by volunteers or be free standing. Volunteers may wish to use auditory prompting as the props are being used (e.g., “here comes a car”).
Appendix K

Car - Stations 4, 6, 7, & 83‛0” (Stations 4, 6, & 8) 2‛0” (Station 6)
Car
- St
atio
ns 4
, 6, 7
, & 8
3‛0”
(Sta
tion
s 4,
6, &
8)
2‛0”
(Sta
iton
. 6)
EDDIE’S BAKERY
Truck - Stations 4, 6, 7, & 83‛0”
Truc
k -
Stat
ions
4, 6
, 7, &
84‛0”
4‛0”
Bush - Station 85‛0”
4‛0”
Fence - Station 85‛0”
Drain Grate - Stations 5 & 84‛0”
2‛0”
Stop Sign - Station 42‛0”

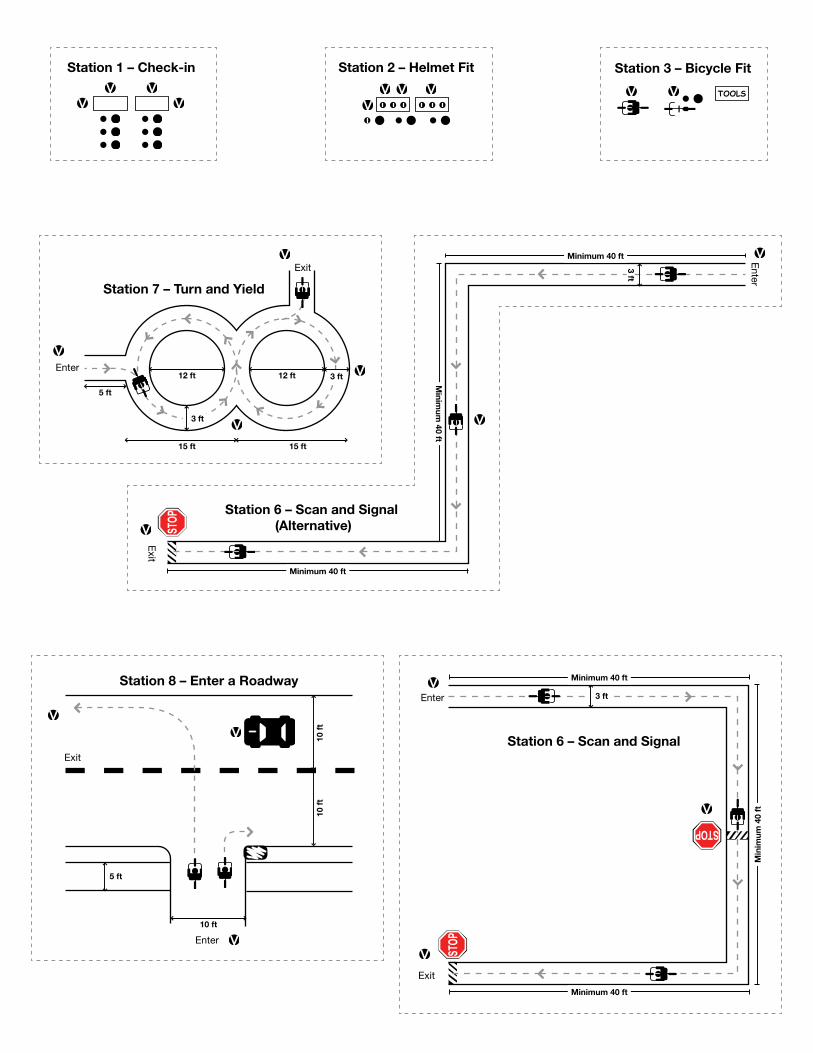
Station Diagrams and DimensionsClinic layouts depend on available space and the number of expected participants. Generally, since the purpose of the clinic is to simulate riding a bicycle in the roadway, the varying stations should be laid out with dimensions that are close to the typical width of a street or sidewalk and with signs and obstacles positioned as they would be seen along a roadway.
Use the following station diagrams provided to guide you in laying out your own cycling skills clinic. Pay particular attention to label your stations and be clear on the expected flow of traffic. Seeing your clinic design on paper can also be useful to your volunteers, showing them how the clinic will work before the participants arrive and the fun begins.
Appendix L
Stations Legend
Depicts a volunteer and recommended placement within the station
Table
Child with Parent
Helmet
Bicyclist
Direction of Movement
Obstacle
Volunteer holding cardboard cutout of vehicle
Exit
Enter
Station 6 – Scan and Signal
Minimum 40 ft
Min
imum
40
ft
Minimum 40 ft
3 ft
Exit
Enter12 ft12 ft
15 ft
5 ft
15 ft
3 ft
3 ft
Station 7 – Turn and Yield
Exit
Enter
Station 8 – Enter a Roadway
10 ft
10 f
t10
ft
5 ft
Exit
Enter
Station 6 – Scan and Signal (Alternative)
Minimum 40 ft
Minimum 40 ft
Minim
um 40 ft
3 ft
Station 1 – Check-in Station 2 – Helmet Fit
TOOLS
Station 3 – Bicycle Fit

Exit
Enter
Station 9 – Intersections
10 f
t10
ft
10 ft 10 ft
5 ft
5 ft
Exit
Enter
Station 10 – Traffic Practice10
ft
10 f
t
10 ft 10 ft
5 ft
5 ft
CelebrateSuccess!
X X
X X
X X
X X
X X
X XO
bst
acle
Ob
stac
le
Exit
Enter
Sta
tio
n 5
– A
void
Haz
ard
s
20 f
t m
inim
um b
efo
re fi
rst
ob
stac
le
80 f
t
80 ft
18"
Exit
Enter
Station 4 – Start and Stop
Frequently Asked Questions The following are a compilation of questions and suggested responses generated from those who teach bicycle education and participate in bicycle rodeos and cycling skills clinics across the county. The best reply to questions for which you are unsure of the answer is “I don’t know, I’ll get back to you,” rather than instilling inaccurate information.
Appendix M
Frequently Asked QuestionsHelmets:Q1: Whenshouldbicyclehelmetsbereplaced?
A: A well cared for helmet lasts for years. It should be replaced if the rider crashes and hits the pavement, or cracks or obvious damage is seen.
Helmets consist of a foam core, usually white or black in color, and most have a thin plastic shell that covers the core. If you have a crash and your helmet takes an impact, the helmet should be replaced. An impact damages the helmet’s foam core, meaning it may not protect you again.
Q2: Doesthelawhererequirehelmets?
A: About half the States have laws requiring children to wear helmets when riding bikes. Some municipalities have helmet use laws. For the most recent listing of helmet use laws for States and municipalities go to the Bicycle Helmet Safety Institute Web site: www.helmets.org.
Q3: Whydoadultsneedtowearhelmets?It’snotthelawandmanydidn’twearahelmetwhentheywerekids.
A: Through research we now know bicyclists of all ages should wear bicycle helmets every ride; we never know when a crash will occur. While helmets don’t prevent crashes, they are proven to be up to 85 percent effective in preventing head and brain injuries when crashes do happen. Wearing helmets save lives. Parents need to protect themselves and be good role models for their children.
Q4: Doesitmatterwhatkindofhelmetabicyclistuses?
A: YES – everyone should wear a helmet that meets the safety standard set by the Consumer Product Safety Commission (CPSC). There are, however, different helmets available for different activities. Each type of helmet is made to protect your head from the impacts common to a particular activity or sport. Ski, hockey or other sport helmets don’t provide protection for the needs of a bicyclist as well as one designed specifically for the sport of bicycling. According to the CPSC you can wear a CPSC compliant bicycle helmet while bicycling, recreational roller or in-line skating, and riding a non-powered scooter. In considering a multi-use sport helmets, check the box or packaging to see if the helmet is listed as suitable for bicycling. While youth can wear a BMX or downhill helmet in lieu of a bicycle helmet, these helmets are heavier and not as ventilated. Those who enjoy low speed bicycling, recreational bicycling or bicycling for transportation will feel more comfortable in a bicycle helmet. Regardless of what helmet is chosen, check inside the helmet for the safety sticker saying it complies with the CPSC bicycle safety standards.
Q5: Canaskateboardhelmetbeusedforbicycling?
A: Yes, skateboard helmets provide suitable covering of the head for the sport of bicycling, but look inside the helmet for a sticker that says the helmet meets the CPSC safety standards.
Q6: Isitokaytoputstickersonahelmet?
A: Yes. In fact stickers are a great way for children to take greater ownership of helmets and make them their own. Personalizing the helmet might make it more likely a child will wear the helmet.

Q7: ShouldIletmychildchoosehisownhelmetaslongasitfits?
A: Absolutely. If it looks cool and the child likes it, there is a greater chance that your child will wear the helmet.
Q8: DoIneedtowearahelmetridingontrails?
A: Yes, helmets should always be worn when bicycling, whether on- or off-road.
Sidewalk Riding:Q1: Ismychildsaferridingonthesidewalk?
A: Children under 10 years old are encouraged to ride on the sidewalk. This is because children under 10 are still learning the skills of balance and starting and stopping a bicycle. They lack experience and maturity to make the decisions necessary to safely ride in the street and lack the understanding of complex traffic situations, such as possible traffic around a curve, even if cars aren’t visible. Children under 10 have less developed peripheral vision, have trouble using direction of sound as well as sight to detect traffic, and tend to underestimate the speed of vehicles. For more information on this subject, see the National Highway Traffic Safety Administration handout called Prevent Bicycle Crashes: Parents and Caregivers at: http://www.nhtsa.gov/DOT/NHTSA/Traffic%20Injury%20Control/Articles/Associated%20Files/Prevent.pdf.
Q2: Whyaren’tallcyclistssaferridingonsidewalks?
A: Riding on a sidewalk is not risk-free; rather it is considered to be the more dangerous place to ride once cycling skills and maturity allow for safer negotiations in traffic. Here are a few reasons why:
• Motorists are not accustomed to and rarely look for fast-moving traffic on sidewalks when coming out of driveways, side streets, or alleys.
• Many bicyclists ride in the wrong direction on sidewalks (facing traffic). The bicyclist is at high risk of being hit by a motorist turning at an intersection. The motorist typically looks to the left to make either a left or right turn.
• Many bicyclists fail to yield or stop for pedestrians or look for turning traffic when crossing streets from sidewalks.
Q3: Atwhatageismychildreadytorideinthestreet?
A: Child safety experts have determined that children 10 and older are better equipped to ride in the street and act as a vehicle in the roadway following all the same rules and responsibilities as motorized traffic. Every child, however, develops and matures differently, a parent must decide, when the child is 10 years old, if the child is ready to handle the responsibility of riding in the roadway. Age aside, adults have a responsibility to continue to oversee and supervise child bicyclists’ safety behavior for many years.
Q4: Canadultsrideonthesidewalk?
A: Adults may be allowed to ride on the sidewalk, but it varies. In many downtown urban areas, for example, there are laws prohibiting bicyclists from riding on the sidewalk. Bicyclists need to find out the local jurisdiction’s rules governing the operation of bicycles on pedestrian facilities. Contact your local police department or department of transportation for information on bicycle-related laws.

Rules of the Road:Q1: Shouldbicyclistsrideinthesamedirectionastrafficorfacingtraffic?
A: Bicyclists should always travel with the flow of vehicular traffic. Riding against traffic is one of the leading causes of bicycle crashes. Riding in the same direction of traffic makes bicyclists more visible to other drivers and makes their movements more predictable. This increases both motorist and bicyclist safety.
Q2: Isabicyclistrequiredtouseabikepathadjacenttoaroadwayorrideinaprovidedbikelane?
A: No. A bicyclist may choose to ride either on the provided path or lane or on the roadway.
Q3: IfIamridingmybikeinthestreet,doIhavetofollowallthetrafficlaws?
A: Yes, a bicycle is considered a “vehicle” and is responsible for following all the same rules of the roadway as motorized vehicles. Examples include riding in the same direction as traffic, obeying all traffic signs and signals, signaling intentions to turn, and using a white front light when riding at night.
Q4: Howimportantisitforbicycliststousehandsignals?
A: As vehicles, bicyclists are expected to follow the same rules of the road as motorized vehicles. This includes signaling their intentions. Motorists do so by using turn signals and tail lights, bicyclists do so by using hand signals. The more information the bicyclist can provide other road users, the greater the chances of avoiding a crash. It is important for bicyclists to learn hand signals. To indicate a:
• Left turn, the left arm is held straight out to the side;
• Right turn, the right arm is held straight out to the right side; and
• Stop, either arm is held at a 90 degree angle with the hand facing down.
Note: Another right-turn signal is occasionally used by older bicyclists and motorists using manual hand signals when their signal lights are not working. The left arm is extended and bent at a 90 degree angle with the hand up. Children should be taught to signal a right hand turn using use the right arm out straight, however, they should be made aware of and be able to interpret the outdated right-turn signal if seen in traffic.
Q5: Howimportantisifforinexperiencedbicycliststousehandsignals?
A: With children and less experienced riders, teaching them hand signals is important. Most seasoned bicycle safety instructors, however, encourage learning and practicing balance and scanning for traffic while maintaining control of the bicycle with both hands on the handlebars before applying the use of hands signals.
Bicycle and Bicycle Equipment:Q1: Whenshouldmychildmovetoalargerbicycle?
A: When the seat is adjusted to its highest point and the child’s knees hit the handlebars. From a safety perspective, it is more dangerous for a child to ride a bicycle that is too big than one that is too small.

Q2: Whichismoreimportant,afrontlightorarearone(orreflector)?
A: To increase your visibility to other road users, use both a white front light and red rear reflector, required in most States for nighttime riding. Most bicycles sold today have a red rear reflector in place. As an additional precaution some bicyclists wear active red lights that blink. These lights can be applied to clothing, backpacks, or may be applied to the bicycle itself, if allowed in your area. White front lights and red rear lights or reflectors are strongly encouraged as well during low-light conditions, including foul weather, dusk, and dawn.
Q3: DoIhavetohavealightonmybicycle?
A: A white headlight and red rear reflector is required nighttime equipment under the law in almost all States. Bicycles are considered vehicles; like a motorized vehicle working lights are a safety requirement to make you more visible to other road users.
Q4: Howoftenshouldabicyclereceiveasafetycheck?
A: The ABC Spin Check (air, brakes, chains, and spin the wheels) should be done before each ride. If the bicycle requires more than a simple adjustment, it is safest to take the bicycle to an experienced bicycle mechanic. Yearly routine maintenance is usually encouraged for those who bicycle long distances.
Teaching Your Child to Bicycle Q1: I’mplanningtoteachmychildtorideabicyclesoon.What’sthemostimportantthingtostartwith?
A: Start by getting them a properly fitted bicycle helmet. Next, check the bike to make sure it is safe to ride. Make sure all the attachable parts are tight, tires are inflated to recommended air pressure, the brakes work, the chain is not loose and is lubricated, and that the bicycle fits your child. Children should be taught to ride on a bicycle that fits them now, not one they will “grow into.” For more information on a simple bicycle safety check, go to AppendixO.
Q2: Whenteachingmychildtorideabicycle,whatshouldIteachfirst,orinwhatorder?
A: A child must learn the basics first, that is, wear a helmet and check the bicycle to make sure it works before each ride. From a skills perspective the child must first learn balance and co-ordination. When the child can balance and coast, then teach the child how to pedal. Move from pedaling to starting and stopping, then riding in a straight line.
Other:Q1: Whataresomesourcesforadditionalinformation?
A: A variety of Federal, State, public, and private organizations exist that support bicycle safety efforts.
• NationalHighwayTrafficSafetyAdministration: www.nhtsa.dot.gov. Click on traffic safety then bicycle
• BicycleHelmetSafetyInstitute: www.helmets.org
• LeagueofAmericanBicyclists: www.bikeleague.org
• PedestrianandBicycleInformationCenter: www.pedbikeinfo.org
• NationalCenterforSafeRoutestoSchool: www.saferoutesinfo.org
Keeping Loaner Helmets CleanA requirement for participation in a cycling skills clinic is for all riders to wear a properly fitted helmet. Having helmets available for each participant can be attained through using children’s helmets from home, obtaining and disseminating free or discounted helmets for give-a-ways, or using loaner helmets.
As not all participants are likely to have their own helmet, and availability of free helmets may be a challenge, loaner helmets can be an option. Some groups or schools purchase helmets of varying styles and sizes to allow for the many head shapes. The sharing of equipment, however needs to include some precaution to prevent the transmission of communicable diseases such as lice. The following explains ways to clean loaner helmets you provide.
Appendix N

Keeping Loaner Helmets CleanIf you use loaner helmets you must clean them before you start, between each use and at the end of the day.
Cleaning Helmets
Option #1The normal way to clean helmets is to spray them with a disinfectant and wipe them down with paper towels.
Option #2
A popular alternative is to provide a head covering such as a surgical cap as a barrier between the child’s head and the helmet. Other head coverings that can be used include shower caps or painter’s caps.
Option #3Instead of using loaner helmets you may choose to simply purchase helmets and give them away to children who need them.
For more information on options for purchasing helmets at a discount:
• Visit www.safekids.org;
• Bicycle Helmet Safety Institute at www.helmets.org/cheapies.htm; or
• Contact a helmet dealer directly to negotiate helmet purchases in bulk.
For a comprehensive site on bicycle helmet information, visit: www.helmets.org.
How to Fit A Bicycle HelmetBicycle helmets are only effective in preventing head injury if they fit and are worn properly. The following are handouts to send home with participants to assist them in properly fitting a bicycle helmet.
Appendix O

Eyes, Ears, and Mouth Test
•Firstputonyourhelmetsoitislevelandsnug—ifitslidesaround,youneedtoinsertthickerpads.
•EYES:Youshouldseetheveryedgeorrimofyourhelmetwhenyoulookuppastyoureyebrows.Thehelmetshouldbelevelonyourhead.
•EARS:Thestrapsshouldmeetandforma“V”rightundereachearlobe.
•MOUTH:Oncethestrapsareadjustedina“V,”bucklethem.Thestrapsshouldbesnugbutnottootight.Adjustuntilyoucanputonefingerbetweenthestrapandyourchin.

Step 4 Side Straps: Adjust the slider on both straps to form a “V” shape under, and slightly in front of, the ears. Lock the slider if possible.
Step 5 Chin Strap: Buckle your chin strap. Tighten the strap until it is snug, so that no more than one or two fingers fit under the strap.
Step 6 Final Fitting: A. Does your helmet fit right? Open your mouth wide…big yawn! The helmet should pull down on the head. If not, refer back to step 5 and tighten the chin strap.
B. Does your helmet rock back more than two fingers above the eyebrows? If so, unbuckle, shorten the front strap by moving the slider forward. Buckle, retighten the chin strap, and test again.
C. Does your helmet rock forward into your eyes? If so, unbuckle, tighten the back strap by moving the slider back toward the ear. Buckle, retighten the chin strap, and test again.
D. Roll the rubber band down to the buckle. All four straps must go through the rubber band and be close to the buckle to prevent the buckle from slipping.
Easy Steps to Properly Fit a Bicycle Helmet It’s not enough to simply buy a bicycle helmet – it should be properly fitted, adjusted, and worn each time you ride.
The Proper Helmet FitHelmets come in various sizes, just like hats. Size can vary between manufacturers. For the most comprehensive list of helmet sizes according to manufacturers, go to the Bicycle Helmet Safety Institute (BHSI) site: http://www.danscomp.com/products/charts/helmetchart.htm
To select and properly fit a bicycle helmet, follow the helmet fitting instructions in this flyer.It may take some time to ensure a proper fit. It is easier if you have someone help you adjust the straps.
Step 1 Size: Measure your head for approximate size. Try the helmet on to ensure it fits snuggly. While it is sitting flat on top of your head, make sure the helmet doesn’t rock side to side. Sizing pads come with new helmets; use the pads to securely fit to your head. Mix or match the sizing pads for the greatest comfort. In your child’s helmet, remove the padding when your child’s head grows. If the helmet has a universal fit ring instead of sizing pads, adjust the ring size to fit the head.
Step 2 Position: The helmet should sit level on your head and low on your forehead—one or two finger-widths above your eyebrow.
Step 3 Buckles: Center the left buckle under the chin. On most helmets, the straps can be pulled from the back of the helmet to lengthen or shorten the chin straps. This task is easier if you take the helmet off to make these adjustments.
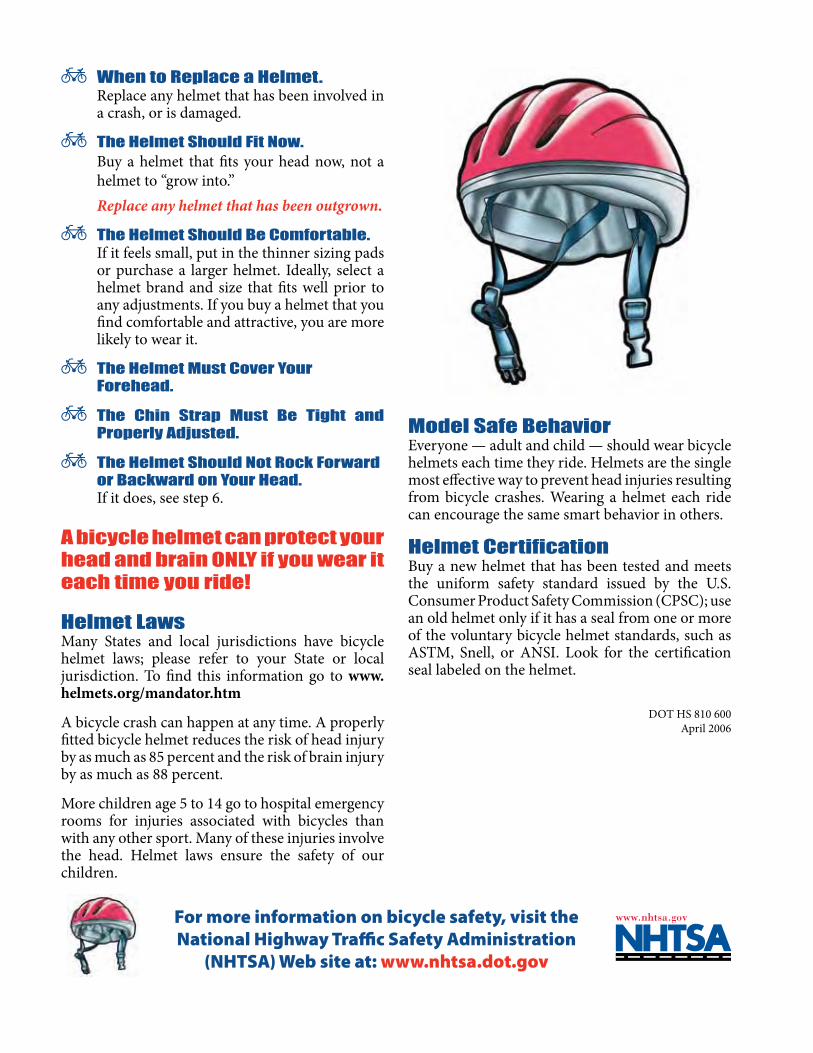
Model Safe BehaviorEveryone — adult and child — should wear bicycle helmets each time they ride. Helmets are the single most effective way to prevent head injuries resulting from bicycle crashes. Wearing a helmet each ride can encourage the same smart behavior in others.
Helmet CertificationBuy a new helmet that has been tested and meets the uniform safety standard issued by the U.S. Consumer Product Safety Commission (CPSC); use an old helmet only if it has a seal from one or more of the voluntary bicycle helmet standards, such as ASTM, Snell, or ANSI. Look for the certification seal labeled on the helmet.
DOT HS 810 600April 2006
^ When to Replace a Helmet. Replace any helmet that has been involved in
a crash, or is damaged.
^ The Helmet Should Fit Now. Buy a helmet that fits your head now, not a
helmet to “grow into.” Replace any helmet that has been outgrown.
^ The Helmet Should Be Comfortable. If it feels small, put in the thinner sizing pads
or purchase a larger helmet. Ideally, select a helmet brand and size that fits well prior to any adjustments. If you buy a helmet that you find comfortable and attractive, you are more likely to wear it.
^ The Helmet Must Cover Your Forehead.
^ The Chin Strap Must Be Tight and Properly Adjusted.
^ The Helmet Should Not Rock Forward or Backward on Your Head. If it does, see step 6.
A bicycle helmet can protect your head and brain ONLY if you wear it each time you ride!
Helmet LawsMany States and local jurisdictions have bicycle helmet laws; please refer to your State or local jurisdiction. To find this information go to www.helmets.org/mandator.htm
A bicycle crash can happen at any time. A properly fitted bicycle helmet reduces the risk of head injury by as much as 85 percent and the risk of brain injury by as much as 88 percent.
More children age 5 to 14 go to hospital emergency rooms for injuries associated with bicycles than with any other sport. Many of these injuries involve the head. Helmet laws ensure the safety of our children.
For more information on bicycle safety, visit the National Highway Traffic Safety Administration
(NHTSA) Web site at: www.nhtsa.dot.gov

PASO 4 – Ajustar las correas lateralesAjusta la corredera en ambas correas laterales para formar una “V” (debajo y enfrente de cada oreja). De ser posible fija la corredera para que no se corra fuera de posición.
PASO 5- Ajustar la correa de la barbillaAbrocha la correa de la barbilla. Ajusta la correa hasta que el casco te quede debidamente ajustado, de modo que no puedas colocar más de uno o dos dedos entre la correa y tu barbilla.
PASO 6- Ajuste finalA. ¿Te queda bien tu casco? Abre tu boca lo máximo que puedas… ¡Da un gran bostezo! Deberás sentir cómo el casco presiona sobre tu cabeza. Si no es así, regresa al Paso 5 y ajusta más la correa de la barbilla.
B. ¿Puedes mover tu casco hacia atrás a más de dos dedos sobre tus cejas? De ser así, desabróchatelo, y acorta la correa frontal deslizando la corredera hacia adelante. Abróchatelo, ajusta la correa de la barbilla, y pruébatelo de nuevo.
C. ¿Puedes mover tu casco hacia adelante de manera que cubra tus ojos? De ser así, desabróchatelo, ajusta la correa de atrás deslizando la corredera hacia atrás en dirección a tu oreja. Abróchatelo, y ajusta la correa de la barbilla, y vuelve a probártelo.
D. Desliza el anillo elástico hacia el broche. Las cuatro correas deben pasar a través del anillo elástico para evitar que éste se corra.
Consejos y pasos para el uso debido del casco para montar bicicletaPara montar bicicleta de forma segura, no basta tener un casco. Es muy importante:
^ Usar el casco del tamaño adecuado
^ Que el casco te quede debidamente ajustado
^ Que cuando montes en bicicleta, siempre uses el casco
PASO 1-Tamaño adecuadoLos cascos vienen en varios tamaños que varían según el fabricante. Mide la circunferencia de tu cabeza para obtener una talla aproximada. Pruébate el casco para asegurarte que te queda debidamente ajustado (o sea, que el casco no se deslice de lado a lado).
Los nuevos cascos traen unas almohadillas adicionales para ajustar la talla del casco. Combina las almohadillas para lograr que te quede cómodo, pero ajustado como es debido.
Si has crecido, saca las almohadillas. Si el casco cuenta con un anillo de ajuste tipo universal en vez de almohadillas, ajusta el anillo para que te quede cómodo, pero debidamente ajustado.
*Para una lista de tamaños según el fabricante, visita: Bicycle Helmet Safety Institute (BHSI por sus siglas en inglés). http://www.danscomp.com/products/charts/helmetchart.htm
PASO 2- Posición correctaEl casco debe de ir nivelado sobre tu cabeza y debe cubrir parte de tu frente. Para probar si tienes el casco puesto correctamente, coloca uno o dos dedos sobre tus cejas. Para quedar debidamente protegido, el casco debe tocar tus dedos.
PASO 3- Ajustar la hebilla debajo de la barbilla Centraliza la hebilla izquierda del broche para que quede debajo de tu barbilla. Puedes ajustar las correas desde la parte de atrás del casco para que la correa de la barbilla sea más larga o corta. Es más fácil ajustar las correas si no tienes puesto el casco.
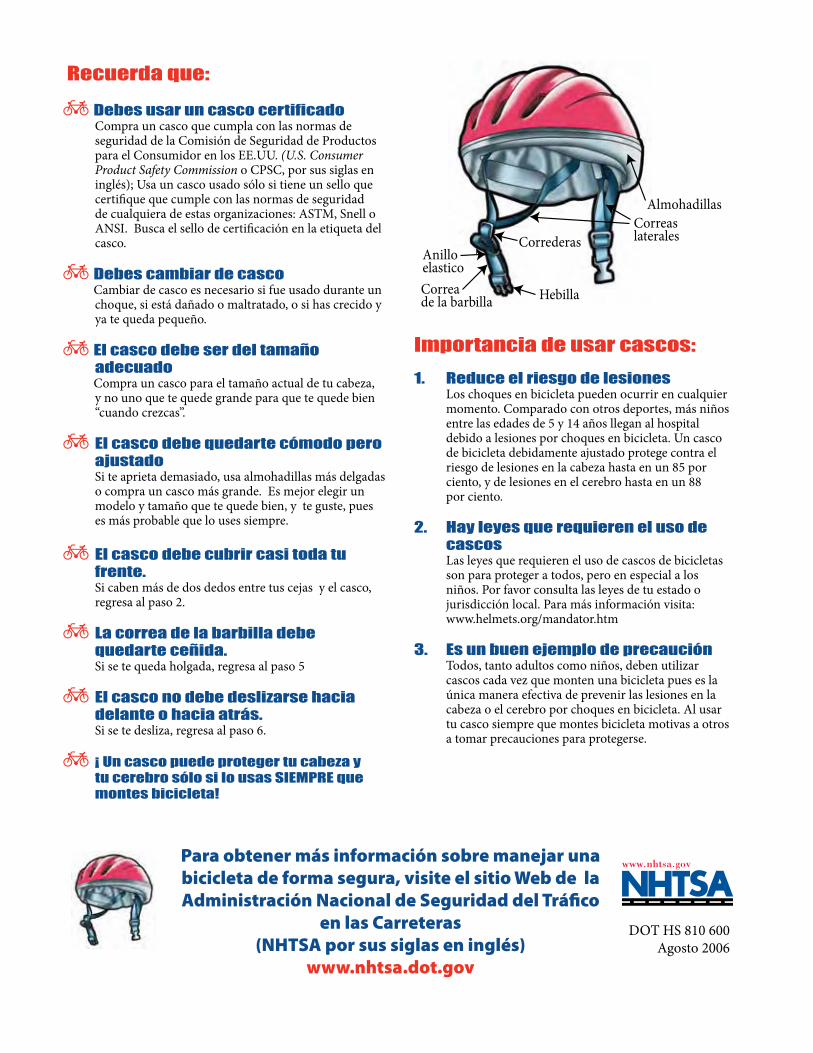
Importancia de usar cascos:
1. Reduce el riesgo de lesiones Los choques en bicicleta pueden ocurrir en cualquier
momento. Comparado con otros deportes, más niños entre las edades de 5 y 14 años llegan al hospital debido a lesiones por choques en bicicleta. Un casco de bicicleta debidamente ajustado protege contra el riesgo de lesiones en la cabeza hasta en un 85 por ciento, y de lesiones en el cerebro hasta en un 88 por ciento.
2. Hay leyes que requieren el uso de cascos
Las leyes que requieren el uso de cascos de bicicletas son para proteger a todos, pero en especial a los niños. Por favor consulta las leyes de tu estado o jurisdicción local. Para más información visita: www.helmets.org/mandator.htm
3. Es un buen ejemplo de precaución Todos, tanto adultos como niños, deben utilizar
cascos cada vez que monten una bicicleta pues es la única manera efectiva de prevenir las lesiones en la cabeza o el cerebro por choques en bicicleta. Al usar tu casco siempre que montes bicicleta motivas a otros a tomar precauciones para protegerse.
Recuerda que:
^Debes usar un casco certificado Compra un casco que cumpla con las normas de seguridad de la Comisión de Seguridad de Productos para el Consumidor en los EE.UU. (U.S. Consumer Product Safety Commission o CPSC, por sus siglas en inglés); Usa un casco usado sólo si tiene un sello que certifique que cumple con las normas de seguridad de cualquiera de estas organizaciones: ASTM, Snell o ANSI. Busca el sello de certificación en la etiqueta del casco.
^Debes cambiar de casco Cambiar de casco es necesario si fue usado durante un
choque, si está dañado o maltratado, o si has crecido y ya te queda pequeño.
^El casco debe ser del tamaño adecuado
Compra un casco para el tamaño actual de tu cabeza, y no uno que te quede grande para que te quede bien “cuando crezcas”.
^El casco debe quedarte cómodo pero ajustado
Si te aprieta demasiado, usa almohadillas más delgadas o compra un casco más grande. Es mejor elegir un modelo y tamaño que te quede bien, y te guste, pues es más probable que lo uses siempre.
^El casco debe cubrir casi toda tu frente.
Si caben más de dos dedos entre tus cejas y el casco, regresa al paso 2.
^La correa de la barbilla debe quedarte ceñida.
Si se te queda holgada, regresa al paso 5
^El casco no debe deslizarse hacia delante o hacia atrás.
Si se te desliza, regresa al paso 6.
^¡ Un casco puede proteger tu cabeza y tu cerebro sólo si lo usas SIEMPRE que montes bicicleta!
AlmohadillasCorreas lateralesCorrederas
AnilloelasticoCorrea de la barbilla Hebilla
Para obtener más información sobre manejar una bicicleta de forma segura, visite el sitio Web de la Administración Nacional de Seguridad del Tráfico
en las Carreteras (NHTSA por sus siglas en inglés)
www.nhtsa.dot.gov
DOT HS 810 600 Agosto 2006
How to Signal Your TurnsA bicycle is a vehicle and like motorized vehicles, it is important to signal to others what you intend to do, especially when turning. The following handout can be sent home with participants to reinforce the hand signals taught in the cycling skills clinic.
Although these signals are important to practice when off the bicycle and when riding, inexperienced riders may need to focus more on balance before adding these skills. Riding on the roadway should be limited until the bicyclists has the ability and the comfort to ride in a straight line signal as well as ride in a straight line and look over the shoulder for traffic
Appendix P
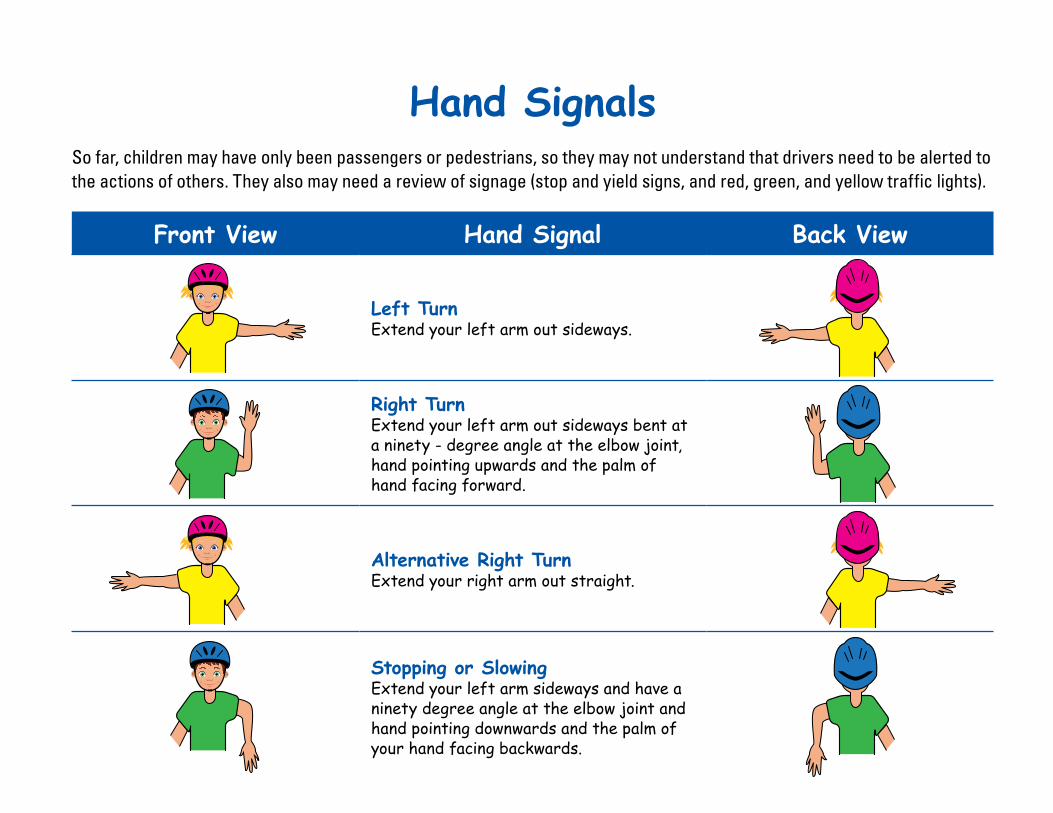
Hand Signals So far, children may have only been passengers or pedestrians, so they may not understand that drivers need to be alerted to the actions of others. They also may need a review of signage (stop and yield signs, and red, green, and yellow traffic lights).
Front View Hand Signal Back View
Left TurnExtend your left arm out sideways.
Right TurnExtend your left arm out sideways bent at a ninety - degree angle at the elbow joint, hand pointing upwards and the palm of hand facing forward.
Alternative Right TurnExtend your right arm out straight.
Stopping or SlowingExtend your left arm sideways and have a ninety degree angle at the elbow joint and hand pointing downwards and the palm of your hand facing backwards.

Cycling Skills Clinic EvaluationHow did the event go? What worked well? What didn’t work well? A sample evaluation form is provided to assist you in finding answers to these questions and plan your next clinic. A sample evaluation form is provided to assist you in finding answers to these questions and to consider when planning your next clinic.
Appendix Q
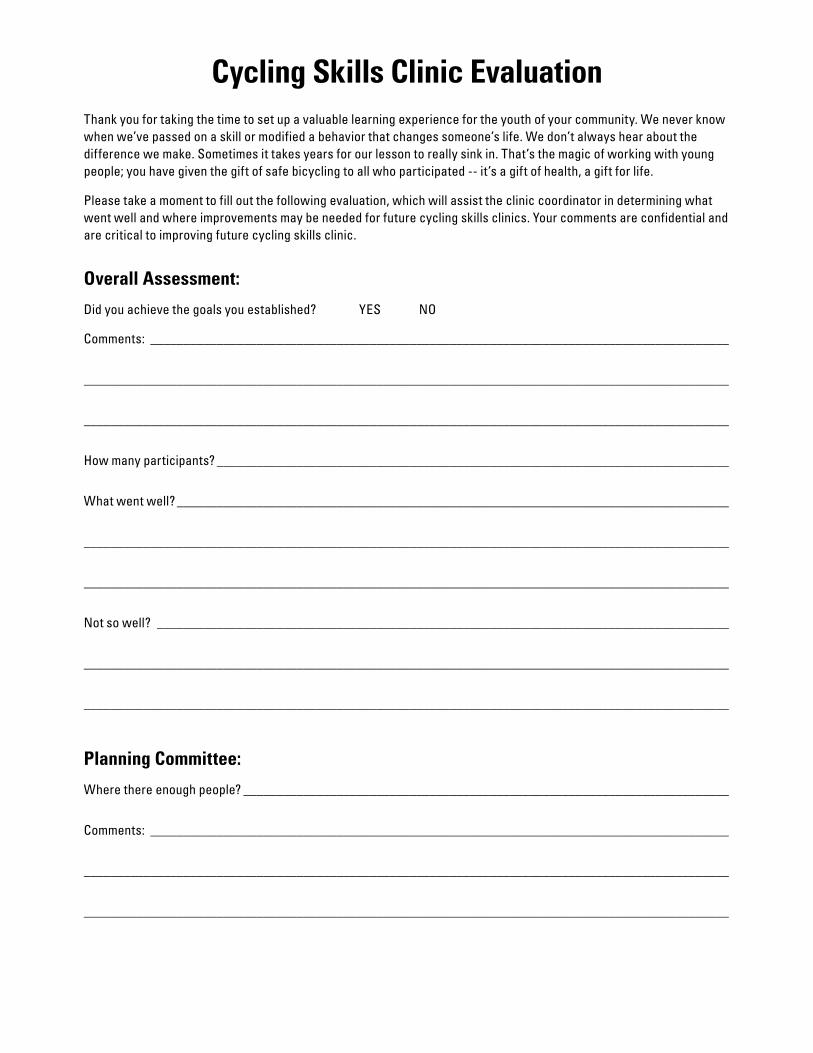
Cycling Skills Clinic EvaluationThank you for taking the time to set up a valuable learning experience for the youth of your community. We never know when we’ve passed on a skill or modified a behavior that changes someone’s life. We don’t always hear about the difference we make. Sometimes it takes years for our lesson to really sink in. That’s the magic of working with young people; you have given the gift of safe bicycling to all who participated -- it’s a gift of health, a gift for life.
Please take a moment to fill out the following evaluation, which will assist the clinic coordinator in determining what went well and where improvements may be needed for future cycling skills clinics. Your comments are confidential and are critical to improving future cycling skills clinic.
Overall Assessment:
Did you achieve the goals you established? YES NO
Comments: _______________________________________________________________________________________
_________________________________________________________________________________________________
_________________________________________________________________________________________________
How many participants? _____________________________________________________________________________
What went well? ___________________________________________________________________________________
_________________________________________________________________________________________________
_________________________________________________________________________________________________
Not so well? ______________________________________________________________________________________
_________________________________________________________________________________________________
_________________________________________________________________________________________________
Planning Committee:
Where there enough people? _________________________________________________________________________
Comments: _______________________________________________________________________________________
_________________________________________________________________________________________________
_________________________________________________________________________________________________

The right ones? ____________________________________________________________________________________
_________________________________________________________________________________________________
_________________________________________________________________________________________________
Who/what to add for next year? _______________________________________________________________________
_________________________________________________________________________________________________
_________________________________________________________________________________________________
Location and date:
Enough space? ____________________________________________________________________________________
_________________________________________________________________________________________________
_________________________________________________________________________________________________
Were you able to provide a realistic environment to simulate real traffic issues? ________________________________
_________________________________________________________________________________________________
_________________________________________________________________________________________________
Were there any conflicts with other events? _____________________________________________________________
_________________________________________________________________________________________________
_________________________________________________________________________________________________
Publicity:
Timing? __________________________________________________________________________________________
_________________________________________________________________________________________________
_________________________________________________________________________________________________
Did you get the coverage you wanted/needed? ___________________________________________________________
_________________________________________________________________________________________________
_________________________________________________________________________________________________
What could you do different next year? _________________________________________________________________
_________________________________________________________________________________________________
_________________________________________________________________________________________________
Funding:
Enough money to cover expenses? ____________________________________________________________________
Any sources you could tap for next year? _______________________________________________________________
_________________________________________________________________________________________________
_________________________________________________________________________________________________
Helmets:
Use of loaners? ____________________________________________________________________________________
_________________________________________________________________________________________________
_________________________________________________________________________________________________
Did you have a giveaway or reduced sale? ______________________________________________________________
_________________________________________________________________________________________________
_________________________________________________________________________________________________
Did everyone have a helmet? _________________________________________________________________________
_________________________________________________________________________________________________
_________________________________________________________________________________________________
Awards, prizes, refreshments:
Did you have enough? _______________________________________________________________________________
_________________________________________________________________________________________________
_________________________________________________________________________________________________

Was everyone recognized in some way? ________________________________________________________________
_________________________________________________________________________________________________
_________________________________________________________________________________________________
Did you have enough food? ___________________________________________________________________________
_________________________________________________________________________________________________
_________________________________________________________________________________________________
Course design (big picture, each station):
Evaluate each station to decide how to improve upon it. ___________________________________________________
_________________________________________________________________________________________________
_________________________________________________________________________________________________
Orientation: ______________________________________________________________________________________
_________________________________________________________________________________________________
_________________________________________________________________________________________________
How much did the volunteers know? ___________________________________________________________________
_________________________________________________________________________________________________
_________________________________________________________________________________________________
What can you do better next time? ____________________________________________________________________
_________________________________________________________________________________________________
_________________________________________________________________________________________________
Recommendations for next cycling skills clinic: __________________________________________________________
_________________________________________________________________________________________________
_________________________________________________________________________________________________