another abc presentation american band college - · pdf fileanother abc presentation american...
TRANSCRIPT
Another ABC Presentation
American Band College ofSam Houston State University
Max McKeeExecutive Director(541) 840-4888
Scott McKeeManaging Director(541) 778-4880
Paul KassulkeDirector of Operations(541) 778-3161
Visit us @ www.bandworld.org
by
Steven Christopher Cline
presented to
Practical Application #2
Oboe for Starters
American Band College Master's Degree Project • More info on ABC @ www.bandworld.org • [email protected] • (541) 778-4880
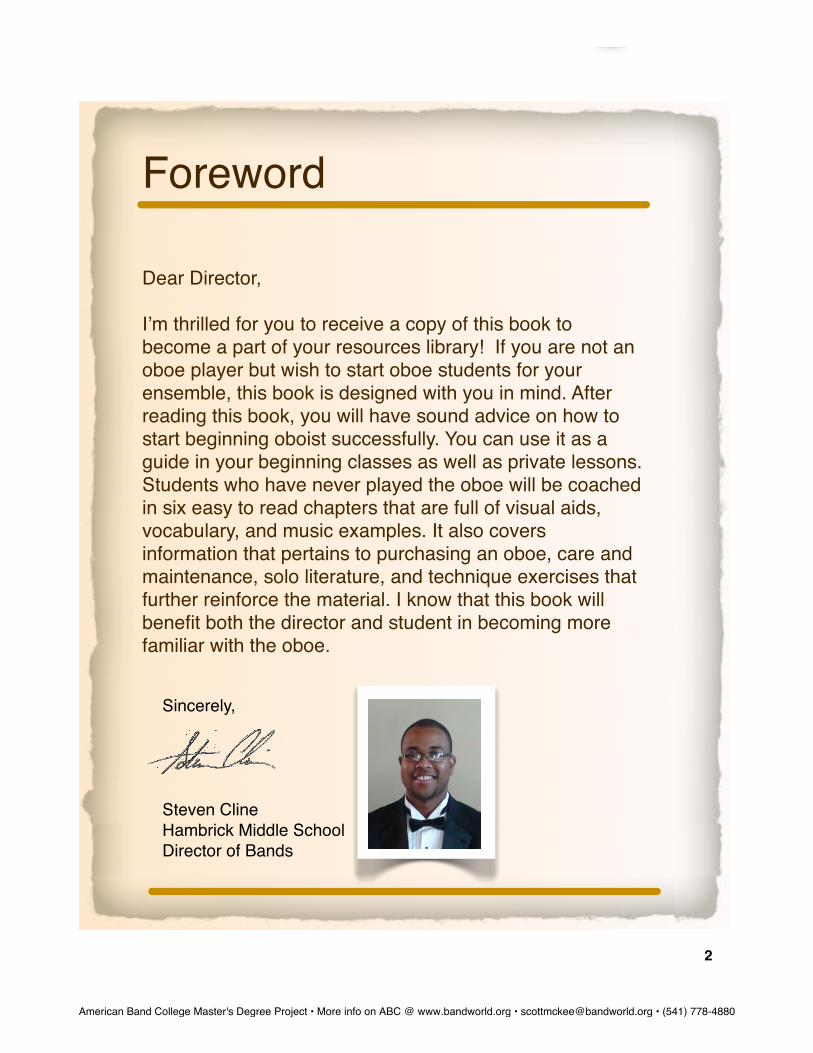
Foreword
Sincerely,
Steven Cline Hambrick Middle School Director of Bands
Dear Director,
Iʼm thrilled for you to receive a copy of this book to become a part of your resources library! If you are not an oboe player but wish to start oboe students for your ensemble, this book is designed with you in mind. After reading this book, you will have sound advice on how to start beginning oboist successfully. You can use it as a guide in your beginning classes as well as private lessons. Students who have never played the oboe will be coached in six easy to read chapters that are full of visual aids, vocabulary, and music examples. It also covers information that pertains to purchasing an oboe, care and maintenance, solo literature, and technique exercises that further reinforce the material. I know that this book will benefit both the director and student in becoming more familiar with the oboe.
2
American Band College Master's Degree Project • More info on ABC @ www.bandworld.org • [email protected] • (541) 778-4880
Table of Contents Chapter 1 - Introduction to the Oboe "Chapter 2 - Posture & Hand Position
Chapter 3 - The Reed & Embouchure
Chapter 4 - Breathing & Tonguing
Chapter 5 - Range & Technique
Chapter 6 - Tuning the Oboe
Appendix A - Care & Maintenance
Appendix B - Selecting an Oboe
Appendix C - Methods & Solo Literature Mini Scales & Arpeggios
Tetrachords
Major Scales
Oboe Fingering & Trill Charts
References
3
American Band College Master's Degree Project • More info on ABC @ www.bandworld.org • [email protected] • (541) 778-4880
Chapter 1
Introduction to the Oboe
Before being considered for playing the oboe, a student should have developed something more than basic facility on another woodwind instrument. The ability to produce a good tone on the clarinet or saxophone with a strong sense of pitch is the best criteria for selecting a student to play the oboe. The benefits of study, prior to the seventh grade, on a woodwind instrument can be transferred quickly and easily to the oboe. A natural aptitude for the oboe may be determined by success in producing a good “crow” on the reed only after brief instruction.
Selecting an Oboe Student
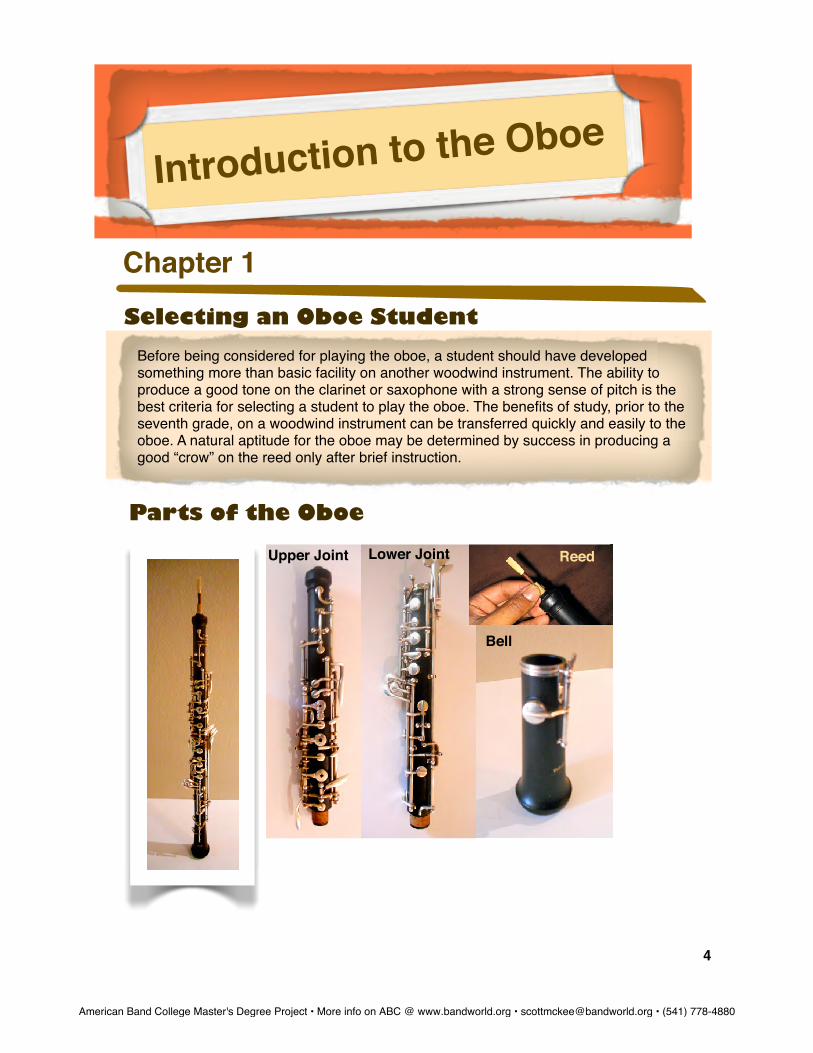
Parts of the Oboe
Upper Joint Lower Joint
Bell
Reed
4
American Band College Master's Degree Project • More info on ABC @ www.bandworld.org • [email protected] • (541) 778-4880

Chapter 1
Introduction to the Oboe
Damage Prevention Of all the woodwind instruments, the oboe is the most susceptible to damage through careless handling in assembly or disassembly. The slightest bent key or rod will throw the oboe out of alignment and cause difficulties in performance. Care in handling is a must. Beginners on the oboe have a tendency to assemble and disassemble the instrument without sufficient care and handling. The proper method of putting the instrument together and taking it apart must be taught from the very beginning. (see below)
Before you Assemble!!Make sure that both corks are well lubricated with cork grease and that the metal lined joints into which the corks fit are wiped clean and smooth. Avoid putting pressure on any part of the oboe which will bend a key or rod.
!!
Steps in Assembling the Oboe
Take the upper joint in the left hand with the fingers covering the tone holes to raise the bridge keys. Hold the lower joint in such a way that the bridge keys are not raised. Keep an eye on the bridge keys and join the two parts with a slight twisting motion. Line up the bridge keys.
Step 1: Upper and Lower Joints
5
American Band College Master's Degree Project • More info on ABC @ www.bandworld.org • [email protected] • (541) 778-4880
Steps in Assembling the Oboe Continued
Introduction to the Oboe
Chapter 1
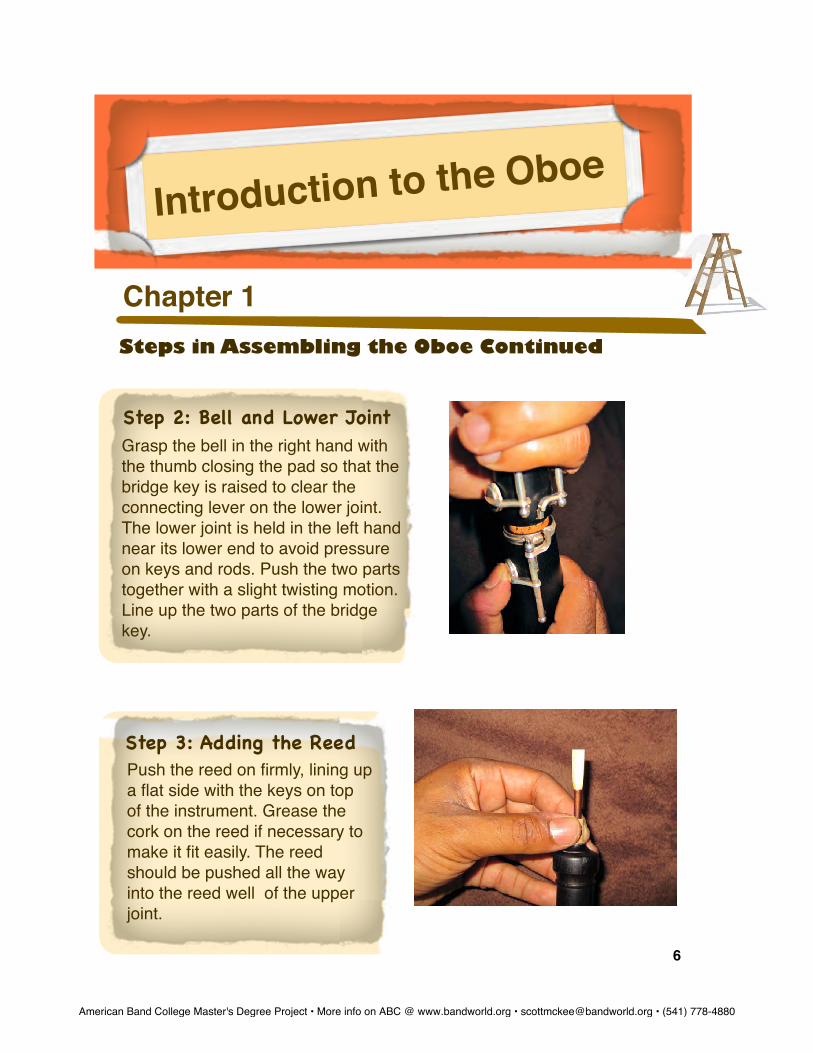
Step 2: Bell and Lower Joint Grasp the bell in the right hand with the thumb closing the pad so that the bridge key is raised to clear the connecting lever on the lower joint. The lower joint is held in the left hand near its lower end to avoid pressure on keys and rods. Push the two parts together with a slight twisting motion. Line up the two parts of the bridge key.
Step 3: Adding the ReedPush the reed on firmly, lining up a flat side with the keys on top of the instrument. Grease the cork on the reed if necessary to make it fit easily. The reed should be pushed all the way into the reed well of the upper joint.
6
American Band College Master's Degree Project • More info on ABC @ www.bandworld.org • [email protected] • (541) 778-4880
Common Faults in Assembly
Introduction to the Oboe
Chapter 1
There are several possible ways in which the oboe may be assembled. The only criteria for a good procedure is that there is no pressure on the rods, plates, or keys during the process. The procedure outlined on the previous page is standard and may be safely used for beginners. The instructor should observe the student putting the instrument together and taking it apart until the correct routine comes readily and accurately. The following items are the faults or inaccuracies most commonly experienced in assembly of the oboe.
1.Failure to grease corks. A container of cork grease must be kept in every oboe case, and the cork joints of the instrument and the reed staple kept well greased so that the connections may be made with ease.
2.Bent bridge keys. A bent bridge key is the most common result of careless assembly, and as a consequence, some notes are difficult or impossible to produce.
3.Holding the joints improperly. Holding the parts improperly puts pressure on the delicate mechanism of the instrument and soon bends keys or rods out of line.
4.Bent keys or rods. Bent keys or rods are the result of improper assembly, rough handling, putting the instrument in its case carelessly, or even dropping it. The keys and rods most frequently
bent are those operated by the left little finger, making certain notes difficult or impossible to produce.
7
American Band College Master's Degree Project • More info on ABC @ www.bandworld.org • [email protected] • (541) 778-4880
Chapter 2
Posture & Hand Position
Proper Posture & Holding Position
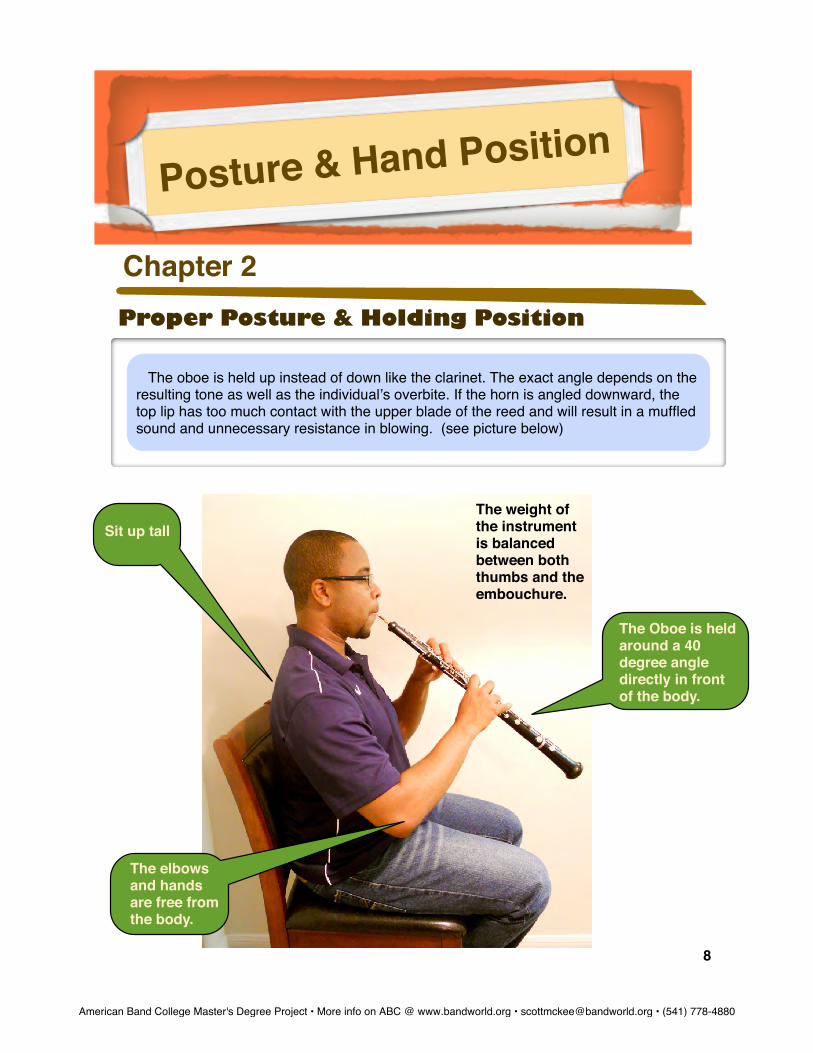
The oboe is held up instead of down like the clarinet. The exact angle depends on the resulting tone as well as the individualʼs overbite. If the horn is angled downward, the top lip has too much contact with the upper blade of the reed and will result in a muffled sound and unnecessary resistance in blowing. (see picture below)
The Oboe is held around a 40 degree angle directly in front of the body.
Sit up tall
The elbows and hands are free from the body.
The weight of the instrument is balanced between both thumbs and the embouchure.
8
American Band College Master's Degree Project • More info on ABC @ www.bandworld.org • [email protected] • (541) 778-4880
Resting Positions
Posture & Hand Position
Chapter 2
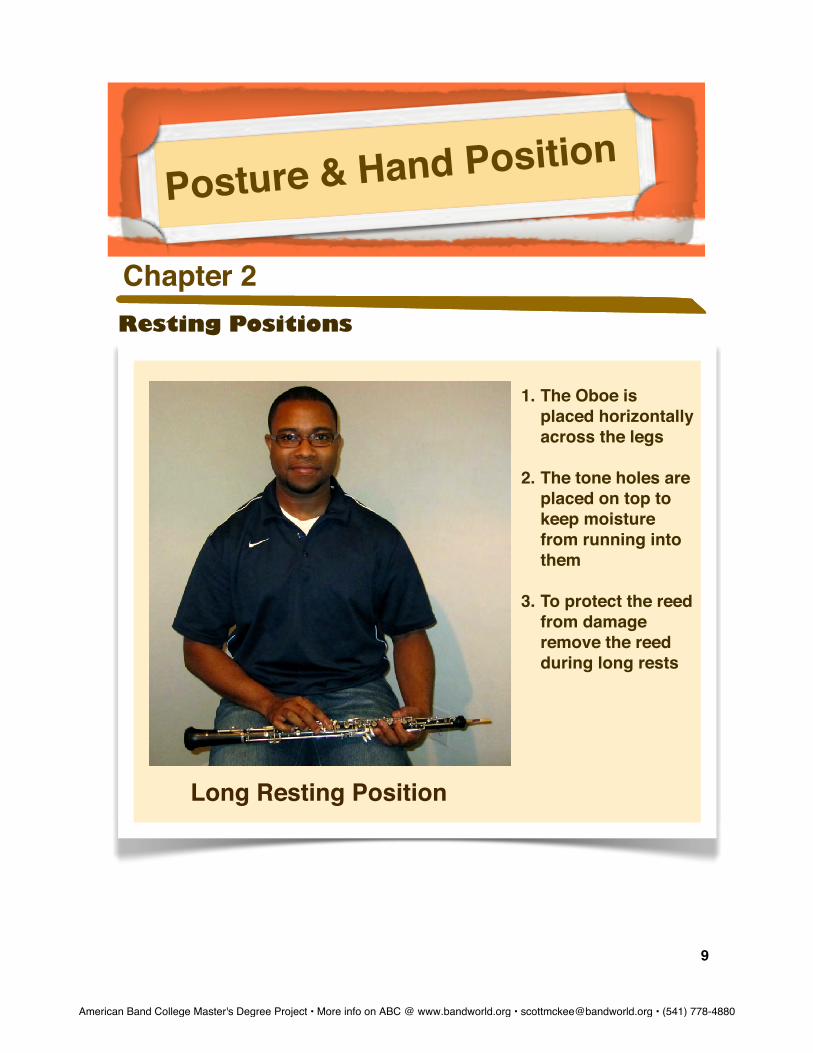
1. The Oboe is placed horizontally across the legs
2. The tone holes are placed on top to keep moisture from running into them
3. To protect the reed from damage remove the reed during long rests
Long Resting Position
9
American Band College Master's Degree Project • More info on ABC @ www.bandworld.org • [email protected] • (541) 778-4880
Chapter 2 Resting Positions
Posture & Hand Position
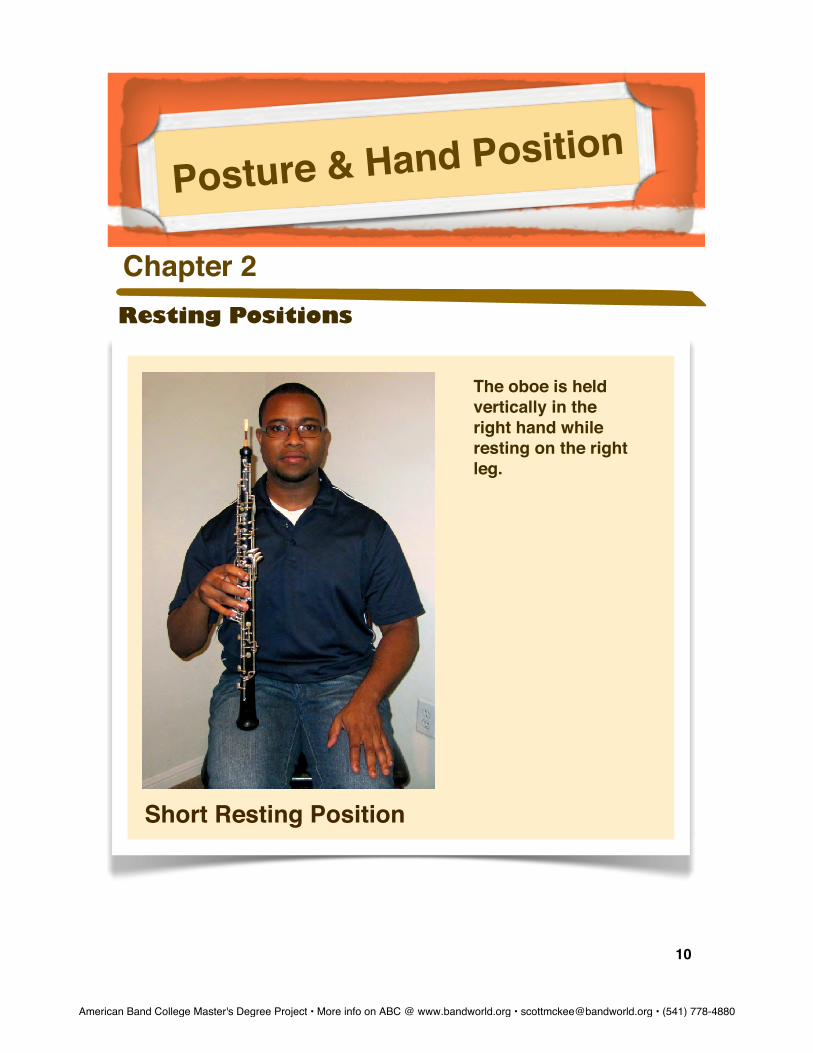
Short Resting Position
The oboe is held vertically in the right hand while resting on the right leg.
10
American Band College Master's Degree Project • More info on ABC @ www.bandworld.org • [email protected] • (541) 778-4880
Posture & Hand Position
Chapter 2
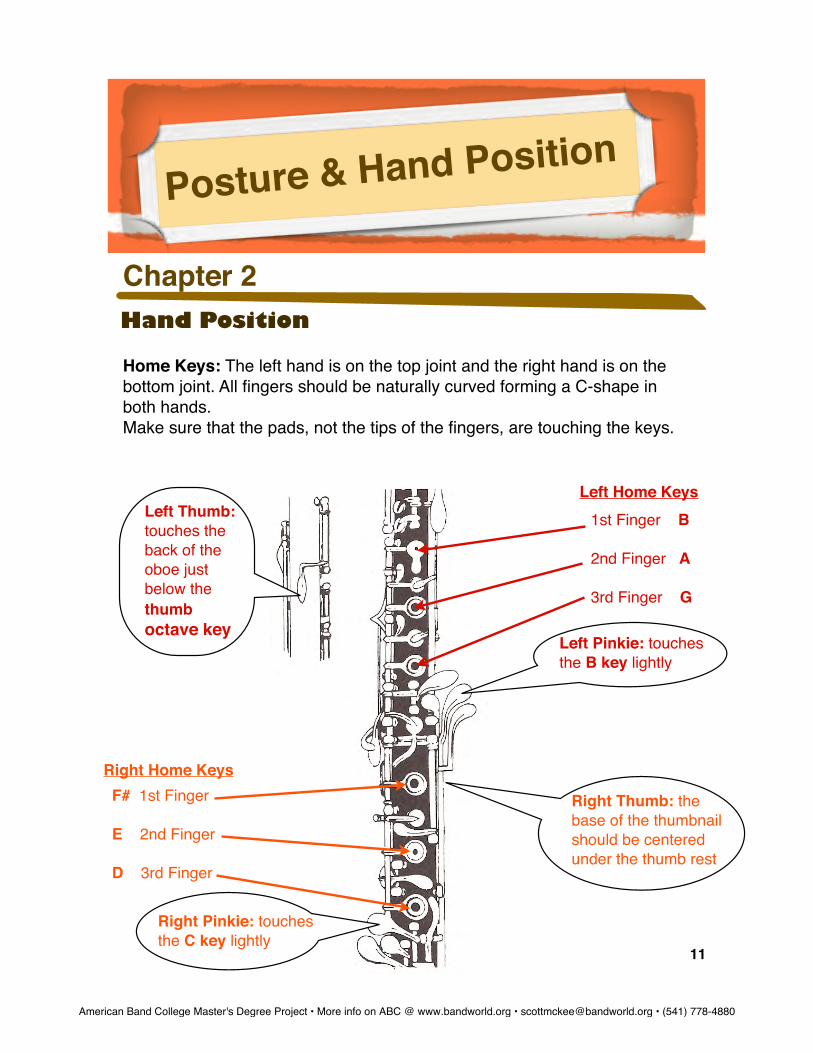
Home Keys: The left hand is on the top joint and the right hand is on the bottom joint. All fingers should be naturally curved forming a C-shape in both hands. Make sure that the pads, not the tips of the fingers, are touching the keys.
Hand Position
Right Thumb: the base of the thumbnail should be centered under the thumb rest
Left Thumb: touches the back of the oboe just below the thumb octave key
Left Pinkie: touches the B key lightly
Right Pinkie: touches the C key lightly
1st Finger B
2nd Finger A
3rd Finger G
F# 1st Finger
E 2nd Finger
D 3rd Finger
Left Home Keys
Right Home Keys
11
American Band College Master's Degree Project • More info on ABC @ www.bandworld.org • [email protected] • (541) 778-4880