age phizzi practical years 5-11
TRANSCRIPT

In the 2016 Royal Institution Christmas Lectures on the
BBC, Professor Saiful Islam made a fruity battery from
1,013 lemons. The maximum voltage measured across
this colossal battery was 1,275.4 volts which was the
largest voltage ever measured from a fruity battery and
won Professor Saiful Islam a place in the Guinness
World Records. Fruity batteries are often included in
lessons about electricity in primary schools because they
show the main parts of a battery. This guide explains
how to make a fruity battery and test it, as well as
outlining common problems that are encountered. The
guide also suggests how fruit batteries can be used in
practical enquiry work to support the development of
working scientifically skills in the classroom.
• Various citrus fruits – lemons, limes, oranges
• Knife and chopping board
• Copper coins
• Zinc nails
• Connecting wires
• Crocodile clips
• Red LED (ideally with a 1.6V forward bias)
• Multimeter
Photo Credit: Royal Institution 1
Fruity batteries
Phizzi practical
Introduction
Scientific explanantion
Equipment needed
All batteries have three key parts: a positive electrode
that loses electrons; a negative electrode that gains
electrons; and an electrolyte (a liquid that conducts)
connecting the two electrodes. When the two electrodes
are connected together using a wire to form a loop, an
electric current will flow. The two electrodes have to be
made from different metals. Typically, for fruity batteries
a zinc nail is used for the positive electrode and a copper
coin is used for the negative electrode. The electrodes
react with the citric acid in the electrolyte. The chemical
reaction between the zinc nail and the citric acid causes
the zinc to lose electrons and become positive; the
chemical reaction between the copper coin and the citric
acid causes the copper coin to gain electrons, becoming
negative. The fruit juice is the electrolyte and lets an
electric current of charged particles called ions flow
through it to complete the circuit.
Age5-11years
Working scientifically
Practical work in the science classroom must always contribute to
children’s understanding of the big ideas in science or develop their
skills in working scientifically. To make fruity batteries a worthwhile
practical activity, teachers should be clear on the learning that is
going to take place.
In terms of science knowledge, this practical gives children a basic
understanding of the structure of a battery; children could also be
given the opportunity to develop skills in drawing 2D scientific
diagrams with labels using some of the new scientific vocabulary they
have learned. Children could also carry out research into different
types of batteries and find differences and similarities between
common batteries and their fruit battery.
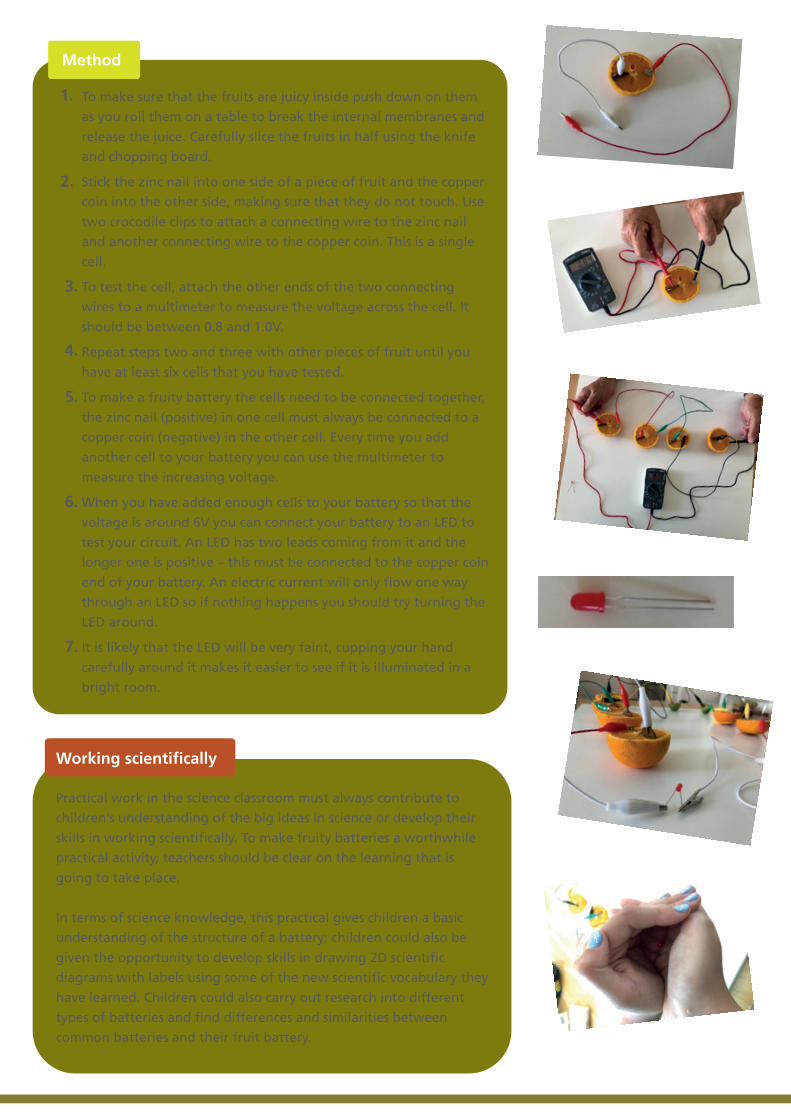
To make sure that the fruits are juicy inside push down on them
as you roll them on a table to break the internal membranes and
release the juice. Carefully slice the fruits in half using the knife
and chopping board.
Stick the zinc nail into one side of a piece of fruit and the copper
coin into the other side, making sure that they do not touch. Use
two crocodile clips to attach a connecting wire to the zinc nail
and another connecting wire to the copper coin. This is a single
cell.
To test the cell, attach the other ends of the two connecting
wires to a multimeter to measure the voltage across the cell. It
should be between 0.8 and 1.0V.
Repeat steps two and three with other pieces of fruit until you
have at least six cells that you have tested.
To make a fruity battery the cells need to be connected together,
the zinc nail (positive) in one cell must always be connected to a
copper coin (negative) in the other cell. Every time you add
another cell to your battery you can use the multimeter to
measure the increasing voltage.
When you have added enough cells to your battery so that the
voltage is around 6V you can connect your battery to an LED to
test your circuit. An LED has two leads coming from it and the
longer one is positive – this must be connected to the copper coin
end of your battery. An electric current will only flow one way
through an LED so if nothing happens you should try turning the
LED around.
It is likely that the LED will be very faint, cupping your hand
carefully around it makes it easier to see if it is illuminated in a
bright room.
Method
1.
2.
3.
4.
5.
6.
7.

The fruity batteries practical also allows children to
investigate how linking cells in series affects the total
voltage across their battery. Children could collect data to
carry out a pattern seeking enquiry and analyse their
measurements by drawing graphs of the number of fruity
cells in the battery vs. the total voltage across the battery.
Although multimeters and voltmeters are often difficult to
get hold of in primary schools, this has the potential to be
a really useful enquiry to develop measuring and data
analysis skills.
In addition to this, children could go on to carry out a
comparative test to find out if the type of fruit affects the
voltage across the fruity cell using lemons, oranges,
apples, strawberries, kiwis and limes.
Common problems that will stop a fruity battery working:
Electrodes touching each other
Crocodile clips attached to the LED touching each other
LEDs connected incorrectly (see point 6 in the method)
Connecting wires linking a zinc nail to another zinc nail or
a copper coin to another copper coin. Connections must
always go from zinc (positive) to copper (negative)
LEDs are damaged – always useful to have a battery
available to test them
Unripe fruit may not have sufficient juice to act as the
electrolyte.
•
•
•
•
•
•