advocacy tools guide - blackbaud · create a form, enter a name and select the advocacy...
TRANSCRIPT

BlackbaudNetCommunity™
Advocacy Tools Guide

072310
©2010 Blackbaud, Inc. This publication, or any part thereof, may not be reproduced or transmitted in any form or by any means, electronic, or mechanical, including photocopying, recording, storage in an information retrieval system, or otherwise, without the prior written permission of Blackbaud, Inc.
The information in this manual has been carefully checked and is believed to be accurate. Blackbaud, Inc., assumes no responsibility for any inaccuracies, errors, or omissions in this manual. In no event will Blackbaud, Inc., be liable for direct, indirect, special, incidental, or consequential damages resulting from any defect or omission in this manual, even if advised of the possibility of damages.
In the interest of continuing product development, Blackbaud, Inc., reserves the right to make improvements in this manual and the products it describes at any time, without notice or obligation.
All Blackbaud product names appearing herein are trademarks or registered trademarks of Blackbaud, Inc.
All other products and company names mentioned herein are trademarks of their respective holder.
Advocacy Tools-2010

Advocacy Tools GuideADVOCACY TOOLS. . . . . . . . . . . . . . . . . . . . . . . . . . . . . . . .1
Advocacy Tools: Process Overview . . . . . . . . . . . . . . . . . . . . . . . . . . . . . . . . . 1Action Item Gallery . . . . . . . . . . . . . . . . . . . . . . . . . . . . . . . . . . . . . . . . . . . . . . . 2
Create Action Items . . . . . . . . . . . . . . . . . . . . . . . . . . . . . . . . . . . . . . . . . . . . . 3Edit Action Items . . . . . . . . . . . . . . . . . . . . . . . . . . . . . . . . . . . . . . . . . . . . . 11Copy Action Items . . . . . . . . . . . . . . . . . . . . . . . . . . . . . . . . . . . . . . . . . . . . . 12Delete Action Items . . . . . . . . . . . . . . . . . . . . . . . . . . . . . . . . . . . . . . . . . . . . 12Action Item Search . . . . . . . . . . . . . . . . . . . . . . . . . . . . . . . . . . . . . . . . . . . . 13
Add Custom Targets . . . . . . . . . . . . . . . . . . . . . . . . . . . . . . . . . . . . . . . . . . . . . 13Advocacy Action Center Part . . . . . . . . . . . . . . . . . . . . . . . . . . . . . . . . . . . . . 15
Advocacy Message Delivery . . . . . . . . . . . . . . . . . . . . . . . . . . . . . . . . . . . . . 18Elected Officials Search Part . . . . . . . . . . . . . . . . . . . . . . . . . . . . . . . . . . . . . 18
INDEX . . . . . . . . . . . . . . . . . . . . . . . . . . . . . . . . . . . . . . . .21

1CHAPTER
Advocacy ToolsIn This Chapter
“Advocacy Tools: Process Overview” on page 1
“Action Item Gallery” on page 2
“Add Custom Targets” on page 13
“Advocacy Action Center Part” on page 15
“Elected Officials Search Part” on page 18
With advocacy tools, you can create a section within your website that allows users to support your organization’s cause. When you use the Advocacy Action Center part, users can send messages through the website to influential people such as legislators, members of the media, or other individuals you specify. The Advocacy Action Center part uses action items you create in Action item gallery to list issues that are important to your organization’s mission. After an advocate reviews and selects an action item, the part uses an advocacy registration form you create in Forms to gather the person’s contact information for the message and reports.You can also use the Elected Officials Search part to allow users to obtain biographical and contact details for local, state, and federal lawmakers. Users can then independently target elected officials to advocate for your cause.
Advocacy Tools: Process OverviewTo create an advocacy section for your website, you perform several steps in different areas of the program. Assign Rights. To allow users to create and manage advocacy tools, you must provide security rights.
You add the desired advocacy-related security rights to site and organizational task groups in Task groups and then associate the task groups with a role or individual user in Security assignments. In Task groups, the necessary organizational task groups appear under Advocacy security and Form security on the Create organization task group and Edit organization task group screens. The necessary site task groups for pages and parts appear under Website security on the Create site task group and Edit site task group screens. For information about security rights, see the Users & Security Guide.
CH A P T E R 12 .
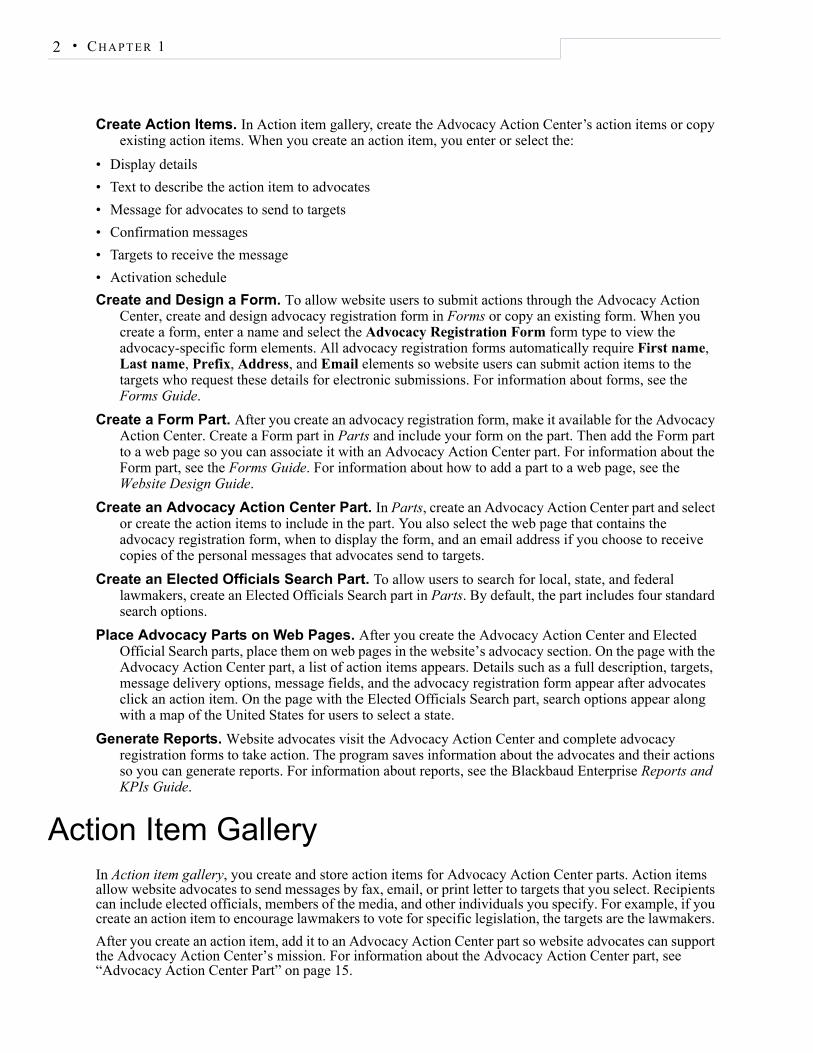
Create Action Items. In Action item gallery, create the Advocacy Action Center’s action items or copy existing action items. When you create an action item, you enter or select the:
• Display details• Text to describe the action item to advocates• Message for advocates to send to targets• Confirmation messages• Targets to receive the message• Activation scheduleCreate and Design a Form. To allow website users to submit actions through the Advocacy Action
Center, create and design advocacy registration form in Forms or copy an existing form. When you create a form, enter a name and select the Advocacy Registration Form form type to view the advocacy-specific form elements. All advocacy registration forms automatically require First name, Last name, Prefix, Address, and Email elements so website users can submit action items to the targets who request these details for electronic submissions. For information about forms, see the Forms Guide.
Create a Form Part. After you create an advocacy registration form, make it available for the Advocacy Action Center. Create a Form part in Parts and include your form on the part. Then add the Form part to a web page so you can associate it with an Advocacy Action Center part. For information about the Form part, see the Forms Guide. For information about how to add a part to a web page, see the Website Design Guide.
Create an Advocacy Action Center Part. In Parts, create an Advocacy Action Center part and select or create the action items to include in the part. You also select the web page that contains the advocacy registration form, when to display the form, and an email address if you choose to receive copies of the personal messages that advocates send to targets.
Create an Elected Officials Search Part. To allow users to search for local, state, and federal lawmakers, create an Elected Officials Search part in Parts. By default, the part includes four standard search options.
Place Advocacy Parts on Web Pages. After you create the Advocacy Action Center and Elected Official Search parts, place them on web pages in the website’s advocacy section. On the page with the Advocacy Action Center part, a list of action items appears. Details such as a full description, targets, message delivery options, message fields, and the advocacy registration form appear after advocates click an action item. On the page with the Elected Officials Search part, search options appear along with a map of the United States for users to select a state.
Generate Reports. Website advocates visit the Advocacy Action Center and complete advocacy registration forms to take action. The program saves information about the advocates and their actions so you can generate reports. For information about reports, see the Blackbaud Enterprise Reports and KPIs Guide.
Action Item GalleryIn Action item gallery, you create and store action items for Advocacy Action Center parts. Action items allow website advocates to send messages by fax, email, or print letter to targets that you select. Recipients can include elected officials, members of the media, and other individuals you specify. For example, if you create an action item to encourage lawmakers to vote for specific legislation, the targets are the lawmakers. After you create an action item, add it to an Advocacy Action Center part so website advocates can support the Advocacy Action Center’s mission. For information about the Advocacy Action Center part, see “Advocacy Action Center Part” on page 15.

AD V O C A C Y TO O L S 3.
Create Action ItemsWhen you create action items in Action item gallery, the program stores them in folders. The Action item gallery folder is the root folder on the Folders tab, and all other folders are subfolders. You cannot edit or delete the Action item gallery folder. To add a folder, click Click here to create a new folder.
Note: You can create action items in Action item gallery or on an Advocacy Action Center part. The program saves action items that you create on an Advocacy Action Center part in Action item gallery folders.
Add an action item
1. From Site explorer, click Action item gallery. Action item gallery appears.2. Click New action item. The New action item screen appears.
3. In the Action item name field, enter a unique name to appear on the website. 4. By default, the Action item type field is disabled. Currently, “Action” is the only available type. 5. Click Next. Additional fields appear.
6. Under Properties, select a folder for the action item in the Folder field. 7. In the Status field, select a status. Each Advocacy Action Center that includes the action item uses
the status you select. • To test the action item, select “Preview.” The action item appears for users with Supervisor or
task group rights to view preview action items in Action item gallery. Action items in preview mode do not send messages to targets. Instead, they send messages to the email addresses that users enter to test the action items. For information about task groups, see the Users & Security Guide.

CH A P T E R 14 .
Note: When an action item is in preview mode, the program pre-populates the advocacy registration form with user contact information and saves changes to the database.
• To activate the action item and display it in the action item list, select “Live.” Live action items send messages to targets.
• To remove the action item and display a results message in the details page, select “Results.” You design the message on the Post-action Results tab under Call to action.
• To disable the action item, select “Inactive.” You can change the status from “Inactive” to “Live” to return the action item to the Advocacy Action Center.
8. In the Action item classification field, select a topic. Topics help targets classify the messages they receive.
9. Under Call to action, enter text to describe the action item to advocates.
a. On the Synopsis and Full Description tabs, enter brief and full descriptions. When the action item’s status is “Preview” or “Live,” the brief description appears in the Advocacy Action Center’s action item list and the full explanation appears when advocates click the action item. To format the appearance and layout, use the HTML editor. For information about the HTML editor, see the Program Basics Guide.
b. On the Post-action Results tab, enter a message to replace the full description when the status is “Results.”

AD V O C A C Y TO O L S 5.
Note: Merge fields in the results message only appear for advocates who log in to the website.
10. Under Advocate message, enter the message for advocates to send to targets. If necessary, include instructions for advocates to modify the message or create their own letter.
a. On the Letter tab, enter a subject for the message in the Subject field. b. In the Message text field, enter the message for advocates to send to targets.c. On the Instructions tab, enter text in the HTML editor to describe how advocates should take
action. For example, you can instruct advocates to enter personal stories or create individual letters.
11. Under Message personalization, select how advocates can enter personal messages.
a. Select whether advocates can overwrite your organization’s message. If you select Advocate cannot overwrite letter, you can designate a section for advocates to add personal messages to your organization’s message.

CH A P T E R 16 .
b. To receive email copies of the messages that advocates send to targets, select Send a copy to my organization. Typically, you use this field if you allow users to change or personalize your organization’s message. Enter contact information for the person to receive the messages on the Advocacy Action Center part.
12. Under Confirmations, design your confirmation messages. Default confirmation messages appear in the HTML editor on the Confirmation Page and Email Acknowledgement tabs. To restore the default messages, click Restore default message.
a. On the Confirmation Page tab, enter the confirmation message to appear after an advocate takes action.
b. On the Email Acknowledgement tab, enter a name for the acknowledgement email message, a subject to include in the Subject field of the email message, and an email address and name to include in the From field of the email message.
c. To specify the email addresses where message responses and failure notifications will arrive, click More Options. Additional fields appear.
d. To receive responses from recipients at a different email address than the one you use to send the message, enter a return address in the Reply Address field.
e. Under Notifications are to be sent to the following addresses, select Failures to receive failure messages for email messages that are not delivered. In the field beside the checkbox, enter an email address to receive failure messages.
Note: Failures are email addresses that do not receive the acknowledgement email. Failures can also be called non-delivery receipts, bouncebacks, UnDeliverables, or Delivery Status Notifications (DSN).For information about how the program handles failed email delivery, see the Email Guide.
f. In the HTML editor, enter the content for the acknowledgement email message and format the appearance and layout. To include personalized information, use merge fields.

AD V O C A C Y TO O L S 7.
13. Under Targets, select the targets for the action item.
a. To select all the members of a target group or select targets from a group list, select Basic. For example, select Federal senators to include all federal senators or select individual senators. The advocate’s postal code or geographic television market determines who receives the message. For example, if all federal senators are targets and an advocate from California takes action, only California senators receive the message.
Note: The Media categories group allows you to target different types of media such as newspapers or television. The Custom targets group allows you to target individuals who do not exist in an elected official or media database. Before you can select custom targets, you must enter them in Custom targets. For information about custom targets, see “Add Custom Targets” on page 13.
Note: To send messages, the program uses the advocate’s postal code for legislative targets and Designated Market Area (DMA) for media targets. DMA is the geographic television market system developed by the advertising industry. The program always sends messages to custom targets. Since custom targets do not exist in elected official or media databases, the postal code or geographic television market does not determine whether to include them as recipients.
• Select the message’s target groups. For most groups, the All and Select options appear.

CH A P T E R 18 .
Note: For State senators and State representatives, you must select a state before the All and Select options appear. The options do not appear for President, Vice president, Governor, and Lieutenant governor because only one person is elected to each position.
• By default, the program includes all members of a group. To select specific members as targets, select Select. A list of all members appears. Select members to include as targets and click Add. The targets appear in the field to the right.
• Beside the target groups you select, select “To” to send direct messages to the group and “Cc” to send carbon copies.
b. To search for targets by name, location, or media source, select Advanced. You can select whether to use advocate postal codes or geographic television markets to determine who receives the message for elected officials and media outlets. For example, if a national media target is in New York, you would not use geographic television markets because the target’s audience includes advocates who live outside of New York.
Note: The program always sends messages to custom targets. Since custom targets do not exist in elected official or media databases, the postal code or geographic television market does not determine whether to include them as recipients. To add a custom target, see “Add Custom Targets” on page 13.
• Select the type of target you want to find. The To and Cc boxes appear.

AD V O C A C Y TO O L S 9.
• For targets who receive direct messages, click To. For targets who receive carbon copies, click Cc. The Advanced target search screen appears.
• In the Search in field, select the type of search criteria.• In the Search for field, enter the search criteria. For example, if you select “District city” in the
Search in field, enter “San Diego” to find elected officials in San Diego.• Click Search. The results appear in a grid.• Select a target to include, and click Add. The target appears under To or Cc.
Note: To add all the search results, click Add all. To remove a target, select it and click Remove. To remove all targets, click Remove all.
• Add as many targets as necessary and click Save. You return to the New action item screen.
Note: To remove advanced targets from the New action item screen, click To or Cc. The Advanced target search screen reopens so you can select and remove the targets.
• By default, the program uses postal codes and geographic television markets to determine the elected officials and media targets for advocates to contact. To send messages to all targets, clear the Postal Code Dependent and DMA Dependent checkboxes. DMA is the abbreviation for Designated Market Area, a system developed by the advertising industry.

CH A P T E R 110 .
Note: The selections you make for the Postal Code Dependent and DMA Dependent checkboxes apply to both To and Cc targets.
14. To view the target list, click Preview targets. The Preview target list screen appears.
a. To preview specific targets, enter a ZIP code and click Search. To view all targets, click Search. The targets appear.
b. After you review the targets, close the Preview target list screen. You return to the New action item screen.
15. Under Message delivery options, select how advocates can contact targets. Each method appears under the target’s name in the Advocacy Action Center’s action item details page. Advocates select one delivery option for each message target. For information about how the program delivers messages, see “Advocacy Message Delivery” on page 18.
• To allow advocates to send electronic messages to targets, select Email. The program determines whether to send email or submit messages through a web form.
• To allow advocates to send faxes, select Fax. Fax service fees apply when advocates use this delivery method.
Note: Action items in preview mode do not send email, web form, or fax messages to targets. Instead, they send messages to the email addresses that users enter to test the action items.
• To allow advocates to indicate they will print messages and send them through the postal system, select Print letter. A Print button appears on the confirmation page after advocates submit action items, regardless of the delivery methods. The button links to a PDF file that contains letters for each target. The PDF file is available even if users select Email or Fax so advocates can save a record of each sent message.
• To allow advocates to exclude targets, select Exclude target.

AD V O C A C Y TO O L S 11.
• To send fax messages if electronic delivery fails multiple times, select Enable fax backup for emails. Delivery failures typically occur after changes to target email or web form services or when problems occur with the systems that receive the messages. Fax service fees apply when the program uses this delivery method.
Note: If a web form uses a challenge response test such as CAPTCHA to ensure that a person submits the form, the program sends the message by fax.
• To send electronic messages when fax delivery fails multiple times, select Enable email backup for faxes. Delivery failures typically occur when a fax number is new or the program cannot connect to the fax number. Fees for the fax service do not apply when fax delivery fails.
16. Under Activation, select Schedule activation to select the dates for the action item to appear in the Advocacy Action Center’s action item list. If you do not schedule activation, the action item immediately appears in the Advocacy Action Center and remains until you remove it or change the status to “Inactive.”
a. In the Initiation date field, enter the date to display the action item in the Advocacy Action Center. The action item appears on the website if its status is “Preview,” “Live,” or “Results.” If you do not enter an initiation date, you must enter an expiration date. An action item without an initiation date immediately appears in the Advocacy Action Center and remains until the expiration date.
Note: Preview action items appear on the website for users with Supervisor or task group rights to view preview action items in Action item gallery.
b. In the Expiration date field, enter the date to remove the action item from the Advocacy Action Center’s action item list. If you do not enter an expiration date, you must enter an initiation date. An action item without an expiration date remains in the Advocacy Action Center until you change the status to “Inactive.”
17. Click Save. You return to Action item gallery. “Advocacy Tools: Process Overview” on page 1“Action Item Gallery” on page 2“Add Custom Targets” on page 13“Advocacy Action Center Part” on page 15
Edit Action Items After you add an action item to Action item gallery, you can edit it as necessary.

CH A P T E R 112 .
Edit an action item
1. From Site explorer, click Action item gallery. Action item gallery appears.2. In the grid, select an action item. To search for an action item, use the Search tab. For information,
see “Search for an action item” on page 13. 3. Under Action, click Click here to edit this action item. The Edit action item screen appears. 4. Make changes as necessary. The items on this screen are the same as on the New action item
screen. For a detailed explanation of the options, see “Add an action item” on page 3. 5. Click Save. You return to Action item gallery.
Copy Action ItemsAfter you create an action item, you can copy it to create a similar action item.
Copy an action item
1. From Site explorer, click Action item gallery. Action item gallery appears.
2. In the grid, select an action item. To search for an action item, use the Search tab. For information, see “Search for an action item” on page 13.
3. Under Action, click Click here to copy this action item. The Copy action item screen appears.4. In the New action item name field, enter a name. By default, the program uses “Copy of”
followed by the original action item name. 5. Click Next. Additional fields appear.6. Make changes as necessary. The items on this screen are the same as on the New action item
screen. For a detailed explanation of the options, see “Add an action item” on page 3. 7. Click Save. You return to Action item gallery.
Delete Action ItemsAfter you create an action item, you can delete it as necessary.
Tip: To avoid the loss of data, we recommend you change the action item’s status to “Inactive” rather than delete it. Inactive action items remain in the database but do not appear in the Advocacy Action Center.
Delete an action item
1. From Site explorer, click Action item gallery. Action item gallery appears. 2. In the grid, select an action item. To search for an action item, use the Search tab. For information,
see “Search for an action item” on page 13. 3. Under Action, click Click here to delete this action item. A confirmation message appears.4. Click OK. You return to Action item gallery.

AD V O C A C Y TO O L S 13.
Action Item SearchIn Action item gallery, you can use the Search tab to find action items if the action item list is long. You can enter search criteria to narrow your results.
Note: To sort the action items by column, click Action item name, Type, or Status.
Search for an action item
1. From Site explorer, click Action item gallery. Action item gallery appears.2. Select the Search tab.
a. To search by name, use the All or part of the action item name field.b. To search by status, use the Action item status field.c. To search by classification, use the Action item classification field.d. To search by site, use the Site field.
3. Click Search. The gallery displays the action items that meet your criteria.
Add Custom TargetsIn Custom targets, you can enter contact information for potential targets who are not in an elected official or media database so they can receive action item messages. For example, if your organization plans to target board members of a large corporation, you can add them as custom targets. After you add custom targets, select them to receive messages when you create action items. The individuals appear as recipients when advocates select the action item and take action.
Add a custom advocacy target
1. From Administration, click Custom targets. Custom targets appears.

CH A P T E R 114 .
2. Click New custom target. The Custom target screen appears.
3. Under Profile information, enter the target’s name, organization, title, and email address. The name and title appear when advocates view action item details.
4. Under Address information, enter the target’s address and fax number. For custom targets in the United States, the state appears on the action item details page along with the name and title. For custom targets outside the United States, the country appears instead of the state.
Tip: We recommend you verify the email addresses and fax numbers. The program uses them to send messages to custom targets.
Note: The program only sends faxes to targets who are located in the United States.
5. By default, the program uses the standard U.S. Postal Service address format. To use a different or international format, enter the target’s address in the Address block override box.
6. In the Salutation override field, enter a greeting to use instead of the standard “Dear <Target title> <Target last name>.” For example, you might use “To Whom It May Concern.”
7. Click Save. You return to Custom targets.

AD V O C A C Y TO O L S 15.
Note: After you create a custom target, you can edit or delete it. To edit the target, select it in the grid and click Click here to edit this custom target. To delete the target, select it and click Click here to delete this custom target.
Advocacy Action Center PartThe Advocacy Action Center part allows you to display action items from Action item gallery for advocates to support your organization’s cause. The name of each action item appears in a list when website users access the Advocacy Action Center, and details such as the targets, message delivery options, message fields, and advocacy registration form appear after advocates click an action item. When you configure the part, you can choose to display a summary of each action item in the Advocacy Action Center list, and the action item name and full description on the details page.
Note: If the Advocacy Action Center contains only one action item, the details page appears instead of the action item list.
After a user takes action, the action item is no longer available for that user. If the Advocacy Action Center requires users to log in, the program removes the action item from the list. If the Advocacy Action Center does not require users to log in, all action items appear when users access the list. However, if a user attempts to resubmit an action item, a message explains that the user already sent a message to the targets. For information about how to create or edit a part, as well as the tabs on the Edit Part screen, see the Website Design Guide.
Design Advocacy Action Center
1. From the Design tab, under Advocacy Registration Form, select the advocacy registration form settings.
a. In the Advocacy registration form page field, select the web page that contains the advocacy registration form. For information about the Form part, see the Forms Guide. For information about how to add a part to a web page, see the Website Design Guide.
b. To require advocates to complete the form before the action item details page appears, select Display advocacy registration form page before details page.

CH A P T E R 116 .
2. Under Organization email information, enter contact information for the person who receives email copies of personal messages that advocates send to targets. The program only sends copies when you enable message personalization for the action item.
3. Under Action items, select the action items to include in the Advocacy Action Center.
• To create an action item and add it to Action item gallery, click Add action item. Complete the fields to add an action item. For information about the items on this screen, see “Add an action item” on page 3.

AD V O C A C Y TO O L S 17.
Note: Users with only view rights to Action item gallery cannot add action items.
• To select an action item from Action item gallery, click Select existing action item. The Select action item screen appears. Select an action item and click Select.
The Action item details screen appears.
Note: If the Action item details screen does not appear, check your browser’s pop-up window settings.
4. Under Relevance, select Urgent if the action item is time sensitive. “Urgent” appears in red next to the action item name in the Advocacy Action Center.
5. Under Action item list, select whether to display summary information in the action item list. You enter the synopsis when you create the action item.
6. Under Details page, select whether to display the action item name and full description on the details page. You enter the full description when you create the action item.
7. Click Save. You return to the Design tab. The action item appears in the grid where you can change the order, edit the display details, or delete action items.
8. Add as many action items as necessary.9. Click Save. You return to Parts.

CH A P T E R 118 .
Advocacy Message DeliveryWhen website advocates take action through the Advocacy Action Center and select “Email” or “Fax” for the message delivery options, the program prepares the messages and sends them to the message service. For “Email,” the service first determines whether the targets accept email or web form messages. When targets accept emails, the service processes the messages and uploads them to the mail server to send to the targets. When targets accept web form deliveries, the service connects to the targets’ web servers and completes the forms. For “Fax,” the service connects to the targets’ fax machines and sends the messages.After the program sends the messages, the targets’ mail systems, web servers, or fax machines provide codes to indicate the delivery status and whether the program should attempt to deliver the messages again. If delivery fails multiple times and you selected Enable fax backup for emails or Enable email backup for faxes on the action item, the program sends the message by the alternate method. Email and web form delivery failures typically occur after changes to targets’ email or web form services or when problems occur with the systems that receive the messages. Fax delivery failures typically occur when the target’s fax number is new or the program cannot connect to the fax machine.To learn the statuses of advocate messages, you can include the Message status field when you create and generate reports. For information about reports, see the Blackbaud Enterprise Reports and KPIs Guide.”“New”. The message is new and has not been sent through the message service.
“Processing”. The message service is attempting to deliver the message through email, web form, fax, or backup method.
“Delivered”. The target’s mail system, web server, or fax machine provided a code to indicate the message delivery was successful.
“Failed”. The message failed multiple delivery attempts or the backup delivery method failed. “Failover”. The program used the backup delivery method to send the message.
Elected Officials Search Part The Elected Officials Search part allows website advocates in the United States to identify their local, state, and federal lawmakers so they can contact the officials and advocate for your organization’s cause. Search results always display the most current data from the database.When you create the part, Design tab options are not available because you cannot edit the standard search options that appear with the part. For information about how to create or edit a part and use the tabs on the Edit Part screen, see the Website Design Guide. State search. The state search option allows advocates to select states from a list or map of the United
States.ZIP code search. The ZIP code search option allows advocates to enter 5- or 9-digit ZIP codes.Address search. The address search option allows advocates to enter street, city, state, and ZIP code
information.Advanced search. The advanced search option requires advocates to search for federal or state officials
by name, committee membership, or leadership position.

AD V O C A C Y TO O L S 19.
Note: Advanced searches for names require advocates to enter at least the first letter of the last names. To narrow a search, a user can enter a first name, party, chamber, or state.
The table below explains the results for each search option. For all searches, the names of federal and state officials link to web pages with biographical and contact details.
The figure below shows the part on a web page.
Search Criteria Search ResultsState Federal and state officials5-digit ZIP code Federal and state officials9-digit ZIP code Federal, state, and local officials Address Federal, state, and local officialsAdvanced (federal officials)
Federal officials
Advanced (state officials) State officials

CH A P T E R 120 .
The figure below shows the Advanced Search option.

21IN D E X .
IndexAaction item
activate 4, 11copy 12create 3delete 12disable 4, 11edit 11preview 3, 10results 4search 13status 3
activistpersonal message 5
advocacyaction center 15action item gallery 2elected official search 18
results 19email 10, 18
acknowledgement 6copy of advocate message 6, 16fax backup delivery 11message delivery 18
fax 10, 18email backup delivery 11message delivery 18
formcreate 2display 2, 15
messageconfirmation 6delivery 18delivery type 10email acknowledgement 6
message personalization 5overview 1report 2, 18user rights 1web form 10, 18webform
message delivery 18advocate
personal message 5
Ccall to action 4custom target 13
add 13
modify 15
Ppreview
action item 3, 10targets 10
print letter option 10
Ttarget
advanced 8basic 7custom 7, 13elected officials 7media 7