adviser’s control panel. explanation of our “my tracer” control panel for absa advisers...
TRANSCRIPT

Adviser’s Control Panel

Explanation of our “My Tracer”
Control Panel for ABSA Advisers
Let’s have a look at the Functionality
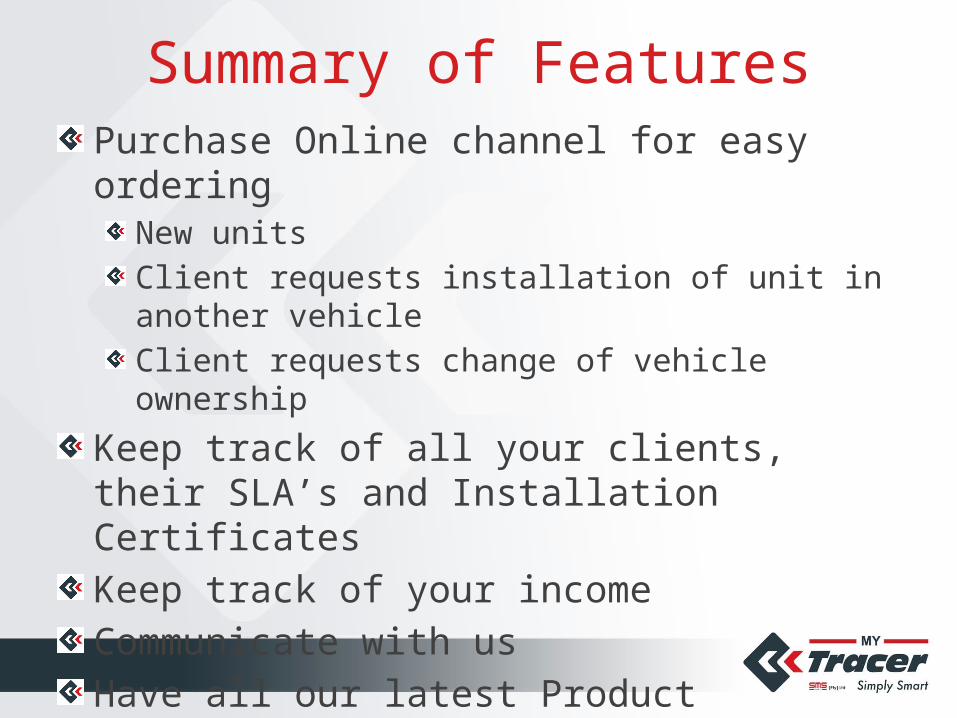
Summary of FeaturesPurchase Online channel for easy ordering
New units
Client requests installation of unit in another vehicle
Client requests change of vehicle ownership
Keep track of all your clients, their SLA’s and Installation Certificates
Keep track of your income
Communicate with us
Have all our latest Product Information, Manuals and Training available at a click of your mouse

Go to www.mytracer.co.za
Should you have the time please Click on “My Tracer Presentation” to learn more detail about our product

Advisers Login
Step 2 – Click on “Adviser Login”
Step 1 – Scroll down
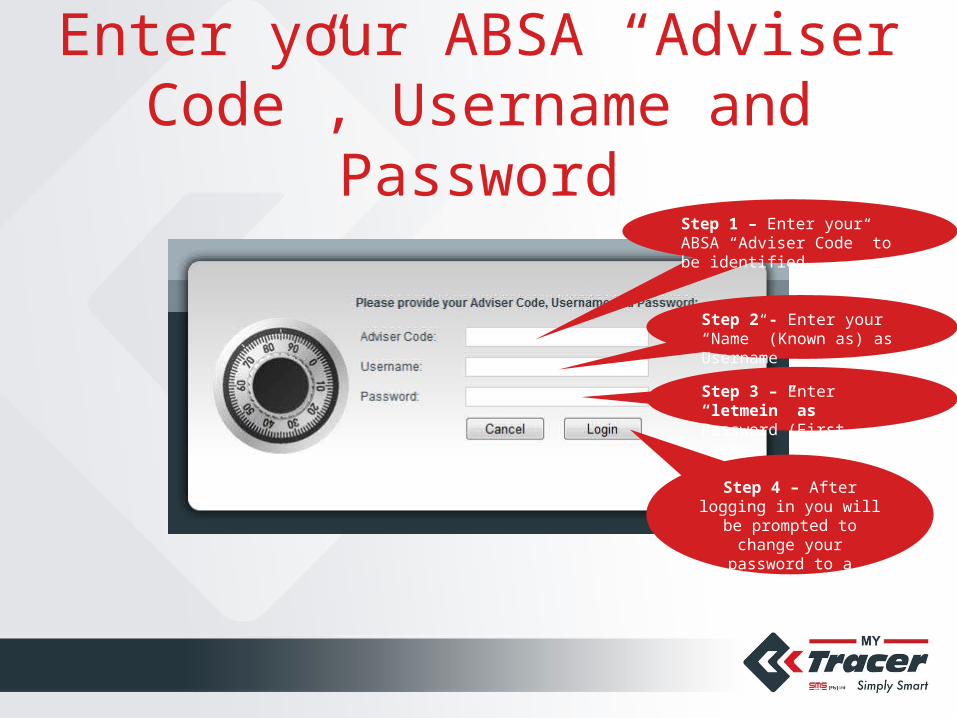
Enter your ABSA “Adviser Code”, Username and Password
Step 1 – Enter your ABSA “Adviser Code” to be identified
Step 3 – Enter “letmein” as Password (First Login)
Step 4 – After logging in you will be prompted to
change your password to a unique password
Step 2 - Enter your “Name” (Known as) as Username

Please change your “Password” The first time you Login

Update your Details
Confirm your new secure private “Password”
Enter your new secure private “Password”

Click “here” to Proceed
Click “here” to Proceed

First step
Click to Contact Us for Support and more information
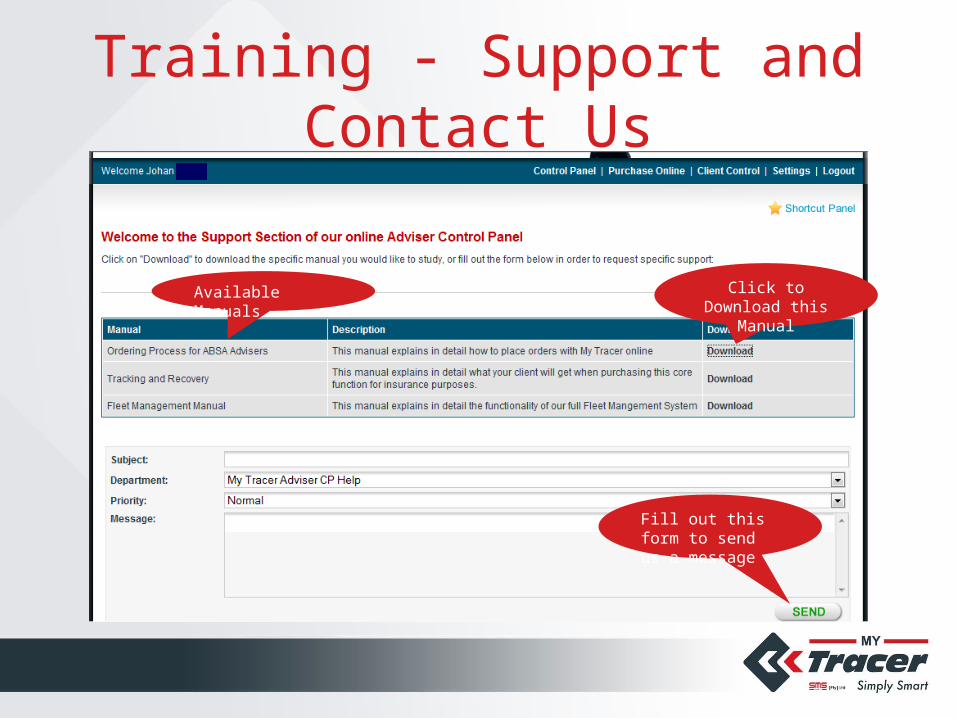
Training - Support and Contact Us
Available Manuals
Fill out this form to send us a message
Click to Download this Manual

New Client - New Order

Click on “Purchase Online”
Click “Purchase Online”
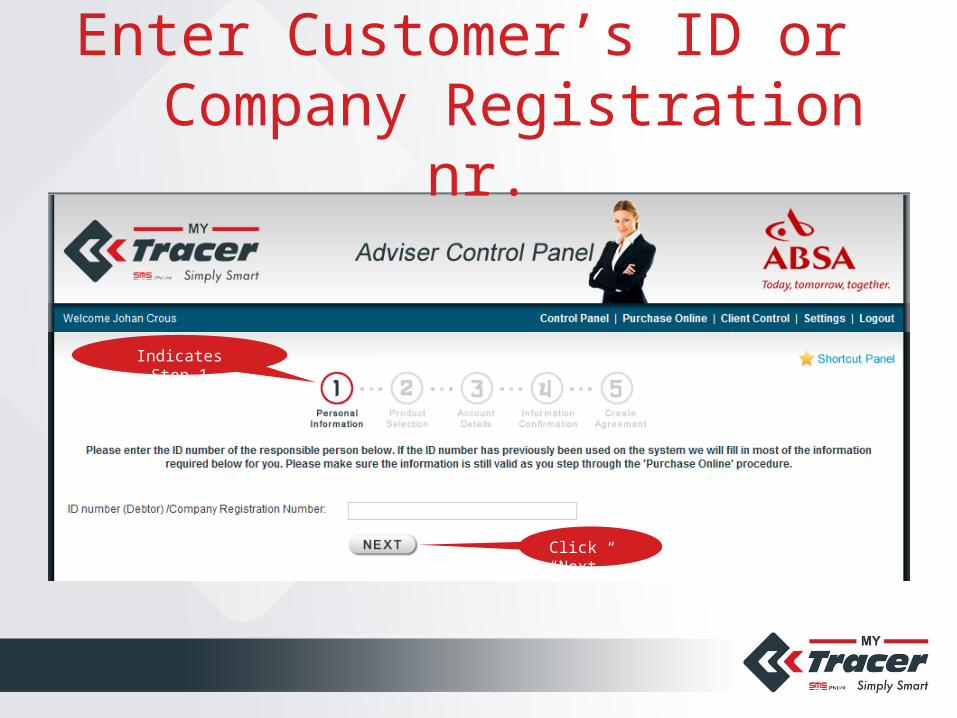
Enter Customer’s ID or Company Registration nr.
Click “Next”
Indicates Step 1

Customer Selects his/her Private and Secure “My Tracer” Username
and Password
Customer enters his/her “My Tracer” Username and Password for future login to
the “My Tracer” siteReminder these login
details are Case-sensitive

Enter Customer or Company Detail
Click “Next”

Select the Product to Order
Click “Add Product” to Order one by one
Scroll up or down to view products

Please Provide the Vehicle details for this unit
Click “Next”
Please try to complete this vehicle detail form as
complete as possible
Should all the information not be
available check this box please
The transaction PRI number is Compulsory

Add another Product or click “Next” to proceed
Click “Next”
Detailed summary of this order
Step 2 completed
Click to add another product to your order
Click “Next “ to continue
Product already ordered
Click here to remove this order

Customer’s Banking Details
Click “Next”
Select payment method
Scared to provide banking information? Just click here and we will contact you
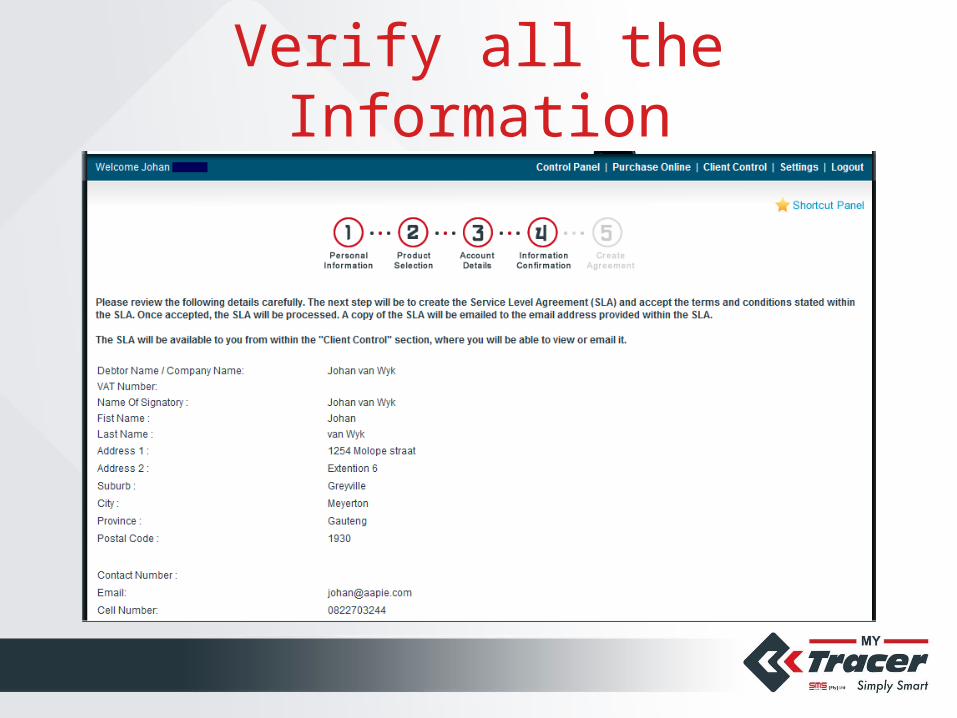
Verify all the Information

Verify all the Information
If the available supplied information is correct click
on “Create Agreement”

Please Read and Print the SLA
Click here to Print the Agreement
Click here to Save the Agreement
Scroll down to Read the SLA
agreement

Customer Signs Agreement and Authorizes the Debit Order Online
Tick checkbox
Final Step Click “Submit Signed Order”
Do this calculation
Your SLA is populated with the
provided details

This Order has been ProcessedThe Customer will be Contacted to
Confirm Debit Order Authorization
To arrange for installation
Adviser may return to the Control Panel toConfirm placed orders of his/her clients
Follow progress of installation process
Control and verify outstanding payments
Order products for more clients

The Client Control Feature
To view client details click on the “Client Control” link

Your Clients info and Progress
The SLA may beViewed
The SLA may beE-mailed
The SLA may beDownloaded
If required information supplied is incomplete or
installation not completed

Vehicle Swop

Existing Customer’s ID RecognizedSwop Unit to another Vehicle
Click to swop unit to another vehicle
To protect our client’s information you need to login with the client’s “My Tracer” Username and Password to
be allowed to do this
If we recognize you as an existing client you have the options to do the following
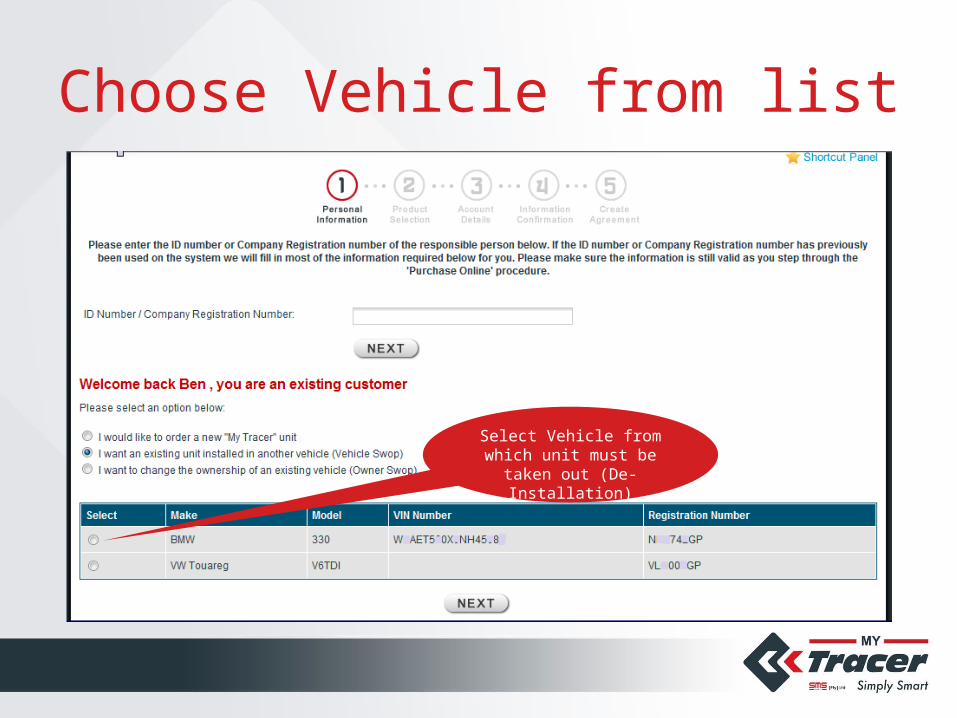
Choose Vehicle from list
Select Vehicle from which unit must be taken out
(De-Installation)

Provide New Vehicle’s Detailsand Verify Banking Details
Please provide the New Vehicle details
if at all possible
Current vehicle details displayed at top of form
Should the new vehicle details not be available
check this box
Please verify that your banking details
are still correct

Confirmation of Information
If the information is correct check this box to confirm
Click next

Process to Complete TransactionCustomer will be contacted
To arrange for this Vehicle Swop Installations
Customer will receiveInvoice for this transaction
New “My Tracer Installation Certificate” containing the New Vehicle’s information
Our computer systems are automatically updated
With the new vehicle’s details

Owner Swop
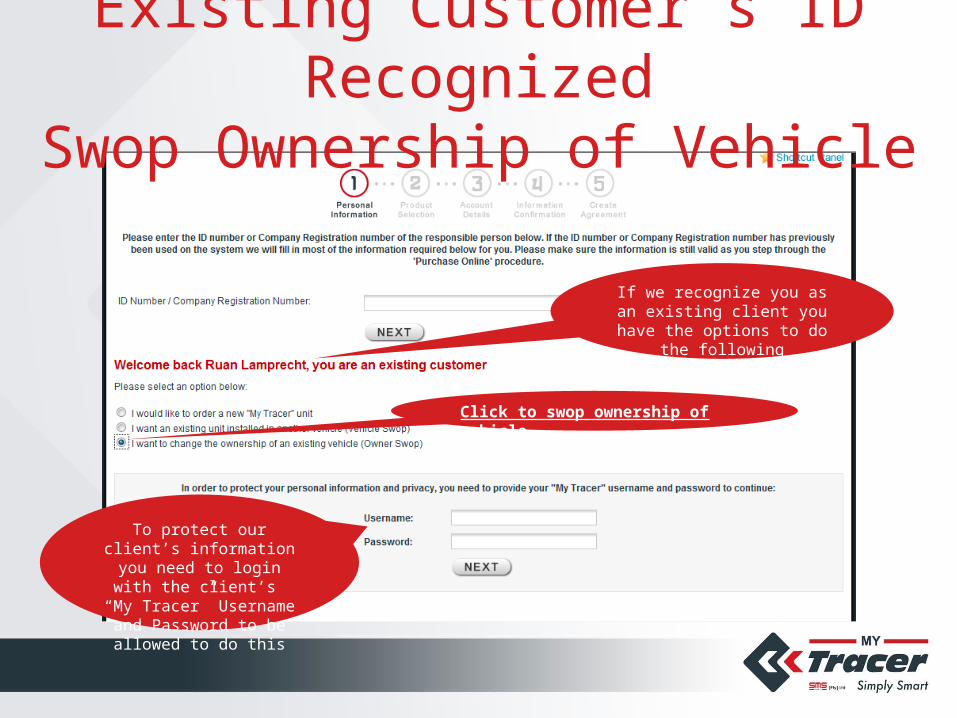
Existing Customer’s ID RecognizedSwop Ownership of Vehicle
Click to swop ownership of vehicle
To protect our client’s information you need to login with the client’s “My Tracer” Username and Password to
be allowed to do this
If we recognize you as an existing client you have the options to do the following

Select Vehicle from List
Select Vehicle of which ownership must change
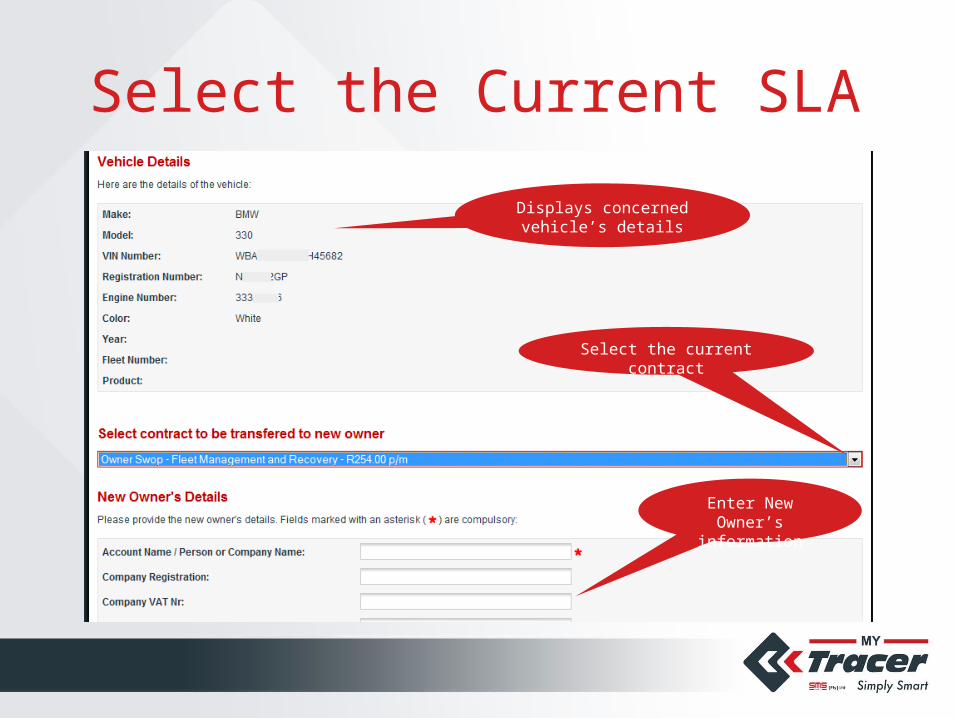
Select the Current SLA
Displays concerned vehicle’s details
Select the current contract
Enter New Owner’s information

New Customer’s Banking DetailsPlease stick to
this format
Select payment method
Scared to provide banking information? Just click here and we will contact you
Click “Next”

Verify Information
Check this box then click “Next”

Customer Signs Agreement and Authorizes the Debit Order Online
Tick checkbox
Final Step Click “Submit Signed Order”
Do this calculation

Process to Complete TransactionVehicle removed from Current owner’s account
New account created for the New Owner
New Owner receivesService Level Agreement with “My Tracer”
“My Tracer Installation Certificate”
Welcome letter from “My Tracer” with the relevant information
Getting started manual

Adviser Control Panel

Top Bar - Main Menu
Click “Purchase Online” to order another unit
Click “Control Panel” to return to main page
Click “Client Control” to view your clients
Click “Settings” to view your details
Click “Logout” to go back to our
Website
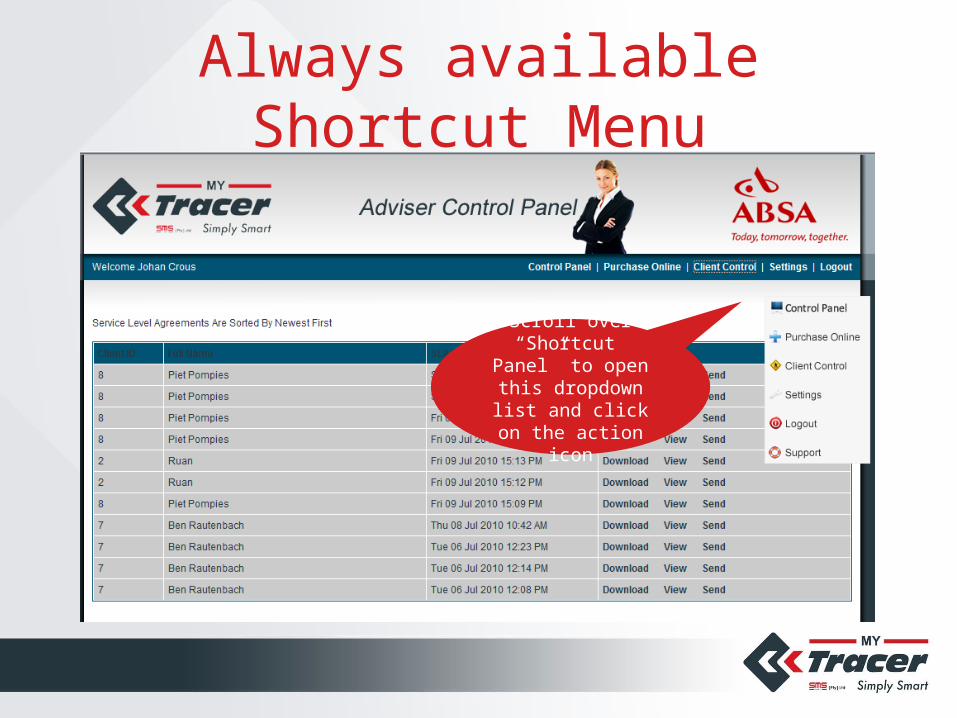
Always available Shortcut Menu
Scroll over “Shortcut Panel” to open this
dropdown list and click on the action icon

Adviser’s Control Panel Main Menu
You already know about this tab
Now click on “My Remuneration”
You already know about this tab
You already know about this tab
You already know about this tab

My Remuneration
Select Month Select Year
Click on “Go”
Selected Month
Transaction PRI nr. Remuneration

Adviser’s Personal Information
Click on “Settings”
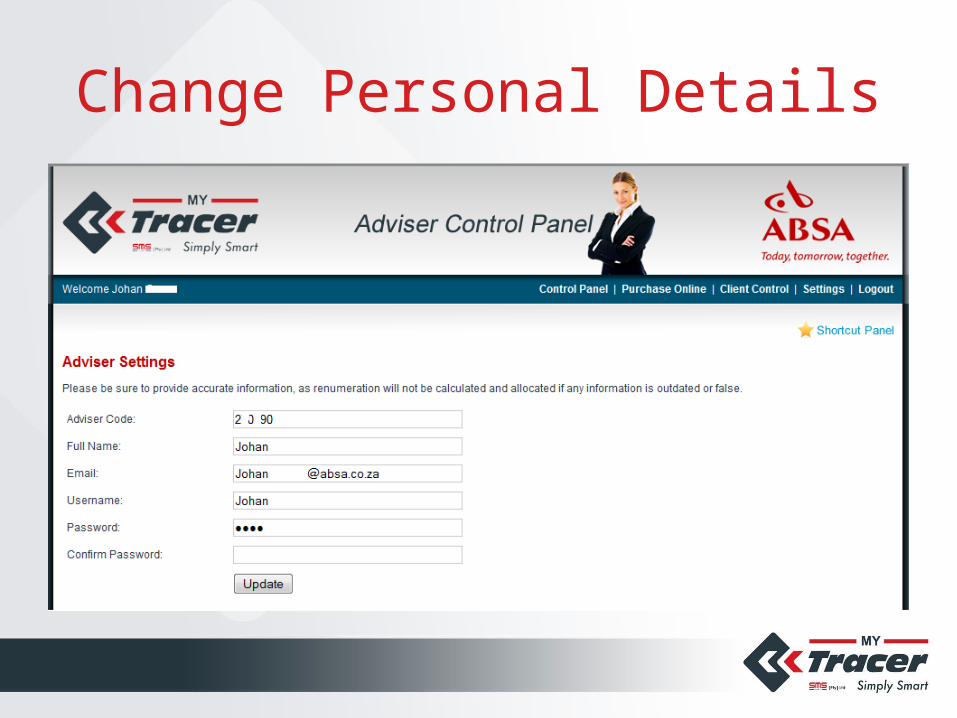
Change Personal Details

Installations of unitsAfter receipt of the order we will contact the client to confirm the debit order mandate and arrange for installation
Installations are done within 7 days from day of order
Easy 3 wire connection during installation
No interference with vehicle’s electronics
Average time 30 to 45 minutes
Very little usage of vehicle’s battery power

Finalizing the TransactionFunctionality of units are verified on site via installer’s cell phone or computer
Final customer and vehicle data collected, verified and submitted via the internet
Unit’s are therefore active immediately after completion of installation
To complete the transaction the client will be e-mailed his/her documentation

Customer’s DocumentsCustomer receives via e-mail his/her
Username and Password
Vehicle Recovery Call Centre number
Instructions on “How to get Started”
Final and complete SLA
Customer receives his/her SAIAS accredited “My Tracer Installation Certificate” accepted by Insurance Companies, if customer is subscribed for Recovery