advanced powerpoint/exercise 2 creating a presentation ... · advanced powerpoint/exercise 2...
TRANSCRIPT
Advanced PowerPoint/Exercise 2 Creating A Presentation With Action Buttons and Hyperlinks
In your first presentation, you created links from Excel to PowerPoint. These links automatically updated the Investments Worksheet slide and 3-D Pie Chart slide when you opened the presentation.
Sometimes when running a slide show, you want to open another program, directly from PowerPoint, show the audience the affect of a change. For example, when presenting the slide showing your Investments Worksheet, you may want to refresh the data during the presentation and have the spreadsheet and the chart both change. You may wish to show the Yahoo financial charts updated to the minute or you may want to link one PowerPoint presentation to another presentation. PowerPoint allows you to do so using interactive documents. An interactive document is a file created in one program, such as Microsoft Word, and then opened during the running of a slide show.
OLE stands for object linking and embedding. Many programs such as Excel, Word, Publisher, Internet Explorer, and others can link with PowerPoint.
Open an Existing Presentation t 1. Start PowerPoint.
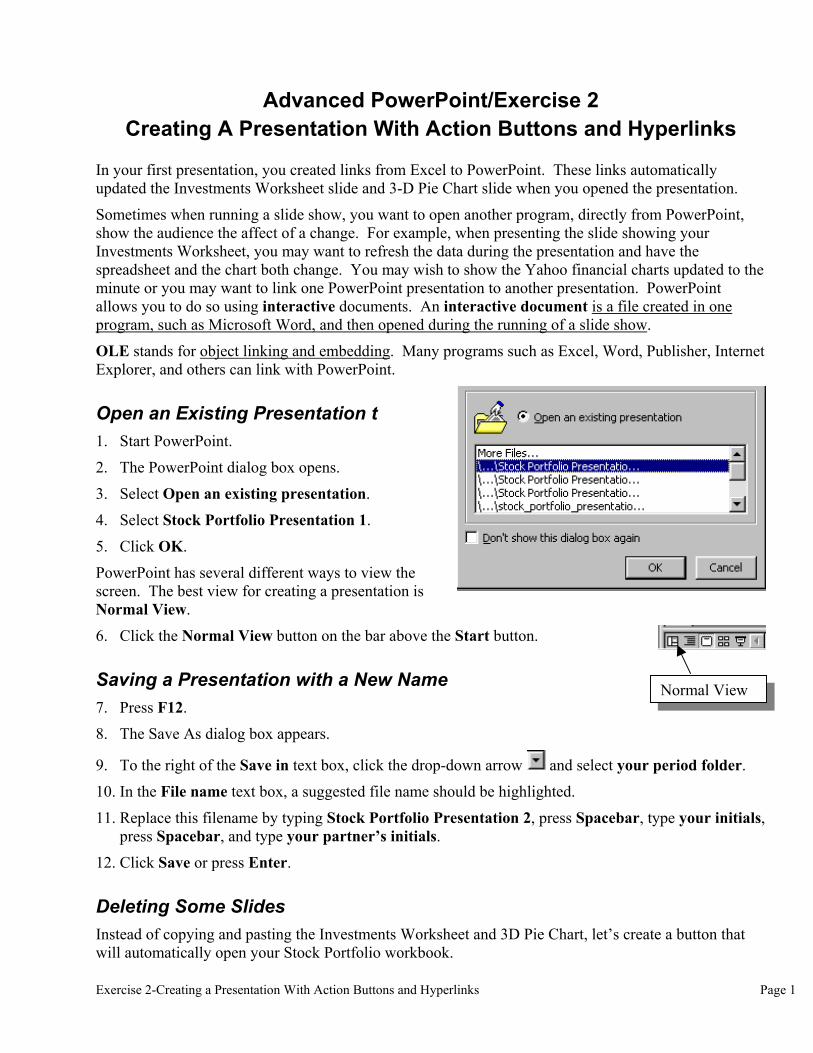
2. The PowerPoint dialog box opens.
3. Select Open an existing presentation.
4. Select Stock Portfolio Presentation 1.
5. Click OK.
PowerPoint has several different ways to view the screen. The best view for creating a presentation is Normal View.
6. Click the Normal View button on the bar above the Start button.
Normal View Saving a Presentation with a New Name 7. Press F12.
8. The Save As dialog box appears.
9. To the right of the Save in text box, click the drop-down arrow and select your period folder.
10. In the File name text box, a suggested file name should be highlighted.
11. Replace this filename by typing Stock Portfolio Presentation 2, press Spacebar, type your initials, press Spacebar, and type your partner’s initials.
12. Click Save or press Enter.
Deleting Some Slides Instead of copying and pasting the Investments Worksheet and 3D Pie Chart, let’s create a button that will automatically open your Stock Portfolio workbook.
Exercise 2-Creating a Presentation With Action Buttons and Hyperlinks Page 1
13. Click the Slide Sorter View button .
14. Hold the Control key down and select the last two slides.
15. The slides are selected.
16. Release the Control key.
17. Press the Delete key to remove the slides.
Finding a Background Picture on the Internet Sometimes it is difficult to find a design template that has all the characteristics your presentation requires. In this project, you want to modify the background by adding a picture of something related to money or the stock market and add a new background object.
18. Click Internet Explorer on the Taskbar to start the program.
19. In the Address bar text box type www.google.com.
20. Click the Images tab.
21. In the search text box type money or “stock market.”
22. Press Enter.
23. The Google search engine will find every photo or piece of clip art that contains your keywords.
24. Find a picture that you like.
25. Make sure that you view the full-size image.
26. Right-click the image and select Save Picture As.
27. The Save Picture dialog box will open.
28. Save in your period folder.
29. Change the File name to a good title.
30. Click Save.
Insert a Picture to Create a Custom Slide Background 31. Click the PowerPoint button on the Taskbar to make it active.
32. Click the Normal View button .
33. Right-click anywhere on Slide 1 except the title or subtitle placeholder.
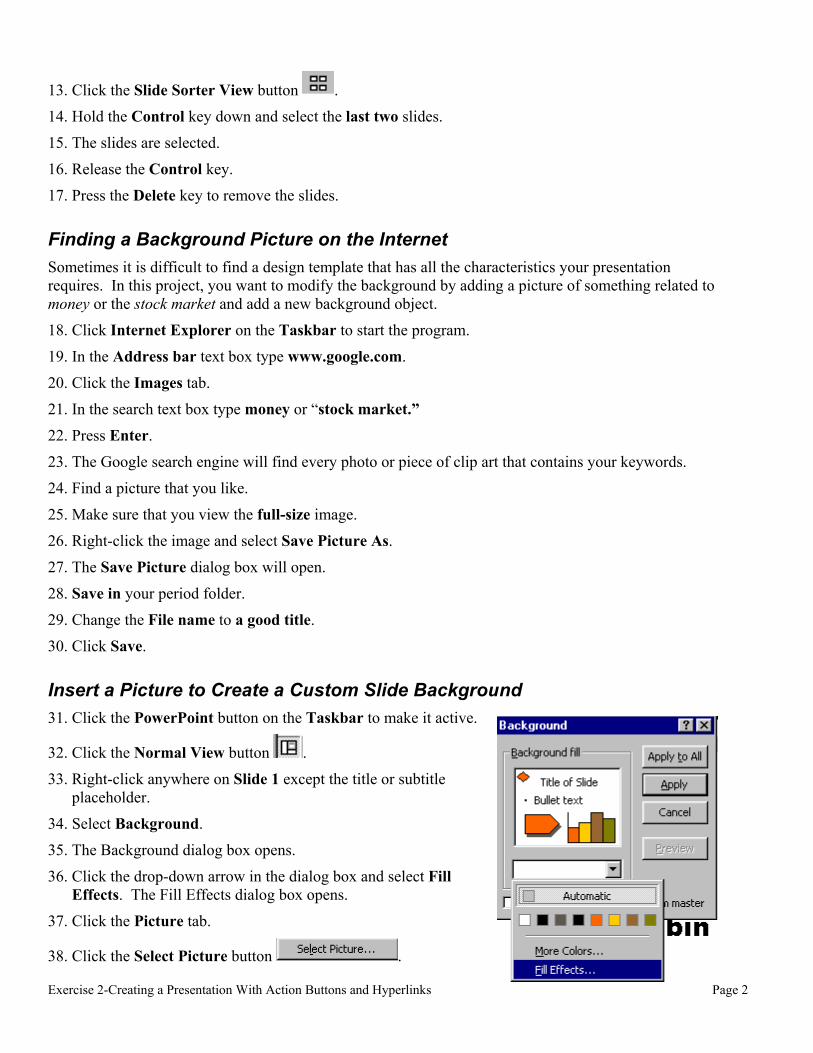
34. Select Background.
35. The Background dialog box opens.
36. Click the drop-down arrow in the dialog box and select Fill Effects. The Fill Effects dialog box opens.
37. Click the Picture tab.
38. Click the Select Picture button .
Exercise 2-Creating a Presentation With Action Buttons and Hyperlinks Page 2
39. The Select Picture dialog box will open
40. Look for the picture you just saved in your period folder.
41. Click the picture to select it.
42. Click Insert.
43. The Fill Effects dialog box will open.
44. Click OK.
45. The Background dialog box will open.
46. Click the Apply to All button .
47. Press Ctrl+S to save your work.
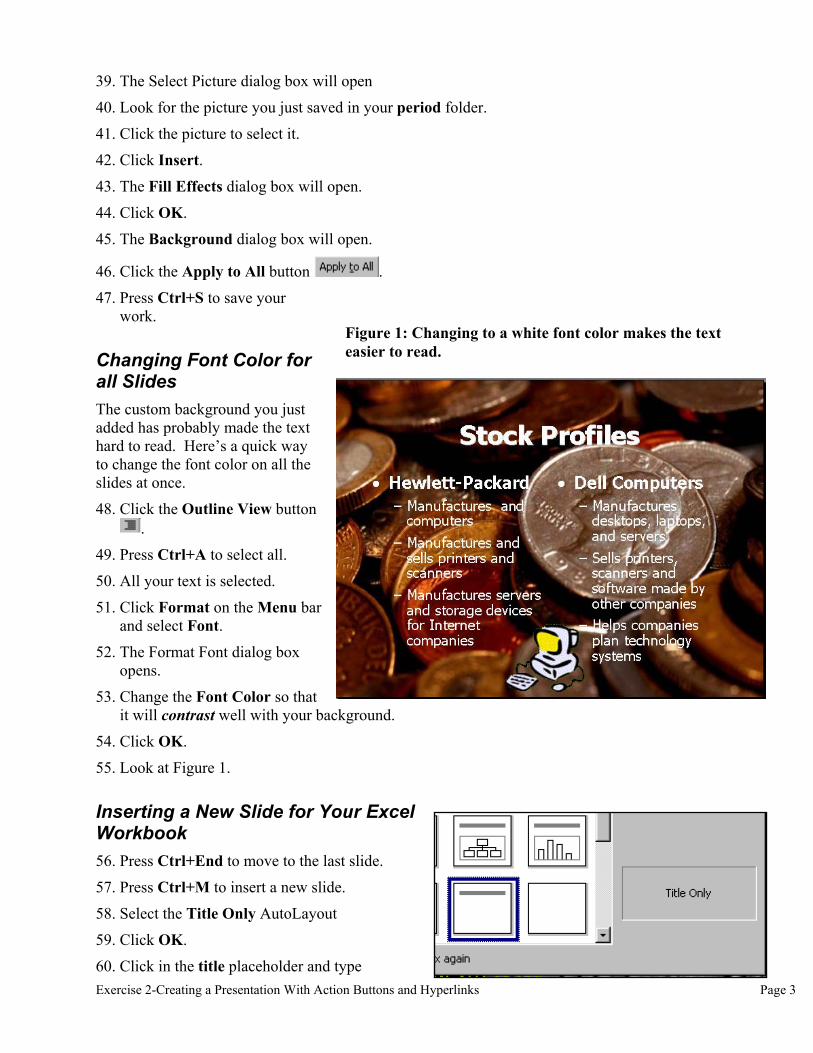
Figure 1: Changing to a white font color makes the text easier to read. Changing Font Color for
all Slides The custom background you just added has probably made the text hard to read. Here’s a quick way to change the font color on all the slides at once.
48. Click the Outline View button .
49. Press Ctrl+A to select all.
50. All your text is selected.
51. Click Format on the Menu bar and select Font.
52. The Format Font dialog box opens.
53. Change the Font Color so that it will contrast well with your background.
54. Click OK.
55. Look at Figure 1.
Inserting a New Slide for Your Excel Workbook 56. Press Ctrl+End to move to the last slide.
57. Press Ctrl+M to insert a new slide.
58. Select the Title Only AutoLayout
59. Click OK.
60. Click in the title placeholder and type Exercise 2-Creating a Presentation With Action Buttons and Hyperlinks Page 3
Investments Workbook.
Adding Linked Action Buttons Action buttons perform a task: open a Web page, open a program, and jump to another slide.
61. Click Slide Show on the Menu bar, point to Action Buttons, and select the Document button (row 3, column 2)
62. Hold the Shift key and draw a button on the slide.
63. Holding the Shift key keeps the button sides equal (a square).
64. The Action Settings dialog box opens.
65. Click the Mouse Click tab.
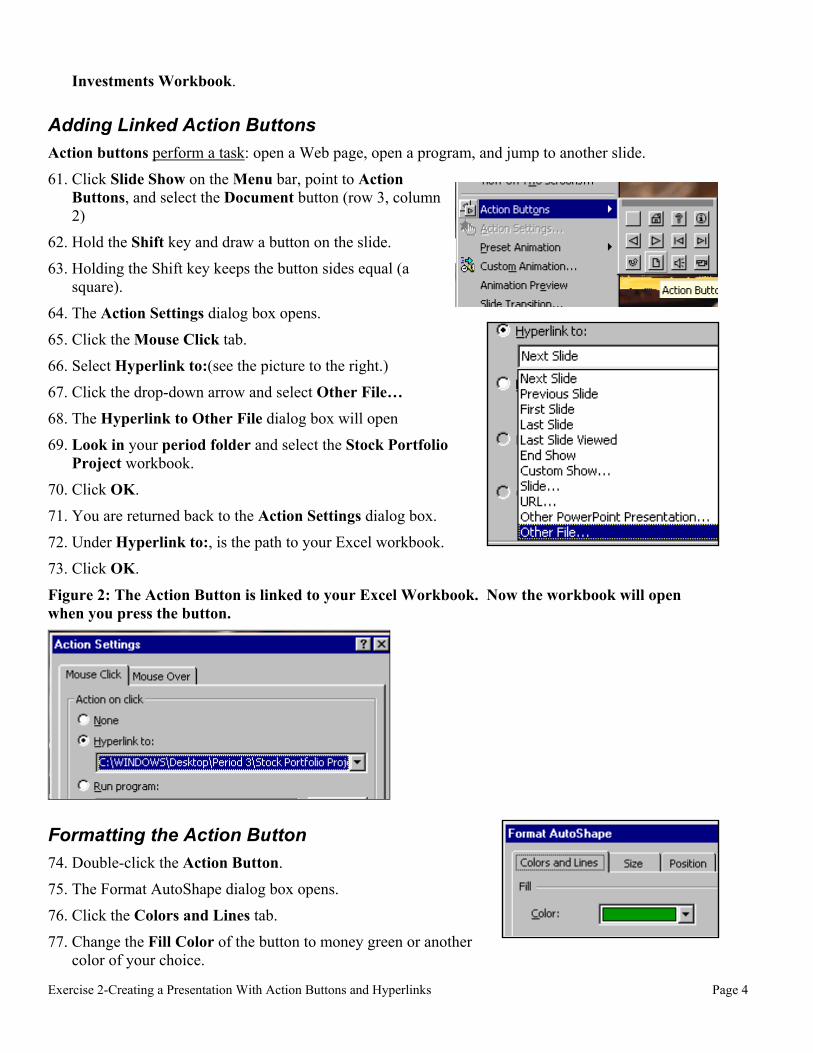
66. Select Hyperlink to:(see the picture to the right.)
67. Click the drop-down arrow and select Other File…
68. The Hyperlink to Other File dialog box will open
69. Look in your period folder and select the Stock Portfolio Project workbook.
70. Click OK.
71. You are returned back to the Action Settings dialog box.
72. Under Hyperlink to:, is the path to your Excel workbook.
73. Click OK.
Figure 2: The Action Button is linked to your Excel Workbook. Now the workbook will open when you press the button.
Formatting the Action Button 74. Double-click the Action Button.
75. The Format AutoShape dialog box opens.
76. Click the Colors and Lines tab.
77. Change the Fill Color of the button to money green or another color of your choice.
Exercise 2-Creating a Presentation With Action Buttons and Hyperlinks Page 4
78. Click OK.
Adding Text to the Action Button Action Buttons are AutoShapes and can be formatted exactly like the AutoShapes you’ve used before.
79. Right-click the new Action Button and select Add Text.
80. The blinking insertion point means you can type your message.
81. Type Excel.
82. Press Enter.
83. Type Workbook.
84. Select the text on the button.
85. Click Format on the Menu bar and select Font.
86. The Format Font dialog box opens.
87. Change the Font Size to 32 points.
88. Change the Font Color to the same color you used for your other text.
89. Change the Font to the same font you are using for your text.
90. Make the text bold.
91. Click OK.
92. Note: You may have to resize the button to get it to fit the text.
93. Look at Figure 3.
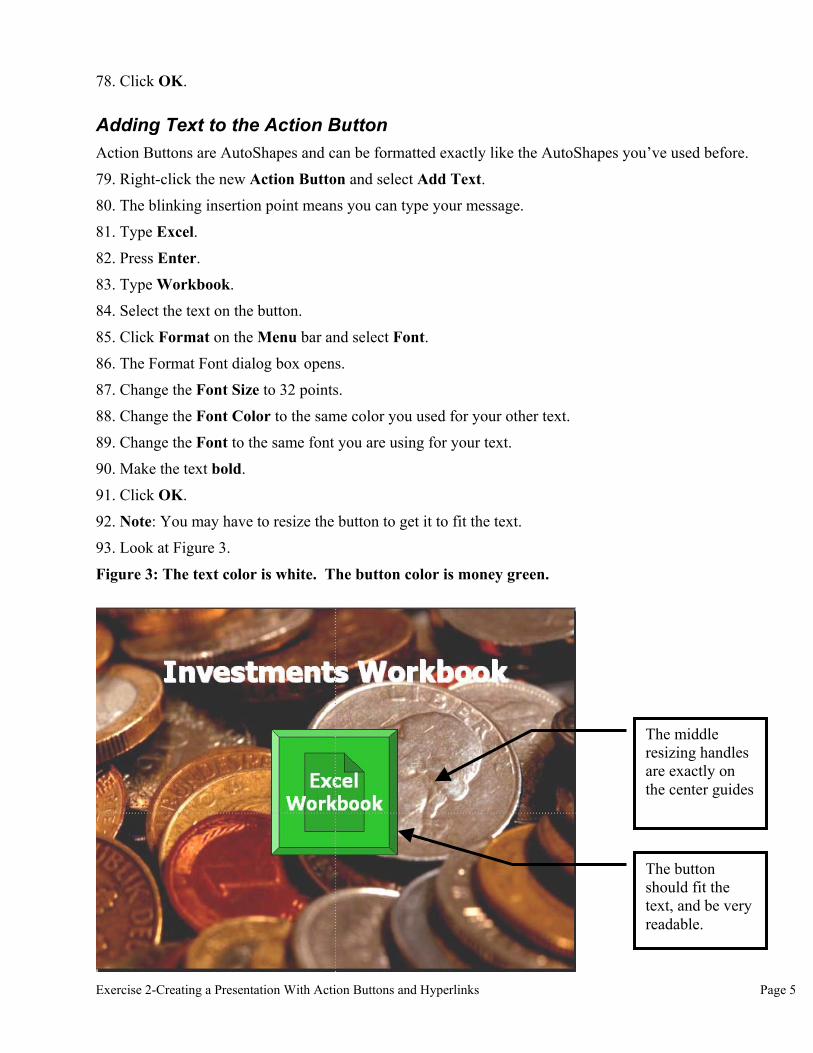
Figure 3: The text color is white. The button color is money green.
The middle resizing handles are exactly on the center guides
The button should fit the text, and be very readable.
Exercise 2-Creating a Presentation With Action Buttons and Hyperlinks Page 5
Center the Button on the Slide 94. Click View on the Menu bar and select Guides.
95. Guides are vertical and horizontal lines that let you line things up.
96. Select the Action Button so that you can see the resizing handles.
97. Press the Arrow keys to nudge the button onto the guides.
98. The middle handles on the button should be on the guides.
99. Look at Figure 3.
Testing the Action Button 100. Click the Slide Show button .
101. Click the new Action Button you just made to test it.
102. Did it connect to your Excel Workbook?
103. Press the Back button on Excel’s Web toolbar to move from the workbook back to your presentation.
104. Press the Esc key to return to Normal View.
105. Press Ctrl+S to save your work.
Inserting a New Slide for Your Excel Workbook 106. Press Ctrl+End to go to the last slide.
107. Press Ctrl+M to insert a new slide.
108. Select the Title Only AutoLayout
109. Click OK.
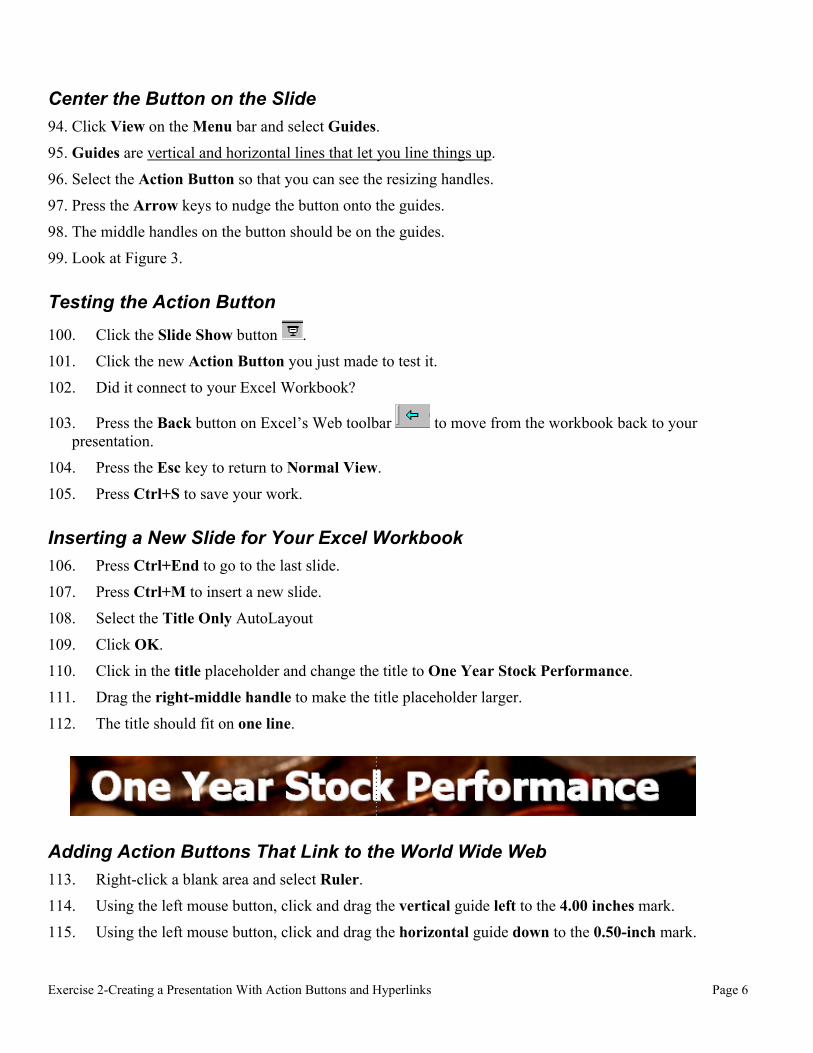
110. Click in the title placeholder and change the title to One Year Stock Performance.
111. Drag the right-middle handle to make the title placeholder larger.
112. The title should fit on one line.
Adding Action Buttons That Link to the World Wide Web 113. Right-click a blank area and select Ruler.
114. Using the left mouse button, click and drag the vertical guide left to the 4.00 inches mark.
115. Using the left mouse button, click and drag the horizontal guide down to the 0.50-inch mark.
Exercise 2-Creating a Presentation With Action Buttons and Hyperlinks Page 6
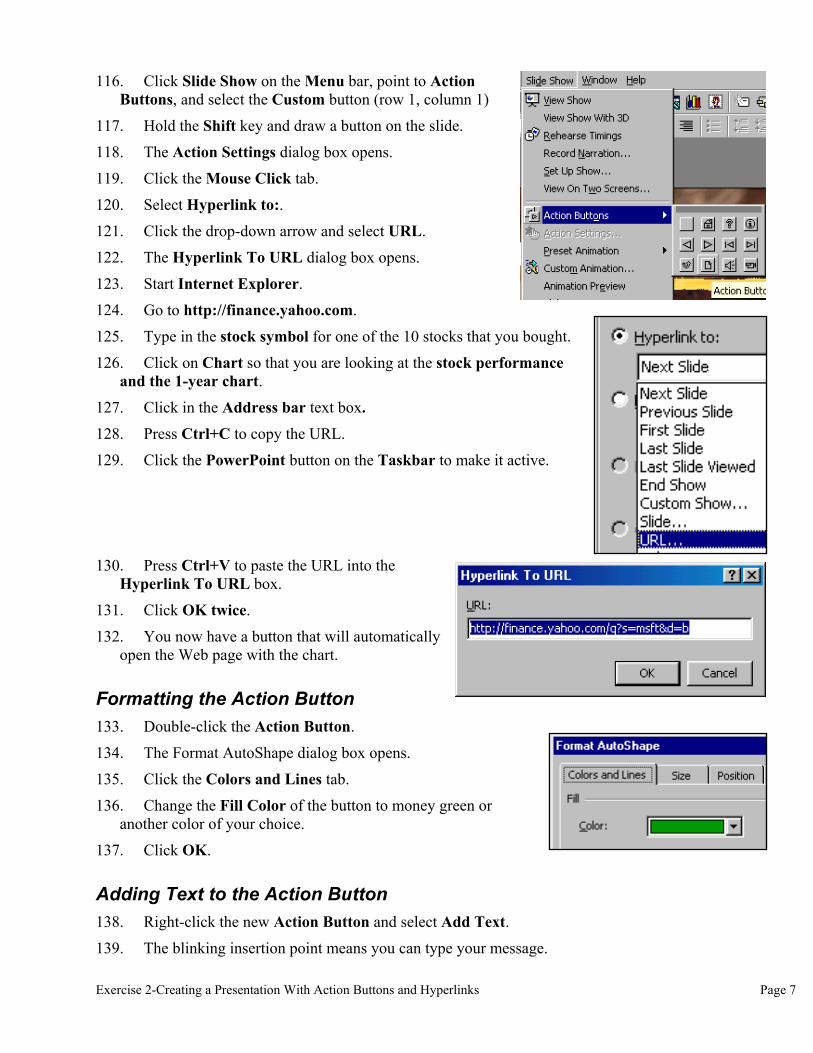
116. Click Slide Show on the Menu bar, point to Action Buttons, and select the Custom button (row 1, column 1)
117. Hold the Shift key and draw a button on the slide.
118. The Action Settings dialog box opens.
119. Click the Mouse Click tab.
120. Select Hyperlink to:.
121. Click the drop-down arrow and select URL.
122. The Hyperlink To URL dialog box opens.
123. Start Internet Explorer.
124. Go to http://finance.yahoo.com.
125. Type in the stock symbol for one of the 10 stocks that you bought.
126. Click on Chart so that you are looking at the stock performance and the 1-year chart.
127. Click in the Address bar text box.
128. Press Ctrl+C to copy the URL.
129. Click the PowerPoint button on the Taskbar to make it active.
130. Press Ctrl+V to paste the URL into the Hyperlink To URL box.
131. Click OK twice.
132. You now have a button that will automatically open the Web page with the chart.
Formatting the Action Button 133. Double-click the Action Button.
134. The Format AutoShape dialog box opens.
135. Click the Colors and Lines tab.
136. Change the Fill Color of the button to money green or another color of your choice.
137. Click OK.
Adding Text to the Action Button 138. Right-click the new Action Button and select Add Text.
139. The blinking insertion point means you can type your message.
Exercise 2-Creating a Presentation With Action Buttons and Hyperlinks Page 7
140. Type the name of the stock or mutual fund.
141. Select the text on the button.
142. Click Format on the Menu bar and select Font.
143. The Format Font dialog box opens.
144. Change the Font Size to 32 points.
145. Change the Font Color to the same color you used for your other text.
146. Change the Font to the same font you are using for your text.
147. Make the text bold.
148. Click OK.
149. Note: You may have to resize the button to get it to fit the text.
150. Look at Figure 4.
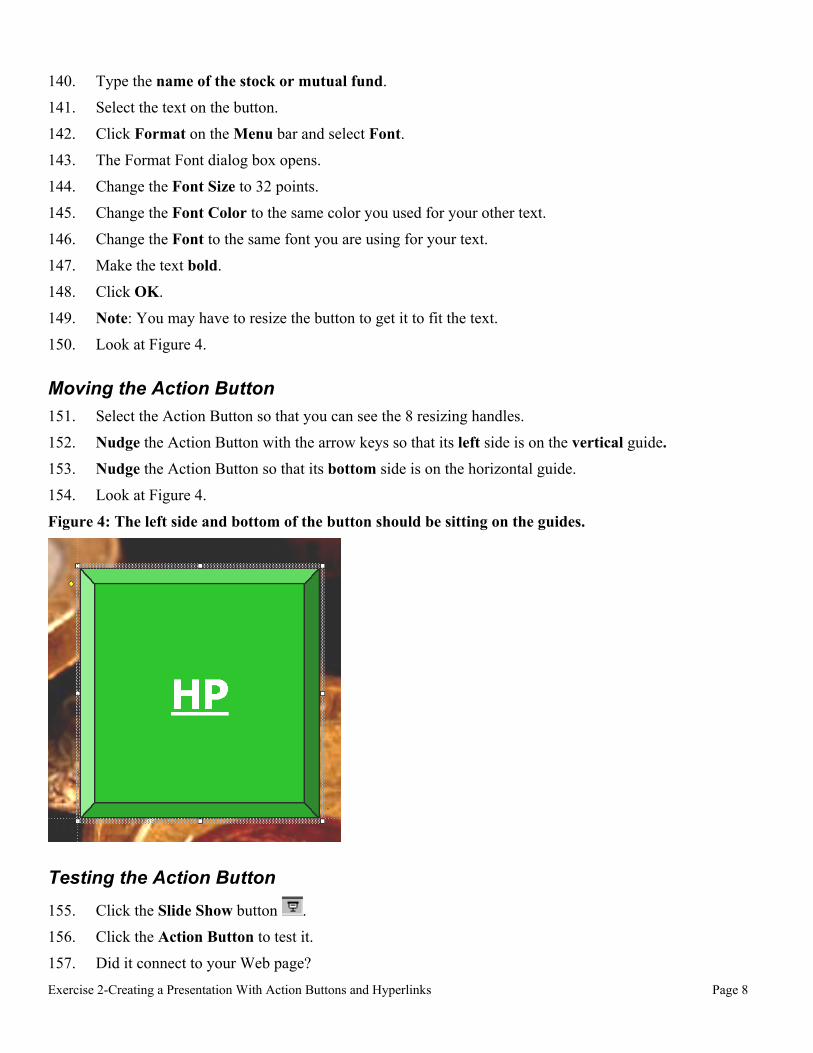
Moving the Action Button 151. Select the Action Button so that you can see the 8 resizing handles.
152. Nudge the Action Button with the arrow keys so that its left side is on the vertical guide.
153. Nudge the Action Button so that its bottom side is on the horizontal guide.
154. Look at Figure 4.
Figure 4: The left side and bottom of the button should be sitting on the guides.
Testing the Action Button 155. Click the Slide Show button .
156. Click the Action Button to test it.
157. Did it connect to your Web page? Exercise 2-Creating a Presentation With Action Buttons and Hyperlinks Page 8

158. Press the Back button in Internet Explorer to move from the Web page back to your presentation.
159. Click the Normal View button .
Copying an Action Button You need to have one action button for each stock you bought. Rather than have 10 buttons on one page, you will make five buttons. The page can be duplicated and changed for a total of 10 buttons. If you have less or more stocks than 10, layout the buttons some other way—perhaps 4 buttons on each page, or 5 on one page and 4 on another.
160. Click the Action Button you just made to select it.
161. Press Ctrl+C to copy it.
162. Press Ctrl+V to paste the button four times.
163. Using the left mouse button, click and drag the vertical guide right to the 4.00 inches mark.
164. Move one of the copied Action Buttons so that its right side is on the vertical guide and its bottom is on the horizontal guide.
165. Using the left mouse button, click and drag the horizontal guide down to the 3.25 inches mark.
166. Move one of the copied Action Buttons so that its right side is on the vertical guide and its bottom side is on the horizontal side.
167. Using the left mouse button, click and drag the vertical guide left to the 4.00 inches mark.
168. Move one of the Action Buttons so that its left side is on the vertical guide and its bottom side is on the horizontal side.
Centering the Last Action Button 169. Drag the horizontal guide back to 0.50 inches.
170. Drag the vertical guide back to 0 inches.
171. Select the last action button and nudge it so that the middle handles sit on the vertical and horizontal guides.
172. Look at Figure 5.
Exercise 2-Creating a Presentation With Action Buttons and Hyperlinks Page 9
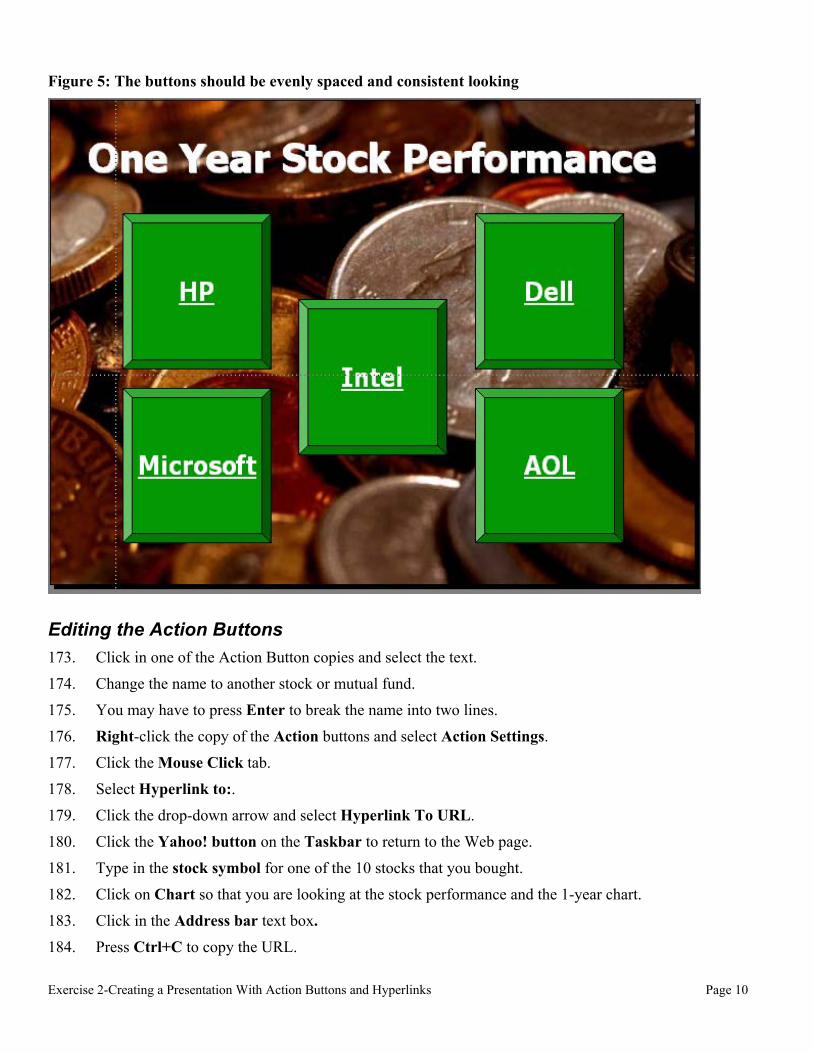
Figure 5: The buttons should be evenly spaced and consistent looking
Editing the Action Buttons 173. Click in one of the Action Button copies and select the text.
174. Change the name to another stock or mutual fund.
175. You may have to press Enter to break the name into two lines.
176. Right-click the copy of the Action buttons and select Action Settings.
177. Click the Mouse Click tab.
178. Select Hyperlink to:.
179. Click the drop-down arrow and select Hyperlink To URL.
180. Click the Yahoo! button on the Taskbar to return to the Web page.
181. Type in the stock symbol for one of the 10 stocks that you bought.
182. Click on Chart so that you are looking at the stock performance and the 1-year chart.
183. Click in the Address bar text box.
184. Press Ctrl+C to copy the URL.
Exercise 2-Creating a Presentation With Action Buttons and Hyperlinks Page 10
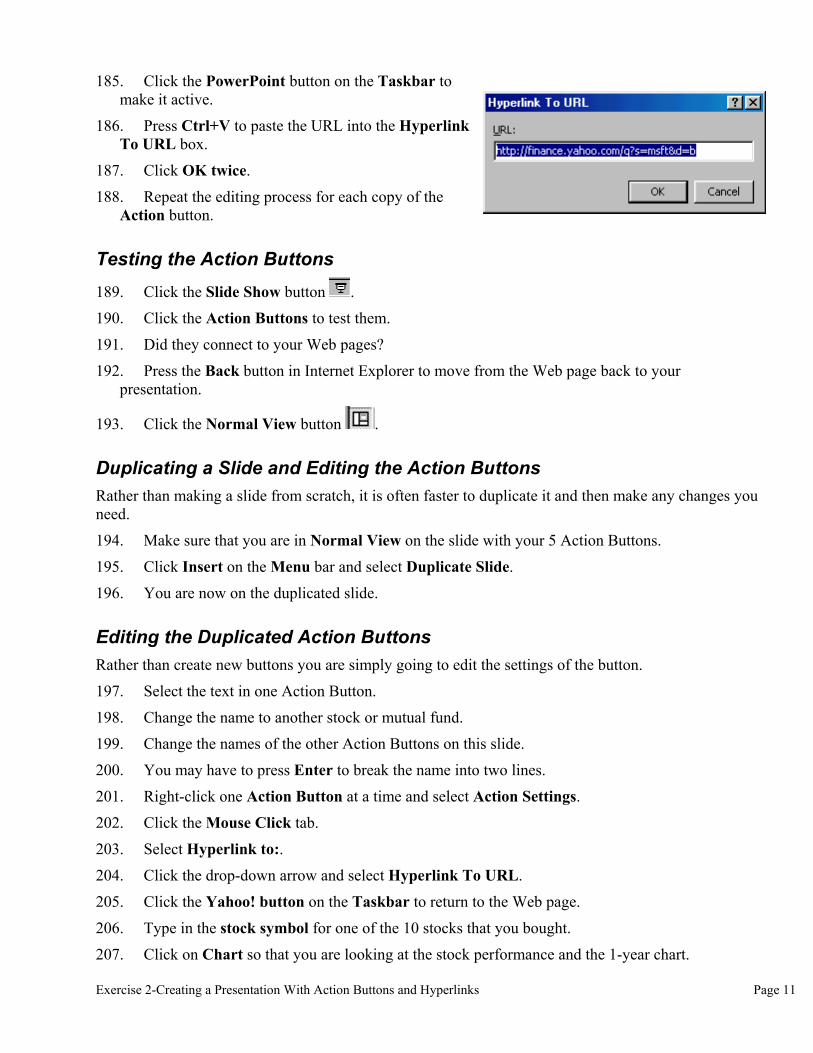
185. Click the PowerPoint button on the Taskbar to make it active.
186. Press Ctrl+V to paste the URL into the Hyperlink To URL box.
187. Click OK twice.
188. Repeat the editing process for each copy of the Action button.
Testing the Action Buttons 189. Click the Slide Show button .
190. Click the Action Buttons to test them.
191. Did they connect to your Web pages?
192. Press the Back button in Internet Explorer to move from the Web page back to your presentation.
193. Click the Normal View button .
Duplicating a Slide and Editing the Action Buttons Rather than making a slide from scratch, it is often faster to duplicate it and then make any changes you need.
194. Make sure that you are in Normal View on the slide with your 5 Action Buttons.
195. Click Insert on the Menu bar and select Duplicate Slide.
196. You are now on the duplicated slide.
Editing the Duplicated Action Buttons Rather than create new buttons you are simply going to edit the settings of the button.
197. Select the text in one Action Button.
198. Change the name to another stock or mutual fund.
199. Change the names of the other Action Buttons on this slide.
200. You may have to press Enter to break the name into two lines.
201. Right-click one Action Button at a time and select Action Settings.
202. Click the Mouse Click tab.
203. Select Hyperlink to:.
204. Click the drop-down arrow and select Hyperlink To URL.
205. Click the Yahoo! button on the Taskbar to return to the Web page.
206. Type in the stock symbol for one of the 10 stocks that you bought.
207. Click on Chart so that you are looking at the stock performance and the 1-year chart.
Exercise 2-Creating a Presentation With Action Buttons and Hyperlinks Page 11

208. Click in the Address bar text box.
209. Press Ctrl+C to copy the URL.
210. Using the Taskbar, go back to PowerPoint
211. Press Ctrl+V to paste the URL into the Hyperlink To URL box.
212. Click OK twice.
213. Repeat the editing process for each copy of the Action Button.
Testing the Action Buttons 214. Click the Slide Show button .
215. Click the Action Buttons to test them.
216. Did they connect to your Web pages?
217. Press the Back button in Internet Explorer to move from the Web page back to your presentation.
218. Click the Normal View button .
219. Press Ctrl+S to save your work.
220. Look at Figure 6.
Figure 6: Notice that the buttons are hyperlinks—they will link to a Web page that shows the stock information.
Exercise 2-Creating a Presentation With Action Buttons and Hyperlinks Page 12
Using the Format Painter
One of your teacher’s favorite tools is the Format Painter . The Format Painter tool copies the formatting from selected text and allows you to “paint” other text with the same formatting quickly. To use the Format Painter once, click the Format Painter tool. To keep using the Format Painter tool many times, double-click the tool.
221. Move to Slide 2.
222. Triple-click the title Stock Profiles to select it
223. Double-click the Format Painter tool on the Standard toolbar.
224. Move to Slide 1.
225. Triple-click the title Our Stock Portfolio to paint the formatting.
226. Move to the One Year Stock Performance slide.
227. Triple-click the title One Year Stock Performance to paint the formatting.
228. Use the Format Painter to paint the other One Year Stock Performance title.
Checking the Presentation for Spelling 229. Press Ctrl+Home to move to Slide 1.
230. Press F7 to start the Spell Checker.
231. Check your presentation for errors.
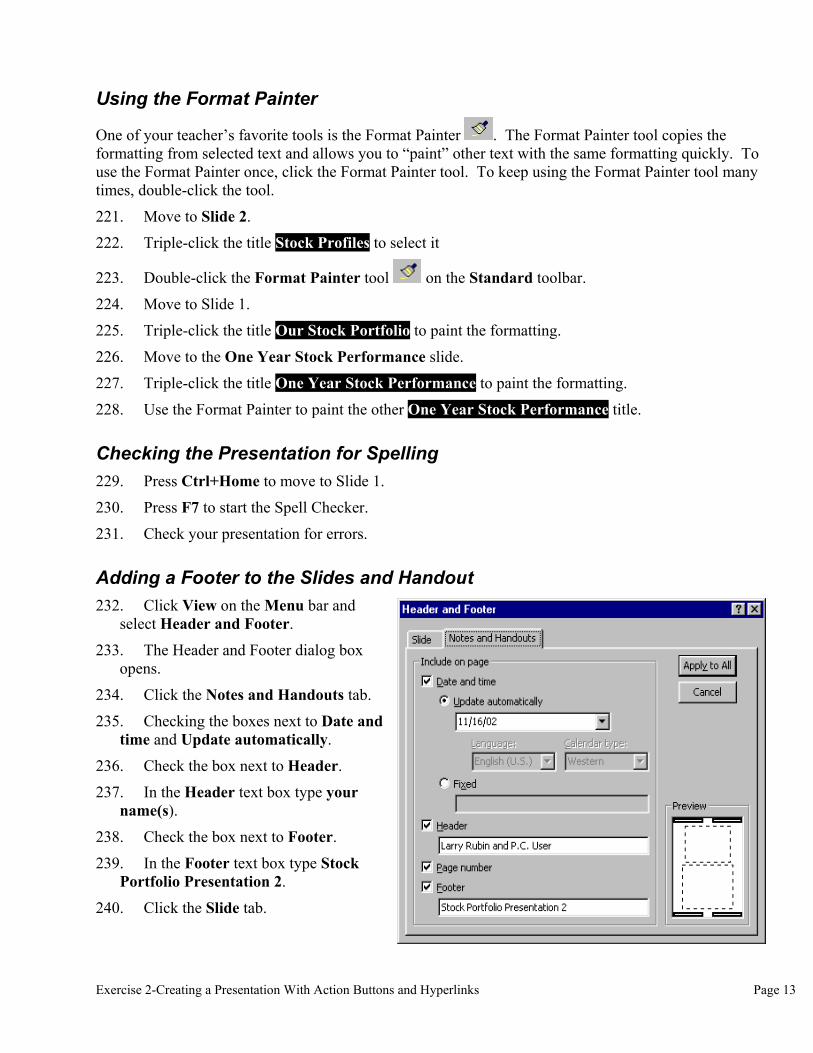
Adding a Footer to the Slides and Handout 232. Click View on the Menu bar and
select Header and Footer.
233. The Header and Footer dialog box opens.
234. Click the Notes and Handouts tab.
235. Checking the boxes next to Date and time and Update automatically.
236. Check the box next to Header.
237. In the Header text box type your name(s).
238. Check the box next to Footer.
239. In the Footer text box type Stock Portfolio Presentation 2.
240. Click the Slide tab.
Exercise 2-Creating a Presentation With Action Buttons and Hyperlinks Page 13
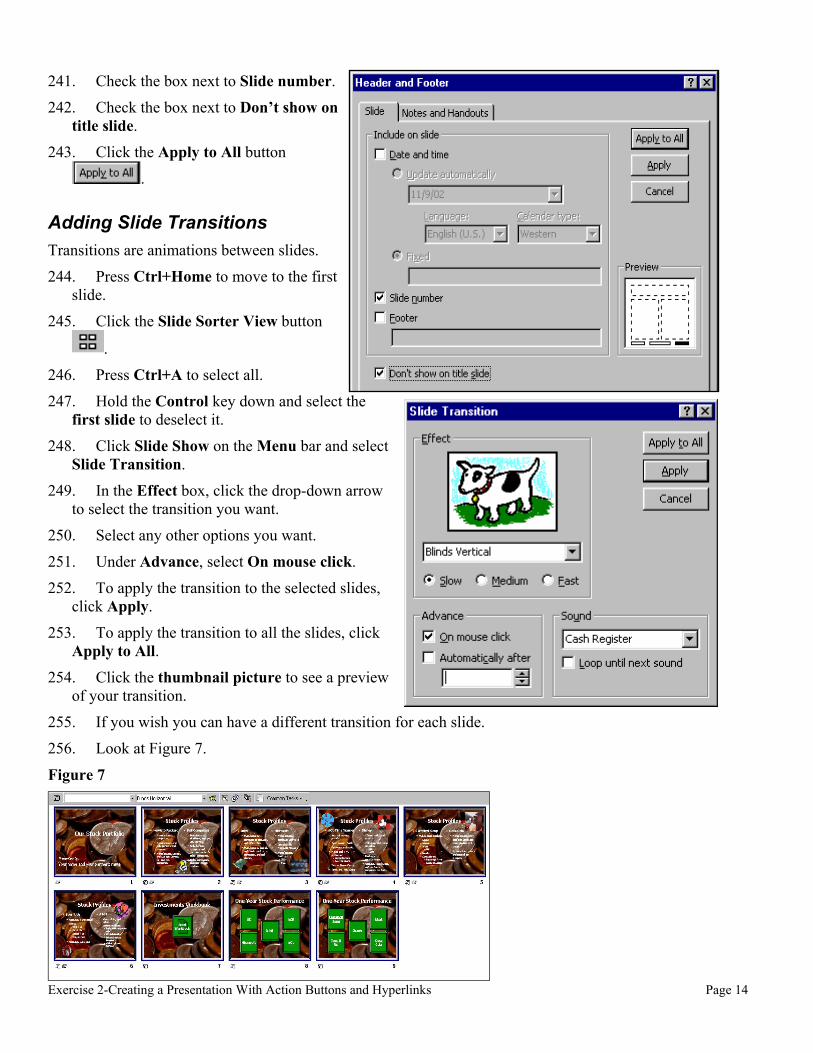
241. Check the box next to Slide number.
242. Check the box next to Don’t show on title slide.
243. Click the Apply to All button
.
Adding Slide Transitions Transitions are animations between slides.
244. Press Ctrl+Home to move to the first slide.
245. Click the Slide Sorter View button
.
246. Press Ctrl+A to select all.
247. Hold the Control key down and select the first slide to deselect it.
248. Click Slide Show on the Menu bar and select Slide Transition.
249. In the Effect box, click the drop-down arrow to select the transition you want.
250. Select any other options you want.
251. Under Advance, select On mouse click.
252. To apply the transition to the selected slides, click Apply.
253. To apply the transition to all the slides, click Apply to All.
254. Click the thumbnail picture to see a preview of your transition.
255. If you wish you can have a different transition for each slide.
256. Look at Figure 7.
Figure 7
Exercise 2-Creating a Presentation With Action Buttons and Hyperlinks Page 14

Animate Text and Objects Your presentation has all the animations and sound from Stock Presentation 1. Here are your choices for this presentation.
• Keep the same animations and sounds—don’t change anything.
• Keep the same animations and sounds, but add new ones for the 3 pages with action buttons.
• Change everything
Running a Slide Show 257. Press Ctrl+Home to move to Slide 1.
258. Click the Slide Show button or press F5.
259. When Slide 1 displays in Slide Show View, click the slide anywhere except on the Popup Menu buttons. Slide 1 will advance to Slide 2.
260. Continue clicking to move through the slide show.
261. When you reach the end of the show, you will be returned to Normal View.
262. You can watch the slide show again or move on to the next step.
Printing a Handout Often, at the end of a presentation, it is nice to give a handout to everyone who attended. In this way, people can reread what you had to say.
263. Press Ctrl+P.
264. The Print dialog box opens.
265. Make sure Ireland is the selected printer.
266. Under Print range select All.
267. Click the drop-down arrow next to Print what and select Handouts.
268. Under Handouts, select 4 slides per page.
269. Print one copy for each partner.
Exercise 2-Creating a Presentation With Action Buttons and Hyperlinks Page 15