adobe photoshop cs4 – illustrated unit f: working with brushes and color effect
TRANSCRIPT

Adobe Photoshop CS4 – IllustratedAdobe Photoshop CS4 – Illustrated
Unit F: Working with Brushes Unit F: Working with Brushes and Color Effectand Color Effect
ObjectivesObjectives
Create custom brushes
Paint with automatic brush strokes
Paint a complex mask
Understand the color picker
Adobe Photoshop CS4 - Illustrated

ObjectivesObjectives
Modify color with the Hue/Saturation adjustment
Use the Replace Color dialog box
User the Black & White adjustment
“Colorize” a Black & White adjustment
Adobe Photoshop CS4 - Illustrated

Working with Brushes Working with Brushes and Color Effectsand Color Effects
Manipulating color in Photoshop tends to take on two different roles: improving realistic color to make a better image Creating special effects with color
There are a variety of techniques used to create color effects these include: adjustment layers, layer masks
and color adjustment utilities
Working effectively with the brush tool and the Brushes panel is important when working with layer masks and adjustments
Adobe Photoshop CS4 - Illustrated

Creating Custom BrushesCreating Custom Brushes
Photoshop comes with hundreds of brushes on the Brushes panel
Custom brushes can be created that have special characteristics
The two most basic characteristics of a brush are: Diameter-the size of the brush Hardness-how hard or soft the edge of the brush
is
Adobe Photoshop CS4 - Illustrated
Creating Custom BrushesCreating Custom Brushes
The paintbrush icon for the Brush tool does not change when the size of the brush being used is changed
Preference setting can be changed for painting cursors in the Cursors section of the Preferences dialog box
Adobe Photoshop CS4 - Illustrated

Creating Custom BrushesCreating Custom Brushes
The Shape Dynamics option, when activated offers greater control for painting, such as using a brush that fades or a brush that respond to pressure
Shape Dynamics are essentially programmed for users using a pressure-sensitive stylus pen instead of a mouse
Adobe Photoshop CS4 - Illustrated

Creating Custom BrushesCreating Custom Brushes
Adobe Photoshop CS4 - Illustrated
Brushes panelBrushes panel

Painting with Automatic Brush Painting with Automatic Brush StrokesStrokes
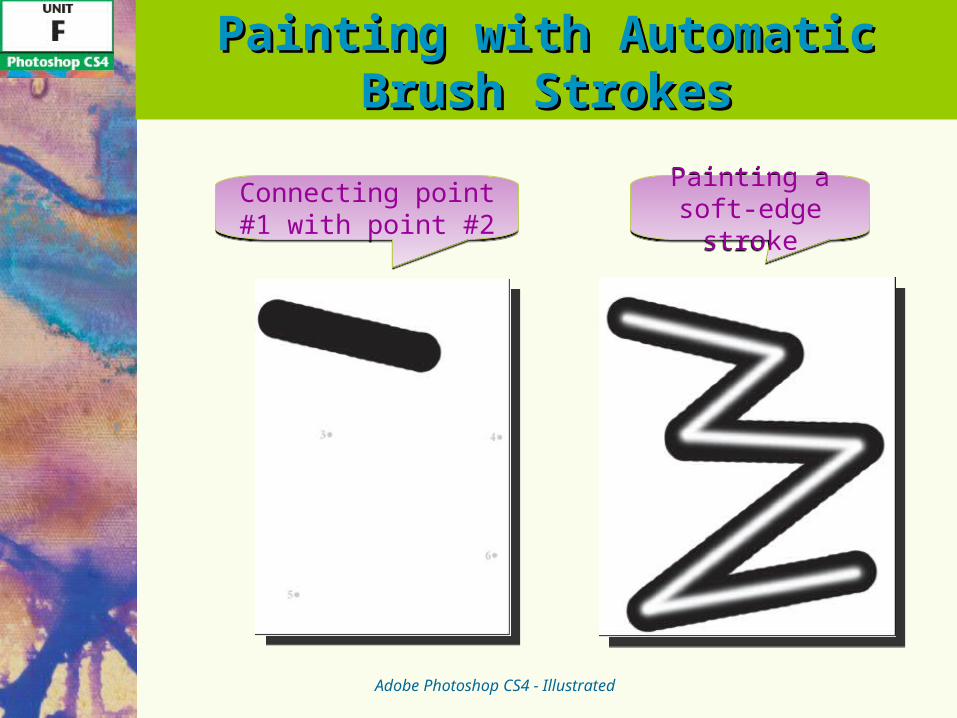
One of the fastest and most effective ways of working with the Brush tool is to use the automatic brush technique
Click the Brush tool, press and hold [Shift], then click in a different location the Brush tool automatically paints a connecting
brush stroke between the two points
Brush settings allow the user to specify the edge of a brush in terms of hardness-100% is the hardest-edged brush and 0% is the softest edged brush
Adobe Photoshop CS4 - Illustrated
Painting with Automatic Brush Painting with Automatic Brush StrokesStrokes
Adobe Photoshop CS4 - Illustrated
Connecting point #1 with point #2
Connecting point #1 with point #2
Painting a soft-edge stroke
Painting a soft-edge stroke

Painting a Complex MaskPainting a Complex Mask
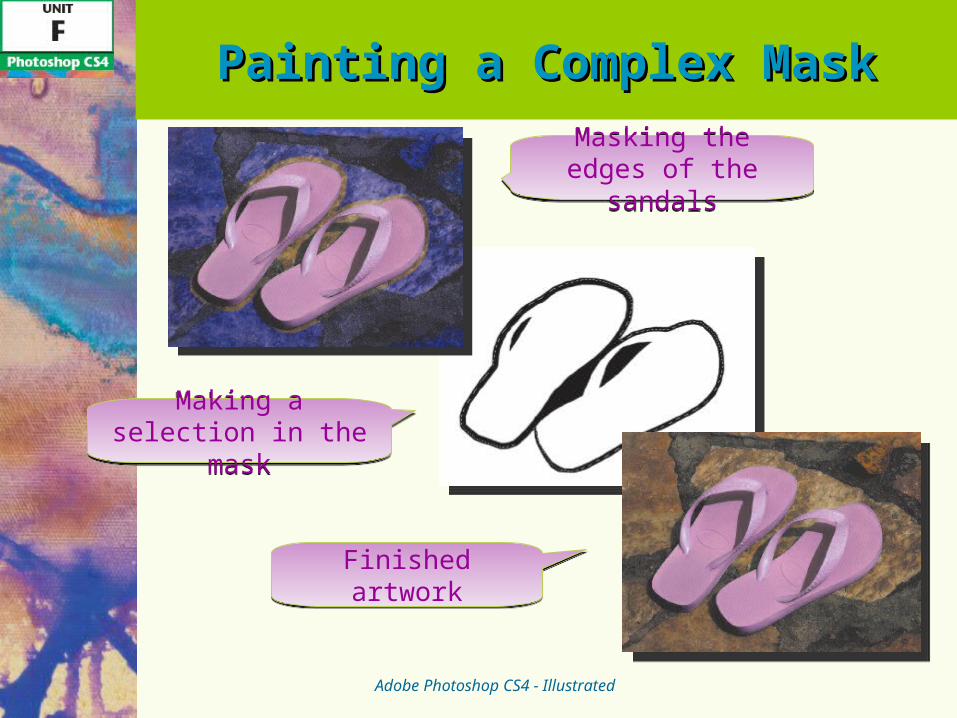
Painting masks are done over and over in Photoshop when making color adjustments the user may
want to mask some of the adjustment to manipulate how it affects the artwork
Masking is essential and it is important to develop skills for using the Brush tool effectively
The decisions made, especially for the brush edge hardness have a direct effect on the success of the mask
Adobe Photoshop CS4 - Illustrated

Painting a Complex MaskPainting a Complex Mask
When painting a mask, the hardness of the brush has a big impact and becomes subjective
When choosing a Hardness setting for the brush to mask an item, the choice is based on the item itself
Adobe Photoshop CS4 - Illustrated
Painting a Complex MaskPainting a Complex Mask
Adobe Photoshop CS4 - Illustrated
Masking the edges of the sandals
Masking the edges of the sandals
Making a selection in the mask
Making a selection in the mask
Finished artworkFinished artwork

Understanding the Color PickerUnderstanding the Color Picker
The Color Picker is one of the essential dialog boxes in Photoshop as it allows the user to choose any color available as a foreground or background color
An understanding of HSB is helpful when using Photoshop as the Color Picker is designed in terms of HSB; hue, saturation, and brightness
• like RGB, HSB is a color model and every pixel in Photoshop artwork can be identified by its HSB values
Adobe Photoshop CS4 - Illustrated

Understanding the Color PickerUnderstanding the Color Picker
Hue represents the name of the color: red, orange, and blue are hues In the Color Picker, Photoshop offers 360
hues to work with
Saturation refers to the intensity of the color: how close it is to a pure hue
Brightness affects a hue in terms of how light or dark the color is if the Brightness setting is set to 0%, it’s as
though the color is being looked at in a completely dark room—all that is seen is black
Adobe Photoshop CS4 - Illustrated
Understanding the Color PickerUnderstanding the Color Picker
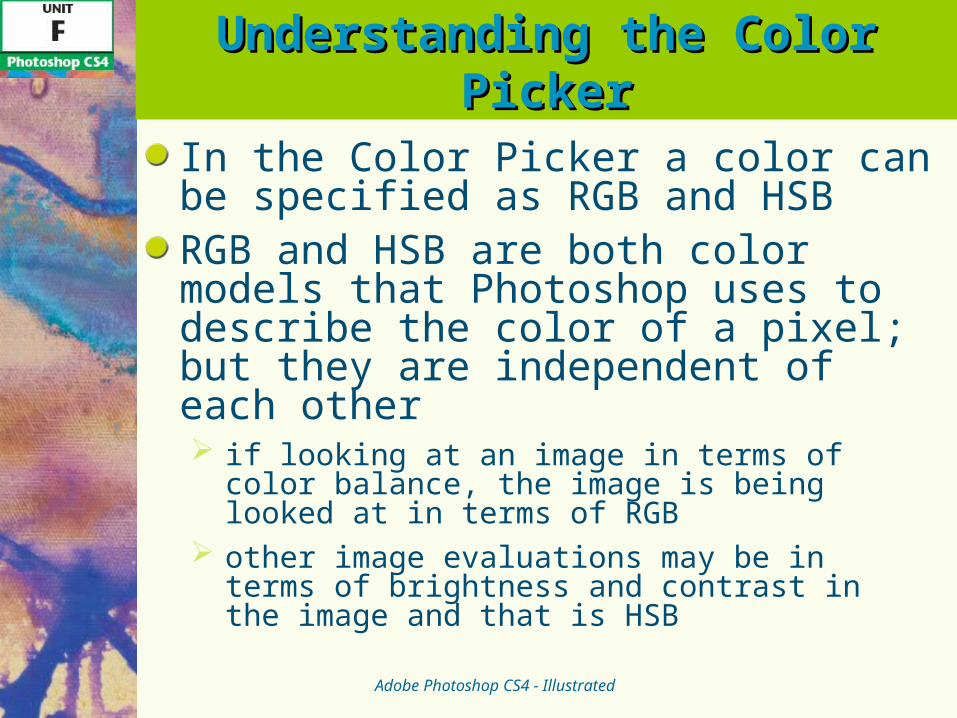
In the Color Picker a color can be specified as RGB and HSBRGB and HSB are both color models that Photoshop uses to describe the color of a pixel; but they are independent of each other if looking at an image in terms of color balance,
the image is being looked at in terms of RGB other image evaluations may be in terms of
brightness and contrast in the image and that is HSB
Adobe Photoshop CS4 - Illustrated
Understanding the Color PickerUnderstanding the Color Picker
Adobe Photoshop CS4 - Illustrated
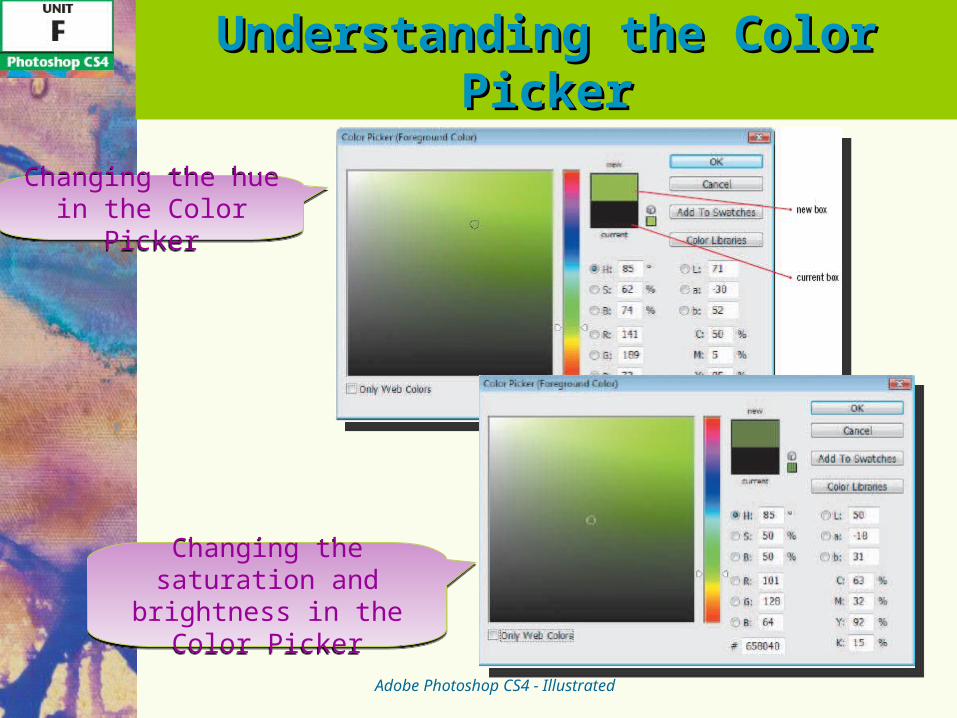
Changing the hue in the Color Picker
Changing the hue in the Color Picker
Changing the saturation and brightness in the
Color Picker
Changing the saturation and brightness in the
Color Picker

Modifying Color with the Modifying Color with the Hue/Saturation AdjustmentHue/Saturation Adjustment
Hue/Saturation is one of the most powerful adjustments in Photoshop; and one that is used often for both practical color improvements and in creating special effects
The adjustment is composed of three values: Hue slider changes only the Hue value of all
selected pixels Saturation slider changes only the saturation,
intensifying or muting the color of selected pixels Lightness slider increases or decreases the
brightness of selected pixelsAdobe Photoshop CS4 - Illustrated

Modifying Color with the Modifying Color with the Hue/Saturation AdjustmentHue/Saturation Adjustment
In the Color Picker and on the Info panel, Hue/Saturation is specified in HSB
In the Hue/Saturation adjustment, the sliders are HSL Lightness in the Hue/Saturation adjustment Brightness in the Brightness/Contrast adjustment
is used to brighten or darken an image
Adobe Photoshop CS4 - Illustrated
Modifying Color with the Modifying Color with the Hue/Saturation AdjustmentHue/Saturation Adjustment
Adobe Photoshop CS4 - Illustrated
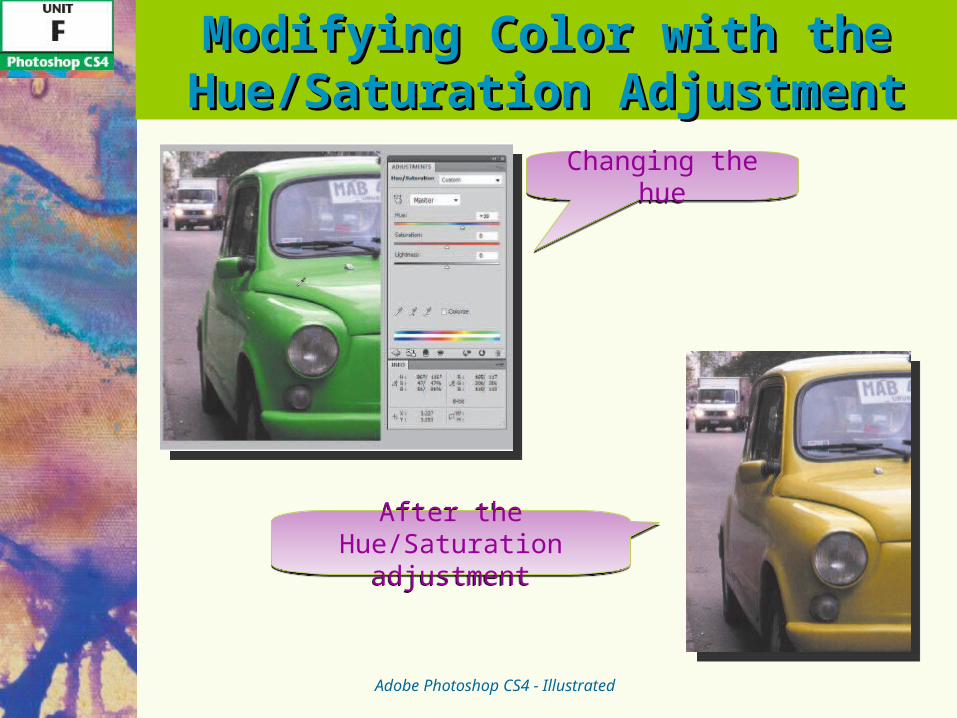
Changing the hueChanging the hue
After the Hue/Saturation adjustment
After the Hue/Saturation adjustment

Using the Replace Color Dialog BoxUsing the Replace Color Dialog Box
The Replace Color dialog box is very useful when modifying colors in areas that are difficult to select with the selection tools or layer mask
The tools in the Replace dialog box allow various areas of an image to be targeted based strictly on similarity in color when an area is targeted the dialog box shows a
black-and-white mask, with the white areas representing the pixels that will be affected by any changes that are made
Adobe Photoshop CS4 - Illustrated
Using the Replace Color Dialog BoxUsing the Replace Color Dialog Box
Drag the Fuzziness slider to increase the targeted area or use the Add to sample tool to click a specific area to add
Once the area is targeted, changing the Hue and Saturation values modify the color only in those areas
If wanting to modify Hue/Saturation in non-specific areas of an image, think about using the Replace Color feature the Replace Color feature is not an adjustment
layer; alterations are applied directly to the layerAdobe Photoshop CS4 - Illustrated

Using the Replace Color Dialog BoxUsing the Replace Color Dialog Box
Adobe Photoshop CS4 - Illustrated
Adding a dark green to the sample
Adding a dark green to the sample
Sampling a light area of the door
Sampling a light area of the door
Using the Black & White Using the Black & White AdjustmentAdjustment
The most common way to make a color image appear as black-and-white is to desaturate it completely using a Hue/Saturation adjustment the adjustment reduces the saturation value of
every pixel to zero
The Black & White Adjustment can be used and offers brightness controls for converting the color original to black-and-white using these controls, an eye-catching, black-and-
white version of the color original can be created
Adobe Photoshop CS4 - Illustrated

Using the Black & White Using the Black & White AdjustmentAdjustment
Another way to create black and white from color is to convert the file from RGB Color mode to Grayscale mode Photoshop will discard all color data from the file,
reducing the file from three color channels to a single grayscale channel
Adobe Photoshop CS4 - Illustrated

Using the Black & White Using the Black & White AdjustmentAdjustment
Adobe Photoshop CS4 - Illustrated
Comparing desaturation (top) to a Black and White
adjustment (bottom)
Comparing desaturation (top) to a Black and White
adjustment (bottom)

““Colorizing” a Black & White Colorizing” a Black & White AdjustmentAdjustment
There are many techniques for adding color to a black-and-white image, creating a “colorized” effect use a layer mask on a Black & White adjustment
layer to gradually introduce color to a specific area of an image
create a radial gradient with a color center that gradates out to a very light shade of the color; or create one by hand which is not nearly as smooth and perfect
Adobe Photoshop CS4 - Illustrated

““Colorizing” a Black & White Colorizing” a Black & White AdjustmentAdjustment
Adobe Photoshop CS4 - Illustrated
Fill dialog boxFill dialog box
Colorize effectColorize effect

SummarySummary
In Photoshop there are a variety of techniques used to create color effects
Photoshop comes with hundreds of brushes on the Brushes panel
Masking is essential and it is why it is important to develop skills for using the Brush tool effectively
The Color Picker is one of the essential dialog boxes in Photoshop as it allows the user to choose any color available as a foreground or background color
Adobe Photoshop CS4 - Illustrated

SummarySummary
An understanding of HSB is helpful when using Photoshop as the Color Picker is designed in terms of HSB; hue, saturation, and brightness (lightness)
The most common way to make a color image appear as black-and-white is to desaturate it completely using a Hue/Saturation adjustment (there are other methods)
There are many techniques for adding color to a black-and-white image, creating a “colorized” effect
Adobe Photoshop CS4 - Illustrated