adobe audition 1.5 classroom in a book ©2005 adobe...
TRANSCRIPT

Lesson 1


1 A Quick Tour of Adobe Audition
To take full advantage of Adobe
Audition’s extensive editing and
conversion tools, it is important to
understand how to navigate through a
session, control audio playback, apply
effects, and export files.

6A Quick Tour of Adobe AuditionLESSON 1
In this lesson, you will be introduced to the tools and interface used in Adobe Audition.
Future lessons will provide more in-depth exercises and specific details as to how
you can better take advantage of the tools. You’ll start the tour by opening a partially
completed session where you’ll add the finishing touches to a 60 second jazz song. You
will add music tracks, repair noisy audio, and then export the session to an mp3 audio
file.
1 Start Adobe Audition, and click on the Multitrack View tab.
2 Choose File > Open Session, and open the 01_start.ses file in the AA_01 folder,
which is located in the AA_CIB folder on your hard disk.
Note: If you have not already copied the resource files for this lesson onto your hard disk
from the AA_01 folder from the Adobe Audition 1.5 Classroom in a Book CD, do so now.
See “Copying the Classroom in a Book files” on page 2.
3 Choose File > Save Session As. Enter the name 01_Tour.ses, and save the file in the
AA_01 folder. This keeps the original file untouched, in case you want to return to the
original source file.
4 To preview the finished session file, choose File > Open Session, and open the
01_end.ses file in the AA_01 folder. Play the completed session file by clicking on
the Play from Cursor to End of View button ( ) in the Transport Controls toolbar,
which is located in the lower left corner of the Audition window. You can also press the
spacebar on your keyboard to play the session.
�
�� �
�� �
� �
�
The Transport Controls. A. Stop. B. Play from Cursor to End of View. C. Pause. D. Play from Cursor to End of File. E. Play Looped. F. Record. G. Go to End or Next Cue. H. Fast Forward. I. Rewind. J. Go to Beginning or Previous Cue.
Note: You may need to maximize your window to see all controls available within Audition.
When the window size is reduced, certain controls are not displayed. You can maximize
your window by clicking the Maximize button in the upper right corner of the window.

ADOBE AUDITION 1.5 7Classroom in a Book
5 When you are ready to start working, close the 01_end.ses file by choosing
File > Close Session and Its Media. If necessary, reopen the 01_Tour.ses file by choosing
File > Open Session and selecting the 01_Tour.ses.
Navigating the sessionThe 01_Tour.ses session is on your screen in Multitrack View. A list of the sound files
used in the session are listed along the left portion of the window in an area called the
Organizer window.
�
�
�
�
�
�
�
� �
��
��
Adobe Audition work area. A. Edit View tab B. Multitrack View tab. C. CD Project tab. D. Current-time Indicator. E. Toolbars. F. Display window. G. Various information windows. H. Current time I. Zoom tools. J. Transport Controls. K. Advanced Organizer window options. L. Organizer Window.

8A Quick Tour of Adobe AuditionLESSON 1
The Multitrack View displays an audio clip on each track, and is located in the center of
the screen. In the this session, each clip represents a musical instrument and each track
has been labeled to identify the instrument used. You can navigate through a session
using a number of different methods.
1 Press the Play button ( ) in the Transport Controls, which are located in the
bottom left corner of the Audition window.
As the session begins to play, the playback cursor, which is displayed as a vertical
white line, moves across the multitrack. Note the arrangement of the clips inside the
multitrack. The first instrument is the UprightBass, which begins playing immediately.
As the playback cursor hits the GruveDrm02 clip, you hear this component. The
GrooveBass track represents another bass track. Each instrument is on a different track,
yet the overall result is multiple instruments playing in synchronization.
2 Press the Pause button ( ) to pause the session. The playback cursor stops and
the current time is displayed at the bottom of the window. We paused our session at 15
seconds.
3 Click the Play button in the Transport Controls and note that the session begins
at the start rather than resuming from the pause point. This is because the Play button
always starts to play at the current-time indicator, which is represented by the yellow
triangles located at the beginning of the session.
4 Press the spacebar on your keyboard to stop the playback. In addition to using
the Transport controls, Audition offers many keyboard shortcuts to perform common
commands. For example, you can use the spacebar to start or stop playback.
5 Place your cursor over one of the yellow current-time indicator triangles. Your
cursor changes to a pointing finger ( ), allowing you to move the current-time
indicator to a specific point in the multitrack.

ADOBE AUDITION 1.5 9Classroom in a Book
6 Click and drag the current-time indicator slowly across the multitrack to the 24
second mark. This position is also the beginning of the audio clip named SquareA01.
The current-time indicator snaps to the beginning of the clip, unless the snapping
options have been changed from Audition’s default settings.
7 Click the Play button in the Transport controls, the session begins to play from the
24 second mark. The current-time indicator is used frequently to navigate and play
specific sections within a session. Press the spacebar to stop playing the session.
8 Place your cursor over the ruler at the bottom of the multitrack, making sure the
hand icon is displayed. Right-click on the ruler and a context menu is displayed. From
the context menu choose the Display Time Format option. Select the Bars and Beats
option and the ruler changes from the decimal format to Bars and Beats. This is a more
traditional time display for working with loop-based files.
Note: While this session was originally displaying time in a decimal format of hours,
minutes, seconds, and milliseconds (HMS), you can change the units of measurement based
upon your needs and the type of session you are creating.

10A Quick Tour of Adobe AuditionLESSON 1
9 Click the Go to Beginning or Previous Cue button ( )in the Transport Controls
to place the current-time indicator at the beginning of the session. At the start of the
session the time display shows 1:1.00. This is read as 1 bar and 1 beat.
The current-time indicator at the beginning of the session.
Working with loopsTo better understand the concept of Bars and Beats, look in the Organizer window and
notice, but don’t select, the drum loop entitled GruveDrm02.cel. The .cel extension
signifies that this file is an Audition file capable of being looped in the multitrack. This
is the loop file used in the first track.
1 Press the spacebar to begin playing the session file. At the 3 bar 1 beat mark the
GruveDrm02 clip plays for exactly one bar and then ends. When the drumbeat stops
playing, press the spacebar to stop the playback cursor. In this session each bar consists
of exactly four beats. Press the spacebar again and when the drum begins, count the
four beats in the drum loop. When the bar is over, press the spacebar to stop playing the
session.

ADOBE AUDITION 1.5 11Classroom in a Book
2 Click once to select the GruveDrm02 clip in the Multitrack View. Place your cursor
over the diagonal lines in the bottom right corner of the GruveDrm02 clip. Your cursor
will change to a double arrow with a small loop icon ( ).
3 Click and drag the loop to the right, extending the loop so it ends at the same time
as the clips in both track 2 and track 3, ThickBas05 and UprightA01 respectively. As you
extend the loop, a dashed line is created with every new bar, helping you keep track of
the number of bars, and ensuring that the clip ends precisely on a beat.
4 Press the Home key on your keyboard to place the current-time indicator at the
beginning of the session, then press the spacebar to play the session. The drum track
loops seamlessly for 16 bars. The original drum clip was one bar in length. You were able
to extend the clip because the original file was designed to be looped. Press the spacebar
to stop playback after you have reviewed the file.
Note: Adobe Audition 1.5 ships with a Loopology CD of nearly 5,000 individual music
loops sampled from a variety of musical sources. It is also possible to create your own loops
in Audition’s Edit View. You will explore this feature in Chapter 4.

12A Quick Tour of Adobe AuditionLESSON 1
5 In the Organizer window, click on the Import File button ( ) and select the file
GuitLick02.cel in the AA_01 folder on your hard disk. Click Open to import the file
into the Organizer window. Click and drag the file GuitLick02.cel into the empty track
named Guitar. Place it near the beginning of the track and release the mouse.
Click and drag GuitLick02.cel to the empty Guitar track.
6 Select the Move/Copy Clip tool ( ) and then click on the GuitLick02 clip, drag it to
the right in the Multitrack View.
The Move/Copy tool is in the tool section.

ADOBE AUDITION 1.5 13Classroom in a Book
As you drag the clip into the multitrack, notice that the beginning and the end of the
clip snap to the individual beats on the ruler. Drag the clip so the beginning aligns with
the 11 bar mark. A vertical white line appears when the clip is aligned to this position.
Make sure the white line is aligning at the beginning of the clip, not the end.
Note: It is useful to refer to the status bar at the bottom of the window. As you move clips
through the multitrack, the status bar reflects the location of the start of the clip.
7 Place your cursor on the handle at the end of the GuitLick02 clip. Extend the clip
two bars to the 15 bar 1 beat mark by clicking and dragging the diagonal handle to the
right.
8 Click and drag the current-time indicator to the 8 bar 1 beat mark (8:1.00) and then
press the spacebar on your keyboard to play the session from this point.

14A Quick Tour of Adobe AuditionLESSON 1
Muting and soloing tracksAudition provides tools to make it easier to work with multiple tracks.
1 Click and drag the current-time indicator to the 9 bar mark (9:1.00). This is the
point that the clip SquareA01 in the Synth1 track begins. To make it easier to separate a
single instrument from the others, you can listen to just a single track using Audition’s
solo and mute options.
2 Press the spacebar on your keyboard to play the session. In the Synth1 track click
the yellow S button ( ). All other tracks except the Synth are temporarily turned off.
The other clips become grayed-out to visually identify that they are not audible. Press
the spacebar to stop the playback cursor. Click the Solo button again to make the other
tracks audible.
3 In the Synth1 track, click the M button ( ).The SquareA01 clip becomes grayed-
out, indicating that it will not be audible. Press the spacebar to begin playing the session,
after a few seconds click the M button and the SquareA01 clip becomes audible. Both
the Mute and Solo buttons work in real time as a session is playing. Press the spacebar to
stop playing the session.
4 Click and drag the current-time indicator to the 7 bar 1 beat mark. Click the Solo
button for the GrooveDrum track. Hold down the Ctrl key and also click on the Solo
button for the Synth2 track. Press the spacebar to play the Drum track and the Synth2
tracks only. Ctrl-clicking the Solo button on two or more tracks allows you to play only
those tracks together.
5 Press the spacebar to stop playing the session. Ctrl-click on the Solo buttons for the
GrooveDrum track and the Synth2 track to enable the remaining tracks.
ADOBE AUDITION 1.5 15Classroom in a Book
Changing track volume and panYou can modify the Volume and Pan properties of each track in a multitrack session. All
clips located within the track are affected by these changes.
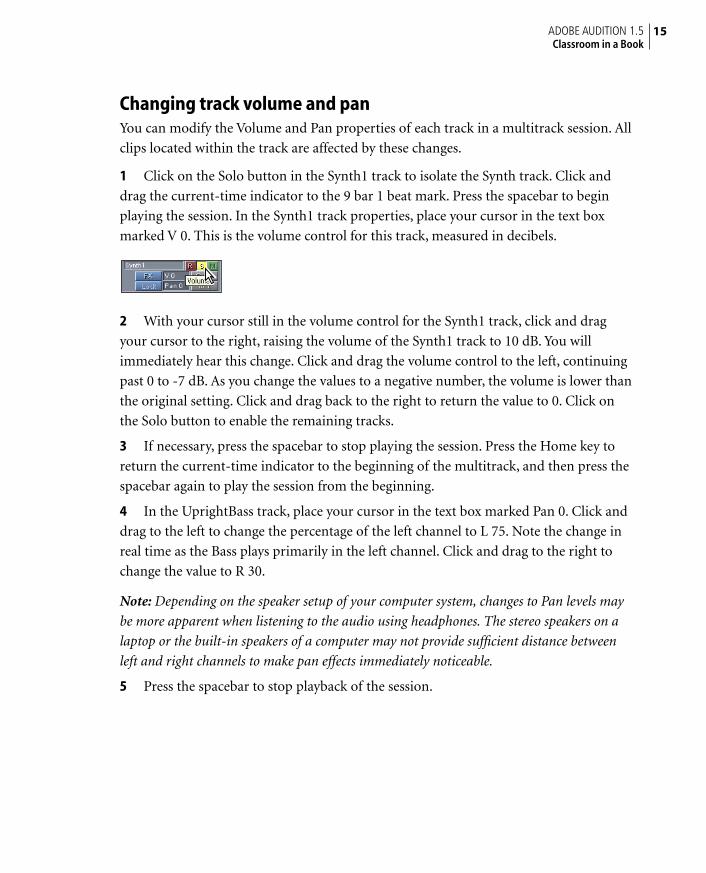
1 Click on the Solo button in the Synth1 track to isolate the Synth track. Click and
drag the current-time indicator to the 9 bar 1 beat mark. Press the spacebar to begin
playing the session. In the Synth1 track properties, place your cursor in the text box
marked V 0. This is the volume control for this track, measured in decibels.
2 With your cursor still in the volume control for the Synth1 track, click and drag
your cursor to the right, raising the volume of the Synth1 track to 10 dB. You will
immediately hear this change. Click and drag the volume control to the left, continuing
past 0 to -7 dB. As you change the values to a negative number, the volume is lower than
the original setting. Click and drag back to the right to return the value to 0. Click on
the Solo button to enable the remaining tracks.
3 If necessary, press the spacebar to stop playing the session. Press the Home key to
return the current-time indicator to the beginning of the multitrack, and then press the
spacebar again to play the session from the beginning.
4 In the UprightBass track, place your cursor in the text box marked Pan 0. Click and
drag to the left to change the percentage of the left channel to L 75. Note the change in
real time as the Bass plays primarily in the left channel. Click and drag to the right to
change the value to R 30.
Note: Depending on the speaker setup of your computer system, changes to Pan levels may
be more apparent when listening to the audio using headphones. The stereo speakers on a
laptop or the built-in speakers of a computer may not provide sufficient distance between
left and right channels to make pan effects immediately noticeable.
5 Press the spacebar to stop playback of the session.
16A Quick Tour of Adobe AuditionLESSON 1
Changing volume using Track EnvelopesTrack Envelopes allow you to change the levels for volume, pan and other audio effects
over the time of the clip. For example, you may wish to dynamically change the volume
levels to fade an instrument out at the end of a clip, or you may wish to create a stereo
effect of a sound panning from left to right.
1 Click on the ThickBass05 clip in the GrooveBass track to select it. Click the Solo
button to turn off all the other tracks. At the top of your screen, click the Show Volume
Envelopes button ( ) if it is not already selected. Volume Envelopes appear on all the
audio clips in the track when this button is depressed. Volume Envelopes are located at
the top of a clip by default. You can see the change in the envelopes in this track at the
15 bar mark.
2 Click on the Edit Envelopes button ( ) if it is not already selected to view the
anchor points located on the volume envelope. Click and drag the current-time indicator
to the 14 bar mark (14:1.00) and press the spacebar on your keyboard. When the
playback cursor reaches the 15 bar mark, the bass track is inaudible, but one bar later in
the clip the volume returns and the track is audible. The anchor points located at the top
of a clip represent 100% volume. Anchor points located at the bottom of a clip represent
0% volume, which is silence. You can use this feature to create a fade-out effect.
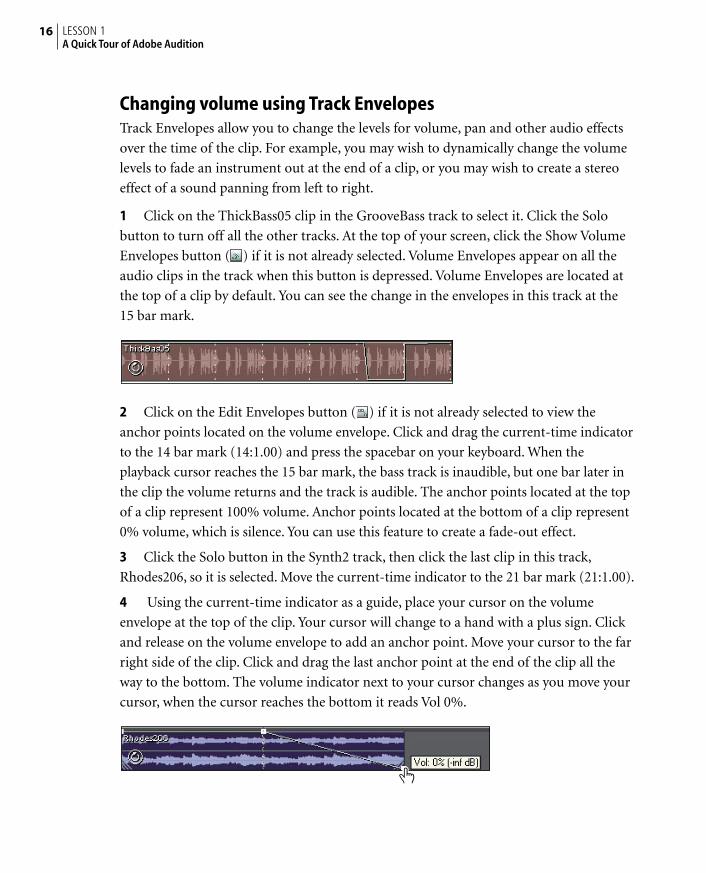
3 Click the Solo button in the Synth2 track, then click the last clip in this track,
Rhodes206, so it is selected. Move the current-time indicator to the 21 bar mark (21:1.00).
4 Using the current-time indicator as a guide, place your cursor on the volume
envelope at the top of the clip. Your cursor will change to a hand with a plus sign. Click
and release on the volume envelope to add an anchor point. Move your cursor to the far
right side of the clip. Click and drag the last anchor point at the end of the clip all the
way to the bottom. The volume indicator next to your cursor changes as you move your
cursor, when the cursor reaches the bottom it reads Vol 0%.

ADOBE AUDITION 1.5 17Classroom in a Book
5 Press the spacebar to play the clip to the end of the track. The organ clip fades out to
silence.
6 Hold down the Ctrl key and click on the first anchor point in the Rhodes206 clip
and drag down to approximately 85%. The first two anchor points now move in unison,
doing so reduces the overall volume of the clip.
Ctrl-clicking any anchor point will allow you to move all anchor points up or down in
order to increase or decrease overall volume. Continue to depress the Ctrl key while moving
the anchor points.
7 Click the Solo button on the GrooveBass track to enable the audio for the other
tracks.
Adding non-destructive effectsAudition allows you to apply various audio effects such as Echo or Reverb to individual
clips. These effects are non-destructive, as they do not alter the original sound file in any way.
1 Click the Solo button on the Guitar track to mute the other tracks.
2 Click the Time Selection tool ( ) located at the top right side of the window.
Click and drag over the length of the entire GuitLick02 clip to select this clip. Press the
spacebar to preview this clip before you add an effect to it.

18A Quick Tour of Adobe AuditionLESSON 1
3 Click on the FX button ( ) located next to the volume control in the Guitar track
properties. The Track 6 Effects Rack window opens.
Note: It may be necessary to expand the size of the Track Properties portion of the window
to see this button. If this button is not visible, click and drag, to the right, the line separating
the Track Properties from the Multitrack display. After clicking the FX button, you may
need to move the window to see both the GuitLick02 clip in the multitrack and the Effects
Rack window at the same time.
4 Click on the plus sign ( ) next to the Delay Effects category and select Flanger.
Click the Add button to add this to the Current Effects Rack. Click the OK button to
add the default Flanger effect, which adds a varying, short delay to the Guitar clip.
5 Click on the FX 6 button again and the FX 6 window appears with the Flanger
controls. In the FX 6 window, click the drop-down menu and select the Vintage Sweep
preset.
6 Click on the Mixer tab at the top of the FX 6 window to view the Mixing controls.
The first mixer named Dry Out is used to control the percentage of the original
guitar signal. This value is currently 0. The second mixer named Flanger controls the
percentage of the Flanger effect, this value is currently 100.
7 Press the spacebar to play the guitar selection and hear the Flanger effect. If
necessary, press the spacebar to repeat playback as you make adjustments in the next
steps.

ADOBE AUDITION 1.5 19Classroom in a Book
8 In the Flanger mixer, click the Bypass button ( ) to hear the original signal. Click
the Bypass button again and drag the Flanger slider down to 80, now drag the Dry Out
slider up to 20. This moderately decreases the Flanger effect and also returns a small
percentage of the original guitar signal back into the mix.
9 Click the Close button in the upper right corner to close the FX window.
10 Click the Solo button in the Guitar track to turn on the other tracks and to hear the
results of the Flanger effect as applied to the Guitar. Press the spacebar to stop playing
the session.
Using hiss reductionWorking non-destructively with envelopes and effects is a very powerful way to perform
edits. Audition also performs destructive edits that change the original source files when
you work using the Edit View. There are features of Audition which are only available in
the Edit View, such as Noise and Hiss Reduction along with the Spectral View.
1 In the Multitrack View display window, in the track named Acoustic End, double-
click on the clip harp_cough.cel to enter the Edit View. The entire audio file is displayed
as an audio waveform.
Note: While in Edit View there are certain commands available that are not in the
Multitrack. You can always switch between views by clicking on the Edit View or Multitrack
View tabs located near the top of the window.

20A Quick Tour of Adobe AuditionLESSON 1
2 Press the Home key on your keyboard to place the current-time indicator at the
beginning of the file and then press the spacebar to play the file from beginning to end.
The source for this file was a live performance. The original recording includes a slight
hiss along with a cough at the end of the harp, which impacts the final file. You will
remove these deficiencies in the file using tools available in the Edit View.
3 Choose Edit > Select Entire Wave to select the entire harp_cough clip.
4 Choose Effects > Noise Reduction > Hiss Reduction to open the Hiss Reduction
window.
5 In the Hiss Reduction window, select Standard Hiss Reduction from the list of
presets, and then click Preview. The hiss decreases dramatically after applying this
effect. To hear the difference, select the bypass option and the hiss returns. Click the OK
button to commit the change.
6 Press the spacebar to play the modified file. Although the hiss has been reduced, the
cough still remains.
7 Click the Multitrack View tab and press the Home key to place the current-time
indicator at the beginning of the session.Then move the current-time indicator to
the 15 bar mark (15:1.0). Press the spacebar to play the session. The hiss is reduced
when previewing the file in the session because changes made to a file in Edit View are
automatically updated to the file in the Multitrack.

ADOBE AUDITION 1.5 21Classroom in a Book
Using the Spectral ViewOne of the unique features of Adobe Audition is its ability to display and edit sound
files in the Spectral View.
1 Double-click on the Harp_cough.cel clip in the Acoustic End track to display the
waveform in the Edit View.
2 Choose View > Spectral View to display the waveform. The x-axis, which is shown
horizontally, is displaying the total time of the loop. The y-axis, which is shown
vertically, is measuring the frequency.
Note: If an alert message is displayed regarding new selection tools, click OK to close the
alert window.
3 Press the Home key on your keyboard to place the current-time indicator at the
beginning of the clip and then press the spacebar to play the file. The greater a sound’s
amplitude within a certain frequency, the brighter the colors. For example, it is very
easy to note the cough at the end of the file.

22A Quick Tour of Adobe AuditionLESSON 1
4 Choose the Marquee Selection tool ( ) from the tools and buttons located at
the top of the window. Click and drag a marquee selection around the entire spectral
representation of the cough. Press the spacebar to play only the selection. Listen
carefully and you can also hear the diminishing tone of the harp. Be careful to not select
too large of an area beyond the cough.
5 Choose Effects > Noise Reduction > Click/Pop Eliminator to open the Click/Pop
Eliminator. This effect is applied only to the selection you made with the Marquee tool.
Note: If the selected area is too large, this option is not available.
6 Click the Fill Single Click Now button at the bottom of the Click/Pop Eliminator
window. Audition processes the file and applies the effect.
7 Press the spacebar again and the selection loops. The cough has been removed, yet
the diminishing tones of the harp have been preserved.
8 Press the Home key to place the current-time indicator at the beginning of the clip.
Press the Play button or the spacebar to hear the edited version of the harp file.

ADOBE AUDITION 1.5 23Classroom in a Book
Changing the tempo of an entire sessionOnce you have created a final version of a song you have the flexibility in Audition to
change the tempo, in other words, to make a session faster or slower.
1 Click on the Multitrack View to return to the session, press the Home key to return
the current-time indicator to the beginning of the session. Press the spacebar to begin
playing. Listen to the session for three or four bars to get a sense of the tempo and then
press the spacebar to stop playing.
2 In the Session Properties window in the lower right hand corner, click to place your
cursor in the text box marked Tempo 80 bpm—bpm represents beats per minute and
determines the rhythmic speed of the song.
3 Double-click in the text box to highlight the number 80 and enter 100. Press the
Enter key and Audition will update the session, which may take a few moments. All the
tracks are time-stretched to match the session’s tempo.
4 Press the Home key on your keyboard to place the current-time indicator at the
beginning of your session. Press the spacebar to play. The updated session has a faster
tempo of 100 beats per minute, yet the original pitch of the instruments has not
changed.
You can always type in a new number to update the tempo of session. However if you
want to compare tempos, you can use the shortcut Ctrl + Z to undo the tempo change and
return to the original tempo for that purpose.

24A Quick Tour of Adobe AuditionLESSON 1
Exporting a session to mp3 audio formatAudition can export audio files in many different file formats, including the mp3
format.
1 Choose File > Save Session As. Navigate to your AA_01 folder and enter the name
01final.ses.
2 Choose File > Export > Audio. If this is your first time exporting audio, an Edit
Original Options window opens. Click Yes to close this window and then in the Save as
Type menu choose mp3Pro.
3 Click the Options button and the mp3 Encoder window opens.
4 In the mp3 Encoder window, click the preset menu in the upper left corner and
select 192 kbps Stereo, then click OK. Click Save to export the mp3. The mp3 file is
saved to your hard drive and can be opened in Audition or using any hardware or
software capable of playing mp3 audio files.
5 Choose File > Close All.
Congratulations! You have completed the lesson.