administrator's guide - files.support.epson.com · administrator's guide welcome to the...
TRANSCRIPT
Administrator's Guide

ContentsAdministrator's Guide................................................................................................................................. 7Using Web Config Network Configuration Software ................................................................................ 8
About Web Config ................................................................................................................................ 8Accessing Web Config ......................................................................................................................... 8Restricting Features Available for Users .............................................................................................. 9
User Feature Restriction................................................................................................................ 10Configuring User Feature Restrictions........................................................................................... 10Changing the Administrator Password in Web Config ................................................................... 12
Using Your Product on a Secure Network .......................................................................................... 13Configuring SSL/TLS Communication........................................................................................... 13
Configuring SSL/TLS Settings .................................................................................................. 13Configuring a Server Certificate for the Product........................................................................ 14
Configuring IPsec/IP Filtering ........................................................................................................ 15About IPsec/IP Filtering ............................................................................................................ 16Configuring Default IPsec/IP Filtering Policy............................................................................. 16Configuring Group IPsec/IP Filtering Policies ........................................................................... 17IPsec/IP Filtering Policy Settings .............................................................................................. 18IPsec/IP Filtering Configuration Examples................................................................................ 22Configuring an IPsec/IP Filtering Certificate ............................................................................. 23
Configuring SNMPv3 Protocol Settings ......................................................................................... 24SNMPv3 Settings...................................................................................................................... 25
Connecting the Product to an IEEE 802.1X Network..................................................................... 26Configuring an IEEE 802.1X Network ....................................................................................... 26IEEE 802.1X Network Settings ................................................................................................. 27Configuring a Certificate for an IEEE 802.1X Network .............................................................. 28IEEE 802.1X Network Status .................................................................................................... 28
Using a Digital Certificate .............................................................................................................. 29About Digital Certification.......................................................................................................... 30Obtaining and Importing a CA-signed Client Certificate............................................................ 30Importing a CA-signed Server Certificate.................................................................................. 32
3
CSR Setup Settings .................................................................................................................. 33CSR Import Settings ................................................................................................................. 34Deleting a CA-signed Client Certificate..................................................................................... 34Deleting a CA-signed Server Certificate ................................................................................... 35Updating a Self-signed Certificate............................................................................................. 35Restarting the Product's Network Service................................................................................. 36
Using an LDAP Server................................................................................................................... 36Configuring the LDAP Server and Selecting Search Settings ................................................... 37LDAP Server Settings ............................................................................................................... 38LDAP Search Settings .............................................................................................................. 39Checking the LDAP Server Connection .................................................................................... 40LDAP Connection Report Messages ........................................................................................ 40
Using an Email Server ................................................................................................................... 41Configuring an Email Server ..................................................................................................... 41Email Server Settings ............................................................................................................... 42Checking the Email Server Connection .................................................................................... 43Email Server Connection Report Messages ............................................................................. 43Configuring Email Notification................................................................................................... 45
Configuring Protocols and Services in Web Config ....................................................................... 46Services and Protocol Settings ................................................................................................. 47
Importing and Exporting Web Config Settings ............................................................................... 51Exporting Settings Using Web Config ....................................................................................... 51Importing Settings Using Web Config ....................................................................................... 51
Using EpsonNet Config Network Configuration Software..................................................................... 53Installing EpsonNet Config ................................................................................................................. 53Configuring a Product IP Address Using EpsonNet Config - Ethernet................................................ 53Configuring a Product IP Address Using EpsonNet Config - WiFi ...................................................... 54
Solving Problems ...................................................................................................................................... 57Solving Network Software Usage Problems....................................................................................... 57
Cannot Find Access Web Config................................................................................................... 57The "Out of Date" Message Appears............................................................................................. 58"The name of the security certificate does not match" Message Appears ..................................... 58Model Name or IP Address Not Displayed in EpsonNet Config..................................................... 58
4
Solving Network Security Problems ................................................................................................... 58Pre-Shared Key was Forgotten ..................................................................................................... 59Cannot Communicate with the Product Using IPsec Communication ........................................... 59Communication was Working, but Stopped................................................................................... 59Cannot Create the Secure IPP Printing Port.................................................................................. 60Cannot Connect After Configuring IPsec/IP Filtering..................................................................... 60Cannot Access the Product After Configuring IEEE 802.1X .......................................................... 60
Solving Digital Certificate Problems ................................................................................................... 60Digital Certificate Warning Messages............................................................................................ 60Cannot Import a Digital Certificate................................................................................................. 62Cannot Update a Certificate or Create a CSR ............................................................................... 62Deleted a CA-signed Certificate .................................................................................................... 63
Where to Get Help.............................................................................................................................. 63Notices ....................................................................................................................................................... 64
Trademarks........................................................................................................................................ 64Copyright Notice................................................................................................................................. 64
Copyright Attribution...................................................................................................................... 65
5

Administrator's GuideWelcome to the Administrator's Guide.For a printable PDF copy of this guide, click here.
Note: Not all features mentioned in this Administrator's Guide are available with every product model.
You can use two software utilities to configure your product's advanced network settings: Web Configand EpsonNet Config. This guide covers Web Config in detail; for information on using EpsonNet Config,see the EpsonNet Config help utility.The available network functions vary by product. (Unavailable functions are not displayed on theproduct’s control panel or software settings screen.) Epson products support the following systemadministration functions:• SSL/TLS communication: use Secure Sockets Layer/Transport Layer Security to encrypt traffic and
avoid spoofing between the product and a computer• IPsec/IP filtering: control access and secure communications between the product and a network
gateway• Individual protocol control: enable and disable single services• Remote configuration of scan and fax destinations: use an LDAP server to look up fax and email
contacts• User feature restriction: allow or deny access to printing, scanning, faxing, and copying on a per user
basis• Import and export printer settings: migrate settings from product to product
7

Using Web Config Network Configuration SoftwareFollow the instructions in these sections to configure your product's adminstrator network settings usingthe Web Config software.
Note: Before you can configure system administration settings, connect the product to a network. Seethe product's Start Here sheet and User's Guide for instructions.
About Web ConfigAccessing Web ConfigRestricting Features Available for UsersUsing Your Product on a Secure Network
About Web ConfigWeb Config is a browser-based application you can use to configure a product's settings. Basic andadvanced setting pages are available.
Note: Before you can configure system administration settings, connect the product to a network. Seethe product's Start Here sheet and User's Guide for instructions.
You can lock the settings you select by setting up an administrator password for your product. See theproduct's User's Guide for instructions.Parent topic: Using Web Config Network Configuration Software
Accessing Web ConfigYou can access Web Config from your browser using HTTP or HTTPS.By default, you access Web Config for the first time using HTTP. If you continue to use HTTP, WebConfig does not display all available menus.1. Print a network status sheet for your product and identify the product IP address. See the product's
User's Guide for instructions.2. Start your web browser and make sure JavaScript is enabled.3. Type the product IP address into the browser as follows, depending on the protocol you are using:
• IPv4: http://product IP address
8
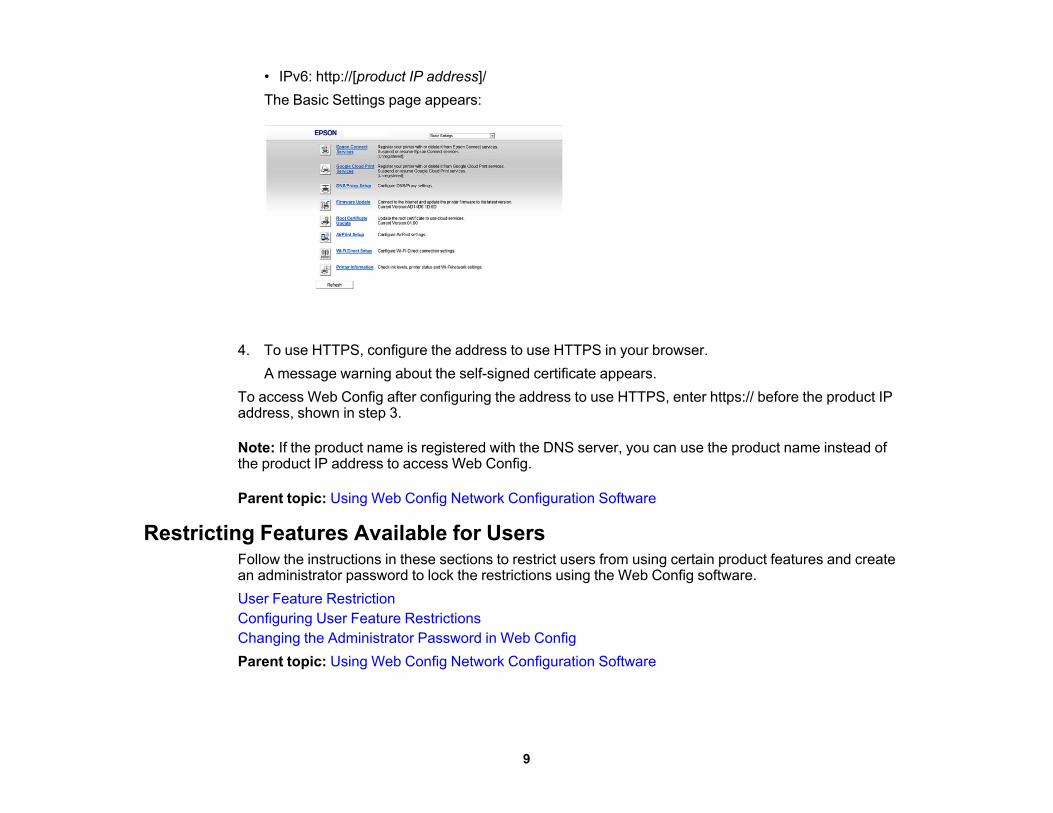
• IPv6: http://[product IP address]/The Basic Settings page appears:
4. To use HTTPS, configure the address to use HTTPS in your browser.A message warning about the self-signed certificate appears.
To access Web Config after configuring the address to use HTTPS, enter https:// before the product IPaddress, shown in step 3.
Note: If the product name is registered with the DNS server, you can use the product name instead ofthe product IP address to access Web Config.
Parent topic: Using Web Config Network Configuration Software
Restricting Features Available for UsersFollow the instructions in these sections to restrict users from using certain product features and createan administrator password to lock the restrictions using the Web Config software.User Feature RestrictionConfiguring User Feature RestrictionsChanging the Administrator Password in Web ConfigParent topic: Using Web Config Network Configuration Software
9
User Feature RestrictionYou can restrict available product features for up to 10 individual users, with different features availableto each user. This requires users to log into the product control panel with their user name and passwordbefore they can use control panel features.With Windows, you can also restrict printing and scanning from the product software. This requires usersto log into the printing or scanning software, and allows the software to authenticate the users beforeprinting or scanning proceeds. For instructions on setting up software restrictions, see the help utility inthe printing or scanning software.Parent topic: Restricting Features Available for Users
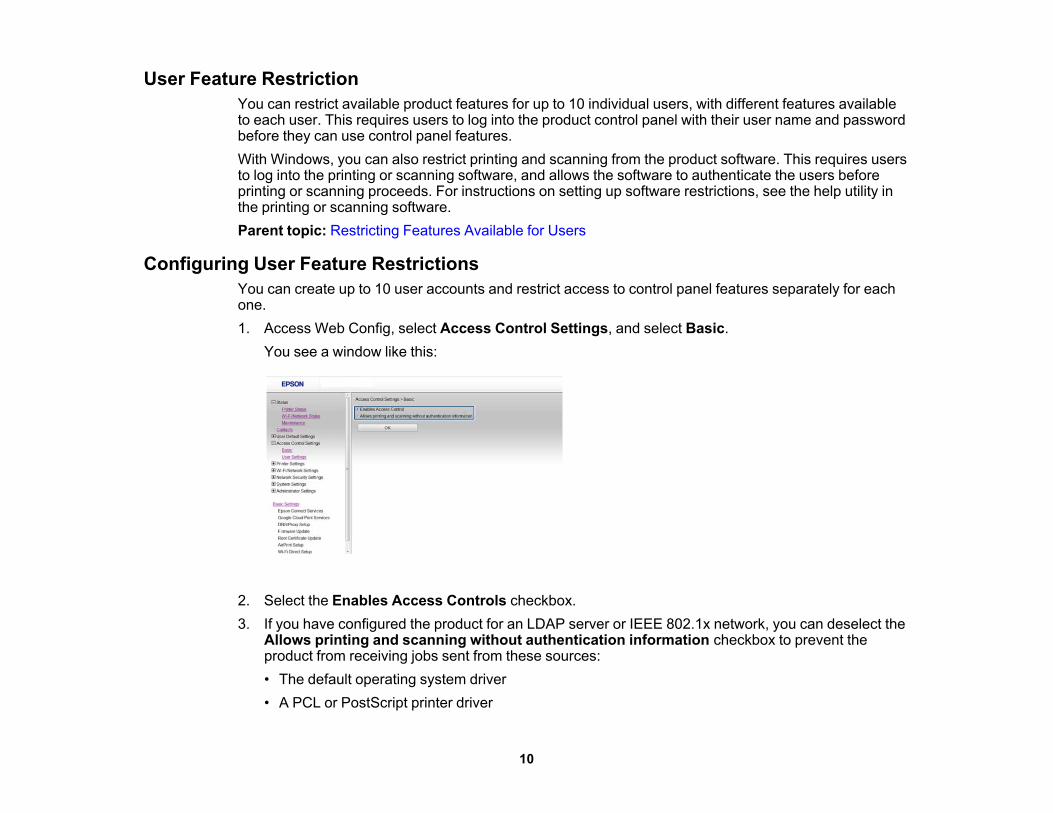
Configuring User Feature RestrictionsYou can create up to 10 user accounts and restrict access to control panel features separately for eachone.1. Access Web Config, select Access Control Settings, and select Basic.
You see a window like this:
2. Select the Enables Access Controls checkbox.3. If you have configured the product for an LDAP server or IEEE 802.1x network, you can deselect the
Allows printing and scanning without authentication information checkbox to prevent theproduct from receiving jobs sent from these sources:• The default operating system driver• A PCL or PostScript printer driver
10
• Web services such as Epson Connect or Google Cloud Print• Smartphones and other mobile devices
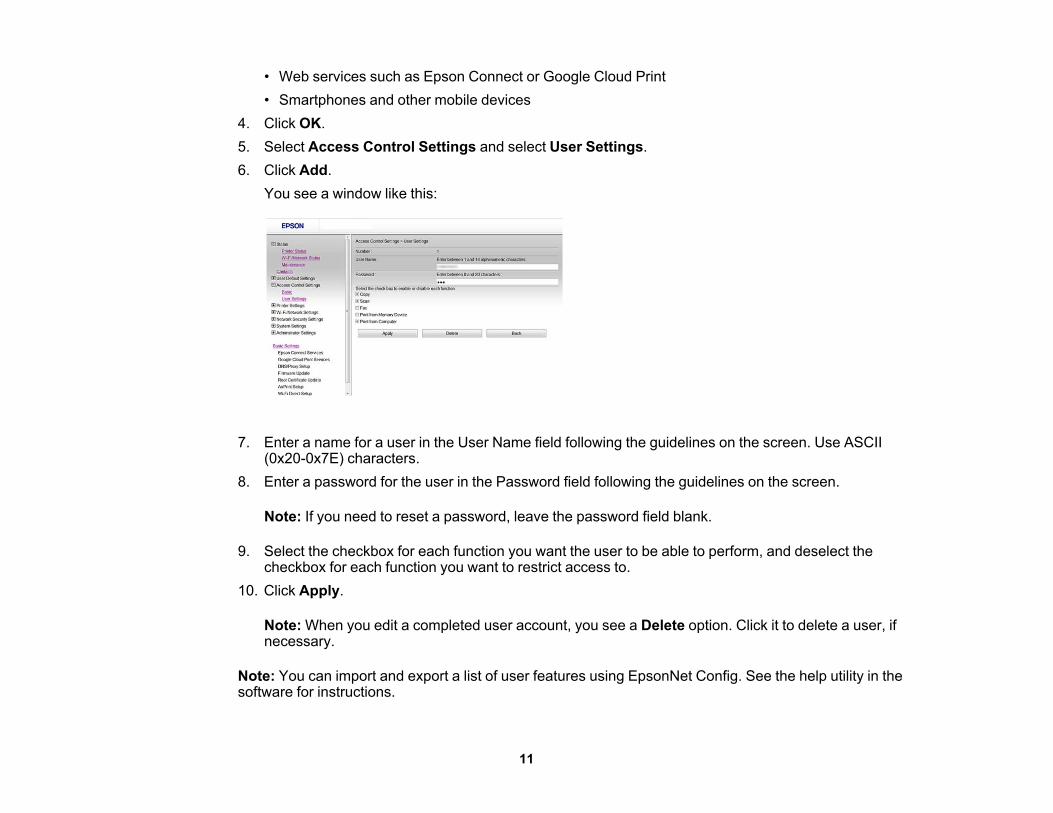
4. Click OK.5. Select Access Control Settings and select User Settings.6. Click Add.
You see a window like this:
7. Enter a name for a user in the User Name field following the guidelines on the screen. Use ASCII(0x20-0x7E) characters.
8. Enter a password for the user in the Password field following the guidelines on the screen.
Note: If you need to reset a password, leave the password field blank.
9. Select the checkbox for each function you want the user to be able to perform, and deselect thecheckbox for each function you want to restrict access to.
10. Click Apply.
Note: When you edit a completed user account, you see a Delete option. Click it to delete a user, ifnecessary.
Note: You can import and export a list of user features using EpsonNet Config. See the help utility in thesoftware for instructions.
11

Parent topic: Restricting Features Available for Users
Changing the Administrator Password in Web ConfigYou can set an administrator password using your product's control panel or using Web Config orEpsonNet Config. You use the same administrator password in all cases.
Note: See your product's User's Guide for instructions on setting an administrator password using thecontrol panel. If you forget your administrator password, contact Epson for support, as described in theproduct's User's Guide.
1. Access Web Config, select Administrator Settings, and select Change Administrator Password.You see a window like this:
2. Do one of the following:• If you have set an administrator password before, enter the current password, then enter and
confirm the new password in the fields provided.• If you have not set an administrator password before, enter a new password and confirm it in the
fields provided3. Click OKParent topic: Restricting Features Available for Users
12
Using Your Product on a Secure NetworkFollow the instructions in these sections to configure security features for your product on the networkusing the Web Config software.Configuring SSL/TLS CommunicationConfiguring IPsec/IP FilteringConfiguring SNMPv3 Protocol SettingsConnecting the Product to an IEEE 802.1X NetworkUsing a Digital CertificateUsing an LDAP ServerUsing an Email ServerConfiguring Protocols and Services in Web ConfigImporting and Exporting Web Config SettingsParent topic: Using Web Config Network Configuration Software
Configuring SSL/TLS CommunicationFollow the instructions in these sections to configure SSL/TLS communication using Web Config.Configuring SSL/TLS SettingsConfiguring a Server Certificate for the ProductParent topic: Using Your Product on a Secure Network
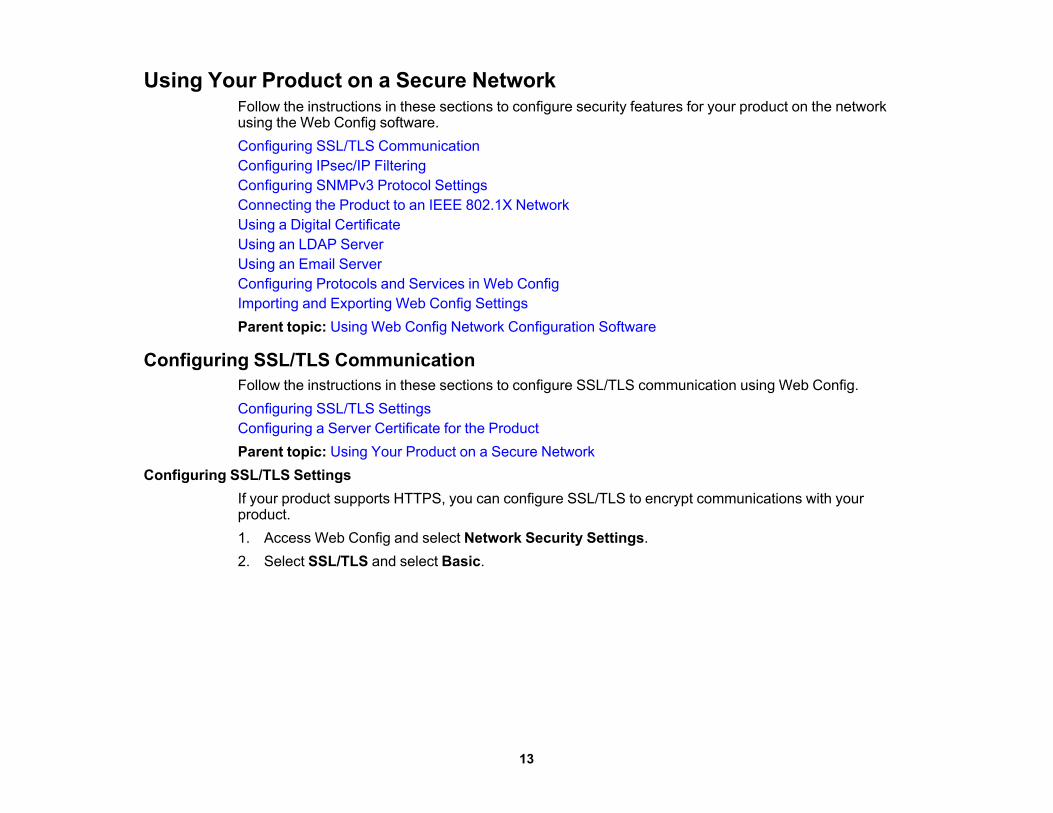
Configuring SSL/TLS SettingsIf your product supports HTTPS, you can configure SSL/TLS to encrypt communications with yourproduct.1. Access Web Config and select Network Security Settings.2. Select SSL/TLS and select Basic.
13
You see a window like this:
3. Select one of the options for the Encryption Strength setting4. Select Enable or Disable for the Redirect HTTP to HTTPS setting as necessary.5. Click Next.
You see a confirmation message.6. Click OK.Parent topic: Configuring SSL/TLS Communication
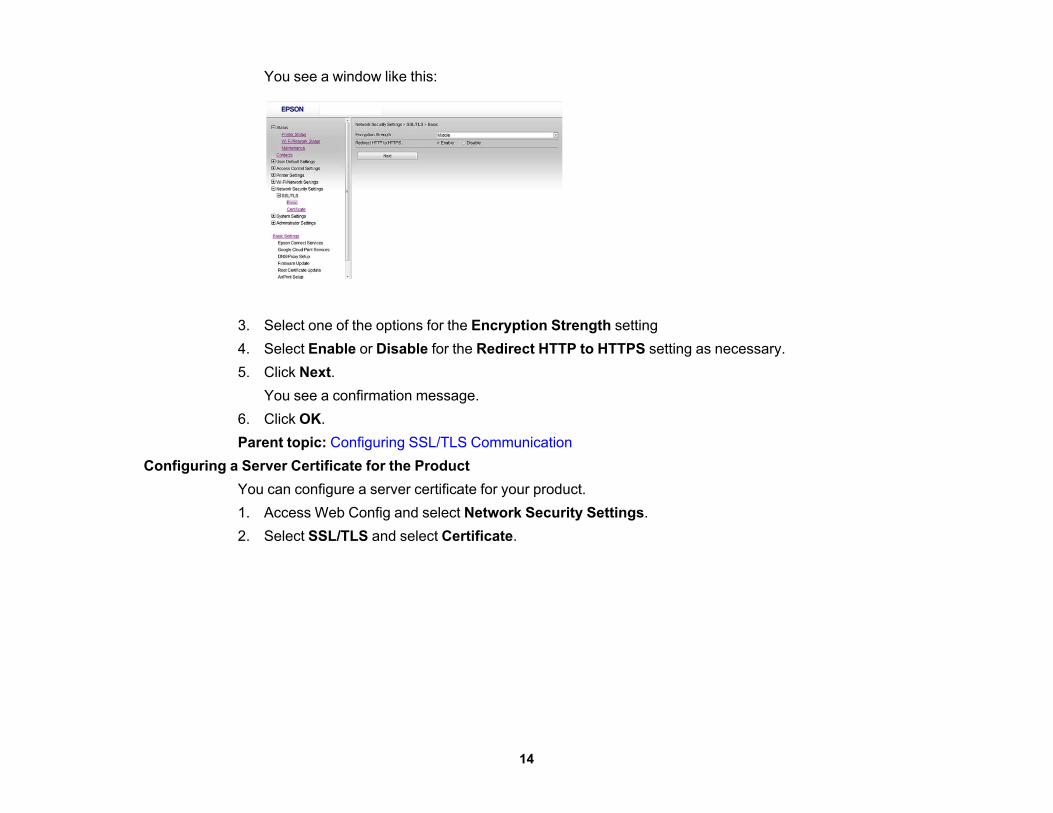
Configuring a Server Certificate for the ProductYou can configure a server certificate for your product.1. Access Web Config and select Network Security Settings.2. Select SSL/TLS and select Certificate.
14
You see a window like this:
3. Select one of the following options for the Server Certificate setting:• Self-signed Certificate: select if you have not obtained a CA-signed certificate and want the
product to generate a self-signed certificate• CA-signed Certificate: select if you have obtained a CA-signed certificate
4. Click Next.You see a confirmation message.
5. Click OK.Parent topic: Configuring SSL/TLS Communication
Configuring IPsec/IP FilteringFollow the instructions in these sections to configure IPsec/IP traffic filtering using Web Config.About IPsec/IP FilteringConfiguring Default IPsec/IP Filtering PolicyConfiguring Group IPsec/IP Filtering PoliciesIPsec/IP Filtering Policy SettingsIPsec/IP Filtering Configuration ExamplesConfiguring an IPsec/IP Filtering CertificateParent topic: Using Your Product on a Secure Network
15

About IPsec/IP FilteringYou can filter traffic to the product over the network based on IP address, service, and port byconfiguring a default policy that applies to every user or group connecting to the product. For control ofindividual users or user groups, you can configure group policies.
Note: IPsec is supported only by computers running Windows Vista or later, or Windows Server 2008 orlater.
Parent topic: Configuring IPsec/IP FilteringConfiguring Default IPsec/IP Filtering Policy
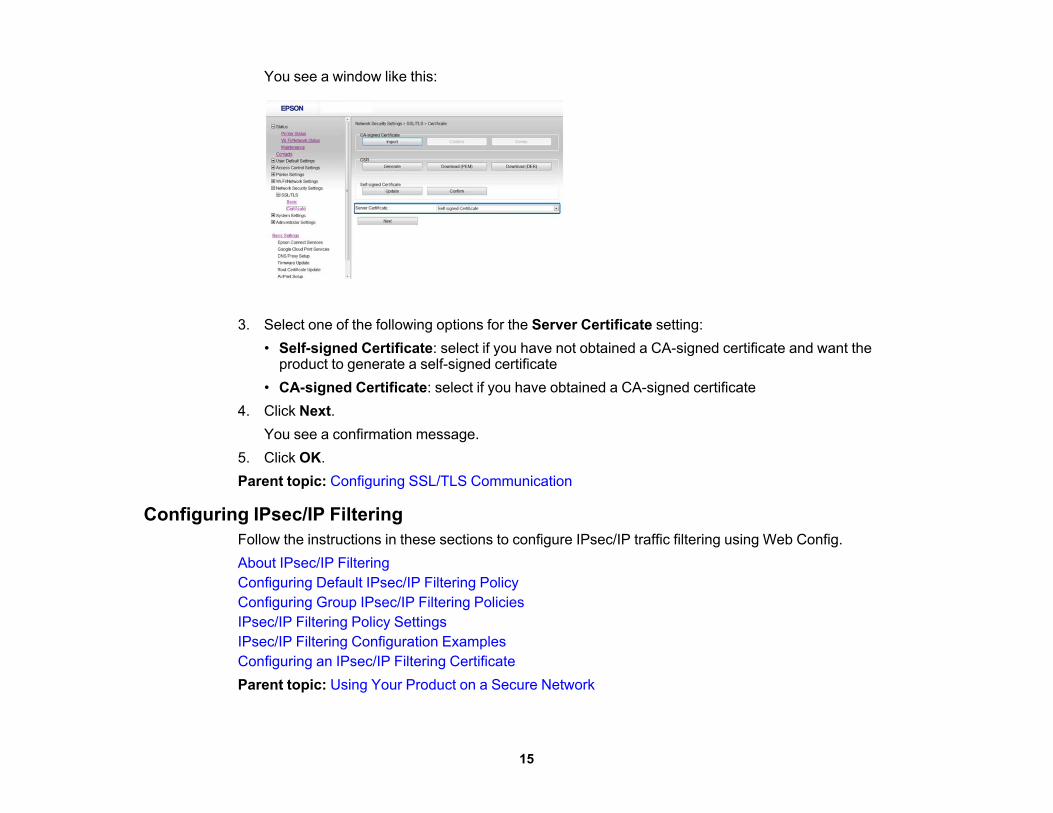
You can configure the default policy for IPsec/IP traffic filtering using Web Config.1. Access Web Config and select Network Security Settings.2. Select IPsec/IP Filtering and select Basic.
You see a window like this:
3. Select Enable to enable IPsec/IP filtering.4. Select the filtering options you want to use for the default policy.5. Click Next.
You see a confirmation message.6. Click OK.Parent topic: Configuring IPsec/IP Filtering
16
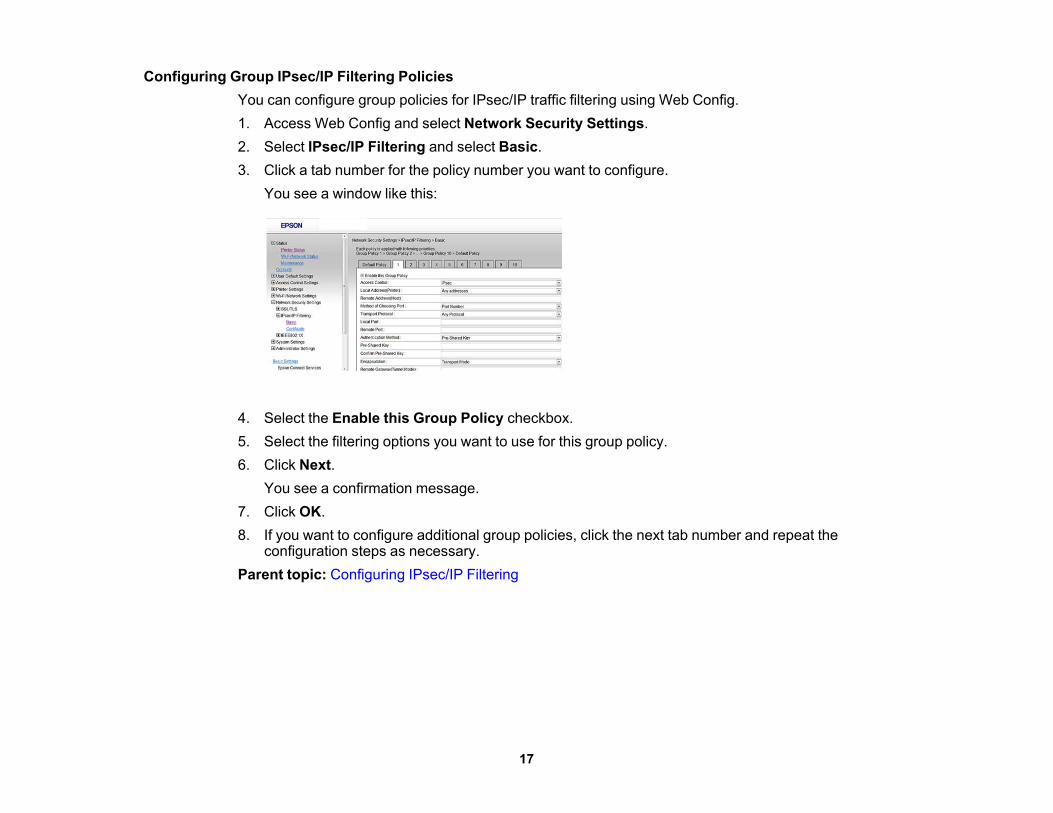
Configuring Group IPsec/IP Filtering PoliciesYou can configure group policies for IPsec/IP traffic filtering using Web Config.1. Access Web Config and select Network Security Settings.2. Select IPsec/IP Filtering and select Basic.3. Click a tab number for the policy number you want to configure.
You see a window like this:
4. Select the Enable this Group Policy checkbox.5. Select the filtering options you want to use for this group policy.6. Click Next.
You see a confirmation message.7. Click OK.8. If you want to configure additional group policies, click the next tab number and repeat the
configuration steps as necessary.Parent topic: Configuring IPsec/IP Filtering
17
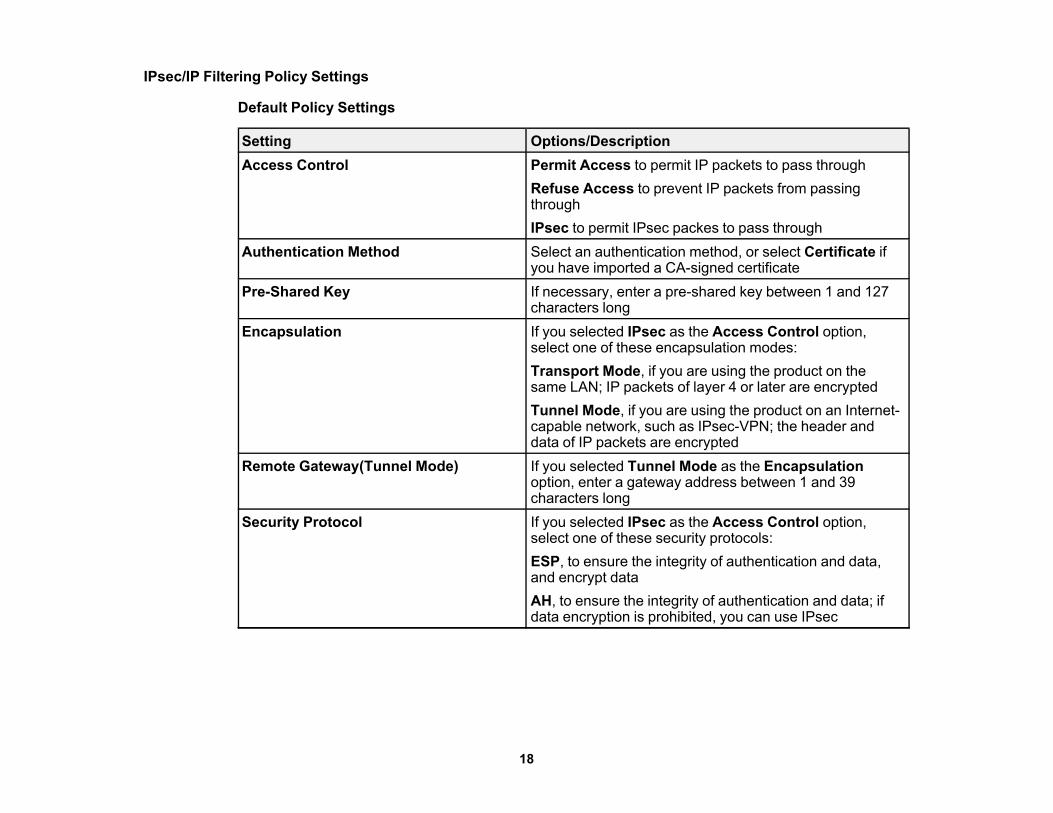
IPsec/IP Filtering Policy Settings
Default Policy Settings
Setting Options/DescriptionAccess Control Permit Access to permit IP packets to pass through
Refuse Access to prevent IP packets from passingthroughIPsec to permit IPsec packes to pass through
Authentication Method Select an authentication method, or select Certificate ifyou have imported a CA-signed certificate
Pre-Shared Key If necessary, enter a pre-shared key between 1 and 127characters long
Encapsulation If you selected IPsec as the Access Control option,select one of these encapsulation modes:Transport Mode, if you are using the product on thesame LAN; IP packets of layer 4 or later are encryptedTunnel Mode, if you are using the product on an Internet-capable network, such as IPsec-VPN; the header anddata of IP packets are encrypted
Remote Gateway(Tunnel Mode) If you selected Tunnel Mode as the Encapsulationoption, enter a gateway address between 1 and 39characters long
Security Protocol If you selected IPsec as the Access Control option,select one of these security protocols:ESP, to ensure the integrity of authentication and data,and encrypt dataAH, to ensure the integrity of authentication and data; ifdata encryption is prohibited, you can use IPsec
18
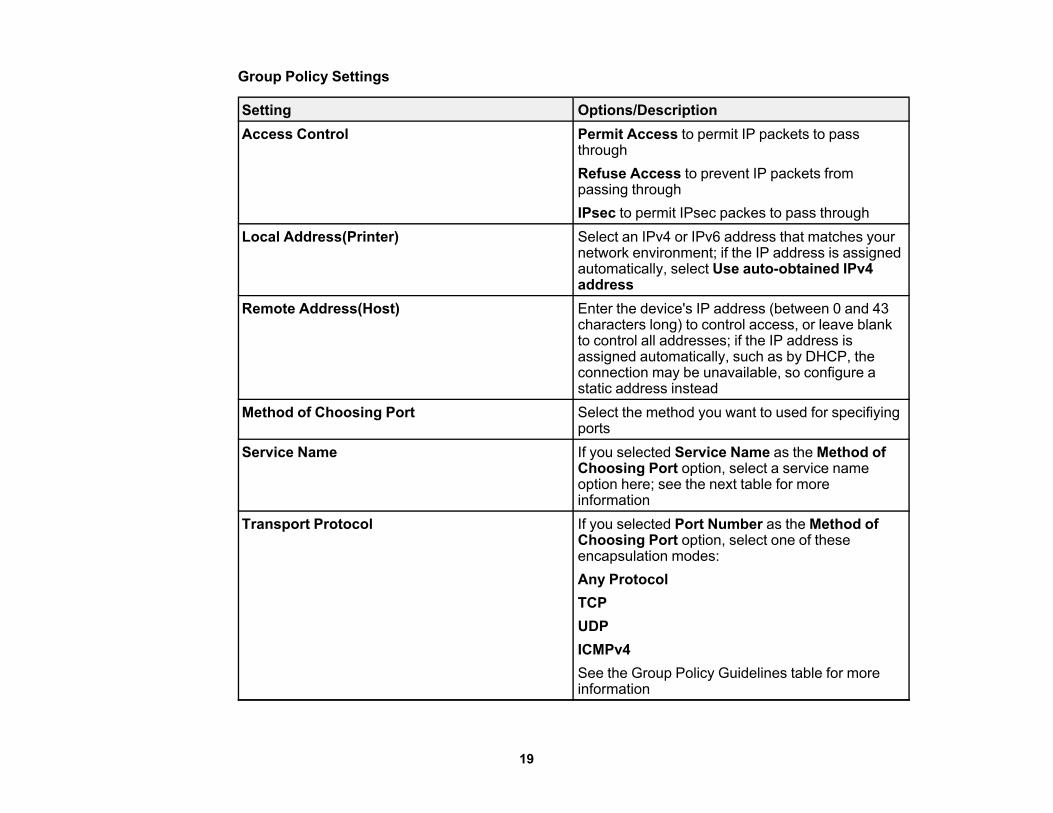
Group Policy Settings
Setting Options/DescriptionAccess Control Permit Access to permit IP packets to pass
throughRefuse Access to prevent IP packets frompassing throughIPsec to permit IPsec packes to pass through
Local Address(Printer) Select an IPv4 or IPv6 address that matches yournetwork environment; if the IP address is assignedautomatically, select Use auto-obtained IPv4address
Remote Address(Host) Enter the device's IP address (between 0 and 43characters long) to control access, or leave blankto control all addresses; if the IP address isassigned automatically, such as by DHCP, theconnection may be unavailable, so configure astatic address instead
Method of Choosing Port Select the method you want to used for specifiyingports
Service Name If you selected Service Name as the Method ofChoosing Port option, select a service nameoption here; see the next table for moreinformation
Transport Protocol If you selected Port Number as the Method ofChoosing Port option, select one of theseencapsulation modes:Any ProtocolTCPUDPICMPv4See the Group Policy Guidelines table for moreinformation
19
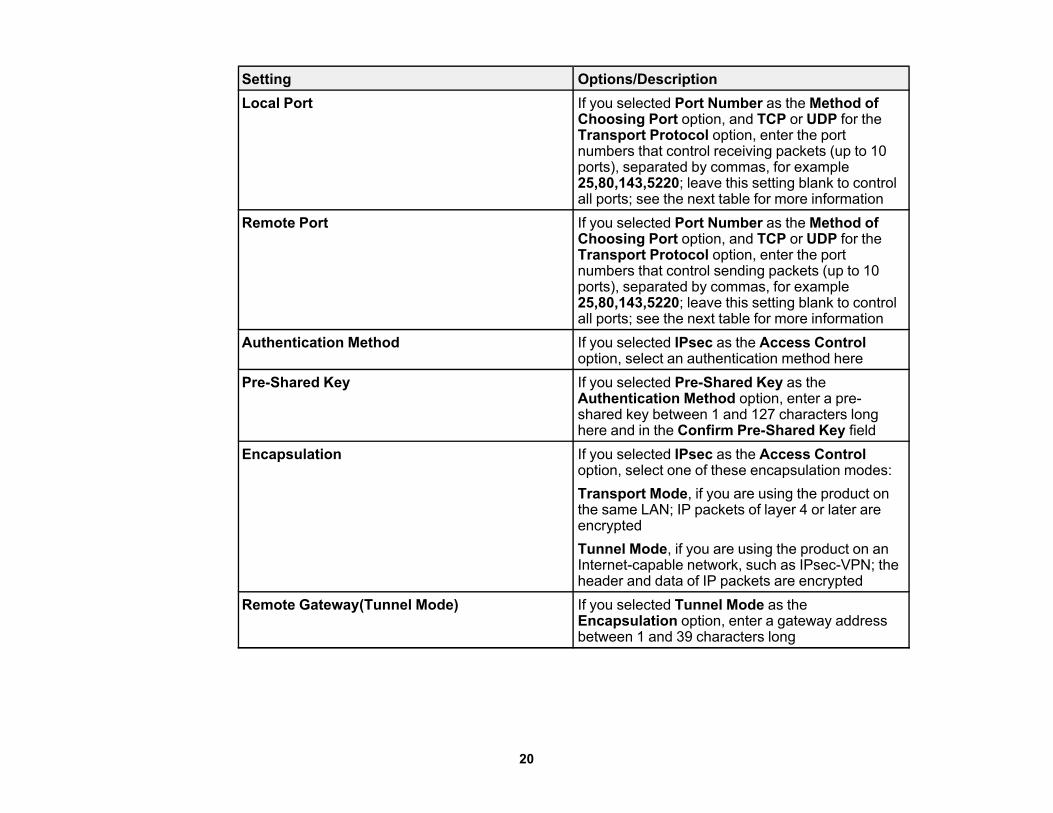
Setting Options/DescriptionLocal Port If you selected Port Number as the Method of
Choosing Port option, and TCP or UDP for theTransport Protocol option, enter the portnumbers that control receiving packets (up to 10ports), separated by commas, for example25,80,143,5220; leave this setting blank to controlall ports; see the next table for more information
Remote Port If you selected Port Number as the Method ofChoosing Port option, and TCP or UDP for theTransport Protocol option, enter the portnumbers that control sending packets (up to 10ports), separated by commas, for example25,80,143,5220; leave this setting blank to controlall ports; see the next table for more information
Authentication Method If you selected IPsec as the Access Controloption, select an authentication method here
Pre-Shared Key If you selected Pre-Shared Key as theAuthentication Method option, enter a pre-shared key between 1 and 127 characters longhere and in the Confirm Pre-Shared Key field
Encapsulation If you selected IPsec as the Access Controloption, select one of these encapsulation modes:Transport Mode, if you are using the product onthe same LAN; IP packets of layer 4 or later areencryptedTunnel Mode, if you are using the product on anInternet-capable network, such as IPsec-VPN; theheader and data of IP packets are encrypted
Remote Gateway(Tunnel Mode) If you selected Tunnel Mode as theEncapsulation option, enter a gateway addressbetween 1 and 39 characters long
20
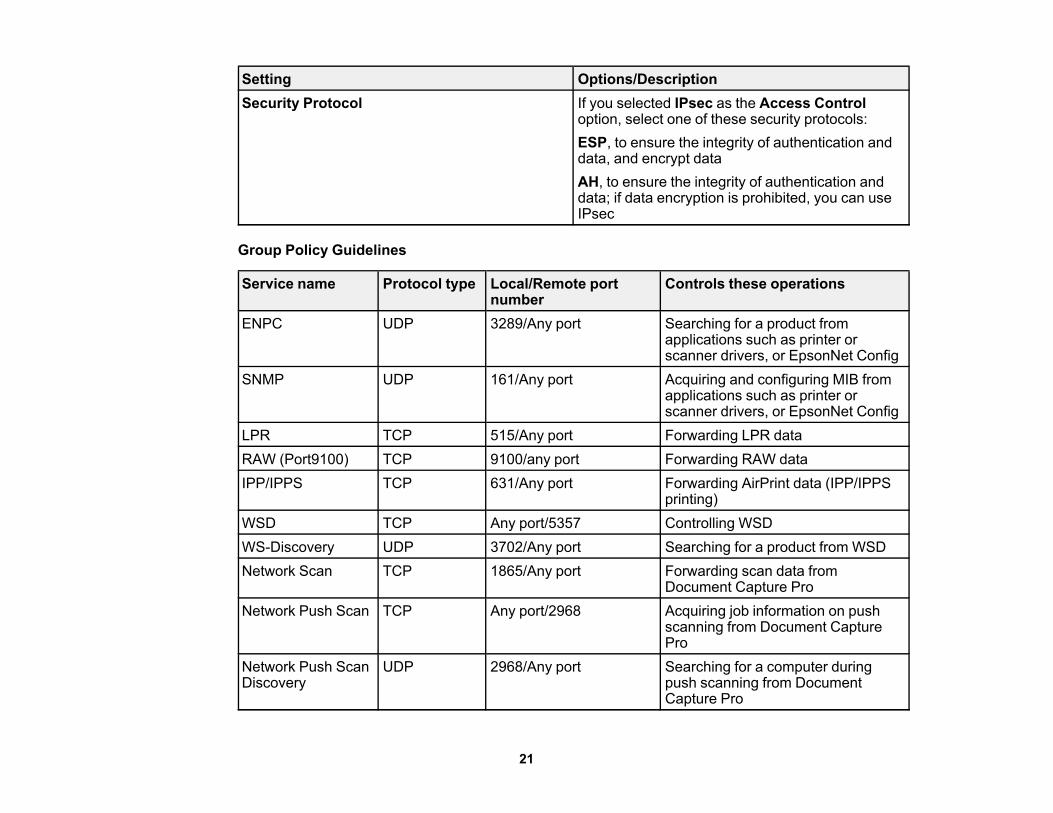
Setting Options/DescriptionSecurity Protocol If you selected IPsec as the Access Control
option, select one of these security protocols:ESP, to ensure the integrity of authentication anddata, and encrypt dataAH, to ensure the integrity of authentication anddata; if data encryption is prohibited, you can useIPsec
Group Policy Guidelines
Service name Protocol type Local/Remote port Controls these operationsnumber
ENPC UDP 3289/Any port Searching for a product fromapplications such as printer orscanner drivers, or EpsonNet Config
SNMP UDP 161/Any port Acquiring and configuring MIB fromapplications such as printer orscanner drivers, or EpsonNet Config
LPR TCP 515/Any port Forwarding LPR dataRAW (Port9100) TCP 9100/any port Forwarding RAW dataIPP/IPPS TCP 631/Any port Forwarding AirPrint data (IPP/IPPS
printing)WSD TCP Any port/5357 Controlling WSDWS-Discovery UDP 3702/Any port Searching for a product from WSDNetwork Scan TCP 1865/Any port Forwarding scan data from
Document Capture ProNetwork Push Scan TCP Any port/2968 Acquiring job information on push
scanning from Document CapturePro
Network Push Scan UDP 2968/Any port Searching for a computer duringDiscovery push scanning from Document
Capture Pro
21
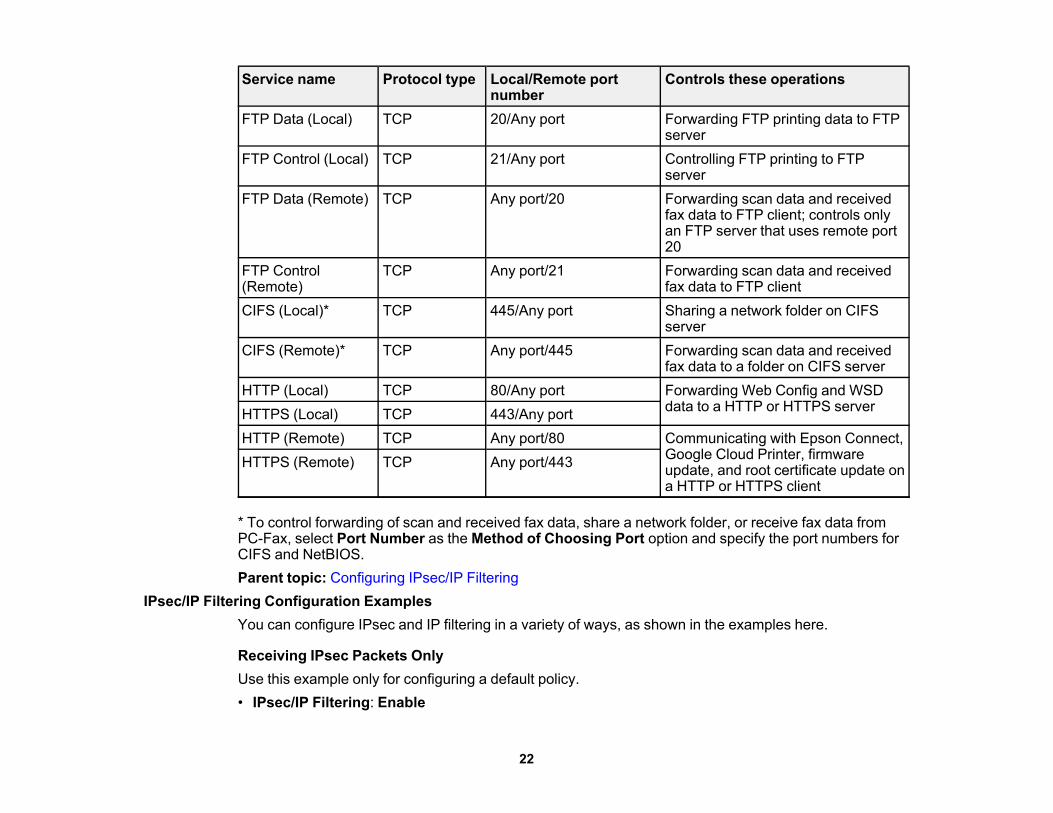
Service name Protocol type Local/Remote port Controls these operationsnumber
FTP Data (Local) TCP 20/Any port Forwarding FTP printing data to FTPserver
FTP Control (Local) TCP 21/Any port Controlling FTP printing to FTPserver
FTP Data (Remote) TCP Any port/20 Forwarding scan data and receivedfax data to FTP client; controls onlyan FTP server that uses remote port20
FTP Control TCP Any port/21 Forwarding scan data and received(Remote) fax data to FTP clientCIFS (Local)* TCP 445/Any port Sharing a network folder on CIFS
serverCIFS (Remote)* TCP Any port/445 Forwarding scan data and received
fax data to a folder on CIFS serverHTTP (Local) TCP 80/Any port Forwarding Web Config and WSD
data to a HTTP or HTTPS serverHTTPS (Local) TCP 443/Any portHTTP (Remote) TCP Any port/80 Communicating with Epson Connect,
Google Cloud Printer, firmwareHTTPS (Remote) TCP Any port/443 update, and root certificate update ona HTTP or HTTPS client
* To control forwarding of scan and received fax data, share a network folder, or receive fax data fromPC-Fax, select Port Number as the Method of Choosing Port option and specify the port numbers forCIFS and NetBIOS.Parent topic: Configuring IPsec/IP Filtering
IPsec/IP Filtering Configuration ExamplesYou can configure IPsec and IP filtering in a variety of ways, as shown in the examples here.
Receiving IPsec Packets OnlyUse this example only for configuring a default policy.• IPsec/IP Filtering: Enable
22
• Access Control: IPsec• Authentication Method: Pre-Shared Key• Pre-Shared Key: Enter a key up to 127 characters long
Receiving Printing Data and Printer SettingsUse this example to allow communication of printing data and printer settings from specified services.Default policy:• IPsec/IP Filtering: Enable• Access Control: Refuse AccessGroup policy:• Access Control: Permit Access• Remote Address(Host): Client IP address• Method of Choosing Port: Service Name• Service Name: Select ENPC, SNMP, HTTP (Local), HTTPS (Local), and RAW (Port9100)
Receiving Access from Only a Specified Address for Product AccessIn these examples, the client will be able to access and configure the product in any policy configuration.Default policy:• IPsec/IP Filtering: Enable• Access Control: Refuse AccessGroup policy:• Access Control: Permit Access• Remote Address (Host): Administrator's client IP addressParent topic: Configuring IPsec/IP Filtering
Configuring an IPsec/IP Filtering CertificateYou can configure a certificate for IPsec/IP traffic filtering using Web Config.1. Access Web Config and select Network Security Settings.2. Select IPsec/IP Filtering and select Client Certificate.
23
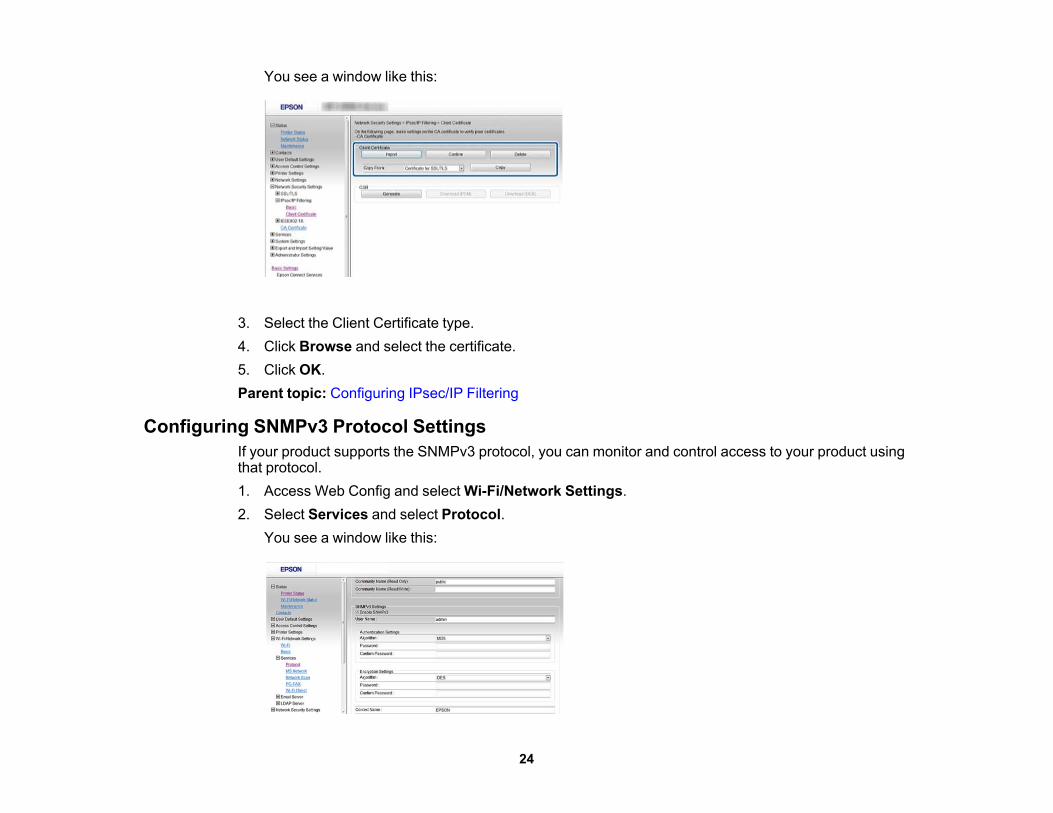
You see a window like this:
3. Select the Client Certificate type.4. Click Browse and select the certificate.5. Click OK.Parent topic: Configuring IPsec/IP Filtering
Configuring SNMPv3 Protocol SettingsIf your product supports the SNMPv3 protocol, you can monitor and control access to your product usingthat protocol.1. Access Web Config and select Wi-Fi/Network Settings.2. Select Services and select Protocol.
You see a window like this:
24
3. Select the Enable SNMPv3 checkbox to enable SNMPv3 settings.4. Select the settings you want in SNMPv3 Settings section.5. Click Next.
You see a confirmation message.6. Click OK.SNMPv3 SettingsParent topic: Using Your Product on a Secure Network
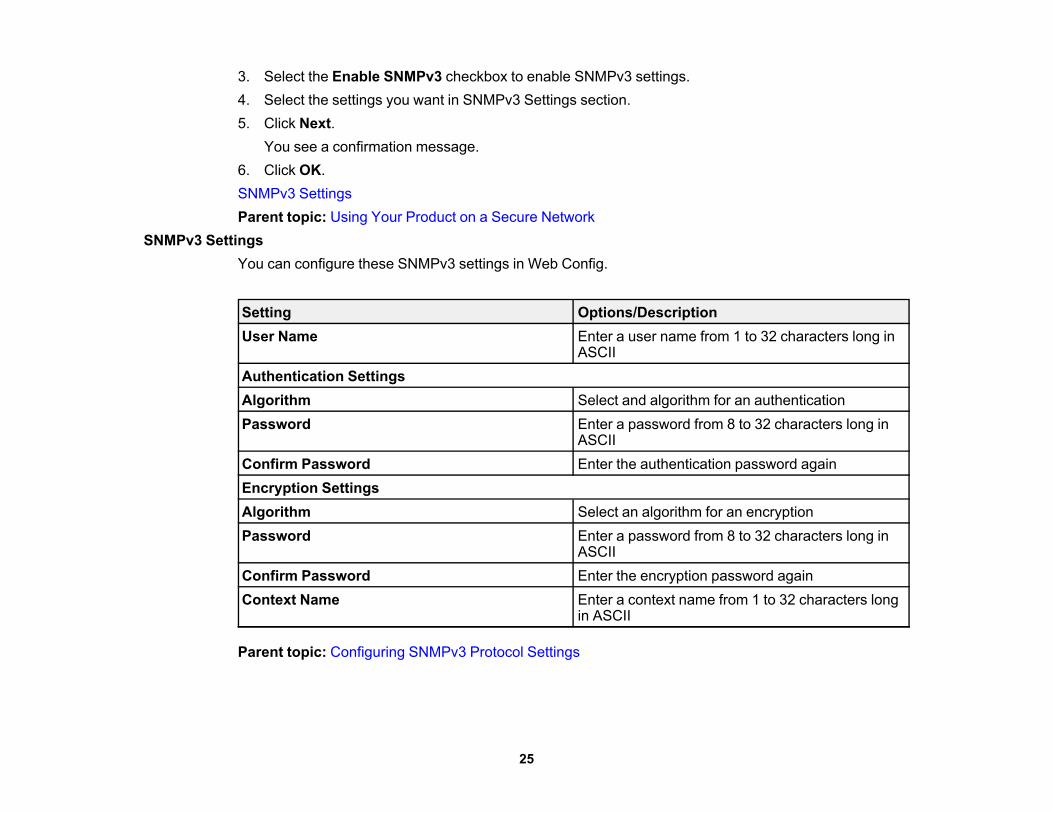
SNMPv3 SettingsYou can configure these SNMPv3 settings in Web Config.
Setting Options/DescriptionUser Name Enter a user name from 1 to 32 characters long in
ASCIIAuthentication SettingsAlgorithm Select and algorithm for an authenticationPassword Enter a password from 8 to 32 characters long in
ASCIIConfirm Password Enter the authentication password againEncryption SettingsAlgorithm Select an algorithm for an encryptionPassword Enter a password from 8 to 32 characters long in
ASCIIConfirm Password Enter the encryption password againContext Name Enter a context name from 1 to 32 characters long
in ASCII
Parent topic: Configuring SNMPv3 Protocol Settings
25
Connecting the Product to an IEEE 802.1X NetworkFollow the instructions in these sections to connect the product to an IEEE 802.1X network using WebConfig.Configuring an IEEE 802.1X NetworkIEEE 802.1X Network SettingsConfiguring a Certificate for an IEEE 802.1X NetworkIEEE 802.1X Network StatusParent topic: Using Your Product on a Secure Network
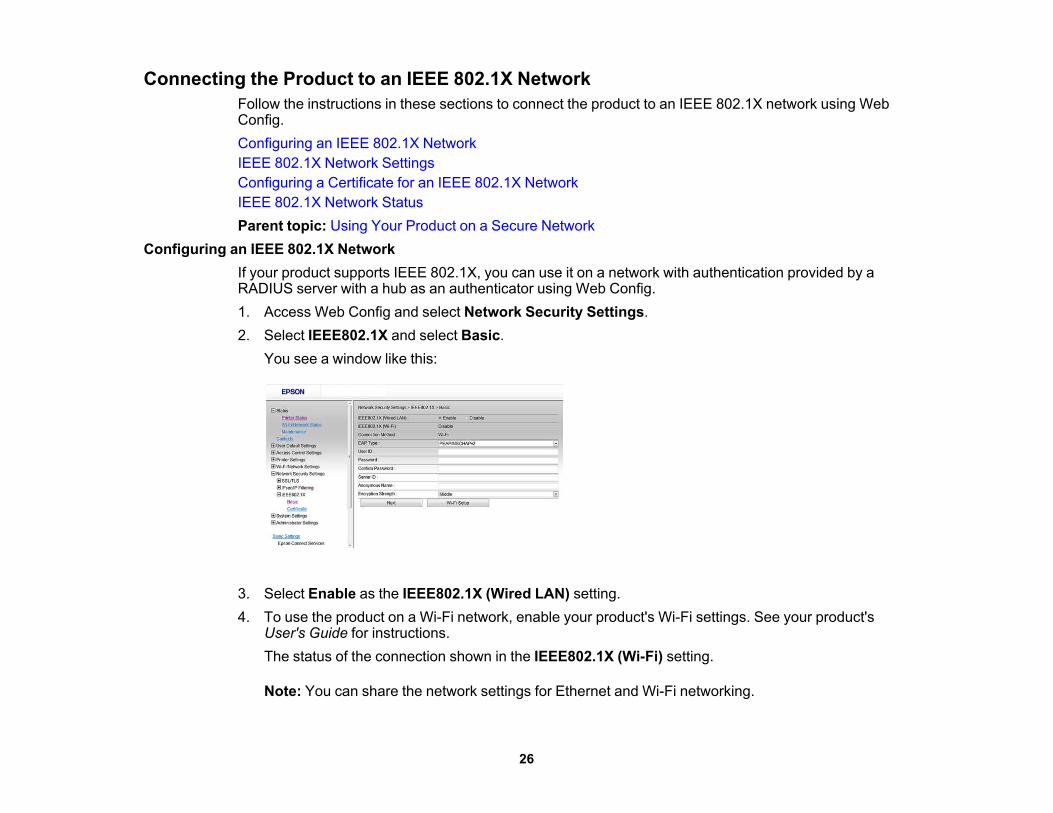
Configuring an IEEE 802.1X NetworkIf your product supports IEEE 802.1X, you can use it on a network with authentication provided by aRADIUS server with a hub as an authenticator using Web Config.1. Access Web Config and select Network Security Settings.2. Select IEEE802.1X and select Basic.
You see a window like this:
3. Select Enable as the IEEE802.1X (Wired LAN) setting.4. To use the product on a Wi-Fi network, enable your product's Wi-Fi settings. See your product's
User's Guide for instructions.The status of the connection shown in the IEEE802.1X (Wi-Fi) setting.
Note: You can share the network settings for Ethernet and Wi-Fi networking.
26
5. Select the IEEE 802.1X setting options you want to use.6. Click Next.
You see a confirmation message.7. Click OK.Parent topic: Connecting the Product to an IEEE 802.1X Network
IEEE 802.1X Network SettingsYou can configure these IEEE 802.1X network settings in Web Config.
Setting Options/DescriptionConnection Method Displays the current network connection methodEAP Type Select one of these authentication methods for connections
between the product and a RADIUS server:EAP-TLS or PEAP-TLS: You must obtain and import a CA-signed certificatePEAP/MSCHAPv2: You must configure a password
User ID Enter an ID between 1 and 128 ASCII characters forauthentication on a RADIUS server
Password Enter a password between 1 and 128 ASCII characters forauthentication of the product. If you are using Windows as aRADIUS server, enter up to 127 ASCII characters.
Confirm Password Enter the authentication password againServer ID Enter a server ID between 1 and 128 ASCII characters for
authentication on a specified RADIUS server; server ID isverified in the subject/subjectAltName field of a servercertificate sent from the RADIUS server
Certificate Validation Select a valid certificate regardless of the authenticationmethod; import the certificate using the CA Certificates.
Anonymous Name If you selected PEAP-TLS or PEAP/MSCHAPv2 as theAuthentication Method setting, you can configure ananonymous name between 1 and 128 ASCII charactersinstead of a user ID for phase 1 of a PEAP authentication
27
Setting Options/DescriptionEncryption Strength Select one of the following encryption strengths:
High for AES256/3DESMiddle for AES256/3DES/AES128/RC4
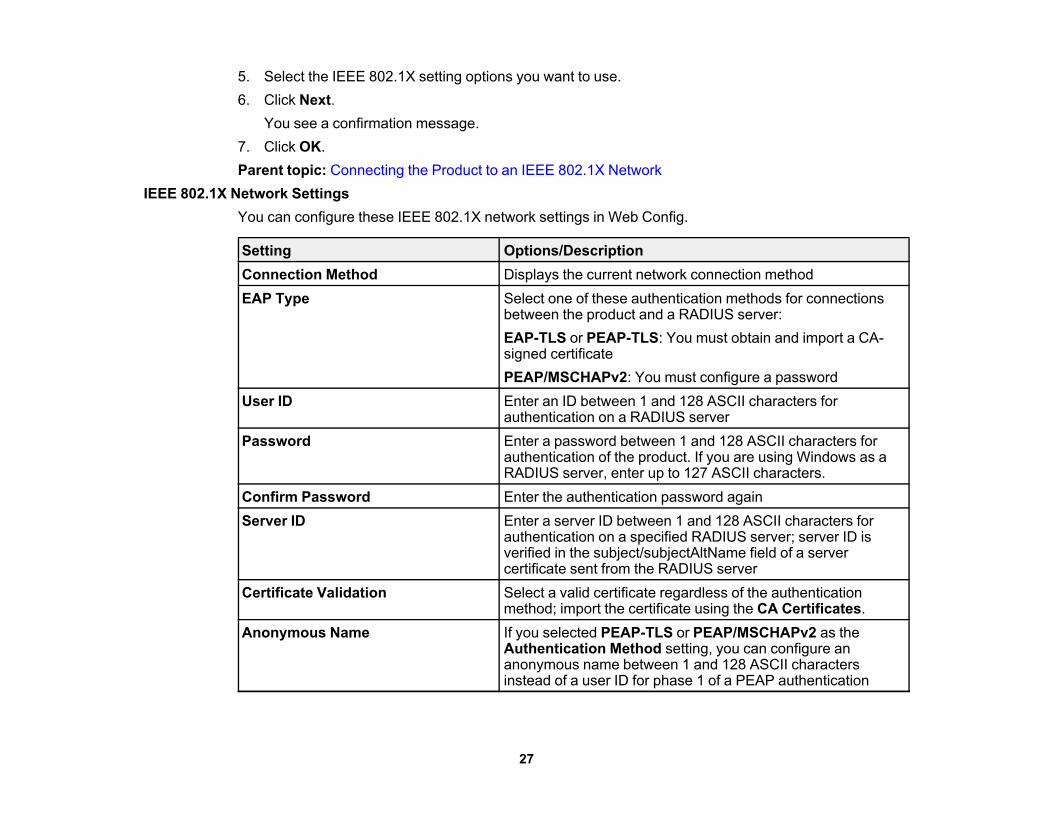
Parent topic: Connecting the Product to an IEEE 802.1X NetworkConfiguring a Certificate for an IEEE 802.1X Network
If your product supports IEEE 802.1X, you can configure a certificate for the network using Web Config.1. Access Web Config and select Network Security Settings.2. Select IEEE802.1X and select Client Certificate.
You see a window like this:
3. Select the Client Certificate type.4. Click Browse and select the certificate.5. Click OK.Parent topic: Connecting the Product to an IEEE 802.1X Network
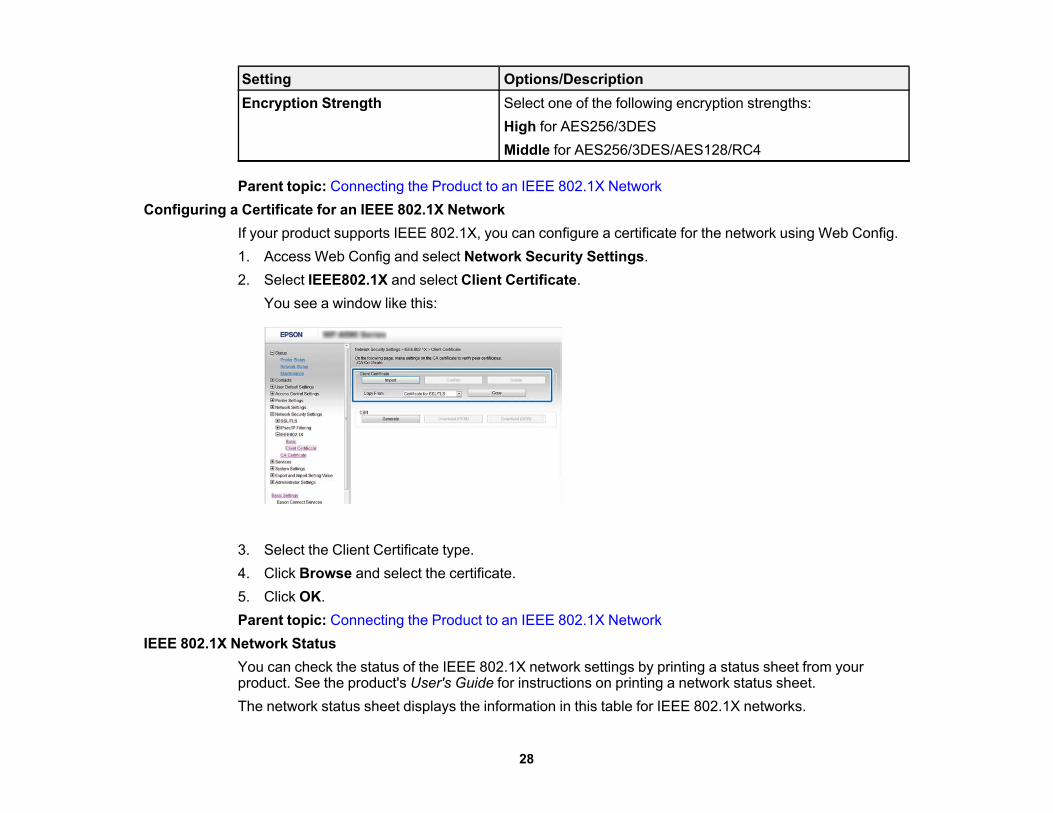
IEEE 802.1X Network StatusYou can check the status of the IEEE 802.1X network settings by printing a status sheet from yourproduct. See the product's User's Guide for instructions on printing a network status sheet.The network status sheet displays the information in this table for IEEE 802.1X networks.
28
Status ID Status descriptionDisable IEEE 802.1X is disablesEAP Success IEEE 802.1X authentication in confirmed and the network is connectedAuthenticating IEEE 802.1X authentication in progressConfig Error Authentication has failed because the user ID was not setClient Certificate Error Authentication has failed because the client certificate is out of dateTimeout Error Authentication has failed because there is no answer from the RADIUS
server and/or authenticatorUser ID Error Authentication has failed because the product's user ID and/or certificate
protocol is incorrectServer ID Error Authentication has failed because the server ID on the server certificate
and the server's ID do not matchServer Certificate Error Authentication has failed because the server certificate is out of date or
the chain of the server certificate is incorrectCA Certificate Error Authentication has failed because the CA certificate is incorrect, not
imported, or out of dateEAP Failure Authentication has failed because the client certificate is incorrect (EAP-
TLS or PEAP-TLS), or the user ID or password is incorrect(PEAP/MSCHAPv2)
Parent topic: Connecting the Product to an IEEE 802.1X Network
Using a Digital CertificateFollow the instructions in these sections to configure and use digital certificates using Web Config.About Digital CertificationObtaining and Importing a CA-signed Client CertificateImporting a CA-signed Server CertificateCSR Setup SettingsCSR Import SettingsDeleting a CA-signed Client CertificateDeleting a CA-signed Server CertificateUpdating a Self-signed Certificate
29
Restarting the Product's Network ServiceParent topic: Using Your Product on a Secure Network
About Digital CertificationYou can configure the following digital certificates for your network using Web Config:CA-signed Certificate
You can insure secure communications using a CA-signed certificate for each security feature. Thecertificates must be signed by and obtained from a CA (Certificate Authority).
Self-signed CertificateA self-signed certificate is issued and signed by the product itself. You can use the certificate for onlySSL/TLS communication, however security is unreliable and you may see a security alert in thebrowser during use.
Parent topic: Using a Digital CertificateObtaining and Importing a CA-signed Client Certificate
You can obtain a CA-signed certificate by creating a CSR (Certificate Signing Request) using WebConfig and submitting it to a certificate authority. The CSR created in Web Config is in PEM/DER format.You can import one CSR created from Web Config at a time.1. Access Web Config and select Network Security Settings.2. Select one of the following network security options and corresponding certificates:
• SSL/TLS and select Certificate• IPsec/IP Filtering and select Client Certificate• IEEE802.1X and select Client Certificate
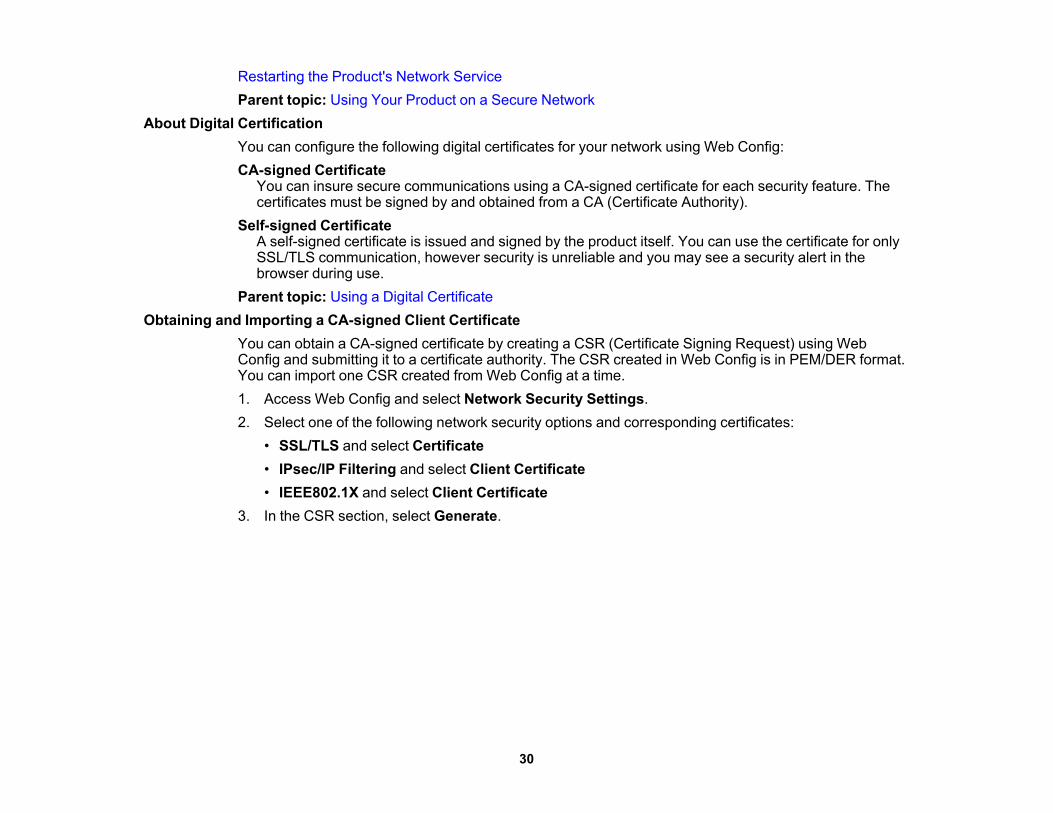
3. In the CSR section, select Generate.
30
You see a window like this:
4. Select the CSR setting options you want to use.5. Click OK.
You see a completion message.6. Select Network Security Settings, select your network security option, and select Certificate
again.7. In the CSR section, click the Download option that matches the format specified by your certificate
authority to download the CSR.
Caution: Do not generate another CSR or you may not be able to import a CA-signed certificate.
8. Submit the CSR to the certificate authority following the format guidelines provided by that authority.9. Save the issued CA-signed certificate to a computer connected to the product.
Before proceeding, make sure the time and date settings are correct on your product. See theproduct's User's Guide for instructions.
10. Select Network Security Settings, select your network security option, and select Certificateagain.
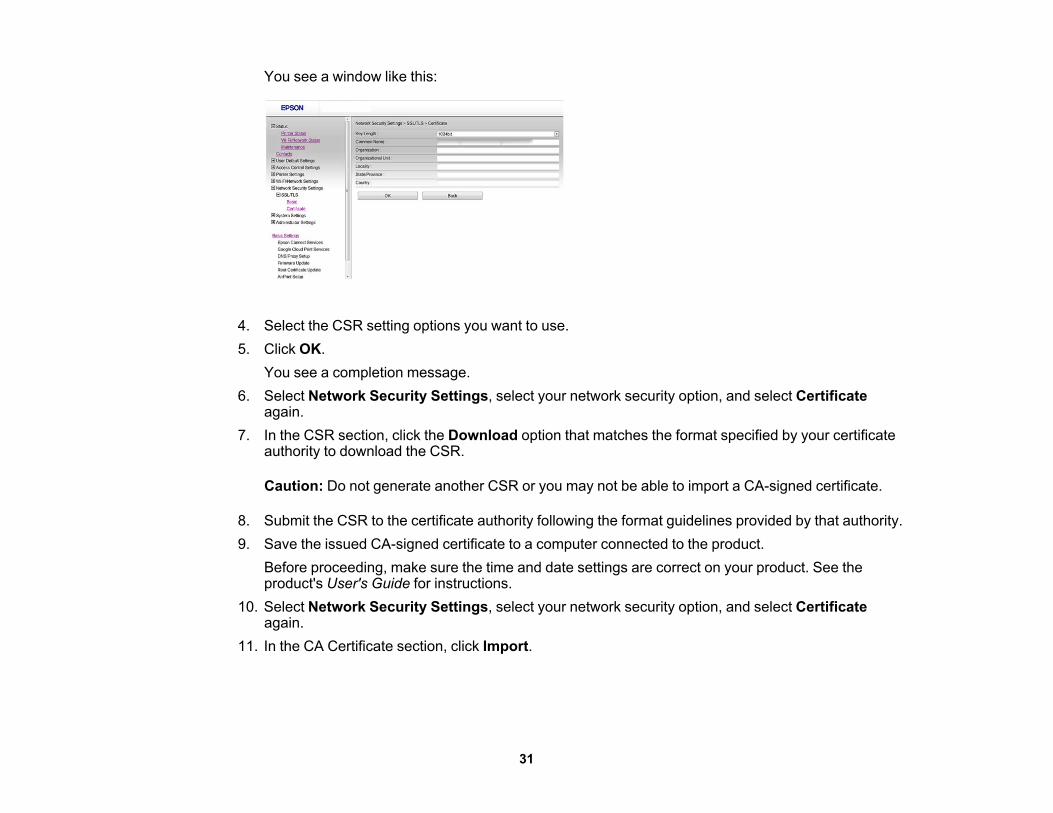
11. In the CA Certificate section, click Import.
31
You see a window like this:
12. Select the format of the certificate as the Server Certificate setting.13. Select the certificate import settings as necessary for the format and the source from which you
obtained it.14. Click OK.
You see a confirmation message.15. Click Confirm to verify the certificate information.Parent topic: Using a Digital Certificate
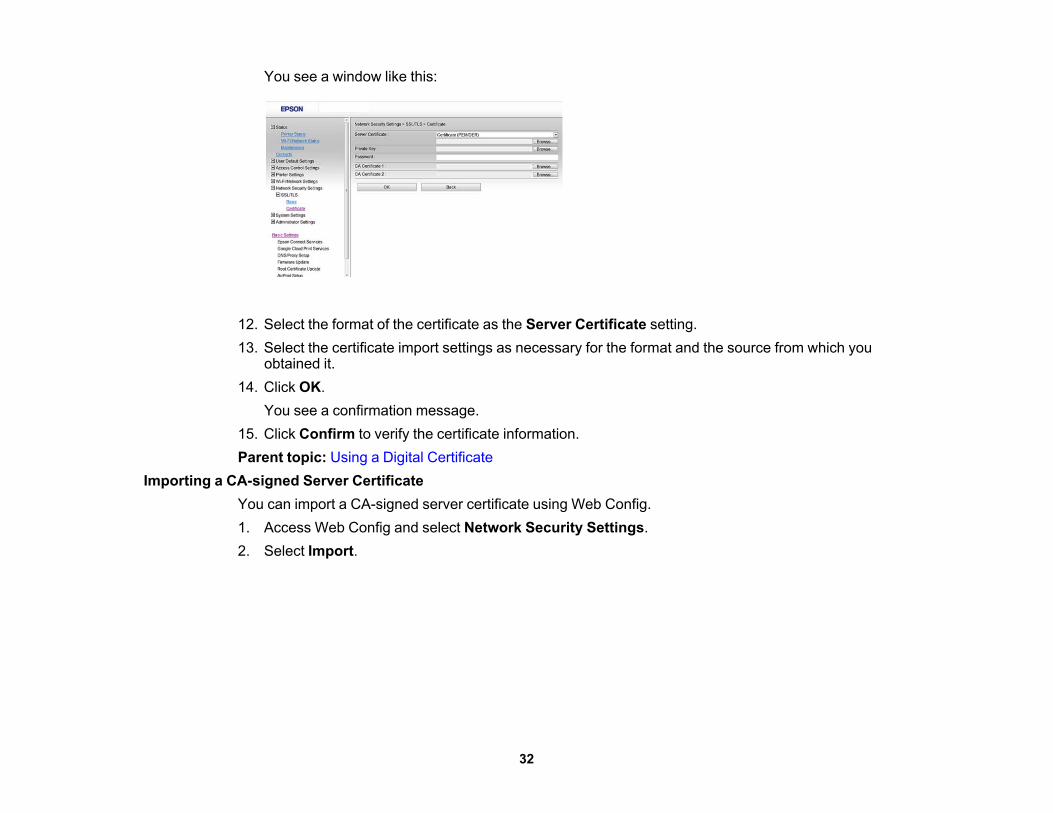
Importing a CA-signed Server CertificateYou can import a CA-signed server certificate using Web Config.1. Access Web Config and select Network Security Settings.2. Select Import.
32

3. Select the CA certificate you want to import.
4. Click OK.The CA certificate import is complete when you see the CA Certificate page and the imported certificateis displayed.Parent topic: Using a Digital Certificate
CSR Setup SettingsYou can select these settings when setting up a CSR in Web Config.
Note: The available key length and abbreviations vary by certificate authority, so follow the rules of thatauthority when entering information in the CSR.
Setting Options/DescriptionKey Length Select a key length for the CSRCommon Name Enter a name or static IP address from 1 to 128
characters long; for example, Reception printeror https://10.152.12.225
Organization, Organizational Unit, Locality, Enter information in each field as necessary, fromState, and Province 0 to 64 characters long in ASCII; separate any
multiple names with commasCountry Enter a two-digit country code number as specified
by the ISO-3166 standard
33
Parent topic: Using a Digital CertificateCSR Import Settings
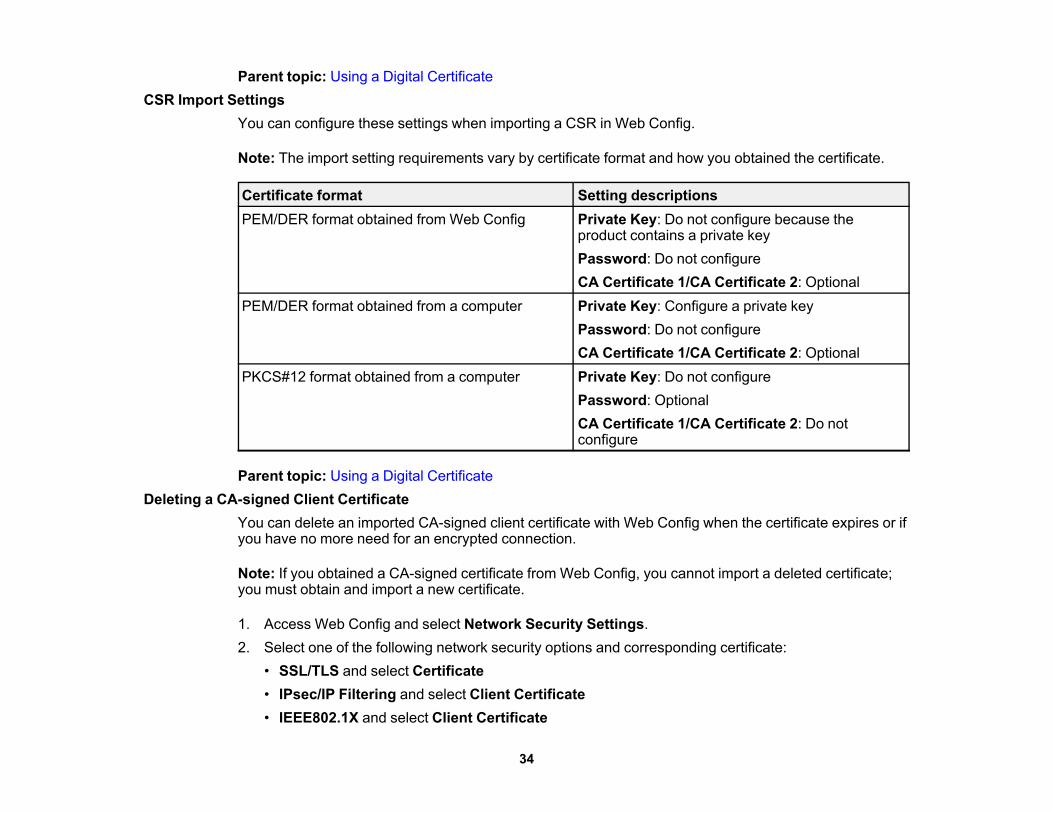
You can configure these settings when importing a CSR in Web Config.
Note: The import setting requirements vary by certificate format and how you obtained the certificate.
Certificate format Setting descriptionsPEM/DER format obtained from Web Config Private Key: Do not configure because the
product contains a private keyPassword: Do not configureCA Certificate 1/CA Certificate 2: Optional
PEM/DER format obtained from a computer Private Key: Configure a private keyPassword: Do not configureCA Certificate 1/CA Certificate 2: Optional
PKCS#12 format obtained from a computer Private Key: Do not configurePassword: OptionalCA Certificate 1/CA Certificate 2: Do notconfigure
Parent topic: Using a Digital CertificateDeleting a CA-signed Client Certificate
You can delete an imported CA-signed client certificate with Web Config when the certificate expires or ifyou have no more need for an encrypted connection.
Note: If you obtained a CA-signed certificate from Web Config, you cannot import a deleted certificate;you must obtain and import a new certificate.
1. Access Web Config and select Network Security Settings.2. Select one of the following network security options and corresponding certificate:
• SSL/TLS and select Certificate• IPsec/IP Filtering and select Client Certificate• IEEE802.1X and select Client Certificate
34

3. Click Delete.You see a completion message.
4. Click OK.Parent topic: Using a Digital Certificate
Deleting a CA-signed Server CertificateYou can delete an imported CA-signed server certificate with Web Config when the certificate expires orif you have no more need for an encrypted connection.1. Access Web Config and select Network Security Settings.2. Select CA Certificate.
3. Locate the certificate you want to remove and click the Delete button next to it.4. Click OK to confirm the deletion.Parent topic: Using a Digital Certificate
Updating a Self-signed CertificateIf your product supports the HTTPS server feature, you can update a self-signed certificate using WebConfig.1. Access Web Config and select Network Security Settings, select SSL/TLS, and select Certificate.2. Click Update.
35
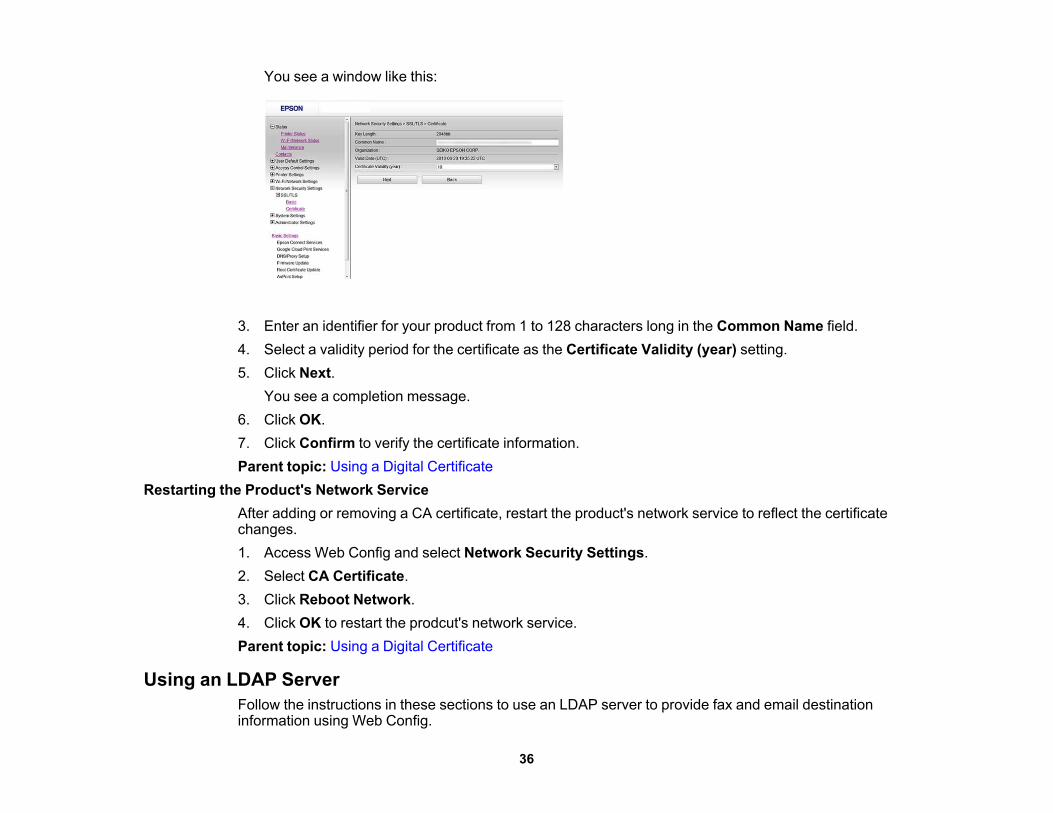
You see a window like this:
3. Enter an identifier for your product from 1 to 128 characters long in the Common Name field.4. Select a validity period for the certificate as the Certificate Validity (year) setting.5. Click Next.
You see a completion message.6. Click OK.7. Click Confirm to verify the certificate information.Parent topic: Using a Digital Certificate
Restarting the Product's Network ServiceAfter adding or removing a CA certificate, restart the product's network service to reflect the certificatechanges.1. Access Web Config and select Network Security Settings.2. Select CA Certificate.3. Click Reboot Network.4. Click OK to restart the prodcut's network service.Parent topic: Using a Digital Certificate
Using an LDAP ServerFollow the instructions in these sections to use an LDAP server to provide fax and email destinationinformation using Web Config.
36
Configuring the LDAP Server and Selecting Search SettingsLDAP Server SettingsLDAP Search SettingsChecking the LDAP Server ConnectionLDAP Connection Report MessagesParent topic: Using Your Product on a Secure Network
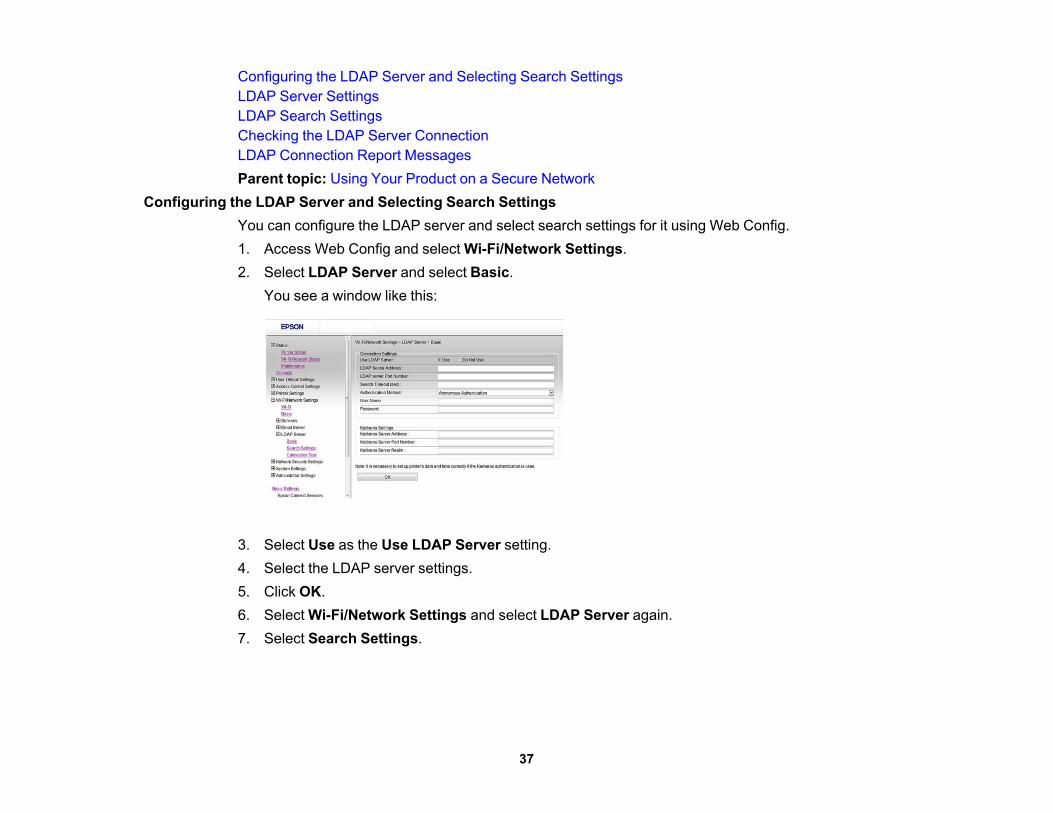
Configuring the LDAP Server and Selecting Search SettingsYou can configure the LDAP server and select search settings for it using Web Config.1. Access Web Config and select Wi-Fi/Network Settings.2. Select LDAP Server and select Basic.
You see a window like this:
3. Select Use as the Use LDAP Server setting.4. Select the LDAP server settings.5. Click OK.6. Select Wi-Fi/Network Settings and select LDAP Server again.7. Select Search Settings.
37
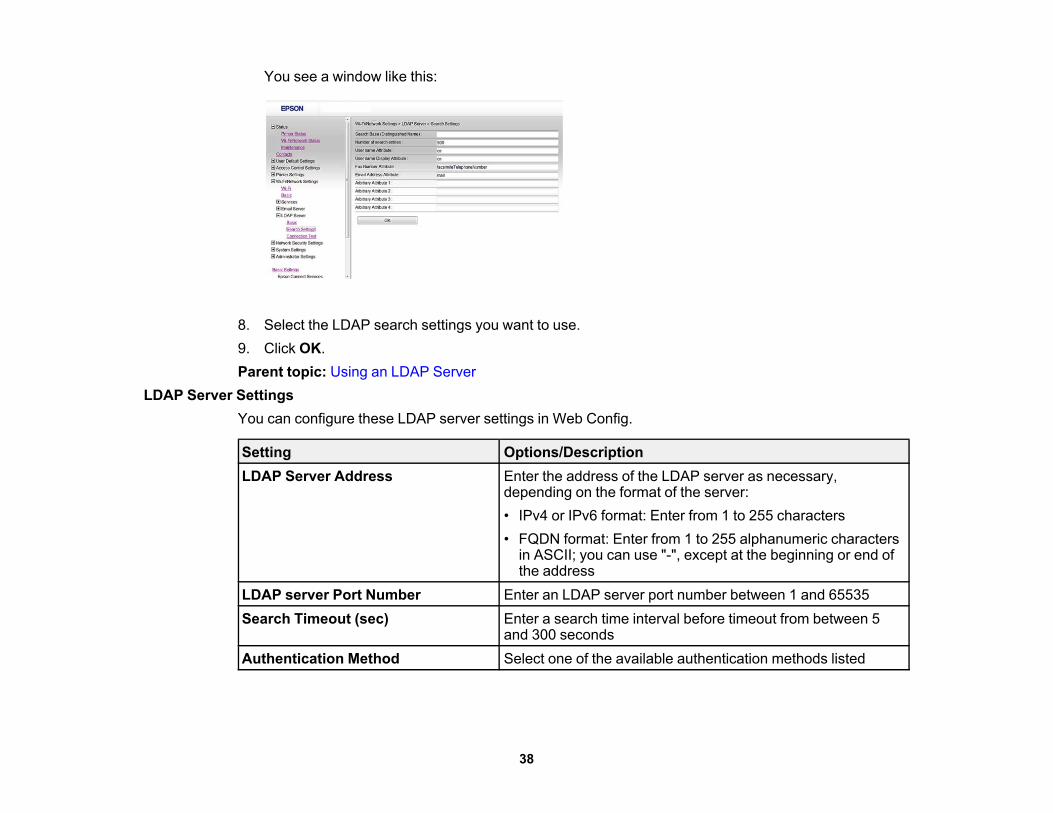
You see a window like this:
8. Select the LDAP search settings you want to use.9. Click OK.Parent topic: Using an LDAP Server
LDAP Server SettingsYou can configure these LDAP server settings in Web Config.
Setting Options/DescriptionLDAP Server Address Enter the address of the LDAP server as necessary,
depending on the format of the server:• IPv4 or IPv6 format: Enter from 1 to 255 characters• FQDN format: Enter from 1 to 255 alphanumeric characters
in ASCII; you can use "-", except at the beginning or end ofthe address
LDAP server Port Number Enter an LDAP server port number between 1 and 65535Search Timeout (sec) Enter a search time interval before timeout from between 5
and 300 secondsAuthentication Method Select one of the available authentication methods listed
38
Setting Options/DescriptionUser Name Enter a user name for the LDAP server from 0 to 128
characters long in Unicode (UTF-8); do not use controlcharacters such as 0x00-0x1F or OX7F (not available whenyou selected Anonymous Authentication as theAuthentication Method option)
Password Enter a password from 1 to 128 characters long in Unicode(UTF-8) for LDAP server authentication; do not use controlcharacters such as 0x00-0x1F or OX7F (not available whenyou selected Anonymous Authentication as theAuthentication Method option)
Kerberos Server Address If you selected Kerberos Authentication as theAuthentication Method option, enter the Kerberos serverport number between 1 and 65535
Kerberos Server Port Number If you selected Kerberos Authentication as theAuthentication Method option, enter
Kerberos Server Realm If you selected Kerberos Authentication as theAuthentication Method option, enter the realm of Kerberosauthentication from 0 to 255 characters long in ASCII
Parent topic: Using an LDAP ServerLDAP Search Settings
You can configure these LDAP search settings in Web Config.
Setting Options/DescriptionSearch Base (Distinguished Name) Leave blank or search for an arbitrary domain name on the
LDAP server using 1 to 128 characters (Unicode (UTF-8)Number of search entries Specify the maximum number of search entries before an
error message appears, from 1 to 500User name Attribute Enter the attribute name to display when searching for users
names from 1 to 255 characters long in Unicode (UTF-8); thefirst character must be a-z, or A-Z
User name Display Attribute Leave blank or enter the attribute name to display as the username from 1 to 255 characters long in Unicode (UTF-8); thefirst character must be a-z, or A-Z
39
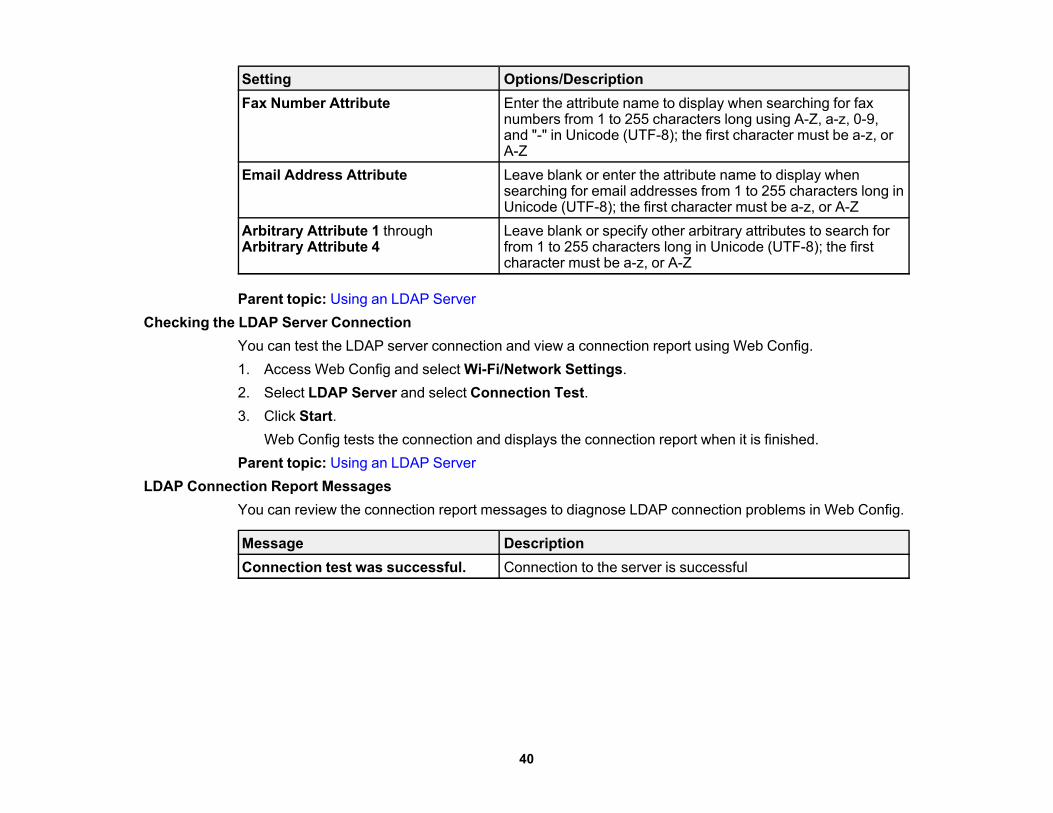
Setting Options/DescriptionFax Number Attribute Enter the attribute name to display when searching for fax
numbers from 1 to 255 characters long using A-Z, a-z, 0-9,and "-" in Unicode (UTF-8); the first character must be a-z, orA-Z
Email Address Attribute Leave blank or enter the attribute name to display whensearching for email addresses from 1 to 255 characters long inUnicode (UTF-8); the first character must be a-z, or A-Z
Arbitrary Attribute 1 through Leave blank or specify other arbitrary attributes to search forArbitrary Attribute 4 from 1 to 255 characters long in Unicode (UTF-8); the first
character must be a-z, or A-Z
Parent topic: Using an LDAP ServerChecking the LDAP Server Connection
You can test the LDAP server connection and view a connection report using Web Config.1. Access Web Config and select Wi-Fi/Network Settings.2. Select LDAP Server and select Connection Test.3. Click Start.
Web Config tests the connection and displays the connection report when it is finished.Parent topic: Using an LDAP Server
LDAP Connection Report MessagesYou can review the connection report messages to diagnose LDAP connection problems in Web Config.
Message DescriptionConnection test was successful. Connection to the server is successful
40

Message DescriptionConnection test failed. Check the One of the following has occurred:settings. • The LDAP server address or port number is incorrect
• A timeout has occurred• You selected Do Not Use as the Use LDAP Server setting• If you selected Kerberos Authentication as the
Authentication Method setting, the Kerberos serversettings are incorrect
Connection test failed. Check the Connection has failed because the time settings for thedate and time on your printer or product and the LDAP server do not matchserver.Authentication failed. Check the Authentication has failed because the User Name andsettings. Password settings are incorrect or, If you selected Kerberos
Authentication as the Authentication Method setting, thetime and date are not configured correctly
Cannot access the printer until The product is busy.processing is complete.
Parent topic: Using an LDAP Server
Using an Email ServerFollow the instructions in these sections to use an email server to send scan and fax data by email, oruse email notification using Web Config.Configuring an Email ServerEmail Server SettingsChecking the Email Server ConnectionEmail Server Connection Report MessagesConfiguring Email NotificationParent topic: Using Your Product on a Secure Network
Configuring an Email ServerYou can configure an email server using Web Config.1. Access Web Config and select Wi-Fi/Network Settings.
41

2. Select Email Server and select Basic.You see a window like this:
3. Select the email server settings.4. Click OK.Parent topic: Using an Email Server
Email Server SettingsYou can configure these email server settings in Web Config.
Setting Options/DescriptionAuthentication Method Select the authentication method that matches your email
serverAuthenticated Account Enter the authenticated account name from 1 to 255
characters long in ASCIIAuthenticated Password Enter the authenticated password from 1 to 20 characters long
in ASCII using A-Z, a-z, 0-9, and these characters:! # $ % ' * + - . / = ? ^ _ { ! } ~ @
Sender's Email Address Enter the sender's email address from 1 to 255 characterslong in ASCII; do not use a period (.) as the first character oruse these characters: ( ) < > [ ] ;
SMTP Server Address Enter the SMTP server address from 1 to 255 characters longusing A-Z, a-z, 0-9, and "-" in IPv4 or FQDN format
42
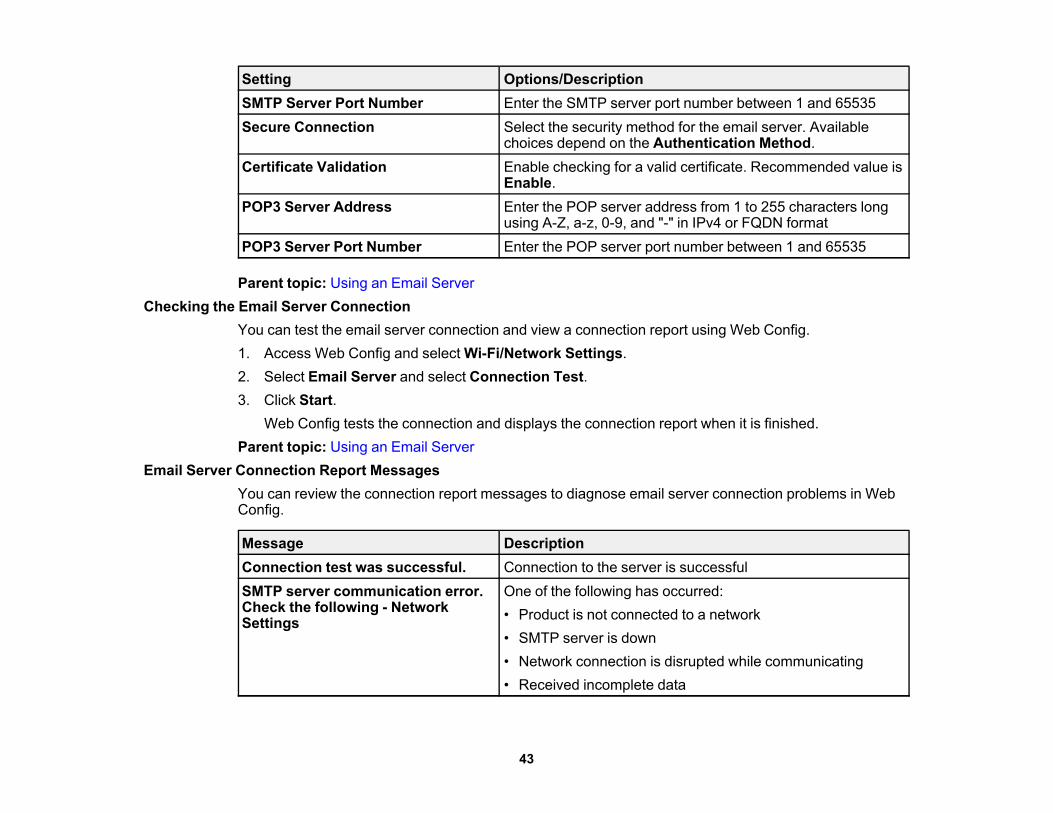
Setting Options/DescriptionSMTP Server Port Number Enter the SMTP server port number between 1 and 65535Secure Connection Select the security method for the email server. Available
choices depend on the Authentication Method.Certificate Validation Enable checking for a valid certificate. Recommended value is
Enable.POP3 Server Address Enter the POP server address from 1 to 255 characters long
using A-Z, a-z, 0-9, and "-" in IPv4 or FQDN formatPOP3 Server Port Number Enter the POP server port number between 1 and 65535
Parent topic: Using an Email ServerChecking the Email Server Connection
You can test the email server connection and view a connection report using Web Config.1. Access Web Config and select Wi-Fi/Network Settings.2. Select Email Server and select Connection Test.3. Click Start.
Web Config tests the connection and displays the connection report when it is finished.Parent topic: Using an Email Server
Email Server Connection Report MessagesYou can review the connection report messages to diagnose email server connection problems in WebConfig.
Message DescriptionConnection test was successful. Connection to the server is successfulSMTP server communication error. One of the following has occurred:Check the following - Network • Product is not connected to a networkSettings
• SMTP server is down• Network connection is disrupted while communicating• Received incomplete data
43
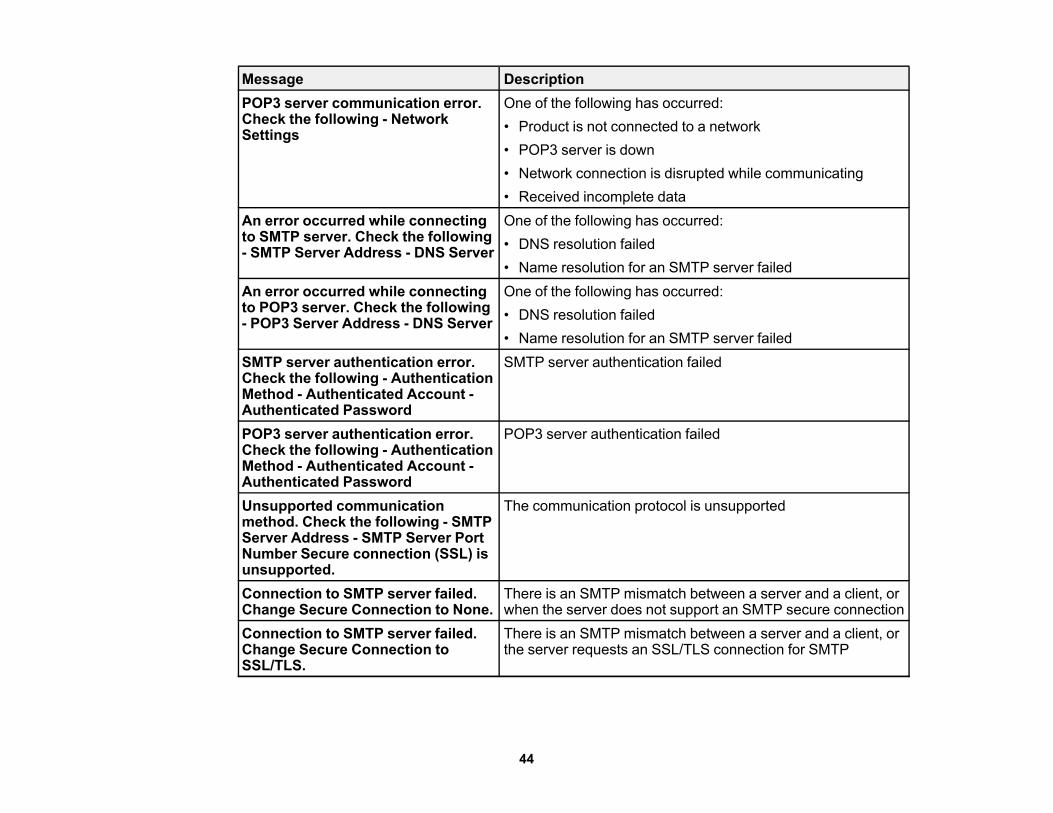
Message DescriptionPOP3 server communication error. One of the following has occurred:Check the following - Network • Product is not connected to a networkSettings
• POP3 server is down• Network connection is disrupted while communicating• Received incomplete data
An error occurred while connecting One of the following has occurred:to SMTP server. Check the following • DNS resolution failed- SMTP Server Address - DNS Server
• Name resolution for an SMTP server failedAn error occurred while connecting One of the following has occurred:to POP3 server. Check the following • DNS resolution failed- POP3 Server Address - DNS Server
• Name resolution for an SMTP server failedSMTP server authentication error. SMTP server authentication failedCheck the following - AuthenticationMethod - Authenticated Account -Authenticated PasswordPOP3 server authentication error. POP3 server authentication failedCheck the following - AuthenticationMethod - Authenticated Account -Authenticated PasswordUnsupported communication The communication protocol is unsupportedmethod. Check the following - SMTPServer Address - SMTP Server PortNumber Secure connection (SSL) isunsupported.Connection to SMTP server failed. There is an SMTP mismatch between a server and a client, orChange Secure Connection to None. when the server does not support an SMTP secure connectionConnection to SMTP server failed. There is an SMTP mismatch between a server and a client, orChange Secure Connection to the server requests an SSL/TLS connection for SMTPSSL/TLS.
44
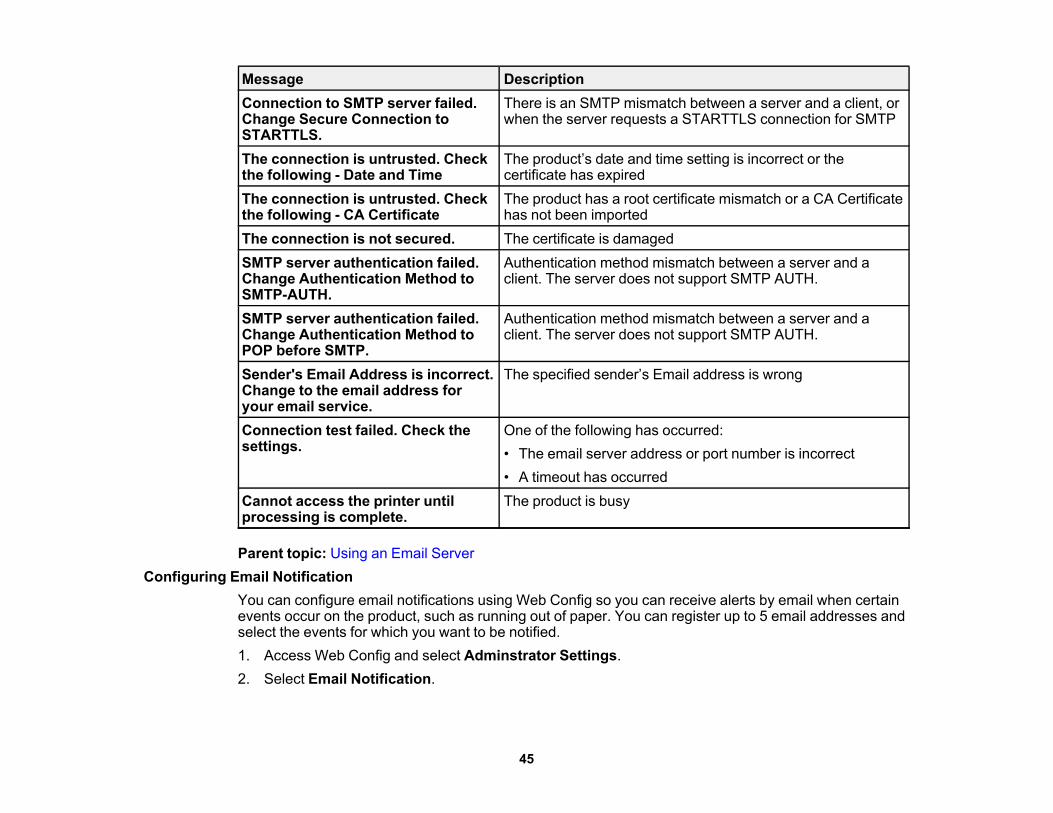
Message DescriptionConnection to SMTP server failed. There is an SMTP mismatch between a server and a client, orChange Secure Connection to when the server requests a STARTTLS connection for SMTPSTARTTLS.The connection is untrusted. Check The product’s date and time setting is incorrect or thethe following - Date and Time certificate has expiredThe connection is untrusted. Check The product has a root certificate mismatch or a CA Certificatethe following - CA Certificate has not been importedThe connection is not secured. The certificate is damagedSMTP server authentication failed. Authentication method mismatch between a server and aChange Authentication Method to client. The server does not support SMTP AUTH.SMTP-AUTH.SMTP server authentication failed. Authentication method mismatch between a server and aChange Authentication Method to client. The server does not support SMTP AUTH.POP before SMTP.Sender's Email Address is incorrect. The specified sender’s Email address is wrongChange to the email address foryour email service.Connection test failed. Check the One of the following has occurred:settings. • The email server address or port number is incorrect
• A timeout has occurredCannot access the printer until The product is busyprocessing is complete.
Parent topic: Using an Email ServerConfiguring Email Notification
You can configure email notifications using Web Config so you can receive alerts by email when certainevents occur on the product, such as running out of paper. You can register up to 5 email addresses andselect the events for which you want to be notified.1. Access Web Config and select Adminstrator Settings.2. Select Email Notification.
45
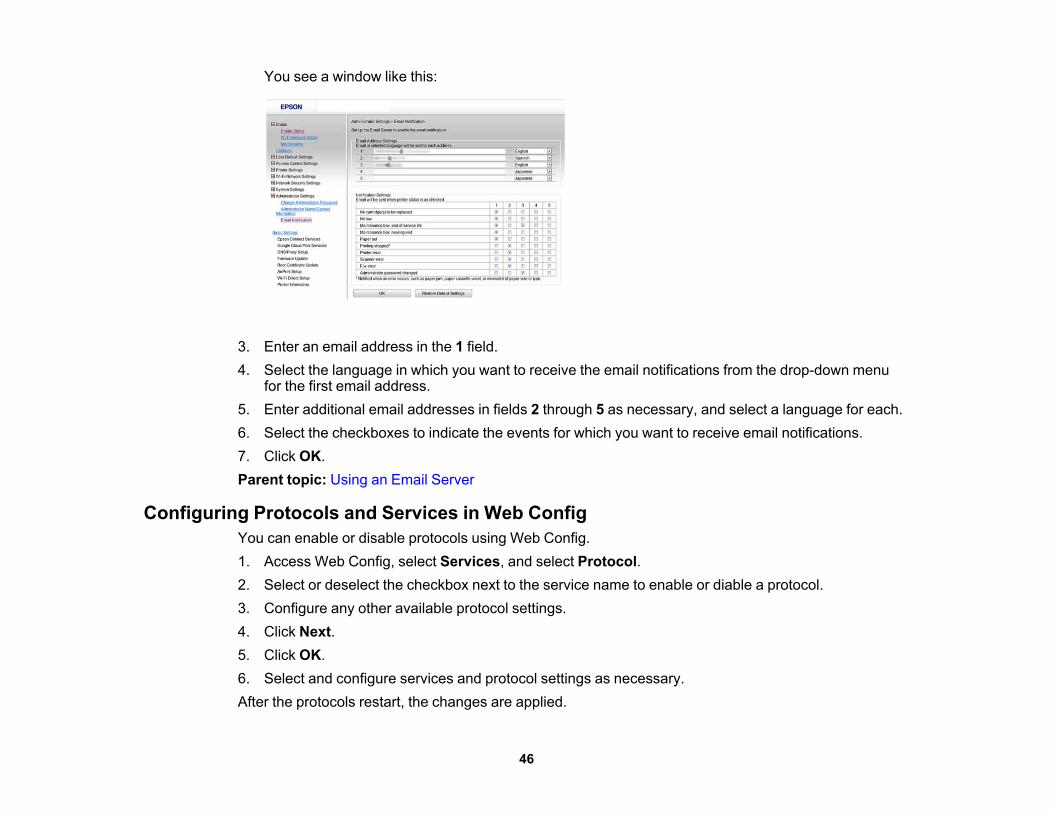
You see a window like this:
3. Enter an email address in the 1 field.4. Select the language in which you want to receive the email notifications from the drop-down menu
for the first email address.5. Enter additional email addresses in fields 2 through 5 as necessary, and select a language for each.6. Select the checkboxes to indicate the events for which you want to receive email notifications.7. Click OK.Parent topic: Using an Email Server
Configuring Protocols and Services in Web ConfigYou can enable or disable protocols using Web Config.1. Access Web Config, select Services, and select Protocol.2. Select or deselect the checkbox next to the service name to enable or diable a protocol.3. Configure any other available protocol settings.4. Click Next.5. Click OK.6. Select and configure services and protocol settings as necessary.After the protocols restart, the changes are applied.
46

Services and Protocol SettingsParent topic: Using Your Product on a Secure Network
Services and Protocol Settings
Services
Name DescriptionMS Network Enable network file sharing so external devices connected to
the product can be recognized as folders and accessed fromnetworked computers
Network Scan Enable Network Scan to scan from networked computersDocument Capture Pro Select the Document Capture Pro mode you want to use:
• Client Mode: scan with the settings specified in DocumentCapture Pro on each computer
• Server Mode: scan with the settings specified in DocumentCapture Pro on the server and enter server address
PC-FAX Enable PC-FAX to send faxes from a networked computerWi-Fi Direct Enable Wi-Fi Direct mode
Protocols
Name DescriptionBonjour Bonjour is used to search for devices and AirPrintSLP SLP is used for push-scanning and network searching in
EpsonNet ConfigWSD Add WSD devices, or print and scan from the WSD portLLTD Displays the product on the Windows network mapLLMNR Use name resolution without NetBIOS even if you cannot use
DNSLPR Print from to the LPR portRAW(Port9100) Print from the RAW port (Port 9100)IPP Print over the Internet, including AirPrint
47
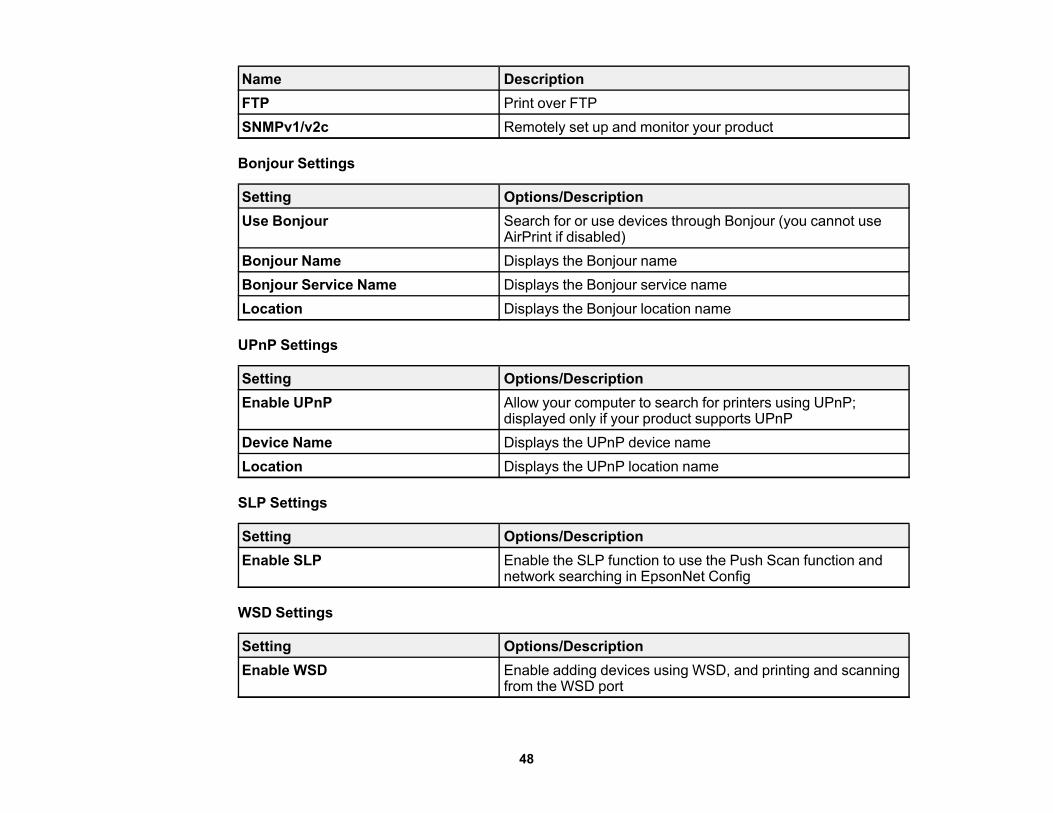
Name DescriptionFTP Print over FTPSNMPv1/v2c Remotely set up and monitor your product
Bonjour Settings
Setting Options/DescriptionUse Bonjour Search for or use devices through Bonjour (you cannot use
AirPrint if disabled)Bonjour Name Displays the Bonjour nameBonjour Service Name Displays the Bonjour service nameLocation Displays the Bonjour location name
UPnP Settings
Setting Options/DescriptionEnable UPnP Allow your computer to search for printers using UPnP;
displayed only if your product supports UPnPDevice Name Displays the UPnP device nameLocation Displays the UPnP location name
SLP Settings
Setting Options/DescriptionEnable SLP Enable the SLP function to use the Push Scan function and
network searching in EpsonNet Config
WSD Settings
Setting Options/DescriptionEnable WSD Enable adding devices using WSD, and printing and scanning
from the WSD port
48
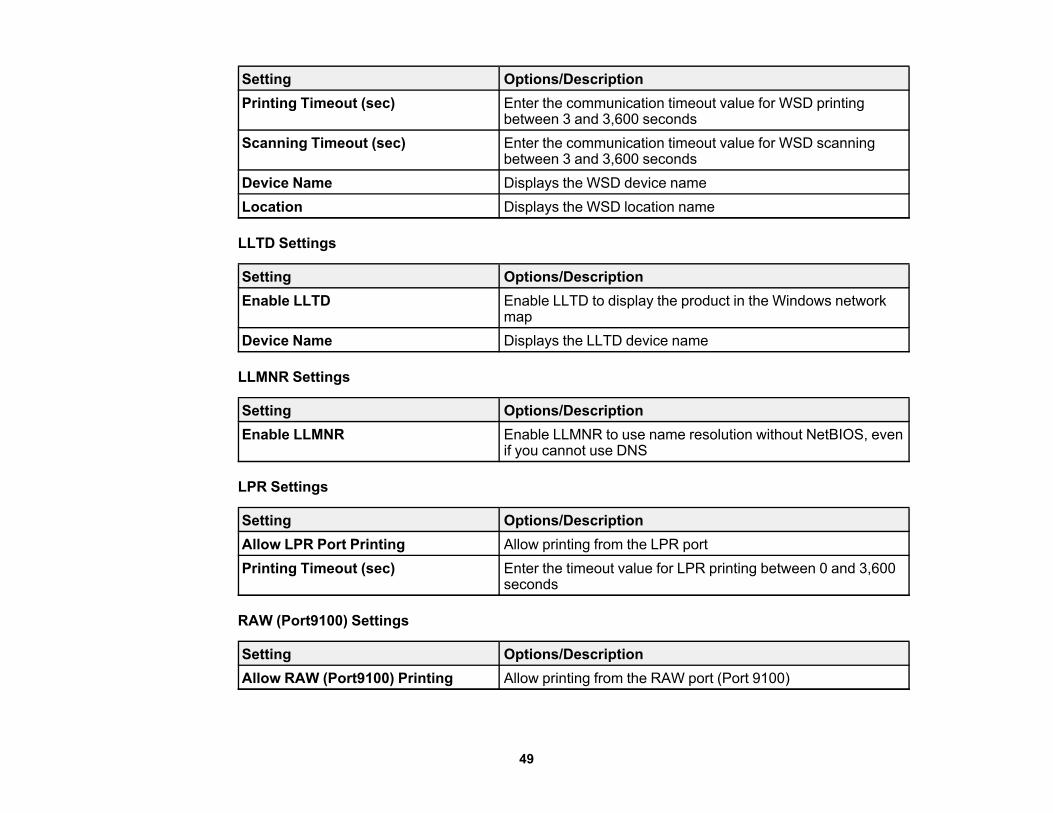
Setting Options/DescriptionPrinting Timeout (sec) Enter the communication timeout value for WSD printing
between 3 and 3,600 secondsScanning Timeout (sec) Enter the communication timeout value for WSD scanning
between 3 and 3,600 secondsDevice Name Displays the WSD device nameLocation Displays the WSD location name
LLTD Settings
Setting Options/DescriptionEnable LLTD Enable LLTD to display the product in the Windows network
mapDevice Name Displays the LLTD device name
LLMNR Settings
Setting Options/DescriptionEnable LLMNR Enable LLMNR to use name resolution without NetBIOS, even
if you cannot use DNS
LPR Settings
Setting Options/DescriptionAllow LPR Port Printing Allow printing from the LPR portPrinting Timeout (sec) Enter the timeout value for LPR printing between 0 and 3,600
seconds
RAW (Port9100) Settings
Setting Options/DescriptionAllow RAW (Port9100) Printing Allow printing from the RAW port (Port 9100)
49
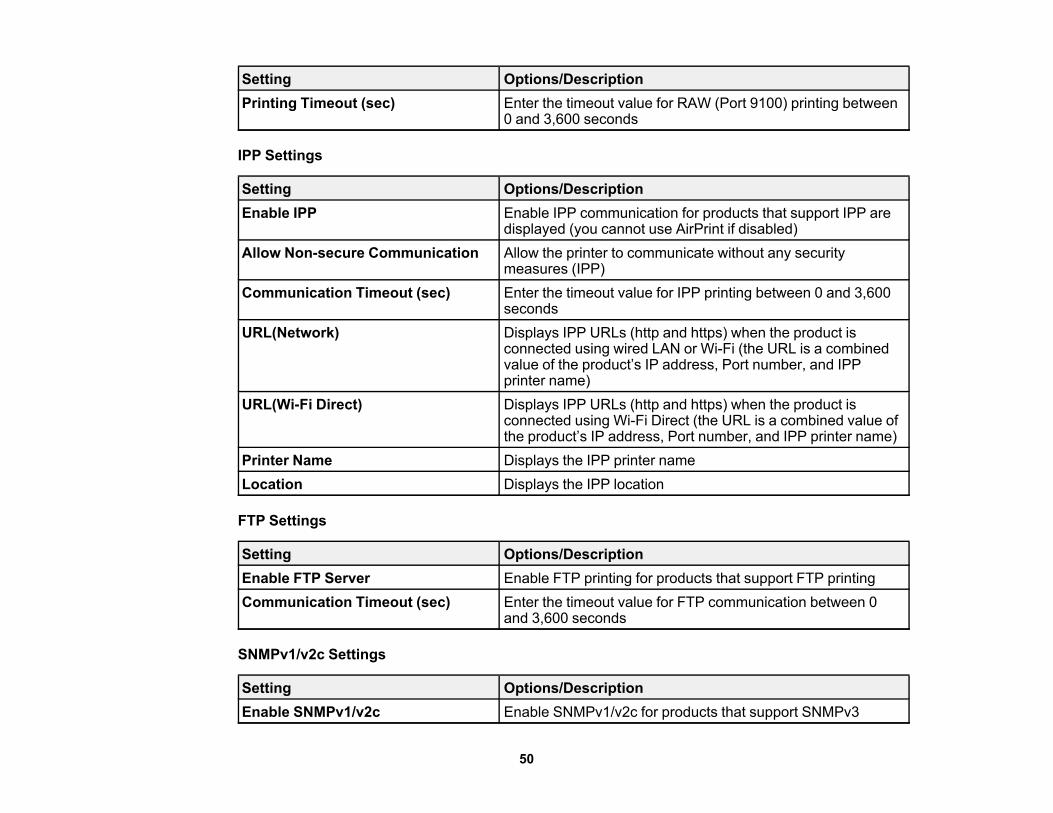
Setting Options/DescriptionPrinting Timeout (sec) Enter the timeout value for RAW (Port 9100) printing between
0 and 3,600 seconds
IPP Settings
Setting Options/DescriptionEnable IPP Enable IPP communication for products that support IPP are
displayed (you cannot use AirPrint if disabled)Allow Non-secure Communication Allow the printer to communicate without any security
measures (IPP)Communication Timeout (sec) Enter the timeout value for IPP printing between 0 and 3,600
secondsURL(Network) Displays IPP URLs (http and https) when the product is
connected using wired LAN or Wi-Fi (the URL is a combinedvalue of the product’s IP address, Port number, and IPPprinter name)
URL(Wi-Fi Direct) Displays IPP URLs (http and https) when the product isconnected using Wi-Fi Direct (the URL is a combined value ofthe product’s IP address, Port number, and IPP printer name)
Printer Name Displays the IPP printer nameLocation Displays the IPP location
FTP Settings
Setting Options/DescriptionEnable FTP Server Enable FTP printing for products that support FTP printingCommunication Timeout (sec) Enter the timeout value for FTP communication between 0
and 3,600 seconds
SNMPv1/v2c Settings
Setting Options/DescriptionEnable SNMPv1/v2c Enable SNMPv1/v2c for products that support SNMPv3
50
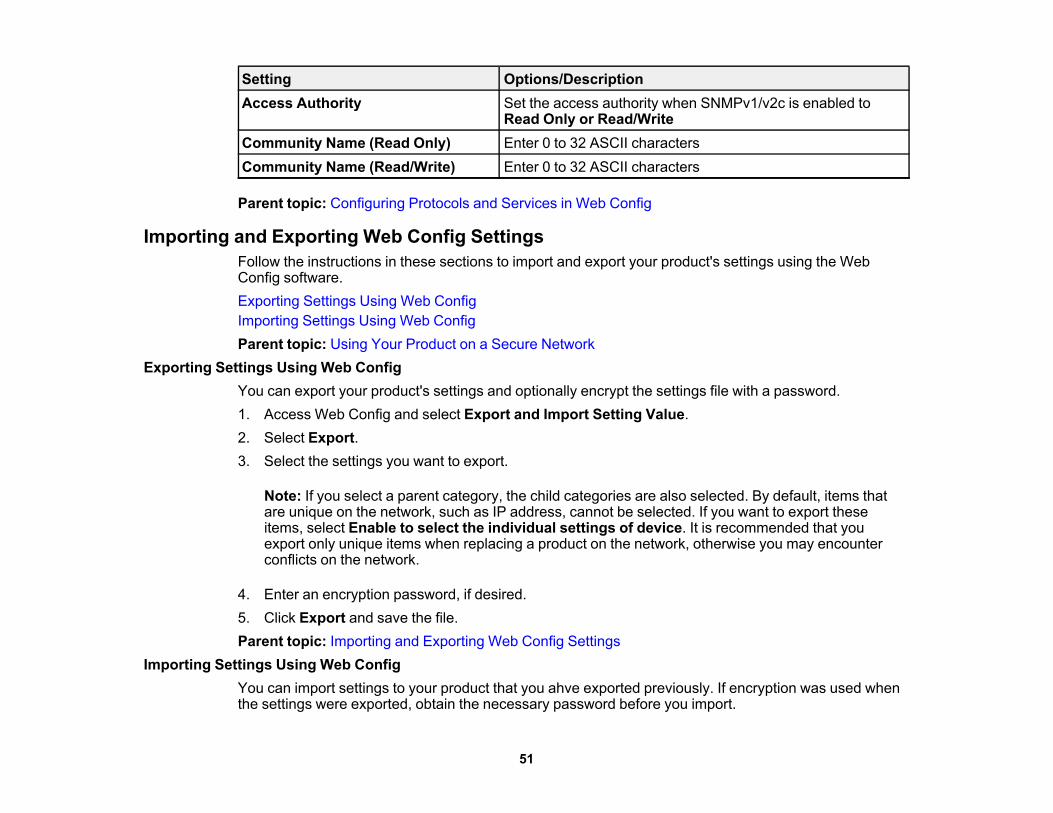
Setting Options/DescriptionAccess Authority Set the access authority when SNMPv1/v2c is enabled to
Read Only or Read/WriteCommunity Name (Read Only) Enter 0 to 32 ASCII charactersCommunity Name (Read/Write) Enter 0 to 32 ASCII characters
Parent topic: Configuring Protocols and Services in Web Config
Importing and Exporting Web Config SettingsFollow the instructions in these sections to import and export your product's settings using the WebConfig software.Exporting Settings Using Web ConfigImporting Settings Using Web ConfigParent topic: Using Your Product on a Secure Network
Exporting Settings Using Web ConfigYou can export your product's settings and optionally encrypt the settings file with a password.1. Access Web Config and select Export and Import Setting Value.2. Select Export.3. Select the settings you want to export.
Note: If you select a parent category, the child categories are also selected. By default, items thatare unique on the network, such as IP address, cannot be selected. If you want to export theseitems, select Enable to select the individual settings of device. It is recommended that youexport only unique items when replacing a product on the network, otherwise you may encounterconflicts on the network.
4. Enter an encryption password, if desired.5. Click Export and save the file.Parent topic: Importing and Exporting Web Config Settings
Importing Settings Using Web ConfigYou can import settings to your product that you ahve exported previously. If encryption was used whenthe settings were exported, obtain the necessary password before you import.
51
1. Access Web Config and select Export and Import Setting Value.2. Select Import.3. Click Browse and select the exported settings file.4. If necessary, enter the decryption password.5. Click Next.6. Select the settings to import and click Next.7. Click OK.The selected settings are imported to the product.Parent topic: Importing and Exporting Web Config Settings
52
Using EpsonNet Config Network Configuration SoftwareFollow the instructions in these sections to configure your product's administrator network settings usingthe EpsonNet Config software.With Windows, you can configure network settings in a batch operation. See the EpsonNet Config helputility for instructions.
Note: Before you can configure system administration settings, connect the product to a network. Seethe product's Start Here sheet and User's Guide for instructions.
Installing EpsonNet ConfigConfiguring a Product IP Address Using EpsonNet Config - EthernetConfiguring a Product IP Address Using EpsonNet Config - WiFi
Installing EpsonNet ConfigTo install EpsonNet Config, download the software from the product's support page atepson.com/support and follow the on-screen instructions.Parent topic: Using EpsonNet Config Network Configuration Software
Configuring a Product IP Address Using EpsonNet Config - EthernetYou can configure the product's IP address using EpsonNet Config.1. Turn on the product.2. Connect the product to a network using an Ethernet cable.3. Do one of the following to start EpsonNet Config:
• Windows 8.x: Navigate to the Apps screen and select EpsonNet Config under EpsonNet.
• Windows (other versions): Click or Start, and select All Programs or Programs. SelectEpsonNet and click EpsonNet Config.
• OS X: Open the Applications folder, open the Epson Software folder, select EpsonNet, selectEpsonNet Config, and double-click the EpsonNet Config icon.
After a few moments, the program displays the connected products.
53
4. Double-click the product you are configuring.
Note: If several products of the same model are connected, you can identify them by their MACaddress.
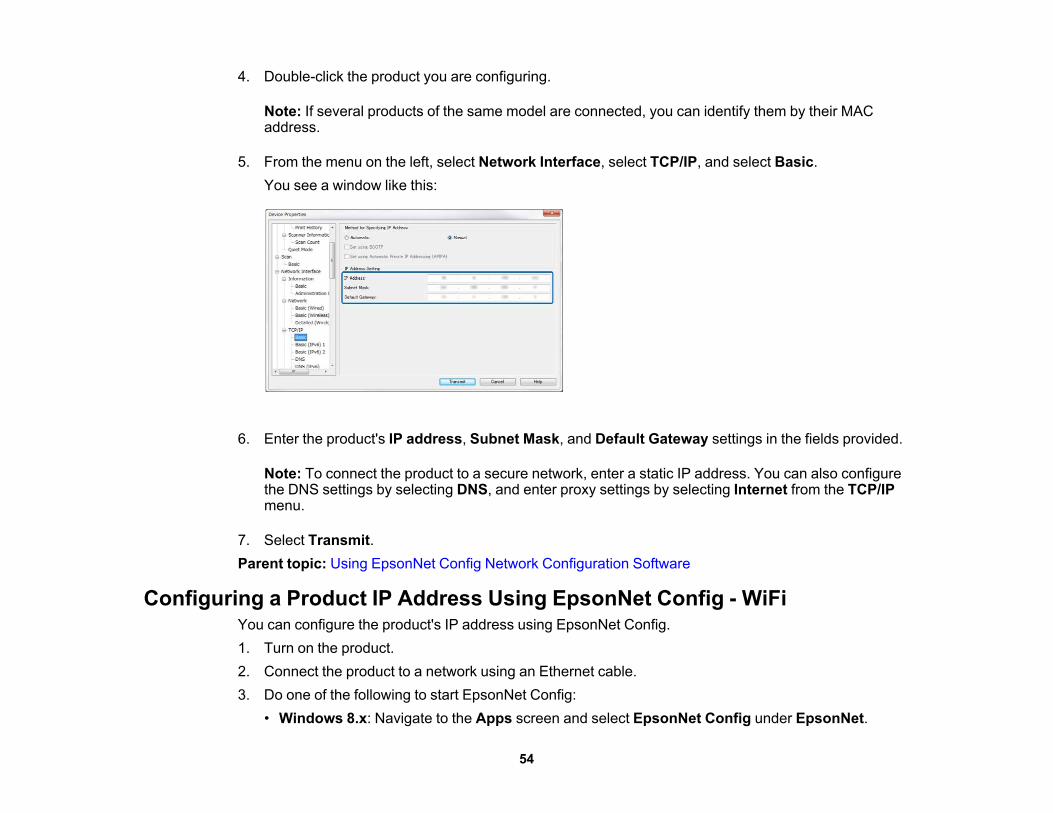
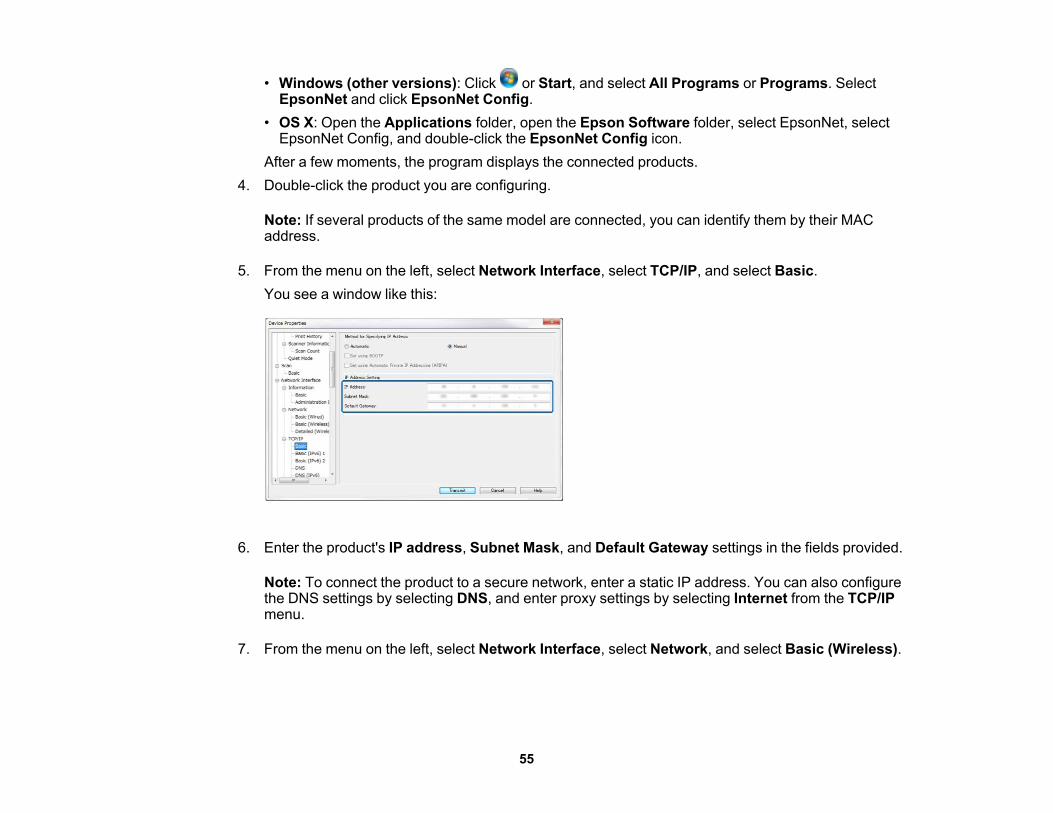
5. From the menu on the left, select Network Interface, select TCP/IP, and select Basic.You see a window like this:
6. Enter the product's IP address, Subnet Mask, and Default Gateway settings in the fields provided.
Note: To connect the product to a secure network, enter a static IP address. You can also configurethe DNS settings by selecting DNS, and enter proxy settings by selecting Internet from the TCP/IPmenu.
7. Select Transmit.Parent topic: Using EpsonNet Config Network Configuration Software
Configuring a Product IP Address Using EpsonNet Config - WiFiYou can configure the product's IP address using EpsonNet Config.1. Turn on the product.2. Connect the product to a network using an Ethernet cable.3. Do one of the following to start EpsonNet Config:
• Windows 8.x: Navigate to the Apps screen and select EpsonNet Config under EpsonNet.
54
• Windows (other versions): Click or Start, and select All Programs or Programs. SelectEpsonNet and click EpsonNet Config.
• OS X: Open the Applications folder, open the Epson Software folder, select EpsonNet, selectEpsonNet Config, and double-click the EpsonNet Config icon.
After a few moments, the program displays the connected products.4. Double-click the product you are configuring.
Note: If several products of the same model are connected, you can identify them by their MACaddress.
5. From the menu on the left, select Network Interface, select TCP/IP, and select Basic.You see a window like this:
6. Enter the product's IP address, Subnet Mask, and Default Gateway settings in the fields provided.
Note: To connect the product to a secure network, enter a static IP address. You can also configurethe DNS settings by selecting DNS, and enter proxy settings by selecting Internet from the TCP/IPmenu.
7. From the menu on the left, select Network Interface, select Network, and select Basic (Wireless).
55

You see a window like this:
8. Enter the Communication Mode, Wireless Mode, SSID, and Security Level settings for the Wi-Finetwork as necessary.
9. Select Transmit.10. Confirm the Wi-Fi connection to the product and disconnect the Ethernet cable from the product.Parent topic: Using EpsonNet Config Network Configuration Software
56
Solving ProblemsCheck these sections for solutions to problems you may have with the network configuration software.Solving Network Software Usage ProblemsSolving Network Security ProblemsSolving Digital Certificate ProblemsWhere to Get Help
Solving Network Software Usage ProblemsCheck these sections if you have problems using the network software.Cannot Find Access Web ConfigThe "Out of Date" Message Appears"The name of the security certificate does not match" Message AppearsModel Name or IP Address Not Displayed in EpsonNet ConfigParent topic: Solving Problems
Cannot Find Access Web ConfigIf you cannot access Web Config on your product, try these solutions:• Make sure your product is turned on and connected to your network using the correct IP address.
Verify connection using your product control panel or print a network status sheet. See your product'sUser's Guide for instructions.
• If you selected High as the Encryption Strength setting in Web Config, your browser must supportAES (256-bit) or 3DES (168-bit) encryption. Check your browser's encryption support or select adifferent Encryption Strength option.
• If you are using a proxy server with your product, configure the browser's proxy settings as follows:• Windows: Select Control Panel > Network and Internet > Internet Options > Connections >
LAN settings > Proxy server. Select the setting that does not use the proxy server for localaddresses.
• OS X: Select System Preferences > Network > Advanced > Proxies. Register the local addressunder Bypass proxy settings for these Hosts & Domains. For example, 192.168.1.*: Localaddress 192.168.1.XXX, subnet mask 255.255.255.0.
Parent topic: Solving Network Software Usage Problems
57
The "Out of Date" Message AppearsIf the "Out of Date" message appears when you are accessing Web Config using SSL communication(HTTPS), the certificate is out of date. Make sure that the product date and time are configured correctly,and obtain a new certificate.Parent topic: Solving Network Software Usage Problems
"The name of the security certificate does not match" Message AppearsIf a message beginning with "The name of the security certificate does not match . . ." appears when youare accessing Web Config using SSL communication (HTTPS), the product's IP address on the CSR orself-signed certificate does not match what you entered in the browser. Change the IP address youentered for the Common Name setting, and obtain and import a certificate again, or change the productname.Parent topic: Solving Network Software Usage Problems
Model Name or IP Address Not Displayed in EpsonNet ConfigIf the product model name and/or IP address is not displayed in EpsonNet Config, try these solutions:• If you selected to block, cancel, or shut down option on a Windows security or firewall screen, the IP
address and model name cannot display in EpsonNet Config. Register EpsonNet config as anexception in your firewall or security software, or close the security software and try running EpsonNetConfig again.
• The operation may have timed out. Select Tools, select Options, select Timeout, and increase thetime option for the Communication Error setting. This may cause EpsonNet Config to run slower,however.
Parent topic: Solving Network Software Usage Problems
Solving Network Security ProblemsCheck these sections if you have problems using the network security features.Pre-Shared Key was ForgottenCannot Communicate with the Product Using IPsec CommunicationCommunication was Working, but StoppedCannot Create the Secure IPP Printing PortCannot Connect After Configuring IPsec/IP FilteringCannot Access the Product After Configuring IEEE 802.1XParent topic: Solving Problems
58
Pre-Shared Key was ForgottenIf you forget a pre-shared key, change the key using Web Config for the default or group policy.Parent topic: Solving Network Security Problems
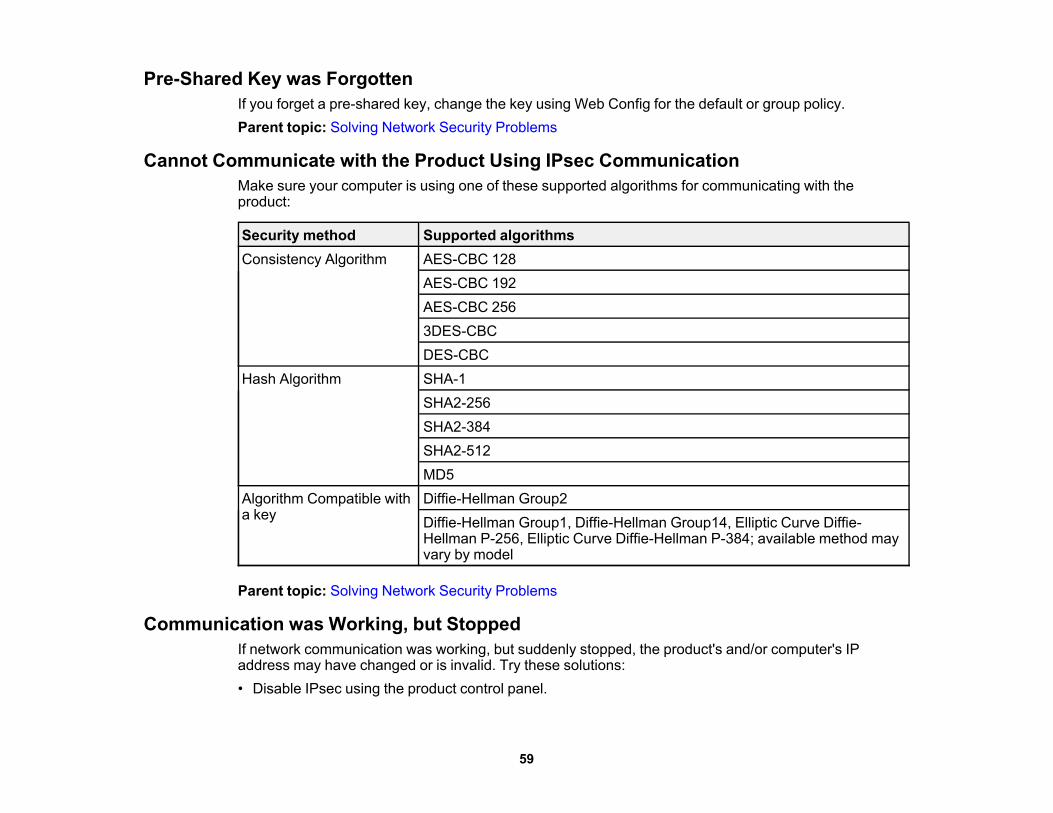
Cannot Communicate with the Product Using IPsec CommunicationMake sure your computer is using one of these supported algorithms for communicating with theproduct:
Security method Supported algorithmsConsistency Algorithm AES-CBC 128
AES-CBC 192AES-CBC 2563DES-CBCDES-CBC
Hash Algorithm SHA-1SHA2-256SHA2-384SHA2-512MD5
Algorithm Compatible with Diffie-Hellman Group2a key Diffie-Hellman Group1, Diffie-Hellman Group14, Elliptic Curve Diffie-
Hellman P-256, Elliptic Curve Diffie-Hellman P-384; available method mayvary by model
Parent topic: Solving Network Security Problems
Communication was Working, but StoppedIf network communication was working, but suddenly stopped, the product's and/or computer's IPaddress may have changed or is invalid. Try these solutions:• Disable IPsec using the product control panel.
59
• If DHCP is out of date, or the IPv6 address is out of date or was not obtained, you may not be able tofind the IP address registered in Web Config.
• If that does not solve the problem, enter a static IP address using Web Config.Parent topic: Solving Network Security Problems
Cannot Create the Secure IPP Printing PortIf you cannot create the secure IPP printing port, try these solutions:• Make sure you specified the correct server certificate for SSL/TLS communication using Web Config.• If you are using a CA certificate, make sure it is imported to the computer that is accessing the
product.Parent topic: Solving Network Security Problems
Cannot Connect After Configuring IPsec/IP FilteringThe set value may be incorrect. Disable IPsec/IP filtering from the product’s control panel. Connect fromthe computer and configure the IPsec/IP Filtering settings again.Parent topic: Solving Network Security Problems
Cannot Access the Product After Configuring IEEE 802.1XIf you cannot access the product after configuring it for IEEE 802.1X, disable IEEE 802.1X and Wi-Fiusing the product control panel. Then connect the product and a computer, and configure IEEE 802.1Xusing Web Config again.Parent topic: Solving Network Security Problems
Solving Digital Certificate ProblemsCheck these sections if you have problems using a digital certificate.Digital Certificate Warning MessagesCannot Import a Digital CertificateCannot Update a Certificate or Create a CSRDeleted a CA-signed CertificateParent topic: Solving Problems
Digital Certificate Warning MessagesIf you see a warning message when using a digital certificate, check for solutions in this table.
60
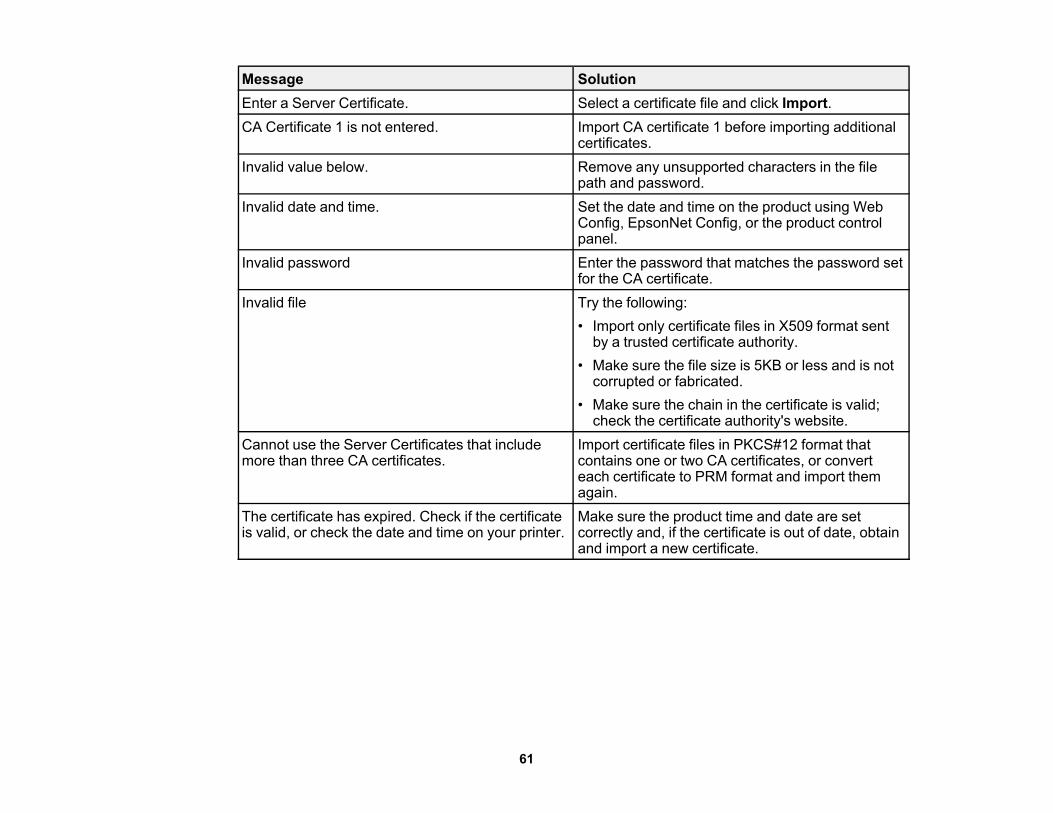
Message SolutionEnter a Server Certificate. Select a certificate file and click Import.CA Certificate 1 is not entered. Import CA certificate 1 before importing additional
certificates.Invalid value below. Remove any unsupported characters in the file
path and password.Invalid date and time. Set the date and time on the product using Web
Config, EpsonNet Config, or the product controlpanel.
Invalid password Enter the password that matches the password setfor the CA certificate.
Invalid file Try the following:• Import only certificate files in X509 format sent
by a trusted certificate authority.• Make sure the file size is 5KB or less and is not
corrupted or fabricated.• Make sure the chain in the certificate is valid;
check the certificate authority's website.Cannot use the Server Certificates that include Import certificate files in PKCS#12 format thatmore than three CA certificates. contains one or two CA certificates, or convert
each certificate to PRM format and import themagain.
The certificate has expired. Check if the certificate Make sure the product time and date are setis valid, or check the date and time on your printer. correctly and, if the certificate is out of date, obtain
and import a new certificate.
61
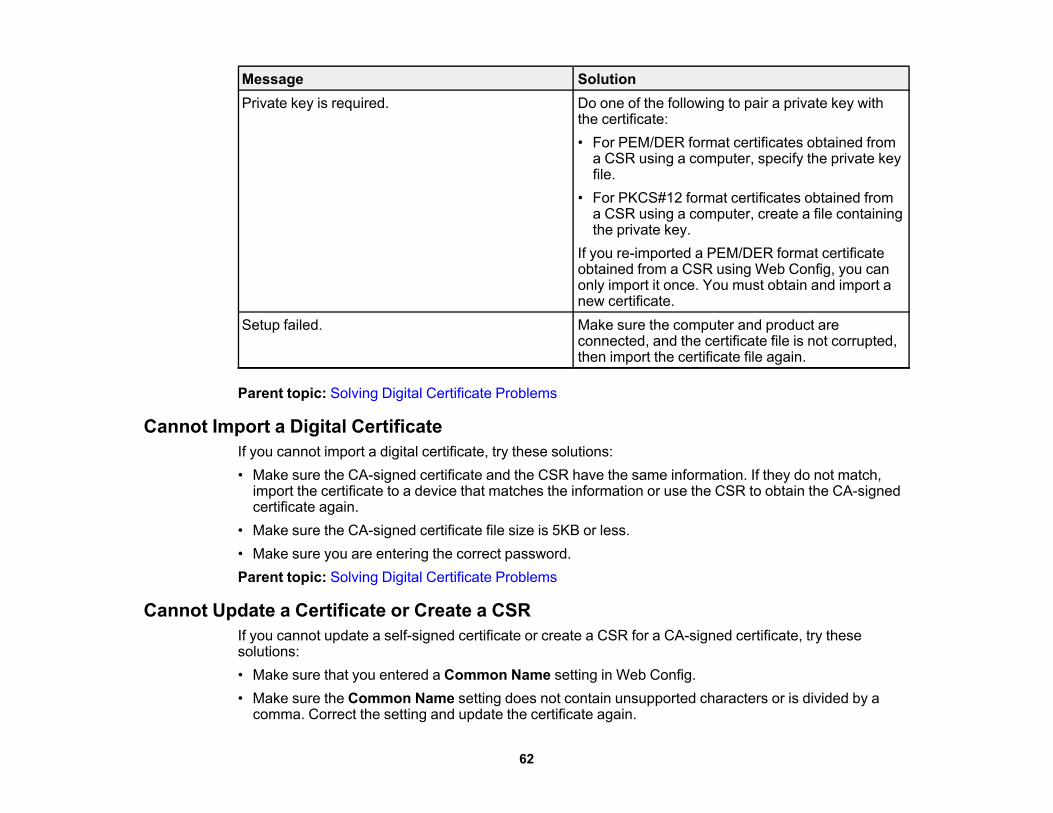
Message SolutionPrivate key is required. Do one of the following to pair a private key with
the certificate:• For PEM/DER format certificates obtained from
a CSR using a computer, specify the private keyfile.
• For PKCS#12 format certificates obtained froma CSR using a computer, create a file containingthe private key.
If you re-imported a PEM/DER format certificateobtained from a CSR using Web Config, you canonly import it once. You must obtain and import anew certificate.
Setup failed. Make sure the computer and product areconnected, and the certificate file is not corrupted,then import the certificate file again.
Parent topic: Solving Digital Certificate Problems
Cannot Import a Digital CertificateIf you cannot import a digital certificate, try these solutions:• Make sure the CA-signed certificate and the CSR have the same information. If they do not match,
import the certificate to a device that matches the information or use the CSR to obtain the CA-signedcertificate again.
• Make sure the CA-signed certificate file size is 5KB or less.• Make sure you are entering the correct password.Parent topic: Solving Digital Certificate Problems
Cannot Update a Certificate or Create a CSRIf you cannot update a self-signed certificate or create a CSR for a CA-signed certificate, try thesesolutions:• Make sure that you entered a Common Name setting in Web Config.• Make sure the Common Name setting does not contain unsupported characters or is divided by a
comma. Correct the setting and update the certificate again.
62
Parent topic: Solving Digital Certificate Problems
Deleted a CA-signed CertificateIf you accidentally deleted a CA-signed certificate, try these solutions:• If you retained a backup file, import the CA-signed certificate again.• If you obtained the certificate using a CSR created in Web Config, you cannot import a deleted
certificate. Create a new CSR and obtain a new certificate.Parent topic: Solving Digital Certificate Problems
Where to Get HelpIf you need to contact Epson for technical support services, use the following support options.
Internet SupportVisit Epson's support website at epson.com/support (U.S.) or epson.ca/support (Canada) for solutions tocommon problems. You can download drivers and documentation, get FAQs and troubleshootingadvice, or e-mail Epson with your questions.
Speak to a Support RepresentativeBefore you call Epson for support, please have the following information ready:• Product name• Product serial number (located on a label on the product)• Proof of purchase (such as a store receipt) and date of purchase• Computer configuration• Description of the problemThen see your product's User's Guide for contact information.
Purchase Supplies and AccessoriesYou can purchase genuine Epson ink and paper at epson.com/ink3 (U.S. sales) or epson.ca (Canadiansales). You can also purchase supplies from an Epson authorized reseller. To find the nearest one, call800-GO-EPSON (800-463-7766).Parent topic: Solving Problems
63
NoticesCheck these sections for important notices.TrademarksCopyright Notice
TrademarksEPSON® is a registered trademark and EPSON Exceed Your Vision is a registered logomark of SeikoEpson Corporation.OS X is a trademark of Apple Inc., registered in the U.S. and other countries.General Notice: Other product names used herein are for identification purposes only and may betrademarks of their respective owners. Epson disclaims any and all rights in those marks.
Parent topic: Notices
Copyright NoticeAll rights reserved. No part of this publication may be reproduced, stored in a retrieval system, ortransmitted in any form or by any means, electronic, mechanical, photocopying, recording, or otherwise,without the prior written permission of Seiko Epson Corporation. The information contained herein isdesigned only for use with this Epson product. Epson is not responsible for any use of this information asapplied to other products.Neither Seiko Epson Corporation nor its affiliates shall be liable to the purchaser of this product or thirdparties for damages, losses, costs, or expenses incurred by purchaser or third parties as a result of:accident, misuse, or abuse of this product or unauthorized modifications, repairs, or alterations to thisproduct, or (excluding the U.S.) failure to strictly comply with Seiko Epson Corporation's operating andmaintenance instructions.Seiko Epson Corporation shall not be liable for any damages or problems arising from the use of anyoptions or any consumable products other than those designated as Original Epson Products or EpsonApproved Products by Seiko Epson Corporation.
64
Seiko Epson Corporation shall not be held liable for any damage resulting from electromagneticinterference that occurs from the use of any interface cables other than those designated as Epsonapproved Products by Seiko Epson Corporation.This information is subject to change without notice.Copyright AttributionParent topic: Notices
Copyright Attribution© 2015 Epson America, Inc.9/15CPD-50331Parent topic: Copyright Notice
65