a360 hr/payroll system contact tab allows you to view your contact details. this includes the...
TRANSCRIPT

A360 HR/Payroll SystemEmployee Self Service (ESS)
January 2018
Notes:
1

2

Account Activation
• Last full week of January, 2018
• Current users of a360 Financial Management will use existing a360account.
Notes:
3

Instructions for first time login to A360 1. You will receive an email from [email protected] with the subject line: ADVMAIL:
Welcome to CGI Advantage360
This email will contain your user ID. You will soon receive an additional email containing instructions on how to activate your account.
Your user ID will be your first initial + middle initial + first 6 letters of your last name @kentcountymi.gov
2. You will next receive an email from [email protected] with the subject line: ADVMAIL:Your Advantage360 User Activation Email to set up security questions and create a password.
This email will contain a link to activate your account where you will be able to set up your password and security questions.
3. Password Requirements: must be a minimum of 10 characters and contain characters fromeach of the following categories:• English uppercase characters (A through Z)• English lowercase characters (a through z)• Base 10 digits (0 through 9)
!! You will have 96 hours from the time you receive this email to activate your account.
4. To login, go to: https://cgiadvantage360.cgi.com/portal/Advantage360Home Click Login.
4

Employee Self Service (ESS)
Notes
5

6

View Profile Information 1. Log into A360 at https://cgiadvantage360.cgi.com/portal/Advantage360Home2. Click Employee Self Service
3. Click the Home tab
4. In the Welcome Widget, click View Profile
5. The Employee Profile pop-up window allows you to view your employee related information.
7

6. Position TabThe Position tab displays your current and prior position details. The From Date and To Date displays the time frame that you spent working in a specific position. This reflects only positions from January 2018 forward. Your current position will have a To Date of 12/31/9999, which indicates that you are currently filling this position. (Note: Department GoverningBody refers to a record necessary for data conversion – not an actual position.)
7. Contact TabThe Contact tab allows you to view your contact details. This includes the Employee Contact Information and Emergency Contact Information sections. (If this information is incorrect, please see the Update Address and Update Emergency Contact sections of this manual).
8. Compensation TabThe Compensation tab allows you to view your pay rate details. (Note: Employment Status CONV refers to a record necessary for data conversion – not an actual position.)
9. The Education, Veteran Information, Training and Work History tabs are not being used at golive.
8

Update Emergency Contact 1. In the Welcome Widget, click Update Emergency Contact
2. Add Emergency Contact
Select the Add Emergency Contact button to insert a new line.
Delete Line - Existing contact lines can be deleted by selecting the trash can icon for the line you wish to delete.
Copy Line - You can also add a contact by copying an existing contact. Select the copy icon on the line for the contact you wish to copy. A new line will be inserted and you can modify the information as needed.
9
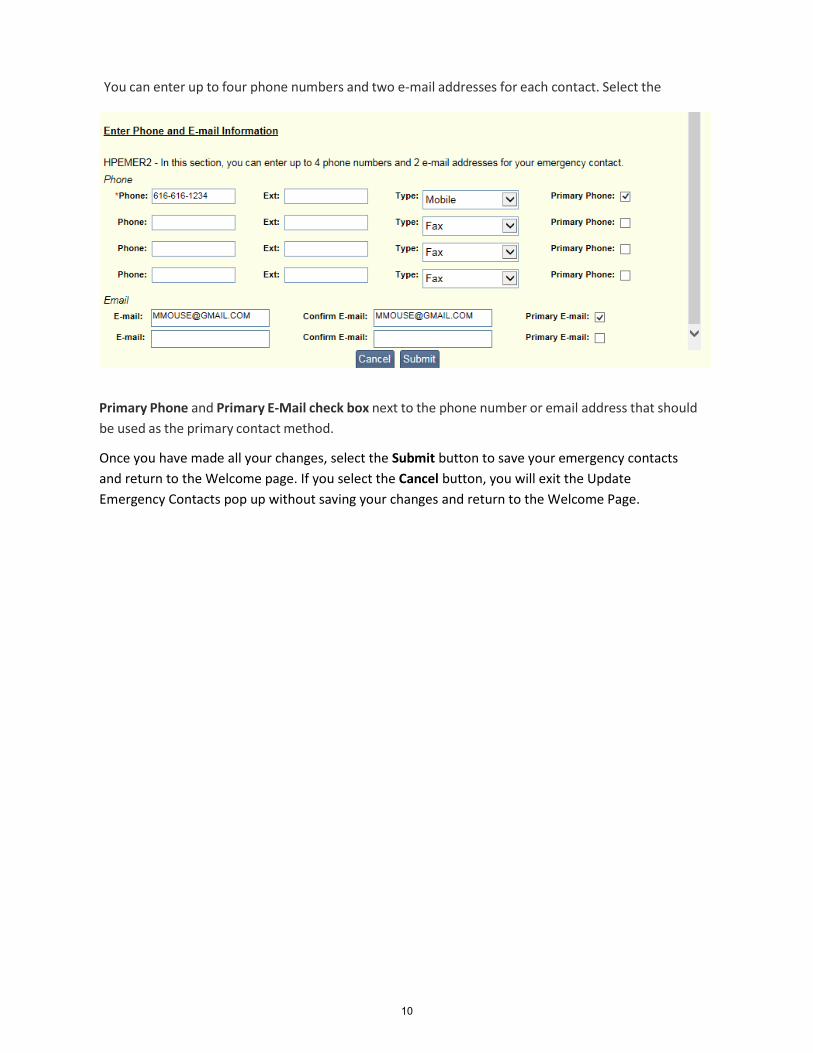
Primary Phone and Primary E-Mail check box next to the phone number or email address that should be used as the primary contact method.
Once you have made all your changes, select the Submit button to save your emergency contacts and return to the Welcome page. If you select the Cancel button, you will exit the Update Emergency Contacts pop up without saving your changes and return to the Welcome Page.
You can enter up to four phone numbers and two e-mail addresses for each contact. Select the
10
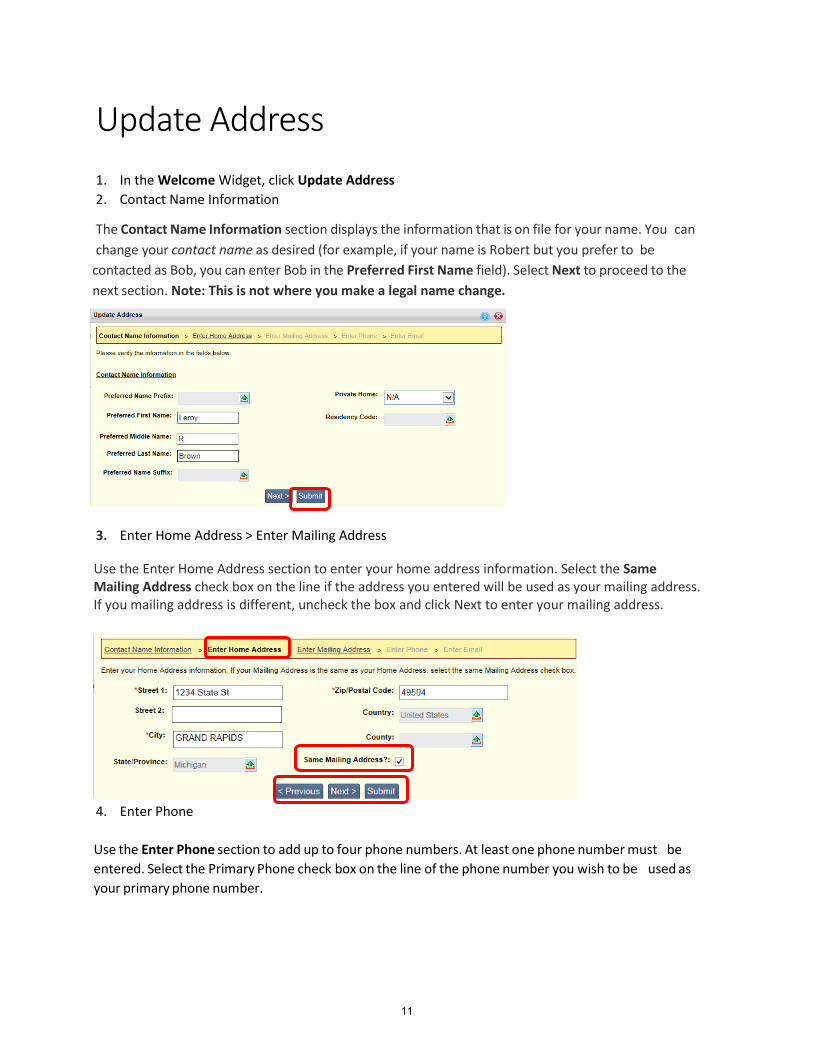
Update Address 1. In the Welcome Widget, click Update Address2. Contact Name Information
The Contact Name Information section displays the information that is on file for your name. You can change your contact name as desired (for example, if your name is Robert but you prefer to be
contacted as Bob, you can enter Bob in the Preferred First Name field). Select Next to proceed to the next section. Note: This is not where you make a legal name change.
3. Enter Home Address > Enter Mailing Address
Use the Enter Home Address section to enter your home address information. Select the Same Mailing Address check box on the line if the address you entered will be used as your mailing address. If you mailing address is different, uncheck the box and click Next to enter your mailing address.
4. Enter Phone
Use the Enter Phone section to add up to four phone numbers. At least one phone number must be entered. Select the Primary Phone check box on the line of the phone number you wish to be used as your primary phone number.
11
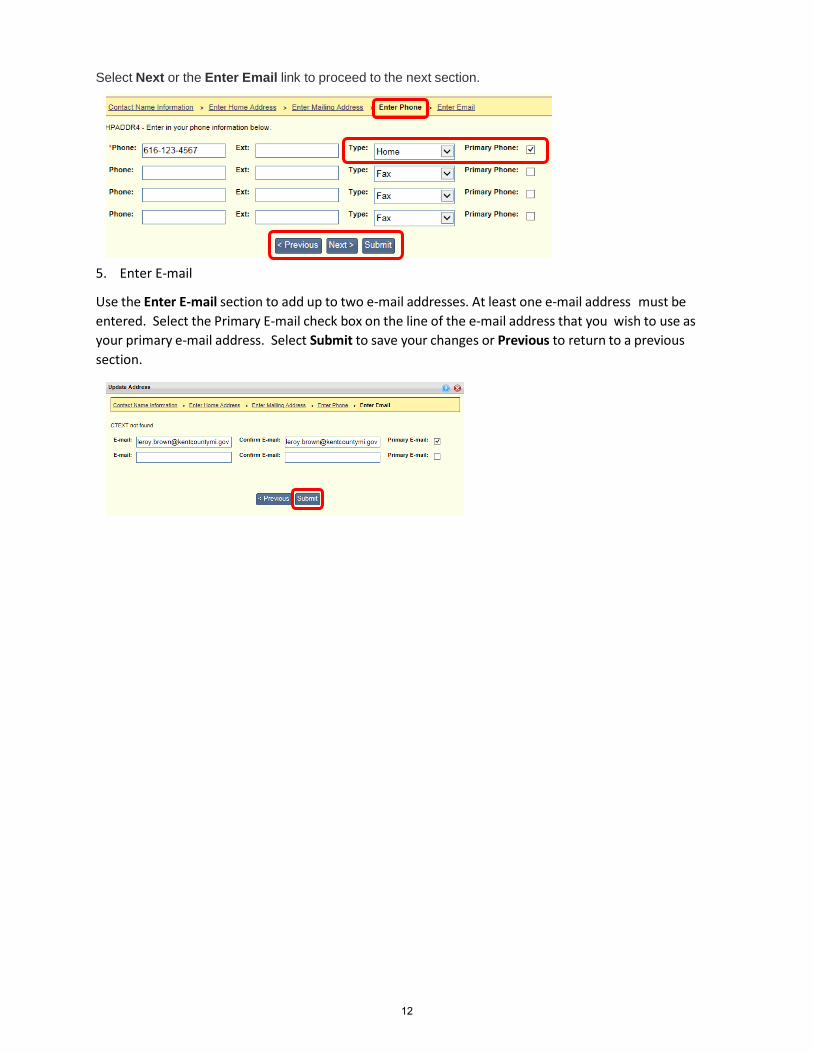
Select Next or the Enter Email link to proceed to the next section.
5. Enter E-mail
Use the Enter E-mail section to add up to two e-mail addresses. At least one e-mail address must be entered. Select the Primary E-mail check box on the line of the e-mail address that you wish to use as your primary e-mail address. Select Submit to save your changes or Previous to return to a previous section.
12

Process Name Change 1. In the Welcome Widget, click Process Name Change2. Add Emergency Contact
Enter the Name Change Reason and provide the new name. You will need to bring your official paperwork (new Social Security Card) to Human Resources to complete the processing of this change.
Select Submit to submit your name change request and return to the Welcome page. Select Cancel to exit without saving your changes.
13

14

ESS: Time and Leave
Notes
15

16
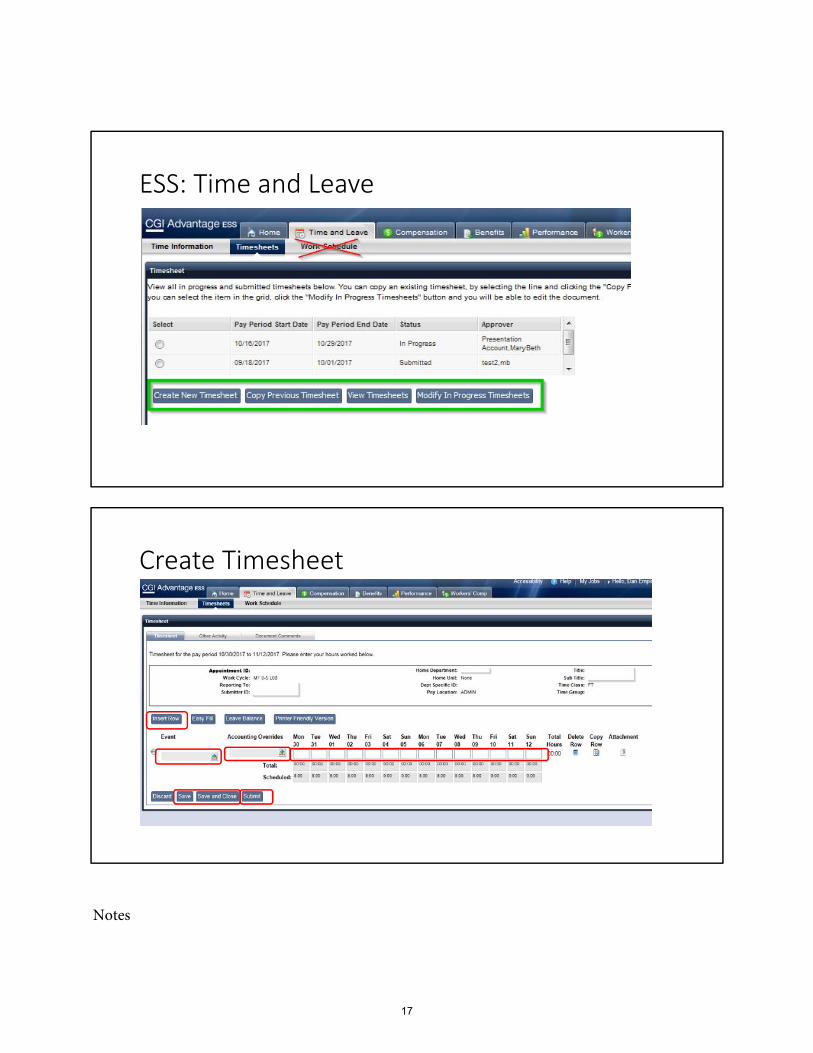
ESS: Time and Leave
Create Timesheet
Notes
17

18

Timesheet Cheat Sheet Click Create New Timesheet
Select appropriate pay period. Click Create Timesheet.
19

Com
plet
e as
hou
rs &
min
utes
04.3
0 =
4 ho
urs a
nd 3
0 m
inut
es
Use
Inse
rt R
ow to
ac
coun
t for
Vac
atio
n tim
e, P
TO e
tc.
Clic
k Su
bmit
whe
n yo
u ar
e re
ady
to
subm
it to
you
r sup
ervi
sor f
or a
ppro
val.
Clic
k Sa
ve if
you
w
ant t
o co
me
back
and
mod
ify.
This
does
not
su
bmit
to y
our
supe
rviso
r.
20

ESS: Compensation
21
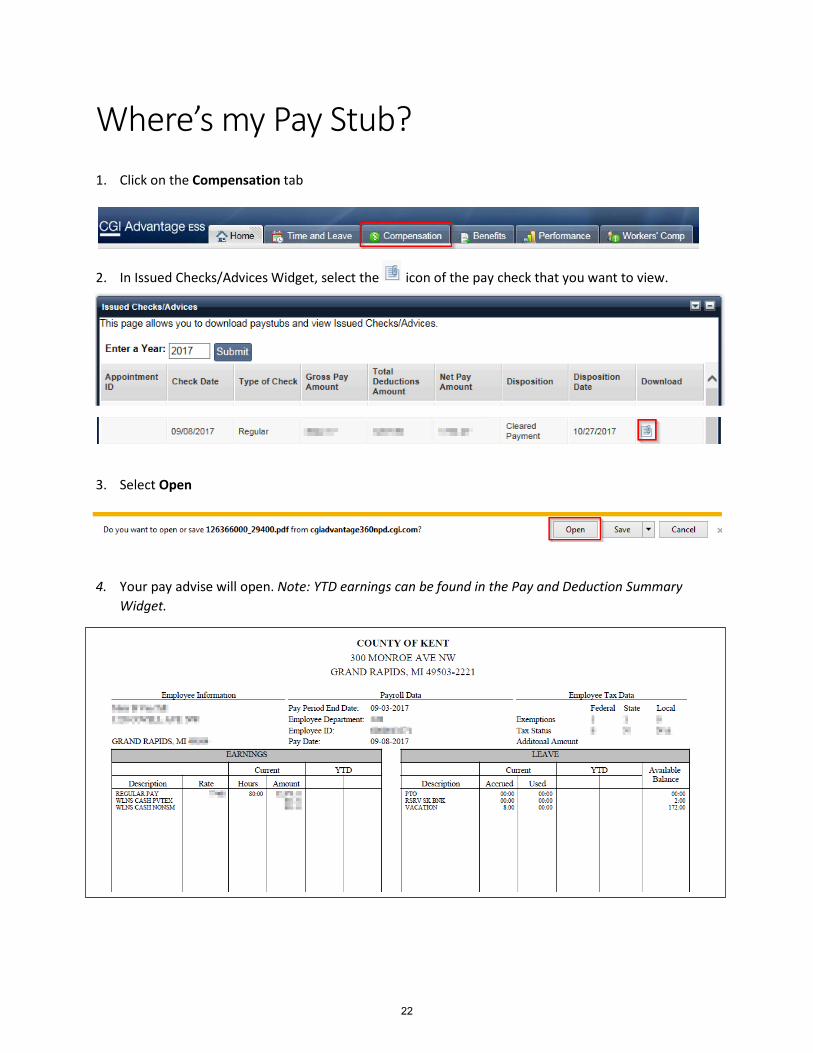
Where’s my Pay Stub? 1. Click on the Compensation tab
2. In Issued Checks/Advices Widget, select the icon of the pay check that you want to view.
3. Select Open
4. Your pay advise will open. Note: YTD earnings can be found in the Pay and Deduction SummaryWidget.
22
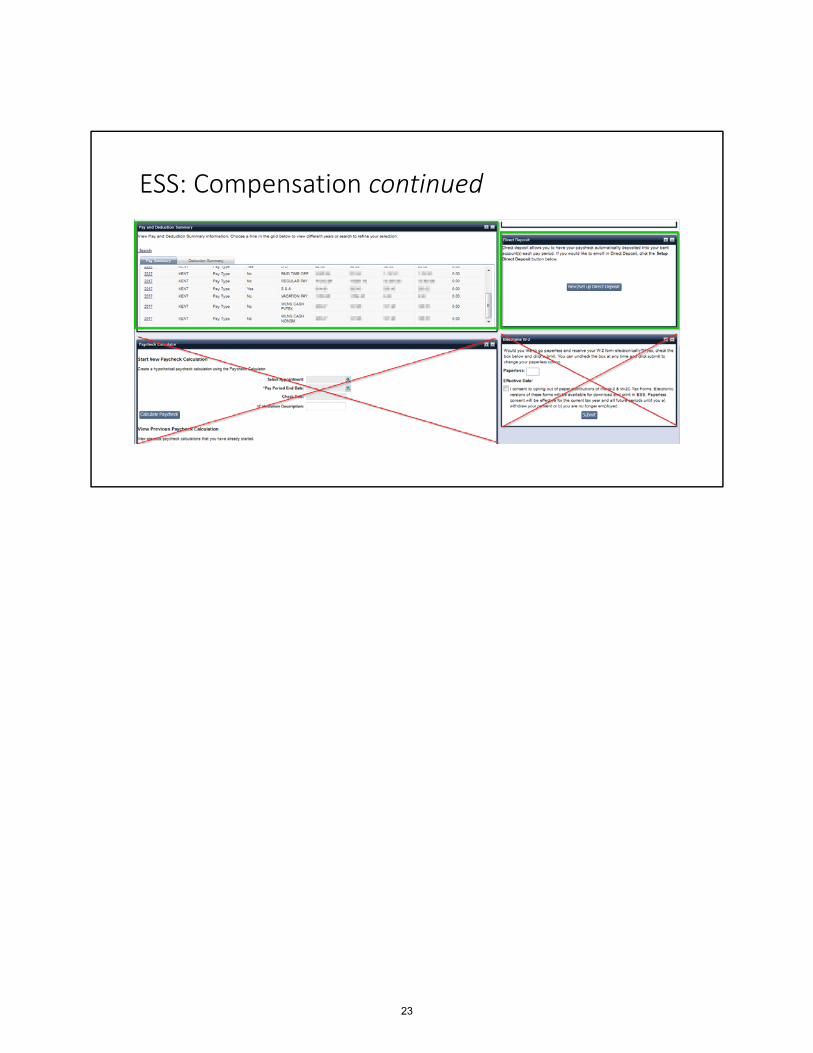
ESS: Compensation continued
23

24
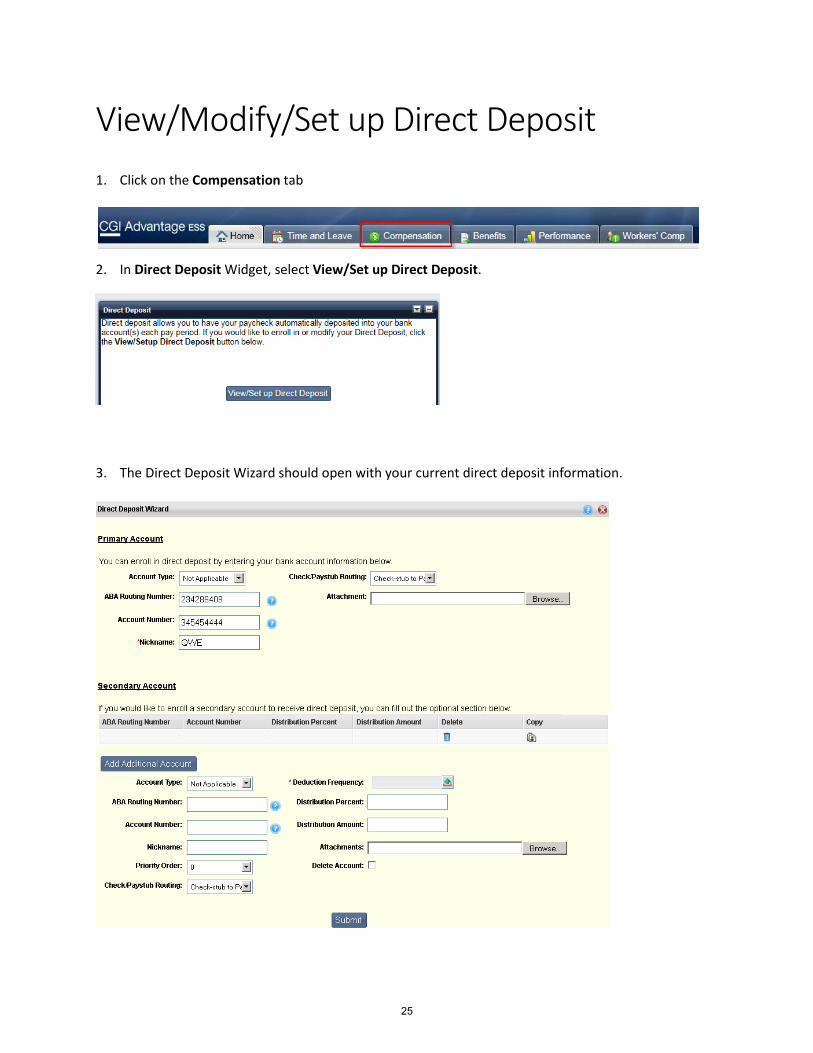
View/Modify/Set up Direct Deposit 1. Click on the Compensation tab
2. In Direct Deposit Widget, select View/Set up Direct Deposit.
3. The Direct Deposit Wizard should open with your current direct deposit information.
25
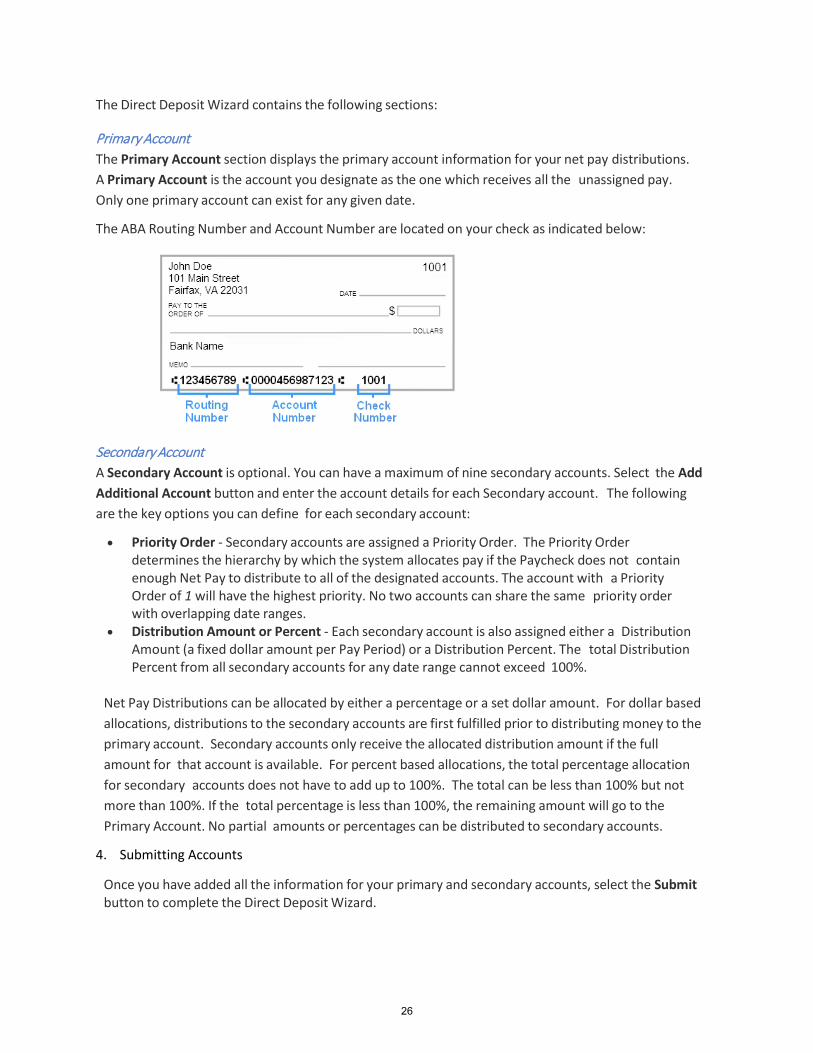
The Direct Deposit Wizard contains the following sections:
Primary Account The Primary Account section displays the primary account information for your net pay distributions. A Primary Account is the account you designate as the one which receives all the unassigned pay. Only one primary account can exist for any given date.
The ABA Routing Number and Account Number are located on your check as indicated below:
Secondary Account A Secondary Account is optional. You can have a maximum of nine secondary accounts. Select the Add Additional Account button and enter the account details for each Secondary account. The following are the key options you can define for each secondary account:
• Priority Order - Secondary accounts are assigned a Priority Order. The Priority Orderdetermines the hierarchy by which the system allocates pay if the Paycheck does not containenough Net Pay to distribute to all of the designated accounts. The account with a PriorityOrder of 1 will have the highest priority. No two accounts can share the same priority orderwith overlapping date ranges.
• Distribution Amount or Percent - Each secondary account is also assigned either a DistributionAmount (a fixed dollar amount per Pay Period) or a Distribution Percent. The total DistributionPercent from all secondary accounts for any date range cannot exceed 100%.
Net Pay Distributions can be allocated by either a percentage or a set dollar amount. For dollar based allocations, distributions to the secondary accounts are first fulfilled prior to distributing money to the primary account. Secondary accounts only receive the allocated distribution amount if the full amount for that account is available. For percent based allocations, the total percentage allocation for secondary accounts does not have to add up to 100%. The total can be less than 100% but not more than 100%. If the total percentage is less than 100%, the remaining amount will go to the Primary Account. No partial amounts or percentages can be distributed to secondary accounts.
4. Submitting Accounts
Once you have added all the information for your primary and secondary accounts, select the Submit button to complete the Direct Deposit Wizard.
26

ESS: Benefits
27
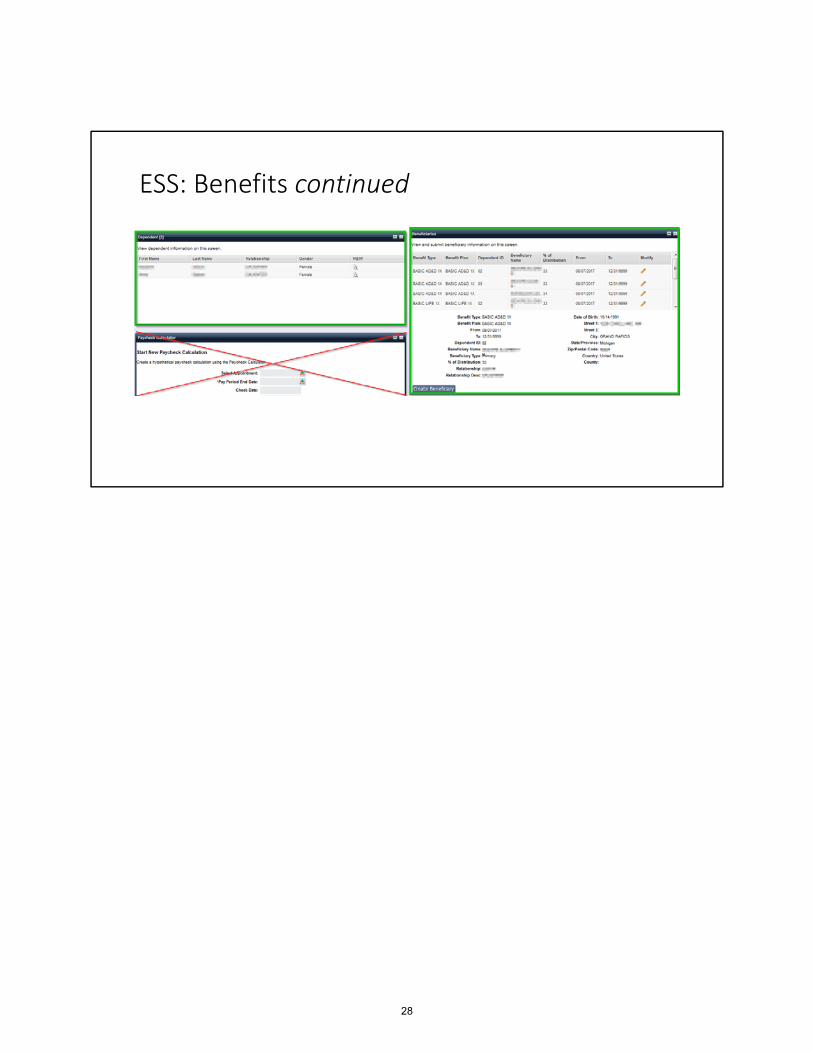
ESS: Benefits continued
28
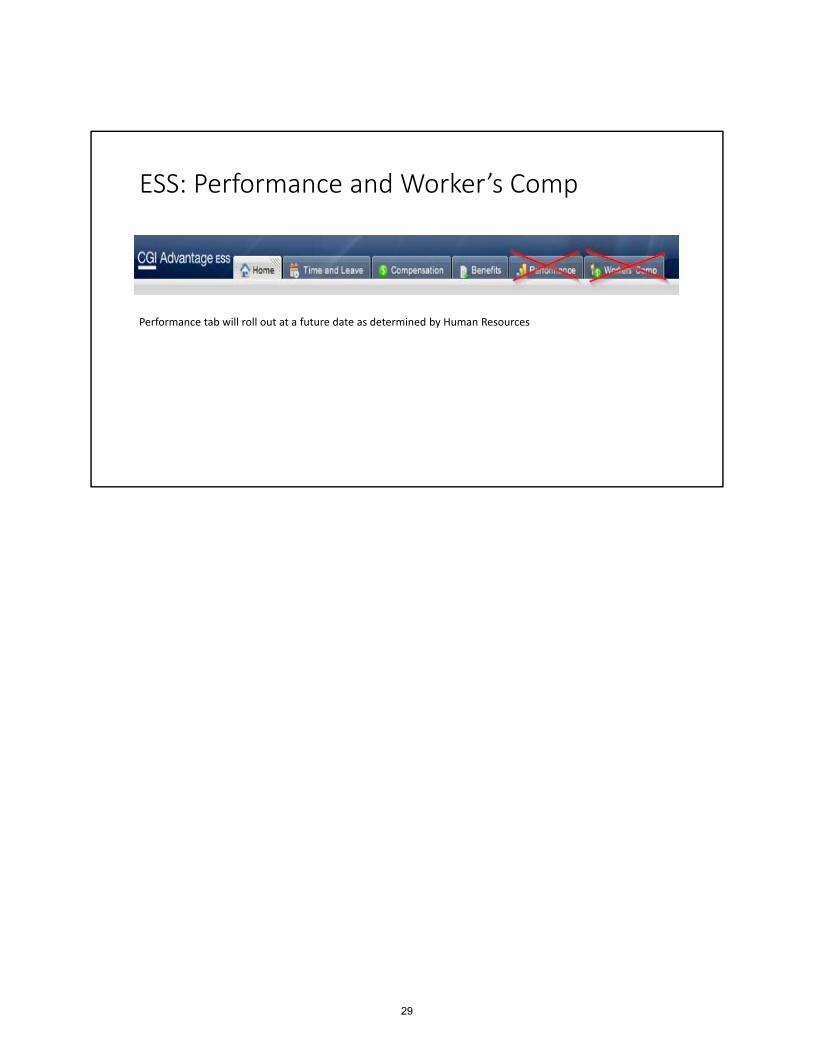
ESS: Performance and Worker’s Comp
Performance tab will roll out at a future date as determined by Human Resources
29