a placket is finished opening in front of blouse, polo,shirt, and even in long sleeves’ cuff...
TRANSCRIPT

THE PLACKETA placket is finished opening in front of
blouse, polo ,shirt, and even in long sleeves’ cuff opening. It is closed with
fasteners.FASTENERS
Fasteners are devices used to close the openings of garments and facilitate their
wearing. These include zippers, snaps, hook and eye and nylon tapes.

Zippers may be made of metal or nylon. The three basic types of zippers are:
(1). Conventional, (2)invisible and (3) separating. The most of common type is the conventional zipper which opens at the top and is held together at the bottom. An invisible zipper is sewed in such a way that it is concealed in the seam. The separating zipper is usually used I jacket or in garments with a completely opened front. The weight of the zipper and the thickness of the cloth determine the overlap on the zipper.
it is usually 1 ¼ cm but may be wider in heavy fabrics.
Buttons are among the most popular fasteners. They may also be used as decorations buttons may be made from shells, bones, metals, wood or plastics. There are two types of buttons: (1) the sank and (2) the sew-through. The shank has a solid top and is sewed to the garments in its lower portion. The sew through which the button is sewed.
SEWING ON FASTENERS Fasteners should be supported with heavy
cotton. For large button which will receive hard wear, fine thread is used. Used over and under stitches and lock on the wrong side of the garment .
An even line and accurate measuring save much disappointment than a straight basting to work the linc where the center of the fastener will be, mark off with pins where each will be sewed.

The snap fasteners are made in pairs and must be put on so they match. To do this. Separate them one at a time as you sew, beginning at one end. Pin the fastener and and mark accurately in correct position. Sew through the four head holes with over and under stitches. Close the joining and place a pin directly opposite, where you will sew on the other half of the fastener. As you go on sewing machine a second fastener watch yhe spacing for a good result.
SNAP FASTENERS
Ton sew hook and eyes, fasten the top of the hook with a loop of thread to the edge of the garment to hold it firmly in place. Then pass the thread to one eyelet and stitch securely to the second eyelet and then come back to the edge. Sew the eye on the opposite edge so that when the hook is caught in it, the edge of the garment will meet and fasten the dress.
HOOK AND EYES
Nylon tape is the newest of the fasteners. It is made of two tape strips, one with a looped snap surface and other with a hooked snap. When press together, the surface of the strips are fastened firmly until pulled apart. This is sewn in the shoulder padding of dresses
BUTTONHOLES Buttonhole is where the passes through. It
can be made by buttonholing machine or hand worked.

Machine made buttonholes are neatly and strongly made while hand worked buttonholes are carefully made by hands.
HAND WORKED BUTTONHOLES Interface the buttonhole before cutting and
then cut the point with a sharp scissors. Apply a blanket stitch closed done with the hole .
1.Soak the fabric for a few minutes. If resistant to water add soap and wash .
2.Hang the fabric in clothes line but do not squeeze.
3.Iron the fabric if necessary.
PRELIMINARES OF CONSTRUCTION PROCESS
Printed fabrics with one direction need careful position to be sure that the prints match together. Patterns can only be placed in one direction just like with corduroy and velvet.
Laying pattern over the fabric: 1. clean the table to have a spacious place
to work on.
Laying out printed fabric

2. fold the material with the right face on the inside
3. Lay the entire pattern on the lengthwise grain.
4. place weights over the pattern or pin the pattern so as not to be moved.
5. Trace all seam lines and necessary marks to have a better result of work.
6. Add the necessary allowance before cutting .
7.check all details to be assured that everything is traced properly.
CUTTING THE FABRIC 1. Use sharp shears in cutting the fabric . 2. Move around the table while cutting . 3. Do not lift the fabric while cutting. You
might accidentally cut another piece . 4. Let the pattern be folded with the parts
to ensure that all pieces are properly attended to.
It is added amount of fabric beyond to all sewing edges:
1. Neck edge, collars , pockets and facing need ¼ inch of seam allowance.
2.Shoulder, arm holds and sleeve caps need ¼ inch of seam allowance
3.hem of sleeves, skirts, blouse, shorts is ¼ “ allowance.
SEAM ALLOWANCE

4. Back crotch of pants trousers is ¼ allowance.
5. Side seams of blouse, blazer and skirts is 1” allowance.
THE UNIT METHOD OF CONSTRUCTION IN CLOTHING
UNIT CONSTRUCTION – A system way of sewing together the parts of a garment by peace or a unit
UNIT –Any group of garments by cut by piece
ADVANTAGE OF THE UNIT METHOD 1. To put together the smallest pieces for
easy handling 2. A completed part can be aside and easily
be attached. 3. speed to attained. 4. The individual will enjoy sewing because
of the systematic way of constructing garments.
PLANING A PROJECT choose a project which will be easily for
beginners. It must be something they will enjoy making that will be useful either in school or at home.
the more the student will finish her/his project the more she/he will feel good about it.
Suggested project for beginning sewer: kitchen outfit
The complete set of kitchen outfit is the chef apron, headband hand towel and potholder .
Chef apron- is a cooling outfit covering the front part of the body from the shoulder strap down to the desired length.
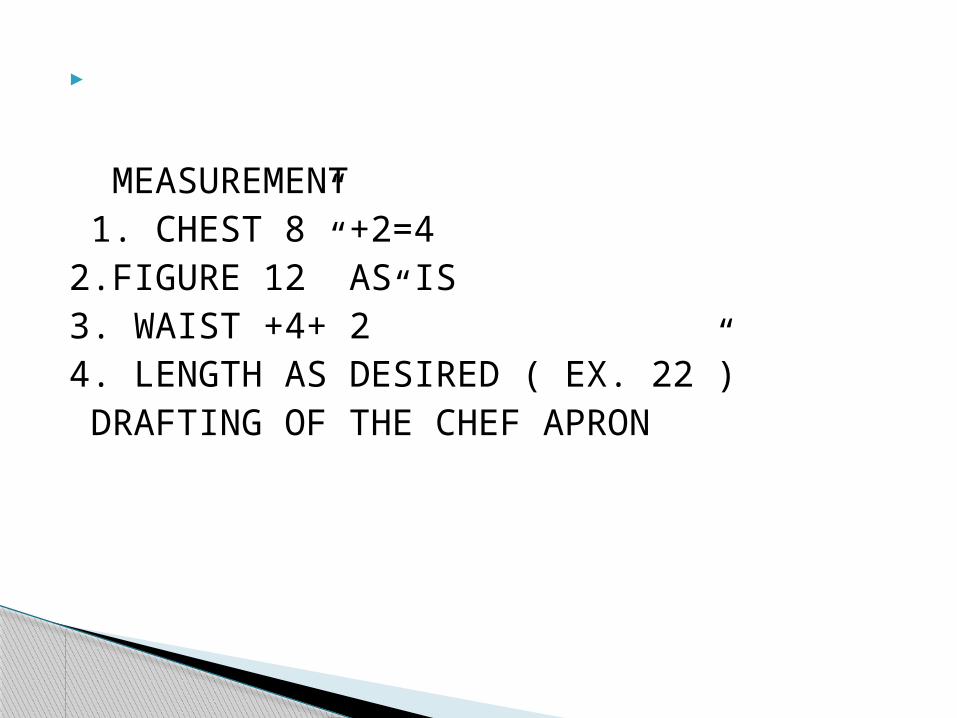
MEASUREMENT 1. CHEST 8” +2=42.FIGURE 12” AS IS3. WAIST +4+ 2”4. LENGTH AS DESIRED ( EX. 22”) DRAFTING OF THE CHEF APRON
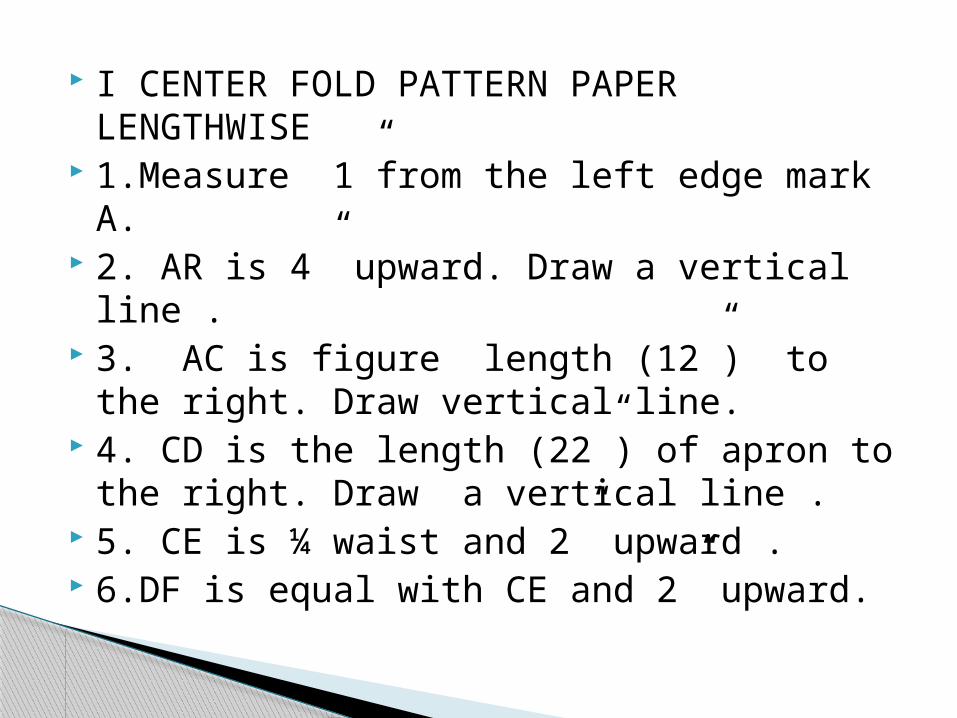
I CENTER FOLD PATTERN PAPER LENGTHWISE
1.Measure 1”from the left edge mark A. 2. AR is 4” upward. Draw a vertical line . 3. AC is figure length (12”) to the right.
Draw vertical line. 4. CD is the length (22”) of apron to the
right. Draw a vertical line . 5. CE is ¼ waist and 2” upward . 6.DF is equal with CE and 2” upward.
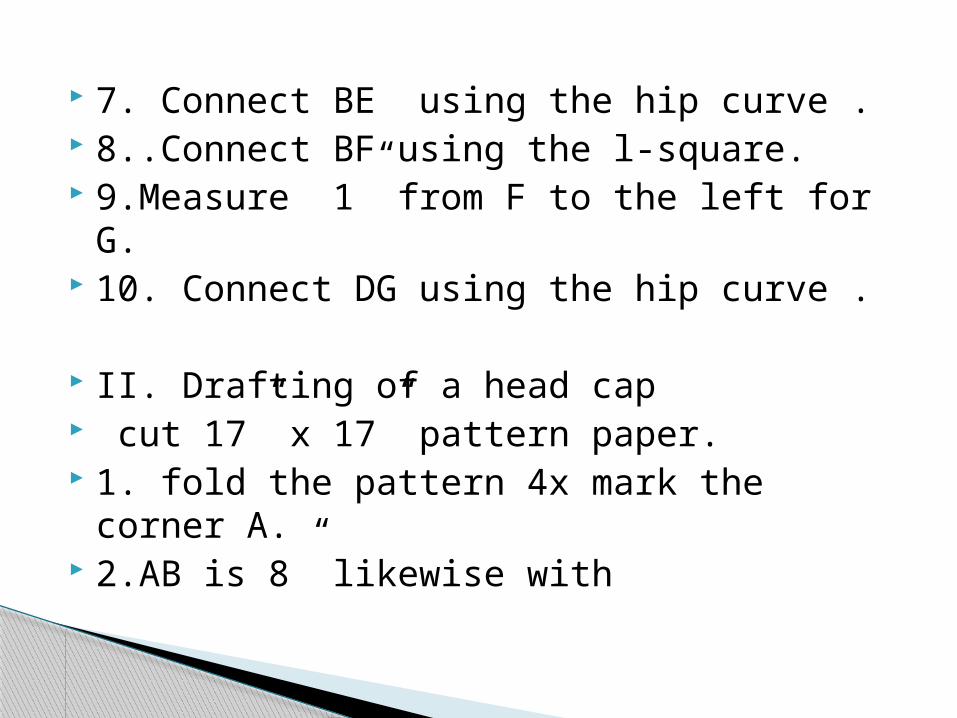
7. Connect BE using the hip curve . 8..Connect BF using the l-square. 9.Measure 1” from F to the left for G. 10. Connect DG using the hip curve .
II. Drafting of a head cap cut 17” x 17” pattern paper. 1. fold the pattern 4x mark the corner A. 2.AB is 8” likewise with
SUBMITTED BY: MERAFLOR R. DEPLOMO BSE TLE -III
SUBMITTED TO : MR. RYAN ANGELES INSTRUCTOR