a introducing the ds-160 u.s. visa application form
DESCRIPTION
A Introducing the DS-160 U.S. Visa Application Form. U.S. Embassy in Tbilisi, Georgia. Overview. A new online DS-160 nonimmigrant visa (NIV) application form Replaces the following forms: DS-156 DS-157 DS-158 MANDATORY AS OF APRIL 30, 2010 D. Advantages to Applicants. - PowerPoint PPT PresentationTRANSCRIPT

U.S. Embassy in Tbilisi, Georgia
April 2010
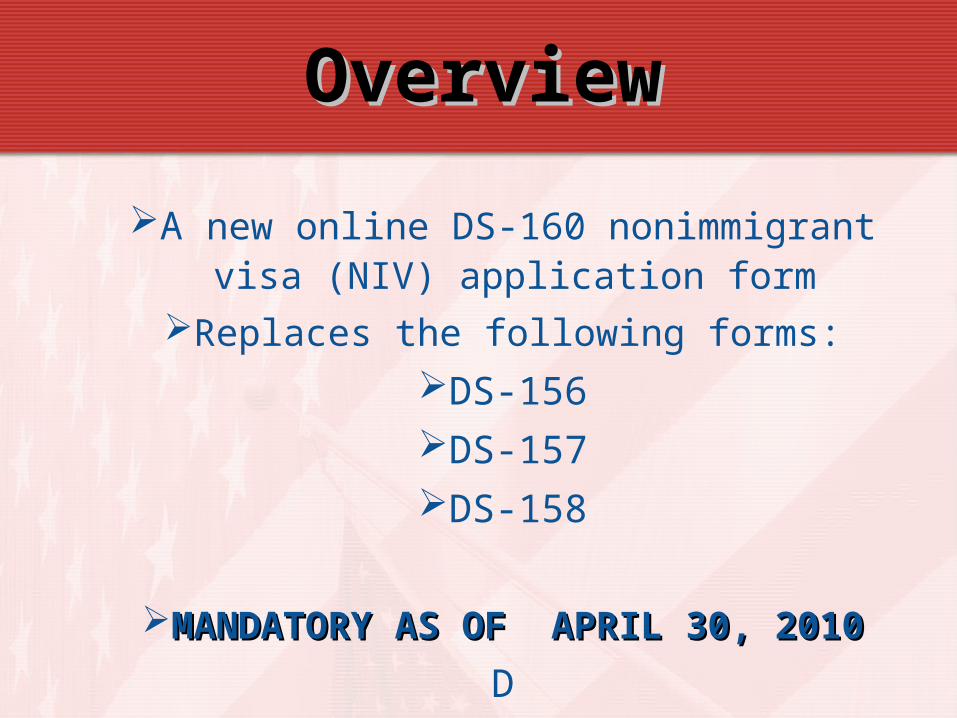
A new online DS-160 nonimmigrant visa (NIV) application form
Replaces the following forms:
DS-156DS-157DS-158
MANDATORY AS OF APRIL 30, 2010MANDATORY AS OF APRIL 30, 2010
D
OverviewOverview
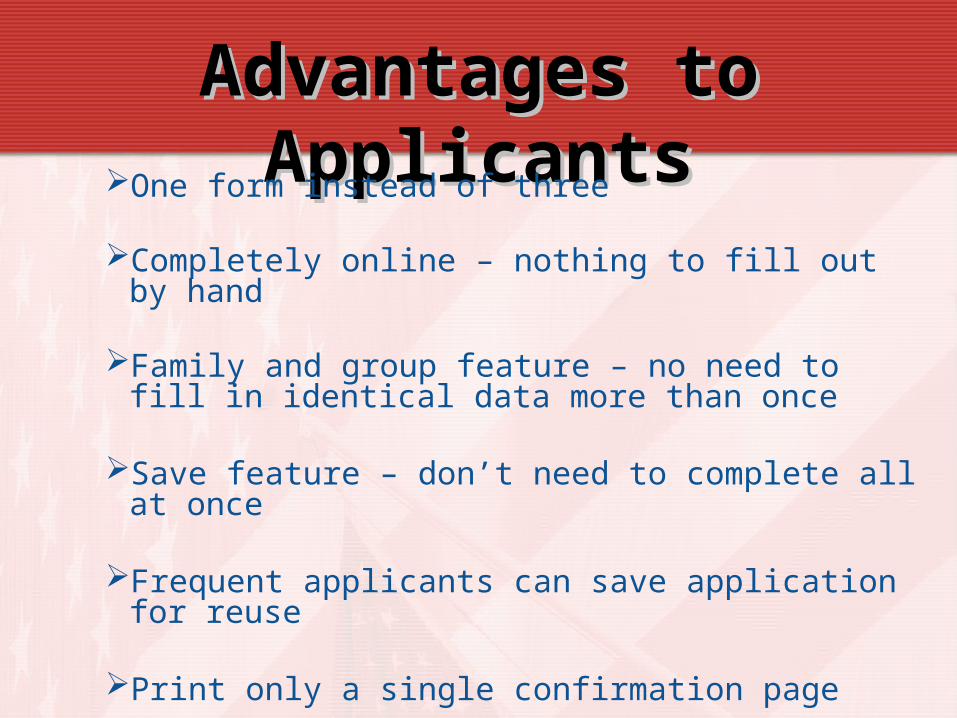
Advantages to ApplicantsAdvantages to ApplicantsOne form instead of three
Completely online – nothing to fill out by hand
Family and group feature – no need to fill in identical data more than once
Save feature – don’t need to complete all at once
Frequent applicants can save application for reuse
Print only a single confirmation page

Pay Fee
•At any TBC Bank branch
Complete Form
•https://ceac.state.gov/genniv/
Make Appointment
•http://georgia.usembassy.gov/visas.html
At Embassy
•Fingerprints •Interview
Visa Delivery
•DHL Courier
Only the application form has changed – Other parts of the process remain the same
1
3
4
2
5
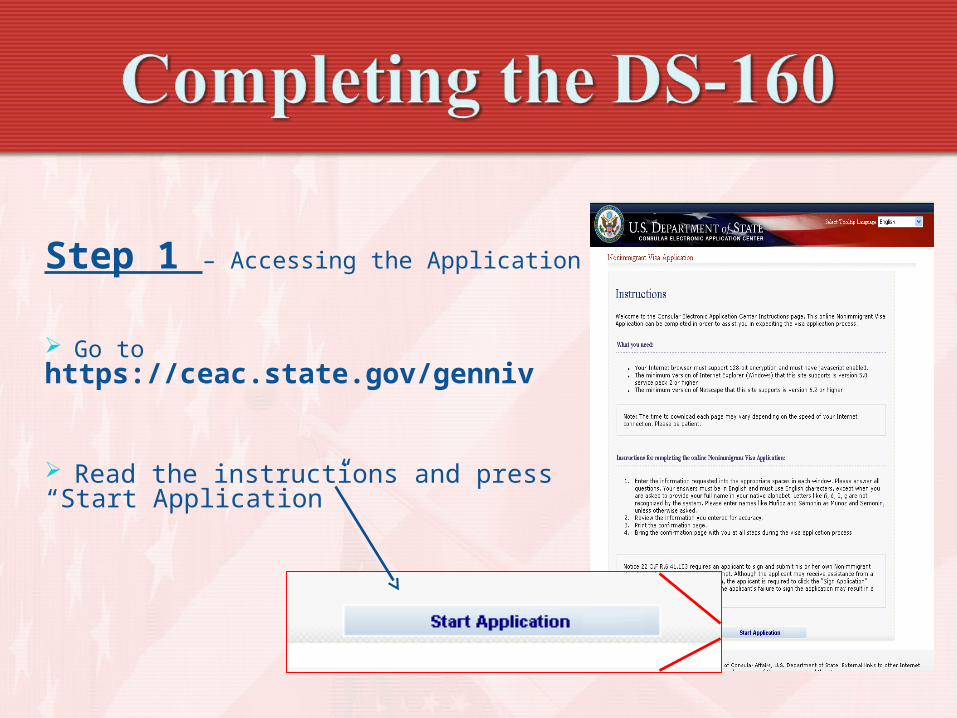
Step 1 – Accessing the Application
Go to https://ceac.state.gov/genniv
Read the instructions and press “Start Application”

Step 2 – Choose the Embassy
Choose the Embassy or Consulate where you will apply
Press “Test Photo” to begin uploading your photo
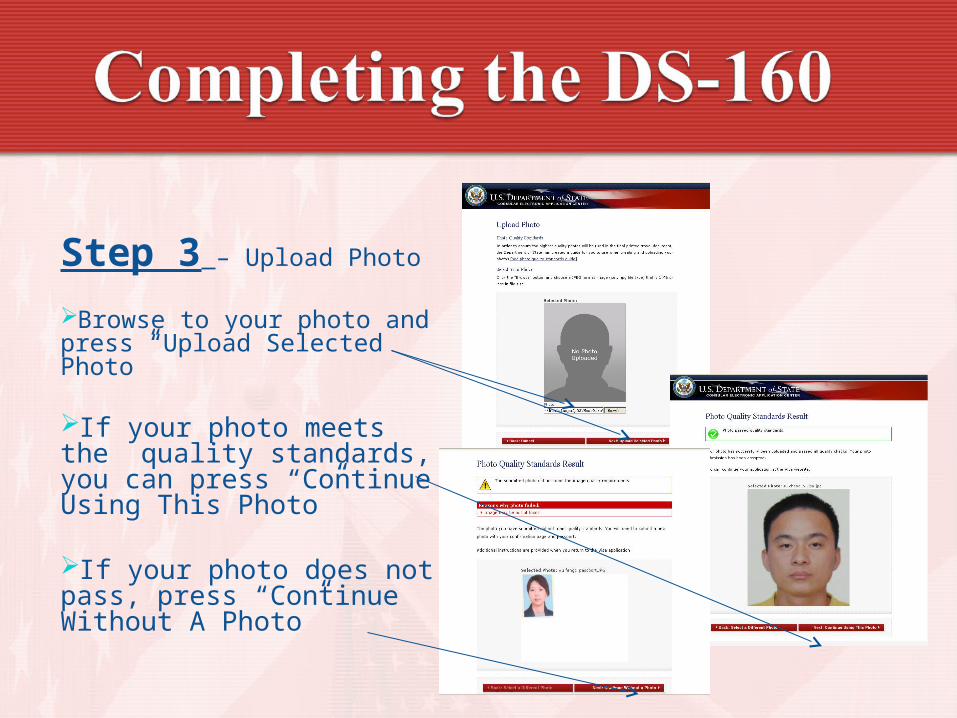
Step 3 – Upload Photo
Browse to your photo and press “Upload Selected Photo”
If your photo meets the quality standards, you can press “Continue Using This Photo”
If your photo does not pass, press “Continue Without A Photo”

Step 4 – Fill In The Form
Complete all questions carefully and accurately
Inserting wrong information or leaving required items blank will only delay your application

Saving an Application
If you can’t finish in one sitting, you can save the application to your hard drive and continue later
Press “Save” at the bottom of any data entry page
Press “Save Application to File”
Press “Save” and navigate to the place you want to save your application
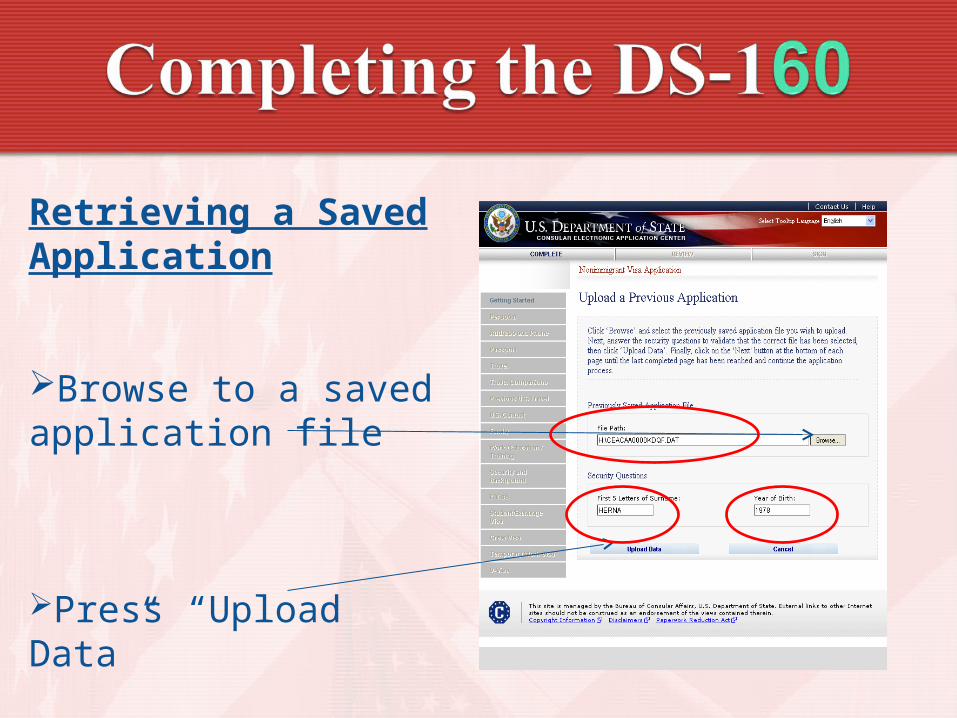
Retrieving a Saved Application
Browse to a saved application file
Press “Upload Data”
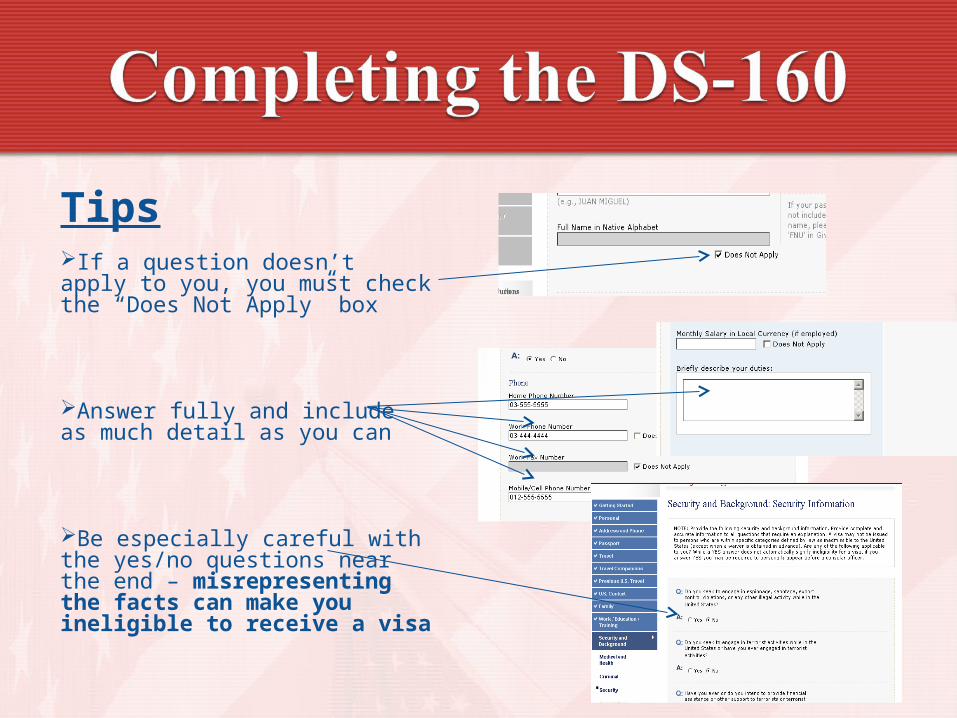
TipsIf a question doesn’t apply to you, you must check the “Does Not Apply” box
Answer fully and include as much detail as you can
Be especially careful with the yes/no questions near the end – misrepresenting the facts can make you ineligible to receive a visa

Step 5 – Reviewing Your Application
You have an opportunity to review and edit all your answers before submitting your application
Check carefully that everything is correct – it’s impossible to make changes after you submit your application online

Step 6 – Submitting Your Application
Once you submit your application, you can’t change it
Pressing “Sign and Submit Application” constitutes your electronic signature, certifying that all the answers on the application are true

Step 7 – Printing Your Confirmation Page
Print the confirmation page
You only need to bring the printed confirmation sheet to the interview
You can print the entire application for your own records if you wish
You can e-mail the confirmation to someone else (e.g., if you are completing the application for another person)

Step 7 – Printing Your Confirmation Letter (cont)
This is what the confirmation page looks like if your photo was not uploaded
You will need to bring a photo with you to the interview
The DS-160 replaces only the application forms. Other items are still required
Students: I-20
Exchange Visitors: DS-2019
Diplomats and Officials: Diplomatic Note
Referrals
And most applicants still need evidence of ties And most applicants still need evidence of ties to their place of residence to their place of residence
Consular Section:
Website: http://georgia.usembassy.gov/visas.html
E-Mail: [email protected]
Phone: 27-77-24