7.2.1 oracle websphere
TRANSCRIPT

Pega 7 Platform Installation Guide7.2.1
Oracle
WebSphere

© Copyright 2016Pegasystems Inc., Cambridge, MA
All rights reserved.
Trademarks
For Pegasystems Inc. trademarks and registered trademarks, all rights reserved. Other brand or product names are trademarks of theirrespective holders.
For information about the third-party software that is delivered with the product, refer to the third-party license file on yourinstallation media that is specific to your release.
Notices
This publication describes and/or represents products and services of Pegasystems Inc. It may contain trade secrets and proprietaryinformation that are protected by various federal, state, and international laws, and distributed under licenses restricting their use,copying, modification, distribution, or transmittal in any form without prior written authorization of Pegasystems Inc.
This publication is current as of the date of publication only. Changes to the publication may be made from time to time at thediscretion of Pegasystems Inc. This publication remains the property of Pegasystems Inc. and must be returned to it upon request. Thispublication does not imply any commitment to offer or deliver the products or services described herein.
This publication may include references to Pegasystems Inc. product features that have not been licensed by you or your company. Ifyou have questions about whether a particular capability is included in your installation, please consult your Pegasystems Inc. servicesconsultant.
Although Pegasystems Inc. strives for accuracy in its publications, any publication may contain inaccuracies or typographical errors, aswell as technical inaccuracies. Pegasystems Inc. may make improvements and/or changes to the publication at any time.
Any references in this publication to non-Pegasystems websites are provided for convenience only and do not serve as anendorsement of these websites. The materials at these websites are not part of the material for Pegasystems products, and use ofthose websites is at your own risk.
Information concerning non-Pegasystems products was obtained from the suppliers of those products, their publications, or otherpublicly available sources. Address questions about non-Pegasystems products to the suppliers of those products.
This publication may contain examples used in daily business operations that include the names of people, companies, products, andother third-party publications. Such examples are fictitious and any similarity to the names or other data used by an actual businessenterprise or individual is coincidental.
This document is the property of:
Pegasystems Inc.One Rogers StreetCambridge, MA 02142-1209USAPhone: 617-374-9600Fax: (617) 374-9620www.pega.com
DOCUMENT: Pega 7 Platform Installation Guide SOFTWARE VERSION: 7.2.1UPDATED: August 23, 2016

CONTENTS
Installation 7Related information 7Pega 7 Platform architecture 8Planning your installation 8Split-schema and single-schema configurations 9Installation methods 10
System requirements 11UI-based installation tool (Installation and Upgrade Assistant) 11Application server 11Database server 13
Pre-installation tasks 13Reviewing the documentation 13Selecting a transport-layer encryption method 13Configuring the Java Platform 14Configuring storage and logging 14Synchronizing time zones, character encoding, and regional settings 14
Setting up the database server 15Verifying the database configuration 15Configuring your Oracle database 15Database users 16Creating an empty database 21Creating Oracle tablespaces 22
Installing the Pega 7 Platform 24Preparing to install 24Running the Installation and Upgrade Assistant (IUA) 25Editing the setupDatabase.properties file 27Database connection properties 28
Optional: Enabling Kerberos authentication 29Installing from the command line 30
Setting up the application server 32
Pega 7 Platform Installation Guide 3

Preparing to configure the application server 32EAR file and WAR file considerations 33Data source resources, data source entries, and default schema entries 33
Configuring the application server 34Creating binding identifiers 34Including IBM WebSphere default packages 35WebSphere profiles 35Using the IBM WebSphere Administrative Console 36
Deploying the Pega 7 Platform application archives 46Assigning the PegaDiagnosticUser Role to your System Management Application users 50
Post-deployment configuration 52Starting the Pega 7 Platform applications 52Logging in to the Pega 7 Platform 52Changing the administrator password 53Enabling online help and the System Management Application 53Configuring Directed Web Access 54Optional: Configuring the Pega 7 Platform to return absolute URLs 54Configuring search index host node settings 56Resizing the Pega 7 Platform log files 57Resizing the database 57Installing Industry applications 57Enabling server-side screen captures for application documents 57Configuring PhantomJS REST server security for including screen captures in an applicationdocument 59
Appendix A — Properties files 60
Appendix B — Troubleshooting installations 61Recovering from a failed installation 61PEGA0055 alert — clocks not synchronized between nodes 61ClassNotFoundException error — session persistence 62System hangs with no error message — insufficient memory 62Obtaining database connection information 62
Appendix C — Optional: Generating and applying DDL 64
Pega 7 Platform Installation Guide 4

Generating the DDL file 64Applying the DDL file 65Editing the setupDatabase.properties file to bypass DDL generation 65
Appendix D — Installing user-defined functions 66
Pega 7 Platform Installation Guide 5

Pega 7 Platform Installation Guide 6
InstallationThis guide describes how to install a new instance of the Pega 7 Platform on a system with Oracleand WebSphere. See the Platform Support Guide on the PDN for a list of supported platforms.
To upgrade, see the Pega 7.2.1 Upgrade Guide. To update from Pega 7.1.x, see the Pega 7.2.1Update Guide.
Installing the Pega 7 Platform is a multiple step process that involves configuring your database andapplication server, loading rules into the database, and then deploying application archives to theapplication server.
The Pega 7 Platform supports different deployment topologies and configuration options that affecthow the supporting infrastructure is configured and managed after installation. Engage yourdatabase administrator and any other infrastructure resources as soon as possible in the planningprocess.
Related informationThe Pega Discovery Network (PDN) at https://pdn.pega.com is Pegasystems' online documentationand information site. To access the latest documentation, use the Supportmenu.
l Pega 7 Platform Support Guide— The Platform Support Guide lists the databases, drivers andapplication servers supported for this release.
l Deployment guides— The PDN includes the latest installation, upgrade, and update guides.
l Pega 7 Platform release notes— The release notes include information about installing thePega 7 Platform that supplement the instructions in this guide. Review the release notes beforeyou continue.
l Updated help files— Pegasystems provides updated help on the PDN. To obtain these updates,download the current prhelp.war file from the PDN.
l Pega 7 Platform Multitenancy Administration Guide— TheMultitenancy AdministrationGuide describes how to configure the Pega 7 Platform in multitenant mode after installation.
l Pega 7 Platform Business Intelligence Exchange User Guide— The Business IntelligenceExchange User Guide describes how to install the Business Intelligence Exchange (BIX) product.BIX is included in the full distribution image, but has a separate installer.

l System Management Application Reference Guide— The optional System ManagementApplication monitors and controls caches, agents, requesters, listeners, and other processing.
Pega 7 Platform architectureThe Pega 7 Platform is a Java EE-compliant enterprise application that requires an application serverand a database server:
l The application server hosts the Pega 7 Platform application archives and also providesinterconnectivity to other systems through various protocols.
l The database server stores the rules, data, and work objects used and generated by the Pega 7Platform.
Application users and developers typically access the Pega 7 Platform through a web browser.Applications can also expose HTTP-based services (for example, SOAP, REST, or HTTP) foradministration or process automation in a headless environment.
Planning your installationThe Pega 7 Platform supports several configuration options that can affect the choices that you makeduring the installation. Before beginning, read this section thoroughly.
l Do not change your environment during an installation. For example, if you are making changesto your application server, or database server, do so before you install the Pega 7 Platform.
l Choose a configuration type: single-schema or split-schema configuration. Pegasystemsrecommends a split-schema configuration. See Split-schema and single-schema configurations.
l Choose whether to use the standard product edition or the multitenancy edition. The multitenancyedition has different requirements, different run-time behaviors, and different administrativeprocedures from the standard edition. Before you select the multitenancy edition, review theMultitenancy Administration Guide on the PDN.
Upgrading and updating from one edition to another is not supported. If you install one editionand later decide to use a different edition, you must drop and re-create the database or create anew database. The schema DDLs for the two editions are not compatible.
l Verify the Business Intelligence Exchange (BIX) and Pega 7 Platform product versions. Releaseversions of the Business Intelligence Exchange (BIX) are synchronized with release versions of the
Pega 7 Platform Installation Guide 8
Installation

Pega 7 Platform. BIX is included in the full distribution image, but has a separate installer. Verifythat the version of BIX is the same as the version of the Pega 7 Platform. For information aboutinstalling BIX, see the Pega 7.2.1 BIX User Guide.
l Choose an installation type: UI tool or command line. See Installation methods.
l Choose whether to use Kerberos functionality. Kerberos is a computer network authenticationprotocol that allows nodes communicating over a non-secure network to prove their identity toone another in a secure manner. If you enable Kerberos authentication, you must use thecommand line to install the Pega 7 Platform.
l Choose whether to have the installation make changes directly to the database. You can eitherhave the Pega 7 Platform installation apply changes directly to your database, or generate DDLfiles of changes for your database administrator to apply. For information about manuallygenerating and applying DDL, see Appendix C — Optional: Generating and applying DDL on page64.
l Choose whether to cluster the Pega 7 Platform nodes. The Pega 7 Platform supports clusterednodes without special configuration, but you will make different choices about ports, indexes, andclock synchronization depending on your node configuration.
l Determine the best configuration for your database. Involve your database administrator in thesedecisions. If necessary, contact Pegasystems Global Customer Support for more information.
For split-schema configurations, choose whether you will maintain separate tablespaces for thedata schema and rules schema. This decision depends on your database configuration.
Conduct a site-dependent analysis of how the Pega 7 Platform and any Industry applicationsthat will be used to determine the size of your database tablespace.
l Choose either dual-user or single-user configuration. In a dual-user configuration, an Admin useris granted full privileges, and a Base user is granted a smaller subset of privileges. In the single-user configuration, a single Base user is granted full privileges. See Database server setup forinformation about user configuration.
Split-schema and single-schema configurations
There are two configuration types: single schema and split-schema. Pegasystems recommends split-schema configurations, particularly in critical development environments such as quality assurance,staging, and production.
Pega 7 Platform Installation Guide 9
Installation

l Single-schema configuration —One schema contains all rules and data objects.
l Split-schema configuration — The rules and data objects reside on separate schemas:
A Rules schema contains rules tables and associated data and objects.
AData schema contains transaction data, including work objects.
With a split-schema configuration, you can upgrade one environment, and then migrate theupgraded objects to other environments.
In a split-schema configuration, the Pega 7 Platform uses the Java Naming and Directory Interface(JNDI) standard to identify and access the appropriate schema. One of the benefits of using JNDI isthat it allows the Pega 7 Platform to access different schemas while using only a single datasource.
The following diagram illustrates the difference between a single-schema configuration and a split-schema configuration.
Installation methods
You can install the Pega 7 Platform either with the UI tool or from the command line. This guideincludes instructions for both methods.
l UI tool – Use the UI-based Installation and Upgrade Assistant to install either the rulebase or therulebase and the schema.
Pega 7 Platform Installation Guide 10
Installation

l Command line – Run scripts to install the Pega 7 Platform.
Regardless of whether you use the UI tool or the command-line scripts, you might need to edit thesetupDatabase.properties file that controls the behavior of the following scripts:
l The generateddl.bat or generateddl.sh script generates an SQL file that your databaseadministrator can use to apply schema changes to the database. You can run this script regardlessof whether you use the IUA or the command-line script to install.
l The install.bat or install.sh script performs the following functions:Installs the most recent version of the Pega 7 Platform.
Specifies whether to generate a DDL file of changes to the database.
Enables Kerberos authentication.
If you use the IUA to install, you do not use the install.bat or install.sh script.
System requirementsEnsure that your system meets the minimum requirements.
UI-based installation tool (Installation and Upgrade Assistant)
If you plan to use the UI-based Installation and Upgrade Assistant ensure that the system on whichyou will install meets these minimum system requirements in addition to all other requirements:
l Windows or Linux operating system
l 1.25 GB minimum available memory
l 10 GB minimum disk space plus at least 8 GB available space in the temporary directory of theroot file system
l Java Platform, Standard Edition Development Kit (JDK)
Application server
The application server requires:
l Oracle JDBC type 4 driver, such as ojdbc7.jar. For more information about supported drivers, seethe Pega 7 Platform Support Guide.
Pega 7 Platform Installation Guide 11
Installation

l A supported 64-bit JDK. See the Platform Support Guide on the PDN for a list of supportedversions.
IBM WebSphere Network Deployment requires that the deployment manager, the node agent, andthe application servers are all on the same JDK version: either JDK 1.7.0 or JDK 1.7.1.
l 1 GB minimum free disk space. You might need additional storage space for debugging andlogging.
Install only the Pega 7 Platform be installed on the application server.
Application server memory requirements
The Pega 7 Platform runs in memory (heap) on Java Virtual Machines (JVMs). In general, all activity isdistributed over multiple JVMs (nodes) on the application server.
l Standard suggested system heap size is 4 - 8 GB based on monitoring of memory usage andgarbage collection frequency.
l Larger heaps are advisable if your applications allow a high number of concurrent open tasks persession or cache a large collection of transaction or reference data.
l Do not deploy the Pega 7 Platform in an environment where the heap size exceeds the vendor-specific effectiveness limit.
Oracle JDKs use compression to minimize the cost of large heaps. The compression option is labeledCompressedOOPS and is effective up to 32 GB.
In current 64-bit JVMs, compression is enabled by default.
The host application server memory size must be at least 4 GB larger than the Pega 7 Platform heapsize to allow space for the operating system, monitoring tools, operating system network filebuffering, and JVM memory size (-XMX option). The minimum host application server memory size is8 GB:
4 GB heap + 4 GB for native memory, operating system, and buffering
If the server does not have enough memory allocated to run the Pega 7 Platform, the system canhang without an error message. The correct memory settings depend on your server hardware, thenumber of other applications, and the number of users on the server, and might be larger than theserecommendations.
Pega 7 Platform Installation Guide 12
Installation
Database server
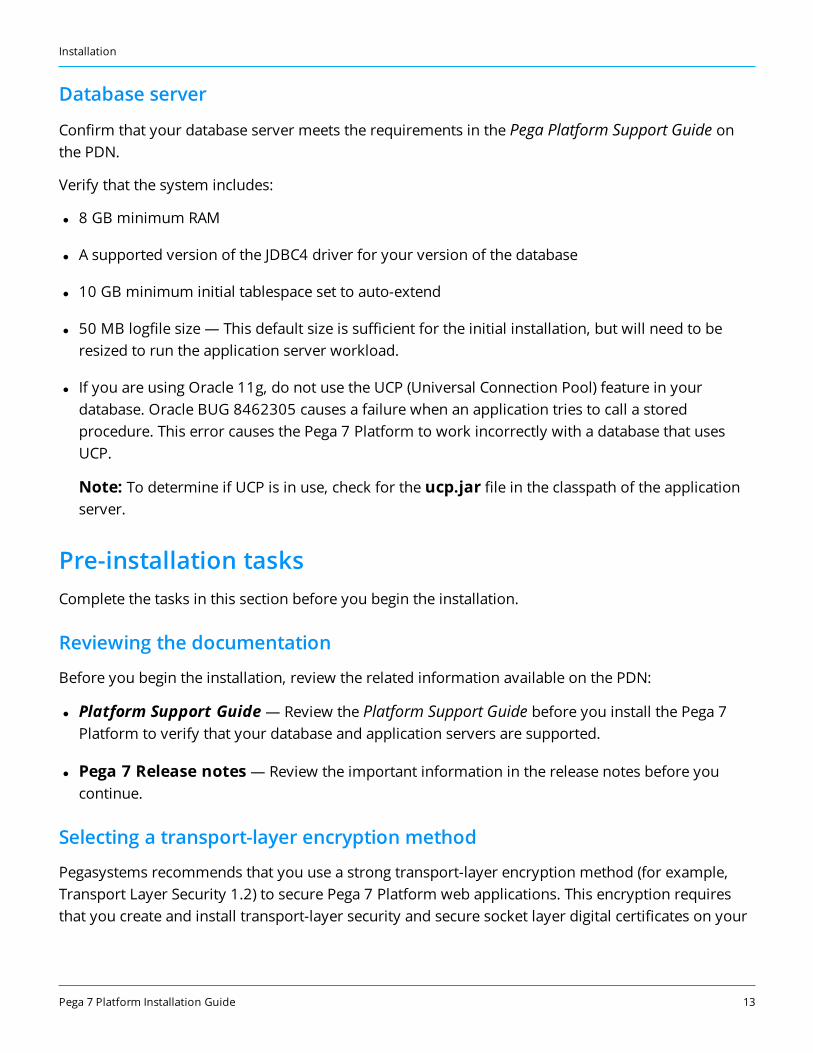
Confirm that your database server meets the requirements in the Pega Platform Support Guide onthe PDN.
Verify that the system includes:
l 8 GB minimum RAM
l A supported version of the JDBC4 driver for your version of the database
l 10 GB minimum initial tablespace set to auto-extend
l 50 MB logfile size — This default size is sufficient for the initial installation, but will need to beresized to run the application server workload.
l If you are using Oracle 11g, do not use the UCP (Universal Connection Pool) feature in yourdatabase. Oracle BUG 8462305 causes a failure when an application tries to call a storedprocedure. This error causes the Pega 7 Platform to work incorrectly with a database that usesUCP.
Note: To determine if UCP is in use, check for the ucp.jar file in the classpath of the applicationserver.
Pre-installation tasksComplete the tasks in this section before you begin the installation.
Reviewing the documentation
Before you begin the installation, review the related information available on the PDN:
l Platform Support Guide— Review the Platform Support Guide before you install the Pega 7Platform to verify that your database and application servers are supported.
l Pega 7 Release notes— Review the important information in the release notes before youcontinue.
Selecting a transport-layer encryption method
Pegasystems recommends that you use a strong transport-layer encryption method (for example,Transport Layer Security 1.2) to secure Pega 7 Platform web applications. This encryption requiresthat you create and install transport-layer security and secure socket layer digital certificates on your
Pega 7 Platform Installation Guide 13
Installation

application server for the Pega 7 Platform. Before you continue, determine what transport-layerencryption method you will use. For more information, see the documentation for your applicationserver.
Configuring the Java Platform1. Set JAVA_HOME to the root directory of the JDK.
2. For Java 8, remove from the PATH any references to a Java shortcut.
Configuring storage and logging1. Allocate enough storage to accommodate debugging and other logging requirements.
2. Configure logging to avoid writing logs to the directory that contains the application server run-time components.
Synchronizing time zones, character encoding, and regional settings
Verify that your database server, application server, and the system on which you are running theinstallation use the same:
l Time zone
l Character encoding (UNICODE or EBCDIC)
l Regional settings/locale
Pega 7 Platform Installation Guide 14
Installation

Setting up the database serverThis section describes how to prepare and configure your database server:
l Configure the database users.
l Create an empty database.
l Create Oracle tablespaces.
Verifying the database configurationBefore you begin preparing your database, confirm that your database server is installedand running. Verify that your database meets the requirements described below.
l Your system includes a supported version of the JDBC4 driver for your version of the database.
l If you are using Oracle 11g, do not use the UCP (Universal Connection Pool) feature in yourdatabase. Oracle BUG 8462305 causes a failure when an application tries to call a storedprocedure. This error causes the Pega 7 Platform to work incorrectly with a database that usesUCP.
Note: To determine if UCP is in use, check for the ucp.jar file in the classpath of the applicationserver.
l If you plan to use user-defined functions (UDF), support for UDF installed by the Pega 7 Platform isenabled.
l If you plan to use user-defined functions (UDF), Java is enabled in the database.
Configuring your Oracle databaseTo prepare your Oracle database server for use with the Pega 7 Platform, complete the followingsteps:
1. Create database user accounts.
2. Create an empty database.
3. Create the database schema.
4. Create the Oracle tablespaces.

Database users
This guide refers to the following database users:l Deployment users — These users perform actions only during the installation.
Deployment user— The user who runs the installation. After the installation, you canremove this user.
Oracle users— Because Oracle has a one-to-one relationship between users and schemas, ifyou have a split-schema configuration, you must have separate users for the rules schema andthe data schema. The Oracle rules schema user might be associated with individual tablespacesor a common tablespace. Pegasystems recommends separate tablespaces for each user incritical SDLC environments. The Oracle rules schema user is only used to create the schemaand requires unlimited tablespace.
l Run-time users — These users perform actions on the Pega 7 Platform after the installation. In adual-user configuration, an Admin user is granted full privileges, and a Base user is granted asmaller subset. Pegasystems recommends the dual-user configuration:
Base user— The user who will run the Pega 7 Platform. Most run-time operations use theBase user and associated data source.
Admin user— An optional user provided to the Pega 7 Platform that is preferentially used bycertain features that require creating, modifying, or dropping database schema objects; forexample, System Management facilities and certain decisioning operations.
Pegasystems recommends that you use the dual-user configuration with separate Admin and Baseusers; however, you can create a single Base user with both sets of privileges. If there is noseparate Admin user, the Pega 7 Platform uses the Base user for all run-time operations.
Oracle user permissions
Use either an SQL command or the Oracle Enterprise Manager to create users with these privilegesand roles. Because Oracle maintains a one-to-one relationship between schemas and database users,creating users also creates the schemas.
Deployment user privileges and roles
The Deployment user requires these privileges and roles for all configurations:
l CREATE SESSION
l CREATE ANY TABLE
Pega 7 Platform Installation Guide 16
Setting up the database server

l ALTER ANY TABLE
l INSERT ANY TABLE WITH ADMIN OPTION
l SELECT ANY TABLE
l UPDATE ANY TABLE
l DELETE ANY TABLE
l CREATE ANY INDEX
l CREATE ANY PROCEDURE
l EXECUTE ANY PROCEDURE
l CREATE ANY VIEW
l CREATE ANY TYPE
l CREATE ANY TRIGGER
l ALTER ANY TRIGGER
l GRANT ANY OBJECT PRIVILEGE
l DROP ANY PROCEDURE
l DROP ANY TRIGGER
l DROP ANY TABLE
l DROP ANY VIEW
l DROP ANY INDEX
l ANALYZE ANY
l ANALYZE ANY DICTIONARY
l SELECT_CATALOG_ROLE (This is a role, not a privilege.)
NOTE: If you plan to install Industry applications on top of Pega 7.2.1, you must grant SELECT_CATALOG_ROLE to the Deployment or Admin user. Some Industry applications use triggers and
Pega 7 Platform Installation Guide 17
Setting up the database server

the user will need SELECT_CATALOG_ROLE to drop triggers that read from the updates cache andrule view tables.
If you have custom triggers that read to the update cache or rule view tables, the deploymentautomatically drops the custom triggers. Manually re-create custom triggers after you deploy Pega7.2.1.
Oracle schema users — requirements
Oracle schema users require only unlimited tablespace.
Run-time users — privileges and roles
The run-time users require different permissions depending on whether or not you have a dual-userconfiguration.
Note: The run-time users of the rules and data schemas can share the same tablespace. If youcreate separate tablespaces for the rules schema and the data schema users, base the size of the datauser tablespace on the estimated number of work objects in the application.
Dual-user configuration — Admin and Base users
In a dual-user configuration, grant these privileges and roles:
l Admin user
CREATE SESSION
CREATE ANY TABLE
ALTER ANY TABLE
INSERT ANY TABLE WITH ADMIN OPTION
SELECT ANY TABLE
UPDATE ANY TABLE
DELETE ANY TABLE
CREATE ANY INDEX
CREATE ANY PROCEDURE
Pega 7 Platform Installation Guide 18
Setting up the database server

EXECUTE ANY PROCEDURE
CREATE ANY VIEW
CREATE ANY TYPE
CREATE ANY TRIGGER
ALTER ANY TRIGGER
GRANT ANY OBJECT PRIVILEGE
DROP ANY PROCEDURE
DROP ANY TRIGGER
DROP ANY TABLE
DROP ANY VIEW
DROP ANY INDEX
ANALYZE ANY
ANALYZE ANY DICTIONARY
SELECT_CATALOG_ROLE (This is a role, not a privilege.)
NOTE: If you plan to install Industry applications on top of Pega 7.2.1, you must grant SELECT_CATALOG_ROLE to the Deployment or Admin user. Some Industry applications use triggers andthe user will need SELECT_CATALOG_ROLE to drop triggers that read from the updates cacheand rule view tables.
If you have custom triggers that read to the update cache or rule view tables, the deploymentautomatically drops the custom triggers. Manually re-create custom triggers after you deployPega 7.2.1.
l Base user—The Base user is the DATA schema user in this configuration.
Basic read and write access to data and rules tables including rules resolution.
CREATE SESSION
Pega 7 Platform Installation Guide 19
Setting up the database server
Single-user configuration— Base user only
Pegasystems recommends that you create an Admin user separate from the Base user; however, ifyou opt for a single Base user, grant these permissions to the Base user:
l CREATE SESSION
l CREATE TABLE
l CREATE PROCEDURE
l CREATE VIEW
l CREATE TYPE
l CREATE TRIGGER
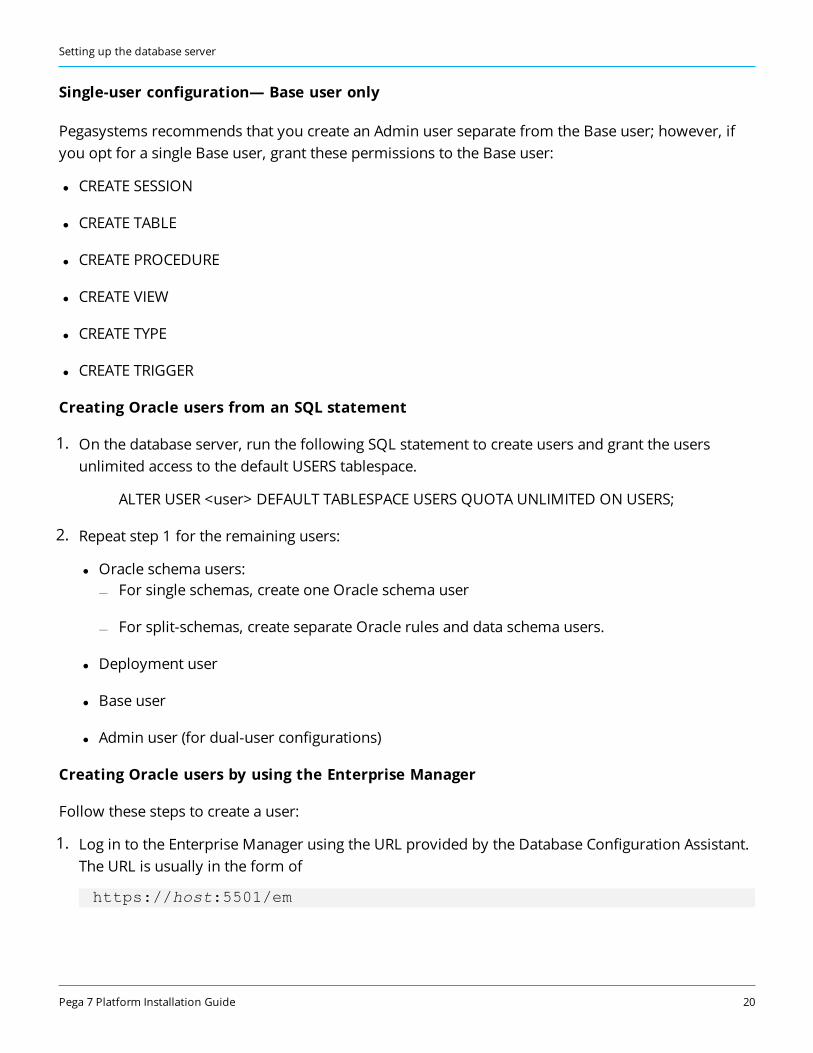
Creating Oracle users from an SQL statement
1. On the database server, run the following SQL statement to create users and grant the usersunlimited access to the default USERS tablespace.
ALTER USER <user> DEFAULT TABLESPACE USERS QUOTA UNLIMITED ON USERS;
2. Repeat step 1 for the remaining users:
l Oracle schema users:For single schemas, create one Oracle schema user
For split-schemas, create separate Oracle rules and data schema users.
l Deployment user
l Base user
l Admin user (for dual-user configurations)
Creating Oracle users by using the Enterprise Manager
Follow these steps to create a user:
1. Log in to the Enterprise Manager using the URL provided by the Database Configuration Assistant.The URL is usually in the form of
https://host:5501/em
Pega 7 Platform Installation Guide 20
Setting up the database server

2. Enter the following credentials and click Login.
User name = sys
Password = password
3. Select Security > Users.
4. Select Actions > Create User.
Accept the other defaults.
5. On the User Account step, enter the name and password for the user you are creating.
6. Click .
a. If you created a dedicated tablespace, choose that tablespace from the menu.
b. Accept the other defaults.
7. Click .
8. Select the privileges for this user and click OK.
9. Repeat these steps to configure the remaining users.
Creating an empty database
Create a database with a minimum of 5 GB for the user tablespace and, if possible, allow thedatabase to grow. This minimum size allows you to load the initial rulebase and do simpledevelopment. Monitor the database use carefully. As development begins, the size of the databasewill need to increase significantly, depending on your use of the Pega 7 Platform and the number ofusers.
Use the Oracle Database Configuration Assistant to create a new Oracle database. Consult your
database administrator to determine the best database type for your application. For more
information about the Oracle Database Configuration Assistant, see your Oracle documentation.
Make note of the EM Database Express URL. You need the URL when you configure the Pega 7
Platform.
Pega 7 Platform Installation Guide 21
Setting up the database server
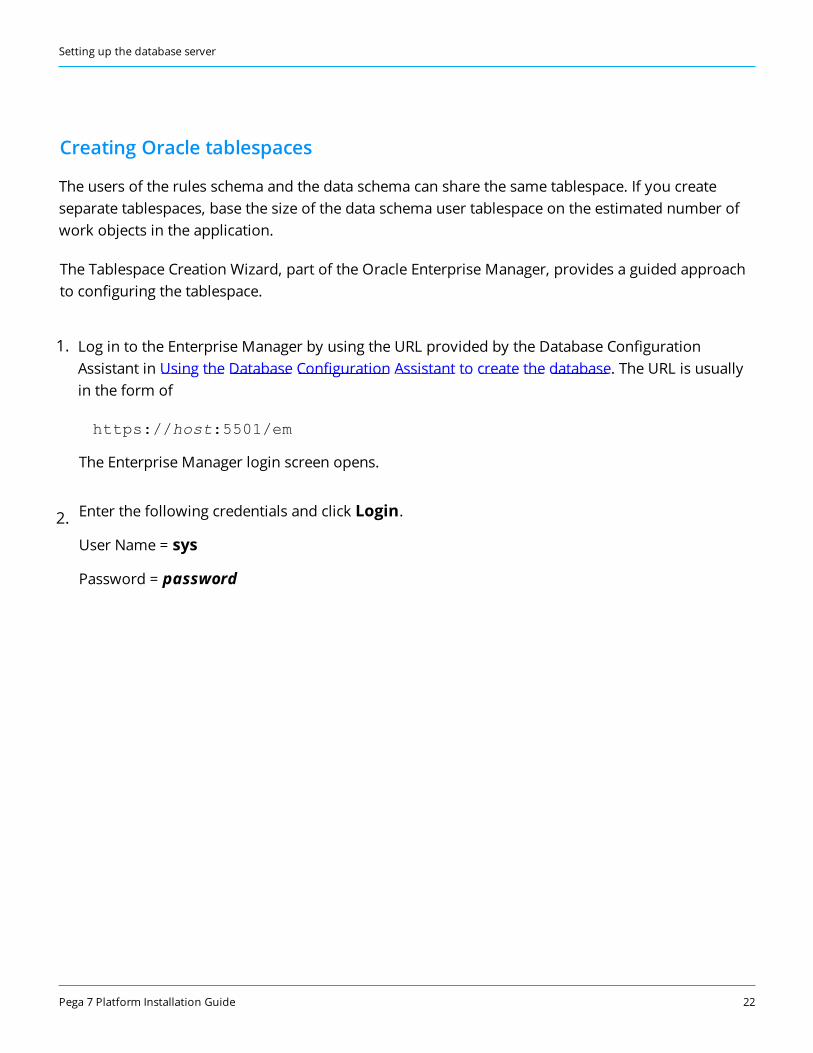
Creating Oracle tablespaces
The users of the rules schema and the data schema can share the same tablespace. If you create separate tablespaces, base the size of the data schema user tablespace on the estimated number of work objects in the application.
The Tablespace Creation Wizard, part of the Oracle Enterprise Manager, provides a guided approach to configuring the tablespace.
1. Log in to the Enterprise Manager by using the URL provided by the Database Configuration Assistant in Using the Database Configuration Assistant to create the database. The URL is usually in the form of
https://host:5501/em
The Enterprise Manager login screen opens.
2. Enter the following credentials and click Login.
User Name = sys
Password = password
Pega 7 Platform Installation Guide 22
Setting up the database server
3. Select Storage > Tablespaces.
4. Select Actions > Create.
In theName field, enter the name of the tablespace.
5. Click .
l Increase the file size to 10 GB.
l Accept the other defaults.
6. Click OK. The tool generates and executes the SQL.
7. Optional: For split-schema configurations with rules and data schema in separate tablespace,repeat steps 4 - 6 by choosing the appropriate values for the data tablespace. The size of the datatablespace depends on the results of the site-dependent analysis performed by your databaseadministrator.
Pega 7 Platform Installation Guide 23
Setting up the database server

Installing the Pega 7 PlatformUse one of these methods to install the Pega 7 Platform:
l UI tool — The Installation and Upgrade Assistant is a Java-based UI tool that sets up the Pega 7Platform rules schema in the database and loads the Pega 7 Platform rules.
l Command-line script— A command-line script automates the installation of the Pega 7Platform in headless environments.
These methods use a batch process to load the rulebase. Because of the large number of rules andother data objects that must be loaded, Pegasystems strongly encourages you to install on the samenetwork as the database server. If this is not possible, install on a computer with fast, direct access tothe database server. Do not attempt to install on a virtual private network (VPN) or a multi-hop widearea network (WAN).
Preparing to installFollow these steps to extract and validate the installation files:
1. Copy the compressed distribution image to the computer that you will use to run the installation.Extract the contents of the compressed file into an empty directory.
If you are installing the software from a DVD, copy the contents of the DVD to an empty directory.
2. Verify the contents of the extracted distribution image.
The Pega-image\checksum directory provides an MD5 checksum for each the file in thedistribution image. To verify that the files downloaded and uncompressed correctly, calculate achecksum using the Jacksum tool at www.jonelo.de/java/jacksum/.For example, if you uncompressed the distribution image to Pega-image, enter the followingcommand:
java -jar jacksum.jar -m -a md5 -r -p -O outputFile.md5 Pega-image
Compare outputFile.md5 to the md5 file located in Pega-image\.checksum. The checksumvalues should be identical.
3. Choose the installation method: IUA or command line.

Running the Installation and Upgrade Assistant (IUA)Because of the large volume of data, run the IUA on the same network as the database server. If thisis not possible, run the tool on a system with fast, direct access to the database server. TheDeployment user performs these steps.
Note: The Pega 7 Platform writes command-line output to a file in the Pega-image\scripts\logsdirectory.
The installation can last for several hours and the time can vary widely based on network proximityto the database server.
To run the IUA:
1. Double-click the PRPC_Setup.jar file to start the IUA.
Note: If JAR files are not associated with Java commands on your system, start the IUA from thecommand line. Navigate to the directory containing the PRPC_Setup.jar file, and type java -jarPRPC_Setup.jar.
The IUA loads and the Pega icon is displayed in your task bar.
2. Click Next to display the license agreement.
3. Review the license agreement and click Accept.
4. On the Installer Mode screen, choose Installation and click Next.
5. Choose your database type and click Next.
6. Choose the product edition and click Next.
l Standard Edition — Install a new instance of Pega 7.2.1.
l Multitenancy Edition — Install Pega 7.2.1 in a specialized mode designed to supportsoftware-as-a-service (SaaS) run-time environments. For more information about multitenacy,see the Pega 7 Platform Multitenancy Administration Guide.
Note: Upgrading and updating from one edition to another is not supported. If you install oneedition and later decide to use a different edition, you must drop and re-create the database orcreate a new database. The schema DDLs for the two editions are not compatible.
7. Configure the database connection. The JDBC drivers allow the Pega 7 Platform application to
Pega 7 Platform Installation Guide 25
Installing the Pega 7 Platform

communicate with the database.
Note: Some of the fields on the Database Connection screen are pre-populated based on thetype of database you selected. If you edit these or any other fields on this screen, and then laterdecide to change the database type, the IUA might not populate the fields correctly. If this occurs,enter the correct field values as documented below, or exit and rerun the IUA to select theintended database type.
l JDBC Driver Class Name— Verify that the pre-populated value is accurate:
oracle.jdbc.OracleDriver
l JDBC Driver JAR Files— Click Select Jar to browse to the appropriate driver files for yourdatabase type and version. For a list of supported drivers, see the Pega 7 Platform SupportGuide.
l Database JDBC URL— Verify that the pre-populated value is accurate. For information aboutURLs, see Obtaining database connection information on page 62 Replace items in italics withthe values for your system:
jdbc:oracle:thin:@//localhost:1521/service-name-or-SID
l Database Username and Password — Enter the user name and password that youcreated for the Deployment user on your database.
l Rules Schema Name — Enter the name of the rules schema in the database.
l Data Schema Name — Enter the name of the data schema in the database. For single-schema configurations the data schema name is identical to the rules schema name.
8. Click Test Connection. If the connection is not successful, review your connection information,correct any errors, and retest. When the connection is successful, click Next to choose how toapply the data schema.
9. Optional: Specify whether you will have your database administrator manually apply the DDLchanges to the schema. These changes include the user-defined functions (UDF) supplied byPegasystems. By default, the IUA generates and applies the schema changes to your database.
l To generate and apply the DDL outside the IUA, select Bypass Automatic DDL Applicationand continue the installation. After you complete the installation, manually generate and applythe DDL and UDF. For more information, see Optional: Generating and applying DDL andAppendix D — Installing user-defined functions on page 66.
Pega 7 Platform Installation Guide 26
Installing the Pega 7 Platform

l To have the Installation and Upgrade Assistant automatically apply the DDL changes and theUDF, clear Bypass Automatic DDL Application.
10. Click Next.
11. Enter the system name and production level and click Next:
l System Name — Enter a name for your Pega 7 Platform system. To find the system name,navigate to System > Settings > System Name.
l Production Level — Enter a production level. The production level affects many securityfeatures of your system. Both the system name and production level can be changed after thesystem is running. Depending on the type of installation, choose:
5 for a system that will be used in production
4 for a preproduction system
3 for a test system
2 for a development system
1 for an experimental system
The production level can be updated from the App Explorer. Enter Data-Admin-System in thesearch field and select SysAdmin > Class > Data-Admin-System to open your system.
12. Click Start to begin loading the rulebase.
Installation logs display in the log window and are also stored in the Pega-image\scripts\logsdirectory.
During the installation, the log window might appear inactive when the IUA is processing largerfiles.
13. Click Back to return to the previous screen, and then click Exit to close the IUA.
Editing the setupDatabase.properties fileSkip this section if your installation meets all of the following criteria:
Pega 7 Platform Installation Guide 27
Installing the Pega 7 Platform

l You will use the Installation and Upgrade Assistant to install.
l You will allow the installation to automatically apply the schema changes and do not need tocreate a DDL file.
l You will not enable Kerberos authentication.
If your installation does not meet all of these criteria, follow the steps in this section to edit thesetupDatabase.properties file to configure scripts to do any or all of the following tasks:
l Install the Pega 7 Platform. Use the install.bat or install.sh script.
l Enable Kerberos authentication. Use the install.bat or install.sh script.
l Generate a DDL file of schema changes. Use the generateddl.bat or generateddl.sh script.You can use the generateddl.bat or generateddl.sh script regardless of whether you use theIUA or the command-line script to install.
l Generate user-defined functions. Use the generateudf.bat or generateudf.sh script.
l Migrate schemas. Use themigrate.bat ormigrate.sh script.
To edit the setupDatabase.properties file:
1. Open the setupDatabase.properties file in the scripts directory of your distribution image:Pega-image\scripts\setupDatabase.properties
2. Specify the properties for your system. For each property, add the appropriate value after theequal sign. See Database connection properties.
3. Save and close the file.
Database connection properties
These properties specify the settings needed to connect to the database:
l The script arguments column lists the arguments for the command-line scripts.
l The Property column lists the corresponding property in the setupDatabase.properties file.
Pega 7 Platform Installation Guide 28
Installing the Pega 7 Platform

Scriptargument
Property Description
--dbType pega.database.type Database vendor type. Enter:
oracledate
--dbSchema rules.schema.name In a single schema environment, sets rules schema and data schema.
In a split-schema configuration, sets the rules schema only.
--dbDataSchema
data.schema.name For split-schema configurations only, sets the data schema name.
--mtSystem multitenant.system Specifies whether this a multitenant system.
--dbuser pega.jdbc.username User name of the Deployment user.
--dbpassword pega.jdbc.password Password of the Deployment user. For encrypted passwords, leavethis blank.
--dburl pega.jdbc.url The database JDBC URL. For more information, see Obtainingdatabase connection information on page 62
--driverJar pega.jdbc.driver.jar Path and file name of the JDBC driver
--driverClass pega.jdbc.driver.class Class of the JDBC driver
--tempdir user.temp.dir Optional: The location of the temp directory. Set this location to anyaccessible location, for example, C:\TEMP.
--connProperties
jdbc.custom.connection.properties Optional: Semicolon-delimited list of custom JDBC properties.
(for example: prop1=value;prop2=value;prop3=value)
Optional: Enabling Kerberos authenticationKerberos is a computer network authentication protocol that allows nodes communicating over anon-secure network to prove their identity to one another in a secure manner.
To enable Kerberos for authentication, you must use the command line to install the Pega 7 Platform:
1. Edit the setupDatabase.properties file.
a. Open the setupDatabase.properties file in the scripts directory of your distribution image:Pega-image\scripts\setupDatabase.properties
b. In the “Uncomment this property section” of the file, uncomment the custom property:
jdbc.custom.connection.properties
c. Provide the correct parameters as semicolon-delimited name/value pairs. The specific
Pega 7 Platform Installation Guide 29
Installing the Pega 7 Platform

parameters depend on your security infrastructure, for example:
jdbc.custom.connection.properties=parameter1=value1;parameter2=value2;parameter3=value3;jdbc.custom.connection.properties=integratedSecurity=true;
d. Comment out all the user name and password properties so that they appear as follows:# pega.jdbc.username db username# pega.jdbc.password db password[lines removed here]# pega.jdbc.username=ADMIN# pega.jdbc.password=ADMIN
e. Save and close the file.
2. Configure your database to enable Kerberos functionality. This might include additional vendor-specific JDBC driver configuration, or other setup procedures. See the Oracle documentation fordetails.
3. Continue at Installing from the command line.
Installing from the command lineBecause of the large volume of data, run the command-line script on the same network as thedatabase server. If this is not possible, run the script on a system with fast, direct access to thedatabase server. To use the install.bat or install.sh script, first configure thesetupDatabase.properties file.
Note: If no additional arguments are passed to the script, the script defaults to the values of theproperties set in the setupDatabase.properties file. See Editing thesetupDatabase.properties file.
1. If you have not done so already, edit the setupDatabase.properties file.
a. Open the setupDatabase.properties file in the scripts directory of your distribution image:Pega-image\scripts\setupDatabase.properties
b. Configure the connection properties. For more information about parameter values, seeProperties file parameters.
Pega 7 Platform Installation Guide 30
Installing the Pega 7 Platform

# Connection Informationpega.jdbc.driver.jar=/path-to-the-database-JAR-file/DRIVER.jarpega.jdbc.driver.class=database driver classpega.database.type=database vendor typepega.jdbc.url=URL of the databasepega.jdbc.username=Deployment usernamepega.jdbc.password=passwordpega.rules.schema=rules-schema-namepega.data.schema=data-schema-name
c. Save and close the file.
2. Open a command prompt and navigate to the scripts directory.
3. Type install.bat or ./install.sh to run the script.
Installing the rulebase can take several hours, depending on the proximity of the database to thesystem running the installation script. When the installation is complete, you see a BUILDSUCCESSFUL message.
Note: The Pega 7 Platform writes command-line output to a file in the Pega-image\scripts\logsdirectory.
Pega 7 Platform Installation Guide 31
Installing the Pega 7 Platform

Setting up the application serverThis section describes how to configure your WebSphere application server:
l Ensure that your application server meets the prerequisites.
l Configure the application server.
l Deploy the Pega 7 Platform applications.
Preparing to configure the application serverComplete these steps before you configure the application server:
1. Ensure that your operating system references a common time standard such as the one availableat www.time.gov.
l On UNIX, this is the Network Time Protocol daemon, ntpd.
l On Windows, you can set a similar service through the clock settings in the Windows ControlPanel or task bar.
See the documentation for your specific hardware operating system for information about settingthis critical service.
2. Ensure that the following ports are open and available:
l Search — One TCP port in the range 9300-9399 (the default is 9300). This port is used forinternal node-to-node communication only, and should not be externally accessible.
l Cluster communication — Leave open the port range 5701-5800. By default, the system beginswith port 5701, and then looks for the next port in the sequence (5702, followed by 5703 andso on). To override the default port range, set the value of cluster/hazelcast/ports in theprconfig.xml file.
Note: The number of available ports in this range must be greater than or equal to the greatestnumber of JVMs on any one node in the cluster. For example, if three JVMs are on one node, andseven JVMs on another node, at least seven ports must be available.
3. Obtain the following information from your database administrator to determine the databaseconnection URL:

l Connection method — Service or SID
l Host name
l Port number
l Service or SID name
4. Add a headless AWT setting to the Java options in the configuration file that is passed to Java toallow the Pega 7 Platform to render and display graphics:
a. Open the configuration file that is passed to Java at startup. The specific file name and locationis site-specific.
b. Save and close the file.
EAR file and WAR file considerations
The Pega 7 Platform application archive is available both as an EAR file and a WAR file. Using theEAR file enables you to add advanced J2EE features as your application grows or when you migrate toa production environment.
Before you continue, decide whether you will deploy the EAR file or the WAR file.
Data source resources, data source entries, and default schema entries
The application server configuration defines the required data source resources, data source entries,and default schema entries:
l Data source resources — Data source resources define the Pega 7 Platform database connectioninformation. The number of data source resources depends on whether you have a single-user ordual-user configuration:
All systems require one data source resource for the Base user.
Dual-user configurations also require a second data source resource for the Admin user.
l Data source entries — Data source entries specify which data source resource to use for databaseoperations in each schema. For dual-user environments, you must explicitly define two additionaldata source entries for the Admin user:
Admin data source entry for the rules schema
Admin data source entry for the data schema
Pega 7 Platform Installation Guide 33
Setting up the application server

l Default schema entries — Every system requires two entries that define the default schemanames:
Default rules schema, for example, PegaRULES.
Default data schema, for example, PegaDATA. For single-schema configurations, the defaultdata schema name is the same as the default rules schema name.
Configuring the application serverThese procedures describe a typical method for setting configuration properties in a basicinstallation.
Creating binding identifiers
To create new binding identifiers:
1. In the IBM WebSphere Administrative Console, select Environment > Naming > Name SpaceBindings to display theName space bindings page.
2. Create the rules schema binding identifier:
a. For the Scope, select server, and click New.
b. For the binding type, select String and click Next.
c. On the Step 2: Specify basic properties screen, enter the following values:
l Binding identifier: PegaRULESDefaultSchema
l Name in the name space relative to lookup name prefix:prconfig/database/databases/PegaRULES/defaultSchema
l String Value: the schema name of your rules schema.
d. Click Next.
e. On the Summary panel, click Finish.
f. Click Save in theMessages box at the top of theName Space Bindings screen.
3. Repeat step 2 to create the data schema binding identifier, but specify the following properties onthe Step 2: Specify basic properties screen:
Pega 7 Platform Installation Guide 34
Setting up the application server

l Binding identifier: PegaDATADefaultSchema
l Name in the name space relative to lookup name prefix:prconfig/database/databases/PegaDATA/defaultSchema
l String Value: the schema name of your data schema
4. Optional: For dual-user configurations, repeat step 2 to add a binding identifier for the Admin useron the data schema. Specify the following properties on the Step 2: Specify basic propertiesscreen:
l Binding identifier: dataSourceAdmin
l Name in the name space relative to lookup name prefix:prconfig/database/databases/PegaDATA/dataSourceAdmin
l String Value: the JNDI name of the Admin data source for your data schema
5. Optional: For dual-user configurations, repeat step 2 to add a binding identifier for the Admin useron the rules schema. Specify the following properties on the Step 2: Specify basic propertiesscreen:
l Binding identifier: dataSourceAdmin
l Name in the name space relative to lookup name prefix:prconfig/database/databases/PegaRULES/dataSourceAdmin
l String Value: the JNDI name of the Admin data source for your rules schema
6. Click Save in theMessages box at the top of theName Space Bindings screen.
Including IBM WebSphere default packages
Confirm that your installation of the IBM WebSphere application server includes all the defaultpackages.
You must include the package EJBDeploy tool for pre-EJB 3.0 modules which the Pega 7Platform requires.
WebSphere profiles
Run the IBM WebSphere Profile Management Tool to create an application server profile in which torun the Pega 7 Platform.
Pega 7 Platform Installation Guide 35
Setting up the application server

You can use either the Typical profile creation or the Advanced profile creation option. Bothmethods allow you to choose whether to apply Administrative Security to require users to log in witha password to start the Administrative Console.
l The Typical profile assigns default values for the Profile name, Node name, Host name, andaccess ports.
On Windows platforms, the Typical option creates the application server as a Windows service bydefault. This means that you must manage the profile as a Windows service, for example whenstarting and stopping the server.
l The Advanced Profile lets you change the defaults. If you choose this option, youmust chooseto deploy the Administrative Console.
When you create the profile, record the following information for use later in the configuration.
l Profile name
l User name and password for the Administrative Console — if you choose to apply AdministrativeSecurity
l Port numbers for the profile, including:Administrative Console Port
HTTP transport port
SOAP connector port
If you are unsure about these requirements, check with your application server administrator.
Using the IBM WebSphere Administrative Console
Start the server for the new profile; launch the IBM WebSphere Administrative Console, and log in.
On Windows platforms, you can start the profile server and launch the IBM WebSphereAdministrative Console from the Start menu, for example:
Start > All Programs > IBM WebSphere > IBM WebSphere Application Server V8.5 >Profiles > AppSvr01 > Start the server.
To launch the administrative console:
Start > All Programs > IBM WebSphere > IBM WebSphere Application Server V8.5 >Profiles > AppSvr01 > Administrative Console.
Pega 7 Platform Installation Guide 36
Setting up the application server

Setting JVM properties
Follow these steps to set the JVM properties.
1. In the IBM WebSphere Administrative Console, on the left side of the screen, click Servers >Server Types > WebSphere application servers.
2. Select the server on which the Pega 7 Platform will run. The Configuration tab for the serveropens.
3. In the Server Infrastructure section, expand Java and Process Management and clickProcess Definition. The Configuration tab opens.
4. In the Additional Properties section, click Java Virtual Machine to display its Configurationtab.
5. Select Verbose garbage collection.
6. Set the JVM memory options to increase the amount of system memory allocated to theapplication server running the Pega 7 Platform:
l Initial Heap Size (Xms) — Between 4 GB - 8 GB, based on monitoring of memory usage andgarbage collection frequency
l Maximum Heap Size (Xmx) — Between 4 GB - 8 GB or larger, depending on your systemconfiguration. See Application server memory requirements for more information.
If your application server uses the recommended Oracle JVM, and you are using Java 7, also addthe PermSize and MaxPermSize settings. (Java 8 does not require you to set PermSize orMaxPermSize.)
l PermSize (-XX:PermSize) — 512 MB
l MaxPermSize (-XX:MaxPermSize) — 1024 MB
If the server does not have enough memory allocated to run the Pega 7 Platform, the system canhang without an error message. The correct memory settings depend on your server hardware,the number of other applications, and the number of users on the server, and might be larger thanthese recommendations.
7. In the Generic JVM Arguments field, enter the following argument to compress references tooptimize heap space:
Pega 7 Platform Installation Guide 37
Setting up the application server
-Xcompressedrefs
8. In the Generic JVM Arguments field, enter these arguments:
-Xverbosegclog:<garbage log collection file name>
9. In the Generic JVM Arguments field, enter the following to set the garbage collection policy toconcurrent collector.
-Xgcpolicy:gencon
or
-Xgcpolicy:optavgpause
10. In the Generic JVM Arguments field, enter the following argument to enable AWT for graphicalreports:
-Djava.awt.headless=true
11. Click Apply. A message is displayed at the top of the screen explaining that the changes weremade.
12. Click Save in the confirmation message at the top of the page to save these changes to the masterconfiguration.
Create URL providers
This procedure sets the required URL Pega reference and an explicit temporary directory for the Pega7 Platform. The temporary directory stores static data. It is important that the directory be properlyspecified and accessible to the Base user.
In IBM WebSphere, specify this directory as a JNDI reference to a URL object.
1. In the IBM WebSphere Administrative Console, select Resources > URL > URL Providers in theleft frame.
2. Set the Scope level to server and click Default URL Provider. The default URL configurationpage opens.
3. Under the Additional Properties section, click the URLs link to display the URLs listing page.
4. Click New to display the Configuration page.
Pega 7 Platform Installation Guide 38
Setting up the application server

5. Enter the following values to define a URL for the NULL file that the Pega 7 Platform uses todiscard erroneous error messages:
l Name— PRPCnone
l JNDI name— url/pega/none
l Specification
Windows — file:///nul
UNIX/Linux — file:///dev/null
6. Click OK, and then click Save in the confirmation message.
7. From the URLs page, click New again to return to the Configuration page.
8. Complete this form to create a URL specification for a temporary directory to store static data.
l Name— PegaTempDir
l JNDI — url/initialization/explicittempdir
l Specification — file:///full-path-to-temporary directoryEnter the path using forward slashes for both Windows and UNIX platforms. For example, onWindows the value might be: file:///D:/Temp/PegaTempDir.
Note: The directory names you enter here are case sensitive. Be sure to enter the names of thedirectories exactly as they have been created on your system.
Note: If the directory you specify does not exist, the Pega 7 Platform attempts to allocate it. It isgood practice to allocate the directory on the system before specifying it here. The user that ownsthe Java process must have the appropriate permissions to use this directory, including writeaccess. In particular, if you have J2 security enabled, ensure that this directory is accessible underyour security policy.
In a clustered deployment, each instance must have its own temporary directory. You cannotshare a temporary directory with more than one instance of the Pega 7 Platform.
9. Click OK, and then click Save in the confirmation message.
Pega 7 Platform Installation Guide 39
Setting up the application server
Creating a JDBC provider
1. In the IBM WebSphere Administrative Console, click Resources > JDBC > JDBC Providers todisplay the JDBC Providers page.
2. In the Scopes list, select server.
3. Click New to display the JDBC provider wizard.
4. Complete the fields as follows:
l Database — Oracle
l Provider type — Oracle JDBC Driver
l Implementation — Connection pool data source
l In the name and description fields, accept the defaults or enter a descriptive name andexplanatory description for the driver you selected.
5. Click Next.
6. In the directory location field, confirm the entry, or enter the path to the JDBC driver JAR file,ojdbc7.jar, driver class file or files listed in the class path field. See the Platform Support Guidefor more information about supported drivers.
7. Click Next to display the Summary screen.
8. Confirm that the settings are correct, and click Finish to return to the JDBC Providers page.
9. Click Save in the confirmation message.
Creating a data source
Follow these steps to create the data source for the Base user. If you are using the dual-userconfiguration, repeat these steps to create a data source for the Admin user.
1. In the IBM WebSphere Administrative Console, click Resources > JDBC > JDBC Providers todisplay the JDBC Providers page.
2. On the JDBC providers page, click on the name of the provider you just created to display theGeneral Properties page.
3. Under the Additional Properties heading, click Data Sources.
Pega 7 Platform Installation Guide 40
Setting up the application server
4. Click New to display the data source wizard.
5. In the Step 1, Enter basic datasource information screen, enter the following information:
l In the Data Source name field, enter the correct name for this data source:
For the Base user, enter PegaRULES.
For the Admin user, enter AdminPegaRULES.
l In the JNDI name field, enter the correct name:
For the Base user, enter jdbc/PegaRULES.
For the Admin user, enter jdbc/AdminPegaRULES.
Tip: JNDI settings are case-sensitive.
6. Click Next to display the Step 2, Enter database specific properties for the data sourcescreen.
7. Enter the connection information for your database:
jdbc:oracle:thin:@//localhost:port/service-name-or-SID
8. In Data store helper class name, specify the Oracle data store helper.
9. Clear Use this data source in container managed persistence (CMP).
10. Click Next to display the Setup security aliases page.
11. Click Next to display the Summary page.
12. On the Summary page, confirm that the settings are correct and click Finish to return to the JDBCProviders page.
13. Click Save in the confirmation message.
14. On the Data Sources page, click the datasource link in the Name column to open the Configurationpage for this data source. Then, under Additional Properties, click the Custom Propertieslink to display the Custom Properties page.
15. Click New to define additional properties for your database connection.
Pega 7 Platform Installation Guide 41
Setting up the application server

After creating each property, click OK to save the property, and click New again to create the nextproperty. Set the Type field appropriately for the Value of the connection property.
The Pega 7 Platform requires the following properties; if these properties already exist, modify thevalue if needed:
l Name:webSphereDefaultIsolationLevel Value: 2
16. After you have set the necessary properties, click the Save link in the message at the top of thepage.
17. Optional: For dual-user configurations, repeat these steps to create the AdminPegaRULES datasource.
Defining database authentication credentials
Follow these steps to define the database authentication credentials for the Base user. For dual-userconfigurations, repeat these steps to define credentials for the Admin user.
1. In the link path at the top of the IBM WebSphere Administrative Console, click the name of thedata source, either PegaRULES or AdminPegaRULES to return to the properties page.
2. Under the Related Items section, click the link JAAS – J2C authentication data.
3. Click New to specify the General Properties.
4. Complete this form as follows:
l In the Alias field enter any name that uniquely identifies this J2C entry.
l In theUser ID and Password fields, enter the user name and password:
For the PegaRULES data source, enter the credentials for the Base user.
For the AdminPegaRULES data source, enter the credentials for the Admin user.
5. Click OK to return to the authentication data entries page, and click Save in the Messages sectionat the top of the page.
6. In the link path at the top of the page, click the name of the data source to return to the propertiespage.
7. In the Security Settings section near the bottom of the page, use the Component-managed
Pega 7 Platform Installation Guide 42
Setting up the application server
authentication aliasmenu to select the J2C alias you just created.
8. Click OK, and then Save in the confirmation message on the Data sources page.
9. On the Data sources page, select the check box for the data source and click Test Connection toconfirm your data source configuration.
10. Optional: For dual-user configurations, repeat these steps for AdminPegaRULES.
Configure IBM WebSphere connection pool properties
Follow these steps to configure the properties for the PegaRULES data source. For dual-userconfigurations, repeat these steps for the AdminPegaRULES data source.
At a minimum, set the maximum data connections to 50.
Note: You should determine the best value of this setting based on your application architecture,usage profile and environment considerations. The database connection pool should be no smallerthan the Work Manager pool.
To set the maximum connections:
1. In the IBM WebSphere Administrative Console, open the Data sources page: Resources > JDBC>Data sources.
2. Click the name of the data source, either PegaRULES or AdminPegaRULES.
3. Under Additional Properties, click Connection pool properties.
4. Set theMaximum connections value to 50 or higher based on your environment needs. Seethe PDN article How to configure a non-blocking UI using Asynchronous Declare Pages for moreinformation about connections.
5. Click Apply.
6. Click Save in the Messages pane at the top of the screen to save the configuration changes.
7. Optional: For dual-user configurations, repeat these steps for the AdminPegaRULES data source.
Configuring the IBM WebSphere WorkManager
To deploy the Pega 7 Platform archive, complete the following procedures to define a WorkManager.The Pega 7 Platform uses the WorkManager to run asynchronous tasks to support internalcomponents such as agents, services, daemons, and child-requesters.
Pega 7 Platform Installation Guide 43
Setting up the application server

Complete the following steps to define the WorkManager:
1. In the navigation menus on the left side of the IBM WebSphere Administrative Console, selectResources> Asynchronous Beans > Work managers.
2. Set the Scope to server.
3. Click New.
4. Complete the Configuration page for the Work Manager.
l Name— Work Manager name, for example, PegaWorkManager.
l JNDI name— wm/PegaWorkManager
l Service — Security
l Maximum number of threads — 20
l Clear the Growable check box.
5. Click OK.
6. In the Messages box at the top of the page, click Save.
Set HTTP transport channel custom property
To support the ability to open files attached to work objects in the Pega 7 Platform, set customproperty CookiesConfigureNoCache to false on the transport chain in the Web Container settingsfor the Pega 7 Platform server.
Note: For earlier versions of IBM WebSphere, custom property CookiesConfigureNoCache wasset to false by default so that cookies could be cached. The current version of IBM WebSphere hasthis property set to true by default. Because the Pega 7 Platform requires this caching to allow usersto open attached files directly from a work object, you must change the property setting.
1. In the IBM WebSphere Administrative Console, select Servers > Server Types > WebSphereapplication servers to display the Application servers page.
2. Click the name of the Pega 7 Platform server to display the Configuration page.
3. Under Container Settings, expandWeb Container Settings, and then clickWeb Containertransport chains.
Pega 7 Platform Installation Guide 44
Setting up the application server

This console displays the listing page for transport chains.
4. Click the name of the appropriate transport chain.
l If your site is using the default transport configuration for this server, selectWCInboundDefault.
l If you have enabled SSL for the Pega 7 Platform port,WCInboundDefaultSecure.
l If your site has defined a custom transport chain for this server, select that chain name.
The console displays the Configuration page for the selected transport chain.
5. Under Transport Channels on this page, click HTTP inbound channel.
The console displays the Configuration page for the selected transport channel.
6. Under Additional Properties, click Custom Properties.
The console displays the listing page for this channel’s custom properties.
7. Click New
The console displays the form for a new custom property.
8. Complete this form.
l In theName field, enter CookiesConfigureNoCache
l In the Value field, enter False
9. Click OK, and then Save in the Messages box on the top of the Custom Properties listing page.
Configure pass-by-reference property
To improve performance, enable pass by reference in the WebServer application server ObjectRequest Broker services.
1. In the IBM WebSphere Administrative Console, select Servers > Server Types > WebSphereapplication servers to display the Application servers page.
2. Click the name of your Pega 7 Platform server to display the Configuration page.
3. Under Container Settings, expand Container Services, and then click ORB service.
Pega 7 Platform Installation Guide 45
Setting up the application server
4. Select Pass by Reference.
5. Click OK.
6. Click Save in the Messages box at the top of the Application servers page to save the setting.
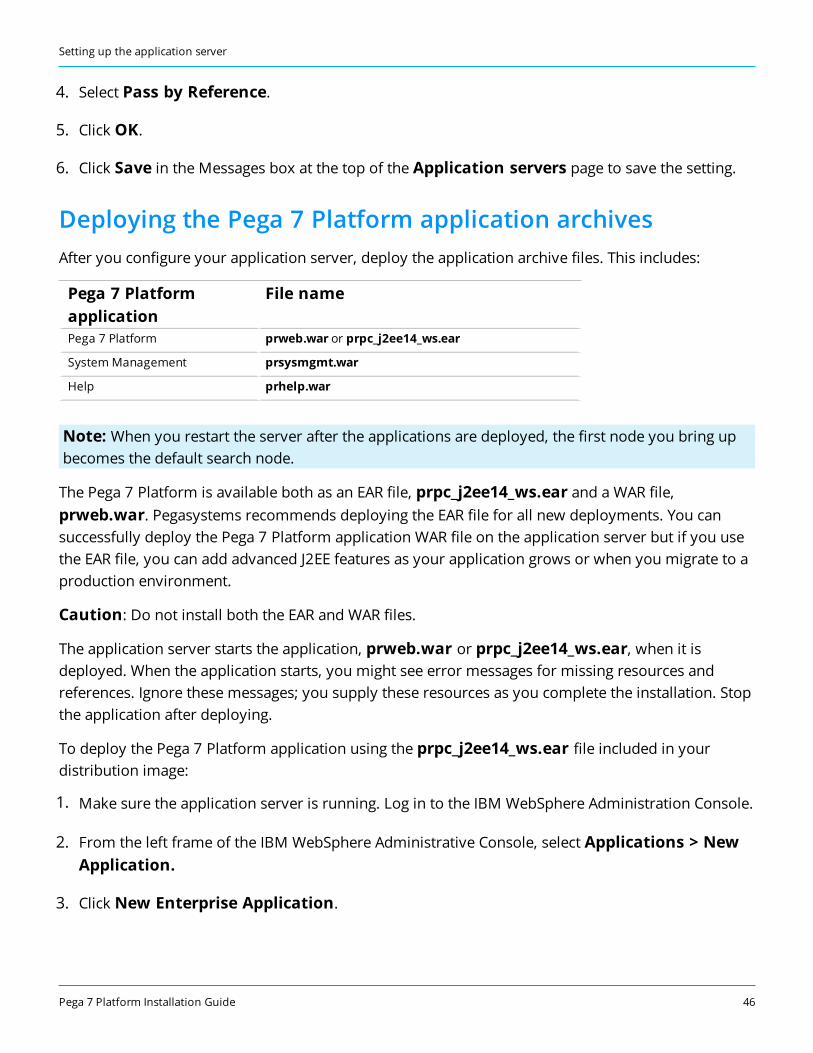
Deploying the Pega 7 Platform application archivesAfter you configure your application server, deploy the application archive files. This includes:
Pega 7 Platformapplication
File name
Pega 7 Platform prweb.war or prpc_j2ee14_ws.ear
SystemManagement prsysmgmt.war
Help prhelp.war
Note: When you restart the server after the applications are deployed, the first node you bring upbecomes the default search node.
The Pega 7 Platform is available both as an EAR file, prpc_j2ee14_ws.ear and a WAR file,prweb.war. Pegasystems recommends deploying the EAR file for all new deployments. You cansuccessfully deploy the Pega 7 Platform application WAR file on the application server but if you usethe EAR file, you can add advanced J2EE features as your application grows or when you migrate to aproduction environment.
Caution: Do not install both the EAR and WAR files.
The application server starts the application, prweb.war or prpc_j2ee14_ws.ear, when it isdeployed. When the application starts, you might see error messages for missing resources andreferences. Ignore these messages; you supply these resources as you complete the installation. Stopthe application after deploying.
To deploy the Pega 7 Platform application using the prpc_j2ee14_ws.ear file included in yourdistribution image:
1. Make sure the application server is running. Log in to the IBM WebSphere Administration Console.
2. From the left frame of the IBM WebSphere Administrative Console, select Applications > NewApplication.
3. Click New Enterprise Application.
Pega 7 Platform Installation Guide 46
Setting up the application server
4. Click Browse and select prpc_j2ee14_ws.ear from the archives directory on your installationmedia.
5. Click Open, and then click Next.
6. Select Detailed - Show me all installation options and parameters.
This option allows you to review all the installation options for the application, including thedefault bindings and resource mappings.
7. Click + to expand Choose to generate default bindings and mappings.
8. Complete this page.
l Check Generate Default Bindings.
l Check Use default virtual host name for Web and SIP modules.
l Leave the other default settings unchanged, and click Next.
9. Scroll to the bottom on this page and click Continue to display a wizard where you can specifyinstallation options.
This security file allows the Pega 7 Platform to run when J2EE Security Checking is enabled.
This section of the installation process is a series of steps under the general heading of InstallNew Application.
10. For Step One, accept the defaults and click Next.
11. Continue through the next steps, either accepting the defaults, or customizing for yourorganization, as needed.
12. Locate the step where youMap resource references to resources.
13. In theMap resource references to resources step, there are three rows that include"explicittempdir" in the Resource Reference column. Use the find tool on your browser to find thecorrect rows for:
l EJB EngineCMT bean
l EngineBMT beans
Pega 7 Platform Installation Guide 47
Setting up the application server

l prweb.war module
14. For each of the three rows, change the value in the Target Resource JNDI Name field to thetemp directory, for example url/initialization/explicittempdir. This maps the location youspecified in the URL provider you created to the corresponding Resource Reference in theapplication, so that the application will use the location for the PegaTempDir. Use the Browsebutton and Apply to change each of the three values.
15. Click Next.
Depending on your configuration, you might see a set of warnings related to missing resourcereferences. These warnings are informational. Review the warnings, and then continue.
Note: These are resource references that are defined in web.xml, the deployment configurationfiles for the application, but not mapped to resource definitions in your application. In the page,Map resources to references, they are mapped to the Target Resource JNDI Nameurl/pega/none, indicating that they are not used. Pegasystems provides these references forJ2EE compliance, but their use is optional. You can continue with the deployment.
16. At the bottom of the Warnings page, click Continue.
17. Click Next as needed to continue through the remaining steps, accepting the defaults, or settingthem to the requirements of your organization.
18. On the Summary page, click Finish.
The system begins installing the EAR file, which can take a few minutes. When the installationcompletes successfully, WebSphere displays a success message similar to thefollowing: "Application Pega 7 Platform installed successfully."
19. Click Save directly to the master configuration.
20. Stop the application.
Deploying the SystemManagement Application and on-line help
In addition to the Pega 7 Platform application, you must also deploy the online help application,prhelp.war, and the System Management Application, prsysmgmt.war.
For more details on the System Management Application, refer to the System ManagementApplication Reference Guide on the PDN.
Complete the following steps to deploy prsysmgmt.war and prhelp.war.
Pega 7 Platform Installation Guide 48
Setting up the application server

1. In the Preparing for the application installation screen, select Local file system and clickBrowse to select the prsysmgmt file.
If you do not see the Preparing for the application installation screen, from the left frame,select Applications > New Application.
2. Click Browse and navigate to select the application file, either prsysmgmt.war orprsysmgmt.ear from the archives directory in your installation media.
3. Click Open, and then click Next to begin the installation.
4. Click Detailed - Show all installation options and parameters.
5. Expand Choose to generate default bindings and mappings.
6. Select the Generate Default Bindings check box, and leave the other settings at their defaults.
7. Click Next. You might see some security warnings. These are informational only.
8. Click Continue to bypass the warnings. The Install New Application opens.
9. Accept the defaults and click Next until you get to theMap context roots for Web Modulesstep.
10. In theMap context roots for Web Modules step, enter prsysmgmt as the context root, andclick Next.
11. Accept the defaults and click Next on the remaining steps.
12. On the Summary page, click Finish.
IBM WebSphere displays a message, Installing . . ., and updates it with information during theinstallation. When the installation is complete, you see a success message.
13. Click Save to save the changes to the master configuration and return to the first page of theinstallation series.
14. Repeat steps 2 - 13 to deploy prhelp.war using the same procedure as for prsysmgmt.war.
Use the name of the file, prhelp, as the context root and deploy to the same server.
Pega 7 Platform Installation Guide 49
Setting up the application server

Assigning the PegaDiagnosticUser Role to your System ManagementApplication users
You can use the System Management Application to monitor and control caches, agents, requestors,listeners, and other processing. For more information, see the System Management ApplicationReference Guide on the PDN.
Users accessing the System Management Application must be assigned the role PegaDiagnosticUser.If the user does not have this role they will be challenged for authentication when they attempt toaccess the System Management Application.
The default deployment configuration assigns the PegaDiagnosticUser role to administrative users.To restrict access to the System Management Application, use your application server tools to assignthe PegaDiagnosticUser role to any other users that must be able to access the System ManagementApplication.
The role PegaDiagnosticUser is associated with the System Management Application through asecurity-constraint element on the Diagnostic Data servlet defined in the prweb.war application’sweb.xml file. In EAR file deployments, the web.xml file is located in the prweb.war file packagedinside the prpc_*.ear file:
<security-constraint><web-resource-collection>
<web-resource-name>Diagnostic Data</web-resource-name> <description>Serves diagnostic files generated by the JMX
client </description><url-pattern>/DiagnosticData</url-pattern><http-method>GET</http-method><http-method>POST</http-method>
</web-resource-collection><auth-constraint>
<role-name>PegaDiagnosticUser</role-name></auth-constraint>
</security-constraint>
If you do not want to restrict access to the System Management Application, edit the web.xml file anddelete the <security constraint> element.
Changing this setting in the web.xml file might require redeploying the PegaRULES Application.
Note: If you want to allow limited access to the SMA, use the Map Special Subjects dropdown toselect All Authenticated in Application’s Realm, or clickMap Users to assign the role to specificusers.
To assign the role:
Pega 7 Platform Installation Guide 50
Setting up the application server

1. Select Applications > Application Types > WebSphere enterprise applications.
2. Click the name of the Pega 7 Platform core application, for example prpc_j2ee14_ws.ear, toopen the Configuration page.
3. In the Detail Properties section, click Security role to user/group mapping.
l If you installed prpc_j2ee14_ws.ear, the PegaDiagnostic role is set to Everyone:
l If you installed prweb.war, the PegaDiagnosticUser role is set to None.
4. Select PegaDiagnosticUser and set the proper access level for your site.
l If you do not want to allow access to the SMA, use theMap Special Subjects dropdown toselectNone.
l If you want to allow limited access to the SMA, use theMap Special Subjects dropdown toselect All Authenticated in Application’s Realm, or clickMap Users . . . to assign therole to specific users.
l If you want to allow open access to the SMA, use theMap Special Subjects dropdown toselect Everyone.
Pega 7 Platform Installation Guide 51
Setting up the application server
Post-deployment configurationThis section describes the post-deployment activities that are performed in the system after you havecompleted the setup and configuration of your WebSphere application server and deployed thearchives.
l Starting applications
l Logging in to the Pega 7 Platform
l Changing the administrator password
l Enabling help and System Administration applications
l Configuring Directed Web Access
l Configuring a load balancer to log XFF headers
l Configuring search index host node settings
l Installing Industry applications
Starting the Pega 7 Platform applicationsEnsure that the application server is running and start the prsysmgmt, prweb, and prhelpapplications.
To start the application:
1. In the IBM WebSphere administrative console, select Applications > Application Types >WebSphere enterprise applications.
2. Select the three applications and click Start.
The application status turns green and the system displays a success message.
Logging in to the Pega 7 PlatformTo test the installation and index the rules, log in to the Pega 7 Platform web application.
1. Navigate to the PRServelet URL, replacing the server and port values with your specific values.
http://server:port/prweb/PRServlet
2. Use the following credentials to log in:

l User ID — [email protected]
l Password — install
After logging in, the Pega 7 Platform indexes the rules in the system to support full-text search.During the index process, there might be a delay in the responsiveness of the Pega 7 Platform userinterface. The process usually takes from 10 to 15 minutes to complete depending on your systemconfiguration.
If the index process ends without generating an error message, the installation is successful.
Changing the administrator passwordBecause the default password for the system administrator is widely published, it is important toprotect your system after an installation by changing the password for the [email protected] ID.
To change the password:
1. From theOperator Menu located to the right of the Designer Studio header, select the Profileoption.
2. Click Change Password.
3. Verify the Current Password, and then enter and confirm theNew Password.
4. Click Save.
Enabling online help and the System ManagementApplicationThe online help and the System Management Application are accessed through a URL and can bedeployed to any application server.
To enable these applications:
1. Click Designer Studio > System > Settings > URLs.
2. In theOnline Help URL field, enter the URL for the Help application in the format:
http://host:port/prhelp
3. In the SMA URL field, enter the URL for the System Management Application in the format:
Pega 7 Platform Installation Guide 53
Post-deployment configuration

http://host:port/prsysmgmt/getnodes.action
4. Click Save.
Note: You must log out of the Pega 7 Platform and log back in for these changes to take effect.
Configuring Directed Web AccessA Directed Web Access (DWA) address allows you to grant one-time access to external users to enablethem to process an assignment in your application. When you grant the access, the Pega 7 Platformsends an email to the external user; this email includes a URL to access the application and canidentify a proxy server.
To configure the URL:
1. Click Designer Studio > System > Settings > URLs.
2. In the Public Link URL field, enter the URL that you want to provide in emails in this format:
http://host:port/prweb
3. Click Save.
4. Log out and log back in to Designer Studio for these changes to take effect.
Optional: Configuring the Pega 7 Platform to returnabsolute URLsIn some scenarios, you might want the Pega 7 Platform to return an absolute URL instead of arelative URL. Pega 7 Platform uses XF* headers to dynamically formulate absolute URLs withoutstatic configuration, when deployed behind a load balancer or reverse proxy.
Follow these steps to log the address of the Pega 7 Platform instance in XF* HTTP headers:
1. Enable XF* logging on your load balancer. See your load balancer documentation for informationabout how to enable logging.
2. Ensure that the web application context path of the load balancer and the Pega 7 Platform is thesame.
3. Open the configuration console or file of your load balancer or reverse proxy:
4. Update the configuration file with the following XML code:
Pega 7 Platform Installation Guide 54
Post-deployment configuration

The following configuration settings are for reference only. The settings specified in yourconfiguration file take precedence over the settings specified here.
when HTTP_REQUEST_SEND{
clientside{
HTTP::header insert X-Forwarded-Host [HTTP::host]HTTP::header insert X-Forwarded-Proto http
}}
5. Update the configuration file with the following XML code:
The following configuration settings are for reference only. The settings specified in theprconfig.xml file take precedence over the settings specified here.
l For Apache:
<VirtualHost *:80>ServerName your_server_nameProxyRequests off<Proxy *>
Order deny,allowAllow from all
</Proxy><Location "/prweb">
ProxyPass http://your_server_name:port /prweb/</Location>RequestHeader set X-Forwarded-Proto "http"
</VirtualHost>
l For F5 BIG-IP:
when HTTP_REQUEST_SEND{clientside
{HTTP::header insert X-Forwarded-Host [HTTP::host]HTTP::header insert X-Forwarded-Proto http
}}
6. Optional: If your load balancer or reverse proxy does not include the port number in the serverURL, insert a port number (X-Forwarded-Port) in the HTTP header.
Pega 7 Platform Installation Guide 55
Post-deployment configuration

Configuring search index host node settingsThe Pega 7 Platform supports full-text search for rules, data instances, and work objects. By default,search indexing is enabled and indexing starts when you start the application server after installingthe Pega 7 Platform. The first node that starts after installation becomes the default initial searchnode. The default index directory is PegaSearchIndex in your temporary directory.
After the search indexes are completely built, you can change the default settings. Do not stop orbring down the default node until the search indexes build completely. The Search Landing Pagedisplays the status.
Follow these steps to configure the search index host node settings:
1. Check your directory sizes. Ensure that the directories for all Elasticsearch host nodes havesufficient free space to hold the Elasticsearch indexes.
2. Open the Designer Studio > System > Settings> Search landing page and expand SearchIndex Host Node Setting.
3. Specify one node to set as the Host Node. If necessary, delete all but one node. This is the node onwhich Elasticsearch indexes will be built.
Note: Do not include more than one node in the Search Index Host Node Setting list.Including more than one node in the list at this point might cause duplicate index builds andcompromise system performance. You will create additional nodes later in this process.
4. Verify the Search Index Host Node ID and the Search Index File Directory.
5. Expand Automated Search Alerts, and enable Automatically Monitor Files.
6. Click Submit to save the settings.
7. After the first indexing is complete, add any needed additional host nodes. The system replicatesthe indexes on the new nodes.
Note: You must configure a minimum of two Elasticsearch host nodes. Pegasystemsrecommends that you configure a minimum of three nodes for maximum fault tolerance. Youmight need more than three nodes depending on the size of your cluster.
8. To enable communication between Elasticsearch host nodes in the cluster, open a TCP port in therange 9300-9399 on each node. (By default, Elasticsearch uses port 9300.) These ports are usedfor internal node-to-node communication only, and should not be externally accessible.
Pega 7 Platform Installation Guide 56
Post-deployment configuration

Resizing the Pega 7 Platform log filesThe initial log file size is 50 MB. After the installation is complete, increase the size of the log files. Thespecific size will depend on your environment and the size of your application. Contact PegasystemsGlobal Customer Support for more information about log file sizes.
Resizing the databaseMonitor the database use carefully. As development begins, the size of the database will need toincrease significantly, depending on your use of the Pega 7 Platform and the number of users.
Installing Industry applicationsInstall any Industry applications now. Follow the instructions in the Installation Guide for yourIndustry applications.
Caution: If you plan to install Industry applications on top of the Pega 7 Platform, grant thedatabase user permissions, including SELECT_CATALOG_ROLE as described in Database users.Some Industry applications use triggers. During startup, the Pega 7 Platform checks for triggers thatreference the updates cache and rule view tables; if these triggers exist, the Pega 7 Platform attemptsto drop them. If the user does not have the correct permissions, the Pega 7 Platform cannot drop thetriggers and fails to start up.
If you installed the Industry applications before you deployed the Pega 7 Platform, the Pega 7Platform automatically drops the triggers and this error does not occur.
Enabling server-side screen captures for applicationdocumentsRegardless of which application server platform you use, you must set up a Tomcat server to supporttaking and storing screen captures on a server rather than on a client. By taking and storing screencaptures on a server, you avoid client-side limitations, such as browser incompatibilities or clientsoftware requirements.
Tip: As a best practice, virtually install Tomcat and deploy the prScreenShot.war file on the sameserver that is running the Pega 7 Platform. Otherwise, use a standalone Linux or Windows server. Ifyou use a Linux server, you must include the following components:
l fontconfig
l freetype
Pega 7 Platform Installation Guide 57
Post-deployment configuration

l libfreetype.so.6
l libfontconfig.so.1
l libstdc++.so.6
You can include screen captures in an application document that is generated by the DocumentApplication tool. Screen captures provide stakeholders with a realistic picture of an application's userinterface. Install a PhantomJS REST server to include screen captures in an application document.
1. Download the following WAR file: Pega_DistributionImage\Additional_Products\PhantomJS\prScreenShot.war
2. Deploy the WAR file on a Tomcat server.
3. Update the tomcat-users.xml file to add the following role and user. This file is located at\apache-tomcat-XX\conf\ tomcat-users.xml.
l Set the role:
<role rolename="pegascreencapture" />.
l Set the user:
<user username="restUser" password="rules"roles="pegascreencapture" />.
4. Start the Tomcat server. The service is hosted athttp://IPaddress:port/prScreenShot/rest/capture, where IPaddress is theaddress of the system where Tomcat is hosted, and port is the port on which the service isdeployed.
5. Log in to your Pega 7 Platform application and make the following updates:a. Update the Data-Admin-System-Setting instance Pega-AppDefinition -
CaptureScreenshotsResourcePath with the URL of the service, for example,http://10.224.232.91:8080/prScreenShot/rest/capture.
b. Update the Data-Admin-Security-Authentication profile instanceCaptureScreenshotsAuthProfile with the user that you created in step 3.
Pega 7 Platform Installation Guide 58
Post-deployment configuration

Configuring PhantomJS REST server security for including screen captures inan application document
To ensure a secure installation of the Pega 7 Platform, you must enable the PhantomJS REST server totake and store server-side screen captures. In application documents generated by the DocumentApplication tool, screen captures provide stakeholders with a realistic picture of the application's userinterface.
1. Obtain the SSL certificate from the Pega 7 Platform administrator.
2. Add the SSL certificate to the list of trusted certificates:a. Double-click the certificate.
b. Click Install certificate to start the Certificate Import wizard.
c. Click Next, and select Place all certificates in the following store.
d. Click Browse, select Trusted Root certificate, and click OK.
e. Click Next, and then click Finish to complete the wizard.
3. Add the certificate to the truststore of the JVM on which the REST server is installed:a. Open a command prompt.
b. Change the root directory to the security folder in the Java installation folder, for example,C:\Program Files (x86)\Java\jre7\lib\security.
c. Run the following command:
keytool -keystore cacerts -importcert -alias certificate alias -file certificate name
d. When prompted, enter the password for the cacerts keystore. The default password ischangeit.
Pega 7 Platform Installation Guide 59
Post-deployment configuration
Appendix A — Properties filesThe Pega 7 Platform properties files include several database-specific properties:
Oracle
l JDBC driver JAR file — ojdbc7.jar
l Database driver class — oracle.jdbc.OracleDriver
l Database vendor type — oracledate
l JDBC URL — url="jdbc:oracle:thin:@host:port/service-name-or-SID"

Appendix B — Troubleshooting installationsUse the information in this section to troubleshoot installation errors. Installation error logs aredisplayed in the Installation and Upgrade Assistant window and are also stored in the Pega-image\scripts\logs directory.
Recovering from a failed installationIf the installation fails, follow these steps to drop the schemas and start a new installation:
1. Review the log files in the \scripts\logs directory.
2. Make any necessary changes to your system. If the error was due to a data entry mistake, makenote of the correct information.
3. Generate the DDL files and drop the schemas:
a. Verify the settings in the setupDatabase.properties file. For information about theproperties, see Editing the setupDatabase.properties file on page 27.
b. At a command prompt, navigate to the Pega-image\scripts directory.
c. Run the generateddl.bat or generateddl.sh script with the --action=drops option, forexample:
generateddl.bat --action=drops
d. Review the DDL files in the Pega-image\schema\generated\ output directory.
e. Have your database administrator apply the DDL to drop the schemas.
4. Repeat the installation steps.
PEGA0055 alert — clocks not synchronized between nodesThe Pega 7 Platform validates time synchronization to ensure proper operations and displays aPEGA0055 alert if clocks are not synchronized between nodes.
For information about how to reference a common time standard, see the documentation for youroperating system.
Pega 7 Platform Installation Guide 61
Appendix B — Troubleshooting installations

ClassNotFoundException error — session persistenceDuring application server shutdown, Tomcat persists session information into the session.ser file inthe server file directory. When the application server restarts, it reloads the session information fromthe session.ser file and deletes the file. If serialized session objects refer to classes that are notvisible to the container layer, you see a ClassNotFoundException error, such as the following:
May 19, 2016 2:37:46 PM org.apache.catalina.session.StandardManagerdoLoad SEVERE: ClassNotFoundException while loading persistedsessions:java.lang.ClassNotFoundExceptioncom.pega.pegarules.session.internal.authorization.ContextMapDiagCallbackjava.lang.ClassNotFoundException:com.pega.pegarules.session.internal.authorization.ContextMapDiagCallback
To suppress these errors, turn off Tomcat session persistence in the context.xml file.
System hangs with no error message — insufficientmemoryIf the server does not have enough memory allocated to run the Pega 7 Platform, the system canhang without an error message. The correct memory settings depend on your server hardware, thenumber of other applications, and the number of users on the server, and might be larger than therecommendations in System requirements on page 11.
Obtaining database connection informationWhen you configure the data source resources, you need the correct database connection URL. Todetermine the database connection URL, obtain the following information from your databaseadministrator:
l Connection method — Service or SID
l Host name
l Port number
l Service or SID name
When you configure the application server, enter the connection string, pega.jdbc.url. Replace itemsin italics with the values for your system:
Pega 7 Platform Installation Guide 62
Appendix B — Troubleshooting installations

jdbc:db2://host:port/database
l jdbc:oracle:thin:@//localhost:port/service-name-or-SID
Pega 7 Platform Installation Guide 63
Appendix B — Troubleshooting installations

Appendix C — Optional: Generating andapplying DDLSkip this section if you will have the Installation and Upgrade Assistant automatically apply the DDL
Generating the DDL fileFollow these steps to generate a DDL file:
1. Edit the setupDatabase.properties file.
a. Open the setupDatabase.properties file in the scripts directory of your distribution image:Pega-image\scripts\setupDatabase.properties
b. Configure the connection properties. For more information about parameter values, seeProperties file parameters.
# Connection Informationpega.jdbc.driver.jar=\path-to-the-database-JAR-file\DRIVER.jarpega.jdbc.driver.class=database driver classpega.database.type=database vendor typepega.jdbc.url=URL of the databasepega.jdbc.username=Deployment usernamepega.jdbc.password=passwordpega.rules.schema=rules-schema-namepega.data.schema=data-schema-name
c. Save and close the file.
2. At a command prompt, navigate to the Pega-image\scripts directory.
3. Type generateddl.bat or generateddl.sh and pass in the required --action installargument:
#generateddl.bat --action install
If you do not specify an output directory, the script writes the output to the default directory:
Pega-image\schema\generated\
Note: The output directory is deleted and re-created each time the generateddl script runs. To savea copy of the DDL, rename the directory before you run the script.
Pega 7 Platform Installation Guide 64
Appendix C — Optional: Generating and applying DDL

Applying the DDL fileBefore you continue, have your database administrator follow these general steps to apply theschema changes; these schema changes can include changes to user-defined functions:
1. Review the DDL file in the output directory and make any necessary changes. The default directoryis:
Pega-image\schema\generated\database\oracledate
2. Apply the DDL file.
a. Register the Java .jar file with the database.
b. Apply the CREATE FUNCTION DDL.
Note: The output directory is deleted and re-created each time the generateddl script runs. To savea copy of the DDL, rename the directory before you rerun the script.
Editing the setupDatabase.properties file to bypass DDLgenerationAfter your database administrator applies the changes to your database, configure thesetupDatabase.properties file to bypass applying a schema that already exists. Reapplying anexisting schema would cause the installation to fail.
To edit the setupDatabase.properties file:
1. Open the setupDatabase.properties file in the scripts directory of your distribution image:Pega-image\scripts\setupDatabase.properties
2. Set the property bypass.pega.schema=true.
3. Save and close the file.
Pega 7 Platform Installation Guide 65
Appendix C — Optional: Generating and applying DDL

Appendix D — Installing user-defined functionsThe user-defined functions (UDFs) enable the Pega 7 Platform to read data directly from the BLOBwithout creating and exposing columns. Skip this section if you installed the UDFs as part of theinstallation.
There are several ways you might have bypassed generating and installing the UDFs during theinstallation:
l Setting either bypass.pega.schema=true or bypass.udf.generation=true in thesetupDatabase.properties file
l Setting pega.target.bypass.udf=true in themigrateSystem.properties file
l Selecting Bypass Automatic DDL Application from the Installation and Upgrade Assistantduring the installation
Before you install the UDFs, verify that you have the appropriate user permissions. For moreinformation about user permissions, see Database users on page 16.
1. Edit the setupDatabase.properties file.
a. Open the setupDatabase.properties file in the scripts directory of your distribution image:Pega-image\scripts\setupDatabase.properties
b. Configure the connection properties. For more information about parameter values, seeProperties file parameters.
# Connection Informationpega.jdbc.driver.jar=\path-to-the-database-JAR-file\DRIVER.jarpega.jdbc.driver.class=database driver classpega.database.type=database vendor typepega.jdbc.url=URL of the databasepega.jdbc.username=Deployment user namepega.jdbc.password=passwordpega.rules.schema=rules-schema-namepega.data.schema=data-schema-name
c. Save and close the file.
2. On the rules schema, navigate to the Pega-image\scripts directory and run the followingcommands to remove any partially installed UDFs:
Pega 7 Platform Installation Guide 66
Appendix D — Installing user-defined functions

DROP FUNCTION rules-schema-name.pr_read_from_stream;DROP FUNCTION rules-schema-name.pr_read_decimal_from_stream;DROP FUNCTION rules-schema-name.pr_read_int_from_stream;
3. Optional: If you have a split-schema, on the data schema, navigate to the Pega-image\scriptsdirectory and run the following commands:
DROP FUNCTION data-schema-name.pr_read_from_stream;DROP FUNCTION data-schema-name.pr_read_decimal_from_stream;DROP FUNCTION data-schema-name.pr_read_int_from_stream;
4. From the Pega-image\scripts directory, run the generateudf.bat or generateudf.sh scriptwith the --action install argument, for example:
generateudf.bat --action install
Pega 7 Platform Installation Guide 67
Appendix D — Installing user-defined functions