6.2 managing variables€¦ · label1.text = cstr(sum) label2.text = cstr(difference) label3.text =...
TRANSCRIPT
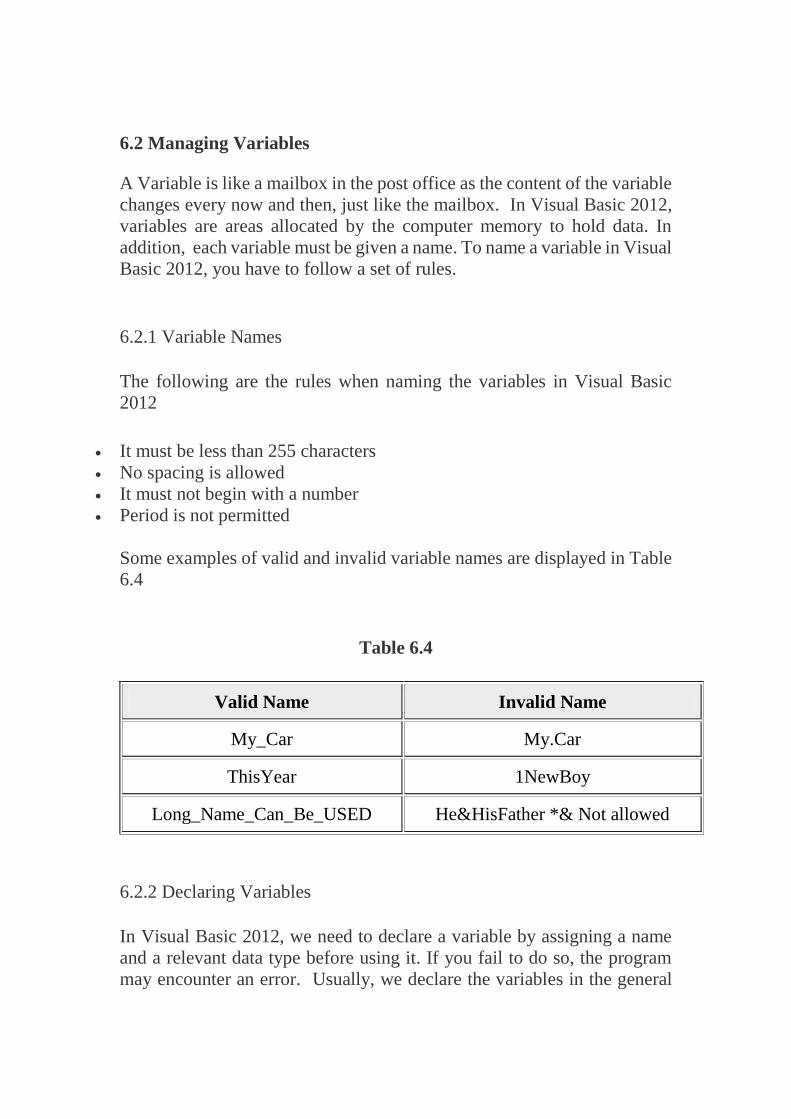
6.2 Managing Variables
A Variable is like a mailbox in the post office as the content of the variable
changes every now and then, just like the mailbox. In Visual Basic 2012,
variables are areas allocated by the computer memory to hold data. In
addition, each variable must be given a name. To name a variable in Visual
Basic 2012, you have to follow a set of rules.
6.2.1 Variable Names
The following are the rules when naming the variables in Visual Basic
2012
It must be less than 255 characters
No spacing is allowed
It must not begin with a number
Period is not permitted
Some examples of valid and invalid variable names are displayed in Table
6.4
Table 6.4
Valid Name Invalid Name
My_Car My.Car
ThisYear 1NewBoy
Long_Name_Can_Be_USED He&HisFather *& Not allowed
6.2.2 Declaring Variables
In Visual Basic 2012, we need to declare a variable by assigning a name
and a relevant data type before using it. If you fail to do so, the program
may encounter an error. Usually, we declare the variables in the general
section of the code window using the Dim statement. The syntax to declare
a variable is as follows:
DimVariable Name AsData Type
Example 6.1
Private Sub Form1_Load(sender As Object, e As EventArgs) Handles
MyBase.Load
Dim password As String
Dim yourName As String
Dim firstnum As Integer
Dim secondnum As Integer
Dim total As Integer
Dim doDate As Date
End Sub
You may also combine them in one line, separating each variable with a
comma, as follows:
Dim password As String, yourName As String, firstnum As
Integer,.............
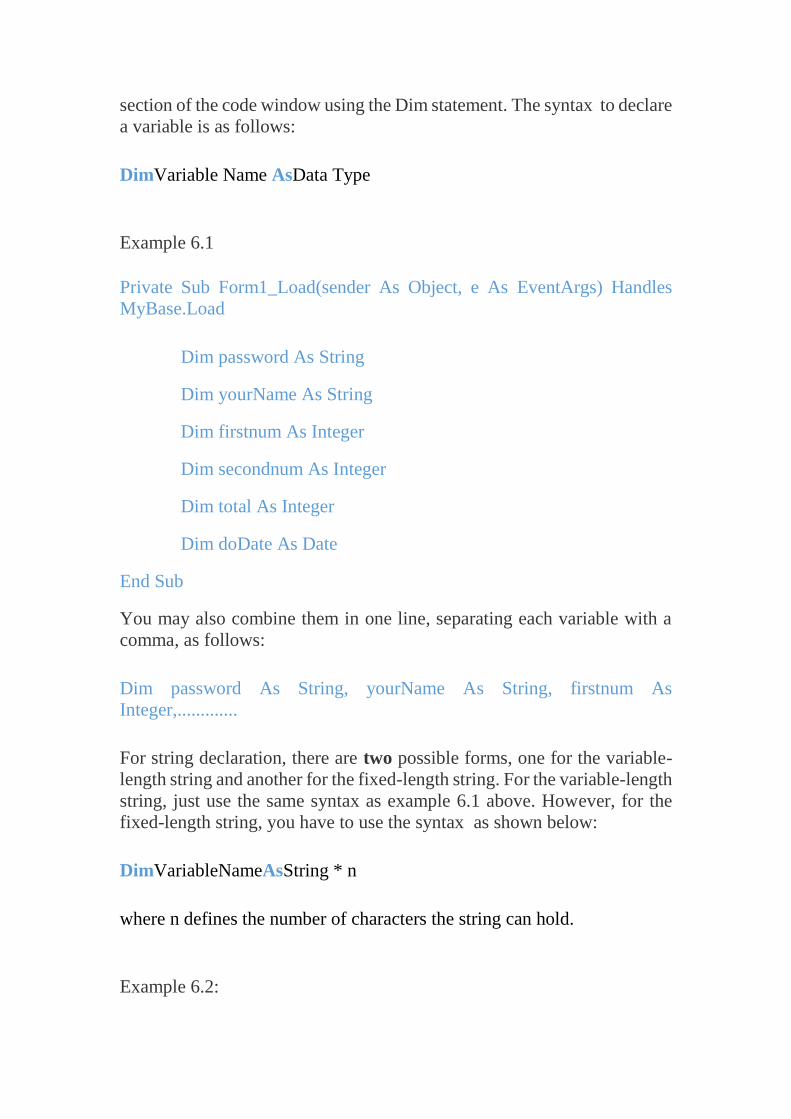
For string declaration, there are two possible forms, one for the variable-
length string and another for the fixed-length string. For the variable-length
string, just use the same syntax as example 6.1 above. However, for the
fixed-length string, you have to use the syntax as shown below:
DimVariableNameAsString * n
where n defines the number of characters the string can hold.
Example 6.2:
Dim yourName As String * 10
yourName can hold no more than 10 Characters.
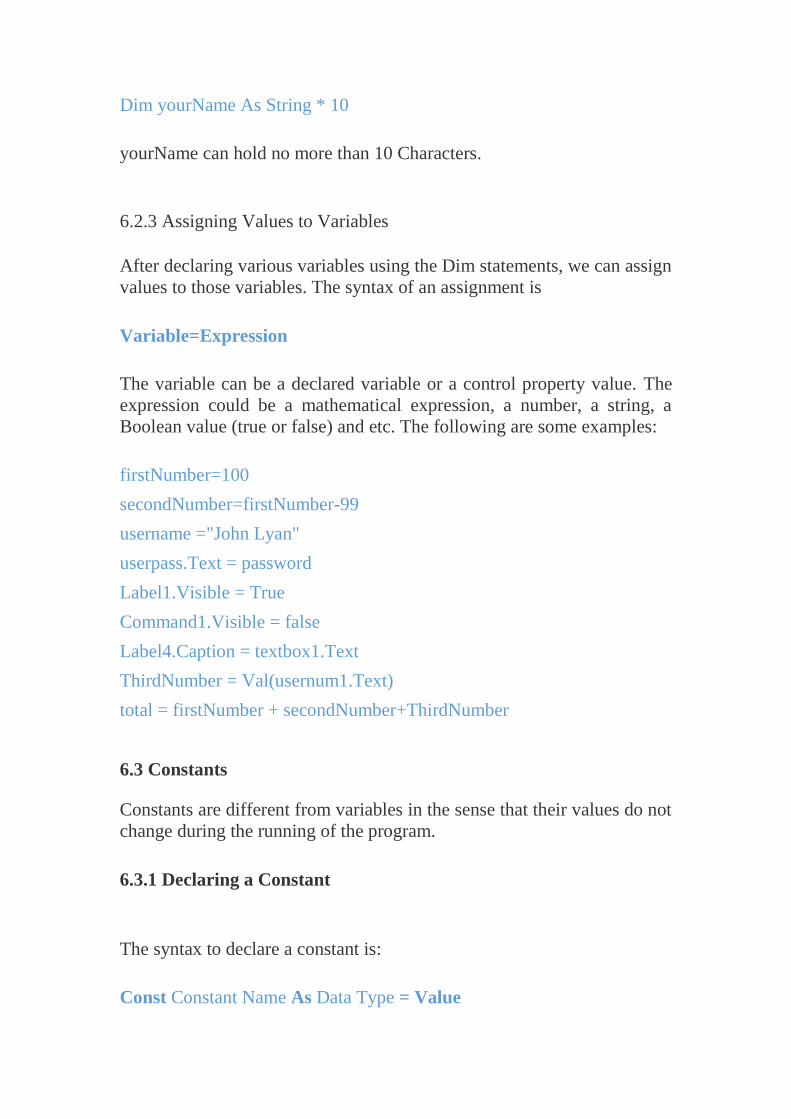
6.2.3 Assigning Values to Variables
After declaring various variables using the Dim statements, we can assign
values to those variables. The syntax of an assignment is
Variable=Expression
The variable can be a declared variable or a control property value. The
expression could be a mathematical expression, a number, a string, a
Boolean value (true or false) and etc. The following are some examples:
firstNumber=100
secondNumber=firstNumber-99
username ="John Lyan"
userpass.Text = password
Label1.Visible = True
Command1.Visible = false
Label4.Caption = textbox1.Text
ThirdNumber = Val(usernum1.Text)
total = firstNumber + secondNumber+ThirdNumber
6.3 Constants
Constants are different from variables in the sense that their values do not
change during the running of the program.
6.3.1 Declaring a Constant
The syntax to declare a constant is:
Const Constant Name As Data Type = Value
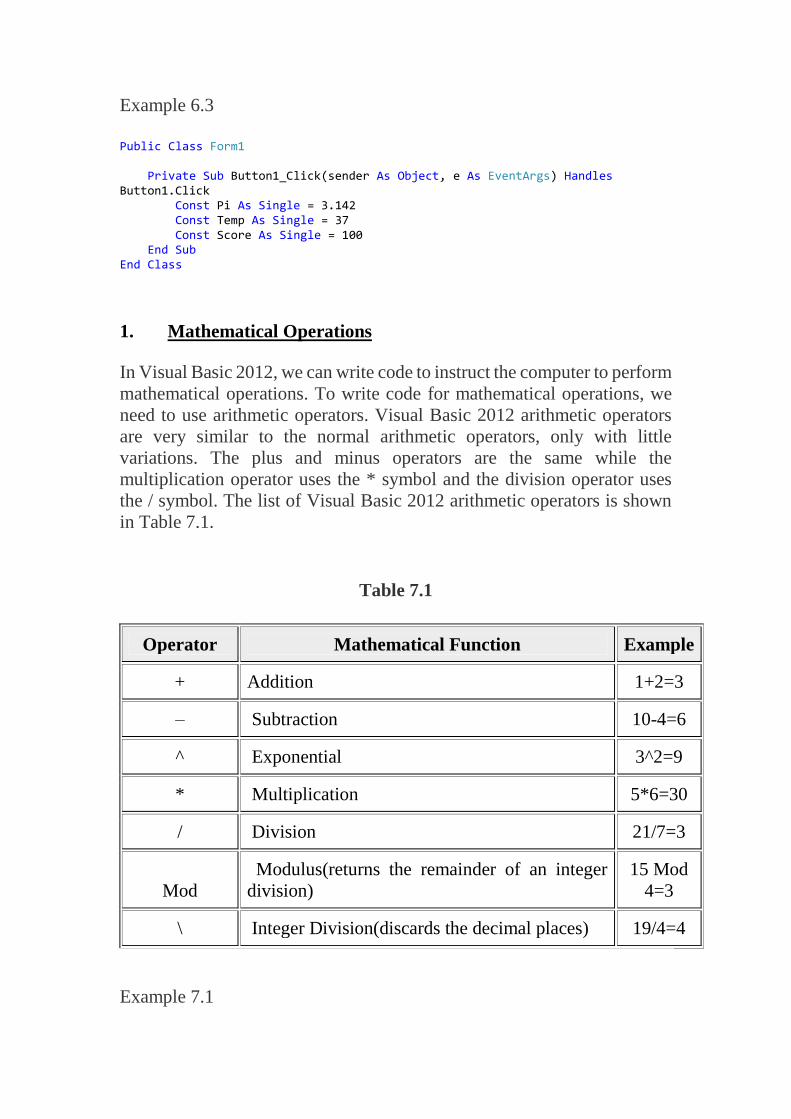
Example 6.3
Public Class Form1 Private Sub Button1_Click(sender As Object, e As EventArgs) Handles Button1.Click Const Pi As Single = 3.142 Const Temp As Single = 37 Const Score As Single = 100 End Sub End Class
1. Mathematical Operations
In Visual Basic 2012, we can write code to instruct the computer to perform
mathematical operations. To write code for mathematical operations, we
need to use arithmetic operators. Visual Basic 2012 arithmetic operators
are very similar to the normal arithmetic operators, only with little
variations. The plus and minus operators are the same while the
multiplication operator uses the * symbol and the division operator uses
the / symbol. The list of Visual Basic 2012 arithmetic operators is shown
in Table 7.1.
Table 7.1
Operator Mathematical Function Example
+ Addition 1+2=3
– Subtraction 10-4=6
^ Exponential 3^2=9
* Multiplication 5*6=30
/ Division 21/7=3
Mod
Modulus(returns the remainder of an integer
division)
15 Mod
4=3
\ Integer Division(discards the decimal places) 19/4=4
Example 7.1
In this program, insert two Textboxes, four labels, and a button. Click the
button and enter the code as shown below. When you run the program, it
will perform the four basic arithmetic operations and displays the results
on the four labels.
Public Class Form1 Private Sub Button1_Click(sender As Object, e As EventArgs) Handles Button1.Click Dim num1, num2, sum, difference, product, quotient As Single num1 = CSng(TextBox1.Text) num2 = CSng(TextBox2.Text) sum = num1 + num2 difference = num1 - num2 product = num1 * num2 quotient = num1 / num2 Label1.Text = CStr(sum) Label2.Text = CStr(difference) Label3.Text = CStr(product) Label4.Text = CStr(quotient) End Sub End Class
Example 7.2
The program can use Pythagoras Theorem to calculate the length of
hypotenuse c given the length of the adjacent side a and the opposite side
b. In case you have forgotten the formula for the Pythagoras Theorem, it is
written as
c^2=a^2+b^2
Public Class Form1 Private Sub Button1_Click(sender As Object, e As EventArgs) Handles Button1.Click Dim a, b, c As Single a = CSng(TextBox1.Text) b = CSng(TextBox2.Text) c = CSng((a ^ 2 + b ^ 2) ^ (1 / 2)) Label1.Text = CStr(c) End Sub End Class
Example 7.3: BMI Calculator
A lot of people are obese now and it could affect their health seriously.
Obesity has proven by the medical experts to be one of the main factors
that bring many adverse medical problems, including the cardiovascular
disease. If your BMI is more than 30, you are considered obese. You can
refer to the following range of BMI values for your weight status.
Underweight = <18.5
Normal weight = 18.5-24.9
Overweight = 25-29.9
Obesity = BMI of 30 or greater
To calculate your BMI, you can create a VB BMI calculator. The BMI
calculator can calculate the body mass index or BMI of a person based on
the body weight in kilogram and the body height in meter. BMI can be
calculated using the formula weight/( height )^2, where weight is measured
in kg and height in meter. If you only know your weight and height in lb
and feet, then you need to convert them to the metric system (you could
indeed write a VB program for the conversion).
Public Class Form1 Private Sub Button1_Click(sender As Object, e As EventArgs) Handles Button1.Click Dim height, weight, bmi As Single height = CInt(TextBox1.Text) weight = CInt(TextBox2.Text) bmi = CSng((weight) / (height ^ 2)) Label1.Text = CStr(bmi) End Sub End Class
The output is shown in the Figure 7.1. In this example, your height is
1.80m( about 5.11foot), your weight is 75 kg (about 168Ib), and your BMI
is about 23.14815. The reading suggests that you are healthy. (Note; 1
foot=0.3048, 1 lb= 0.45359237 kilogram)
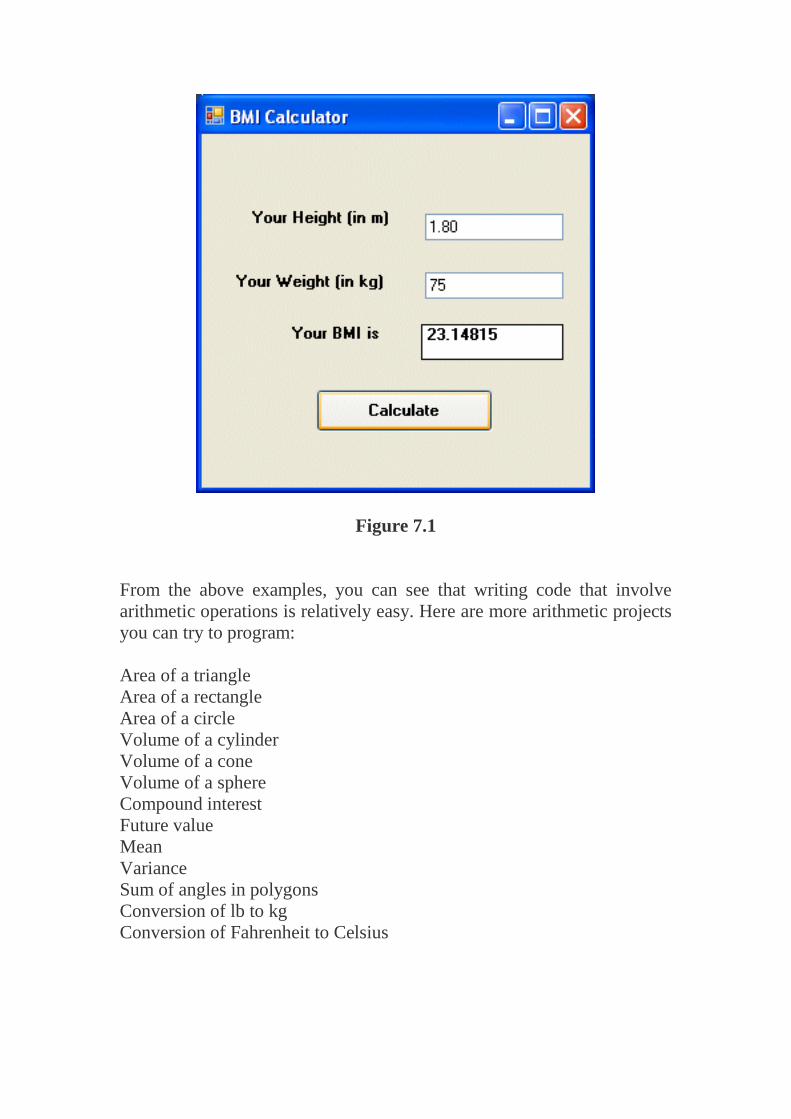
Figure 7.1
From the above examples, you can see that writing code that involve
arithmetic operations is relatively easy. Here are more arithmetic projects
you can try to program:
Area of a triangle
Area of a rectangle
Area of a circle
Volume of a cylinder
Volume of a cone
Volume of a sphere
Compound interest
Future value
Mean
Variance
Sum of angles in polygons
Conversion of lb to kg
Conversion of Fahrenheit to Celsius
2. String Manipulation
8.1 String Manipulation Using + and & signs.
In Visual Basic 2012, strings can be manipulated using the & sign and the
+ sign, both perform the string concatenation which means combining two
or more smaller strings into larger strings. For example, we can join
“Visual”,”Basic” and “2012” into “Visual Basic 2012” using
“Visual”&”Basic” or “Visual “+”Basic”, as shown in the Examples below
Example 8.1(a)
Public Class Form1 Private Sub Button1_Click(sender As Object, e As EventArgs) Handles Button1.Click Dim text1, text2, text3, text4 As String text1 = "Visual" text2 = " Basic" text3 = " 2012" text4 = text1 + text2 + text3 MsgBox("text4") MsgBox(text4) End Sub End Class
The line text4=text1+ text2 + text3 can be replaced by text4=text1 & text2
&text3 and produces the same output. However, if one of the variables is
declared as numeric data type, you cannot use the + sign, you can only use
the & sign.
Example 8.1(b)
Public Class Form1 Private Sub Label1_Click(sender As Object, e As EventArgs) Handles Label1.Click Dim text1, text3 As String Dim Text2 As Integer text1 = "Visual Basic " Text2 = 2012 text3 = text1 + Text2 Label1.Text = text3 End Sub End Class
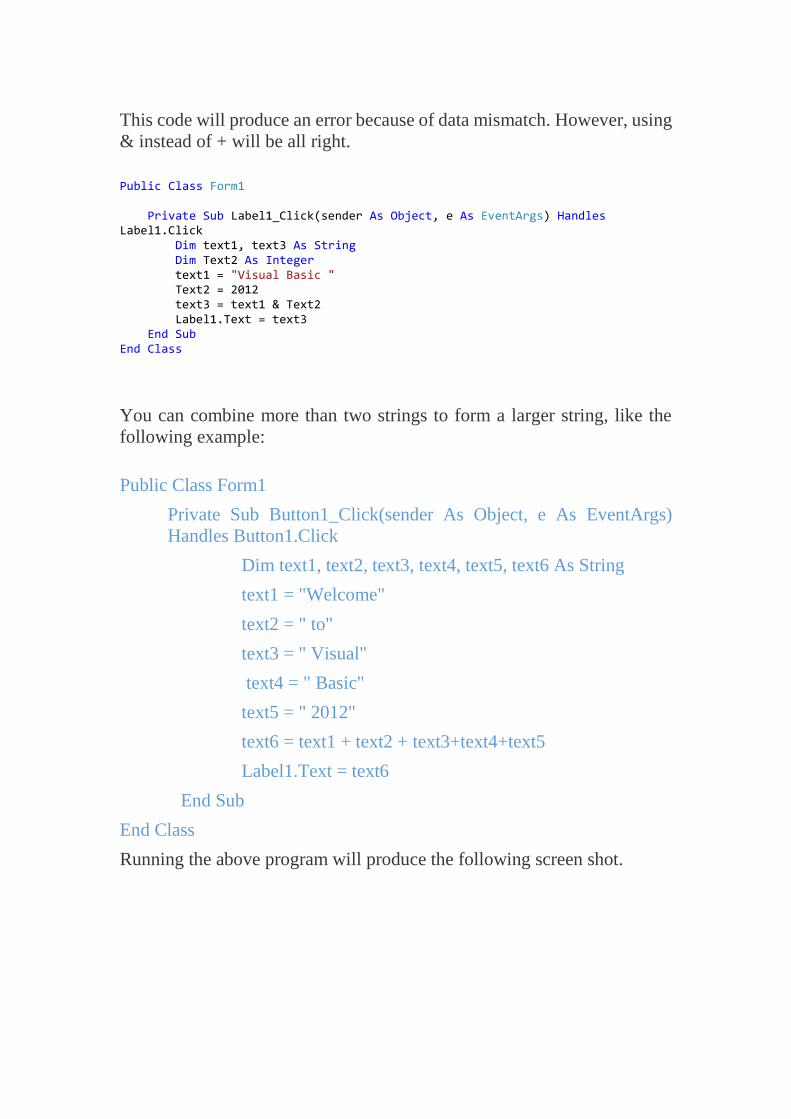
This code will produce an error because of data mismatch. However, using
& instead of + will be all right.
Public Class Form1 Private Sub Label1_Click(sender As Object, e As EventArgs) Handles Label1.Click Dim text1, text3 As String Dim Text2 As Integer text1 = "Visual Basic " Text2 = 2012 text3 = text1 & Text2 Label1.Text = text3 End Sub End Class
You can combine more than two strings to form a larger string, like the
following example:
Public Class Form1
Private Sub Button1_Click(sender As Object, e As EventArgs)
Handles Button1.Click
Dim text1, text2, text3, text4, text5, text6 As String
text1 = "Welcome"
text2 = " to"
text3 = " Visual"
text4 = " Basic"
text5 = " 2012"
text6 = text1 + text2 + text3+text4+text5
Label1.Text = text6
End Sub
End Class
Running the above program will produce the following screen shot.
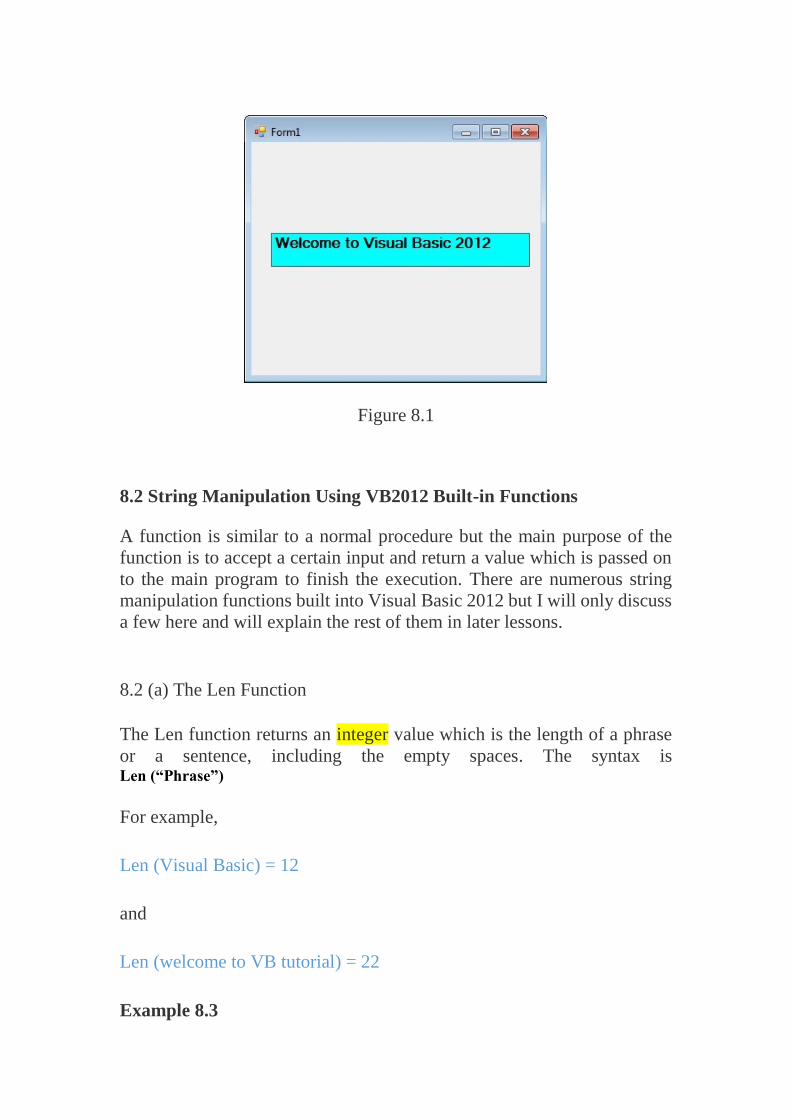
Figure 8.1
8.2 String Manipulation Using VB2012 Built-in Functions
A function is similar to a normal procedure but the main purpose of the
function is to accept a certain input and return a value which is passed on
to the main program to finish the execution. There are numerous string
manipulation functions built into Visual Basic 2012 but I will only discuss
a few here and will explain the rest of them in later lessons.
8.2 (a) The Len Function
The Len function returns an integer value which is the length of a phrase
or a sentence, including the empty spaces. The syntax is Len (“Phrase”)
For example,
Len (Visual Basic) = 12
and
Len (welcome to VB tutorial) = 22
Example 8.3
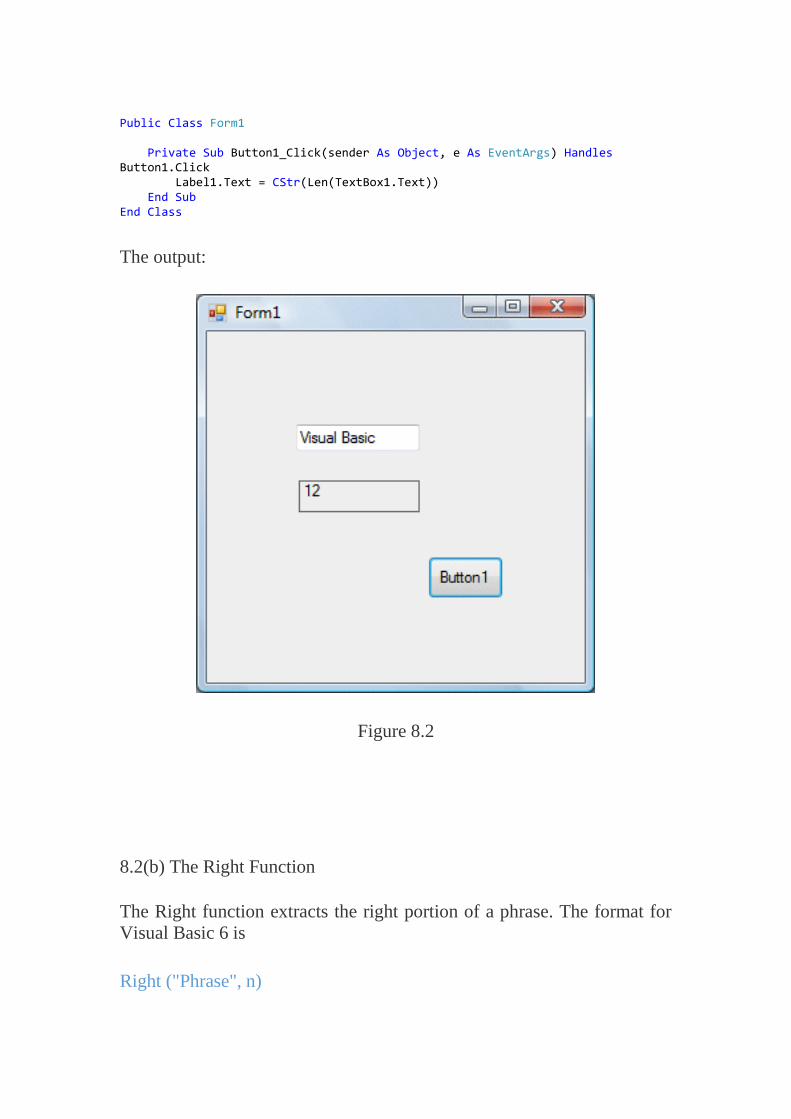
Public Class Form1 Private Sub Button1_Click(sender As Object, e As EventArgs) Handles Button1.Click Label1.Text = CStr(Len(TextBox1.Text)) End Sub End Class
The output:
Figure 8.2
8.2(b) The Right Function
The Right function extracts the right portion of a phrase. The format for
Visual Basic 6 is
Right ("Phrase", n)
Where n is the starting position from the right of the phrase where the
portion of the phrase is going to be extracted. For example,
Right("Visual Basic", 4) = asic
However, this syntax is not applicable in VB2012. In VB2012, we need
use the following format
Microsoft.VisualBasic.Right("Phrase",n)
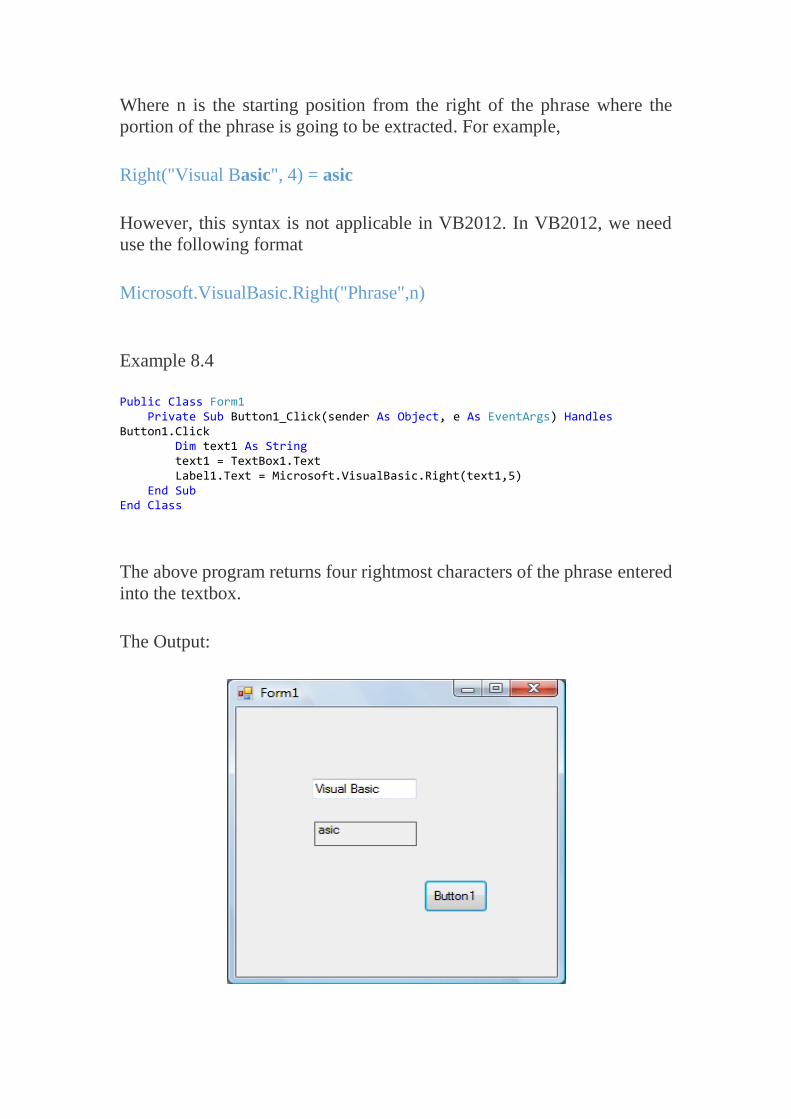
Example 8.4
Public Class Form1 Private Sub Button1_Click(sender As Object, e As EventArgs) Handles Button1.Click Dim text1 As String text1 = TextBox1.Text Label1.Text = Microsoft.VisualBasic.Right(text1,5) End Sub End Class
The above program returns four rightmost characters of the phrase entered
into the textbox.
The Output:
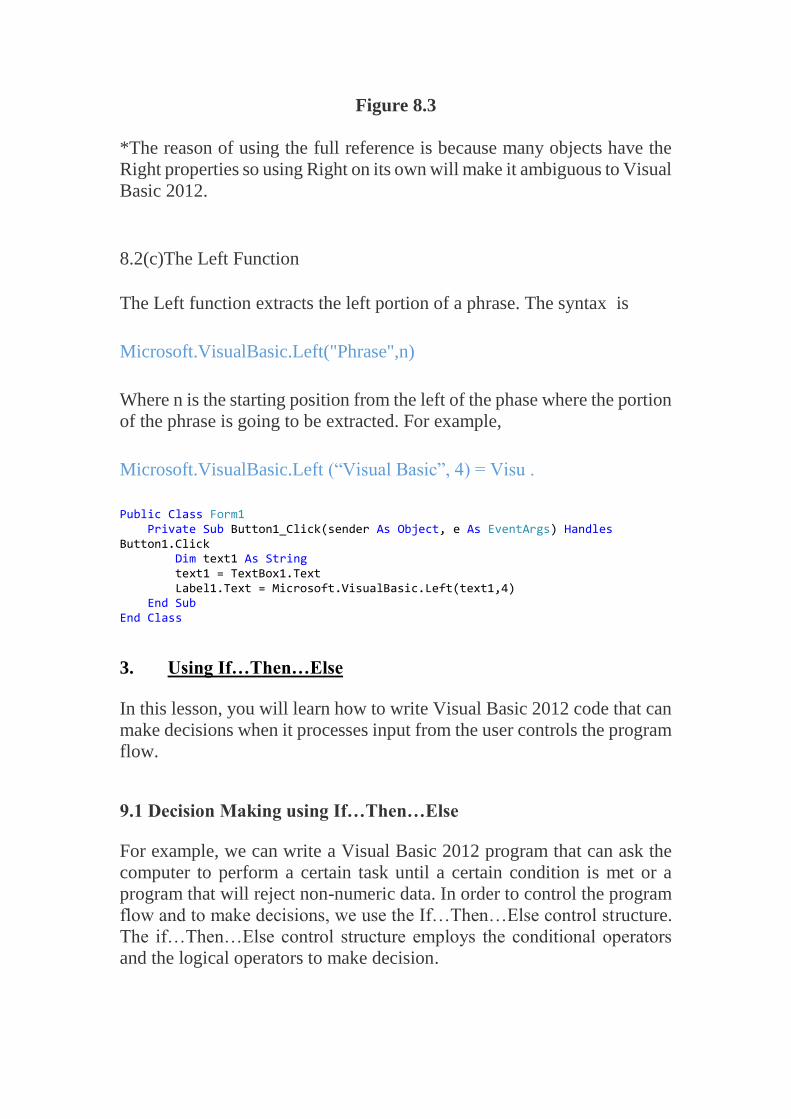
Figure 8.3
*The reason of using the full reference is because many objects have the
Right properties so using Right on its own will make it ambiguous to Visual
Basic 2012.
8.2(c)The Left Function
The Left function extracts the left portion of a phrase. The syntax is
Microsoft.VisualBasic.Left("Phrase",n)
Where n is the starting position from the left of the phase where the portion
of the phrase is going to be extracted. For example,
Microsoft.VisualBasic.Left (“Visual Basic”, 4) = Visu .
Public Class Form1 Private Sub Button1_Click(sender As Object, e As EventArgs) Handles Button1.Click Dim text1 As String text1 = TextBox1.Text Label1.Text = Microsoft.VisualBasic.Left(text1,4) End Sub End Class
3. Using If…Then…Else
In this lesson, you will learn how to write Visual Basic 2012 code that can
make decisions when it processes input from the user controls the program
flow.
9.1 Decision Making using If…Then…Else
For example, we can write a Visual Basic 2012 program that can ask the
computer to perform a certain task until a certain condition is met or a
program that will reject non-numeric data. In order to control the program
flow and to make decisions, we use the If…Then…Else control structure.
The if…Then…Else control structure employs the conditional operators
and the logical operators to make decision.
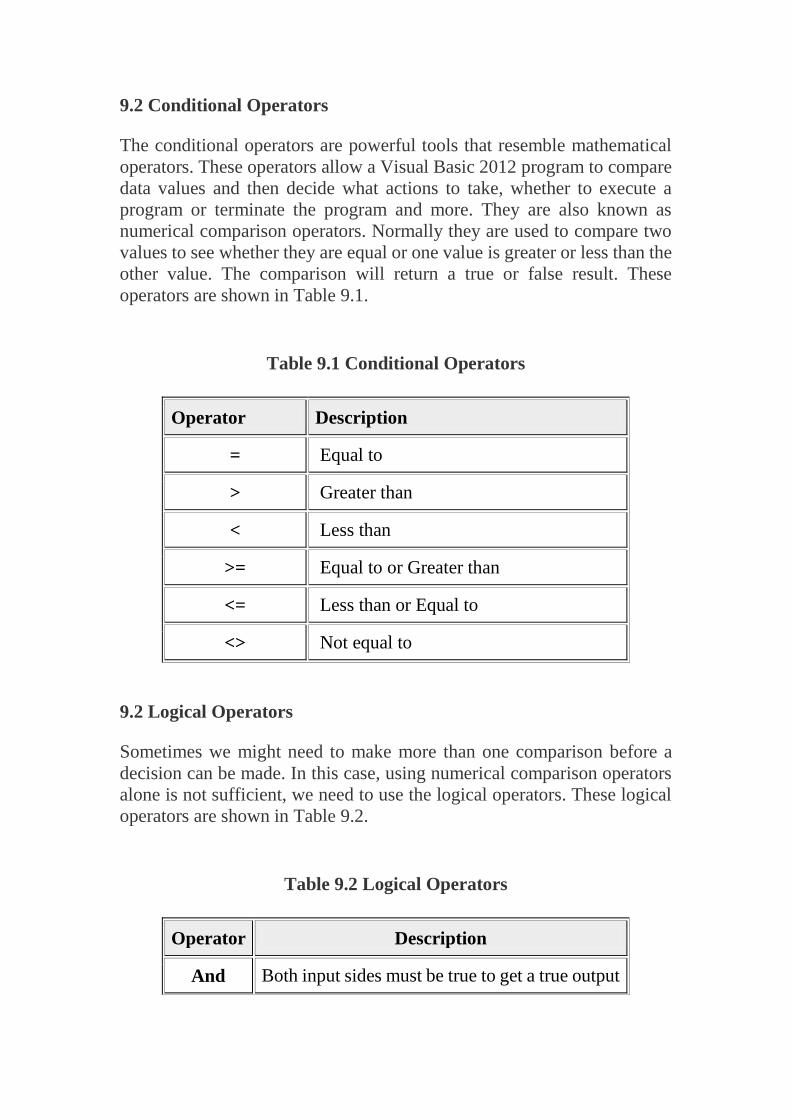
9.2 Conditional Operators
The conditional operators are powerful tools that resemble mathematical
operators. These operators allow a Visual Basic 2012 program to compare
data values and then decide what actions to take, whether to execute a
program or terminate the program and more. They are also known as
numerical comparison operators. Normally they are used to compare two
values to see whether they are equal or one value is greater or less than the
other value. The comparison will return a true or false result. These
operators are shown in Table 9.1.
Table 9.1 Conditional Operators
Operator Description
= Equal to
> Greater than
< Less than
>= Equal to or Greater than
<= Less than or Equal to
<> Not equal to
9.2 Logical Operators
Sometimes we might need to make more than one comparison before a
decision can be made. In this case, using numerical comparison operators
alone is not sufficient, we need to use the logical operators. These logical
operators are shown in Table 9.2.
Table 9.2 Logical Operators
Operator Description
And Both input sides must be true to get a true output
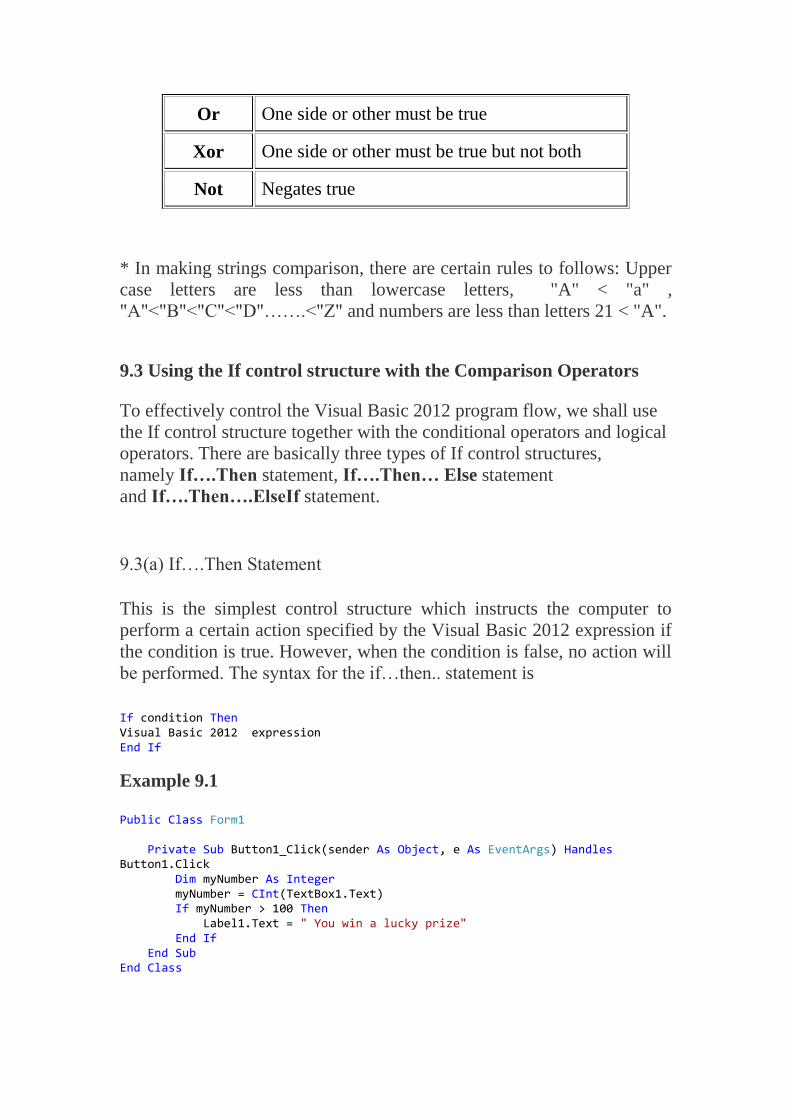
Or One side or other must be true
Xor One side or other must be true but not both
Not Negates true
* In making strings comparison, there are certain rules to follows: Upper
case letters are less than lowercase letters, "A" < "a" ,
"A"<"B"<"C"<"D"…….<"Z" and numbers are less than letters 21 < "A".
9.3 Using the If control structure with the Comparison Operators
To effectively control the Visual Basic 2012 program flow, we shall use
the If control structure together with the conditional operators and logical
operators. There are basically three types of If control structures,
namely If….Then statement, If….Then… Else statement
and If….Then….ElseIf statement.
9.3(a) If….Then Statement
This is the simplest control structure which instructs the computer to
perform a certain action specified by the Visual Basic 2012 expression if
the condition is true. However, when the condition is false, no action will
be performed. The syntax for the if…then.. statement is
If condition Then Visual Basic 2012 expression End If
Example 9.1
Public Class Form1 Private Sub Button1_Click(sender As Object, e As EventArgs) Handles Button1.Click Dim myNumber As Integer myNumber = CInt(TextBox1.Text) If myNumber > 100 Then Label1.Text = " You win a lucky prize" End If End Sub End Class
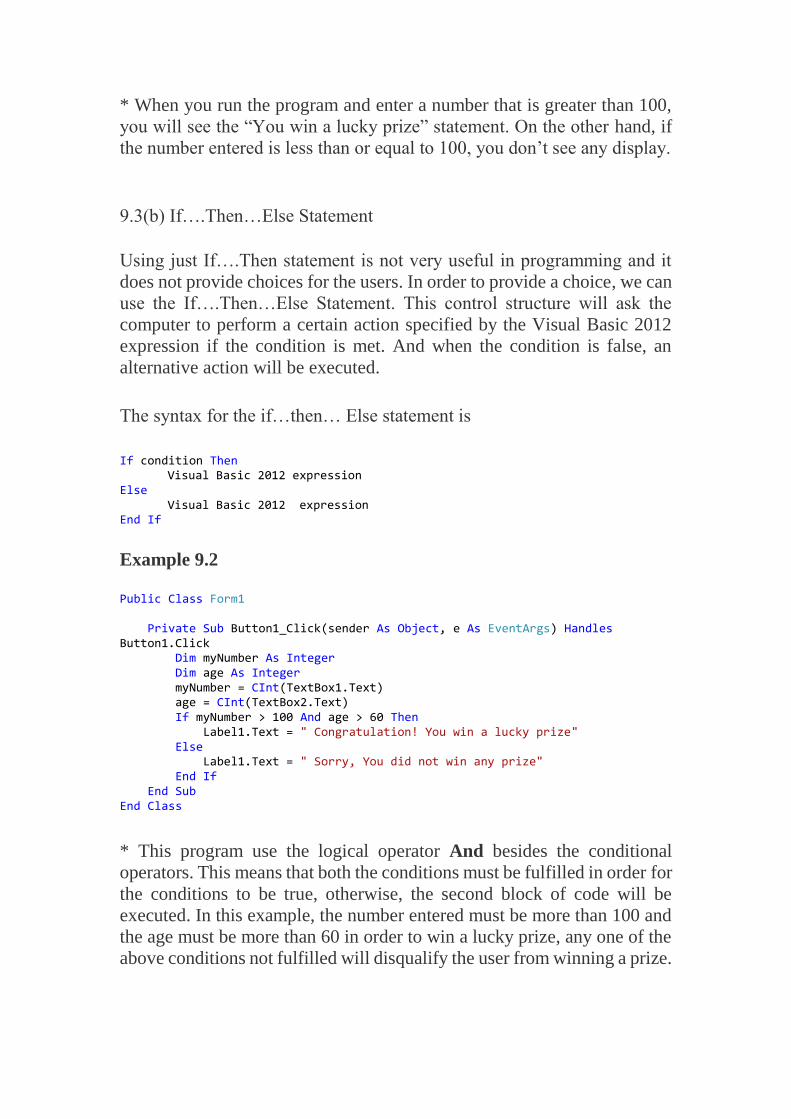
* When you run the program and enter a number that is greater than 100,
you will see the “You win a lucky prize” statement. On the other hand, if
the number entered is less than or equal to 100, you don’t see any display.
9.3(b) If….Then…Else Statement
Using just If….Then statement is not very useful in programming and it
does not provide choices for the users. In order to provide a choice, we can
use the If….Then…Else Statement. This control structure will ask the
computer to perform a certain action specified by the Visual Basic 2012
expression if the condition is met. And when the condition is false, an
alternative action will be executed.
The syntax for the if…then… Else statement is
If condition Then Visual Basic 2012 expression
Else Visual Basic 2012 expression
End If
Example 9.2
Public Class Form1 Private Sub Button1_Click(sender As Object, e As EventArgs) Handles Button1.Click Dim myNumber As Integer Dim age As Integer myNumber = CInt(TextBox1.Text) age = CInt(TextBox2.Text) If myNumber > 100 And age > 60 Then Label1.Text = " Congratulation! You win a lucky prize" Else Label1.Text = " Sorry, You did not win any prize" End If End Sub End Class
* This program use the logical operator And besides the conditional
operators. This means that both the conditions must be fulfilled in order for
the conditions to be true, otherwise, the second block of code will be
executed. In this example, the number entered must be more than 100 and
the age must be more than 60 in order to win a lucky prize, any one of the
above conditions not fulfilled will disqualify the user from winning a prize.
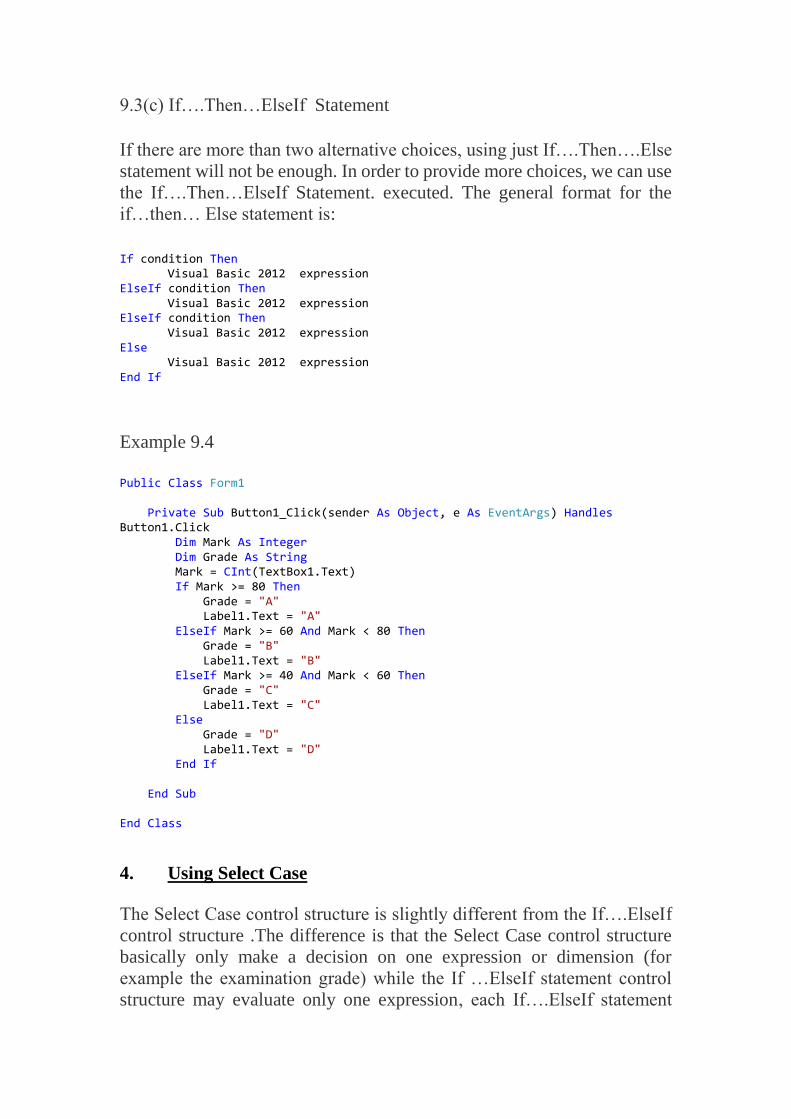
9.3(c) If….Then…ElseIf Statement
If there are more than two alternative choices, using just If….Then….Else
statement will not be enough. In order to provide more choices, we can use
the If….Then…ElseIf Statement. executed. The general format for the
if…then… Else statement is:
If condition Then Visual Basic 2012 expression ElseIf condition Then Visual Basic 2012 expression ElseIf condition Then Visual Basic 2012 expression Else Visual Basic 2012 expression End If
Example 9.4
Public Class Form1 Private Sub Button1_Click(sender As Object, e As EventArgs) Handles Button1.Click Dim Mark As Integer Dim Grade As String Mark = CInt(TextBox1.Text) If Mark >= 80 Then Grade = "A" Label1.Text = "A" ElseIf Mark >= 60 And Mark < 80 Then Grade = "B" Label1.Text = "B" ElseIf Mark >= 40 And Mark < 60 Then Grade = "C" Label1.Text = "C" Else Grade = "D" Label1.Text = "D" End If End Sub End Class
4. Using Select Case
The Select Case control structure is slightly different from the If….ElseIf
control structure .The difference is that the Select Case control structure
basically only make a decision on one expression or dimension (for
example the examination grade) while the If …ElseIf statement control
structure may evaluate only one expression, each If….ElseIf statement
may also compute entirely different dimensions. Select Case is preferred
when there exist multiple conditions as using If… Then… ElseIf
statements will become too messy.
conditions using If…Then..ElseIf statements will become too messy.
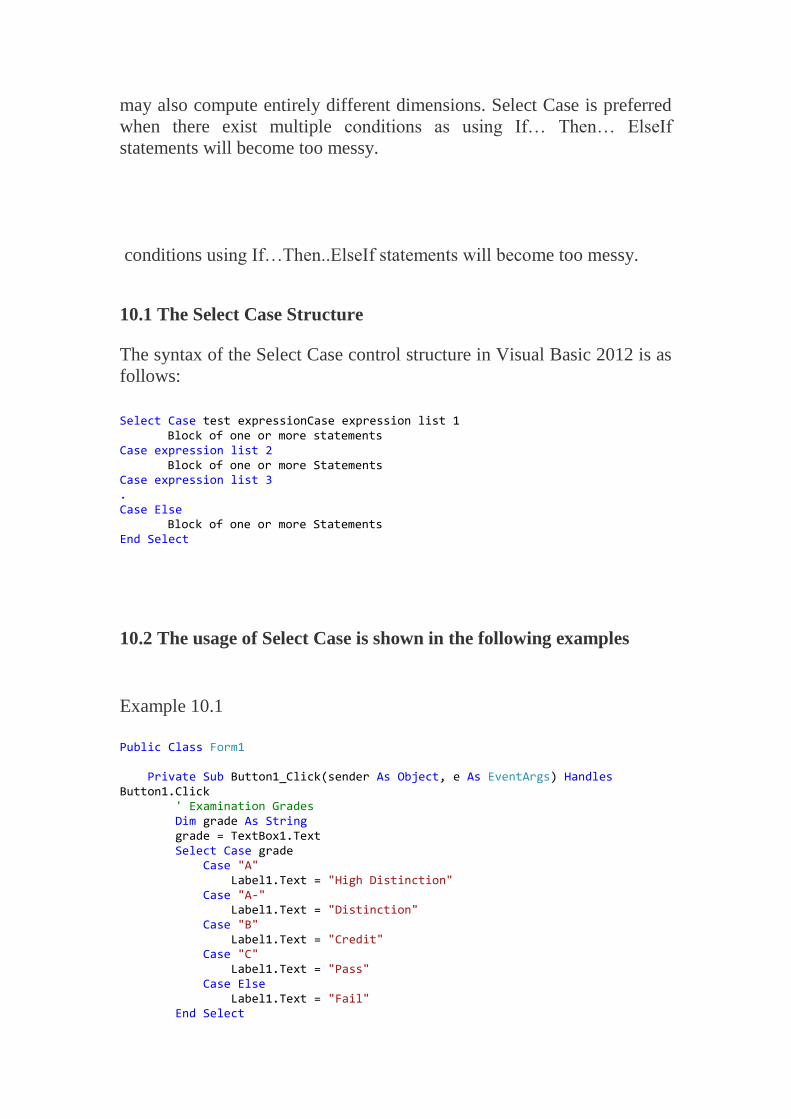
10.1 The Select Case Structure
The syntax of the Select Case control structure in Visual Basic 2012 is as
follows:
Select Case test expressionCase expression list 1 Block of one or more statements
Case expression list 2 Block of one or more Statements
Case expression list 3 . Case Else
Block of one or more Statements End Select
10.2 The usage of Select Case is shown in the following examples
Example 10.1
Public Class Form1 Private Sub Button1_Click(sender As Object, e As EventArgs) Handles Button1.Click ' Examination Grades Dim grade As String grade = TextBox1.Text Select Case grade Case "A" Label1.Text = "High Distinction" Case "A-" Label1.Text = "Distinction" Case "B" Label1.Text = "Credit" Case "C" Label1.Text = "Pass" Case Else Label1.Text = "Fail" End Select
End Sub End Class
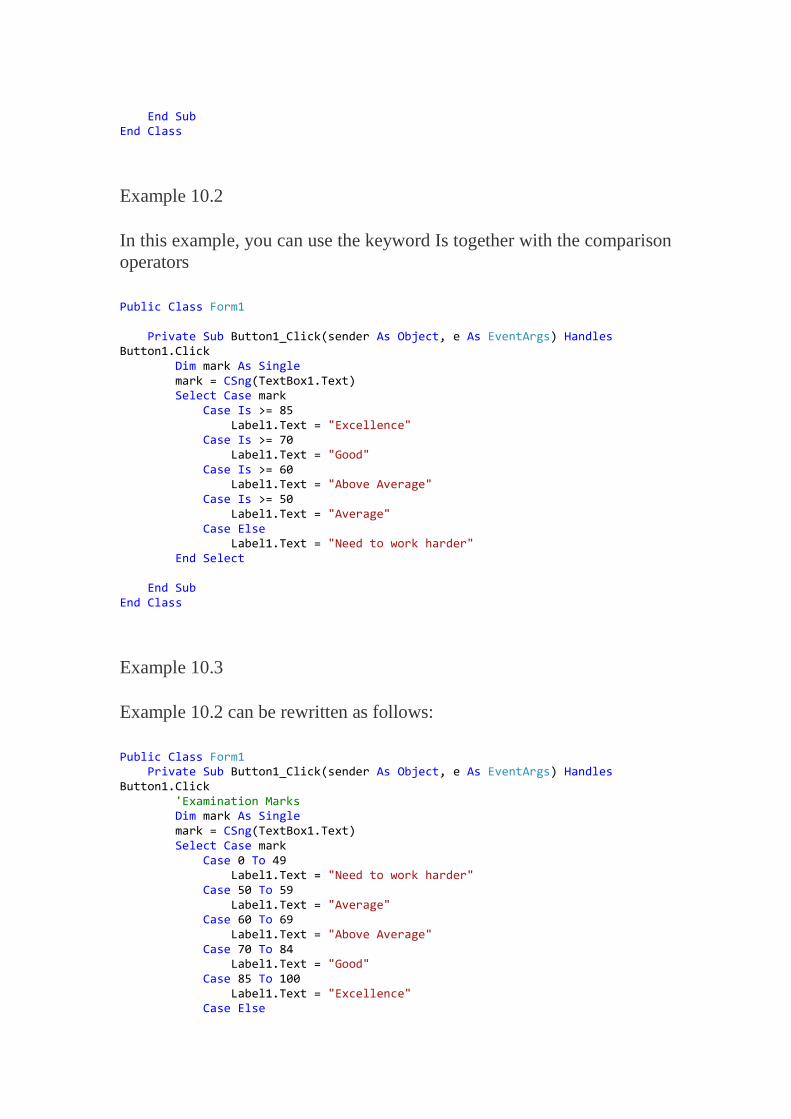
Example 10.2
In this example, you can use the keyword Is together with the comparison
operators
Public Class Form1 Private Sub Button1_Click(sender As Object, e As EventArgs) Handles Button1.Click Dim mark As Single mark = CSng(TextBox1.Text) Select Case mark Case Is >= 85 Label1.Text = "Excellence" Case Is >= 70 Label1.Text = "Good" Case Is >= 60 Label1.Text = "Above Average" Case Is >= 50 Label1.Text = "Average" Case Else Label1.Text = "Need to work harder" End Select End Sub End Class
Example 10.3
Example 10.2 can be rewritten as follows:
Public Class Form1 Private Sub Button1_Click(sender As Object, e As EventArgs) Handles Button1.Click 'Examination Marks Dim mark As Single mark = CSng(TextBox1.Text) Select Case mark Case 0 To 49 Label1.Text = "Need to work harder" Case 50 To 59 Label1.Text = "Average" Case 60 To 69 Label1.Text = "Above Average" Case 70 To 84 Label1.Text = "Good" Case 85 To 100 Label1.Text = "Excellence" Case Else
Label1.Text = "Wrong entry, please reenter the mark" End Select End Sub End Class
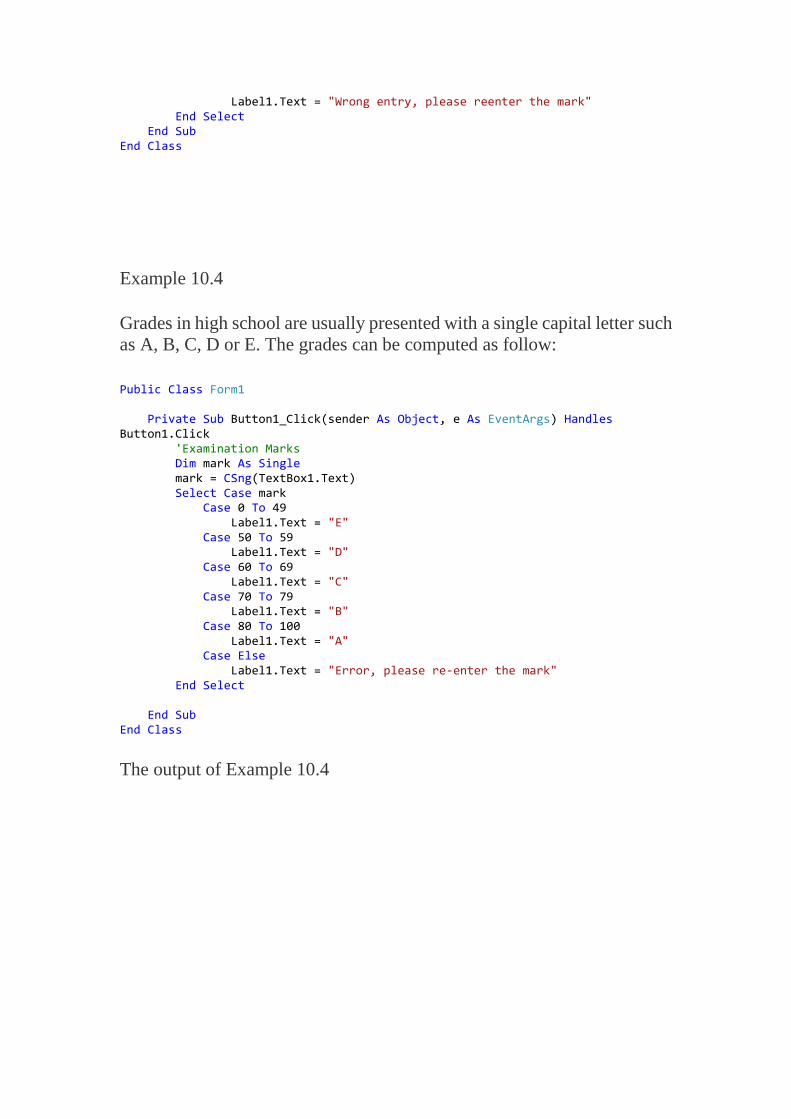
Example 10.4
Grades in high school are usually presented with a single capital letter such
as A, B, C, D or E. The grades can be computed as follow:
Public Class Form1 Private Sub Button1_Click(sender As Object, e As EventArgs) Handles Button1.Click 'Examination Marks Dim mark As Single mark = CSng(TextBox1.Text) Select Case mark Case 0 To 49 Label1.Text = "E" Case 50 To 59 Label1.Text = "D" Case 60 To 69 Label1.Text = "C" Case 70 To 79 Label1.Text = "B" Case 80 To 100 Label1.Text = "A" Case Else Label1.Text = "Error, please re-enter the mark" End Select End Sub End Class
The output of Example 10.4
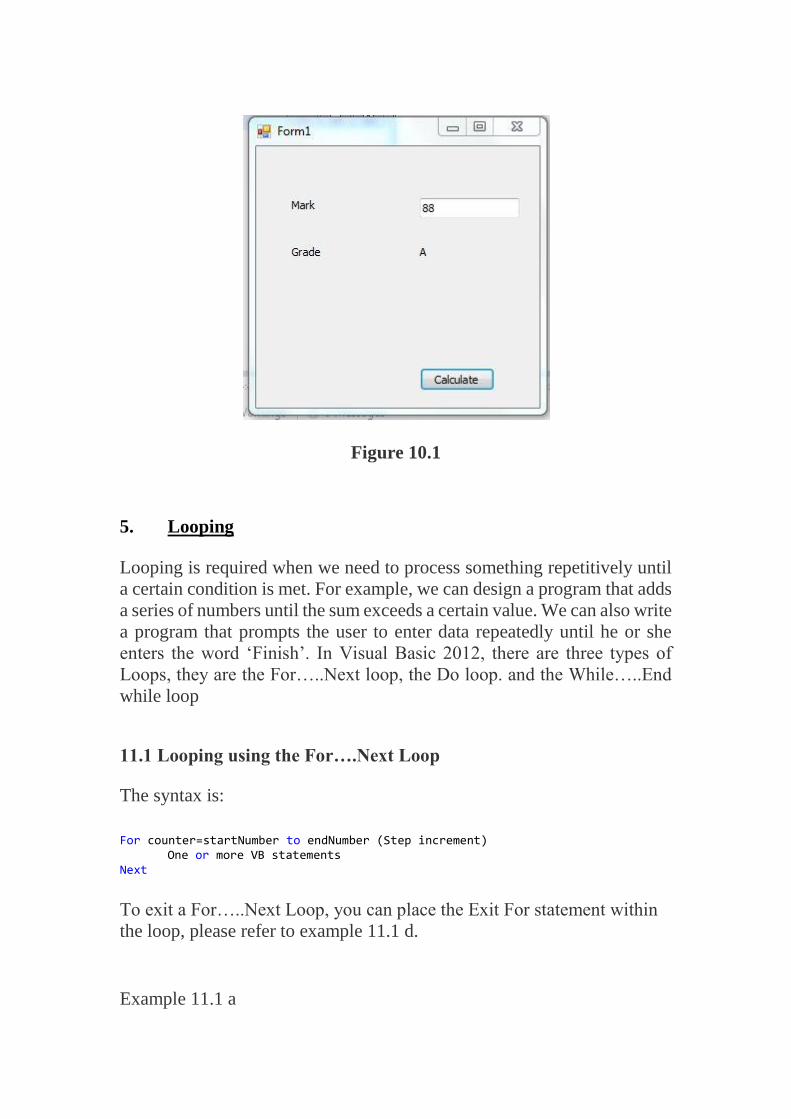
Figure 10.1
5. Looping
Looping is required when we need to process something repetitively until
a certain condition is met. For example, we can design a program that adds
a series of numbers until the sum exceeds a certain value. We can also write
a program that prompts the user to enter data repeatedly until he or she
enters the word ‘Finish’. In Visual Basic 2012, there are three types of
Loops, they are the For…..Next loop, the Do loop. and the While…..End
while loop
11.1 Looping using the For….Next Loop
The syntax is:
For counter=startNumber to endNumber (Step increment) One or more VB statements
Next
To exit a For…..Next Loop, you can place the Exit For statement within
the loop, please refer to example 11.1 d.
Example 11.1 a
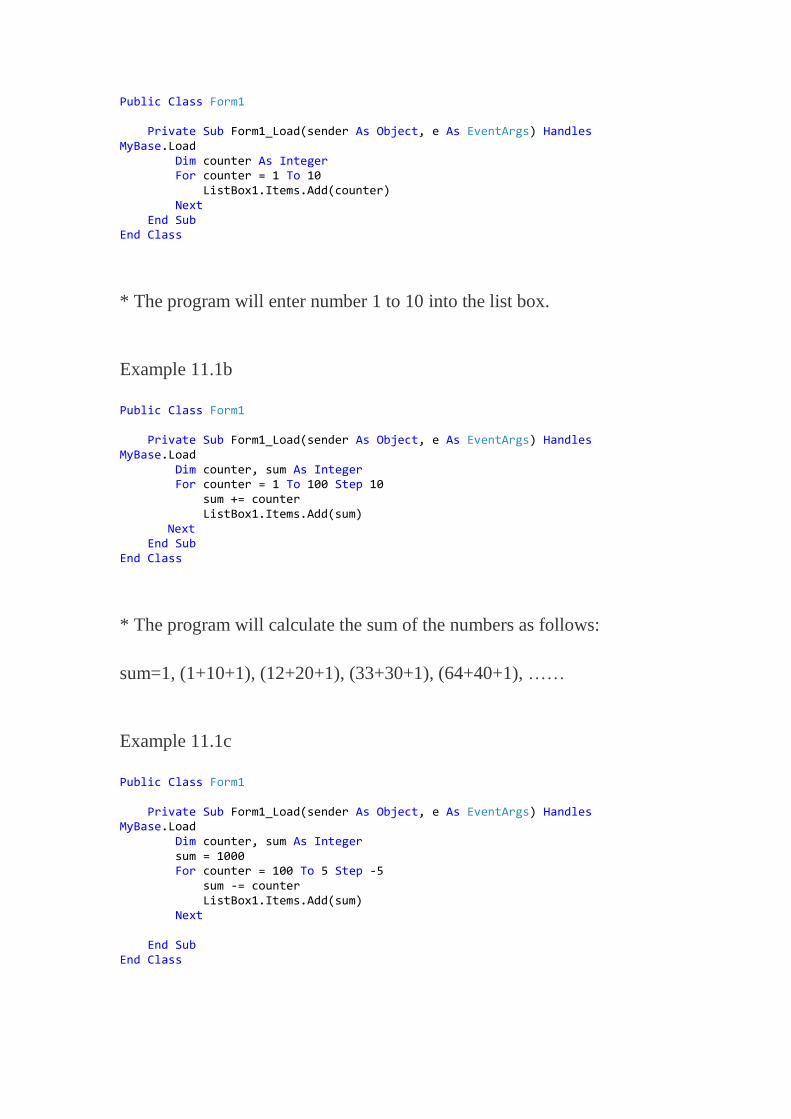
Public Class Form1 Private Sub Form1_Load(sender As Object, e As EventArgs) Handles MyBase.Load Dim counter As Integer For counter = 1 To 10 ListBox1.Items.Add(counter) Next End Sub End Class
* The program will enter number 1 to 10 into the list box.
Example 11.1b
Public Class Form1 Private Sub Form1_Load(sender As Object, e As EventArgs) Handles MyBase.Load Dim counter, sum As Integer For counter = 1 To 100 Step 10 sum += counter ListBox1.Items.Add(sum)
Next End Sub End Class
* The program will calculate the sum of the numbers as follows:
sum=1, (1+10+1), (12+20+1), (33+30+1), (64+40+1), ……
Example 11.1c
Public Class Form1 Private Sub Form1_Load(sender As Object, e As EventArgs) Handles MyBase.Load Dim counter, sum As Integer sum = 1000 For counter = 100 To 5 Step -5 sum -= counter ListBox1.Items.Add(sum) Next End Sub End Class
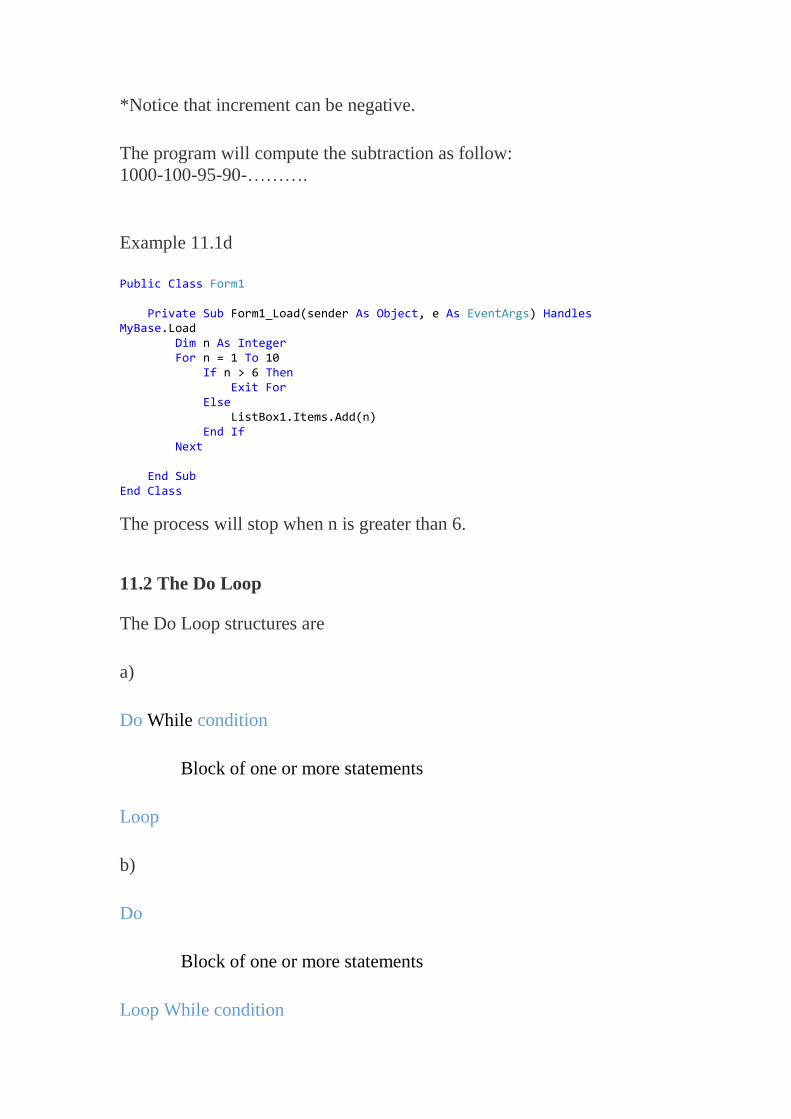
*Notice that increment can be negative.
The program will compute the subtraction as follow:
1000-100-95-90-……….
Example 11.1d
Public Class Form1 Private Sub Form1_Load(sender As Object, e As EventArgs) Handles MyBase.Load Dim n As Integer For n = 1 To 10 If n > 6 Then Exit For Else ListBox1.Items.Add(n) End If Next End Sub End Class
The process will stop when n is greater than 6.
11.2 The Do Loop
The Do Loop structures are
a)
Do While condition
Block of one or more statements
Loop
b)
Do
Block of one or more statements
Loop While condition
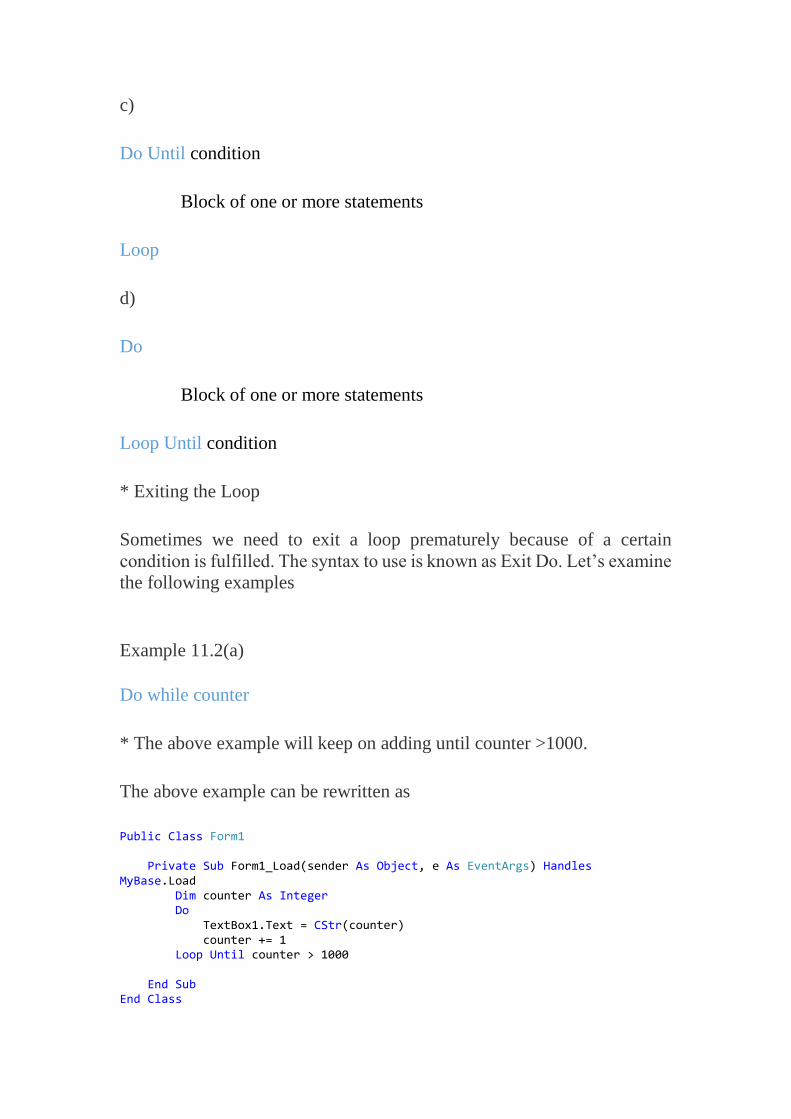
c)
Do Until condition
Block of one or more statements
Loop
d)
Do
Block of one or more statements
Loop Until condition
* Exiting the Loop
Sometimes we need to exit a loop prematurely because of a certain
condition is fulfilled. The syntax to use is known as Exit Do. Let’s examine
the following examples
Example 11.2(a)
Do while counter
* The above example will keep on adding until counter >1000.
The above example can be rewritten as
Public Class Form1 Private Sub Form1_Load(sender As Object, e As EventArgs) Handles MyBase.Load Dim counter As Integer Do TextBox1.Text = CStr(counter) counter += 1 Loop Until counter > 1000 End Sub End Class
Example 11.2(b)
Public Class Form1 Private Sub Form1_Load(sender As Object, e As EventArgs) Handles MyBase.Load Dim sum, n As Integer ListBox1.Items.Add("n" & vbTab & "Sum") ListBox1.Items.Add("----------------------") Do n += 1 sum += n ListBox1.Items.Add(n & vbTab & sum) If n = 100 Then Exit Do End If Loop End Sub End Class
6. Functions
A function is a procedure that returns a value which is passed on to the
main procedure to finish the execution. There are two types of functions in
Visual Basic 2012, the built-in functions (or internal functions) and the
functions created by the programmers. The syntax of a function is:
Function Name (arguments)
The arguments are values that are passed on to the function.
In this lesson, we are going to learn two very basic but useful internal
functions of Visual Basic 2012 , i.e. the MsgBox( ) and InputBox ( )
functions.
12.1 MsgBox ( ) Function
The MsgBox function produces a pop-up message box and prompts the
user to click on a command button before he /she can continues. This
syntax is as follows:
yourMsg = MsgBox(Prompt, Style Value, Title)
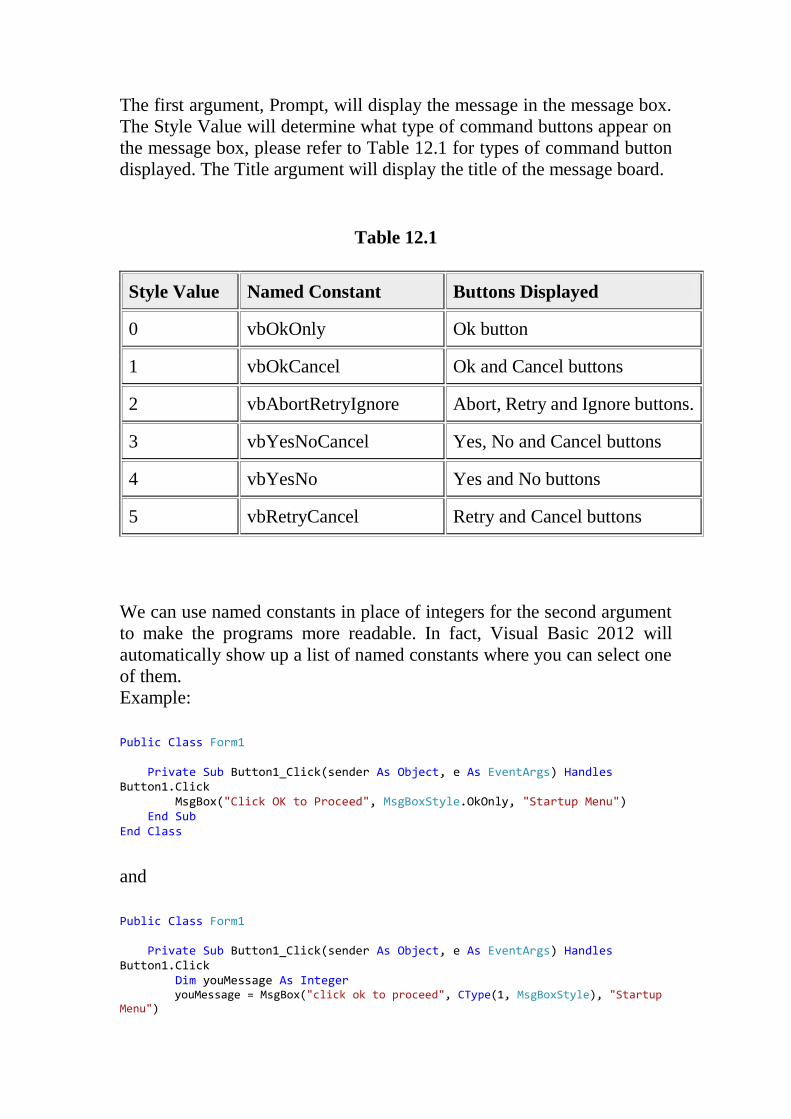
The first argument, Prompt, will display the message in the message box.
The Style Value will determine what type of command buttons appear on
the message box, please refer to Table 12.1 for types of command button
displayed. The Title argument will display the title of the message board.
Table 12.1
Style Value Named Constant Buttons Displayed
0 vbOkOnly Ok button
1 vbOkCancel Ok and Cancel buttons
2 vbAbortRetryIgnore Abort, Retry and Ignore buttons.
3 vbYesNoCancel Yes, No and Cancel buttons
4 vbYesNo Yes and No buttons
5 vbRetryCancel Retry and Cancel buttons
We can use named constants in place of integers for the second argument
to make the programs more readable. In fact, Visual Basic 2012 will
automatically show up a list of named constants where you can select one
of them.
Example:
Public Class Form1 Private Sub Button1_Click(sender As Object, e As EventArgs) Handles Button1.Click MsgBox("Click OK to Proceed", MsgBoxStyle.OkOnly, "Startup Menu") End Sub End Class
and
Public Class Form1 Private Sub Button1_Click(sender As Object, e As EventArgs) Handles Button1.Click Dim youMessage As Integer youMessage = MsgBox("click ok to proceed", CType(1, MsgBoxStyle), "Startup Menu")
End Sub End Class
are the same.
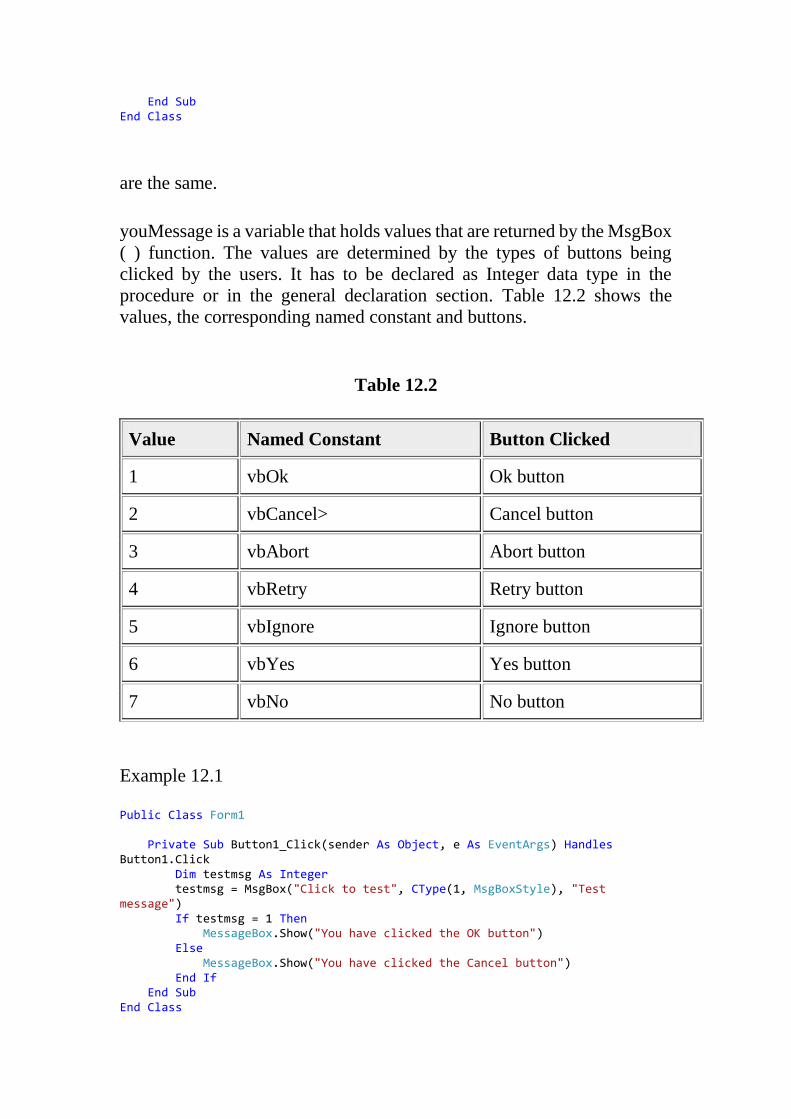
youMessage is a variable that holds values that are returned by the MsgBox
( ) function. The values are determined by the types of buttons being
clicked by the users. It has to be declared as Integer data type in the
procedure or in the general declaration section. Table 12.2 shows the
values, the corresponding named constant and buttons.
Table 12.2
Value Named Constant Button Clicked
1 vbOk Ok button
2 vbCancel> Cancel button
3 vbAbort Abort button
4 vbRetry Retry button
5 vbIgnore Ignore button
6 vbYes Yes button
7 vbNo No button
Example 12.1
Public Class Form1 Private Sub Button1_Click(sender As Object, e As EventArgs) Handles Button1.Click Dim testmsg As Integer testmsg = MsgBox("Click to test", CType(1, MsgBoxStyle), "Test message") If testmsg = 1 Then MessageBox.Show("You have clicked the OK button") Else MessageBox.Show("You have clicked the Cancel button") End If End Sub End Class
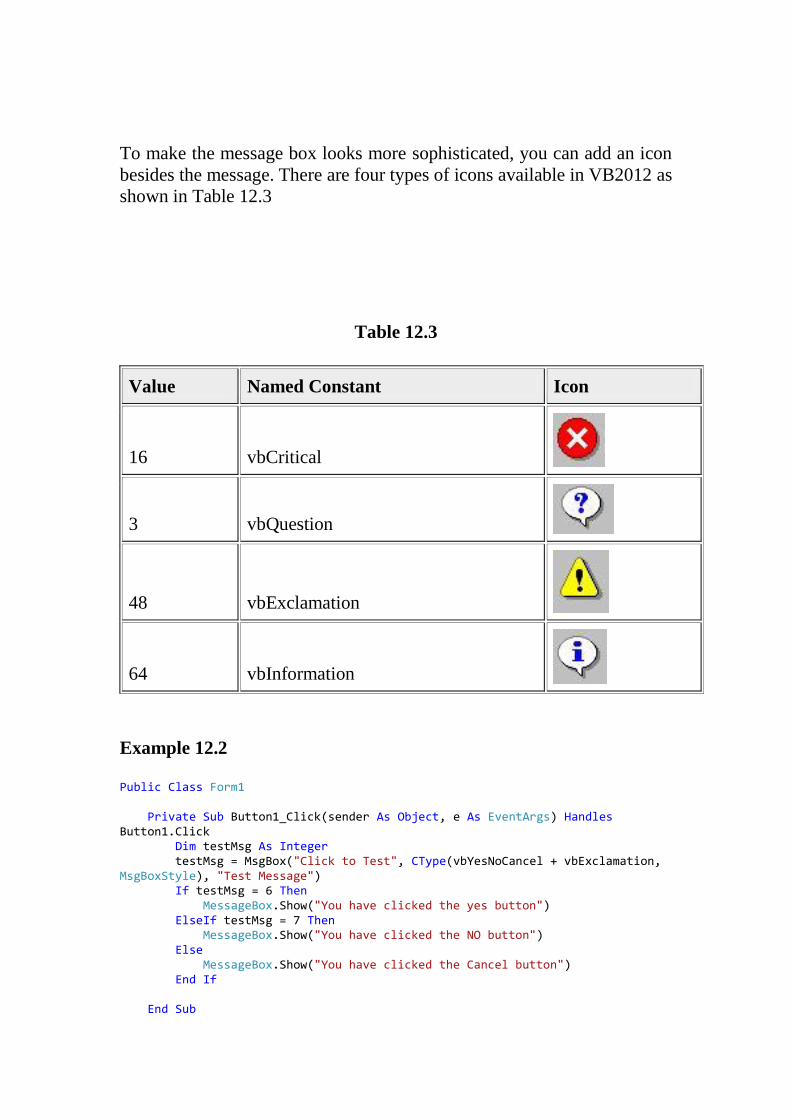
To make the message box looks more sophisticated, you can add an icon
besides the message. There are four types of icons available in VB2012 as
shown in Table 12.3
Table 12.3
Value Named Constant Icon
16 vbCritical
3 vbQuestion
48 vbExclamation
64 vbInformation
Example 12.2
Public Class Form1 Private Sub Button1_Click(sender As Object, e As EventArgs) Handles Button1.Click Dim testMsg As Integer testMsg = MsgBox("Click to Test", CType(vbYesNoCancel + vbExclamation, MsgBoxStyle), "Test Message") If testMsg = 6 Then MessageBox.Show("You have clicked the yes button") ElseIf testMsg = 7 Then MessageBox.Show("You have clicked the NO button") Else MessageBox.Show("You have clicked the Cancel button") End If End Sub
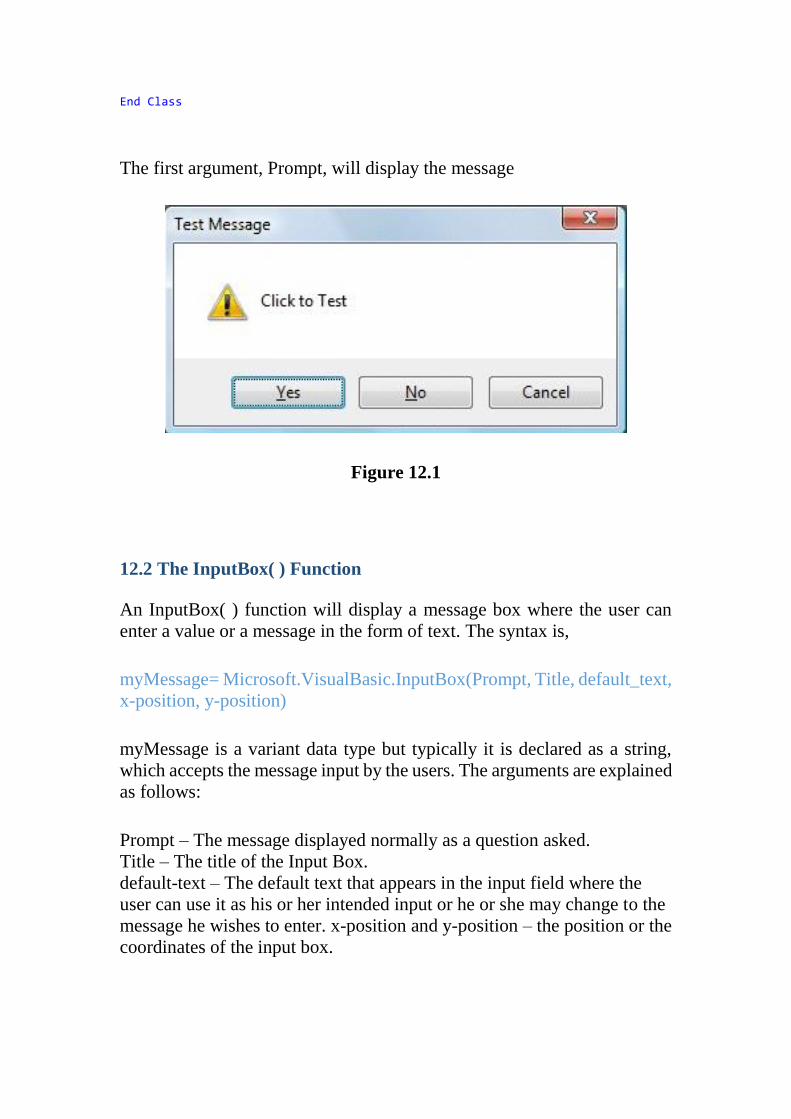
End Class
The first argument, Prompt, will display the message
Figure 12.1
12.2 The InputBox( ) Function
An InputBox( ) function will display a message box where the user can
enter a value or a message in the form of text. The syntax is,
myMessage= Microsoft.VisualBasic.InputBox(Prompt, Title, default_text,
x-position, y-position)
myMessage is a variant data type but typically it is declared as a string,
which accepts the message input by the users. The arguments are explained
as follows:
Prompt – The message displayed normally as a question asked.
Title – The title of the Input Box.
default-text – The default text that appears in the input field where the
user can use it as his or her intended input or he or she may change to the
message he wishes to enter. x-position and y-position – the position or the
coordinates of the input box.
However, in Visual Basic 2012 because InputBox is considered a
namespace. So, you need to key in the full reference to the Inputbox
namespace.
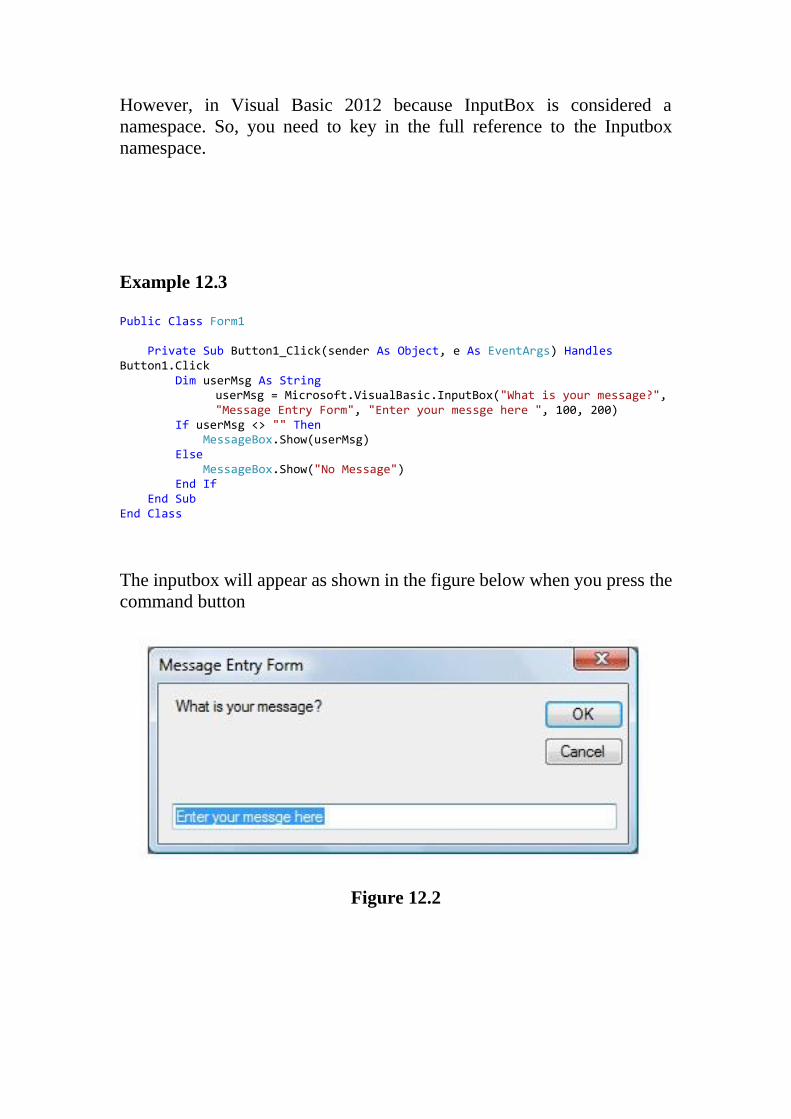
Example 12.3
Public Class Form1 Private Sub Button1_Click(sender As Object, e As EventArgs) Handles Button1.Click Dim userMsg As String
userMsg = Microsoft.VisualBasic.InputBox("What is your message?", "Message Entry Form", "Enter your messge here ", 100, 200)
If userMsg <> "" Then MessageBox.Show(userMsg) Else MessageBox.Show("No Message") End If End Sub End Class
The inputbox will appear as shown in the figure below when you press the
command button
Figure 12.2
7. The Built-In Functions
There are many built-in functions In Visual Basic 2012. In this lesson,
you will learn a couple of built-in functions that deal with string
manipulation.
13.1 The Mid Function
The Mid function is used to retrieve a part of the text from a given phrase.
The syntax of the Mid Function is
Mid(phrase, position,n)
*phrase is the string from which a part of the text is to be retrieved
*position is the starting position of the phrase from which the retrieving
process begins.
*n is the number of characters to retrieve.
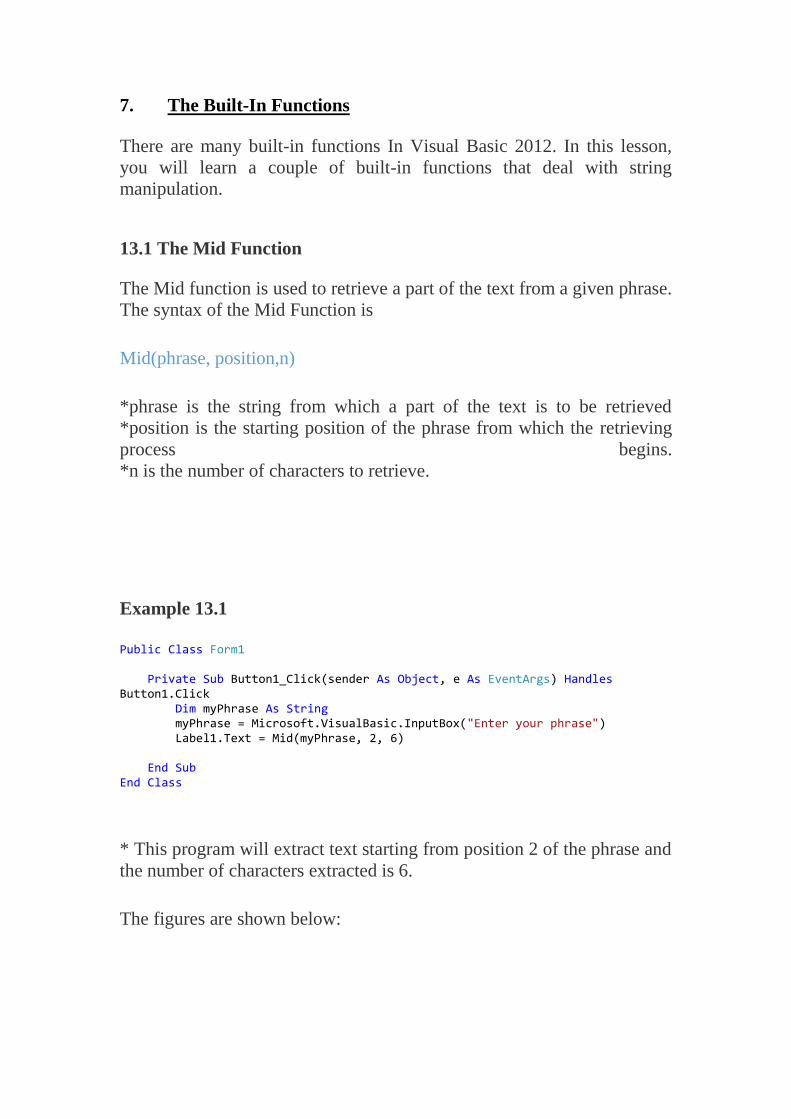
Example 13.1
Public Class Form1 Private Sub Button1_Click(sender As Object, e As EventArgs) Handles Button1.Click Dim myPhrase As String myPhrase = Microsoft.VisualBasic.InputBox("Enter your phrase") Label1.Text = Mid(myPhrase, 2, 6) End Sub End Class
* This program will extract text starting from position 2 of the phrase and
the number of characters extracted is 6.
The figures are shown below:
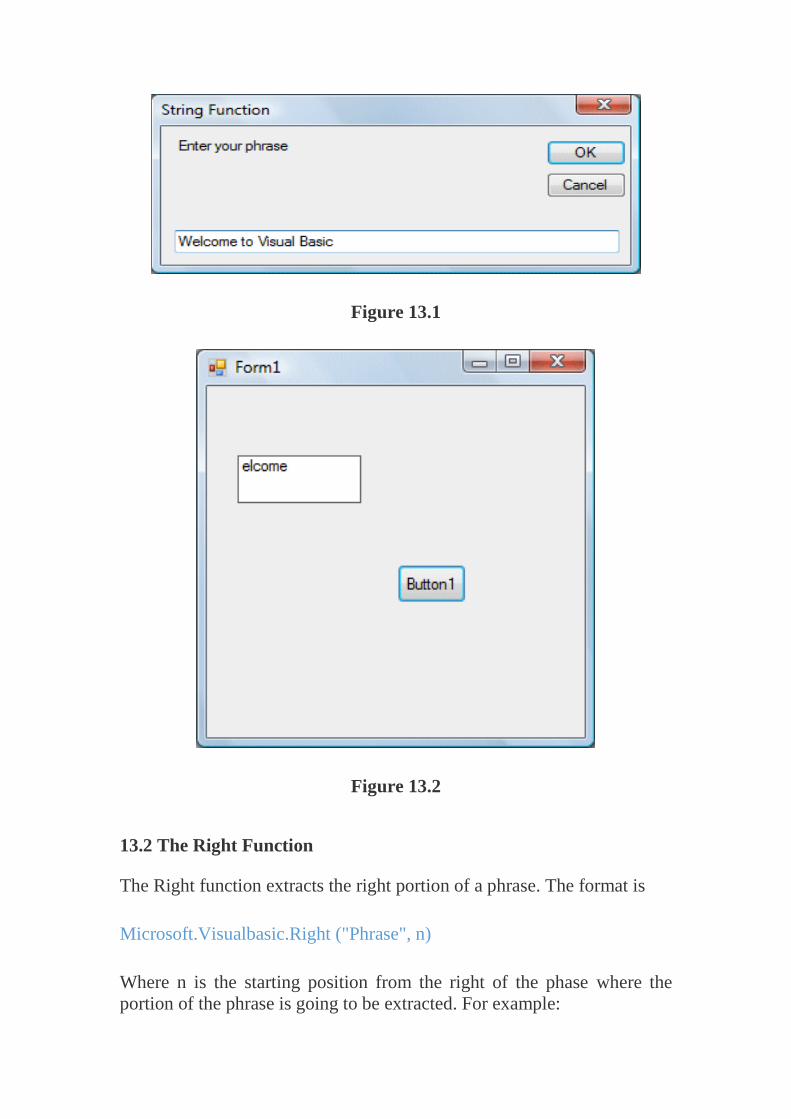
Figure 13.1
Figure 13.2
13.2 The Right Function
The Right function extracts the right portion of a phrase. The format is
Microsoft.Visualbasic.Right ("Phrase", n)
Where n is the starting position from the right of the phase where the
portion of the phrase is going to be extracted. For example:
Microsoft.Visualbasic.Right ("Visual Basic", 4) = asic
Example 13.2
The following code extracts the right portion any phrase entered by the
user.
Private Sub Button1_Click (ByVal sender As System.Object, ByVal e As
System.EventArgs) Handles Button1.Click
Dim myword As String
myword = TextBox1.Text
Label1.Text = Microsoft.VisualBasic.Right (myword, 4)
End Sub
13.3 The Left Function
The Left function extracts the left portion of a phrase. The format is
Microsoft.Visualbasic.Right ("Phrase", n)
Where n is the starting position from the left of the phase where the portion
of the phrase is going to be extracted. For example:
Microsoft.Visualbasic.Left("Visual Basic", 4) = asic
Example 13
The following code extracts the left portion any phrase entered by the user.
Private Sub Button1_Click (ByVal sender As System.Object, ByVal e As
System.EventArgs) Handles Button1.Click
Dim myword As String
myword = TextBox1.Text
Label1.Text = Microsoft.VisualBasic.Left (myword, 4)
End Sub
13.4 The Trim Function
The Trim function trims the empty spaces on both sides of the phrase. The
format isTrim("Phrase").For example,
Trim (” Visual Basic “) = Visual basic
Example 13.4
Private Sub Button1_Click(ByVal sender As System.Object, ByVal e As
System.EventArgs) Handles Button1.Click
Dim myPhrase As String
myPhrase = Microsoft.VisualBasic.InputBox("Enter your phrase")
Label1.Text = Trim(myPhrase)
End Sub
13.5 The Ltrim Function
The Ltrim function trims the empty spaces of the left portion of the phrase.
The format is Ltrim("Phrase").For example,
Ltrim (" Visual Basic 2012")= Visual basic 2012
13.6 The Rtrim Function
The Rtrim function trims the empty spaces of the right portion of the
phrase. The format is Rtrim("Phrase"). For example,
Rtrim ("Visual Basic 2012 ") = Visual Basic 2012
13.7 The InStr function
The InStr function looks for a phrase that is embedded within the original
phrase and returns the starting position of the embedded phrase. The format
is
Instr (n, original phase, embedded phrase)
Where n is the position where the Instr function will begin to look for the
embedded phrase. For example
Instr(1, "Visual Basic 2012 ","Basic")=8
*The function returns a numeric value.
You can write a program code as shown below:
Private Sub Button1_Click(ByVal sender As System.Object, ByVal e As
System.EventArgs) Handles Button1.Click
Label1.Text = InStr(1, "Visual Basic", "Basic")
End Sub
13.8 The Ucase and the Lcase Functions
The Ucase function converts all the characters of a string to capital letters.
On the other hand, the Lcase function converts all the characters of a string
to small letters.
The syntax is
Microsoft.VisualBasic.UCase(Phrase)
Microsoft.VisualBasic.LCase(Phrase)
For example,
Microsoft.VisualBasic.Ucase("Visual Basic") =VISUAL BASIC
Microsoft.VisualBasic.Lcase("Visual Basic") =visual basic
13.9 The Chr and the Asc functions
The Chr function returns the string that corresponds to an ASCII code
while the Asc function converts an ASCII character or symbol to the
corresponding ASCII code. ASCII stands for “American Standard Code
for Information Interchange”. Altogether there are 255 ASCII codes and as
many ASCII characters. Some of the characters may not be displayed as
they may represent some actions such as the pressing of a key or produce
a beep sound. The format of the Chr function is
Chr(charcode)
and the format of the Asc function is
Asc(Character)
The following are some examples:
Chr(65)=A, Chr(122)=z, Chr(37)=% ,
Asc("B")=66, Asc("&")=38
8. The Math Functions
In this lesson, you will learn how to use the built-in math functions in
Visual Basic 2012. There are numerous built-in math functions in Visual
Basic 2012. Let’s examine them one by one.
14.1 The Abs function
The Abs function returns the absolute value of a given number.
The syntax is
Math. Abs (number)
* The Math keyword indicates that the Abs function belong to the Math
class.
14.2 The Exp function
The Exp of a number x is the exponential value of x, i.e. ex . For example,
Exp(1)=e=2.71828182
The syntax is
Math.Exp (number)
Example 14.1
Private Sub Button1_Click(ByVal sender As System.Object, ByVal e As
System.EventArgs) Handles Button1.Click
Dim num1, num2 As Single
num1 = TextBox1.Text
num2 = Math.Exp(num1)
Label1.Text = num2
End Sub
14.3 The Fix Function
The Fix function truncates the decimal part of a positive number and
returns the largest integer smaller than the number. However, when the
number is negative, it will return smallest integer larger than the number.
For example, Fix(9.2)=9 but Fix(-9.4)=-9
Example 14.2
Private Sub Button1_Click(ByVal sender As System.Object, ByVal e As
System.EventArgs) Handles Button1.Click
Dim num1, num2 As Single
num1 = TextBox1.Text
num2 = Fix(num1)
Label1.Text = num2
End Sub
14.4 The Int Function
The Int is a function that converts a number into an integer by truncating
its decimal part and the resulting integer is the largest integer that is smaller
than the number. For example
Int(2.4)=2, Int(6.9)=6 , Int(-5.7)=-6, Int(-99.8)=-100
14.5 The Log Function
The Log function is the function that returns the natural logarithm of a
number. For example, Log(10)=2.302585
Example 14.3
Private Sub Button1_Click(ByVal sender As System.Object, ByVal e As
System.EventArgs) Handles Button1.Click
Dim num1, num2 As Single
num1 = TextBox1.Text
num2 = Math.Log(num1)
Label1.Text = num2
End Sub
* The logarithm of num1 will be displayed on label1
14.6 The Rnd( ) Function
Rnd is a very useful function in Visual Basic 2012 . We use the Rnd
function to write code that involves chance and probability. The Rnd
function returns a random value between 0 and 1. Random numbers in their
original form are not very useful in programming until we convert them to
integers. For example, if we need to obtain a random output of 6 integers
ranging from 1 to 6, which makes the program behave like a virtual dice,
we need to convert the random numbers to integers using the formula
Int(Rnd*6)+1.
Example 14.4
Private Sub Button1_Click(ByVal sender As System.Object, ByVal e As
System.EventArgs) Handles Button1.Click
Dim num as integer
Num=Int(Rnd()*6)+1
Label1.Text=Num
End Sub
In this example, Int(Rnd*6) will generate a random integer between 0 and
5 because the function Int truncates the decimal part of the random number
and returns an integer. After adding 1, you will get a random number
between 1 and 6 every time you click the command button. For example,
let say the random number generated is 0.98, after multiplying it by 6, it
becomes 5.88, and using the integer function Int(5.88) will convert the
number to 5; and after adding 1 you will get 6.
14.7 The Round Function
The Round function is a Visual Basic 2012 function that rounds up a
number to a certain number of decimal places. The Format is Round (n, m)
which means to round a number n to m decimal places. For example,
Math.Round (7.2567, 2) =7.26
Example 14.5
Private Sub Button1_Click(ByVal sender As System.Object, ByVal e As
System.EventArgs) Handles Button1.Click
Dim num1, num2 As Single
num1 = TextBox1.Text
num2 = Math.Round(num1, 2)
Label1.Text = num2
End Sub
* The Math keyword here indicates that the Round function belong to the
Math class.
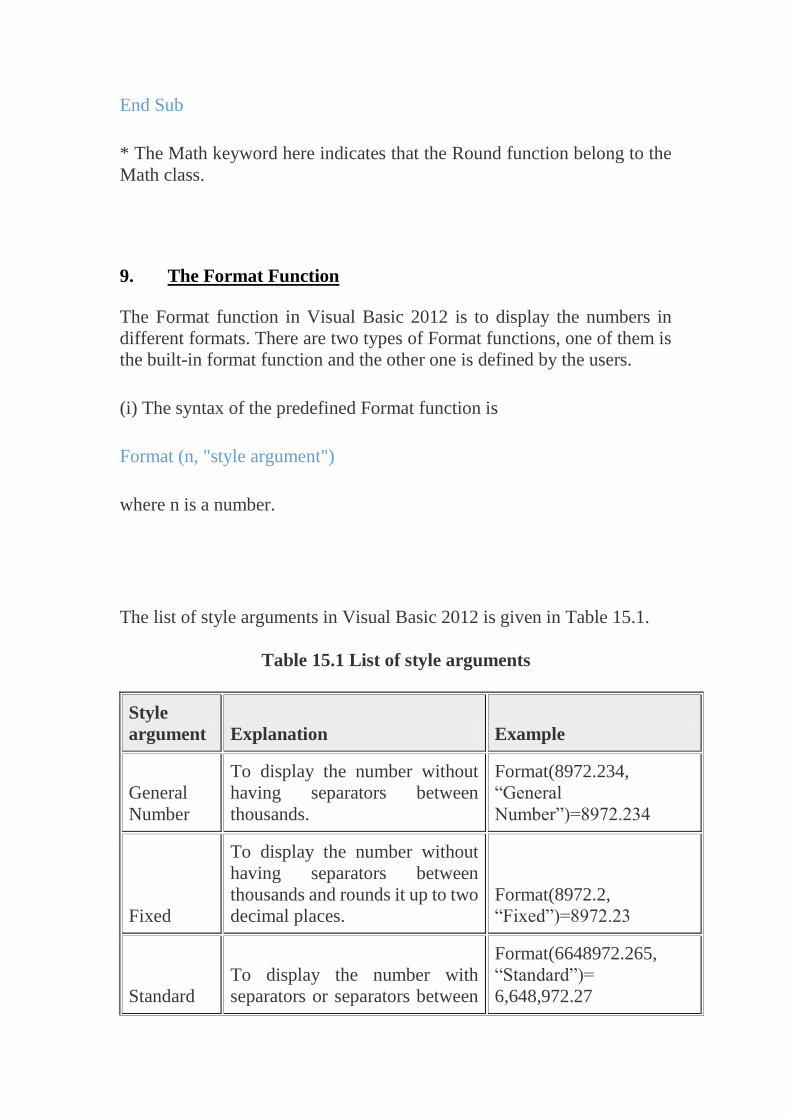
9. The Format Function
The Format function in Visual Basic 2012 is to display the numbers in
different formats. There are two types of Format functions, one of them is
the built-in format function and the other one is defined by the users.
(i) The syntax of the predefined Format function is
Format (n, "style argument")
where n is a number.
The list of style arguments in Visual Basic 2012 is given in Table 15.1.
Table 15.1 List of style arguments
Style
argument Explanation Example
General
Number
To display the number without
having separators between
thousands.
Format(8972.234,
“General
Number”)=8972.234
Fixed
To display the number without
having separators between
thousands and rounds it up to two
decimal places.
Format(8972.2,
“Fixed”)=8972.23
Standard
To display the number with
separators or separators between
Format(6648972.265,
“Standard”)=
6,648,972.27
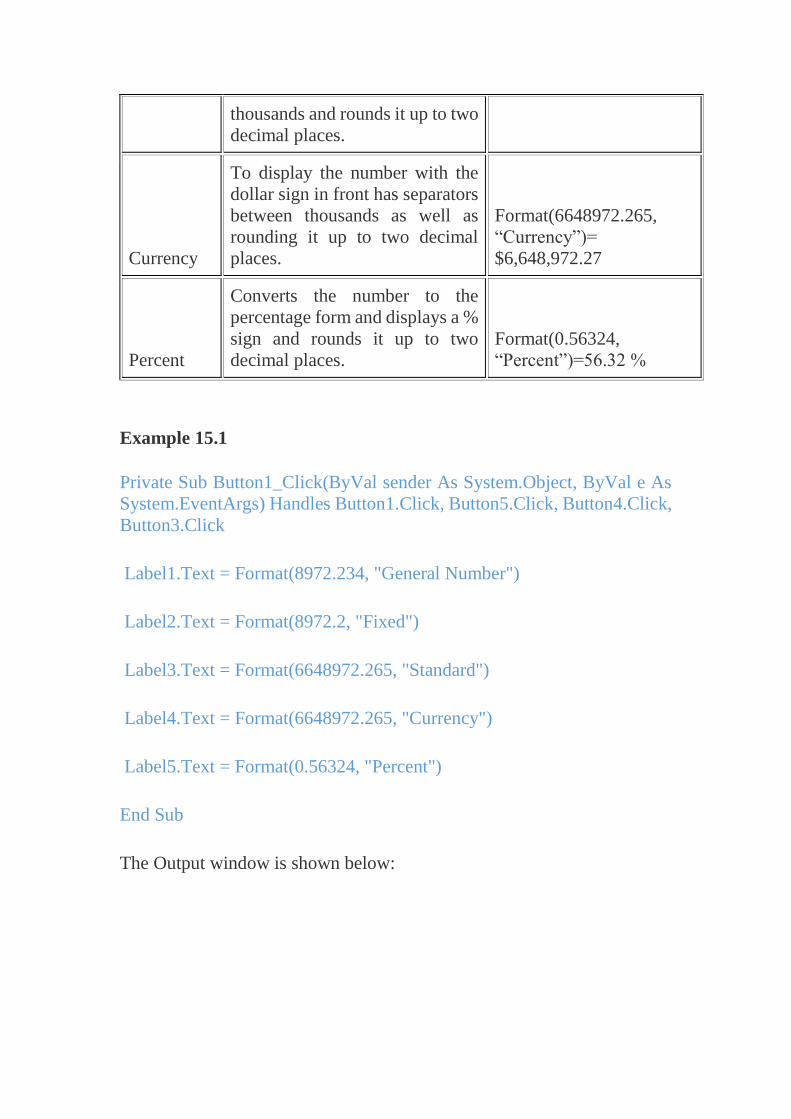
thousands and rounds it up to two
decimal places.
Currency
To display the number with the
dollar sign in front has separators
between thousands as well as
rounding it up to two decimal
places.
Format(6648972.265,
“Currency”)=
$6,648,972.27
Percent
Converts the number to the
percentage form and displays a %
sign and rounds it up to two
decimal places.
Format(0.56324,
“Percent”)=56.32 %
Example 15.1
Private Sub Button1_Click(ByVal sender As System.Object, ByVal e As
System.EventArgs) Handles Button1.Click, Button5.Click, Button4.Click,
Button3.Click
Label1.Text = Format(8972.234, "General Number")
Label2.Text = Format(8972.2, "Fixed")
Label3.Text = Format(6648972.265, "Standard")
Label4.Text = Format(6648972.265, "Currency")
Label5.Text = Format(0.56324, "Percent")
End Sub
The Output window is shown below:
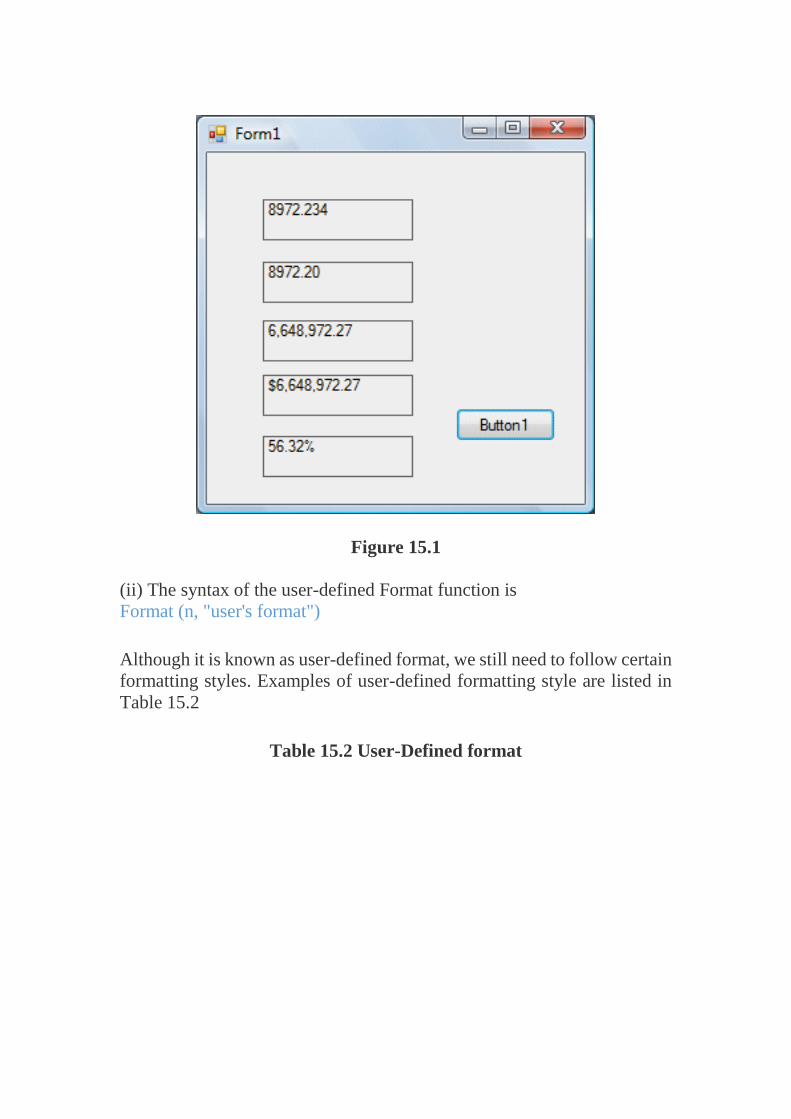
Figure 15.1
(ii) The syntax of the user-defined Format function is
Format (n, "user's format")
Although it is known as user-defined format, we still need to follow certain
formatting styles. Examples of user-defined formatting style are listed in
Table 15.2
Table 15.2 User-Defined format
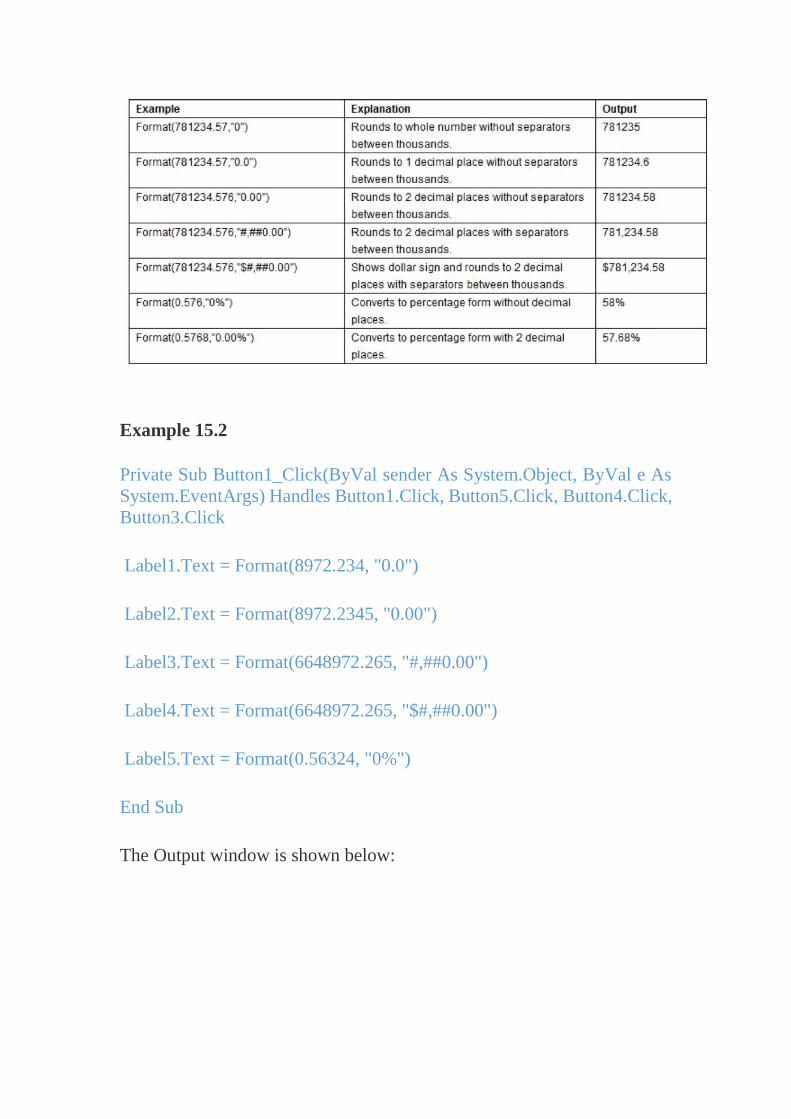
Example 15.2
Private Sub Button1_Click(ByVal sender As System.Object, ByVal e As
System.EventArgs) Handles Button1.Click, Button5.Click, Button4.Click,
Button3.Click
Label1.Text = Format(8972.234, "0.0")
Label2.Text = Format(8972.2345, "0.00")
Label3.Text = Format(6648972.265, "#,##0.00")
Label4.Text = Format(6648972.265, "$#,##0.00")
Label5.Text = Format(0.56324, "0%")
End Sub
The Output window is shown below:
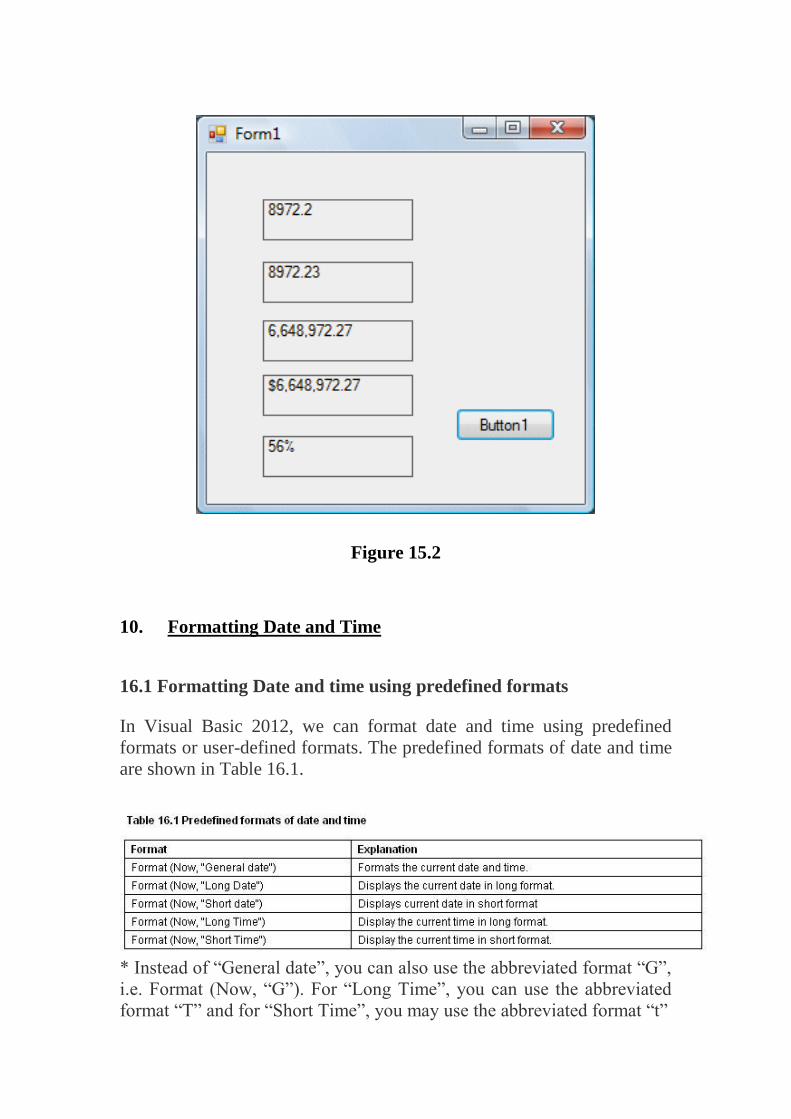
Figure 15.2
10. Formatting Date and Time
16.1 Formatting Date and time using predefined formats
In Visual Basic 2012, we can format date and time using predefined
formats or user-defined formats. The predefined formats of date and time
are shown in Table 16.1.
* Instead of “General date”, you can also use the abbreviated format “G”,
i.e. Format (Now, “G”). For “Long Time”, you can use the abbreviated
format “T” and for “Short Time”, you may use the abbreviated format “t”
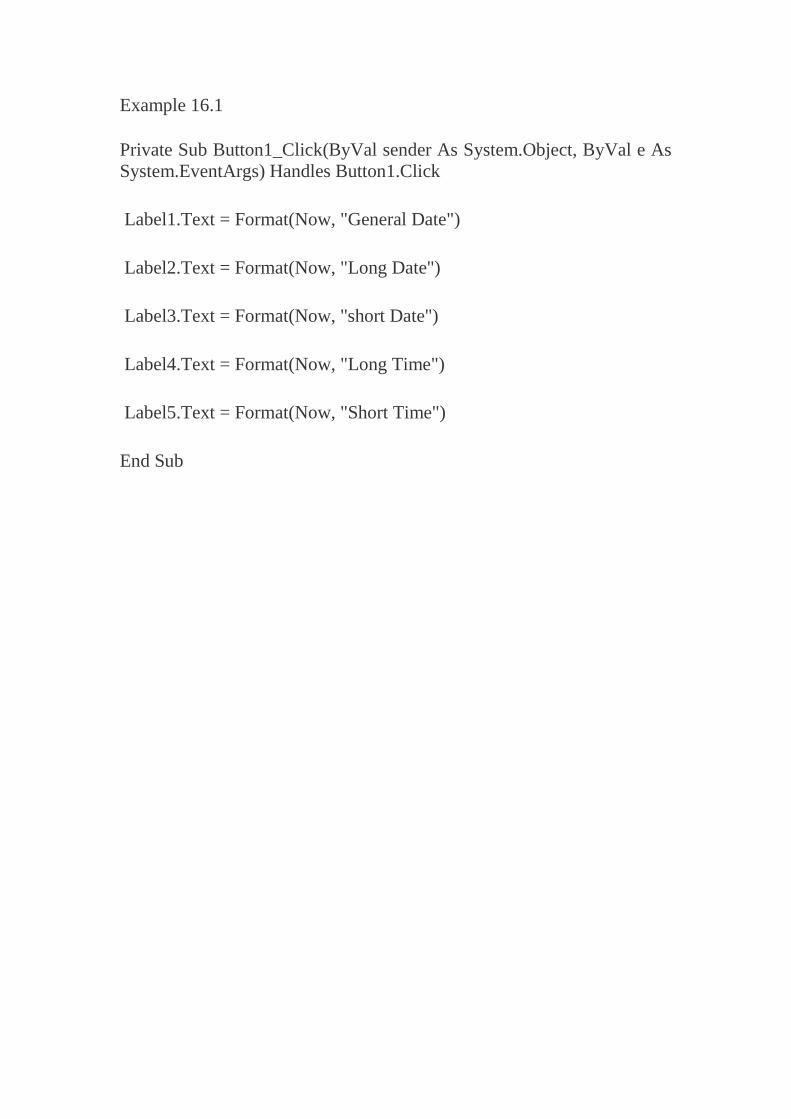
Example 16.1
Private Sub Button1_Click(ByVal sender As System.Object, ByVal e As
System.EventArgs) Handles Button1.Click
Label1.Text = Format(Now, "General Date")
Label2.Text = Format(Now, "Long Date")
Label3.Text = Format(Now, "short Date")
Label4.Text = Format(Now, "Long Time")
Label5.Text = Format(Now, "Short Time")
End Sub