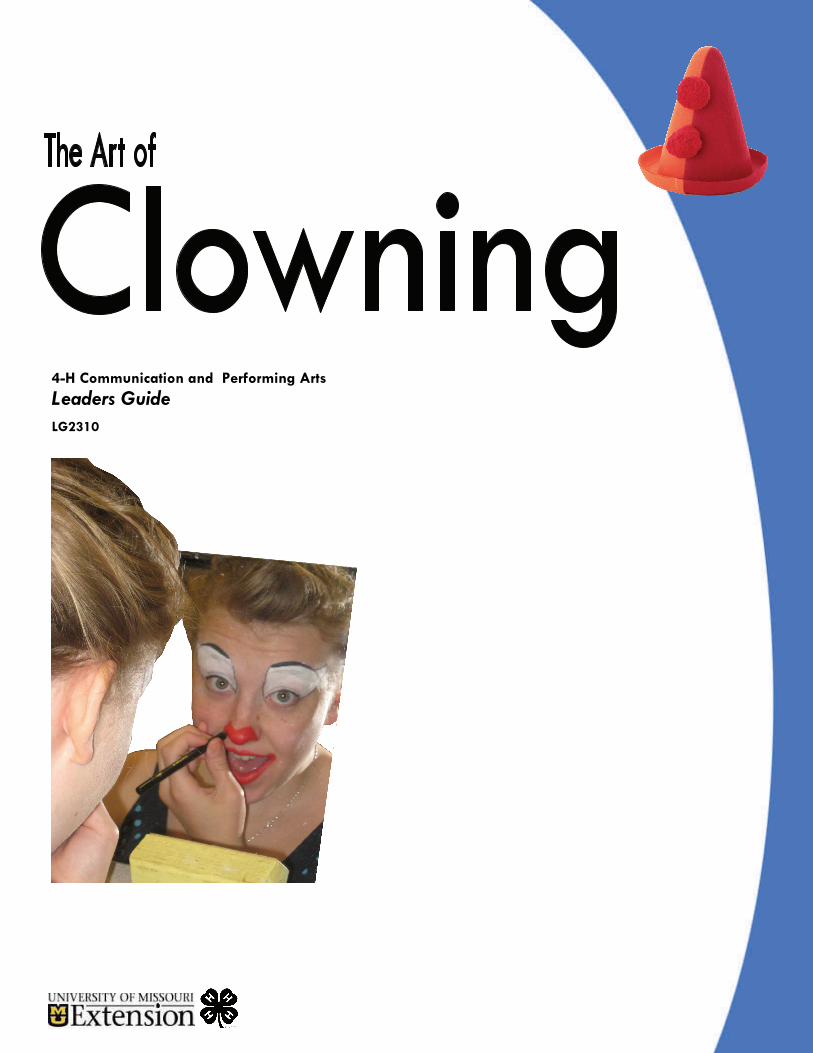
4-h communication and performing arts leaders...
TRANSCRIPT
25
4-H Communication and Performing Arts Leaders Guide LG2310

4-H Communication and Performing Arts
Leaders Guide LG2310
Introduction and First Steps.…………………………….…………..………
Lesson Plans
Eight-Lesson Format..……………………………………...…………
Six-Lesson Format...……………………………….…………………
Six Hour Workshop plus Five Two-Hour Lessons………………...….
Communication Exercises….……………………………….……………...
Non-Verbal Communication Exercises….……………...…………………..
Evaluation Form……………………………………..…………………….
2
6
9
12
14
16
22
This material was adapted from the Art of Clowning member and leader guides, which were originally developed by Michigan 4-H Youth Development, Michigan State University Extension.
Additional Content by Bradd Anderson, State 4-H Youth Development Specialist
Graphics Design: Meg Phillips, 4-H Center for Youth Development
Contributing Editors: Meredith Brunkow, 4-Corners 4-H Club Member; Tina Brunkow, 4-Corners 4-H Club Leader;
Amy Wilsdorf, Missouri State 4-H Council Regional Representative, Woodlandville 4-H Club

2
Introduction Clowning is a great way for 4-H leaders to teach a variety of life skills. For example, through clowning youth can strengthen their communication abilities, in-crease self awareness, develop good character, and experience community service. Although clowns exist to make people laugh, not every-one reacts this way to an irrational stranger with face paint and exaggerated features. Some children and even adults are quite afraid of clowns. As with many other fears, makers of horror movies have made a lot of money exploiting this, which has added to a less positive view of clowns among some members of our society. However, this media image does not represent true clowning. 4-H’ers enrolled in this project will learn that clowns are part of a long, rich history. Clowns carry on a noble and valued tradition, with benefits for the youth and the communities they live in. The following experiences were recorded by 4-H clowns and their leaders:
• Shy people found that they really “had it” and could perform well as clowns. Clowning helped to overcome shyness. Youth who hadn’t felt accepted by their peers were compli-mented and supported by them.
• Participants experienced meaningful effects of non-verbal communication. • They also found that clowning gave them a tremendous opportunity to be creative. • 4-H clowns taught others through the art of clowning. Example: at a 4-H event, six clowns
developed and presented a skit on grooming, posture and exercise. • Personal appearance members chose making their clown outfits as their 4-H projects and
evaluated and modeled them in a personal appearance program. • Clowns entered their skits and routines in talent shows. • Clowns have enjoyed participating and helping in their communities as clowns. • Clowns perform at children’s birthday parties, hospitals, convalescent homes, etc. • Members have had the joy of bringing fun and laughter to many people of all ages. • Clowns have promoted 4-H and taught a skill by giving demonstrations.
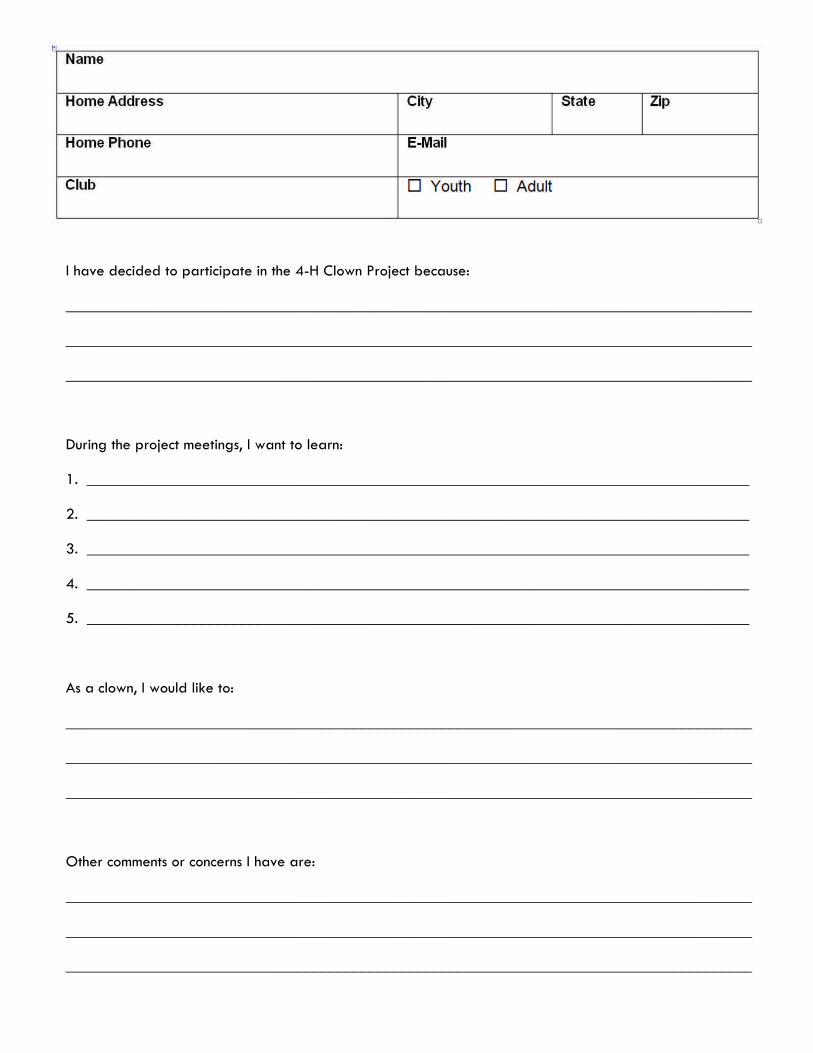
First Steps To help get your 4-H clown class off on the right foot, consider having each participant fill out a form like the one on page 3. You could also do much of this as a group discussion.
3
I have decided to participate in the 4-H Clown Project because:
______________________________________________________________________________________
______________________________________________________________________________________
______________________________________________________________________________________
During the project meetings, I want to learn:
1. ___________________________________________________________________________________
2. ___________________________________________________________________________________
3. ___________________________________________________________________________________
4. ___________________________________________________________________________________
5. ___________________________________________________________________________________
As a clown, I would like to:
______________________________________________________________________________________
______________________________________________________________________________________
______________________________________________________________________________________
Other comments or concerns I have are:
______________________________________________________________________________________
______________________________________________________________________________________
______________________________________________________________________________________

4
Getting Started Just like the person underneath the makeup, every clown is unique, from their face paint and outfit to the acts they develop. It’s okay to be different, and as a clown it is essential! Putting on Your Face For younger children around the Clover Kid age, the process of mixing and applying their makeup is far more interesting than the end result. It takes time to develop these makeup skills. Focus on what’s being learned rather than how perfect the end result is. For young teens, clowning may offer a chance to be in the spotlight, knowing that any physical features they are self-conscious about are no longer a factor. For example, bad hair is covered by a bright wig, a big nose is covered by an even bigger nose, and clumsiness is part of the act! As one Missouri 4-H clown put it, “It’s a new way for me to come out of my shell. I’m not the same person as I am without makeup.” Dressing the Part If your county has a sewing project, this section presents some great leadership opportunities. For example, consider inviting some of those youth to come give tips and advice for project members making clown suits.
Communicating as a Clown This section presents great opportunities to develop life skills such as decision-making, problem-solving, critical thinking and service learning. Discuss various scenarios and ask questions such as, “What would make clowning a good way to deliver this message?”, “What prob-lems might you run into with this message or this audi-ence?”, and “How will this benefit the people we’re here to help?” Performing as a Clown Clown etiquette fits nicely into the Six Pillars of Char-acter: Trustworthiness, Respect, Responsibility, Caring, Citizenship and Fairness. Just like pillars support a large building, these pillars of character support one’s life. Good character makes you stronger in every way. Many children and youth have difficulty understanding the importance of practice and rehearsal. Before per-forming in public, have them perform first in front of the other clowning group members or possibly the par-ents. This should be done well in advance of the public performance. It provides a “safe” audience to make mistakes in front of, and to realize that there is a great need for more practice.

5
When studying pantomime, hand puppetry or ventriloquism, consider searching for examples on Internet sites such as YouTube or Google Video. This is an easy way to offer your 4-H’ers a look at great per-formances throughout modern history! As an adult, you will need to pre-screen these clips for appropriateness of course. Unfortunately, some of today’s best ventriloquists have acts which are not appropriate for youth.
Lesson Plans On the following pages are two sets of lesson plans, an eight lesson format and a six les-son format, that you may want to use with your 4-H clowning group. These sessions are recommended for youth ages 12 and older, with a class sizes of 15-30, depending on the number of instructors. You should use them as general guidelines only, adapting them to the needs and talents of your club.
Basic Equipment (to be brought to each class) • Cotton swabs, 1 dozen • Cotton balls, 1 dozen • Black eyebrow pencil • White powder (MUST be white. Do not use cornstarch, as it will yellow the makeup) • Powder puffs, 2 large • Shaving brush or soft paint brush • Hair covering • Mirror, 8” x 10,” self-standing, magnified on one side • Toilet tissue • Mineral, baby oil, cold cream or petroleum jelly for removing makeup • Makeup Assignment: Work on designing and drawing your own clown face on self with eye-brow pencil. Bring basic equipment in a suitable container to second session. Begin making clown outfit and think about clown names. Look up history of clowning and bring one item about clowning to next class. Suggestion: Provide each participant with a small sample of washable clown makeup or white grease paint and two color sticks (one red). If you opt to go with the traditional grease paint, fill a lid from a gallon milk jug with white grease paint and cover with wax paper. Cut color sticks into 1 inch pieces. This is sufficient for two or three trial makeups.

6
Eight-Lesson Format Lesson 1 • Have participants bring mirror, eyebrow pencil, mineral oil or petroleum jelly, cold cream,
baby oil, washable makeup, a towel for wiping it all off, etc.
• Provide name tags for all participants. Get acquainted through games and/or mixers.
• View pictures or slides of clowns and discuss types of clowns and especially explain features
of clown faces. Jot down ideas on a worksheet for your own face at this time.
• Demonstration of makeup application for a White Face and Hobo Clown.
• Explanation of makeup supplies can be done simultaneously with a narrator explain-
ing each step of application.
• Washable makeup is advised, as it is much easier to take off.
• Selection of clown name and costume.
• Show clown costumes or pictures and discuss creation of clown “person” and costume.
• This discussion may also be lead by another instructor when there is a slow time dur-
ing the makeup demonstration.
• Participants begin designing their clown faces.
• Have them make faces in a mirror, moving their eyebrows up and down and trying
different smiles. Have them look for the smile lines and other lines in their faces.
• Draw out the design on paper. It will probably take several tries to get one they
like.
• Instruct them to choose one or two facial areas to emphasize. Otherwise their clown
face will be too busy.
• If time permits, sketch clown face on self with eyebrow pencil.
• Remove makeup.
Lesson 2
• Discuss history of clowning.
• Class members outline face and fill in areas to be colored.
• Remove makeup.
• Put on complete face, if time permits, including base color (clown white if White Face Clown,
etc.)
• Remove makeup.
Assignment: Practice applying and removing makeup. Work on costume.

7
Assignment: Practice applying and removing makeup. Work on costume. Bring at least one prop to next
session. Be prepared to demonstrate how to use that prop in clowning. Select clown name.
Lesson 4
• Application of makeup. Complete face.
• Demonstrate how to create a clown skit, pantomime, or routine.
• Each participant announces his/her clown name.
• Each participant shows and demonstrates using a clown prop brought to class.
• Assignment: Work on face, costume, and develop a skit or routine for graduation.
Lesson 5
• Application of makeup. Complete face.
• Balloon artistry.
• Clown etiquette—emphasize the impor-
tance and value of being a good clown.
Discuss how the Six Pillars of Character re-
late to clowning.
• Conduct exercises in relationships to help
participants become aware of this facet of
being good clowns.
• Practice skits, pantomimes, and routines.
Offer constructive suggestions.
• Assignment: Practice making balloon
animals. Work on face, costume, and skit or
routine.
Lesson 3
• Application of makeup. Complete face.
• Ask youth to present their face and describe how they came up with it.
• Critique faces—constructive criticism of each person’s clown face, starting and
ending with the positive features. Open discussion to help each participant.
• Instructors to show props and demonstrate props in clowning.

8
Lesson 6
• Application of makeup. Complete face.
• Discuss opportunities for clowning.
• Critique faces if necessary.
• Practice balloon artistry.
Assignment: Finish costume, work on applying face, and perfect performance for graduation
(8th session).
Lesson 7: On the Job Training
Participate in an actual clowning experience! For example, your group could visit and perform
at a nursing home or in a children’s ward at a hospital.
Assignment: Have face, costume, and skit or routine ready for graduation.
Lesson 8: Graduation!
• Come in full costume and with makeup applied.
• Invite parents and friends to come to the graduation.
• Introduce and present each participant a certificate of achievement.
• Presentation of clown skits, pantomimes, or routines (each must be involved).
• Celebrate with refreshments!

9
Six-Lesson Format Lesson 1
• Have participants bring mirror, eyebrow pencil, mineral oil or petroleum jelly,
cold cream, baby oil, washable makeup, a towel for wiping it all off, etc.
• Get acquainted with name tags, games, mixers, etc.
• Watch old movie clips or pre-selected Internet video clips of clown performances.
• View pictures of clowns and discuss types of clowns. Explain features of clown faces. Jot down ideas on
a worksheet for your own face at this time.
• Demonstration of makeup application for a White Face and Hobo Clown. Explanation of makeup sup-
plies can be done simultaneously with a narrator explaining each step of application.
• Selection of clown name and costume. Show clown costumes or pictures and discuss creation of clown
“person” and costume. This may be done by another instructor when there is a slow time during makeup
demonstration. (This can also be left until Lesson 2).
• Participants begin designing their clown faces.
• Have them make faces in a mirror, moving their eyebrows up and down and trying different
smiles. Have them look for the smile lines and other lines in their faces.
• Draw out the design on paper. It will probably take several tries to get one they like.
• Instruct them to choose one or two facial areas to emphasize. Otherwise their clown face will be too
busy.
• If time permits, sketch clown face on self with eyebrow pencil.
• Remove makeup.
Assignment: Work on designing and drawing your own clown face on self with eyebrow pencil. Collect
basic equipment to bring to next class in a suitable container.
Lesson 2
• Application of makeup. Complete face.
• Class members outline faces.
• Remove makeup.
• Selection of clown costume. Show clown costumes and discuss features in creating and designing your
own clown costume. What are some ideas youth have for their outfits?
Assignment: Practice applying makeup. Begin making clown outfit.

10
Lesson 3
• Application of makeup. Complete
face.
• Show props and demonstrate using
props in clowning.
• Demonstrate how to create a clown
skit, pantomime or routine.
• Practice – help youth get experi-
ence with the use of props in skits.
Assignments: (1) Create a skit, pantomime or routine to be presented at the graduation cere-
mony at the sixth session. This can be individual or group act. (2) Select a clown name. (3)
Select a prop and practice using it.
Lesson 4
• Application of makeup. Complete face.
• Ask youth to present their face and describe how they came up with it.
• Critique faces—constructive criticism of each person’s clown face, starting and ending with
the positive features. Open discussion to help each participant.
• Each participant announces his/her clown name.
• Each participant shows and demonstrates using a clown prop that he/she brought to class.
• Balloon artistry. Learn to make the basic balloon animal characters.
Assignment: Continue to work on costume, face and perfecting performance for graduation
(sixth session).
Lesson 5
• Application of makeup.
• Clown Etiquette. Emphasize the importance and value of being a good clown. Discuss how
the Six Pillars of Character relate to clowning.
• Conduct exercises in relationships to help participants become aware of this facet of being
good clowns.

11
• Practice skits, pantomimes, and routines. Offer constructive suggestions. Always
start and end with the positives.
Assignment: Participate in an actual clowning experience before the next session.
(This should be arranged prior to the meeting.)
Lesson 6: Graduation!
• Everyone comes in full costume and with makeup applied.
• Invite parents and friends to come to the graduation.
• Introduce and present each participant a certificate of achievement.
• Presentation of clown skits, pantomimes, or routines (each must be involved).
• Discuss opportunities for clowning.
• Take pictures, serve clown refreshments, and celebrate!

12
Six Hour Workshop plus Five
Two-Hour Lessons
Session 1—Six Hour Workshop
10:00 a.m.- 4:00 p.m.
10:00 a.m.
• Introduction
• Show PowerPoint slides and/or video
• History
• Types
• Explain makeup supplies
• Makeup demonstration, both White Face and Hobo—also demonstrate makeup removal
• Students work up face on worksheet
• Students draw features on their faces with eyebrow pencil
• Students fill in features with color sticks, remove
12:30 Lunch (sack lunch)
1:00-2:30
• Students make up entire face
• Critique
2:30-4:00
• Costuming, names, props, skits, balloons
• Bring in experienced clowns who show costuming through a combination of skits and show
and tell. Names are worked into this.
• Props can also be demonstrated by experienced clowns.
• Clowns do several skits while instructor discusses pantomime and acting skills.
• Clowns demonstrate balloon artistry while students participate. Students given several bal-
loons for at-home practice.
For this workshop, instructor either brings basic equipment and makeup or advise in advance
what materials students should bring to the workshop and succeeding sessions.

13
Assignment: Practice applying makeup, work on balloon artistry, and begin
work on costume.
Session 2 –Two Hour Workshop
• Students apply entire makeup
• Discussion of clown etiquette and Six Pillars of Character
• Special relationship exercises, facial expressions
• Order makeup
Assignment: Practice applying makeup, work on costume, bring prop to next class.
Session 3 –Two Hour Workshop
• Students apply entire makeup
• Show props
• Practice pantomime, using props if possible
Assignment: Practice applying makeup, work on costumes, decide on names.
Session 4 –Two Hour Workshop
• Students apply entire makeup
• Students present their name and tell why it was chosen
• Review balloon artistry
Assignment: Practice applying makeup, work on costumes, work on skit for graduation.
Session 5 –Two Hour Workshop
• Students apply entire makeup
• Final critique (Are they ready for the street?)
• Practice for graduation
Assignment: Finish costume. Practice skit.
Session 6 –Two Hour Workshop
• Graduation and on-the-job training
• Meet in costume, drive to hospital, nursing home, etc.

14
Communication Exercises for the Clown
The art of clowning depends on the clown’s ability to relate to the audience, not only as an en-
tertainer but as an interpersonal communicator as well. With good interpersonal and group
communication skills, a clown will be successful with an audience, perhaps a little more skillful in
handling hecklers, and will enrich his/her own personal relationships.
This section helps the clown get in touch with interpersonal and group communication styles.
These experiences will provide the clown with the opportunity to 1) become more aware of ef-
fective and ineffective communication procedures, 2) become more aware of his/her own behav-
ior in communicating with others, and 3) practice effective communication procedures in order to
develop increased skills. The concepts of nonverbal communications, active listening, position and
environment, and verbal put-downs are introduced.
Each of the exercises is set up in a lecture format so that anyone may introduce communication
concepts and exercises, and then process the exercise afterwards to help youth get the most out
of the experience. Each exercise lists the purpose, materials needed, instructions, and processing
questions for the exercise.
Introductory Exercises Establishing an open, friendly atmosphere in which to learn interpersonal skills is very important.
Taking time to do an introductory exercise or two, so that everyone in the group knows the
names of other group members, will aid in establishing an atmosphere in which participants feel
they can share thoughts and feelings with each other.
Name Circle Game
Materials Needed (for each participant)
Newsprint
Masking tape
Magic markers
Purpose
To have participants become acquainted with one another.
Procedure
• Ask each person to draw a picture, caricature, etc., that depicts, without words, their
clown name. For example, a clown named King Richard might draw a crown (for king)
and a “$” for, while another clown named Kathy might draw a cat and add “hy”.

15
• After everyone finishes, the group sits in a circle. The first person explains his
name (participants can also guess it). The clown might talk about the origin of his
or her clown name and how it coordinates with his character and outfit. The next
person must explain his name and repeat the name of the person next to him.
The third person does the same and repeats the name of the first two. This proc-
ess continues until everyone gets a turn. The final person repeats all the names of
the people around the circle (during this process, participants hold their posters
up in front of them to aid the recall of names).
• Afterwards, the group can hang their pictures around the room in case anyone forgets a name and
needs to refer back to a picture. The posters also add a personal atmosphere to the room.
• Variation: Ask clowns to draw their personal names and their clown names.
Interview Someone You Don’t Know
Materials Needed
3 x 5 or 5 x 8 index cards
Pencils
Purpose
To facilitate group interaction and aid group members in becoming better acquainted. To aid members
in remembering each other’s names.
Procedure
Give each group member a card and pencil and ask him to interview three (or as many as all) members
he doesn’t know. The group member should ask the person being interviewed:
• Their name
• Where they’re from
• What they like most about being a 4-H clown
• The hardest part about being a 4-H clown
• How it must feel to be a young child and see a clown for the first time
• How it must feel to be small and have a clown in a large baggy suit towering overhead.
• How it feels to be given a toy or piece of candy from a clown.
After group members have interviewed three people or more, the facilitator asks group members to re-
port back to the whole group. The interviewer should introduce the interviewee by name, tell where
they’re from and outline the information that others in the group don’t know about this person, but that
this person wishes to share with the group.
16
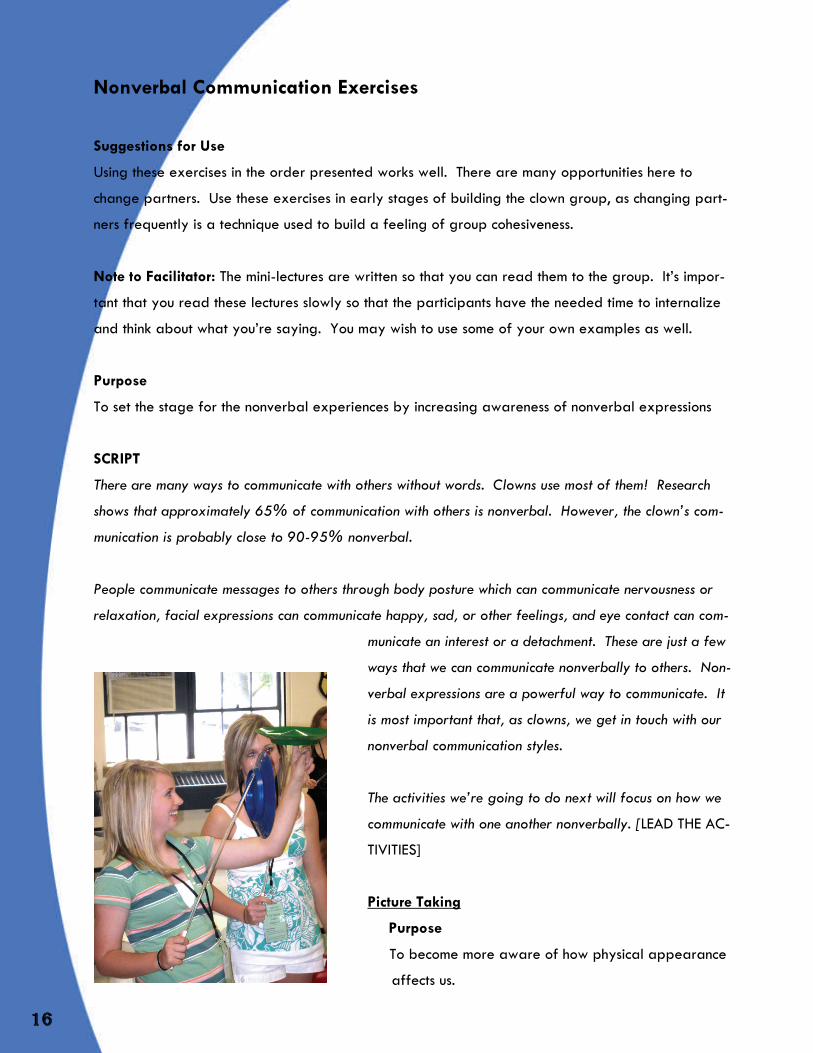
Nonverbal Communication Exercises
Suggestions for Use
Using these exercises in the order presented works well. There are many opportunities here to
change partners. Use these exercises in early stages of building the clown group, as changing part-
ners frequently is a technique used to build a feeling of group cohesiveness.
Note to Facilitator: The mini-lectures are written so that you can read them to the group. It’s impor-
tant that you read these lectures slowly so that the participants have the needed time to internalize
and think about what you’re saying. You may wish to use some of your own examples as well.
Purpose
To set the stage for the nonverbal experiences by increasing awareness of nonverbal expressions
SCRIPT
There are many ways to communicate with others without words. Clowns use most of them! Research
shows that approximately 65% of communication with others is nonverbal. However, the clown’s com-
munication is probably close to 90-95% nonverbal.
People communicate messages to others through body posture which can communicate nervousness or
relaxation, facial expressions can communicate happy, sad, or other feelings, and eye contact can com-
municate an interest or a detachment. These are just a few
ways that we can communicate nonverbally to others. Non-
verbal expressions are a powerful way to communicate. It
is most important that, as clowns, we get in touch with our
nonverbal communication styles.
The activities we’re going to do next will focus on how we
communicate with one another nonverbally. [LEAD THE AC-
TIVITIES]
Picture Taking
Purpose
To become more aware of how physical appearance
affects us.

17
Procedure
• Form groups of two by choosing someone you don’t know well and is not sit-
ting on either side of you.
• Give the group these instructions: Sit comfortably in front of your partner and
look at that person carefully. Don’t be concerned that someone once told you
that it was impolite to stare. Look at your partner’s every facial feature. Notice
what each part of their face is doing. What are the eyebrows, eyelids, and eyes
doing? Take a look at the person’s nose and mouth. What about the facial muscles?
Do this for about one minute and then close your eyes. See how clearly you can bring this person’s
face into your mind’s eye. If you’ve missed something, open your eyes and pick up on the details
you have missed.
You have been taking mental picture of the person in front of you and you’ve been processing those
pictures. That processing might be like, “Wow! What a nice face!” or “What an interesting hair
style!” This internal processing or internal dialog goes on all the time, each time we meet and talk
to another person. It’s this internal dialog that affects our relationships with others.
As we become aware of our thoughts, we may notice that some of these thoughts make us feel bad
and some make us feel good—our bodies respond to what we’re feeling. When nervous and
afraid, our stomachs feel full of butterflies, our hands sweat, and our knees feel weak. On the other
hand, if we feel really good, our bodies will be relaxed.
• Ask the pairs to share with each other how they are feeling now, then encourage group members
to share with the total group.
• Ask pairs how they feel about their partners now. Is it different from the way they felt when
their partners were only another one of the group members?
• Ask the group to talk about mistakes they might make if they make snap judgments about indi-
viduals in their audience. For instance, the “dirty-looking kid” may not be so nice to get close to,
but might be the person in the audience who needs interaction with the clown most of all.

18
Back to Back
Purpose
To become aware of the need for eye contact in interpersonal communication.
Procedure
• Form two-partner groups (dyads).
• Give the group these instructions:
• Sit back to back with your partner and begin to talk about something neat that happened to
you recently as a 4-H clown—something that was a really good experience. (You may vary
this with other clown or non-clown topics.)
• (After about one minute) Now, move about five feet away from your partner and con-
tinue talking.
• After about 30 seconds, stop the conversations and ask the group members to share how this ex-
perience felt. How did it feel to share a good experience with someone who was turned away from
you?
• If the group members do not bring up the following points, discuss them with the group.
• What about a need for eye contact when talking with others?
• Did you find yourself missing the non-verbal gestures and facial expressions? Why?
• How easy was it to hear what your partner was saying?
• Discuss with the group how they see the importance of maintaining eye contact and a close rela-
tionship with members of their audience.
One Up, One Down
Purpose
To become aware of the effect of physical position on interpersonal communication.
Procedure
• Change partners
• Give the participants these instructions: One of you stand
and the other be seated directly in front of the other. Begin
to share another experience with your partner. After about
two minutes, stop and share how it feels to talk in this posi-
tion. Then change experiences – the other partner try stand-
ing directly above and talking down.
Discuss how you felt with your partner.

19
Relate this experience to what it must be like to be a little kid and always have to
look up to communicate. What do you feel it could do to your communication (the
little kid’s way of communicating)? Is it any wonder that some people feel little all
of their lives? Shouldn’t you, as a clown, kneel down next to the child?
• Again, in the position of the above exercise, look around and see what one
sees from that perspective. How about the furniture, does it appear bigger?
How about all the people who are standing, are knees and legs more important
than faces which are relatively far away?
Variation – Hold Hands
Try another variation of the one up, one down experience. Hold hands for at least thirty sec-
onds. The person on the floor obviously has to hold his hand and arm up and the one standing
has his arm extending down to reach his partner’s.
Hurts, doesn’t it? The kid with his arm held up after a minute or so begins to grow numb. Does
that say something about kids who get cross when they are hauled around by an arm all day?
What does it say to you as a clown?
Variation – Eye Rest
Get back into the standing and sitting positions for another thirty seconds and then break eye
contact. Notice how quickly this change in position will give your neck, eyes, shoulders, and back
some relief. Now imagine how easily an adult could interpret this looking away as disrespect
when the kid was only trying to get in a quick eye rest.
Variation – Pat on the Head
Next, the stander gives the sitter a playful pat on the head. Is it experienced as comforting or
as a greeting, or rather as a “cranial explosion?” What does that say to the clown?
Variation – Ceiling to Floor
Now one partner stands on a chair and the other partner kneels on the floor. Again, try commu-
nicating. This is just another way of experiencing the one up, one down position.
Share feelings about this experience with the total group.

20
Positive Feelings
Ask the group to be seated in a circle so that everyone can see each other’s faces. Ask each individual
to tell something that they did for a member in their audience that made them feel very good. (You
may vary this question.)
Options: You could have group members first draw a picture or write a story about this event and then
share it in the circle. Process the exercise by asking group members why it is important to help make
others feel good about themselves and each other. Can a clown help this process?
Killer Statements and Gestures
Ask the group to be seated in a circle so that all can see each other’s faces. Ask group members to dis-
cuss with each other (in dyads) statements made by others or gestures made by others that make them
feel less good about themselves. Also discuss gestures or statements that have made them feel good
about themselves. Have participants discuss how gestures and statements they make can help or hinder
their clowning routine.
A Friend to All
Purpose
To make clowns aware of the many things in life that make them and their audience feel happy and
pleased.
Ask group members to complete the following sentences and then share their responses with another
member in the group.
Sentence Stubs
• The world would be a better place if everyone…
• I like being a clown because…
• Cooperation is really important to me because…
• I like my family because…
• Helping others is…
• One thing I like to do in groups is…
• If I could teach everyone in the world one thing, it would be…
• I can help other people most by…
• The hardest thing for me to do as a clown is…
• I like being with people who…

21
• I like being with people when…
• One thing I could teach someone as a clown is…
Variations: Set chairs in concentric circles with chairs facing each other. After
group members have completed their sentence sheets, ask them to be seated in
the concentric circles and share their response to one sentence (which you read
aloud) with the person facing them and talk about the response. Call time and
have the innermost circle switch one chair to the right. Then read the next sen-
tence and ask the new partners to discuss the response. This process may be continued until the end
of the sentence list or until the group seems to tire of the process.
One-Way Feeling Glasses
Explain that as the group leader you have some magic glasses to look through. Hold out your hand
and show the group members that you have glasses there, but they are invisible. Then ask each par-
ticipant to pretend to take a pair of glasses out of your hands and put them on. Ask if they notice
that these magic glasses enable them to see anything through happy eyes. Help them see every-
thing through happy eyes. Ask participants what changes in their environment when they see through
“happy eyes.”
When you think they’re ready for a change, help them switch their glasses to “angry glasses.” Now
the world is an angry place. Everything that’s done causes angry responses. The room is full of
grouches. Again let them interact for a while.
At an appropriate time, you may switch to other glasses such as:
Scared Bragging Nobody loves me Gloomy Things are OK Curious Suspicious Too Cool to Be Here Modest Show-off Stubborn
After several role playing situations, carry on a discussion of their feelings while wearing different
types of glasses. Have there been days when they think they’ve had on a particular pair of one
way feeling glasses? Do they know people who seem to always wear one type of glasses? Probe
for what the exercise may man to them in their own daily behavior.
Now, encourage clown members to incorporate their magic glasses into their clown routine as well as
into their everyday lives.

22

23
Evaluation Form Use The evaluation form on the preceding page can be copied and given to each clown. The clowns in turn can use it with friends, relatives and other to determine how they may improve as a clown. The form also has possibilities for use by the clown leader to evaluate the clowns in class.
Adapted with permission from the Cooperative Extension Service, 4-H Youth Programs, Michigan State University
Members of the Harg Hustlers, River Hills, and Woodlandville 4-H Clubs: Bobo, Daisy, Galaxie, Squiggles, Sketti, Spangles, Spots, Star, Stripes, and Sweet lil Thang.