4-h cloverbud activity record book c 2016-2017 · pdf file•burnett county cloverbud...
TRANSCRIPT

Materials adapted by Beth Rank, August 2016, from resources originally created by: Kim Drolshagen, Michelle Grimm and Michelle Schroeder, 2010
“An EEO/Affirmative Action employer, University of Wisconsin-Extension provides equal opportunities in employment and programming, including Title IX and ADA. Please make requests for reasonable accommodations to ensure equal access to educational programs as early as possible preceding the scheduled
program, service, or activity. This document can be provided in an alternative formation by calling UW-Extension at 715-349-2151r 711 for Wisconsin Relay.”
4-H Cloverbud Activity Record Book C
2016-2017
1

• Burnett County Cloverbud Meeting Calendars p. 3-4 • Excerpt from 2016 County Fair Book-Dept. 17
and Entry Suggestions for 2017 County Fairs p. 5-7 • A Little Bit About Me p. 8 • My 4-H Club p. 9 • Pledge of Allegiance p. 10 • 4-H Pledge p. 11 • About 4-H p. 12 • 4-H Activities p. 13 • My 4-H Cloverbud Story with Parent Comments p. 14 ACTIVITY PAGES (must complete at least 7 to achieve) • Making Mosaics p. 15-17 • First Aid Kit p. 19-20 • Homemade Potato Soup Mix p. 21-22 • Birdseed Cakes p. 23-24 • Family Flags/Signal Flags p. 25-30 • Scrumptious Sundae p. 31-32 • Toad Abode p. 33 • Beautiful Butterflies p. 34-38 • Balloon Rocket p. 39-40 • Animal Tracks p. 41-46 • Let’s Sculpt p. 47 • Mime Time p. 48 • Tic-Tac-Toe Weaving p. 49-52 • Noisy Cups p. 53 • Mystery of Water and Oil p. 54 • Cave Formations p. 55 • Ocean in a Bottle P. 56 • Nature Scavenger Hunt P. 57-59 • 4-H Cloverbud Additional Info Pages (Optional) P. 60-70 • References p. 71
2

3
Date Location and Time Coordinator Topic
Monday, October 10, 2016 Room 165 BCGC at 6:00 p.m. Maiya Fuller Making Mosaics
Monday, November 14, 2016 Room 165 BCGC at 6:00 p.m. Anna Treague First Aid
Monday, December 12, 2016 Room 165 BCGC at 6:00 p.m. Sheryl Stiemann Homemade Potato Soup
Monday, January 9, 2017 Room 162/163 BCGC at 6:00
p.m. Karin Reinert Birdseed Cakes
Monday, February 13, 2017 Room 165 BCGC at 6:00 p.m. Amy Kopecky Family Flag/Signal Flag
Monday, March 13, 2017 Room 165 BCGC at 6:00 p.m. Alexis Slater Scrumptious Sundaes
Monday, April 10, 2017 Room 162/163 BCGC at 6:00
p.m. Maiya Fuller Toad Abode
Monday, May 8, 2017 Room 165 BCGC at 6:00 p.m. Amy Kopecky Beautiful Butterflies
Monday, June 12, 2017 Room 165 BCGC at 6:00 p.m. Maiya Fuller Balloon Rockets
Tuesday, July 11, 2017 Camp Burnett on Lake 26
10:00 a.m.-4:00 p.m. Camp Staff Cloverbud Day Camp
Monday, August 14, 2017 Room 165 BCGC at 6:00 p.m. Anna Treague Animal Tracks
Monday, September 11, 2017 Room 165 BCGC at 6:00 p.m. Maiya Fuller Let’s Sculpt
The 4-H Cloverbud Project is a program of Burnett County 4-H Program which is coordinated through Burnett County UW-Extension.
The 4-H Cloverbud Project is a program of Burnett County 4-H Program which is coordinated through Burnett County UW-Extension. The 4-H Cloverbud Project, Burnett County 4-H, UW-Extension and their partners do not discriminate against anyone for reasons of race, color, gender/sex, gender identity, creed, disability, religion, national origin, ancestry, age, sexual orientation, pregnancy, marital or parental status, arrest or conviction record or veteran status.
The Burnett County 4-H Cloverbud Project is open to all youth in Five-Year-Old Kindergarten through 2nd grade.
Youth in 3rd grade or higher are encouraged to join 4-H as a 4-H member. For more details contact the UW-Extension
Office at 715-349-2151.
Cloverbud projects are designed for the member to explore and discover project areas. Safety is the primary concern
of the 4-H Cloverbud Project Leaders. Please let the UW-Extension 4-H Youth & Family Development Educator, Beth
Rank, know of any food allergies or special accommodations needed to ensure participation to the fullest extent.
This book contains activities that will be used throughout this 4-H year October 2016-September 2017. Each year a
new book will be distributed by the UW-Extension Office to all registered 4-H Cloverbuds.
Meeting Cancelation Policy: If area schools are closed for a full day or close early due to weather, Cloverbud Project
meetings scheduled for that evening are canceled. Meetings will still be held on days when the start of school is
delayed due to weather.
In order for Cloverbud project members to receive the Outstanding Cloverbud Award and achieve for the year
in 4-H, they must complete (and document in their own handwriting) a minimum of seven (7) activity pages.
The activities in green text will be completed at the monthly countywide Cloverbud meetings. Members can use any of
the activities in green OR blue text to meet the requirements.
Burnett County Government Center Calendar

4
Date Location and Time Coordinator Topic
Tuesday, October 11, 2016 Grantsburg Library Learning
Center 6:00 p.m. Missy Peterson Making Mosaics
Tuesday, November 15, 2016 Grantsburg Library Learning
Center 6:00 p.m. Missy Peterson First Aid
Tuesday, December 13, 2016 Grantsburg Library Learning
Center 6:00 p.m. Missy Peterson Homemade Potato Soup
Tuesday, January 10, 2017 Grantsburg Library Learning
Center 6:00 p.m. Karin Reinert Birdseed Cakes
Tuesday, February 14, 2017 Grantsburg Library Learning
Center 6:00 p.m. Amy Kopecky Family Flag/Signal Flag
Tuesday, March 14, 2017 Grantsburg Library Learning
Center 6:00 p.m. Alexis Slater Scrumptious Sundaes
Tuesday, April 11, 2017 Grantsburg Library Learning
Center 6:00 p.m.
Beth Rank or guest
presenter Toad Abode
Tuesday, May 9, 2017 Grantsburg Library Learning
Center 6:00 p.m. Amy Kopecky Beautiful Butterflies
Tuesday, June 13, 2017 Grantsburg Library Learning
Center 6:00 p.m. Maiya Fuller Balloon Rockets
Tuesday, July 11, 2017 Camp Burnett on Lake 26
10:00 a.m.-4:00 p.m. Camp Staff Cloverbud Day Camp
Tuesday, August 15, 2017 Grantsburg Library Learning
Center 6:00 p.m. Anna Treague Animal Tracks
Tuesday, September 12, 2017 Grantsburg Library Learning
Center 6:00 p.m. Alexis Slater Let’s Sculpt
The 4-H Cloverbud Project is a program of Burnett County 4-H Program which is coordinated through Burnett County UW-Extension.
The 4-H Cloverbud Project is a program of Burnett County 4-H Program which is coordinated through Burnett County UW-Extension. The 4-H Cloverbud Project, Burnett County 4-H, UW-Extension and their partners do not discriminate against anyone for reasons of race, color, gender/sex, gender identity, creed, disability, religion, national origin, ancestry, age, sexual orientation, pregnancy, marital or parental status, arrest or conviction record or veteran status.
The Burnett County 4-H Cloverbud Project is open to all youth in Five-Year-Old Kindergarten through 2nd grade.
Youth in 3rd grade or higher are encouraged to join 4-H as a 4-H member. For more details contact the UW-Extension
Office at 715-349-2151.
Cloverbud projects are designed for the member to explore and discover project areas. Safety is the primary concern
of the 4-H Cloverbud Project Leaders. Please let the UW-Extension 4-H Youth & Family Development Educator, Beth
Rank, know of any food allergies or special accommodations needed to ensure participation to the fullest extent.
This book contains activities that will be used throughout this 4-H year October 2016-September 2017. Each year a
new book will be distributed by the UW-Extension Office to all registered 4-H Cloverbuds.
Meeting Cancelation Policy: If area schools are closed for a full day or close early due to weather, Cloverbud Project
meetings scheduled for that evening are canceled. Meetings will still be held on days when the start of school is
delayed due to weather.
In order for Cloverbud project members to receive the Outstanding Cloverbud Award and achieve for the year
in 4-H, they must complete (and document in their own handwriting) a minimum of seven (7) activity pages.
The activities in green text will be completed at the monthly countywide Cloverbud meetings. Members can use any of
the activities in green OR blue text to meet the requirements.
Grantsburg Library Calendar

Excerpt from Central Burnett County Fair Junior Division Entry Book 2016 found online at www.cbcfair.org on August 10, 2016.
DEPARTMENT 17 CLOVERBUDS GRADES K-2ND White 14x22 inch tag board should be used for posters. Cloverbuds exhibits may not be shown by another exhibitor. Class A - Cloverbuds, Grades K - 2 Lot# All premiums $1.50 1 A scrapbook showing activities of your club or youth group 2 A mounted photograph taken by the exhibitor 3 A home-made puzzle 4 A writing exhibit (poem or story) 5 One model (any kind, made from a kit) 6 A bird house you have made 7 Article you have sewn 8 A simple wood project 9 An item you have knitted 10 An item you have crocheted 11 Art exhibit 12 Craft exhibit 13 Recycled craft exhibit 14 Collection of 12 or more similar objects 15 Family poster 16 Homemade puppet 17 Kite you have made (not from a kit) 18 Any other Holiday item 19 Halloween item 20 Thanksgiving item 21 Christmas item 22 Easter item 23 Lego kit 24 Lego no kit - free hand 25 Card or Invitation 26 Crafty creation with explanation of why you made it and from what materials 27 Two labeled paper airplanes 28 Homemade musical instrument 29 Plate of three cookies 30 Plate of three brownies 31 Plate of three muffins 32 A loaf of bread you have baked 33 Cake from mix, unfrosted 34 Plate of 2 healthy, shelf-stable snacks 35 Poster showing 2 healthy snack options with explanation of why they are good choices 36 A poster showing parts of a plant 37 A poster showing the life cycle of a plant
38 Three different vegetables you have grown 39 A house plant you started this year 40 A collection of 5 pressed & dried wildflowers (each identified with the common name) 41 A collection of 5 pressed & dried leaves of trees (giving common name of each) 42 Three different kinds of fruit you have grown 43 Five ears of sweet corn you have grown 44 A forage exhibit you have grown 45 Cut flower (annual) three stems any kind 46 Cut flowers (perennial) any kind (three stems) 47 A poster showing the life cycle of an insect 48 A display on fishing, birds, wildlife or pets 49 A collection of five different insects 50 A poster about a dairy animal you have raised, managed, groomed & cared for 51 A poster about a beef animal you have raised, managed, groomed & cared for 52 A poster about a pig you have raised, managed, groomed & cared for 53 A poster about a cat you have raised & cared for 54 A poster showing parts of an animal 55 A poster about a poultry you have raised & cared for 56 A poster about a rabbit you have raised & cared for 57 A poster about a horse you have cared for 58 A poster about a sheep you have raised & cared for 59 A poster about a dog you have cared for 60 Poster of parts of an insect 61 Poster about a goat you have raised & cared for 62 Poster about a guinea pig you have raised & cared for 63 Homemade treat for an animal or bird with recipe 64 A poster showing exhibitors responsibilities at home 65 A poster showing personal health habits 66 A poster on safety 67 A poster of a science experiment 68 A poster showing results of a science experiment or paper airplane flight test 69 Homemade first aid kit 70 Homemade weather gauge 71 A poster of constellations with name, drawing, and two facts
Excerpt from Burnett County Fair Junior Division Entry Book 2016
5

6

7

Place
Your
Picture
Here
Name:_________________________________________
Age:______________ Grade:____________
My Family members: _____________________________
______________________________________________
______________________________________________
My favorite activities:_____________________________
______________________________________________
______________________________________________
The information in this Cloverbud Record Book is true and of my own work.
Member signature _________________________ 8

My 4-H Club
My Name: ______________________________________
4-H Club Name: _________________________________
4-H Club Leader’s Name: __________________________
Phone Number:____________________________
4-H Club President’s Name: ________________________
Phone Number:____________________________
4-H Youth Development Agent’s Name:________________
Phone Number:____________________________ 9

Pledge of
Allegiance
(Place right hand over heart)
I pledge allegiance to
the Flag of the United
States of America and
to the Republic for
which it stands, one
nation, under God,
indivisible, with liberty
and justice for all.
10

11

4-H Club Emblem
The official emblem is a four leaf clover with the letter “H” on each leaf which stands for head, heart, hands and health. The colors of the emblem are green and white.
4-H Slogan
The 4-H Slogan is “LEARN BY DOING”
4-H Motto
The 4-H Motto is “TO MAKE THE BEST BETTER.” This motto challenges everyone involved in 4-H to do the very best job they can.
12

May include pictures of Cloverbud at various 4-H activities.
Use the optional photo section in the back of this book.
Pla
nn
ed
Acc
om
plis
hed
Club Activities
Demonstrations
Talks
Judging
Recreation
Club Music Performance
Club Drama Performance
Picnic
Other:
Other:
Other:
Other:
Other:
Other:
Other:
County Activities
Music Contest
Cultural Arts Fest/Drama Contest
4-H Promotion at June Dairy Breakfast
4-H Promotion at June Dairy Days in Alpha
County Trip
Central Burnett County Fair (Webster)
Burnett County Ag Society Fair (Grantsburg)
Project Day(s)
Cloverbud Day Camp
4-H Promotions (4-H Week)
Achievement Night
Other:
Other:
State Activities
State Fair Demonstrations
State Fair Exhibitor with your club
Other:
Other:
4-H Activities
13

14
My 4-H Cloverbud Story
My name is ______________________________________________.
This is my _____________________ year in Cloverbuds.
I have done activities like _________________________________
and _____________________________________.
I also went to __________________ monthly 4-H club meetings
and __________ county-wide Cloverbud meetings.
This year, my favorite thing to do at 4-H was
__________________________________________________________
__________________________________________________________
I liked it because
__________________________________________________________
__________________________________________________________
My favorite project I showed at the fair was
__________________________________________________________
__________________________________________________________
When I was working on my project, the hardest thing was
____________________________________________________________________________________________________________________ I liked being a Cloverbud this year because
__________________________________________________________
__________________________________________________________ Parent /Guardian Comments:
Parent/Guardian Signature:_____________________Date:_______

Art
Making Mosaics
Materials: Large piece of cardboard 8”x8” minimum Construction paper for background behind pumpkin Pumpkin Template (see next page) Scissors White Liquid Glue Yellow Popcorn Kernels Dried black beans Dried green split peas Procedure:
1. Cut out the Pumpkin Template (page 17 in this book) and carefully cut around the pumpkin. Discard scraps.
2.Glue construction paper to large cardboard. Then glue Pumpkin Template onto construction paper.
3.Apply a layer of glue on the stem of the Pumpkin Template. Press the flat side of the dried green split peas into the glue. Be careful to press the seeds close together so there are no gaps.
4.Optional: If you want to make a Jack ‘O Lantern pumpkin mosaic, apply a layer of glue on the pumpkin where you want the eyes, nose, and mouth and press dried black beans into the glue.
5.Apply a layer of glue all over the rest of the pumpkin and press popcorn kernels all over the pumpkin. Press the seeds close together so there are no gaps.
6.Let your pumpkin mosaic dry.
15
October 2016
Safety Tip: Seeds and beans can be choking hazards. Do not let young children play with them.
Mosaics are pictures made out of different objects glued together. They can be made out of any objects, such as tiles, pieces of glass, beads, beans, seeds, squares of paper, etc.

Making Mosaics Now that you know how to make a mosaic pumpkin, please share what you learned while completing this craft.
What was your favorite part of making your mosaic pumpkin?
What was the most difficult part of this activity?
If you could make another mosaic, what would you make?
This mosaic pumpkin can be entered in the Burnett County 4-H Cultural Arts Fest under Arts & Crafts. This contest is usually held in the late winter/early spring. If you enter this in the Cultural Arts Fest and/or the County Fair, please write what placing you received (blue ribbon/first place, red ribbon/second place, etc.).
Draw a picture or attach a photo of you with your mosaic pumpkin.
16

17
Pumpkin Template Directions: Cut this page out of your Cloverbud Activity/Record Book and cut around the outside of the pumpkin. Discard scraps in recycling or garbage.

18

First Aid Examine the items you find in a first aid kit, and write what
they are used for.
Adhesive Tape Antiseptic Wipes ___________________ _____________________ ___________________ _____________________ ___________________ _____________________
Bandages Sterile Gauze ___________________ _____________________ ___________________ _____________________ ___________________ _____________________
Antibiotic Ointment Sterile Gloves ___________________ _____________________ ___________________ _____________________ ___________________ _____________________
Now, let’s make a First Aid Kit! Ask an adult to help gather the materials listed above. Find an old coffee can, plastic zip-lock bag, old lunch box, clean recycled plastic container or anything that can help hold your first aid supplies. Keep your first aid kit in a safe place you can easily get to.
Health
19
November 2016

First Aid Now that you have prepared a First Aid Kit, please share what you learned while completing this activity.
Can you list two places where you could use this First Aid Kit?
Can you list two things that could happen that would use items in your First Aid Kit?
It is most important to avoid getting injured or sick. There are many things we can do to keep ourselves safe. Circle the SAFE things we can do to avoid injuries.
WEAR HELMET WHILE RIDING BIKE RUN REALLY FAST DOWN A HILL
climb trees WASH HANDS BEFORE EATING
LOOK BOTH WAYS BEFORE CROSSING A STREET OR ROAD
TOUCH THE STOVE WHEN THE BURNER/FLAME IS ON
Draw a picture or write about what you can do if someone gets hurt.
20

Foods & Nutrition
Homemade Potato Soup Mix
During the cold winter months, soup is a comfort food for many people. This soup mix can be made as a gift or eaten when you’re hungry and need a quick meal. This recipe makes 1 quart of soup mix or approximately 8 individual ½ cup servings. Materials: Large mixing bowl Dull knife and plate (used for leveling ingredients) Large spoon to stir ingredients Measuring cups and spoons Baggies or jar to store soup mix Ingredients: 2 cups instant potato flakes 1 ¾ cups dry instant milk powder 2 tablespoons chicken or vegetable bouillon 2 teaspoons dried onion flakes 2 teaspoons dried parsley ¼ teaspoons dried thyme 1 ½ teaspoons seasoning salt Instructions for Making Soup MIX:
1. Measure each ingredient carefully and level off each measuring cup or spoon using a dull knife over a plate.
2.Pour each ingredient into the large mixing bowl. 3.Stir the contents carefully to ensure ingredients are well mixed. 4.Scoop ½ cup of soup mix into baggies or jars. 5.Write on baggie or piece of paper directions for making soup.
Instructions for Making Soup TO EAT: Add 1 cup hot water to ½ cup of Potato Soup Mix and stir. Add salt and pepper to taste. Enjoy! 21
December 2016

Soup Mix Now that you know how to make Potato Soup Mix, please share what you learned while completing this activity.
What was your favorite part of making soup mix?
You used measuring cups and spoons to complete this activity. It is important to use the correct sized cup or spoon. What do you think would happen if you used a tablespoon instead of a teaspoon of seasoning salt in this recipe?
If you could make this recipe again, would you change anything?
This Homemade Potato Soup Mix could be given as a gift. What are some things that you could do to the package to make it look like a pretty gift?
Draw a picture or attach a photo of you with your Homemade Potato Soup Mix.
22

Natural Sciences
Birdseed Cakes Whether you are looking to attract more birds to your backyard or giving them to someone as a gift, these birdseed cakes are simple to make and provide a wintertime treat to our feathered friends. Materials: 12” to 18” length of twine, string, or ribbon Simple shaped cookie cutters Waxed paper Styrofoam plate Unflavored gelatin powder ½ cup measuring cup Medium mixing bowl Spoon 1 ½ cups to 2 cups Birdseed 2” long piece of a drinking straw Procedure:
1. For each birdseed cake, cut a 12” to 18” length of twine, string, or ribbon. Loop and tie the ends in a knot so you have a circle not a line.
2.Mix ½ ounce gelatin (2 packages) with ½ cup boiling water. Stir well to dissolve the gelatin completely. Be careful not to splash the hot liquid on yourself.
3.Add about 1 ½ cups birdseed to gelatin solution. Mix well. If mixture is still watery, add more birdseed until it has a stiff but sticky consistency.
4. Add one layer of waxed paper on top of the Styrofoam plate. Place cookie cutter on top of waxed paper.
5.Fill each cookie cutter half-full of birdseed mixture. 6. Place the circle of twine, string, or ribbon on top of the mixture and center
it in the cookie cutter so ½ to 1/3 of the loop is hanging outside the cookie cutter mold.
7.Fill cookie cutter with more birdseed mixture on top of loop. Firmly press mixture with back of spoon to compact in place.
8.After a few hours, gently unmold each cake onto fresh waxed paper. Let dry, flipping birdseed cake every few hours. It may take 72 hours to completely set up enough to handle birdseed cake without it crumbling.
Note: If your birdseed cake crumbles, you can still feed the mixture to the birds, just use the Styrofoam plate or other birdfeeder. 23
January 2017
CAUTION: Use caution while stirring the gelatin into the boiling water so as not to burn your hands. Adult supervision and assistance is required.

Birdseed Cakes Now that you know how to make Birdseed Cakes, please share what you learned while completing this activity.
What was your favorite part of making birdseed cakes?
What was challenging about making birdseed cakes?
If you could make birdseed cakes again would you change anything? If yes, what?
Find a place to hang your birdseed cake. Using the internet visit the Wisconsin Department of Natural Resources Environmental Education for Kids website to identify Wisconsin’s Favorite Winter Birds http://dnr.wi.gov/eek/critter/bird/birdposter/index.htm. Watch your birdseed cake and write down any birds you could identify.
Draw a picture or attach a photo of your Birdseed Cakes.
24
Think about your family’s special likes and talents. Design a flag or coat of arms to represent your family. You may construct your flag using anything you would like. You may draw a flag, make it using construction paper and craft items or sew a flag. If you want to include the 4-H flag or US flag on your family flag, cut them out from the templates on page 25. I added _______________ to my family’s flag because __________ ____________________________________________________. I used ________________ colors because _________________ ____________________________________________________.
Family Flag
Family, Home and Health February 2017
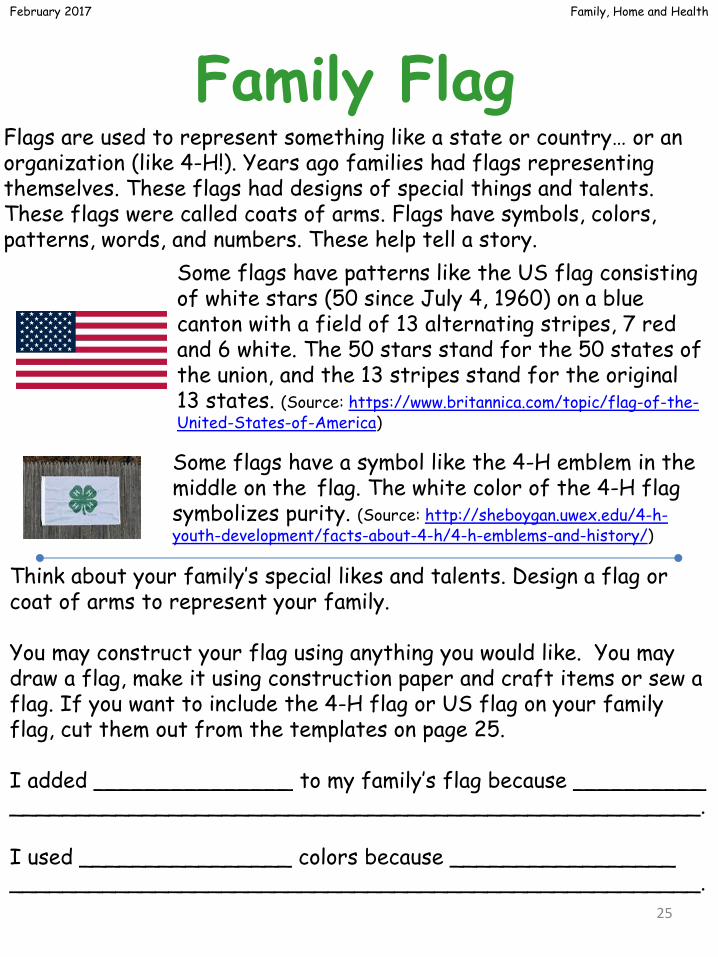
Flags are used to represent something like a state or country… or an organization (like 4-H!). Years ago families had flags representing themselves. These flags had designs of special things and talents. These flags were called coats of arms. Flags have symbols, colors, patterns, words, and numbers. These help tell a story.
Some flags have a symbol like the 4-H emblem in the middle on the flag. The white color of the 4-H flag symbolizes purity. (Source: http://sheboygan.uwex.edu/4-h-youth-development/facts-about-4-h/4-h-emblems-and-history/)
Some flags have patterns like the US flag consisting of white stars (50 since July 4, 1960) on a blue canton with a field of 13 alternating stripes, 7 red and 6 white. The 50 stars stand for the 50 states of the union, and the 13 stripes stand for the original 13 states. (Source: https://www.britannica.com/topic/flag-of-the-United-States-of-America)
25

26
Nautical Flags The colorful flags below are known as the international maritime signal flags. They correspond directly with the NATO alphabet and can be used to spell a message letter by letter. As well as representing an individual letter, each flag also has a specific standard meaning. For instance, the yellow and red flag for O also means "Man overboard."
Nautical flag source: http://www.puzzazz.com/how-to/codes
Try spelling out your last name using signal flags.

27

28
If you want to include the US flag or 4-H clover as part of your family flag, please cut out these images instead of drawing them.

29

Family Flag Now that you know how to make Family Flag, please share what you learned while completing this activity.
What was your favorite part of making your flag?
What was challenging about making your flag?
If you could make another family flag would you change anything? If yes, what?
Was it easy or difficult to spell your last name in Nautical Flags? What made it easy or difficult?
Your Family Flag can be entered into the County Fairs if you attach your flag to a piece of white poster board that is 14”x22” and neatly write why you made your flag the way you did, and why this represents your family. This can be entered under Department 17 Cloverbuds Class A under Lot 15 Family Poster. If you entered your Family Flag Poster in the County Fairs, please write here what ribbon you received.
Draw a picture or attach a photo of your Family Flag .
30

Foods & Nutrition
Scrumptious Sundae Let’s Make a Delicious and Nutritious Snack!
Ingredients: ½ cup Low-Fat Flavored Yogurt ½ Graham Cracker Sheet ½ Banana Equipment: Plastic Knife Small plate or cutting board Small bowl Spoon Procedure:
1. Before making the snack, wash your hands with soap and warm water.
2. Measure ½ cup of yogurt and spoon into a small bowl. 3. Break the graham cracker into small pieces and put on top of
the yogurt. 4. Peel and slice the banana on the cutting board or small plate.
Place sliced banana pieces on top of the sundae. 5. Enjoy!
This snack has ingredients from three different food groups (dairy, fruit and grains). What is another healthy snack that has at least two food groups? _______________ _________________________________ You could enter this activity into the County Fair Under Lot 35 if you make a poster (size 14”x22”) showing two health snack options with explanation of why they are good choices.
March 2017
31

Scrumptious Sundaes Now that you know how to make Scrumptious Sundaes, please share what you learned while completing this activity.
What was your favorite part of this activity?
If you could make this recipe again, would you change anything?
The Scrumptious Sundaes snack had three different food groups. What are they?
If you chose to make a poster of two health snack options to enter in the County Fairs, was there anything hard about making a poster? Did you receive a ribbon?
If you enjoy thinking about healthy snacks and meals, check out MyPlate Kids’ Place for fun nutrition related activities. If allowed, and with adult supervision, go to https://www.choosemyplate.gov/kids.
Draw a picture or attach a photo of you with your Scrumptious Sundae snack or your Two Healthy Snacks Poster.
32

Natural Sciences/Art
Toad Abode
Describe what a toad looks like. ___________________________ ____________________________________________________ Name some things a toad may eat. __________________________ ____________________________________________________
33
April 2017
CAUTION: Toads have enlarged glands (called the paratoid glands) on the side of the neck, one behind each eye. These glands secrete a viscous white poison that gets smeared in the mouth of any would-be predator, inflaming the mouth and throat and causing nausea, irregular heart beat, and, in extreme cases, death. Toads pose a danger to pets, which may pounce on and bite them. Humans should take care to wash their hands after handling a toad, and to avoid touching the mouth or eyes until having done so. (Source: http://www.enature.com/fieldguides/detail.asp?recnum=AR0006)
Let’s build a house for a toad and observe these fascinating creatures. Watch for toads feasting on their favorite food – bugs! Toads eat insects, grubs, slugs, worms and other invertebrates.
Materials: 4 Inch Diameter Ceramic Pot Acrylic Paints Paint Brush Newspapers Small Spade or spoon Procedure:
1. Spread newspapers on your workspace. 2.Decorate the pot using paints. 3.Once the pot has dried, take it outside to a spot in the soil (a
flower bed or a spot under a bush or tree works great). 4.Take the spade and dig down in the soil a little ways to burry the
pot half way in the ground on its side. Leave the soil turned up and don’t pat it down.
5.Now it’s time to wait for a toad! If you don’t get a toad in one spot, try another!
To learn more about toads in Wisconsin and to listen to some recordings of toads and frogs visit: https://www.aza.org/frogwatch-usa-wisconsin

34

35

36
Eggs
Caterpillar
Chrysalis
Butterfly
Lif
e C
ycle
of
a
But
terf
ly
Directions: Cut out all words and around the butterfly. Use these pieces to create your Life Cycle of a Butterfly poster.

37

Beautiful Butterflies Now that you know how to make a poster and about the four stages of a butterflies life cycle, please share what you learned while completing this activity.
What was your favorite part of this activity?
What was challenging about this activity?
If you could make another poster would you change anything? If yes, what?
Was it easy or difficult for you to put together this poster about butterflies?
Your Beautiful Butterflies Poster can be entered into the County Fairs. It must be made from a pieces of poster board that is 14”x22”. This can be entered under Department 17 Cloverbuds Class A under Lot 47 A Poster Showing the Life Cycle of an Insect. If you entered your poster in the County Fairs, please write here what ribbon you received.
Draw a picture or attach a photo of your Beautiful Butterflies paper plate and/or poster.
38

Balloon Rocket A rocket is a type of spacecraft that is powered by gases that are forced out of one end.
Lets use our aerospace skills to make a balloon rocket!
Materials: 12 Feet of String 4 Inch Piece of Drinking Straw 2 Chairs 9 Inch Round Balloon Spring Clothespin Transparent Tape Flexible tape measure or piece of string and ruler
Procedure: 1. Thread the string through the straw and tie both ends of the
string to the backs of the chairs. 2.Position the chairs so the string between them is very tight. 3.Inflate the balloon and twist the open end of the balloon and
secure it with the clothespin. 4.Move the straw to one end of the string. 5.Tape the inflated balloon to the straw. 6.Time for takeoff! Carefully remove the clothespin from the
balloon. 7.Measure how many inches your balloon traveled. That was a great
test flight.
Now, let’s do a science experiment using your balloon rocket! 1. We are going to guess how far you think the rocket will travel., 2. Measure how big your balloon is around the biggest part. 3. Test how far the balloon rocket really did travel. 4. Write down the results in the chart on the next page. 5. Then you get to repeat the same trial three times for accuracy.
Science June 2017
39

40
How far did they
fly?
Test 1 Balloon inflated to 15 inches
Test 2 Balloon inflated to 15 inches
Test 3 Balloon inflated to 15 inches
Test 1 Balloon inflated to 20 inches
Test 2 Balloon inflated to 20 inches
Test 3 Balloon inflated to 20 inches
I think it will fly…
The balloon rocket really flew…
Did your balloon rocket go a longer or shorter distance than you guessed?
____________________________________________________ What happened when you tried the bigger balloon?
____________________________________________________ The bigger balloon had more air than the smaller balloon, did that make a difference?
____________________________________________________
If you enjoyed this science experiment and want to learn more about rockets and how the balloon rocket worked, ask an adult to help you search the internet for “balloon rockets” and learn about thrust. Also look in the Burnett County 4-H Bugle newsletter for information about the Rocketry Project.
You can also enter this activity in the County Fairs under Department 17 Class A Lot 68 A Poster Showing Results of a Science Experiment. Write out the procedures from the previous page, add pictures to help explain what you did and copy the chart above onto a 14”x22” poster board. Don’t forget to add a title to your poster!
Balloon Rocket Experiment

Animal Tracks Have you ever been on a walk and seen some tracks and wondered what made them? Animals make tracks as they move allowing us to study their habits. Let’s go on a search for animal tracks and make a cast/mold!
Using the Animal Tracks Guide (next two pages), go with an adult searching for animal tracks! You can look in your backyard, a park or a woods. Look for tracks near trees and in open places where grass doesn’t grow.
What animals did you find in your backyard? __________________ ____________________________________________________ What animals did you find in a woods or a park? ________________ ____________________________________________________
What type of ground (grass, mud or snow) is it easier to find animal tracks? _____________________________________________
Procedure: 1. Mix two parts plaster to one part water. A plastic bag works well
to mix everything together. 2. Dig around the track a few inches. 3. Mix the plaster and water together, pour the mixture into an
animal track within 5-10 minutes or it will harden in the bag (if it does harden in the bag, dry it completely and use it for sidewalk chalk).
4. Allow it to dry in the mold for 30-60 minutes. 5. Using a small shovel or spoon to dig around the plaster mold and
remove it from the ground. Allow the cast to harden completely. 6. Using a soft brush (old toothbrushes work well) brush away any
leftover dirt.
Animal Science
41
August 2017

Animal Track Guide Animal Sciences
Animal Life
42

Animal Sciences Animal Life
43

Matching Tracks Animal Sciences
Animal Life
Draw a line matching the animal to its track! Answers are on the last page of this book.
44

Matching Tracks Animal Sciences
Animal Life
45

Matching Tracks Animal Sciences
Animal Life
46

Art
Let’s Sculpt
Make a sculpture using homemade play dough! Materials: ¼ Cup Salt 1 Cup Flour ¼ Cup Water Procedure:
1. Combine the salt, flour and water in a large mixing bowl. 2. Knead or stir the mixture until it is like clay consistency. You
may need to add more water. 3. Divide the dough into as many pieces as you would like colors.
Add food coloring to each piece of dough to get the color you would like.
4. Make a sculpture out of your dough and let sit overnight to dry.
47
September 2017
NOTE: This activity will be completed after you submit your Cloverbud Activity/Record Book to your 4-H Club Leader. We will make copies of this activity available at the September 4-H Cloverbud meeting. You have the option to complete this activity before that meeting and use it as one of your seven complete activities in order to Achieve in 4-H this year.
What was your favorite part of making your own sculpting dough?
Was there anything that challenged you while you made the dough or sculpted something?

Cultural Arts
Mime Time
Miming is the acting out of something, using no words or sounds. Materials: Any Props That Are Handy Procedure:
1.Gather a group of friends and family and take turns guessing actions such as foods with action (popcorn, toast in a toaster, eggs, sizzling bacon, etc) or any other actions you can come up with.
2.Now, try pretending like you have hundreds of strings attached to all muscles in your body. Pretend an outside force is pulling from above. All parts of your face should snap up. Do the same with forces pulling from the right, left and down.
What are some actions you could act out by miming? _______ ____________________________________________________________________________________________
Adapted from: Mime and Yours. Cloverbuds Activities Packet. By: Richard Moreland and Lori K. Hutchins. University of Minnesota Extension Service.
48

Tic-Tac-Toe Weaving Take a close look at the fabric of your clothes. What do you see? Fabrics and baskets are often made by weaving. Weaving is where threads are put over and under each other in a pattern. Time for some Tic-Tac-Toe Materials: 1 – 8 ½ Inch x 11 Inch Piece of Colored Card Stock 2 – 8 ½ Inch x 11 Inch Pieces of Colored Paper 12 Pieces of Poster Board That Are Different Colors and Different Colors From the Colored Paper Scissors Glue 1 Letter Sized Envelope Tic-Tac-Toe Pattern Page Procedure:
1. Fold one of the 8 ½” x 11” pieces of colored paper in half lengthwise. Fold this paper in half again lengthwise so when it is opened there are four sections.
2. Use the scissors to cut along the folds so there are four paper strips. Lay the strips aside. (Only 3 of the strips are going to be used)
3. Lay the Tic-Tac-Toe Pattern on top of the second 8 ½” x 11” piece of colored paper. Cut off the bottom portion to create a square.
4. With the pattern still on top of the colored paper, fold the papers in half on the fold line.
5. Starting at the fold, cut along the dotted line. Unfold both papers and lay the pattern piece aside.
6. Weave the first strip through the square with the cuts in it. Weave the strip first under one and over one, continuing to the opposite side of the paper. The next strip is woven first over one and then under one, continuing as before. Push the first strip to the top of the cuts and push the second strip close to the first strip. Weave the last strip through the square using the under one, over one patter the first strip used. The square should look like a tic-tac-toe board.
7. Glue the woven tic-tac-toe board to the card stock and cut off excess strip paper.
8. Lay the tic-tac-toe board so the card stock side is facing up. Glue the envelope onto the board. Lay the board aside.
9. Cut out the pattern piece for the markers. Trace the round pattern piece onto the colored poster board nine times.
10.Cut out the markers and store in the envelope on the back of your tic-tac-toe board.
11.Play!
Family, Home and Health
Adapted from: Mini 4-H Before You Sew. By: Roylene Laswell. Purdue University Extension Service.
49

Family, Home and Health
Adapted from: Mini 4-H Before You Sew. By: Roylene Laswell. Purdue University Extension Service.
50

51

Tic-Tac-Toe Weaving Now that you know how to weave a tic-tac-toe board, please share what you learned while completing this activity.
What was your favorite part of making this paper craft?
What was challenging about this activity?
If you could make this woven paper craft again would you change anything? If yes, what?
Draw a picture or attach a photo of your Tic-Tac-Toe Weaving project.
52

Science
Noisy Cups Sound vibrations travel through liquids, gases and solids. In this activity sound is traveling through a solid. Try making noise with a dry string, a wet string and a string covered with dishwashing liquid. Which one will make the loudest sound? _____________ Which will make the quietest sound? ______________ Let’s make some noise! Materials: Paper or Plastic cups Large Paper Clips Cotton String Scissors Sharpened Pencil Tape Water Dishwashing Liquid Procedure:
1. Poke a small hole in the bottom of a cup with a pencil. 2.Pull 2 feet of string through the bottom of the cup and tie a paper clip
to the end that’s inside the cup. 3.Pull the string tight, so the paper clip rests at the bottom of the cup.
Tape the paper clip flat. 4.Hold the cup in one hand and the string in the other near the bottom of
the cup. 5.Squeeze the string tightly between your fingers and thumb and slide
them down the string as fast as you can. 6.Now, let’s experiment with water! Wet the string with water and slide
your fingers along the string again. Try once more using dishwashing liquid.
Which way made the loudest noise? ______________________________ Which made the quietest noise? _________________________________ Were there any surprises? _____________________________________
Adapted from: Screaming String Thing. Fetch! PBS Go Kids. http://www.pbs.org/parents/fetch/activities/act/index.html
53

Science
The Mystery of Water and Oil Do water and oil mix? Let’s try mixing water and oil to see what happens! Make a prediction! What do you think will happen to the water and vegetable oil when they get put into the same container?_________ ____________________________________________________ Materials: Plastic Bottle with Lid Food Coloring Water Vegetable Oil Funnel Measuring Cup Procedure:
1. Place ½ cup of water into the plastic bottle. 2.Add a few drops of food coloring to the water. 3.Add ½ cup of vegetable oil to the plastic bottle and secure the
cap on the bottle. 4.Observe the location of each liquid. Which liquid is on top? ____
_____ Which liquid is on the bottom? ____________________ 5.Time to shake! Make sure the lid is secured tightly and shake up
the bottle. What happens to the liquids? __________________ Where is each liquid located now? _______________________
6.Let the bottle rest on a flat surface for 2 minutes and observe what happens. What happened to the oil and water? _________
_________________________________________________ Which liquid do you think is lighter? ______________________ Why? _____________________________________________
54

Natural Resources
Cave Formations Have you ever wondered what those crystal-like things in caves were? Caves have stalactites and stalagmites that make formations over thousands of years. Stalactites hold tight to the ceiling of the cave and stalagmites are mighty and stand up on the cave floor. Let’s make our own cave formations! Materials: 2 Jars Water Epsom Salts String Small Weights (i.e. Rocks or Fishing Sinkers) Plate Procedure:
1. Fill both jars with warm water and mix in Epsom salts until no more will dissolve.
2.Wet the string and tie a weight to each end. Drop one end of the string into each jar.
3.Put a plate between the two jars with the string hanging over the plate.
4. Let the stalactites and stalagmites begin! Make sure to check your cave every day to see if any have formed.
Did you have any stalactites form? ________ Where were they located? _________________________ Did you have any stalagmites form? ________ Where were they located? _________________________
Adapted from: Stalactite and Stalagmite Experiment for Kids. TLC Family. http://tlc.howstuffworks.com/family/nature-activities-for-kids1.htm
55

Natural Resources
Ocean in a Bottle Have you ever been amazed by the movement of waves on a beach? Waves are energy in motion. The waves or energy force the sand to move along the shore. Let’s experiment with waves and make an ocean in a bottle! Materials: Jar or Glass Bottle with Lid Hot Glue Gun – Ask an adult for help! Water Vegetable Oil Blue Food Coloring Sand Seashells Procedure:
1. Spoon some sand into a clean jar. 2.Fill the jar ½ full with water. Add blue food coloring to the
bottle one drop at a time until you get the blue color you like. 3.Add a few shells to your ocean. 4.Add vegetable oil until the bottle is almost full. Make sure to
leave a small space at the top for air. 5.Have an adult take the hot glue gun and put glue around the lid of
the bottle. Quickly place a lid on the bottle. 6.Turn the ocean on its side and watch as the waves go back and
forth. Do any of the sand particles move? _________________ 7.Shake up the bottle and observe what happens. What happens to the sand? ______________ What happens
to the shells? _____________ Does all the sand move as the waves move or just a little at a time? _____________________
56

Natural Resources
Nature Scavenger Hunt
Let’s go on a scavenger hunt! Using the Nature Scavenger Hunt Checklist go on a scavenger hunt in a park, woods or your backyard with some friends and an adult. Bring a camera or pencil so you can get a picture of what you saw during your hunt while using your checklist. Make sure not to disrupt the area you are hunting in. See how many items you can find! Were you able to find every thing on the list? ___________ What was the most difficult to find? __________________ Did you notice anything while doing the scavenger hunt you may not have otherwise seen? _______________________ What was the most interesting thing you saw? ___________ ______________________________________________
57

Natural Resources
Nature Scavenger Hunt Checklist
See how many items you can find on the list and then draw a picture of each one. See if you can
identify the leaf or animal!
Feather
Insect with Wings
Animal Tracks
Something a Squirrel Would Eat
Hole in a Tree
Something a Bird Might Eat
An Animal that has Fur
Spider Web
Singing Bird
A Fallen Leaf
Leaf that has been Partially Eaten
A Coniferous Tree
A Deciduous Tree
An Animal that Likes to be Near Water
Bird’s Nest
58

59

60
4-H Cloverbud Additional Information Pages (optional)
Put clippings, pictures, drawings and other items
of different 4-H activities you participated in here
or on the next 10 pages. This is also a place to
share about Cloverbud meetings that you
participated in at the club level.

61

62

63

64

65

66

67

68

69

70

References
• http://www.education.com/activity/
• A great website for activity ideas.
• 4-H Mini Before You Sew. By: Roylene Laswell. Purdue University Extension
Service.
• Clover Kids Beautiful Butterflies. Iowa State Extension.
www.extension.iastate.edu/4H/Clover/Documents/ButterfliesCK.doc
• Cloverbud Program Manual. Montana 4-H.
http://www.montana4h.org/#project:53.
• Environment/Earth Science Activity Guide
• Mime and Yours Cloverbuds Activities Packet. By: Richard Mooreland and
Lori K. Hutchins. University of Minnesota Extension Service.
• Screaming String Thing. Fetch! PBS Go Kids.
http://www.pbs.org/parents/fetch/activities/act/index.html
• Stalactite and Stalagmite Experiment for Kids. TLC Family.
http://tlc.howstuffworks.com/family/nature-activities-for-kids1.htm
• http://innerchildfun.com/2013/02/potato-soup-mix-in-a-jar.html
• http://www.countrywomanmagazine.com/project/bird-seed-heart-cake/
• https://www.choosemyplate.gov/kids
71