307-2011: becoming a better programmer with sas...
TRANSCRIPT

Paper BB-01
Becoming a Better Programmer with SAS® Enterprise Guide® 4.3
Andy Ravenna, SAS Institute Inc., New York, NY Presented at SESUG 2011 by Kate Schwarz of SAS
ABSTRACT
Both existing and new users of SAS® are turning to SAS Enterprise Guide to write and run their code. Long-time users are accustomed to typing all their code in the Program Editor window and simply clicking Submit. New users do not have this same set of expectations and are more willing to point and click on occasion. But the truth is becoming clear; the winning programmer will be the one who has the expertise to use the best of both worlds—either coding or clicking, depending on which is more efficient for a given task. SAS Enterprise Guide 4.3 contains new functionality that can help anyone become a better programmer. This paper addresses the all-important question: When is it appropriate to code, and when to click? The purpose here is to expose new users as well as those familiar with SAS to tips and best practices that will enable them to return to the office as better programmers.
INTRODUCTION
This paper is an introduction to coding with the new improved program editor in SAS Enterprise Guide. At the same time, this paper provides more reasons than ever why SAS Enterprise Guide is a great choice for programmers of varying levels. The paper also discusses the benefits of using SAS Enterprise Guide as a programming tool for a software project from the aspect of the new programmer, the experienced programmer, and the manager. While the scenario for this paper involves entering and examining SAS code, the main focus remains on investigating the new features in the program editor.
If you have absolutely no exposure to the SAS Enterprise Guide interface, complete the free Getting Started tutorial that is available from the Help menu (or the Welcome window). The tutorial is a great way to familiarize yourself with some of the features before you tackle coding. The audience for this paper falls into one of two very different categories:
New Users who are unfamiliar with SAS coding Experienced Users who have been coding in SAS for years
This paper was created with SAS 9.2 and SAS Enterprise Guide 4.3, running on top of a Microsoft Windows platform. SAS Enterprise Guide 4.3 was released in August 2010. If you are still using SAS Enterprise Guide 4.1, you will notice some enhancements to the interface and functionality. While the two versions are very similar in many ways, the enhancements made to the program editor in 4.3 are significant.
New Users: To determine the version of SAS Enterprise Guide that you have, select Help►About SAS Enterprise Guide from the menus that are located at the top of the screen.
Experienced Users: If you want more information about the enhancements, select Help►SAS Enterprise Guide Help. Click the Contents tab, open the What‟s New folder, and then select What's New in SAS Enterprise Guide 4.3. For more in-depth examples, see the 2010 SAS Global Forum Paper, “SAS® Programmer‟s Paradise: New Goodies in SAS® Enterprise Guide® 4.3.”
SESUG 2011

WHY PROGRAM IN SAS ENTERPRISE GUIDE?
If you are not familiar with programming with the SAS language on the Windows operating system, you will find basically three options when you sit down to write SAS code. You could write the code in some sort of text editor such as Notepad, write code by using the enhanced editor that is available in the main SAS window, or write code by using the new improved program editor in SAS Enterprise Guide 4.3. If you write code in a text editor, there are no syntax-checking features built in to help prevent you from making mistakes in the code. With the enhanced editor in “traditional” SAS, there exist helpful features such as color-coded program elements that highlight syntax errors and collapsible code sections that aid in readability. While the enhanced editor took a step forward, the new improved program editor in SAS Enterprise Guide has made a giant leap forward in functionality and features! The new programmer will find features such as syntax suggestion and integrated tooltip-style help to be invaluable resources. Syntax suggestion works as you begin to type in the Program Editor window. A list of possible keywords is presented that match, and you simply select the desired one. The integrated syntax help appears as a mini-window with text directly over the program editor when you position the mouse pointer over a valid SAS keyword.
On the other hand, perhaps you have been programming in SAS for some time. You might have already had the opportunity to code in previous versions of SAS Enterprise Guide. As an experienced SAS programmer, there are even more features to take advantage of, such as analyzing existing programs and sharing projects with relative paths for easier collaboration. At the request of customers, this latest version of SAS Enterprise Guide can take an existing complex SAS program, analyze it, and break it down into a series of logical nodes in a process flow diagram. Also in this version, project files, data files, and SAS programs have external file references that are stored as relative paths. Not only is this compatible with many source management tools, but it also allows for easy team collaboration on SAS Enterprise Guide projects.
Consider the advantages that SAS Enterprise Guide 4.3 could offer a manager of a group of SAS programmers. There is a clearly a benefit or ROI (return on investment) from both the management perspective as the leader of a group and the programming perspective as a member of a group. From the manager side, one only needs to invest in a single programming tool for a software project for the entire group. SAS Enterprise Guide is a “one size fits all” solution for both the experienced and the non-experienced programmer. From the programmer side, one can build job security while working with the SAS Enterprise Guide interface. A new programmer can learn the programming language quickly by using the features of the new improved program editor while also taking advantage of the point-and-click tasks. Experienced programmers can take advantage of the more advanced new features and broaden their knowledge base by using the code generation behind the tasks as a learning tool.
It is becoming clear that the winning programmer of the future will be the one who has the knowledge to use the best of both worlds—to code when coding is more efficient and to point and click when that is more efficient. The latest version of SAS Enterprise Guide provides more reasons than ever why it is a great choice for SAS programmers of all levels.
SESUG 2011

GETTING STARTED
There are three main areas to navigate when you use the current release of SAS Enterprise Guide: the project tree, the workspace area, and the resources pane.
Figure 1. SAS Enterprise Guide Interface
The project tree displays data, code, and tasks. The workspace area displays data, code, logs, results, and process flows. The resources pane enables you to display the task list, SAS folders, server list, or prompt manager. In addition to these three main areas, the toolbar at the top of the application provides access to many of the basic functions.
Writing a New Program
The scenario used in this paper refers to Freddie Mac mortgage data that is available from www.freddiemac.com. A Microsoft Excel spreadsheet contains Freddie Mac's Conventional Mortgage Home Price Index (CMHPI) data that is summarized by quarter at the Metropolitan level. The following quotation from freddiemac.com defines these index values: “CMHPI provides a measure of typical price inflation for houses within the US.” These values will be imported from an Excel spreadsheet, manipulated through DATA steps, and produced into reports.
SESUG 2011

The Excel 2007 spreadsheet that contains Freddie Mac's Conventional Mortgage Home Price Index data has been downloaded to a local hard drive. To convert this spreadsheet to a SAS data set, verify that the second maintenance release for SAS 9.2 is installed and that SAS/ACCESS to PC File Formats is licensed.
Figure 2. Freddie Mac Index Data
Experienced SAS users are accustomed to entering all of their code in the Program Editor window and clicking Submit. SAS Enterprise Guide requires the additional organizational level of a project. To begin writing code, create a new program in a new project by selecting File►New►Project from the menu. Then select File►New►Program.
SESUG 2011

Figure 3. Pop-up List of SAS Keywords
The new features become evident as soon as you begin typing. Type only the first two letters of the keyword PROC in the empty Program Editor window and you are presented with a selection list of possible SAS keywords that complete the spelling.
SESUG 2011

Figure 4. Syntax Help for the IMPORT Procedure
Press SPACEBAR (not ENTER ) to select the appropriate keyword PROC. The autocompletion feature continues to the next keyword. There are many ways to add a suggested keyword from the selection list to your program:
Double-click a selected keyword. Select a keyword, and then press either SPACEBAR, ENTER, or TAB. If you use the spacebar, the
autocompletion feature will continue with the next keyword. Select the next valid key, such as the semicolon, period, or equal sign.
Type only the first letter of the keyword IMPORT and the list now begins with the keyword IML. Get abbreviated syntax help by positioning the mouse pointer directly over the IMPORT keyword in the pop-up window.
SESUG 2011

Figure 5. Options for the IMPORT Procedure Click the down arrow one time to highlight the IMPORT keyword, and then press SPACEBAR to select it. There are many ways to scroll through the suggested list of keywords in the pop-up window:
Continue typing until the desired keyword appears. Matching improves with each letter you add. Scroll through the list one item at a time by using the up and down arrows. Page up and page down are also
available. Click a keyword and use the scroll wheel on the mouse to view more keywords.
The autocompletion window now displays all recognizable options for the IMPORT procedure. While this list might not include all valid options for a procedure, they are the only options for which autocompletion features are available.
Figure 6. Remaining Options for the IMPORT Procedure
Select the DATAFILE= option by using the spacebar and type the path and file of the Excel spreadsheet that contains the mortgage index data, “C:\SGF2011\large_msas.xls”. Press ENTER to begin coding on the second line of the program and press TAB to add some indention. Simply press SPACEBAR for the suggested list of valid options in a pop-up window.
SESUG 2011

Figure 7. Available Libraries
Use the down arrow to highlight the DBMS= option, and then press SPACEBAR to select it. Next, scroll down and select the EXCEL option by pressing ENTER.
New Users: The options for a PROC statement appear alphabetically in the pop-up window. The same options for that PROC statement are often placed in a different order in the documentation. When using the autocompletion feature, it is easier to code the options in alphabetical order.
Experienced Users: Many of the autocompletion features are customizable. For example, the autocompletion feature can be turned off and the next keyword is not suggested. Also, you can specify on which character the autocompletion pop-up window should appear. It might appear on any one of the first three characters that are typed. To change these and other options, click the Autocomplete tab from Program►Editor Options.
Press ENTER to begin coding on the third line of the program and type the first two letters of the OUT option. Select the OUT= option by pressing either TAB or SPACEBAR to bring up the list of available libraries.
SESUG 2011

Figure 8. PROC Statement and GETNAMES Statement Use the down arrow to highlight the Work library. Type .large_msas to complete the data set name work.large_msas. Press ENTER to begin coding on the fourth line of the program and type the first two letters of the REPLACE option. Select the REPLACE option by pressing the semicolon key, and press then ENTER to enter the next line of the program. The semicolon finishes the PROC statement.
Type the first two letters of the GETNAMES statement, and then select it by pressing SPACEBAR. Type yes; to finish the statement, and then press ENTER to begin the next line of code.
Figure 9. Complete Code for IMPORT Step
Continue typing the code by using the autocompletion features until the entire PROC IMPORT step is complete.
SESUG 2011

The IMPORT procedure converts the Excel spreadsheet to a SAS data set. Click Run from the context-sensitive toolbar at the top of the workspace above your code. The Log tab opens to validate that the WORK.LARGE_MSAS data set has been created. Beginning with SAS Enterprise Guide 4.2, the workspace area was designed to give you tabbed access to the most important windows. In this case, the Program and Log windows are accessible. If output were produced, a new tab would be created automatically. However, in the current release, new tables are not automatically displayed as objects in the workspace area.
Figure 10. One Program in the Process Flow Window
To verify that only the program exists in the current process flow, press F4 or click Process Flow from the main toolbar.
One way to add the WORK.LARGE_MSAS data set to the current project is to move the table from the servers that are listed in the resources pane.
SESUG 2011

Figure 11. WORK.LARGE_MSAS Data Set
Click the Servers icon in the resources pane. Expand Servers and the Local server, and then navigate to the active Libraries. To locate the CMHPI table, expand Libraries and the Work library. Right-click LARGE_MSAS and select Add to Project.
SESUG 2011

Figure 12. Linking the Code to the Table
To return to the process flow view, press F4 or click Process Flow from the main toolbar. Because the WORK.LARGE_MSAS table was added to the project manually, it is not linked to the code. Right-click on the program, and then select Link Program to►LARGE_MSAS (Process Flow) ►OK to place a user-defined link between the code and the data set. Rename the program by right-clicking on Program, selecting Rename, and then typing Import Index Data.
New Users: SAS Enterprise Guide connects objects with a solid line. Objects that you link together as a user-defined link are connected by a dashed line.
Experienced Users: Connecting programs with links is one way to control the order in which programs are executed. SAS Enterprise Guide runs a project from left to right and top to bottom. You can also control the order in which programs are executed by selecting File►New►Ordered List.
SESUG 2011
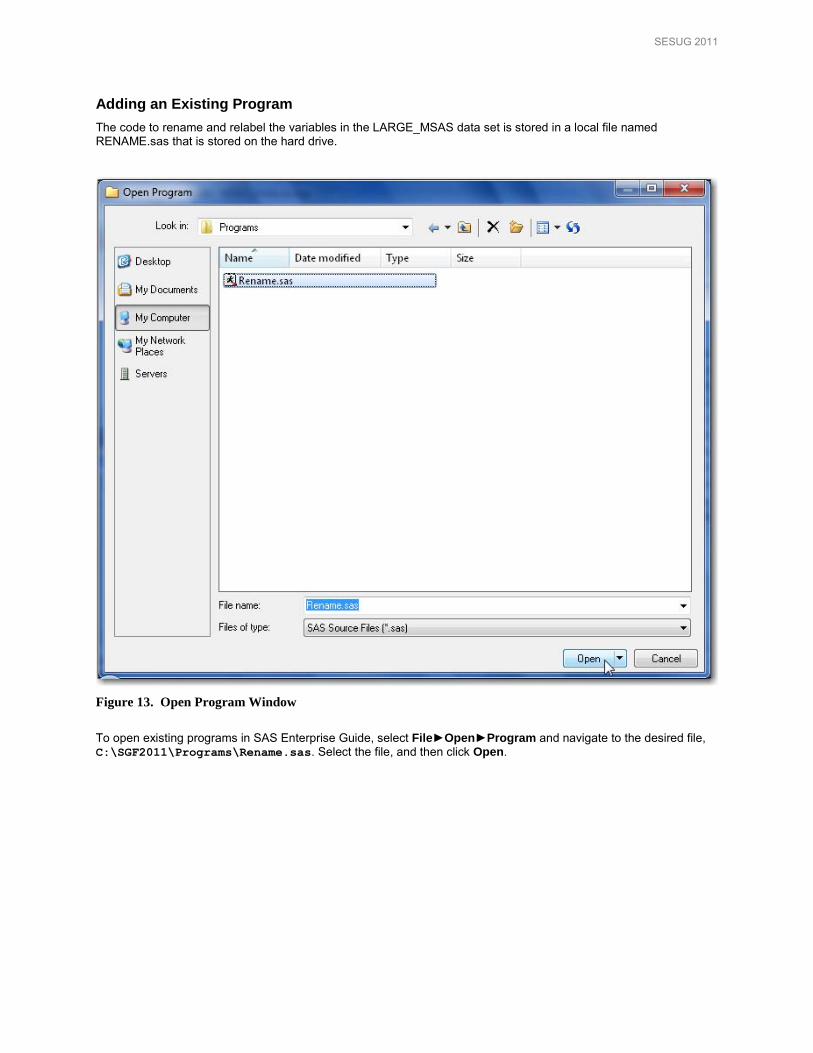
Adding an Existing Program
The code to rename and relabel the variables in the LARGE_MSAS data set is stored in a local file named RENAME.sas that is stored on the hard drive.
Figure 13. Open Program Window
To open existing programs in SAS Enterprise Guide, select File►Open►Program and navigate to the desired file, C:\SGF2011\Programs\Rename.sas. Select the file, and then click Open.
SESUG 2011

Figure 14. External Program RENAME.SAS
The PROC DATASETS code is added to the project. Note that the RENAME.sas program icon has a shortcut arrow to indicate that it is a pointer to an external file. The existing program, Import Index Data, does not have a shortcut arrow on the program icon because the program is embedded in the project.
New Users: Programs that are written in a project are automatically saved when the project is saved. There is no need to save programs to an external subdirectory. Existing programs that are added to projects are added only as shortcuts that point to their external location. The program is not automatically copied into the project.
Experienced Users: Programs that are written in a project are automatically saved and embedded in the project. Already-existing programs that are brought into a project become part of the project only if they are embedded by right-clicking the program and selecting Properties►General►Embed. The project can be used as a replacement for a single subdirectory. Programs can be saved externally to a project by selecting the program, and then selecting File►Save „Program Name‟ As. If multiple subdirectories are desired as an organizational tool, multiple process flows can be used as an organizational structure.
SESUG 2011

Figure 15. Syntax Help for the RENAME Statement
Position the mouse pointer over the RENAME keyword to display the integrated pop-up window. This syntax help can be invoked in one of the following three ways:
Position the mouse pointer over any valid SAS keyword in the program editor.
Place the cursor within any valid SAS keyword and press F1.
Position the mouse pointer over any suggested keyword in a pop-up syntax list in the program editor.
New Users: The pop-up integrated syntax help is a subset of SAS online documentation. The purpose of the integrated help is to serve as a high-level summary and prevent the programmer from spending large periods of time researching in more detailed documentation. The integrated help typically contains information about the syntax and a brief description of the keyword.
Experienced Users: There are many additional resources available through the Help menu. For information specifically about SAS Enterprise Guide, select Help►SAS Enterprise Guide Help. To get the latest information about SAS Enterprise Guide, links to hot fixes and downloads, and links to documentation and white papers, select Help►SAS on the Web►SAS Enterprise Guide Support Documentation.
SESUG 2011

Figure 16. Correct Sequence for Both Programs
(See the appendix for PROC DATASETS code that is used to rename variables and add labels and formats.)
Click Run from the toolbar at the top of the workspace above your code. The PROC DATASETS code renames all of the regional variables in the LARGE_MSAS data set. The code also gives those variables matching labels with shorter names and numeric formats. To return to the process flow view, press F4 or click Process Flow from the main toolbar.
To place the programs in the correct sequence, delete the existing link between the program and the data set. Right-click on the dashed line between the Import Index Data program and the LARGE_MSAS data set, and then select Delete►Yes. Right-click on the Import Index Data program, and then select Link Import Index Data to►Rename (Process Flow) ►OK to place a user-defined link between the two programs. Right-click on the Rename program and select Link Rename to►LARGE_MSAS (Process Flow) ►OK to place a link between the program that renames the variables and the output data set.
SESUG 2011

Adding More Code
Select File►New►Program to begin entering some DATA step code in a separate program that will create two needed variables for the reports that will be created.
Figure 17. Connect Icon in the Program Editor Window
In the blank program editor, press CTRL + SPACEBAR to display a pop-up list of SAS global statements. Scroll down and select the OPTIONS statement by pressing SPACEBAR. Type the first three letters of the NOREPLACE option. Select the NOREPLACE option by pressing the semicolon key, and then press ENTER to enter the next line of the program. The NOREPLACE option prevents the accidental overwriting of a permanent data set with the same name.
Type the keyword DATA, and then a single space. Press CTRL + L to display a pop-up list of the SAS libraries that are available with the current server connection. In order to use this feature that automatically displays a current list of libraries or data sets, the project must be connected to a SAS session. Here are three ways to establish a connection:
Open a data source in a SAS library.
Open up your SAS server list in the resources pane and navigate through the desired server.
Click the connect icon at the top of the Program Editor window.
There are several other program editor autocompletion shortcuts available. The following table contains the complete list of shortcuts:
Pop-up Window Is Populated with Keyboard Shortcut
keyword on which the cursor is currently positioned or if in a blank program, a list of global statements
CTRL + SPACEBAR
SAS functions CTRL + SHIFT + F1 macro functions CTRL + SHIFT + F2 SAS libraries available CTRL + L SAS informats CTRL + SHIFT + I SAS formats CTRL + SHIFT + F SAS colors CTRL + SHIFT + C statistics keywords CTRL + SHIFT + K style elements CTRL + SHIFT + F3 style attributes CTRL + SHIFT + F4 data sets created with DATA statement CTRL + D
Table 1. Program Editor Autocompletion Shortcuts
SESUG 2011

Figure 18. Parenthesis Highlighting
Select the SASUSER library and type .cmhpi to complete the data set name sasuser.cmhpi. Finish the statement by pressing the semicolon key, and then press ENTER to enter the next line of the program. Use the autocompletion features to type the following statement: set work.large_msas(rename = ( YYYYQQ = old ));. (After the first open parenthesis, press CTRL + SPACEBAR to display a pop-up list of SAS data set options.) The program editor highlights pairs of parentheses, braces, and brackets to prevent you from leaving pairs open-ended. If only one side of the parentheses, braces, or brackets is highlighted as you scan through your code, there is a missing match to be resolved.
The RENAME option renames the YYYYQQ variable to old in this data set. This is one method of converting a variable type while keeping the same variable name. Later on in the code, the variable old will be placed into a PUT function and set equal to the variable YYYYQQ.
SESUG 2011

Figure 19. Syntax Help for Function Arguments
Press ENTER to continue with the next line of the program. Type YYYYQQ = and then press CTRL + SHIFT + F1 to display a pop-up list of SAS functions. Type the first two letters of the PUT function, and then select it by pressing the open parenthesis key. With SAS functions, the integrated help provides information about the keyword and the arguments. As you type each argument, position by position, help for that specific argument is displayed. Type old,
and then type 6.); to finish the statement.
SESUG 2011

Figure 20. Syntax Help for the SUBSTR Function
Press ENTER to continue with the next line of the program. Create a new variable Year with the SUBSTR function. Type Year = substr(. The SUBSTR function has two uses either on the left side or right side of the equal sign. Both versions of the syntax are covered in the integrated help. Use the up and down arrows to select different definitions in the help. The integrated function help also includes help for the optional arguments.
Figure 21. DATA Step Code to Create New Variables
Continue adding code until the DATA step is complete as shown in Figure 21.
SESUG 2011

Figure 22. Code Processed with the Code Formatter
To make the program slightly easier to read, document, and debug, use the new code formatter. Right-click in the Program Editor window and select Format Code (or press CTRL + I) to “clean up” the DATA step and add some indention.
Click Run to create the SASUSER.CMHPI data set. The table opens to display the two new variables, Year and Quarter, which are needed for the transposition in the next step.
Figure 23. Process Flow with Three Programs
To return to the process flow view, press F4 or click Process Flow from the main toolbar. Right-click on LARGE_MSAS, and then select Link LARGE_MSAS to►Program (Process Flow) ►OK to place a user-defined link between the code and the data set. Rename the program by right-clicking on Program, selecting Rename, and then typing Add Variables.
SESUG 2011

Keeping Your Projects Portable
Starting with SAS Enterprise Guide 4.3, it is easier than ever to share projects and their corresponding files. In previous versions, external files were stored with fully referenced, absolute pathnames. If you wanted to move the location of the project and files, those pathnames had to be adjusted. Now you can reference programs and importable files in a project relative to the location of the project. When the project and files are moved as a group, the pathnames are automatically updated.
Figure 24. Setting the Relative Pathnames Option
To use pathnames that are relative to the project, select File►Project Properties►File References from the main menu. Select the check box Use paths relative to the project for programs and importable files, and then click OK to close the Properties window.
Select File►Save Project As... and navigate to C:\SGF2011. Type CMHPI_Analysis as the File name and click Save. The SGF2011 subdirectory contains two existing subdirectories, Data and Programs.
SESUG 2011

Figure 25. File Path Automatically Updating as Project Location Changes
In the Process Flow window, right-click on the Rename program and select Properties. The file path for the SAS program is C:\SGF2011\Programs\Rename.sas when the project is in the C:\SGF2011 subdirectory. Click OK to close the Properties window, and then select File►Close Project. Click No if asked to Save Project with Temporary Data.
Copy the SGF2011 subdirectory and all of its contents to a network drive U. Select File►Open►Project and navigate to U:\SGF2011\CMHPI_Analysis.EGP. Select the project file, and then click Open.
In the Process Flow window, right-click on the Rename program and select Properties. The file path for the SAS program is now U:\SGF2011\Programs\Rename.sas when the project is in the U:\SGF2011 subdirectory. Click OK to close the Properties window, and then select File►Close Project. Click No if asked to Save Project with Temporary Data.
Return to the project on drive C.
New Users: The relative paths feature is limited to SAS program files and files that can be imported, such as Microsoft Excel files. The project must be stored on a local computer. Projects that are stored on servers cannot take advantage of this feature. Pathnames that are part of the code inside of a program are not affected. Only the pathname that is associated with the program‟s location can be referenced.
Experienced Users: The Assign Library Project task is not affected by the relative paths feature. The path that is specified in this task remains the same even if a project is moved to a different location. Combine this new feature with capabilities of a software versioning and revision control system (for example, Apache Subversion) to keep track of historical versions of projects and their corresponding files.
SESUG 2011

Changing the Project View
The ability to customize the view of a SAS Enterprise Guide session is a key feature that affects the ease of interaction on a daily basis. As a programmer, it is desirable to view more than one aspect of the project at a time. Splitting up the workspace area enables a programmer to multitask.
Figure 26. Splitting the Workspace Area
To see the new process flow and the new data set SASUSER.CMHPI at the same time, split the workspace area by selecting View►Workspace Layout►Stacked from the menu. In the bottom window of the workspace, scroll through the recently viewed items. Double-click on the Add Variables program in the Process Flow window. Then click the Output Data tab, which is the CMHPI table. Keep this split view open to continue to code and view the Process Flow window at the same time. There is also a side-by-side view available.
SESUG 2011

Letting SAS Enterprise Guide Write Most of the Code
The CMHPI data set is structured so that for a given year and quarter, all the index values for all of the metropolitan areas are contained in a single observation, or row. Sometimes this is referred to as a wide data set because for any given entity, all the information is in a single row. This type of data can be useful in some reporting and in data mining. However, for some analyses in SAS, a narrow data set is required. A narrow data set has multiple observations or rows per entity. In other words, for a given item, the information is spread down a column.
Figure 27. Transpose Task: Data Option
To restructure a data set from wide to narrow or vice versa, two options include using DATA step code, which can require repetitive code or PROC TRANSPOSE. Perhaps you are not familiar with this procedure. Allow SAS Enterprise Guide to easily write the majority of the code by using the Transpose task. In the lower workspace area where the CMHPI data set is open, select Data►Transpose to start the Transpose task from the context-sensitive toolbar. Drag Year and Quarter to the Group Analysis by task role, and then take the 11 numeric variables and make them Transpose variables. (To select multiple variables at a time, press SHIFT or CTRL by using the mouse.) Right-click on any transpose variable in the Task roles column, and then select Sort Column►by Name Ascending.
SESUG 2011

Figure 28. Transpose Task: Options Option
Select Options. Type MetroArea in the Name field, and then type AnnualGrowthRate for the Column name
prefix. Select Results►Browse, and then type METRONARROW as the File Name in the Work library. Click Save, and then click Run to transpose the data set.
Figure 29. Output Table from the Transpose Task
The 142-row table is transposed into a 1,562-row table with the correct rows and columns, but the table needs a couple of changes. The Label column is not needed, and the AnnualGrowthRate column name does not need the extra „1‟. Fortunately, SAS Enterprise Guide has written the majority of the PROC SORT and PROC TRANSPOSE code. To see the code, click the Code tab in the lower workspace area. To view the code in a larger window, close
SESUG 2011

the process flow view in the upper workspace area by clicking the Close button in the upper right corner of the process flow.
Figure 30. Procedure Code Only from Transpose Task
To make edits, begin entering text in the code window. SAS Enterprise Guide displays a message that enables you to create a copy of the read-only code that is associated with the task. Click Yes. In the new code window, delete any code that does not belong to either PROC SORT or PROC TRANSPOSE.
Figure 31. Transpose Task Code with Edits Made
If you prefer to have the line numbers in the code window to help you make your edits, select Tools►Options►SAS Programs►Editor Options►Show line numbers.
SESUG 2011

Starting on line 9 of the Code for Transpose program, add two data set options to the WORK.METRONARROW data set. Inside the open parenthesis after the LABEL="Transposed SASUSER.CMHPI" option, add rename = (AnnualGrowthRate1 = AnnualGrowthRate) and drop = Label. These two options rename the Growth Rate column and drop the column that contains the old metro labels, respectively.
Figure 32. WORK.METRONARROW Data Set
Click Run to use your customized code to overwrite the previous WORK.METRONARROW table.
SESUG 2011

Exporting the Code
At this point there are three programs in logical order followed by a task that is no longer needed. Delete the task, link the final transpose program to the end of the other sequence of programs, and then export all of the code into a single program on the hard drive.
Figure 33. Link Final Program
To return to the process flow view, press F4 or click Process Flow from the main toolbar. Right-click on the Transpose task, and then select Delete►Yes. Because you have the code from the Transpose task, you no longer need the task itself. Right-click on the CMHPI data set and select Link CMHPI to►Code for Transpose (Process Flow)►OK.
SESUG 2011

Figure 34. Export All Programs into One Program
From the menu at the top of the main application, select File►Export►Export All Code In Process Flow. Next, in the Export to file field, type C:\SGF2011\Programs\FredMacData.sas. To keep the code as simple as possible, deselect Include headers and Include generated wrapper code. Click Export to write all three programs into the single file FredMacData.sas.
SESUG 2011

Creating a New Process Flow
Now that the METRONARROW data set has been created, we will create a report in a new process flow to demonstrate some additional programming features in SAS Enterprise Guide.
Figure 35. New Process Flow in Same Project
At the top of the main application, select File►New►Process Flow. Right-click the default name of Project Flow 1 in the project tree, and then select Rename. Change the name to Reports.
Modifying Code in a Task
Another occasion where you might want to combine your coding skills and the code-writing abilities of SAS Enterprise Guide is in modifying the code of a task. Create a three-dimensional pie chart with the Freddie Mac data set in a task, and then edit the code to add a graph option.
SESUG 2011

Figure 36. Creating a Simple Pie Chart
To open the METRONARROW data set in the data grid, right-click the Transposed SASUSER.CMHPI data set in the Project Tree and select Open Transposed SASUSER.CMHP. Transposed SASUSER.CMHPI is the label for the METRONARROW data set. To start the Pie Chart task, select Graph►Pie Chart., Select Simple Pie for the Pie Chart option.
SESUG 2011

Figure 37. Subset the Data
Select the Data option in the selection pane and make MetroArea the Column to chart and AnnualGrowthRate the Sum of task role. Click Edit to open the Edit Data and Filter window. Use the menu in the task filter to select Year and Equal to. Then type 2000 in the third text entry box. (You can also click the ellipsis button directly to the right of the box to query the data for the year values.) Click OK. The capability to subset data directly in a task became available in SAS Enterprise Guide 4.2.
SESUG 2011

Figure 38. Selecting the Three-Dimensional Option
Select the Layout option in the selection pane, and then select the 3 Dimensional radio button in the Dimension box.
SESUG 2011

Figure 39. Display Averages in Pie Chart
Finally, select the Advanced option and choose Average as the Statistic used to calculate slice. Click Run to create the three-dimensional pie chart.
SESUG 2011

Figure 40. Average Indexes for Year 2000
The pie chart can be enhanced by emphasizing the largest slice held by SanFran. This option can be added to the task code.
SESUG 2011

Figure 41. Entering Custom Code
To access the Pie Chart task that already contains the customizations you have made, select Modify Task in the workspace area. Click Preview code in the lower left corner of the task. In the Code Preview for Task window, click Insert Code to open the User Code window. You can make your code edits in the User Code window. Scroll in the User Code window until you find the <double-click to insert code> gray bar that falls between the NOHEADING option and the semicolon (;). Double-click on that gray bar to open the Enter User Code window. Type the following code: explode = “SanFran”. Click OK twice, and then close the Code Preview for Task window. Now click Run, and then click Yes to replace the results.
SESUG 2011

Figure 42. Pie Chart with SanFran Slice Emphasized
When you export the code from a customized task, all of the custom code is automatically included in the exported code.
New Users: Programmers who are new to SAS can take advantage of the fact that SAS Enterprise Guide stores all code, logs, and results inside one project. To save your project, select File►Save „Project Name‟ As from the menu, and choose the location.
Experienced Users: Programmers who have been writing SAS code for many years can choose to use traditional storage methods for their programs. As shown earlier, you can export all code in a project by using the Export All Code window. From either the Process Flow window or the Project Tree, you can also right-click on almost any code, log, or output object and choose to save it individually to an external location. Files can be stored relative to the location of the project in order to continue to take advantage of the relative paths feature.
SESUG 2011

Figure 43. Reports Process Flow Window
To return to the process flow view, press F4 or click Process Flow from the main toolbar. Right-click on Pie Chart and select Move Pie Chart to Process Flow►0 Reports. In the upper left corner of the workspace, select the Reports process flow to validate that the task was moved and that it brought the correct data source. This begins an organizational structure of having DATA step programming in one process flow and reporting programming in a separate process flow.
CONCLUSION
SAS Enterprise Guide provides many features for coders and the latest version has a supercharged program editor. For programmers who are just getting started, SAS Enterprise Guide can be used as a teaching tool. The Program Editor window has syntax suggestion and autocompletion to get you started and keep you going. For the hard-core coder, this product provides an interface with integrated help and a “code cleaner.” There are also payoffs for the manager who chooses this software tool for developing projects. Clearly, the winning programmer will be the one who has access to the latest version of SAS Enterprise Guide and the knowledge to know when pointing and clicking is more efficient or coding is more efficient. And the winning manager will be the one who chooses SAS Enterprise Guide as the software development tool.
APPENDIX
Here is additional code that was used in the PROC DATASETS program:
PROC DATASETS LIBRARY=WORK NOLIST;
MODIFY large_msas;
RENAME
'Boston-Cambridge-Quincy, MA-NH M'n = Boston
'Chicago-Naperville-Joliet, IL-IN'n = Chicago
'Dallas-Fort Worth-Arlington, TX 'n = Texas
'Detroit-Warren-Livonia, MI MSA'n = Detroit
'Los Angeles-Long Beach-Santa Ana'n = Californ
'Miami-Fort Lauderdale-Miami Beac'n = Miami
'New York-Northern New Jersey-Lon'n = NewYork
'Philadelphia-Camden-Wilmington, 'n = Philly
'San Francisco-Oakland-Fremont, C'n = SanFran
'Seattle-Tacoma-Bellevue, WA MSA'n = Seattle
'Washington-Arlington-Alexandria,'n = WashDC ;
LABEL
yyyyqq = "YYYYQQ"
Boston = "MA-NH"
Chicago = "IL-IN-WI"
Texas = "TX"
Detroit = "MI"
Californ = "CA"
SESUG 2011

Miami = "FL"
NewYork = "NY-NJ-PA"
Philly = "PA-NJ-DE-MD"
SanFran = "CA"
Seattle = "WA"
WashDC = "DC-VA-MD-WV" ;
FORMAT
yyyyqq BEST12.
Boston F12.2
Chicago F12.2
Texas F12.2
Detroit F12.2
Californ F12.2
Miami F12.2
NewYork F12.2
Philly F12.2
SanFran F12.2
Seattle F12.2
WashDC F12.2 ;
QUIT;
REFERENCES
Fecht, Marje, and Rupinder Dhillon. 2009. “A SAS® Programmer‟s Guide to SAS® Enterprise Guide®.” Proceedings of the SAS Global Forum 2009 Conference. Cary, NC: SAS Institute Inc. Hemedinger, Chris, and Anand Chitale. 2009. “What‟s New in SAS® Enterprise Guide® 4.2?” Proceedings of the SAS Global Forum 2009 Conference. Cary, NC: SAS Institute Inc. Slaughter, Susan, and Lora Delwiche. 2008. “Writing Code in SAS® Enterprise Guide®.” Proceedings of the SAS Global Forum 2009 Conference. Cary, NC: SAS Institute Inc. Hemedinger, Chris, Audimar Bangi, and Stephen Slocum. 2010. “SAS® Programmer‟s Paradise: New Goodies in SAS® Enterprise Guide® 4.3” Proceedings of the SAS Global Forum 2010 Conference. Cary, NC: SAS Institute Inc.
RECOMMENDED READING
For a community of other SAS Enterprise Guide users, including SAS programmers, visit the SAS Enterprise Guide discussion forum at http://support.sas.com/forums.
CONTACT INFORMATION
Your comments and questions are valued and encouraged. Contact the author:
Andy Ravenna SAS Institute Inc. 787 Seventh Avenue New York, NY 10019 212-757-3826 x54018 [email protected]
SAS and all other SAS Institute Inc. product or service names are registered trademarks or trademarks of SAS Institute Inc. in the USA and other countries. ® indicates USA registration.
Other brand and product names are trademarks of their respective companies.
SESUG 2011