2016-2017 lincoln elementary science fair planning guide · 2017-04-24 · 2 types of science...
TRANSCRIPT
0
2016-2017
Lincoln
Elementary
Science
Fair Planning
Guide

1

2
Types of Science Projects: There are two types of science projects: Models and Experiments. Here is the difference between the two:
There are three
types of volcanoes:
Model or Display Bad Choice for the Science Fair!
A Model, Display or Collection: Shows how something works in the real world, but doesn’t really test
anything.
Examples of display or collection
projects can be: “The Solar System”, “Types of Dinosaurs”, “Types of Rocks”, “My gum collection…” Examples of models might be: “The solar system” or “How an Electric Motor Works”, “Tornado in a Bottle”
COOL!!!!! DO THIS An Experiment: Lots of information is given, but it
Which laundry detergent works best?
Resultsalso has a project that shows
testing being done and the
gathering of data.
Examples of experiments can be: “The effects of detergent on the
growth of plants”, “Which paper towel is more absorbent” or “What
structure can withstand the most amount of weight”
Question Which laundry detergent will get
my whites whiter?
Hypothesis I think that
brand x laundry deter-
gent will get my
whites whiter
because it has…..
Materials: Brand X
Brand Y
Brand z
Procedure:
1.
2.
3.
Conclusion
I found out that brand x detergent
was actually….
You can tell you have an
experiment if you are testing
something several times and changing a variable to see what
will happens. We’ll talk about variables later….
Experiment
Great Choice for the science fair!
So What Type of Experiment Should You Do? Even though you can learn a lot from building a model or display, we recommend that you do an experiment! Why? Well, they are fun, they are more interesting and most of all, they take you through the SCIENTIFIC METHOD, which is the way real scientists investigate in real science labs and the real world.

3
So what in the world
is the Scientific
Method?
Find a problem.
Ask a
“How does…”
Question.
Research the problem and find out all you can.
Make a Hypothesis. Predict what might happen
based on what you know.
Conduct the experiment
to find out what
happens.
Think about what you learned
and how it applies to the
real world!
Form a conclusion
Compare/ contrast your hypothesis against the results.
Organize your data in tables
and graphs so that it’s easy to see the Results!
Compile proof by recording
data after conducting your experiment/
investigation several times.

4
Choosing a topic that interests you…
Please feel free to change or add to any of these topics. Let these topics be the beginning to your
own ideas. Choose something that interests you and makes you wonder why. Be creative and have
fun!
ANIMAL STUDIES
Do ants like cheese or sugar better? On which surface can a snail move faster, dirt or cement?
Does an earthworm react to light or darkness? Do mealworms prefer light or dark environments?
How do day-old domestic chicks behave? How does earthworm population relate to soil type?
CONSUMER TESTING
Which dish soap makes the most bubbles? Which paper towel is the strongest?
With which type of battery do toys run the longest? Which laundry detergent works the best?
Which home insulation works best? Which brand of popcorn pops the most kernels?
Which plastic trash bag is the strongest? Which brand of disposable diaper absorbs the most liquid?
COMPARATIVE STUDIES
What kind of juice cleans pennies best? How does omitting an ingredient affect the taste of a cookie?
Which cheese grows mold the fastest? Which lubricants make it most difficult to pick a screwdriver?
What factors affect the growth of mold? Which materials keep ice cubes from melting for the longest
time?
HUMAN STUDIES
In my class, who has the biggest feet, boys or girls? Which student in class has the greatest lung capacity?
Do taller people run faster than shorter people? Does heart rate increase with increasing sound volume?
Does exercise affect heart rate? Does the human tongue have definite areas for certain
tastes?
PLANT STUDIES
Can plants grow without soil? Will bananas brown faster on the counter or in the refrigerator?
Does temperature affect the growth of plants? Do different kinds of apples have the same number of seeds?
Do bigger seeds produce bigger plants? Does a plant grow bigger if “watered” with milk or water?
Do plants grow bigger in soil or water? Will adding bleach to the water of a plant reduce fungus growth?
How much weight can a growing plant lift? Do different types of soil hold different amounts of water?
Do living plants give off moisture? What percentage of corn seeds in a package will germinate?
Does a plant need some darkness to grow? How does light direction affect plant growth?
PHYSICAL SCIENCE
Does a ball roll farther on grass or dirt? Can the design of a paper airplane make it fly farther?
Do all objects fall to the ground at the same speed? What holds two boards together better, a nail or a screw?
Does water with salt boil faster than plain water? Does an ice cube melt faster in air or water?
Do all colors fade at the same rate? Will more air inside a basketball make it bounce higher?
What kind of glue holds two boards together better? Does the width of a rubber band affect how far it will stretch?
What gets warmer faster, sand or soil? Will a ball bounce higher if it is dropped further from the floor?
Which metal conducts heat best? Does sound travel best through solids, liquids, or gases?
Do liquids cool as they evaporate? Does the slope of the land affect the amount of erosion?
Does the viscosity of a liquid affect its boiling point? Does the color of a material affect its absorption of heat?
WATER
Does warm water freeze faster than cool water? Which materials absorb the most water?
What materials dissolve in water? Does the color of water affect its evaporation?
What type of soil filters water best? Will water with salt evaporate faster than water without salt?
Can the sun’s energy be used to clean water? What types of bacteria are found in tap water?

5
Doing the Research and Forming a
Hypothesis…
So you’ve picked your category and you’ve chosen a topic. Now it is time to research your problem as much as possible. Becoming an expert on your topic is what real scientists do in real labs and the world.
So how do you become an expert?
YOU READ!
READ about your topic. READ encyclopedias. READ magazine articles and books from the library. READ articles from the Internet. Take note of any new science words you learn and use them. It makes you sound more like a real scientist. Keep Track of all the books and articles you read. You’ll need that list for later.
YOU DISCUSS! TALK about it with your parents. TALK about it with your teachers. TALK about it with experts like Veterinarians, Doctors, Weathermen or others who work with the things you are studying. Sometimes websites will give you e-mail addresses to experts who can answer questions. But do not write to anyone on the Internet without letting an adult supervise it. (*hint: take pictures of yourself interviewing people).
Whew…..
Then when you think that you can’t possibly learn anymore and the information just keeps repeating itself…you are ready to...
Write a Hypothesis Now it is the time to PREDICT what you think will happen if you test your problem. This type of “SMART GUESS” or PREDICTION is what real scientists call a HYPOTHESIS. Using this fancy word will amaze your friends and will have you speaking like a full-fledged scientist.
So how do you begin? Well, just answer this very simple question:
What do you think will happen, (even before you start your experiment)?
Example Problem: Which paper towel is more absorbent?
Example Hypothesis: I think Brand X will be more absorbent because it’s a more popular brand. It is thicker and the people I interviewed said that the more expensive brands would work better.
(This hypothesis not only predicts what will happen in the experiment, but also shows that the “scientist” used research to back up his prediction.)

6
Testing your Hypothesis by doing
an experiment…
Now we’ve come to the good part; the part that all scientists can’t wait to get their grubby little hands on. You guessed it, The EXPERIMENT!
Designing an experiment is really cool because you get to use your imagination to come up
with a test for your problem, and most of all, you get to prove (or disprove) your hypothesis.
First: Gather your materials: What will you need to perform your experiment? The safest way to do
this is to recruit an adult to help you get the materials you need. Oh, did we mention to take pictures or draw pictures of your materials? This will come in handy when you are making your board display.
Second: Write a PROCEDURE. A procedure is a list of steps that you did to perform an
experiment. Why do you need to write it down? Well it’s like giving someone a recipe to your favorite
dish. If they want to try it, they can follow your steps to test if it’s true. Scientists do this so that people
will believe that they did the experiment and also to let other people test what they found out. Did we
mention to take pictures of yourself doing the steps?
Third: Identify your VARIABLES. The variables are any factors that can change in an
experiment. Remember that when you are testing your experiment you should only test one variable at a
time in order to get accurate results. In other words, if you want to test the affect that water has on plant growth, then all the plants you test should be in the same conditions, these are called controlled
variables: same type of dirt, same type of plant, same type of location, same amount of sunlight, etc. The only variable you would change from plant to plant would be the amount of water it received. This is
called the independent or manipulated variable. The independent variable is the factor you are testing. The results of the test that you do are called the dependent or responding variables. The
responding variable is what happens as a result of your test. Knowing what your variables are is very
important because if you don’t know them you won’t be able to collect your data or read your results.
Fourth: TEST, TEST, TEST. Remember that we expect your results to be consistent in order to be a
good experiment. In other words, when you cook from a recipe you expect the outcomes to be the same if you followed the directions (or procedure) step by step. So that means you need to do the experiment
more than once in order to test it properly. We recommend five times or more. More is better!
Don’t forget to take pictures of the science project being done and the results.
Fifth: Collect your DATA. This means to write down or record the results of the experiment every time
you test it. Be sure you also organize the data in ways to make it is easy to read and interpret the results. Most scientists use tables, graphs and other organizers to show their results. Organizing makes the results
easy to read, and much easier to recognize patterns that might be occurring in your results. (Besides, it impresses the judges when you use them.) But don’t make a graph or table because we asked you to, use
it to benefit your project and to help you make sense of the results. There is nothing worse than having
graphs and tables that have nothing to do with answering the question of a science experiment.

7
Plant Amount of water per day
Size it grew in two weeks
(controlled variable)
(independent variable)
(responding variable)
Plant A none .5 cm
Plant B 5 ml 2 cm
Plant C 10 ml 5 cm
Plant D 20 ml 7 cm
Time out: How Do You Collect Data?!!? • Keep a science journal: A science journal is a type of science diary that you can keep especially if your
experiment is taking place over a long period of time. We suggest you do that if your experiment is over a
period of a week or more. In your journal you can record observations, collect re- search, draw and diagram pictures and jot down any additional questions you might have for later.
• Have the right tools to do the job: Make sure you have the stuff you need to take accurate
measurements like rulers, meter tapes, thermometers, graduated cylinders or measuring cups that measure volume. The recommended standard of measurement in science is metric so if you can keep your
measurements in meters, liters, Celsius, grams, etc, you are doing great!
• Tables, charts and diagrams: These graphic sources are generally
the way a good scientist like you would keep track of your experiment trials. Remember you are testing at least 5 times or more. A table is
organized in columns and rows and ALWAYS has labels or headings telling what the columns or rows mean. You will probably need a row
for every time you did the experiment and a column telling what the
independent variable was (what you tested) and the responding variable (the result that happened because of the independent
variable).
• Be accurate and neat: When you are writing your tables and
charts please make sure that you record your data in the correct column or row, that you write neatly, and that you record your data as soon as you collect it SO YOU
DON’T FORGET WHAT HAPPENED. Sometimes an experiment might be hard
to explain with just a table, so if you have to draw and label a diagram (or picture) to explain what happened, it is recommended that you do.
• Use the right graph for your experiment. There is nothing worse than a bad graph. There are all types
of graph designs, but these seem to be easy to use for science fair experiments.
*Pie graphs are good to use if you are showing percentages of groups. Remember that you can’t have more than 100% and all the pieces need to add up to 100%. This type of graph is great if you
are doing surveys.
*Bar graphs are good if you are comparing amounts of things
because the bars show those amounts in an easy to read way. 2
0
Growth in CM
growth cm
*Line graphs are good to use if you are showing how changes occurred in your experiments
over time. In this particular case you would be using the x axis to show the time increments (minutes, hours, days, weeks, months) and then you would use the Y axis to show what you were measuring at that
point in time.
….And Now back to the Experiment Steps Sixth: Write a conclusion: Tell what happened. Was your hypothesis proved, were the results
accurate? Would you change anything about the experiment or are you curious about something else
now that you’ve completed your experiment? And most of all, TELL WHAT YOU LEARNED FROM
DOING THIS EXPERIMENT.
8
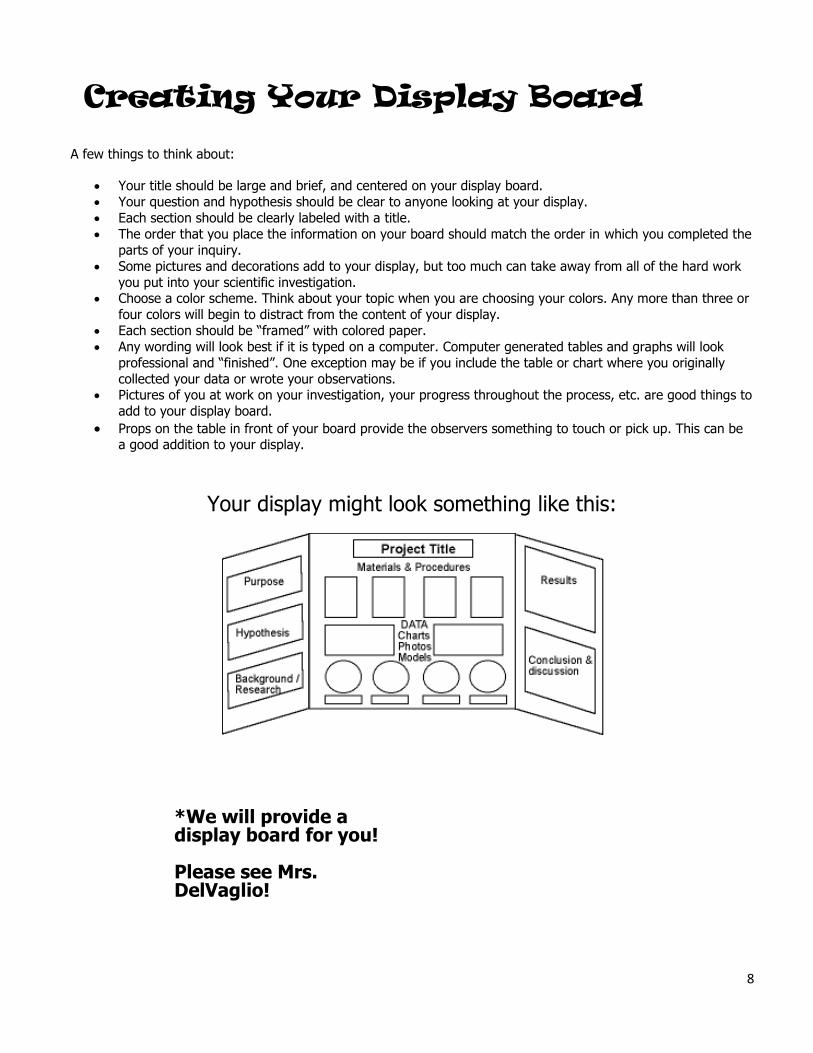
Creating Your Display Board
A few things to think about:
Your title should be large and brief, and centered on your display board.
Your question and hypothesis should be clear to anyone looking at your display.
Each section should be clearly labeled with a title.
The order that you place the information on your board should match the order in which you completed the
parts of your inquiry.
Some pictures and decorations add to your display, but too much can take away from all of the hard work
you put into your scientific investigation. Choose a color scheme. Think about your topic when you are choosing your colors. Any more than three or
four colors will begin to distract from the content of your display.
Each section should be “framed” with colored paper.
Any wording will look best if it is typed on a computer. Computer generated tables and graphs will look
professional and “finished”. One exception may be if you include the table or chart where you originally
collected your data or wrote your observations. Pictures of you at work on your investigation, your progress throughout the process, etc. are good things to
add to your display board.
Props on the table in front of your board provide the observers something to touch or pick up. This can be a good addition to your display.
Your display might look something like this:
*We will provide a display board for you! Please see Mrs. DelVaglio!

9
If you completed everything in this packet you probably have a terrific science fair project, and you are now a real scientist! Good Job! But…
If you still need more ideas, here is a list websites about science fair projects that you can check out to give you even more ideas.
Websites Internet Public Library http://www.ipl.org/div/kidspace/projectguide/ Are you looking for some help with a science fair project? If so, then you have come to the right place. The IPL will guide you to a variety of web site resources, leading you through the necessary steps to successfully complete a science experiment.
Discovery.com: Science Fair Central http://school.discovery.com/sciencefaircentral/ "Creative investigations into the real world." This site pro- vides a complete guide to science fair projects. Check out the 'Handbook' which features information from Janice VanCleave, a popular author who provides everything you need to know for success. You can even send her a question about your project.
Science Fair Idea Exchange http://www.halcyon.com/sciclub/cgi-pvt/scifair/ guestbook.html This site has lists of science fair project ideas and a chance to share your ideas with others on the web!
Cyber-Fair http://www.isd77.k12.mn.us/resources/cf/welcome.html This site has one-sentence explanations of each part of a science fair. One of the steps described is presenting your project to judges. This may or may not be a part of your science fair. The site also has an explanation of what makes a good project and an explanation of how to come up with your own science fair project.
Try Science http://tryscience.com Science resource for home that gives you labs to try and 400 helpful links all related to science
The Yuckiest Site in the Internet http://yucky.kids.discovery.com/ Brought to you by Discovery Kids, this site gives you lots of ideas on how to do the messiest yuckiest experiments
Experimental Science Projects: An Introductory Level Guide http://www.isd77.k12.mn.us/resources/cf/SciProjIntro.html An excellent resource for students doing an experiment- based science fair project. There are links on this page to a more advanced guide and an example of an actual experiment-based project.
Gateway to Educational Materials: Science Fair Projects http://members.ozemail.com.au/~macinnis/scifun/ projects.htm The Gateway to Educational Materials extensive and de- tailed step-by-step guide to doing a science fair project. Science Fair Primer http://users.rcn.com/tedrowan/primer.html A site to help students get started and run a science fair project. Science Fair Project Guidebook http://www.energy.sc.gov/K-12/science_fair.htm The State of South Carolina publishes a K-12 science fair guidebook. It can be viewed using Adobe Acrobat Reader. Science Project Guidelines http://www.thesciencefair.com/guidelines.html The scientists at the Kennedy Space Center have participated in judging local school science fairs for many years and have some great suggestions for student research projects. This information by Elizabeth Stryjewski of the Kennedy Space Center is now provided on a commercial site. The Ultimate Science Fair Resource http://www.scifair.org/ A variety of resources and advice. What Makes A Good Science Fair Project http://www.usc.edu/CSSF/Resources/Good_Project.html A website from USC that gives a lot of good tips and ideas to think about regarding what makes a good science fair project. Advice for students as well as teachers and parents is included. Mr. McLaren's Science Fair Survival Page http://www.ri.net/schools/East_Greenwich/Cole/ sciencefair.html Tips from Archie R. Cole Junior High school on what makes a good project. Neuroscience for Kids: Successful Science Fair Projects http://faculty.washington.edu/chudler/fair.html Site made by Lynne Bleeker a former science teacher, science fair organizer, and judge. Gives a thorough and de- tailed description of the steps to a successful science fair project

10
Title: ____________________
By: ____________________
Write down the question/problem and create a Hypothesis based on what you have researched. Problem:
Hypothesis: I think that
(will happen) because (my research shows)…
My Research (websites, books, people I talked to, etc.)
Some important points that I learned about my topic are: •
•
•
•

11
Materials: (take pictures!)
List the Materials that you will need for your science experiment here:
1. 6.
2. 7.
3. 8.
4. 9.
5. 10 .
My controlled variables are (the parts that will always stay the same):
My independent variable is (the part that changes from one experiment to the next, it is what you
are testing):
___________________________________________________________________________
___________________________________________________________________________
___________________________________________________________________________
Procedure: (Remember to take pictures) List the steps that you have to do in order to perform the experiment here:
_1st
_
_2nd
_
_3rd_____________________________________________________________________
_________________________________________________________________________
_4th_____________________________________________________________________
_________________________________________________________________________
_5th_____________________________________________________________________
_________________________________________________________________________
12
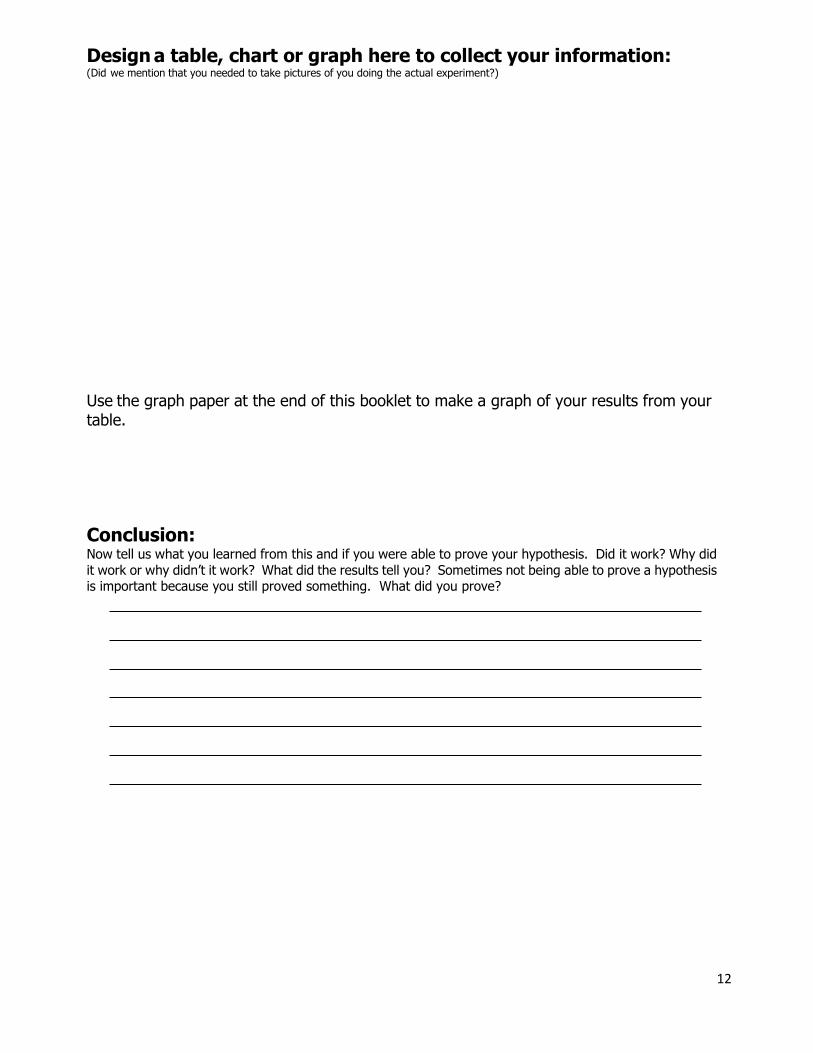
Design a table, chart or graph here to collect your information: (Did we mention that you needed to take pictures of you doing the actual experiment?)
Use the graph paper at the end of this booklet to make a graph of your results from your table.
Conclusion: Now tell us what you learned from this and if you were able to prove your hypothesis. Did it work? Why did
it work or why didn’t it work? What did the results tell you? Sometimes not being able to prove a hypothesis is important because you still proved something. What did you prove?

13
Lincoln Elementary School Science Fair
Entry Form
Dear Parents,
We are excited to announce that Lincoln School will hold its annual Science Fair on June
8th, 2017 in the gym, both during the day, and in the evening at our Lincoln Family End-of-the-
Year Barbecue.
This activity is intended to be a learning experience for our students. Parents are
encouraged to provide guidance and help as needed.
The best projects are experiments, however, observations, collections, or models can be
considered by your child’s teacher. Students may want to exhibit projects that were completed
earlier in the school year so they can share them with the entire school.
Your child’s teacher must approve all projects. For safety reasons, no dangerous
substances, open fires or live animals will be allowed.
-----------------------------------------------------------------------------------------------------------------
-----------------------------------------------------------------------------------------------------------------
Entry Form
Name: _____________________________________________________________
Grade: ________________ Teacher: ____________________________________
Topic of Project: ______________________________________________________
Title of Experiment: ____________________________________________________
Hypothesis: (example: I think if I try popping different types of popcorn, then Jiffy Pop will be the best because….)
I think if I ______________________________________________________________________________
then ___________________________________________________________________________________.
Parent Signature: _____________________________ Teacher Signature: ___________________________