2001 youth atv modelscdn.polarisindustries.com/polaris/common/parts-manuals/... · 2012-09-27 ·...
TRANSCRIPT

Read this manual carefully. It contains important safety information.Scrambler 50 - No one under the age of 6 should ride this vehicle.
Sportsman 90 and Scrambler 90 - No one under the age of 12 should ride these vehicles.
2001 YOUTH ATV MODELSOwner’s Safety and Maintenance Manual
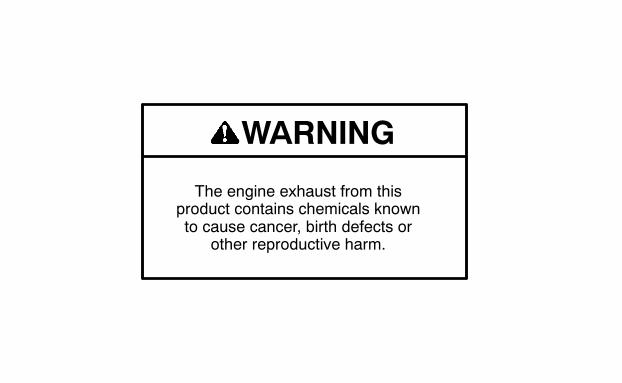
The engine exhaust from thisproduct contains chemicals knownto cause cancer, birth defects or
other reproductive harm.
WARNING

Indicates a potential hazard which couldresult in severe injury or death.

Part No. 9916424
Improper ATV use can result in SEVERE INJURY or DEATH
Always use an approvedhelmet and protective gear
Never use on public roads Never carry passengers Never use withdrugs or alcohol
NEVER operate: without proper training or instruction; at speeds too fast for your skills or theconditions; on public roads - a collision can occur with another vehicle; with a passenger - passen-gers affect balance and steering and increaqse risk of losing control.
ALWAYS: use proper riding techniques to avoid vehicle overturns on hills and rough terrainand in turns; avoid paved surfaces - pavement may seriously affect handingl and control.

i
FOREWORD
Congratulations and thank you from Polaris Industries Inc. for purchasing one of ourall-terrain vehicles (ATVs). Built with American engineering andmanufacturing know-how, it is designed to provide superior riding comfort, enjoyment, and safety.
This manual is furnished to ensure that the operator and parents are aware of safeoperating procedures. It also includes information about the general care and main-tenance of your ATV.
Carefully read the following pages. If you have any questions regarding this ATV con-tact a Polaris dealer for assistance. Remember, Polaris dealers have the knowledgeand facilities to provide you with the best service possible.

ii
PROTECT YOUR SPORT
Know all local, state/province riding laws;
Respect your vehicle;
Respect the environment; and
You will gain the respect of others.
We also advise you to strictly follow the recommended maintenance program as out-lined. This preventive maintenance program is designed to ensure that all criticalcomponents on this ATV are thoroughly inspected at various intervals.
All information in this manual is based upon the latest product data and specificationsavailable at the time of printing. Polaris Industries Inc. reserves the right to makeproduct changes and improvements which may affect illustrations or explanations.
No part of this manual shall be reproduced or used without the written permission ofPolaris Industries Inc.
Illustrations included in this manual are general representations of partshaving a similar function. Your model may differ.

iii
INTRODUCTORY SAFETY MESSAGE TO PARENTSANATV ISNOTATOYANDCANBEHAZARDOUSTOOPERATE. AnATVhandlesdifferently from other vehicles including motorcycles and cars. A collision or rollovercan occur quickly, even during routine maneuvers such as turning and driving on hillsor over obstacles, if you fail to take proper precautions.Children differ in skills, physical abilities, and judgement. Some children may not beable to operate an ATV safely. Parents should supervise their child’s use of the ATVat all times. Parents should permit continued use only if they determine that the childhas the ability and maturity to operate the ATV safely.
Failure to follow the warnings contained in this manual can result inSERIOUS INJURY or DEATH.
• Read this manual and all labels carefully and follow the operating procedures de-scribed.
• Never operate an ATV without proper instruction. Take a training course. Ridersshould receive training from a certified instructor. Contact an authorized PolarisATV dealer or call Polaris at 1-800-342-3764 to find out about the training coursesnearest you.

iv
• Always follow the age guidelines for your machine. Youth ATVs are designed andintended for use by children in two age groups. The Scrambler 50 is for childrennot less than 6 years of age. The Scrambler 90 and the Sportsman 90 are for chil-dren not less than 12 years of age. No children under the age of 16 should ride anATV designed and sold for an adult.
• Do not allow other children to ride this ATV unless they have read the manual, seenthe instructional video and taken and passed a Polaris approved riding skill test.
• Always avoid operating an ATV on any paved surfaces, including sidewalks, drive-ways, parking lots and streets.
• Never operate an ATV on any public street, road or highway, even a dirt or gravelone.
• Never operate an ATV without wearing an approved helmet that fits properly. Youshould also wear eye protection (goggles or face shield), gloves, boots, long-sleeved shirt or jacket, and long pants.
• Never consume alcohol or drugs before or while operating this ATV.
• Never operate at excessive speeds. Always travel at a speed which is proper forthe terrain, visibility and operating conditions, and your experience.

v
• Never attempt wheelies, jumps or other stunts.
• Always inspect your ATV each time you use it to make sure it is in safe operatingcondition. Always follow the inspection and maintenance procedures and sched-ules described in this manual.
• Always keep both hands on the handlebars and both feet on the footrests of theATV during operation.
• Always go slowly and be extra careful when operating on unfamiliar terrain. Alwaysbe alert to changing terrain conditions when operating the ATV.
• Never operate on excessively rough, slippery or loose terrain.
• Always follow proper procedures for turning as described in this manual. Practiceturning at low speeds before attempting to turn at faster speeds. Do not turn at ex-cessive speed.
• Always have the ATVchecked byan authorizedPolaris dealer if it has been involvedin an accident.
• Never operate the ATV on hills too steep for the ATV or for your abilities. Practiceon smaller hills before attempting larger hills.

vi
• Always follow proper procedures for climbing hills as described in this manual.Check the terrain carefully before you start up any hill. Never climb hills with exces-sively slippery or loose surfaces. Shift yourweight forward. Never open the throttlesuddenly or make sudden gear changes. Never go over the top of any hill at highspeed.
• Always follow proper procedures for going down hills and for braking on hills as de-scribed in this manual. Check the terrain carefully before you start down any hill.Shift your weight backward. Never go down a hill at high speed. Avoid going downa hill at an angle which would cause the vehicle to lean sharply to one side. Gostraight down the hill where possible.
• Always follow proper procedures for crossing the side of a hill as described in thismanual. Avoid hills with excessively slippery or loose surfaces. Shift your weightto the uphill side of the ATV. Never attempt to turn the ATV around on any hill untilyou havemastered the turning technique described in this manual on level ground.Avoid crossing the side of a steep hill if possible.

vii
• Always use proper procedures if you stall or roll backwards when climbing a hill.To avoid stalling, maintain a steady speed when climbing a hill. If you stall or rollbackwards, follow the special procedure for braking described in this manual. Dis-mount on the uphill side or to either side if pointed straight uphill. Turn the ATVaround and remount, following the procedure described in this manual.
• Always check for obstacles before operating in a new area. Never attempt to oper-ate over large obstacles, such as large rocks or fallen trees. Always follow properprocedures when operating over obstacles as described in this manual.
• Always be careful of skidding or sliding. On slippery surfaces, such as ice, go slowlyand be very cautious in order to reduce the chance of skidding or sliding out of con-trol.
• Avoid operating the ATV through deep or fast flowing water. If you cannot avoidwater which exceeds the recommended maximum depth (pg. 98), go slowly, bal-ance your weight carefully avoiding sudden movements, maintain a slow andsteady forward motion, do not make sudden turns or stops, and do not make sud-den throttle changes.
• Wet brakesmay have reduced stopping ability. Test your brakesafter leavingwater.If necessary apply them lightly several times to let friction dry out the pads.

viii
• Always use the size and type tires specified in this manual. Alwaysmaintain propertire pressure as described in this manual.
• Never modify an ATV through improper installation or use of accessories.
• Never exceed the stated load capacity for an ATV. Cargo should be properly distrib-uted and securely attached. Reduce speed and follow instructions in this manualfor carrying cargo or pulling a trailer. Allow greater distance for braking.
FORMORE INFORMATIONABOUTATV SAFETY, call the Consumer Product Safe-ty Commission at 1-800-638-2772, or Polaris at 1-800-342-3764.
Additional Important Information...
Due to our concern for the safety of our customers and the general public, Polarishereby strongly recommends and requests that consumers not have installed on aPolaris ATV any equipment which is intended to increase the speed or power of thevehicle; ormake any othermodifications to the vehicle for these purposes. Anymodi-fications to the original equipment of the ATV substantially increase the risk of bodilyinjury. Please be aware that these modificationsmay create a substantial safety haz-ard.

ix
Polaris hereby informs you that the warranty on your ATV is terminated if any suchequipment has been added to the ATV or any modifications have been made to theATV which increase its speed or power.
We also advise you to strictly follow the recommendedmaintenance programoutlinedin this manual. This preventive maintenance program is designed to ensure that allcritical components on the ATV are thoroughly inspected by your dealer at variousmileage intervals.
NOTE:The addition of certain accessories may change the handling characteristics of theATV.Be certain any accessories added to this ATV have been approved by Polaris.Familiarize yourself with their function and affect on the ATV.
Indicates a potential hazard which couldresult in severe injury or death.

x
TABLE OF CONTENTS
RIDER’S SECTION R-1 - R-20. . . . . . . . . . . . . . . . . . . . . . . . . . . . . . . . . . . . . . . . . . . . . . .
UNDERSTANDING WARNINGS 1-4. . . . . . . . . . . . . . . . . . . . . . . . . . . . . . . . . . . . . . . . . .
GENERAL SAFETY AND DESCRIPTION OF LABELS 5-18. . . . . . . . . . . . . . . . . . . . .
DAILY PRE-RIDE CHECK 20-21. . . . . . . . . . . . . . . . . . . . . . . . . . . . . . . . . . . . . . . . . . . . .
OPERATION WARNINGS 22-46. . . . . . . . . . . . . . . . . . . . . . . . . . . . . . . . . . . . . . . . . . . . .
VEHICLE IDENTIFICATION NUMBERS 47-48. . . . . . . . . . . . . . . . . . . . . . . . . . . . . . . . .
CONTROL AND PARTS FUNCTIONS 49-69. . . . . . . . . . . . . . . . . . . . . . . . . . . . . . . . . .
STARTING THE ENGINE 70-71. . . . . . . . . . . . . . . . . . . . . . . . . . . . . . . . . . . . . . . . . . . . .
RIDING GEAR 72-73. . . . . . . . . . . . . . . . . . . . . . . . . . . . . . . . . . . . . . . . . . . . . . . . . . . . . . .
VEHICLE BREAK IN PERIOD 74-76. . . . . . . . . . . . . . . . . . . . . . . . . . . . . . . . . . . . . . . . .
CARRYING LOADS 77-80. . . . . . . . . . . . . . . . . . . . . . . . . . . . . . . . . . . . . . . . . . . . . . . . . .
DAILY PRE-RIDE CHECK 81-83. . . . . . . . . . . . . . . . . . . . . . . . . . . . . . . . . . . . . . . . . . . . .
RIDING 84-103. . . . . . . . . . . . . . . . . . . . . . . . . . . . . . . . . . . . . . . . . . . . . . . . . . . . . . . . . . . .

xi
TABLE OF CONTENTSPVT SYSTEM OPERATION 104-105. . . . . . . . . . . . . . . . . . . . . . . . . . . . . . . . . . . . . . .
BATTERY 106-111. . . . . . . . . . . . . . . . . . . . . . . . . . . . . . . . . . . . . . . . . . . . . . . . . . . . . . .
NOISE EMISSION CONTROL SYSTEM REGULATION 112-114. . . . . . . . . . . . . . .
MAINTENANCE 115-161. . . . . . . . . . . . . . . . . . . . . . . . . . . . . . . . . . . . . . . . . . . . . . . . . .
SPECIFICATIONS 162-168. . . . . . . . . . . . . . . . . . . . . . . . . . . . . . . . . . . . . . . . . . . . . . . .
WIRING DIAGRAMS 169-170. . . . . . . . . . . . . . . . . . . . . . . . . . . . . . . . . . . . . . . . . . . . .
TROUBLE SHOOTING 171-172. . . . . . . . . . . . . . . . . . . . . . . . . . . . . . . . . . . . . . . . . . .
WARRANTY 173-178. . . . . . . . . . . . . . . . . . . . . . . . . . . . . . . . . . . . . . . . . . . . . . . . . . . . .
INDEX 179-180. . . . . . . . . . . . . . . . . . . . . . . . . . . . . . . . . . . . . . . . . . . . . . . . . . . . . . . . . .

R--1
RIDER’S SECTION

R--2
KNOW YOUR MACHINE
PARENTS: Review the information in this manual with any child who may beoperating the ATV. It is up to you to teach your child the proper and safe wayto ride an ATV. You must set boundaries and adhere to them, keeping yourchild’s safety foremost in your mind. Never allow your child to operate thismachine without adult supervision.
CHILDREN: Before you ride your new Polaris ATV, there are some importantthings you should know. How to keep safe is the most important thing. Youmust also learn some things that will keep you and those around you safe whileyou are riding.

R--3
KNOW YOUR MACHINEPay attention when you see this symbol.:
This is the safety alert symbol. When you see this symbol on yourmachine or in this manual it means PAY ATTENTION. If you don’t,you could get hurt verybadly or even killed. Your safety is involved!

R--4
KNOW YOUR MACHINEBefore you have an adult start the engine for you for the first time, let’s learnabout the controls on your new machine.
1. Engine Stop Switch - When theengine is running, you can slide thisbutton to the left or the right and theengine will stop. The stop switchmust be in the “middle” position tostart the engine again.
2. ThrottleControl (A) -Thismakes yourATV go forward when you press it withyour thumb. You must always makesure the throttle control does not stickbefore you operate your ATV. Readmore about it on page R--12.
1
RUN OFFOFF
2A

R--5
KNOW YOUR MACHINE3. Kick Starter (B) - If your battery is too
weak to start your machine, you canpush on this with your foot to start theengine. Have an adult show you howthis works. There is more informationon how to use the kickstart on page69.
3
B

R--6
KNOW YOUR MACHINE4. Gas Cap - This is where the gas goes
that will run your ATV. Your ATV willnot run without gas. Only adultsshould fill the gas tank.
1
4
Always have an adult put gas in your machine.

R--7
KNOW YOUR MACHINE5. Brake Lever (C) - Squeeze this
towards the handle bar to makeyour ATV slow down or stop. Theright hand lever (C-1) controls thefront brake. The left hand lever(C-2) controls the rear brake. Toslow down or stop, squeeze bothbrake handles at the same time.
5
C-1
C-2
Always apply both brakes at thesame time or loss of vehicle con-trol can occur resulting in seriousinjury or death.Always take your thumb off thethrottle control when you pull thebrake lever.

R--8
KNOW YOUR MACHINE6. Ignition Switch - This key must be turned “on” before pushing the starterbutton. You can also use this key to turn off the engine. You can find it on theRight-hand side of the Scramblers (D) and on the pod of the Sportsman (E).
D
E
6

R--9
KNOW YOUR MACHINE7. Tether Strap/ Switch - This mustalways be attached snugly to your rightwrist and your machine when you areriding. If you fall off your ATV, the tetherwill pull off the switch and the enginewill stop. Put one end of the tetherstrap around your right wrist. The otherend must be attached to the ATV.Always attach the tether strap beforeyou ride. (Sportsman - F andScramblers - G)
F
G
7
Never ridewithout the tether strap attached to your rightwrist andmachine.Be careful not to get the cord tangled around the handlebars or any partof your body.

R--10
KNOW YOUR MACHINE
Let’s review the three ways to stop your ATV.
1. Sliding the shut off switch to the left or right.
2. Disconnecting the tether strap will shut off the engine.
3. Turning the key to off will shut off the engine.

R--11
KNOW YOUR MACHINE
1
2
3

R--12
PRE RIDE CHECKYou are almost ready to have an adult start your ATV. Before the ATV is startedfor the first time, youmust do aPRE-RIDECHECK. In fact, every time you rideyour ATV you must have an adult help you check these things before startingit. Let’s learn about these things now.
Make sure the throttle doesn’t stick. Check this by pushing the lever towardthe handlebar and then letting go. The lever should come right back to whereit was before you pushed it. If it comes back slowly or stays open, you havea sticky throttle. This means that something is wrong or broken.
If you have a sticky throttle, do not start the engine. You could get hurt ifyou ridewhen youhavea sticky throttle. Have anadult or your PolarisDeal-er fix the throttle.

R--13
PRE RIDE CHECKMake sure the brakes don’t stick. Check the brake levers by squeezing
them toward the handlebar and then letting it go. They should come right backtowhere theywere before you squeezed. If they goback slowly or stay on, yourbrakes are sticking.
If you have used the storage area under the seat, make sure the seat islocked and in place.
If you have sticky brakes, do not start the engine. You could get hurt if youride when you have sticky brakes. Have an adult or your Polaris Dealer fixthe sticky brakes.

R--14
PRE RIDE CHECKHave an adult check the gas level to see if your ATV needsmore. Children
should never add their own gasoline. This should always be done by anadult. Before anyone adds gasoline to your ATV they must read theinstructions and warnings on page 60 in this Owner’s Manual.
Haveanadult check the engine oil levelwhen the engine is cold. Theengineis very hot after it has been running. It could burn you. Children should nevercheck the oil on their own. An adult should be in charge of keeping the gas andoil levels to the full marks.
Always have an adult put gas in your machine.

R--15
PRE RIDE CHECKThis last check is done with the engine running. You must check to make
certain that ALL THREEWAYS TO STOP your ATV are working the way theyshould. Do you remember what they are? If you cannot list them, go back topage R--10 and review.

R--16
RIDING RULESNow you are ready to learn about riding a ATV. You will learn what you can doand what you cannot do. The adult with you is your teacher. You must listenand pay attention or you won’t be safe when you ride. Remember that safetywhile you ride is the most important thing. Let’s learn how to ride!
" Your ATV is made for one person. Never carry a passenger. A passengerwill make the ATV harder to drive. You may lose control and hurt yourselfand your passenger.
"Make sure you knowwhere you are going to drive when your ATV is started.Make sure the area is safe all around your ATV.
You must always follow the safe riding rules found on the next pages.If you do not, you could be hurt really bad or even killed.

R--17
RIDING RULES"Alwayswear the right kind of clothingwhen
you are riding your ATV. You will need agood helmet with a face shield or goggles.Wear a long sleeved shirt or jacket,gloves, long pants, and boots. Make sureyour clothing fits properly. If it is too small,it could keep you from moving easily. If itis too big, it could hang down and getcaught in a moving part.
L
L
L
L
L
L

R--18
RIDING RULES
"Never ride alone. An adult should always be watching you in case you needhelp. Always drive within the sight of an adult.
" Never ride on public trails.
" Always drive your ATV while sitting down. Keep both hands on thehandlebars and keep both feet on the running boards.
You must always follow the safe riding rules found on the next pages.If you do not, you could be hurt really bad or even killed.

R--19
RIDING RULES"Don’t ride your ATV on roads or over railroad tracks. Your ATVmakes noise
that will keep you from hearing cars, trucks or trains that may be comingtowards you.
" Don’t ride at night.
" Learn where there are lakes, rivers, ponds and ditches in your driving area.Stay away from them. Never ride on frozen water. You could get hurt or youcould even die. All ice can be dangerous!
" Always be alert and pay attention to where you are driving. Pay attentionto other drivers and be even more careful around them because you don’tknow what they’re going to do.

R--20
RIDING RULES" Never follow another ATV too closely. Always allow lots of time and space
to stop your ATV.
" Only ride your ATV where you know it is safe to drive. No driving over theflower garden or on the little trees you planted. Be careful of the thingsaround you.
" Always attach the tether strap to your right wrist and machine before riding.
Respect your ATV;respect your environment;
and you will earnthe respect of everyone.

1
UNDERSTANDING WARNINGS
ATTENTION:
Always follow the age guidelines on the machine. YOU MUSTMAKE CERTAIN THEOPERATOR(S) UNDERSTAND ALL WARNINGS AND THE OWNER’S MANUALBEFORE OPERATION.
KNOW YOUR VEHICLE BEFORE YOU BEGIN RIDING!.
It is the parent’s responsibility to teach their children the proper and safe way to rideany ATV. This should be done by reading the owner’s manual with your children be-fore they first use the ATV and periodically afterwards.
SAFETY TRAINING.
When you purchased this vehicle your dealer presented a hands-on safety trainingcourse covering all aspects of ATV safety. In addition, you were provided with certainprinted material and a video which instructs operators on safe operating procedures.

2
UNDERSTANDING WARNINGS
You should review this information with your child on a regular basis. In the event youpurchased a used Polaris ATV from a party other than a Polaris dealer, safety trainingcan obtained at no charge from any authorized Polaris dealer.
Failure to follow the warnings contained in this manual can result in severe INJURYOR DEATH.
NOTE: Illustrations used in this manual are for general representation only. Yourmodel may differ.SAFETY ALERT
WARNINGS identify special instructions or procedures which, if not correctlyfollowed, could result in personal injury, or loss of life. Read all WARNINGS inthis manual carefully. Always follow their instructions.

3
UNDERSTANDING WARNINGS
The following precautionary signal words are used throughout this manual to conveythe following messages:
This is the safety alert symbol. When you see this symbol onyour machine or in this manual, be alert to the potential forpersonal injury. Your safety is involved!
Indicates a potential hazard which couldresult in severe injury or death.

4
UNDERSTANDING WARNINGS
The following precautionary signal words are used throughout this manual to conveythe following messages:
Indicates a potential hazard which mayresult inminor personal injury ordamageto the ATV.
NOTE The word “NOTE:” in this manual will alert you to keyinformation or instructions.
Indicates asituation that can result in damage to themachine.

5
GENERAL SAFETY AND DESCRIPTION OF LABELSNOTE:Warning decals have been placed on the vehicle for the protection of the operator(s).Read and follow the instructions on each decal carefully. In the event any decal be-comes illegible or comes off, contact your Polaris dealer for a replacement. Any safe-ty decal needing replacement will be provided by Polaris at no charge. The part num-ber is printed on the decal.

6
GENERAL SAFETY AND DESCRIPTION OF LABELS
1
WARNING

7
GENERAL SAFETY AND DESCRIPTION OF LABELSImproper ATV use can result in SEVERE INJURY OR DEATH.Always use an approved helmet and protective gear; Never use on public roadsNever carry passengers; Never use with drugs or alcoholNEVER operate: without proper training or instruction; at speeds too fast for yourskills or the conditions; on public roads - a collision can occur with another vehicle;with a passenger - passengers affect balance and steering and increase risk oflosing control.ALWAYS use proper riding techniques to avoid vehicle overturns on hills andrough terrain and in turns; avoid paved surfaces - pavement may seriously affecthandling and controlLOCATE AND READ OWNER’S MANUAL. FOLLOW ALL INSTRUCTIONS ANDWARNINGS. IF OWNER’S MANUAL IS MISSING, CONTACT A POLARIS DEAL-ER FOR A REPLACEMENT.

8
GENERAL SAFETY AND DESCRIPTION OF LABELS
2Kids under age 6 should NEVER operate this ATV. Kidsunder 6 have an increased chance of losing control, whichcould result in severe injury or death.
Adult supervision is required.
Make sure operators follow Owner’s Manual and labels.
Make sure operators watch the safety video and pass theATV Training Course.
Never operate this ATV on HILLS steeper than 15 degrees15°. To prevent flipover on hilly terrain, use throttle
and brakes gradually.
S
S
S
S
S
2
(Found on Scrambler 50)

9
SAFETY WARNING AND OPERATION DECALSS Kids under age 6 should NEVER operate this ATV. Kidsunder 6 have an increased chance of losing control, whichcould result in severe injury or death.S Adult supervision is required.S Make sure operators follow Owner’s Manual and labels.S Make sure operators watch the safety video and pass theATV Training Course.
S Never operate this ATV on HILLS steeper than 15 degrees15°. To prevent flipover on hilly terrain, use throttle
and brakes gradually.
10
SAFETY WARNING AND OPERATION DECALS
2
Kids under age 12 should NEVER operate this ATV. Kidsunder 12 have an increased chance of losing control, whichcould result in severe injury or death.
Adult supervision is required.
Make sure operators follow Owner’s Manual and labels.
Make sure operators watch the safety video and pass theATV Training Course.
Never operate this ATV on HILLS steeper than 15 degrees15°. To prevent flipover on hilly terrain, use throttle
and brakes gradually.
S
S
S
S
7079091
2
(Found on Scrambler 90 and Sportsman 90
S

11
GENERAL SAFETY AND DESCRIPTION OF LABELSS Kids under age 12 should NEVER operate this ATV. Kidsunder 12 have an increased chance of losing control, whichcould result in severe injury or death.S Adult supervision is required.S Make sure operators follow Owner’s Manual and labels.S Make sure operators watch the safety video and pass theATV Training Course.
S Never operate this ATV on HILLS steeper than 15 degrees15°. To prevent flipover on hilly terrain, use throttle
and brakes gradually.

12
GENERAL SAFETY AND DESCRIPTION OF LABELS
IMPROPER TIRE PRESSURE OROVERLOADING can cause loss of control,resulting in SEVERE INJURY OR DEATH.TIRE PRESSURE (PSI): FRONT 2 REAR 2
maximum weight capacity(Gross Vehicle Weight) INCLUDING MACHINE,
DRIVER AND CARGO IS _____ LBS.
(Found on Scrambler 50 and Scrambler 90)
3
34
WARNING

13
GENERAL SAFETY AND DESCRIPTION OF LABELS4
WARNING
Indicates a potential hazard which couldresult in severe injury or death.

14
GENERAL SAFETY AND DESCRIPTION OF LABELS
5
6

15
GENERAL SAFETY AND DESCRIPTION OF LABELSD Operation of thisvehicle without thefilter element will severelydamage the engine.
D Clean air filter often, morefrequent cleaning required industy conditions.
(on rear of seat)6
D Specific carburetor jettingand adjustments are
required depending on temperatureand altitude. See your Owner’s Manual.
Factory Setting:D 40° to 80° F. at 0-3000 feet. (5° to 27°C. at 0-900 meters)
ATTENTION
5

16
GENERAL SAFETY AND DESCRIPTION OF LABELS
7
10
8 9

17
GENERAL SAFETY AND DESCRIPTION OF LABELS
7Moving parts hazard under belt-clutch guard. To prevent serious injury, donot operate vehicle with guard removed.Do not modify engine or clutch. Doing so can cause part failure, possibleimbalance, and excessive engine RPM which can result in serious injury ordeath.
DO NOT TOW FROM RACK OR BUMPER.Vehicle damage or tipover may resultcausing severe injury or death.Maximum Front Rack Load 10 lbs.
DO NOT TOW FROM RACK OR BUMPER.Vehicle damage or tipover may resultcausing severe injury or death.Maximum Rear Rack Load 20 lbs.
8 9
(Found on the Sportsman 90)
WARNING

18
GENERAL SAFETY AND DESCRIPTION OF LABELS
MANUFACTUREDBY: POLARIS IND. INC.
DATE:
VIN:
THIS VEHICLE IS AN ALL TERRAIN VEHICLE AND ISNOT INTENDED FOR USE ON PUBLIC ROADS.
CE VÉHICULE EST UN VÉHICULE TOUT TERRAINQUI NiEST PAS DESTINÉ À ÊTRE UTILISÉ SURLES CHEMINS PUBLICS.
IMPROPER TIRE PRESSURE OR OVERLOADING can causeloss of control resulting in SEVERE INJURY OR DEATH.
TIRE PRESSURE (PSI): FRONT 2 REAR 2
MAXIMUM WEIGHT CAPACITY (Gross Vehicle WeightINCLUDING MACHINE, DRIVER AND CARGO IS 423 LBS.)
Reduce speed and allow greater distance for braking whencarrying cargo. Overloading or carrying tall, off-center, or unse-cured loads will increase your risk of losing control. Loadsshould be centered, carried as low as possible, and firmly se-cured to the racks. With dual racks, load distribution 1/3 front2/3 rear is best. For stability on rough or hilly terrain, reducespeed and cargo. Be careful if load extends over the side of therack.
Read Owner’s Manual for more detailed loading information.
S
S
(Found on Sportsman 90)
10

19
OPERATION WARNINGS
POTENTIAL HAZARDOperating this ATV without proper instruction.WHAT CAN HAPPENThe risk of an accident is greatly increased if the operator does not know how tooperate the ATV properly in different situations and on different types of terrain.HOW TO AVOID THE HAZARDBeginning and inexperienced operators should complete the certified trainingcourse offered by Polaris Industries Inc. They should then regularly practice theskills learned in the course and the operating techniques described in theOwner’s Manual.For more information about the training course, contact an authorized ATVdealer or call Polaris at 1-800-342-3764.
WARNING

20
DAILY PRE-RIDE INSPECTION
Use the following checklist to verify yourmachine is in proper working order each timeyou ride.
Item/Inspection Procedure1. Tires - check condition and pressures
2. Fuel and oil tanks - fill both tanks to their proper levels
3. All brakes - check operation, adjustment.
4. Throttle - check for free operation and closing
5. Brakelight - check for proper operation.
This ATV must be inspected each time before riding to ensure it is in properworking order. If proper inspection is not done, severe injury or death couldresult.

21
DAILY PRE-RIDE INSPECTION6. Engine stop switch - check for proper function
7. Wheels - check for tightness of wheel nuts and axle nuts; check that axle nuts aresecured by cotter pins
8. Drive chain - condition and slack; refer to drive chain adjustment
9. Air cleaner element - check for dirt; clean or replace
10. Steering - check for free operation noting any unusual looseness in any area
11. Loose parts - visually inspect vehicle for any damaged components or loose nuts/bolts or fasteners
12. Operators helmet, goggles and clothing
Indicates a potential hazard which couldresult in severe injury or death.

22
OPERATION WARNINGS
POTENTIAL HAZARDFailure to follow the age recommendations for this ATV.WHAT CAN HAPPENUse by children of ATVs that are not recommended for their age can lead tosevere injury or death of the child.Even though a child may be within the age group for which some ATVs arerecommended, he or shemay not have the skills, abilities, or judgment neededto operate the ATV safely and may be involved in a serious accident.HOW TO AVOID THE HAZARDFollow the age guidelines printed on your machine.
WARNING

23
OPERATION WARNINGS
POTENTIAL HAZARDCarrying a passenger on this ATV.WHAT CAN HAPPENGreatly reduces your ability to balance and controlthis ATV.Could cause an accident, resulting in harm to youand/or your passenger.HOW TO AVOID THE HAZARDNever carry a passenger. The long seat is to allowthe operator to shift position as needed during op-eration. It is not for carrying passengers.
WARNING

24
OPERATION WARNINGS
POTENTIAL HAZARDOperating this ATV on paved surfaces, including side-walks, paths, parking lots, and driveways.WHAT CAN HAPPENThe ATV tires are designed for off-road use. Pavedsurfaces may seriously affect handling and control oftheATV, andmay cause the vehicle to goout of control.HOW TO AVOID THE HAZARDAvoid operating the ATV on pavement whenever pos-sible. If you must ride on a paved surface, go slowlyand do not make sudden turns or stops.
WARNING

25
OPERATION WARNINGS
POTENTIAL HAZARDOperating this ATV on public streets, roads orhighways.WHAT CAN HAPPENYou can collide with another vehicle.HOW TO AVOID THE HAZARDNever operate this ATV on any public street,road or highway, even a dirt or gravel one.In many states it is illegal to operate ATVs onpublic streets, roads and highways.
WARNING

26
OPERATION WARNINGS
POTENTIAL HAZARD Operating this ATV withoutwearing an approved helmet, eye protection and pro-tective clothing.WHAT CAN HAPPEN Operating without an approvedhelmet increases your chances of a severe head injuryor death in the event of an accident.Operating without eye protection can result in an acci-dent and increases your chances of a severe injury inthe event of an accident.
HOW TO AVOID THE HAZARD Always wear an approved helmet which fitsproperly.You should also wear: eye protection (goggles or face shield); gloves; boots;long-sleeved shirt or jacket; and long pants.
WARNING
27
OPERATION WARNINGS
POTENTIAL HAZARDOperating this ATV after consuming alcohol or drugs.WHAT CAN HAPPENCould seriously affect your judgment.Could cause you to react more slowly.Could affect your balance and perception.Could result in an accident.HOW TO AVOID THE HAZARDNever consume alcohol or drugs before or while driving this ATV.
WARNING

28
OPERATION WARNINGS
POTENTIAL HAZARDOperating this ATV at excessive speeds.WHAT CAN HAPPENIncreases your chances of losing control of the ATV, which can result in an acci-dent.HOW TO AVOID THE HAZARDAlways travel at a speed which is proper for the terrain, visibility and operatingconditions; and your experience.
WARNING
Indicates a potential hazard which couldresult in severe injury or death.
29
OPERATION WARNINGS
POTENTIAL HAZARDAttempting wheelies, jumps and other stunts.WHAT CAN HAPPENIncreases the chance of an accident, including anoverturn.HOW TO AVOID THE HAZARDNever attempt stunts, such as wheelies or jumps.Don’t try to show off.
WARNING

30
OPERATION WARNINGS
POTENTIAL HAZARDFailure to inspect the ATV before operating.Failure to properly maintain the ATV.WHAT CAN HAPPENIncreases the possibility of an accident or equipment damage.HOW TO AVOID THE HAZARDAlways inspect your ATV each time you use it to make sure the ATV is in safeoperating condition.Always follow the inspection and maintenance procedures and schedulesdescribed in the Owner’s Manual.
WARNING

31
OPERATION WARNINGS
POTENTIAL HAZARDRemoving hands from handlebars or feet from footrests during operation.WHAT CAN HAPPENRemoving even one hand or foot can reduce your ability to control the ATV orcould cause you to lose your balance and fall off the ATV. If you remove a footfrom the footrest, your foot or leg may come into contact with the rear wheels,which could injure you or cause an accident.HOW TO AVOID THE HAZARDAlways keep both hands on the handlebars and both feet on the footrests ofyour ATV during operation.
WARNING

32
OPERATION WARNINGS
POTENTIAL HAZARDFailure to use extra care when operating this ATVon unfamiliar terrain.WHAT CAN HAPPENYou can come upon hidden rocks, bumps, orholes, without enough time to react.Could result in the ATV overturning or going outof control.
HOW TO AVOID THE HAZARDGo slowly and be extra careful when operating on unfamiliar terrain.Always be alert to changing terrain conditions when operating the ATV.
WARNING

33
OPERATION WARNINGS
POTENTIAL HAZARDFailure to use extra care when operating onexcessively rough, slippery or loose terrain.WHAT CAN HAPPENCould cause loss of traction or vehicle control,which could result in an accident, including anoverturn.
HOW TO AVOID THE HAZARDDo not operate on excessively rough, slippery or loose terrain until you havelearned and practiced the skills necessary to control the ATV on such terrain.Always be especially cautious on these kinds of terrain.
WARNING
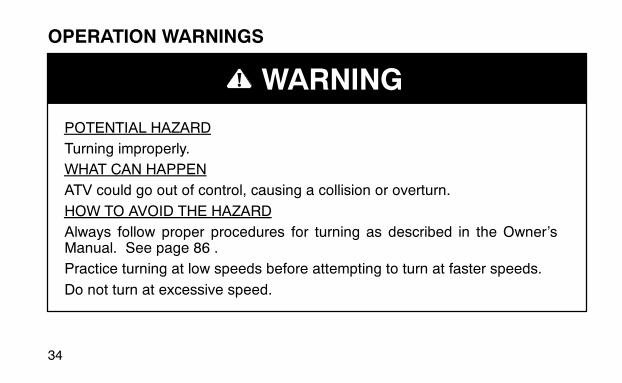
34
OPERATION WARNINGS
POTENTIAL HAZARDTurning improperly.WHAT CAN HAPPENATV could go out of control, causing a collision or overturn.HOW TO AVOID THE HAZARDAlways follow proper procedures for turning as described in the Owner’sManual. See page 86 .Practice turning at low speeds before attempting to turn at faster speeds.Do not turn at excessive speed.
WARNING

35
OPERATION WARNINGS
POTENTIAL HAZARDClimbing hills improperly.WHAT CAN HAPPENCould cause loss of control or cause ATV to over-turn.HOW TO AVOID THE HAZARDAlways follow proper procedures for climbing hills
as described in the Owner’s Manual. See pages 91 through 96.Always check the terrain carefully before you start up any hill.Never climb hills with excessively slippery or loose surfaces. Shift yourweight for-ward.Never open the throttle suddenly. The ATV could flip over backwards. Never goover the top of any hill at high speed. An obstacle, a sharp drop, or another ve-hicle or person could be on the other side of the hill.
WARNING

36
OPERATION WARNINGS
POTENTIAL HAZARDGoing down a hill improperly.WHAT CAN HAPPENCould cause loss of control or cause ATV to overturn.HOW TO AVOID THE HAZARDAlways follow proper procedures for going down hills
as described in the Owner’s Manual. See page 94. NOTE: A special techniqueis required when braking as you go downhill.Always check the terrain carefully before you start down any hill. Shift yourweightbackward. Never go down a hill at high speed.Avoid going down a hill at an angle which would cause the vehicle to lean sharplyto one side. Go straight down the hill where possible.
WARNING

37
OPERATION WARNINGS
POTENTIAL HAZARDImproperly crossing hills or turning on hills.WHAT CAN HAPPENCould cause loss of control or cause ATV to overturn.HOW TO AVOID THE HAZARDNever attempt to turn the ATV around on any hill until
you have mastered the turning technique as described in the Owner’s Manualon level ground. See page 96. Be very careful when turning on any hill.Avoid crossing the side of a steep hill if possible.When crossing the side of a hill: Always follow proper procedures as describedin the Owner’s Manual. Avoid hills with excessively slippery or loose surfaces.Shift your weight to the uphill side of the ATV.
WARNING

38
OPERATION WARNINGS
POTENTIAL HAZARDStalling, rolling backwards or improperly dismount-ing while climbing a hill.WHAT CANHAPPEN Could result in ATV overturn-ing.HOW TO AVOID THE HAZARDMaintain steady speed when climbing a hill.If you lose all forward speed: Keepweight uphill. Ap-
ply the brakes. Lock parking brake after you are stopped.If you begin rolling backwards: Keep weight uphill; never apply engine power.Never apply the rear brake while rolling backwards. Apply the front brake slowlyby squeezing the RH lever. When fully stopped, apply rear brake as well, andthen lock parking brake. Dismount on uphill side, or to either side if pointedstraight uphill. Turn the ATV around and remount, following the procedure de-scribed in the Owner’s Manual. See page 96.
WARNING

39
OPERATION WARNINGS
POTENTIAL HAZARDSkidding or sliding.WHAT CAN HAPPENYou may lose control of the ATV.You may also regain traction unexpectedly, which may cause the ATV to over-turn.HOW TO AVOID THE HAZARDOn slippery surfaces, such as ice, go slowly and be very cautious in order toreduce the chance of skidding or sliding out of control.
WARNING
Indicates a potential hazard which couldresult in severe injury or death.

40
OPERATION WARNINGS
POTENTIAL HAZARDImproperly operating over obstacles.WHAT CAN HAPPENCould cause loss of control or a collision. Could cause the ATV to overturn.HOW TO AVOID THE HAZARDBefore operating in a new area, check for obstacles.Use extreme caution when riding over large obstacles, such as large rocks orfallen trees.If you cannot avoid obstacles, always follow proper procedures as described inthe Owner’s Manual.
WARNING

41
OPERATION WARNINGS
POTENTIAL HAZARDRiding on frozen lakes and rivers.WHAT CAN HAPPENSevere injury or death can result if the ATV and/or the operator breakthrough the ice.HOW TO AVOID THE HAZARDNever ride your ATV on a frozen body of water.
WARNING

42
OPERATION WARNINGS
POTENTIALHAZARD Operating thisATV throughdeep or fast flowingwater.WHAT CAN HAPPENTires may float, causing loss of traction and loss of control, which could leadto an accident.HOW TO AVOID THE HAZARDAvoid operating the ATV through deepor fast flowingwater. If you canot avoidwater which exceeds the recommended maximum depth, go slowly, balanceyour weight carefully avoiding sudden movements, maintain a slow andsteady forward motion, do not make sudden turns or stops, and do not makesudden throttle changes. See page 98.Remember that wet brakes may have reduced stopping ability. Test yourbrakes after leaving water. If necessary, apply them several times to let fric-tion dry out the pads.
WARNING

43
OPERATION WARNINGS
POTENTIAL HAZARDOperating thisATVwith improper tires, orwith improper oruneven tire pressure.WHAT CAN HAPPENUse of improper tires on this ATV, or operation of this ATV with improper or un-even tire pressure, may cause loss of control, and increases the risk of an acci-dent.HOW TO AVOID THE HAZARDAlways use the size and type tires specified in theOwner’s Manual Supplementfor this vehicle.Alwaysmaintain proper tire pressure as described in the Owner’s Manual Sup-plement.
WARNING

44
OPERATION WARNINGS
POTENTIAL HAZARDOverloading this ATVWHAT CAN HAPPENCould cause changes in vehicle handling which could lead to an accident.HOW TO AVOID THE HAZARDNever exceed the stated load capacity for this ATV.Cargo should be properly distributed and securely attached.
WARNING

45
OPERATION WARNINGS
After a rollover or an accident, have a qualified service dealer check the com-plete machine including, but not limited to, brakes, throttle and steering forpossible damage.
Safe operation of this rider active vehicle requires good judgement andphysical skills. Persons with cognitive or physical disabilities who operatethis vehicle have an increased risk of overturns and loss of control whichcould result in severe injury or death.
WARNING
WARNING
Indicates a potential hazard which couldresult in severe injury or death.

46
OPERATION WARNINGS
POTENTIAL HAZARDOperating this ATV with improper modifications.WHAT CAN HAPPENImproper installation of accessories or modification of this vehicle may causechanges in handling which in some situations could lead to an accident.HOW TO AVOID THE HAZARDNever modify this ATV through improper installation or use of accessories.All parts and accessories added to this vehicle should be genuine Polaris In-dustries Inc. or equivalent components designed for use on this ATV; andshould be installed and used according to instructions. If you have questions,consult an authorized Polaris ATV dealer.
WARNING

47
VEHICLE IDENTIFICATION NUMBERS
21

48
VEHICLE IDENTIFICATION NUMBERSRecord these numbers from your ATV in the spaces provided.
2. Frame VIN (found on the front of frame below steering post)
1. Engine Serial Number (Left side of engine crankcase)
Remove the spare key and store in a safe place. Your key can be duplicated onlyby obtaining a key blank from Polaris and having it cut bymating it with your existingkey.
The vehicle frame and engine serial numbers are important for model identificationwhen registering your vehicle, obtaining insurance or whenever replacement partsare required. In the event your vehicle were stolen these numbers are essential tothe recovery and identification of your ATV.

49
CONTROL AND PARTS FUNCTIONSEngine Electrical Switches
1 - Main Switch- Located on theRight-hand sideof the Scram-blers (A) and onthe pod of theSportsman (B).This switch isoperated with akey and mustbe turned clock-wise to the “on”position to startthe engine.
A
B
1

50
CONTROL AND PARTS FUNCTIONS
2 - Emergency Engine Stop Switch Theengine will not start or run when the switch isin its “off” position. Its purpose is to providethe operator with a quick means of engineshutdown in case of stuck throttle or otheremergency. NOTE: Both the main switchand the emergency engine stop switch shutoff all electrical power to the entire vehicle.To stop the engine, slide the stop switch rightor left to the “off” position.
RUN OFFOFF
2

51
CONTROL AND PARTS FUNCTIONS
3 - Engine Start Button - To startthe engine, make certain the tetherswitch is securely plugged into themachine and attached to the rider’sright wrist. Turn the key to the “on”position, set the parking brake, and push thestart button.
NOTE: Remember to release thepark brake before driving forward.
3

52
CONTROL AND PARTS FUNCTIONS
Engine or driveline damage could occur if the machine is driven without thepark brake released.
This ATV is not equipped with lighting. This ATV is designed for off-roaduse only and must not be ridden on streets or highways. Use caution anddrive at reduced speeds in conditions of reduced visibility. Do not operatethis machine after dark.

53
CONTROL AND PARTS FUNCTIONSEngine Throttle
Indicates a potential hazard which couldresult in severe injury or death.
Do not start or operate an ATV with sticking or improperly operating throttlecontrols. A stuck or improperly operating throttle could cause an accidentresulting in severe injury or death.Always contact your dealer for service repairs whenever throttle problemsarise.Failure to check or maintain proper operation of the throttle system can re-sult in the throttle lever sticking during riding and cause an accident.Always check the lever for free movement and return before starting the en-gine and occasionally during riding.

54
CONTROL AND PARTS FUNCTIONS
Throttle LeverEngine speed and vehicle movement are con-trolled by pressing the throttle lever. Thethrottle lever (1) is spring loaded and enginespeed returns to idle when the lever is re-leased.This vehicle is equipped with an ElectronicThrottle Control (ETC) which is designed toreduce the risk of a frozen or stuck throttle. Inthe event the throttle cable should stick in anopen position, the engine will stop and powerto the rear wheels will cease when the opera-tor releases the throttle lever.
1

55
CONTROL AND PARTS FUNCTIONS
The Electronic Throttle Control (ETC) stops the engine in the event of athrottle system malfunction and is provided for your safety. Do not at-tempt to modify the ETC system or replace it with any after market throttlemechanism.

56
CONTROL AND PARTS FUNCTIONS
Switches
Each Polaris ATV has a main switch. It is located on the right hand side of themachine or headlight pod and operated with a key.
Indicator Lights
Each Polaris ATV has indicator lights. This model has a low oil warning light.When this red dot is lit, it is indicating a low oil level.

57
CONTROL AND PARTS FUNCTIONSFront and Rear Brakes
To activate the rear brake (A),squeeze the left hand lever to-ward the handlebar.
The front brakes (B) are activatedby squeezing the lever on the RHhandlebar.
A
B
Always apply both brakes at thesame time or loss of vehicle con-trol can occur resulting in seri-ous injury or death.

58
CONTROL AND PARTS FUNCTIONSParking Brake
Setting the Parking Brake1. Squeeze the left hand brake lever (A).
2. Push the park brake lock (B) down. This will pre-vent the lever from returning to the releasedposition.
Always check to be sure that the parking brake has been disengaged beforeoperating the ATV. An accident could result causing severe injury if the park-ing brake is left on while the ATV is operated.
A
B

59
CONTROL AND PARTS FUNCTIONS3. To release the parking brake lock, squeeze the brake lever. The parking brake will
release automatically.
Important Safeguards
NOTE: This vehicle has a PVT system which is always in forward. Always lock thepark brake before starting the engine.
Always lock the parking brake whenever the vehicle is left unattended.
Before starting the engine, make certain the park brake is fully locked. Since themachine has a transmission that is always in forward, throttle activation to warmthe engine will make the machine go forward if the park brake is not locked.
Once the engine has warmed enough for operation, release the park brake andgently apply the throttle to go forward.

60
CONTROL AND PARTS FUNCTIONS
Gasoline is highly flammable and explosive under certain conditions.D Always exercise extreme caution whenever handling gasoline.
D Always refuel with the engine stopped and outdoors or in a well ventilatedarea.
D Do not smoke or allow open flames or sparks in or near the area where re-fueling is performed or where gasoline is stored.
D Do not over fill the tank. Do not fill the tank neck.
D If you get gasoline on your skin or clothing, immediately wash it off withsoap and water and change clothing.
D Never start the engine or let it run in an enclosed area. Gasoline poweredengine exhaust fumes are poisonous and can cause loss of consciousnessand death in a short time.
D Shut off fuel valve whenever the ATV is stored or parked.

61
CONTROL AND PARTS FUNCTIONS
Indicates a potential hazard whichcould result in severe injury or death.
WARNING
The engine exhaust from this prod-uct contains chemicals known to
cause cancer, birth defects or otherreproductive harm.

62
CONTROL AND PARTS FUNCTIONSPVT System
The PVT system rotates at high speeds, creating large amounts of force onclutch components. Extensive engineering and testing has been conductedto insure the safety of this product. However, as the owner you have the fol-lowing responsibilities to make sure this system remains safe:D Do not modify any component of the PVT system. Doing so may reduce itsstrength so that a failure may occur at high speeds. This system has beenprecision balanced. Any modification will cause the system to be out of bal-ance, creating vibration and additional loads on components.
D Routine maintenance is the responsibility of the owner. Always follow rec-ommended maintenance procedures. See your dealer!
D This PVT system is intended for use on Polaris products only.D The PVT housing must be securely in place during operation.
Failure to comply with this warning can result in severe injury or death.

63
CONTROL AND PARTS FUNCTIONSEngine Fuel and Oil System
Fuel System
The fuel tank filler cap (1) is located directlybehind the handlebar. The tank has a ca-pacity of 1.3 gallons (5 liters). Use un-leaded gasoline with a minimum pump oc-tane number of 87 octane.
1

64
CONTROL AND PARTS FUNCTIONS
The fuel valve is located on the engine, be-hind the right front fender and has threepositions:
OFF: For vehicle storage and whenevertransporting.
ON: For normal operation.
RES: For reserve supply in the event ofmain supply exhaustion.
NOTE: There is about a 7 to 10 mile (11.2to 16 km) range on reserve gas. Alwaysrefill the gas tank as soon as possible afterhaving used the reserve supply.
Always return valve to “on” position afterrefueling machine.
ScramblerFuel Valve
SportsmanFuel Valve

65
CONTROL AND PARTS FUNCTIONSEngine Fuel Safety/Fuel/FilterThe Polaris ATV is equipped with an in-line fuel filter.This filter should be replaced by your dealer after every 100 hours of operation orannually. Do not attempt to clean the fuel filter.
Use only Polaris injection oil. Never substitute or mix oil brands. Serious en-gine damage and voiding of warranty can result.
To avoid serious engine damage always top off the oil level when refueling.

66
CONTROL AND PARTS FUNCTIONSOil SystemThe oil tank (1) is located under the seat and has a capacity of 12 ounces (1 liter).
To remove the seat,reach under the rear ofthe cab and pull back onthe seat latch. To re-place the seat, set it inplace and push down onthe rear of seat. Alwaysmake sure the seat islocked in place before riding.
1
Do not attempt to release the seat latch unless the machine has not beenrun for at least an hour. The exhaust gets very hot when the machine is runand can cause serious burns.

67
CONTROL AND PARTS FUNCTIONS
Polaris 2-Cycle LubricantsPolaris has a family of premium oils available for use in all our products and highlyrecommends their use. The only oils recommended for Polaris 2-cycle ATVs are Po-laris Premium 2-cycle oil or Premium Gold Synthetic 2-cycle oil.
Enginewarranty coveragemay become void if you use a brand other than Polarisin your machine.

68
CONTROL AND PARTS FUNCTIONSPolaris Premium 2-cycle lubricants are the most advanced formulation of oils spe-cifically designed for today’s 2-cycle engines. Months of lab and field tests haveresulted in a new generation of 2-cycle lubricants. Polaris Premium 2-cycle lubri-cants provide additives for 2-cycle engines lacking in today’s fuel that keep ringgrooves cleaner for less ring sticking and provide improved overall engine cleanli-ness. With new generation lubricity technology, they excel in meeting the lubrica-tion demands of today’s high performance 2-cycle engines. These are optimumoils recommended for liquid cooled and air cooled 2-cycle engines. We believethese oils are the best available in the market today.
Premium 2-Cycle Oil
Polaris also has a TC-W3 premium oil available for use in all of our 2 cycle prod-ucts. We highly recommend its use if premium gold synthetic is not used. Theonly oil recommended for this ATV is Polaris brand oil.Polaris Premium 2-cycle oils will readily mix with each other, however do not mixPolaris Premium 2-cycle oils with any other oils as they may not be compatibleand engine damage may occur.
69
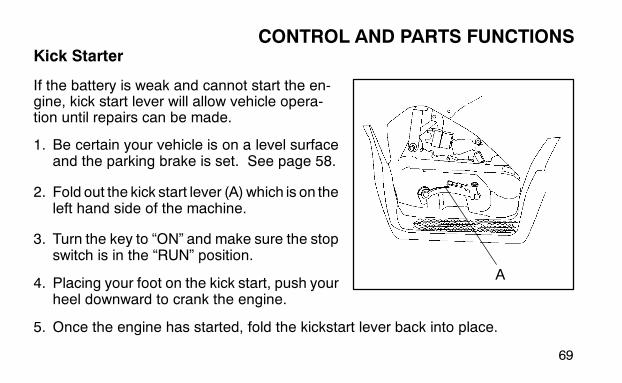
CONTROL AND PARTS FUNCTIONSKick Starter
If the battery is weak and cannot start the en-gine, kick start lever will allow vehicle opera-tion until repairs can be made.
1. Be certain your vehicle is on a level surfaceand the parking brake is set. See page 58.
2. Fold out the kick start lever (A)which is on theleft hand side of the machine.
3. Turn the key to “ON” and make sure the stopswitch is in the “RUN” position.
4. Placing your foot on the kick start, push yourheel downward to crank the engine.
5. Once the engine has started, fold the kickstart lever back into place.
A

70
STARTING THE ENGINEProcedure for Starting a Cold Engine
Indicates a potential hazard which couldresult in severe injury or death.
Never run an engine in an enclosed area. Carbon monoxide exhaust gas is poi-sonous and can cause severe injury or death. Always start engines outdoors.
You must allow your vehicle adequate warm up time before operating or en-gine damage could result.

71
STARTING THE ENGINE1. Set the parking brake.2. Turn the fuel tank valve to ON.3. Sit on the vehicle.4. Attach tether strap to machine and wrist.5. Turn the engine stop switch to RUN.6. Turn the ignition key to ON.7. Press the starter button. NOTE: The rear brake lever must be engaged or the en-
gine will not start.8. Do not press the throttle while starting the engine.9. Activate the starter for a maximum of five seconds, releasing the button when the
vehicle starts. If engine does not start, release the starter and wait five seconds;then activate the starter for another five seconds. Repeat this procedure until en-gine starts.
After the engine starts, vary the engine RPM slightly with the throttle to aid inwarm up until the engine idles smoothly.

72
RIDING GEARSafe Riding GearAlways wear clothing suited to the type of riding youare doing. ATV riding requires special protectiveclothing which will make you feel more comfortableand reduce chances of injury.1. HelmetYour helmet is the most important piece of protec-tive gear for safe riding. A helmet can prevent asevere head injury.Select an approved helmet which meets or exceedsyour state’s safety standards and bears either theDepartment of Transportation (DOT) label, theAmerican National Standards Institute label (ANSIz90.1), or the Snell Memorial Foundation label.
L
LL
L
L
L

73
RIDING GEAR2. Eye ProtectionDo not depend on sunglasses for proper eye protection. A pair of goggles or hel-met face shield offer the best protection for your eyes. They should be kept cleanand be of shatterproof design (bearing the markings z2.1 or VESC 8).3. GlovesOff-road style gloves with knuckle pads are the best for comfort and protection.4. BootsThe best footwear is a pair of strong over the calf type boots with heels, such asmoto-cross boots.5. ClothingTo protect your body, long sleeves and pants should always be worn. Ridingpants with kneepads, a jersey and shoulder pads provide the best protection.

74
VEHICLE BREAK-IN PERIOD2-Cycle EnginesThe break in period for your new Polaris ATV is defined as the time it takes to usethe first tank of gasoline. No single action on your part is as important as a properbreak in period. Careful treatment of a new engine will result in more efficient per-formance and longer life for the engine. Perform the following procedures careful-ly.
1. Mix 6.4 ounces of injection oil to two gallons of gasoline in a suitable gas can. Fillthe fuel tank as outlined on page 65.
2. Fill the oil tank with Polaris injection oil.
Use only Polaris injection oil. Never substitute or mix oil brands. Serious en-gine damage and voiding of warranty can result.

75
VEHICLE BREAK-IN PERIOD
3. Drive slowly at first. Select an areawhich is open and will give you room to familiar-ize yourself with vehicle operation and handling.
4. Vary the throttle positions.
5. Perform regular checks on fluid levels, controls and all important areas on the ve-hicle as outlined earlier on the daily pre-ride inspection checklist found on page 20.
Do not operate at full throttle or high speeds for extended periods during thefirst three hours of use. Excessive heat can build up and cause damage toclose fitted engine parts.

76
VEHICLE BREAK-IN PERIOD
After the break in period the oil injection system provides the necessary enginelubrication without the need for pre-mixed fuel.
After the first tank of pre-mixed fuel has been used please verify that the oil levelin the oil tank has dropped, indicating that the oil pump is functioning properly. Ifthe level has not dropped, see your dealer for oil pump bleeding and repeat thepre-mix procedure.
Fill the oil tank when you refuel your ATV. If you don’t serious enginedamage could result.

77
CARRYING LOADSThe Sportsman 90 has been designed to carry a certain amount of load. CARGOWEIGHT should be evenly distributed (1/3 on the front and 2/3 on the rear) andmounted as low as possible. When operating over rough or hilly terrain, reducespeed and cargo to maintain stable driving conditions. Never exceed the weightsspecified and never attempt to carry cargo on the Scrambler models.
Correct loading of this vehicle is necessary to maintain proper stability and op-erating characteristics. Overloading or incorrect positioning of the load affectsthe vehicle’s turning, stopping distance and stability. Failure to follow loadingrequirements could cause severe injury or death.

78
CARRYING LOADS
2/3 of Load onRear Rack
1/3 of Load onFront Rack
Important Safeguards
To reduce risk of injury or machine damage when carrying loads, read andfollow the warnings listed below:
D REDUCE SPEED AND ALLOW GREATER DISTANCE FOR BRAKINGWHEN CARRYING CARGO.
D CARGO WEIGHT DISTRIBUTION should be 1/3 on the front rack and 2/3on the rear rack. When operating over rough or hilly terrain, reducespeed and cargo to maintain stable driving conditions. Carrying loads onone rack only increases the possibility of vehicle tip over.

79
CARRYING LOADS
D HEAVY LOADS CAN CAUSE BRAKING AND CONTROL PROBLEMS.Use extreme caution when applying brakes with a loaded vehicle. Avoidterrain or situations which may require backing downhill.
D ALL LOADS MUST BE SECURED BEFORE MOVING VEHICLE. Unse-cured loads can create unstable operating conditions, which could resultin loss of control of the vehicle.
D LOADS MUST BE CARRIED AS LOW ON THE RACKS AS POSSIBLE.Carrying loads high on the racks raises the center of gravity of the ve-hicle and creates a less stable operating condition. When cargo loadsare carried high on the racks, the weight of the loads must be reduced tomaintain stable operating conditions.
D OPERATE ONLY WITH STABLE AND SAFELY ARRANGED LOADS.When handling off-centered loads which cannot be centered, securelyfasten load and operate with extra caution.

80
CARRYING LOADS
D EXTREME CAUTION MUST BE USED when operating with loads extend-ing over the rack sides. Stability and maneuverability may be adverselyaffected, causing the machine to overturn.
D DO NOT TRAVEL FASTER THAN THE RECOMMENDED SPEEDS.

81
DAILY PRE-RIDE CHECK
You must inspect your ATV each time before riding to ensure it is in properworking order. If proper check is not done, severe injury or death could result.

82
DAILY PRE-RIDE CHECK
Use the following checklist to verify your machine is in proper working order eachtime you ride.
Item/Inspection Procedure1. Tires - check condition and pressures
2. Fuel and oil tanks - fill both tanks to their proper levels
3. All brakes - check operation and adjustment.
4. Throttle - check for free operation and closing
5. Brakelight - check for proper operation.
6. Engine stop switch - check for proper function
7. Wheels - check for tightness of wheel nuts and axle nuts; check that axle nuts aresecured by cotter pins

83
DAILY PRE-RIDE CHECK8. Drive chain - condition and slack; refer to drive chain adjustment
9. Air cleaner element - check for dirt; clean or replace
10. Steering - check for free operation noting any unusual looseness in any area
11. Loose parts - visually inspect vehicle for any damaged or loose nuts/bolts or fas-teners
12. Operators helmet, goggles and clothing
Indicates a potential hazard which couldresult in severe injury or death.

84
RIDING

85
RIDING1. Sit upright with both feet on the footrests and both hands on the handlebars.
2. Start the engine and allow it to warm up.
3. Check your surroundings and determine your path of travel.
4. Release the parking brake.
5. Slowly depress the throttle with your right thumb and begin driving. Vehicle speedis controlled by the amount of throttle opening.
6. Drive slowly, practice maneuvering and using the throttle and brakes on level sur-faces.

86
RIDINGMaking Turns

87
RIDINGPractice making turns at slow speeds.Polaris ATVs are equipped with a solid rear axle which drives both rear wheelsequally at all times. This means that the wheel on the outside of the turn musttravel a greater distance than the inside wheel when turning and the inside tiremust slip traction slightly. To turn, steer in the direction of the turn leaning yourupper body to the inside of the turn while supporting your weight on the outer foot-rest. This technique alters the balance of traction between the rear wheels allow-ing the turn to be made smoothly.
Avoid turning at sharp angles. Tipover and severe injury may result.

88
RIDINGRiding On Slippery Surfaces
Whenever riding on slippery surfaces such as wet trails or loose gravel, or dur-ing cold freezing weather, special attention must be paid to prevent vehicleturnover. Always:

89
RIDING1. Slow down when entering slippery areas.2. Maintain a high level of alertness, reading the trail and avoiding quick, sharp turns
which can cause skids.3. Correct a skid by turning the handlebars in the direction of the skid and shifting your
body weight forward.4. Never apply brakes during a skid. Complete loss of ATV control can result.5. Do not operate on excessively slippery surfaces if possible to avoid.6. Always reduce speed and use additional caution.
Failure to exercise care when operating the ATV on slippery surfaces can bedangerous.Loss of tire traction and vehicle control can result in an accident, including anoverturn.

90
RIDINGTraveling Uphill
15_ Maximum

91
RIDING
If you have to travel uphill always travel straight uphill and:1. Avoid steep hills (15_ maximum).2. Keep both feet on the footrests.3. Transfer your weight forward.4. Proceed at a steady rate of speed and throttle opening.5. Remain alert and be prepared to take emergency action. This may include quick
dismounting of the ATV.
Do not operate this machine on hilly terrain. If you cannot avoid operating inhilly terrain, use extreme caution. Braking and handling are greatly affected.Loss of vehicle control or overturning of the ATV could occur causing severeinjury or death.

92
RIDINGSidehilling

93
RIDINGAvoid traveling across the side of a hill at all costs. In the event you do enterinto a situation where sidehilling is unavoidable, always:1. Slow down.
2. Lean into the hill transferring your upper bodyweight up hill while keeping your feeton the footrests.
3. Steer slightly into the hill to maintain vehicle directions.
If vehicle begins to tip, quickly turn the front wheel downhill, if possible, or dis-mount on the uphill side immediately!
Improperly crossing hills or turning on hills can be dangerous. Loss of vehiclecontrol or overturning of the ATV could occur causing severe injury or death.

94
RIDINGTraveling Downhill

95
RIDINGWhenever descending a hill, always:1. Drive directly downhill.
2. Transfer your weight to the rear of the vehicle.
3. Slow down.
4. Apply the the front and rear brakes at the same time and very slightly to aid in slow-ing.
Do not travel at excessive speeds. It is dangerous and can cause loss of ve-hicle control and tipping, resulting in severe injury or death.

96
RIDINGTurning Around On A Hill
8’
Uphill
If the ATV stalls while climbing a hill, never back it down the hill! Onemaneuverwhich can be used when it is necessary to turn around while climbing a hill isthe K-turn.

97
RIDING1. Stop and lock the parking brake while maintaining body weight uphill.2. Shut off engine.3. Dismount on left or uphill side of ATV.4. Staying uphill of ATV, turn handlebars full left (while facing front of ATV).5. While holding service brake, release parking brake lock and slowly allow ATV to
roll around to your right until ATV is pointing across the hill or slightly downward.6. Lock the parking brake and remount ATV from the uphill side, maintaining body
weight uphill.7. Restart engine, release parking brake, and proceed slowly, controlling speed with
the service brake, until ATV is on reasonably level ground.
Avoid climbing steep hills. Loss of vehicle control or overturning of the ATVcould occur resulting in severe injury or death.

98
RIDINGCrossing Streams
Your Polaris ATV can operate through water up to depths just below the foot-rests. Before fording streams always:

99
RIDING1. Determine water depths and current.2. Choose a crossing where both banks have gradual inclines.3. Proceed slowly, avoiding rocks and obstacles if possible.4. After crossing, dry the brakes by applying light pressure to the levers until braking
action is normal. If you do not perform this procedure, your brakesmay be ineffec-tive.
D Avoid operating the ATV through deep or fast flowing water. If you cannot avoidwater which exceeds the recommended maximum depth, go slowly, balanceyour weight carefully, avoid sudden movements, maintain a slow and steady for-ward motion. Do not make sudden turns or stops and do not make suddenthrottle changes.
NOTE: If the vehicle is run in water, it is critical the machine is serviced as out-lined in the maintenance chart beginning on page 117. The following areas needspecial attention: engine oil, transmission oil, front and rear gearcases, and allgrease fittings.

100
RIDINGTrail Obstacles

101
RIDINGKeep Alert!Look ahead and learn to read the trail as you ride. Stay on the right side of thetrail, if possible, and be constantly alert for hazards such as logs, rocks and lowhanging branches.
Not all obstacles are visible. Travel with caution on trails. severe injury ordeath can result if your machine comes in contact with a hidden obstacle.
Indicates a potential hazard which couldresult in severe injury or death.

102
RIDINGParking on an Incline

103
RIDINGWhenever the Vehicle is Parked1. Turn the engine off.
2. Set the parking brake.
3. Avoid parking on an incline. If it is necessary to park on an incline, always blockthe rear wheels on the down hill side as shown above.
4. Shut off fuel supply.

104
PVT SYSTEM OPERATIONPVT System
The PVT system rotates at high speeds, creating large amounts of force onclutch components. Extensive engineering and testing has been conducted toinsure the safety of this product. However, as the owner you have the follow-ing responsibilities to make sure this system remains safe:D Do not modify any component of the PVT system. Doing so may reduce itsstrength so that a failure may occur at high speeds. This system has beenprecision balanced. Any modification will cause the system to be out of bal-ance, creating vibration and additional loads on components.
D Routine maintenance is the responsibility of the owner. Always follow rec-ommended maintenance procedures. See your dealer!
D This PVT system is intended for use on Polaris products only.D The PVT housing must be securely in place during operation.
Failure to comply with this warning can result in severe injury ordeath.

105
PVT SYSTEM OPERATION
If the vehicle is operated in dusty areas, it will be necessary to clean the filter moreoften. To clean the PVT filter:1. Remove the screws and the crankcase cover.2. Remove the screws and the filter cover.3. Soak the filter in a mild detergent and rinse with clean water.4. Allow the filter to air dry and reinstall it.
If your vehicle is operated in salt water areas, it must be rinsed with fresh waterto prevent corrosion that can be caused by exposure to seawater.

106
BATTERYBattery
Only adults should ever touch the battery. Never allow children to handlea battery or service a battery in any way.
Whenever removing the battery, disconnect the negative (black) cablefirst. When reinstalling the battery, connect the negative (black) cable lastor an explosive situation could result causing serious injury or death.

107
BATTERY
Battery electrolyte is poisonous. It contains sulfuric acid. Serious burnscan result from contact with skin, eyes or clothing. Antidote:External: Flush with water.Internal: Drink large quantities of water or milk. Follow with milk of mag-nesia, beaten egg, or vegetable oil. Call physician immediately.Eyes: Flush with water for 15 minutes and get prompt medical attention.Batteries produce explosive gases. Keep sparks, flame, cigarettes, etc.away. Ventilate when charging or using in an enclosed space. Alwaysshield eyes when working near batteries. KEEP OUT OF REACH OFCHILDREN.

108
BATTERY
Replenishing the Battery FluidA poorly maintained battery will deteriorate rapidly.Check the battery fluid level often. The fluid levelshould be kept between the upper and lower levelmarks.To refill use only distilled water. Tap water containsminerals which are harmful to a battery.
Maintainbetweenupper andlower levelmarks

109
BATTERYBattery Removal1. Disconnect hold down straps holding the electrical box and battery in position.2. Disconnect the black (negative) battery cable first.3. Disconnect the red (positive) battery cable next.4. Lift the battery out of the ATV, being careful not to tip it sideways and spill electro-
lyte.
If electrolyte spills, immediately wash it off with a solution of one tablespoonbaking soda and one cup water to prevent damage to the ATV.
Indicates a potential hazard which couldresult in severe injury or death.

110
BATTERY
Battery Installation and Connections
Battery terminals and connections should be kept free of corrosion.If cleaning is necessary, remove the corrosion with a stiff wire brush. Wash with asolution of one tablespoon baking soda and one cup water. Rinse well with tapwater and dry off with clean rags. Coat the terminals with dielectric grease or pe-troleum jelly.Be careful not to allow cleaning solution or tap water into the battery.
To avoid the possibility of explosion, always connect battery cables in the orderspecified. Red (positive) cable first; black (negative) cable last. An explodingbattery can cause serious injury or death.

111
BATTERY1. Set the battery in its holder.2. First connect and tighten the red (positive) cable.3. Second connect and tighten the black (negative) cable.4. Attach the hold down strap.5. Verify that cables are properly routed.
NOTE:
D When your ATV is placed in storage for three months or more, the batteryshould be removed, charged to proper level, and stored in a cool dry place.
D Before reusing, take the battery to your dealer for testing and recharging.
D When installing a new battery, make certain it is fully charged prior to it’s initialuse. Using a battery that is not fully charged can damage the battery resultingin a shorter life of the battery. It can also hinder vehicle performance.

112
NOISE EMISSION CONTROLSYSTEM REGULATIONTAMPERING WITH NOISE CONTROL SYSTEM PROHIBITED!
U.S. Federal law prohibits the following acts or the causing thereof:
(1) The removal or rendering inoperative by any person other than for purposes ofmaintenance, repair, or replacement of any device or element of design incorpo-rated into any new vehicle for the purpose of noise control prior to its sale or deliv-ery to the ultimate purchaser or while it is in use or
(2) the use of the vehicle after such device or element of design has been re-moved or rendered inoperative by any person.
ACTS PRESUMED TO CONSTITUTE TAMPERING ARE THE ACTS LISTED BE-LOW INCLUDE BUT ARE NOT LIMITED TO THE FOLLOWING:1. Removal or alteration or the puncturing of the muffler or any engine component
which conducts removal of engine exhaust gases.

113
NOISE EMISSION CONTROLSYSTEM REGULATION
2. Removal or alteration or the puncturing of any part of the engine air induction sys-tem.
3. Replacement of any vehicle parts with parts not in compliance with federal regula-tions.
4. Lack of proper maintenance.
CAUTION: Remember, exhaust system components are very hot during and afteruse of ATV.
D Do not touch exhaust system components. Serious burns can result.
D Be especially careful when traveling through tall grass. The potential for fire ex-ists.

114
NOISE EMISSION CONTROLSYSTEM REGULATIONUSFS Approved Spark Arrestor
Most Polaris ATVs have mufflers that were tested and approved in accordancewith the USFS Forest Service Standard 5100-1A.

115
MAINTENANCE
Tool KitsTo help you perform routine maintenance, a tool kit is provided in the storagecompartment under the seat. Items included in the kits are:
2-cycle enginesD spark plug wrench with Phillips head screwdriver
D tire pressure gauge
Periodic Maintenance Schedule
Careful periodic maintenance will help keep your vehicle in the safest, most reli-able condition. Inspection, adjustment and lubrication intervals of important com-ponents are explained in the following chart on the following pages.

116
MAINTENANCEMaintenance intervals are based upon average riding conditions and an averagevehicle speed of approximately 10 miles per hour. Vehicles subjected to severeuse, such as operation in wet or dusty areas, should be inspected and servicedmore frequently. If you are not familiar with safe service and adjustment proce-dures, have a qualified dealer perform these operations.Inspect, clean, lubricate, adjust or replace parts as necessary. NOTE: Inspectionmay reveal the need for replacement parts. Always use genuine Polaris partsavailable from your Polaris dealer.Service and adjustments are critical. If you are not familiar with safe service andadjustment procedures, have a qualified dealer perform these operations.
Due to the nature of the adjustments marked with a J on the following chart, itis recommended that service be performed by an authorized Polaris dealer.

117
MAINTENANCE" More often under severe use, such as dirty or wet conditions
Item HoursorMiles
When Remarks
Brake System Pre-ride Pre-ride Pre-ride inspection item
Tires Pre-ride Pre-ride Inspect daily, pre-ride inspection item
Wheels Pre-ride Pre-ride Pre-ride inspection item
Frame nuts, bolts,fasteners
Pre-ride Pre-ride Pre-ride inspection item
Oil Level Daily Daily Check when refueling
" Air Filter Daily Daily Inspect-Clean
J Brake pad wear 10hrs/100miles
Monthly Inspect periodically
Battery 20 hrs Monthly Check Terminals/clean/check fluid level

118
MAINTENANCEPeriodic Maintenance Schedule (Cont.)
" More often under severe use, such as dirty or wet conditions
Item HoursorMiles
When Remarks
Oil Pump Cable 50 hrs 6 months Inspect, adjust, lubricate, replace if re-quired
Carburetor FloatBowl
50 hrs 6 months Drain bowl periodically and prior to storage
Due to the nature of the adjustments marked with a J on the following chart, it isrecommended that service be performed by an authorized Polaris dealer.

119
MAINTENANCEItem Hours
orMiles
When Remarks
J Throttle Cable/ETC Switch
50 hrs 6 months Inspect-adjust, lubricate, replace if neces-sary; pre-ride inspection item
" Steering 50 hrs 6 months Inspect daily, lubricate
" Rear Axle 50 hrs 6 months Inspect bearings, Lube
" Front Suspension 50 hrs 6 months Inspect--lubricate, tighten fasteners
" Rear Suspension 50 hrs 6 months Inspect, tighten fasteners
" Drive Chain 50 hrs 6 months Inspect daily, adjust and lubricate if need-ed
J Clutches (driveand driven)
100 hrs 12months
Inspect, clean

120
MAINTENANCE
" More often under severe use, such as dirty or wet conditions
Item HoursorMiles
When Remarks
Engine Mounts 100 hrs 12 months Inspect
Spark Plug 100 hrs 12 months Inspect--replace if necessary
J Ignition Timing 100 hrs 12 months Inspect and adjust as needed
Due to the nature of the adjustments marked with a J on the following chart, it isrecommended that service be performed by an authorized Polaris dealer.

121
MAINTENANCEItem Hours
orMiles
When Remarks
J Fuel System 100hours
12 months Check for leaks at tank cap, lines, fuelvalve, filter, pump and carburetor. Re-place lines every two years.
J Fuel Filter 100 hrs 12 months Replace annually
Spark arrestor 100 hrs 12 months Clean out
J Front wheel bear-ings
300 hrs 36 months Inspect, replace if necessary
J Idle Speed As Re-quired
As Re-quired
Adjust
J Toe adjustment As re-quired
As re-quired
Periodic inspection, adjust when partsare replaced

122
MAINTENANCELubrication Recommendations
Item Lube Rec. Method Frequency*
1. Engine Oil PolarisInjection Oil
Fill oil tank. See page 63. As needed,when refueling
2. Transmission Oil Polaris PremiumSynthetic gearcase lube
See Page 146 Change annuallyor at 100 hours

123
MAINTENANCELubrication Recommendations
OperatingRange
2. Transmission(plug)

124
MAINTENANCE
3. Drive Chain O-Ring chain lube orSAE 80/90
Lubricate as often as re-quired. Before each ridein wet conditions
As required
4. Front A-Arm L Grease ** Locate fittings and grease Every 3months or 50hours
L More often under severe use, such as wet or dusty conditions.
**Polaris Premium all Season Grease or grease conforming to NLGI No. 2, suchas Conoco Superlube M or Mobilegrease Special.+ Grease every 40 hours or approximately 500 miles, or after submerging in wateror before long periods of storage or after pressure washing. Always use PolarisPremium U-Joint Lube for maximum service of these driveline components (PN2871515 3 oz.)(PN 2871551 14 oz.).∆When suspension action becomes stiff or after washing.

125
MAINTENANCENOTE: Hours are based on 10 mph average.
4.

126
MAINTENANCEPeriodic Maintenance RecordUse the following chart to record periodic maintenance work:
MaintenanceIntervalPerformed
ServicingDate
ServicingDealer
or Person
Remarks
First 5 Hrs.
25 Hrs.
50 Hrs.
75 Hrs.
100 Hrs.

127
MAINTENANCE
MaintenanceIntervalPerformed
ServicingDate
ServicingDealer
or Person
Remarks

128
MAINTENANCE
Handlebar Adjustment
Your ATV has handlebars which can be adjusted for your personal fit.1. Locate handlebar bolts. On models with a headlight pod, it will be necessary to
remove the upper “headlight” pod. On other models remove the handlebar cover.
Improper adjustment of the handlebars or incorrect torquing of the adjusterblock tightening bolts can cause limited steering or loosening of the handle-bars, resulting in loss of control and possible serious personal injury or death.

129
MAINTENANCE2. Loosen the four bolts.3. Adjust handlebar to desired height.
Be sure handlebarsdo not hit gas tankor any other part of machine whenturned fully to left or right.
4. Torque handlebar adjuster block boltsto 7.3 ft. lbs.
NOTE: Tighten bolts so there is anequal gap at the front and rear of thehandlebar block. Improper gap will re-sult in improper fit of upper pod.

130
MAINTENANCEThe following items should be checked occasionally for tightness; or if they havebeen loosened for maintenance service.Axle and Wheel Nut Torque Specifications
Specification
Front Spindle Nuts 43 ft. lbs
Rear Spindle Nuts 80 ft. lbs.
NOTE: All nuts that have a cotter pin installed must be serviced by an autho-rized Polaris Dealer.
Front Wheel Hub TighteningFront wheel bearing tightness and spindle nut retention are critical component op-erations. Service work must be performed by your authorized Polaris dealer.

131
MAINTENANCERear Spring Adjustment
The rear shock absorber spring is ad-justed by rotating the adjuster in thedirection required to increase or decreasespring tension.
Rear SpringAdjustmentCam

132
MAINTENANCEAir CleanerInspect the filter weekly or after every 50 hours of operation. If the vehicle is rid-den in wet or dusty conditions, clean the filter more often.
Never operate the ATV with the filter element removed. Dirt will enter theengine causing serious rapid wear and damage to the engine.

133
MAINTENANCE
To clean the filter:1. Remove the screws on
the airbox (A) and re-move the filter (B).
2. Soak the filter in a milddetergent and rinse it inclean water.
3. Let the filter air dry andreinstall in the air box.
A
B

134
MAINTENANCESteering InspectionThe steering assembly of the machine should be checked periodically for loosenuts and bolts. If loose nuts and bolts are found, have your dealer tighten thembefore riding your vehicle.Camber and CasterThe camber and caster are non-adjustable.
Do not attempt to adjust the tie rod for toe alignment. Severe injury or deathcan result from improper adjustment. Contact your Polaris dealer. He/she hasthe training and tools to make these adjustments.

135
MAINTENANCE
Throttle Stop System
This vehicle is equipped with athrottle stop system that controlshow far the throttle opens. Usingthis feature, adults can limit howfast the machine will travel. Toadjust, loosen the jam nut (D)Turn the screw (E) inward to re-duce speed and outward to in-crease speed. Tighten jam nutafter adjusting.
DE

136
MAINTENANCEToe Alignment
You can check the toe alignment of thevehicle using the following method.The recommended toe alignment is1/8″ to 1/4″ (.3 to .6 cm) toe out. If youdiscover improper adjustment haveyour dealer correct it.1. Set the handlebars in a straight aheadposition and hold them in this position.NOTE: The steering frog can be usedas an indicator of whether the handle-bars are straight. The frog should al-ways point straight back from thesteering post.

137
MAINTENANCEToe Alignment (cont.)2. Place stands in front of the machine, perpendicular to the rear tires.3. Tie an elastic string around the stands, making sure string just touches sidesurface of the rear tires on each side ofmachine and goesaround the standsin front of the machine.
4. Measure from string to rim at front and rear of front rim. Rear rim measure-ment should be 1/16″ - 1/8″ (.2 to .3 cm) more than front rim measurement.
5. If this measurement needs to be adjusted, contact your dealer for service.

138
MAINTENANCEBrake Adjustment
Periodically check the freeplay of thefront and rear brakes. Refer to the chartbelow for the acceptable range of free-play for your machine.
To adjust the front brake, turn the adjust-ment knob (A) until the freeplay is accept-able.
A

139
MAINTENANCE
To adjust the rear brake, turn the adjusternut (B) until the proper freeplay is at-tained.
B

140
MAINTENANCE
Brake Freeplay Adjustment
Model Front Rear
Sportsman 90 .39″ - .78″10 mm - 20 mm
.39″ - .78″10 mm - 20 mm
Scrambler 90 .39″ - .78″10 mm - 20 mm
.39″ - .78″10 mm - 20 mm
Scrambler 50 .1″ - .39 ″2.5mm - 9.9 mm
.15″ - .30″3.8mm - 7.6mm

141
MAINTENANCE
Throttle Cable Adjustment
Always check the throttle forsmooth operation before riding.Periodically check the throttlefreeplay. It should be kept bet-ween 1/16″ and 1/8 ″ (1.5mm -3.2mm) (C). If adjustment is re-quired, turn the adjustment nut (D)until the freeplay falls in to the ac-ceptable limit.
Indicates a potential hazard which couldresult in severe injury or death.
C
D

142
MAINTENANCESpark PlugsThe spark plug required for this machine is NGK BP7HS or NGK BPR7HS. Incor-rect spark plug gap can cause the spark plugs to foul. The spark plug gap shouldbe between 0.6 - 0.7 mm.The spark plug and its condition is indicative of engine operation. The spark plugfiring end condition should be read after the engine is warmed up and the vehicleis driven at higher speeds. Immediately check the spark plug for correct color.1. NormalThe insulator tip is gray, tan or light brown. There will be few combustion deposits.The electrodes are not burned or eroded. This indicates the proper type and heatrange for the engine and the service.NOTE: The tip should not be white. A white insulator tip indicates overheating,caused by use of an improper spark plug or incorrect carburetion adjustments.

143
MAINTENANCE2. Wet FouledThe insulator tip is black. A damp oil film covers the firing end. There may be acarbon layer over the entire nose. Generally, the electrodes are not worn. Gener-al causes are excessive oil, use of non-recommended injection oil, improper useof the choke, or incorrect carburetion adjustments.

144
MAINTENANCESpark Plug Removal and Replacement
The spark plug is removed by using the special wrench provided in the tool pouch.Remove the spark plug cap and then the spark plug by rotating counterclockwise.Reverse the procedure for spark plug installation. Torque to 17 ft. lbs.Never deviate from the recommended spark plug as engine damage can occur.
Never attempt to remove a spark plug while the engine is warm. The exhaustsystem or engine could burn you causing severe injury.

145
MAINTENANCE
Cylinder Head/Cylinder Base Fastener Torque(2-Cycle Models)Have your dealer check the ATV cylinder head and cylinder base fasteners forproper torque at the first service or after 25 hours.
Indicates a potential hazard which couldresult in severe injury or death.

146
MAINTENANCETransmission LubricationThe transmission dipstick (A) is located onthe top of the transmission.The transmission lubricant level should bechecked monthly. Transmission oil shouldbe changed annually. With the ATV on alevel surface, remove fill plug dipstick andcheck the lubricant level. Lubricant shouldbe kept at the full mark on the dipstick.The correct transmission lubricant to use isPolaris Premium Synthetic Gearcase Lubri-cant (PN 2871478).
A

147
MAINTENANCE
Transmission Oil Changing Procedure1. Remove fill plug/dipstick.2. Remove transmission drain plug and drain the oil. Catch and discard used oil prop-
erly.3. Clean and reinstall the drain plug.4. Add Polaris Premium Synthetic Gearcase Lubricant (PN 2871478 - 12 oz. bottle)
to full mark on the fill plug/dipstick.5. Check for leaks.

148
MAINTENANCE
Operating your ATV with worn tires, improperly inflated tires, non-standard tiresor improperly installed tires will affect vehicle handling which could cause anaccident resulting in serious injury or death.
Follow the safeguards listed below to prevent this type of situation.

149
MAINTENANCE
Important Safeguards
Maintain proper tire pressure according to charts below. Improper tire inflation mayaffect ATV maneuverability.
Do not use improper tires. The use of non-standard size or type tires may affect ATVhandling.
Make certain the wheels are installed properly. If wheels are improperly installed itcould affect vehicle handling and tire wear.
Wheel Removal Procedure1. Stop the engine, place the transmission in gear and lock the parking brake.2. Loosen the wheel nuts slightly.3. Elevate the side of the vehicle by placing a suitable stand under the footrest frame.4. Remove the wheel nuts and remove the wheel.

150
MAINTENANCE
Wheel Size PSI Wheel NutTorque
Scrambler 50 Front 16 x 8 - 7 2 22 ft. lbsRear 16 x 8 - 7 2 22 ft. lbs
Scrambler 90 Front 18 x 7 - 7 2 22 ft. lbsRear 18 x 7 - 7 2 22 ft. lbs
Sportsman 90 Front 19 x 7 - 8 2 22 ft. lbsRear 18 x 9.5 - 8 2 22 ft. lbs

151
MAINTENANCE
Wheel Installation1. With the park brake locked, place the wheel in the correct position on the wheel
hub. Be sure the valve stem is toward the outside and rotation arrows on the tirepoint toward forward rotation.
2. Attach the wheel nuts and finger tight-en them.
3. Lower the vehicle to the ground.4. Securely tighten the wheel nuts ac-
cording to the chart found on page130:

152
MAINTENANCE
Tire Inspection
When replacing a tire always use original equip-ment size and type.
Tire Tread Depth
Always replace tires when tread depth is wornto 1/8″ (.3 cm) (1) or less.
1

153
MAINTENANCE
Drive Chain Inspection and AdjustmentPolaris ATV drive chains are equipped with O-ring sealed permanently greasedpins and rollers. However, it is still necessary to lubricate the outer surfaces of theroller.
Regularly lubricate the drive chain with SAE 80-90 lube or an approved O-ringchain spray lube.
Never wash the chain with a high pressure washer or gasoline. Damage to theO-rings will result, causing premature wear and drive chain failure.
Indicates a potential hazard which couldresult in severe injury or death.

154
MAINTENANCE
Drive Chain Inspection and Adjustment (Cont.)
The adjuster stud must be held secure when tightening jam nuts or the studmay break.

155
MAINTENANCERear Drive Chain Slack Adjustment
The normalchain slackshould be keptbetween .40″ -.80″ ⟨10-20 mm)(A).
Never adjust or operate the vehicle with the rear drive chain too loose or tootight as severe damage to the transmission and drive components can result.
1
A

156
MAINTENANCE
Adjustment Procedure1. Loosen 4 rear housing mount bolts (A).2. Tighten chain adjuster (B) to reduce
slack to recommended setting. (.4″ - .8″/ 10 mm - 20 mm)
3. Tighten jam nuts on chain adjuster.4. Tighten the four rear housing mount
bolts.
A B

157
MAINTENANCEBrakelight Lamp Replacement
If the brakelight does not work the lamp may need tobe replaced.1. From the rear of the brake light remove two
screws (A)holding lens cover in place and removelens cover (B).
2. Remove lamp (C) and replace it with recom-mended lamp.
3. Test the brakelight to see that it’s working.4. Reinstall the lens cover removed in step 1.
A
B
C

158
MAINTENANCECleaning Your ATV
Keeping your ATV clean will not only improve its appearance but it can also ex-tend the life of various components. With a few precautions, your ATV can becleaned much like an automobile.
Washing
If a high pressure type car wash system is used, extreme care must be taken toavoid water damage to the wheel bearings, transmission seals, body panels,brakes and warning labels. Many expensive repair bills can result from using highpressure detergent systems.
NOTE: If a high pressure car wash is used, grease all zerk fittings immediatelyafter washing. Also run the vehicle to evaporate any water that might have en-tered the engine or exhaust system.

159
MAINTENANCE
The best and safest way to clean your ATV is with a garden hose and a pail ofmild soap and water. Use a professional type washing mitten, cleaning the upperbody first and the lower parts last. Rinse with water frequently and dry with achamois to prevent water spots. NOTE: If warning labels are damaged, contactyour a Polaris dealer for free replacement.
Waxing
Your ATV can be waxed with any non-abrasive automotive paste wax. Avoid theuse of harsh cleaners since they can scratch the body finish.
Certain products, including insect repellants and chemicals, will damage plas-tic surfaces. Care must be taken when using these products near plastic sur-faces.

160
MAINTENANCETransportingWhenever the ATV is to be transported the following measures should be taken.1. Turn the fuel valve to off.2. Be certain the fuel cap, oil cap, and seat are installed correctly.3. Always tie the frame of the ATV to the transporting unit securely using suitable
straps or rope.4. Always lock the parking brake.
161
MAINTENANCECarburetor AdjustmentsIf the vehicle is to be operated at various altitudes and temperatures, certain ad-justments can be made to improve its operation and driveability. Above 6000 feet(1800 m) the engine air/fuel mixture becomes overly rich. An engine losesapproximately 3% of its power for each 1000 foot (304.8 m) increase in elevation.Although this power cannot be regained, changes to the carburetor and drive sys-tem can be made to allow efficient operation. These changes include:1. Carburetor re-jetting to compensate for altitude and/or temperature changes.2. Transmission convertor modification to adjust for engine horsepower loss during
high altitude operation. Contact your dealer.3. On 2 cyclemodels, air screw adjustments can bemade to compensate for temper-
ature changes and/or changes in altitude.
NOTE: Contact your dealer for altitude adjustments. They have the training andspecial tools required to perform all necessary modifications for you.

162
SPECIFICATIONS
Specifications - Scrambler 50
Rider Capacity 1
Displacement 49cc
Cooling Fan Cooled
Engine type 2-Stroke
Lubrication Oil Injected
Oil Capacity 1.1 quarts (1 liter)
Fuel Capacity 1.3 gallons (5 liters)
Starting Electric with kick-start backup
Transmission Automatic CVT
Front Suspension A-Arm with 2″ (5 cm) of travel
Rear Suspension Spring over shock with 2 ″ (5 cm) of travel

163
SPECIFICATIONS
Specifications - Scrambler 50
Front/Rear Brakes Drum
Parking Brake Mechanical Lock
Front and Rear Tires / PSI 16 x 8-7 (2psi)
Turning Radius 74.8″ (190 cm)
Wheel Base 35.4″ (90 cm)
Dry Weight 211.6 lbs (96 kgs)
Length 54.6″ (138.7 cm)
Width 34″ (86.3 cm)
Height 34.7″ (88.2 cm)
Brake Light Standard
Low Oil Light Standard

164
SPECIFICATIONS
Specifications - Scrambler 90
Rider Capacity 1
Displacement 89cc
Cooling Fan Cooled
Engine type 2-Stroke
Lubrication Oil Injected
Oil Capacity 1.1 quarts (1 liter)
Fuel Capacity 1.3 gallons (5 liters)
Starting Electric with kick-start backup
Transmission Automatic CVT
Front Suspension A-arm with 2″ (5 cm) of travel
Rear Suspension Spring over shock with 2″ (5 cm) of travel

165
SPECIFICATIONS
Specifications - Scrambler 90
Front/Rear Brakes Drum
Parking Brake Mechanical Lock
Front and Rear Tires / PSI 18 x 7 - 7 (2psi)
Turning Radius 98.4″ (250 cm)
Wheel Base 35.4″ (90 cm)
Dry Weight 233.7 lbs (106 kgs)
Length 56.1″ (142.4 cm)
Width 34″ (86.3 cm)
Height 36.1″ (91.8 cm)
Brake Light Standard
Low Oil Light Standard

166
SPECIFICATIONS
Specifications - Sportsman 90
Rider Capacity 1
Displacement 89cc
Cooling Fan Cooled
Engine type 2-Stroke
Lubrication Oil Injected
Oil Capacity 1.1 qts. (1 ltr)
Fuel Capacity 1.3 ga. (5 ltr)
Starting Electric with kick-start backup
Transmission Automatic CVT
Front Suspension A-arm with 2 in / 5 cm of travel
Rear Suspension Spring over shock with 2 in / 5 cm of travel

167
SPECIFICATIONS
Specifications - Sportsman 90
Front/Rear Brakes Drum
Parking Brake Mechanical Lock
Front Tires / PSI 19 x 7 - 8 (2 psi)
Rear Tires / PSI 18 x 9.5 - 8 (2 psi)
Wheel Base 37.8″ (96 cm)
Turning Radius 98.4″ (250 cm)
Dry Weight 238.1 lbs (108 kgs)
Length 57.6 ″ (146.3 cm)
Width 34.4″ (87.4 cm)
Height 36.6″ (93 cm)
Brake Light Standard

168
SPECIFICATIONS
Specifications - Sportsman 90
Low Oil Light Standard
Front Rack Capacity 10 lb (4.5 kgs)
Rear Rack Capacity 20 lb (9 kgs)
AccessoriesThere are a wide range of Polaris Accessories available for ATVs. Contact yourPolaris dealer to find out about the accessories available for your machine.

169
WIRING DIAGRAM

170
WIRING DIAGRAM

171
TROUBLESHOOTINGProceduresThe following information is provided to help you identify probable causes forquestions you may have about the operation of your ATV. See your Polaris dealerwith any additional questions you may have.
ENGINE CRANKS BUT FAILS TO START
No Fuel Water in Fuel Spark Plug
Fuel Valve Off Drain System No Spark toSpark Plug
Contact YourDealer
Clogged FuelValve or filter

172
TROUBLESHOOTING
ENGINE STOPS OR LOSES POWER
No Fuel
Contact YourDealer
Contact YourDealer
Spark PlugFouled
EngineOverheated
Clean EngineExterior
Turn FuelValve to “Res”
Water in Fuel
Air FilterClogged
ElectronicThrottle ControlMalfunction
Fuel VentLine Kinkedor Plugged
Clean Radiatorscreen andRadiator Core(liquid cooledmodels)

173
WARRANTY
LIMITED WARRANTY
Polaris Industries Inc., 2100 Highway 55, Medina, MN 55340, gives a SIX MONTHLIMITED WARRANTY on all components of the Polaris All Terrain Vehicle (ATV)against defects inmaterial or workmanship. Polaris also gives a one year limitedwar-ranty on the final drive chain for failure due to defects. This warranty covers the partsand labor charges for repair or replacement of defective parts which are covered bythis warranty. This warranty begins on the date of purchase. Thiswarranty is transfer-rable to another consumer during thewarranty period through a Polaris dealer. Thereis a charge of $35.00 payable to Polaris Industries Inc.

174
WARRANTY
REGISTRATION
At the time of sale, theWarranty Registration Formmust be completed by your dealerand submitted to Polaris within ten days. Upon receipt of this registration, Polaris willrecord the registration for warranty. THE PURCHASERMUST COMPLETE AN ATVSAFETY TRAINING COURSE PROVIDED BY THE DEALER IN ORDER TO HAVEVALID WARRANTY ON THE ATV. No verification of registration will be sent to thepurchaser as the copy of the Warranty Registration Form will be the warranty entitle-ment. If you have not signed the original registration and received the “customercopy”, please contact your dealer immediately. NOWARRANTY COVERAGEWILLBE ALLOWED UNLESS YOUR ATV IS REGISTERED WITH POLARIS.
Initial dealer preparation and set--up of your ATV is very important in ensuringtrouble--free operation. Purchasing a machine in the crate or without proper dealerset--up will void your warranty coverage.

175
WARRANTY
WARRANTY COVERAGE AND EXCLUSIONS:
LIMITATIONS OF WARRANTIES AND REMEDIES
The Polaris limited warranty excludes any failures that are not caused by a defect inmaterial or workmanship. This warranty does not cover accidental damage, normalwear and tear, abuse or improper handling. This warranty also does not cover anyATV that has been altered structurally, modified, neglected, improperly maintained,used for racing, or used for purposes other than for which it wasmanufactured, or forany damages which occur during trailer transit or as a result of unauthorized serviceor the use of unauthorized parts. In addition, this warranty does not cover physicaldamage to paint or finish, stress cracks, tearing or puncturing of upholstery material,corrosion, or defects in parts, components or the ATV due to fire, explosions or anyother cause beyond Polaris’ control.

176
WARRANTY
This warranty does not cover the use of unauthorized lubricants, chemicals, or fuelsthat are not compatible with the ATV. The exclusive remedy for breach of this warran-ty shall be, at Polaris’ exclusive option, repair or replacement of any defective materi-als, or components or products. THEREMEDIESSET FORTH IN THISWARRANTYARETHEONLYREMEDIESAVAILABLETOANYPERSONFORBREACHOFTHISWARRANTY. POLARIS SHALL HAVE NO LIABILITY TO ANY PERSON FOR INCI-DENTAL, CONSEQUENTIAL OR SPECIAL DAMAGES OF ANY DESCRIPTION,WHETHER ARISING OUT OF EXPRESS OR IMPLIED
WARRANTY OR ANY OTHER CONTRACT, NEGLIGENCE, OR OTHER TORT OROTHERWISE. Some states do not permit the exclusion or limitation of incidental orconsequential damages or implied warranties, so the above limitations or exclusionsmay not apply to you if inconsistent with controlling state law.

177
WARRANTY
ALL IMPLIED WARRANTIES (INCLUDING BUT NOT LIMITED TO THE IMPLIEDWARRANTIES OFMERCHANTABILITY AND FITNESS FORA PARTICULARPUR-POSE) ARE LIMITED INDURATIONTO THE ABOVE SIXMONTHWARRANTYPE-RIOD. POLARIS FURTHER DISCLAIMS ALL EXPRESS WARRANTIES NOTSTATED IN THIS WARRANTY. Some states do not allow limitations on how long animplied warranty lasts, so the above limitation may not apply to you if inconsistent withcontrolling state law.
HOW TO OBTAIN WARRANTY SERVICE
If your ATV requireswarranty service, youmust take it to a Polaris dealer authorized torepairPolaris ATVs. When requesting warranty service youmust present your copyofthe Warranty Registration form to the dealer. (THE COST OF TRANSPORTATIONTO AND FROM THE DEALER IS YOUR RESPONSIBILITY). Polaris suggests thatyouuse youroriginal selling dealer; however, youmayuse anyPolaris ServicingDeal-er to perform warranty service.

178
WARRANTY
Please work with your dealer to resolve any warranty issues. Should your dealer re-quire any additional assistance they will contact the appropriate person at Polaris.
This warranty gives you specific legal rights, and you may also have other rightswhich vary from state to state.
If any of the above terms are void because of state or federal law, all other warrantyterms will remain in effect.
Engine Oil
1. Always use Polaris engine oil.
2. Never substitute ormix oil brands asserious engine damage and voiding ofwarran-ty can result.

179
INDEXAIR CLEANER 132. . . . . . . . . . . . . . . . . . . . . . . .BATTERY INSTALLATION 110. . . . . . . . . . . . . .BATTERY MAINTENANCE 106. . . . . . . . . . . . . .BATTERY REMOVAL 109. . . . . . . . . . . . . . . . . . .Brake Adjustment 138. . . . . . . . . . . . . . . . . . . . . . .Brake Freeplay Adjustment 140. . . . . . . . . . . . . . .Brake Lever R7. . . . . . . . . . . . . . . . . . . . . . . . . . .BRAKE PARKING 58. . . . . . . . . . . . . . . . . . . . . .Brakelight Lamp Replacement 157. . . . . . . . . . . . .BRAKES, FRONT 57. . . . . . . . . . . . . . . . . . . . . . .BRAKES, REAR 57. . . . . . . . . . . . . . . . . . . . . . . .Break In Period 74-76. . . . . . . . . . . . . . . . . . . . . . .CAMBER AND CASTER 134. . . . . . . . . . . . . . . .CARBURETOR ADJUSTMENTS 161. . . . . . . . . .CARRYING LOADS 77-80. . . . . . . . . . . . . . . . . .Chain Adjustment 155. . . . . . . . . . . . . . . . . . . . . . .CLEANING YOUR ATV 158. . . . . . . . . . . . . . . . .Control and Parts Functions 49-69. . . . . . . . . . . . .CROSSING STREAMS 98. . . . . . . . . . . . . . . . . . .CYLINDER HEAD TORQUE 145. . . . . . . . . . . . .DAILY PRE-RIDE INSPECTION 20-21, 81-83. .Drive Chain Adjustment 153-154. . . . . . . . . . . . . .ENGINE ELECTRICAL SWITCHES 49. . . . . . . .Engine Start Button 51. . . . . . . . . . . . . . . . . . . . . . .Engine Stop Switch R4, 50. . . . . . . . . . . . . . . . . . .
Front Brake R7. . . . . . . . . . . . . . . . . . . . . . . . . . . .Fuel Safety 65. . . . . . . . . . . . . . . . . . . . . . . . . . . . .FUEL SYSTEM 63. . . . . . . . . . . . . . . . . . . . . . . . .Gas Cap R6. . . . . . . . . . . . . . . . . . . . . . . . . . . . . .GENERAL SAFETY AND
DESCRIPTION OF LABELS 5-18. . . . . . . .HANDLEBAR ADJUSTMENT 128. . . . . . . . . . . .Ignition Switch R8. . . . . . . . . . . . . . . . . . . . . . . . .INDICATOR LIGHTS 56. . . . . . . . . . . . . . . . . . . .Kick Starter R5, 69. . . . . . . . . . . . . . . . . . . . . . . . .KNOW YOUR MACHINE R2-R11. . . . . . . . . . .Load Capacity 77-80. . . . . . . . . . . . . . . . . . . . . . . .LUBRICANT, 2 Cycle 67. . . . . . . . . . . . . . . . . . . .LUBRICATION RECOMMENDATIONS 122-123Main Switch 49. . . . . . . . . . . . . . . . . . . . . . . . . . . .Battery 106-111. . . . . . . . . . . . . . . . . . . . . . . . . . .Maintenance 115-161. . . . . . . . . . . . . . . . . . . . . . .MAINTENANCE RECORD 126. . . . . . . . . . . . . .MAINTENANCE SCHEDULE 115-118. . . . . . . .MAKING TURNS 86. . . . . . . . . . . . . . . . . . . . . . .NOISE CONTROL SYSTEM 112-114. . . . . . . . . .OIL SYSTEM 63. . . . . . . . . . . . . . . . . . . . . . . . . . .Oil System 66. . . . . . . . . . . . . . . . . . . . . . . . . . . . .OPERATION WARNINGS 19-46. . . . . . . . . . . . . .PARKING ON AN INCLINE 102. . . . . . . . . . . . . .

180
INDEXPre Operation Check R12-R15. . . . . . . . . . . . . . . .PVT SYSTEM 62, 104. . . . . . . . . . . . . . . . . . . . . .Rear Brake R7. . . . . . . . . . . . . . . . . . . . . . . . . . . .REAR SPRING ADJUSTMENT 131. . . . . . . . . . .RIDER’S SECTION R1. . . . . . . . . . . . . . . . . . . . .RIDING 84-103. . . . . . . . . . . . . . . . . . . . . . . . . . .Riding Gear 72-73. . . . . . . . . . . . . . . . . . . . . . . . .RIDING ON SLIPPERY SURFACES 88. . . . . . . . .SAFETY WARNING AND
OPERATION DECALS 10. . . . . . . . . . . . . . .SIDEHILLING 92. . . . . . . . . . . . . . . . . . . . . . . . . .SPARK PLUGS 142. . . . . . . . . . . . . . . . . . . . . . . .SPECIFICATIONS 162-168. . . . . . . . . . . . . . . . . .STARTING A COLD ENGINE 70. . . . . . . . . . . . .Starting the Engine 70-71. . . . . . . . . . . . . . . . . . . .STEERING INSPECTION 134. . . . . . . . . . . . . . . .Tether Strap R9. . . . . . . . . . . . . . . . . . . . . . . . . . .Throttle R4, 53. . . . . . . . . . . . . . . . . . . . . . . . . . . .Throttle Cable Adjustment 135, 141. . . . . . . . . . . .THROTTLE LEVER 54. . . . . . . . . . . . . . . . . . . . .TIRE INSPECTION 152. . . . . . . . . . . . . . . . . . . . .
Toe Alignment 136-137. . . . . . . . . . . . . . . . . . . . .TOOL KIT 115. . . . . . . . . . . . . . . . . . . . . . . . . . . .TORQUE SPECIFICATIONS 130. . . . . . . . . . . . . .TRAIL OBSTACLES 100. . . . . . . . . . . . . . . . . . . .TRANSMISSION LUBRICATION 146. . . . . . . . .TRANSMISSION
OIL CHANGING PROCEDURE 147. . . . . . .TRANSPORTING 160. . . . . . . . . . . . . . . . . . . . . .TRAVELING DOWNHILL 94. . . . . . . . . . . . . . . .TRAVELING UPHILL 90. . . . . . . . . . . . . . . . . . . .TROUBLESHOOTING 171-172. . . . . . . . . . . . . .TURNING AROUND ON A HILL 96. . . . . . . . . .UNDERSTANDING WARNINGS 1-4. . . . . . . . . .Understanding Warnings R16-R20. . . . . . . . . . . .VEHICLE IDENTIFICATION NUMBERS 47-48.WARRANTY 173-178. . . . . . . . . . . . . . . . . . . . . .WHEEL INSTALLATION 149-151. . . . . . . . . . . .Wheel Nut Torque 150. . . . . . . . . . . . . . . . . . . . . .WHEEL REMOVAL 149. . . . . . . . . . . . . . . . . . . .WIRING DIAGRAM 169-170. . . . . . . . . . . . . . . .